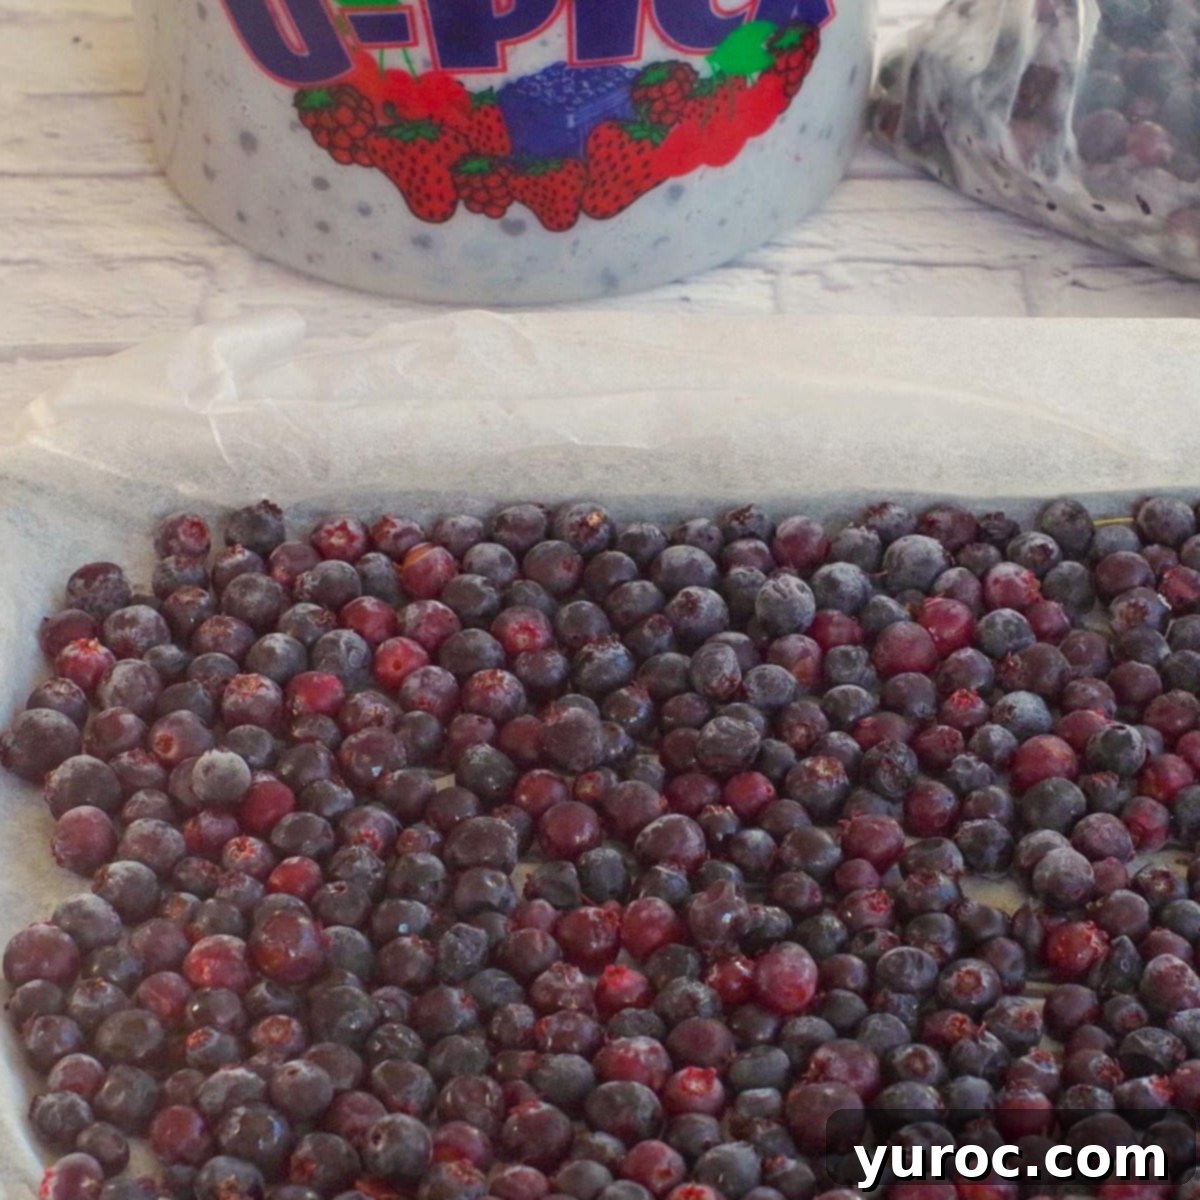
How to Freeze Saskatoon Berries: A Comprehensive Guide to Preserving Summer’s Sweetness All Year Round
Saskatoon berries, cherished across North America and beyond, herald the arrival of summer with their unique, subtly sweet, and nutty flavor. Known by various names such as “Juneberries” in the northern U.S., “Service berries” in the UK, and often simply “prairie berries” in Canada, these delightful fruits appear only once a year. If you’re fortunate enough to have access to a bountiful patch of Saskatoon berry bushes or find them in abundance at local markets, you’ll inevitably ask yourself: how to freeze Saskatoon berries to enjoy their distinctive taste long after their short season ends. The good news is, preserving these precious berries through freezing is remarkably straightforward and highly effective, locking in their fresh flavor for months.
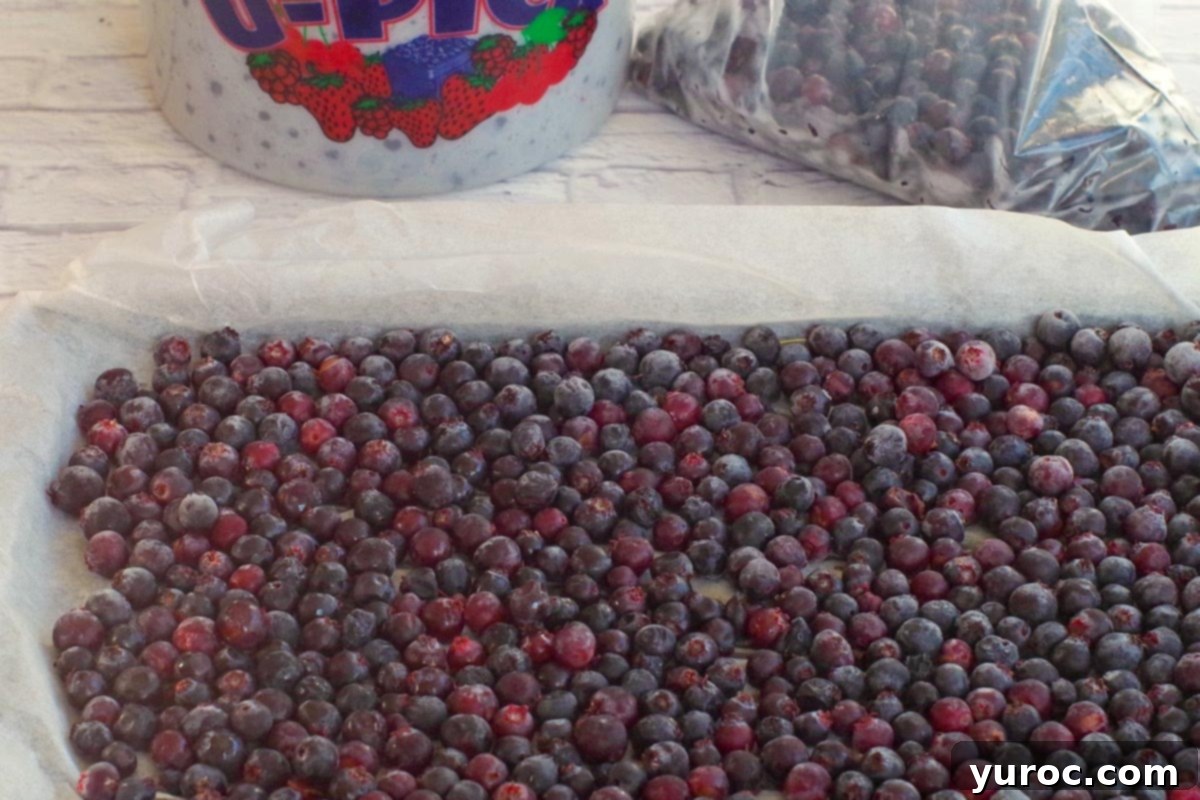
The peak season for Saskatoon berries typically spans from early to late July and into early August in North America, though timing can vary based on your specific location and the environmental conditions of a particular year. Many berry enthusiasts are unsure about the best methods for freezing Saskatoon berries or how to properly utilize them once frozen. This guide aims to demystify the process, ensuring you can savor the incomparable flavor of fresh Saskatoon berries throughout the entire year. Imagine whipping up your favorite Saskatoon Berry Oatmeal Cookies or fluffy Saskatoon Berry Pancakes in the dead of winter – freezing makes it possible!
Preserving Saskatoon berries isn’t just about extending their shelf life; it’s about capturing the essence of summer. Freezing allows you to enjoy these nutritious berries in a myriad of dishes, from pies and muffins to smoothies and sauces, long after the harvest season has passed. It’s an economical and practical way to minimize food waste and maximize your enjoyment of this regional delicacy.
How Long Do Fresh Saskatoon Berries Last?
The joy of Saskatoon season is fleeting, and unfortunately, fresh Saskatoon berries have a relatively short shelf life. To ensure you make the most of your harvest, it’s best to use them within 5-7 days of picking. While some sources suggest they might last 10-14 days, personal experience often indicates a shorter window for optimal freshness. Beyond this period, their quality can quickly decline, making freezing an invaluable preservation method that truly guarantees their longevity and flavor.
If you’re purchasing Saskatoon berries from local farmers’ markets, it’s wise to consider that they may have already spent a few days since being picked. In such cases, plan to freeze them within a couple of days of purchase to ensure maximum freshness is retained. To prepare for freezing or immediate use, store your freshly picked Saskatoons in airtight plastic containers in the refrigerator. This helps to protect them from moisture loss and premature spoilage.
For large batches, a practical approach is to immediately refrigerate a portion for consumption within the next few days and freeze the remainder. This strategy allows you to enjoy the fresh berries while they’re at their prime, and simultaneously secure a supply for future culinary adventures. Prompt freezing is key to maintaining the berries’ vibrant color, firm texture, and distinct taste, preventing them from becoming soft, mushy, or developing freezer burn too early.
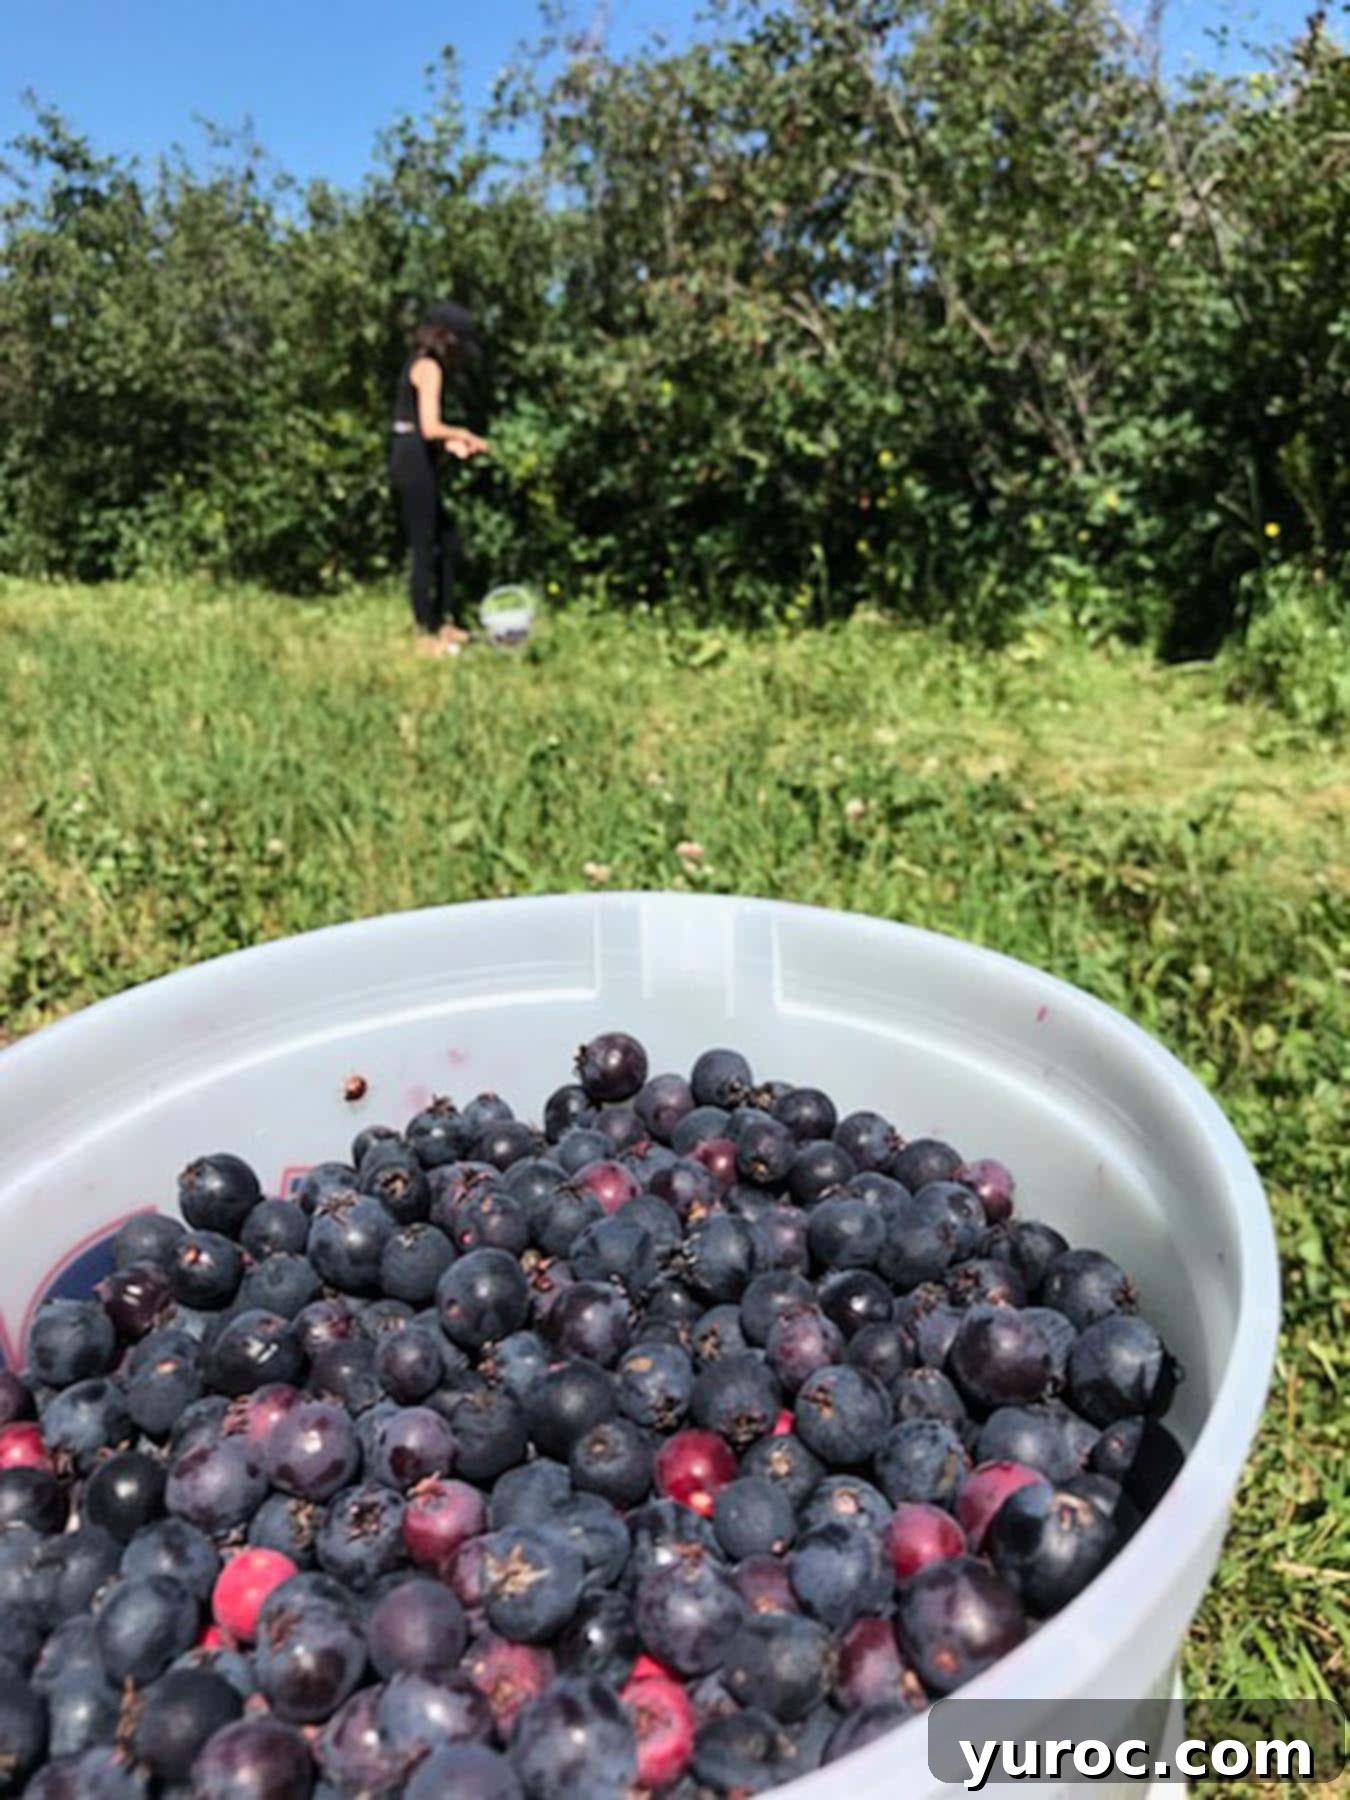
🔪Step-by-Step: How to Clean and Freeze Saskatoon Berries
The process of cleaning and freezing Saskatoon berries is simple, but each step is crucial for preserving their quality. By following these detailed instructions, you’ll ensure your frozen berries are perfect for all your recipes.
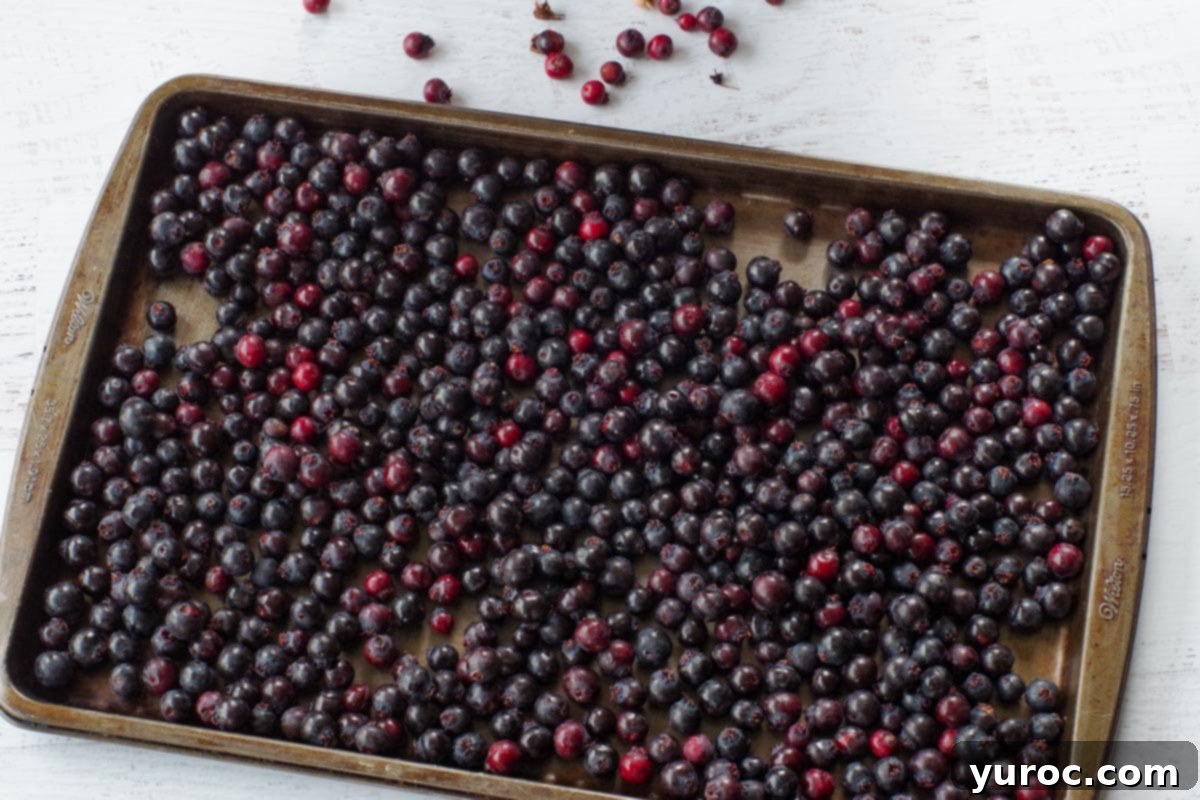
When you first bring your Saskatoon berries home, or even better, while you’re picking them, prioritize selecting ripe, firm, purple berries. Laying them out on a baking sheet provides an excellent overview, making it easier to spot and remove any unwanted elements. This initial sorting step is key to saving time later and ensures only the best berries make it into your freezer.
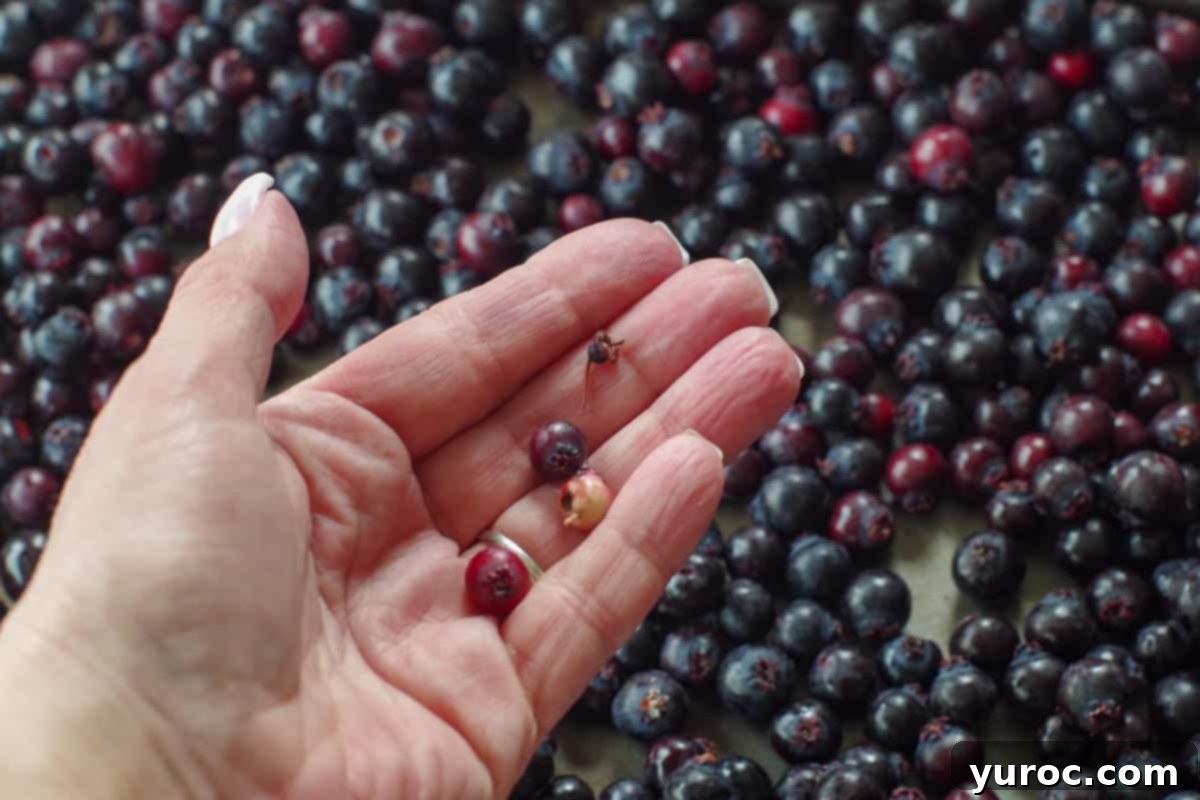
Carefully go through your berries, removing any small bits of stems, leaves, or unripe berries that are still green or pale. Crucially, discard any soft, mushy, or overripe Saskatoons. These inferior berries can affect the texture and quality of the entire batch once frozen, so it’s important to be thorough at this stage.
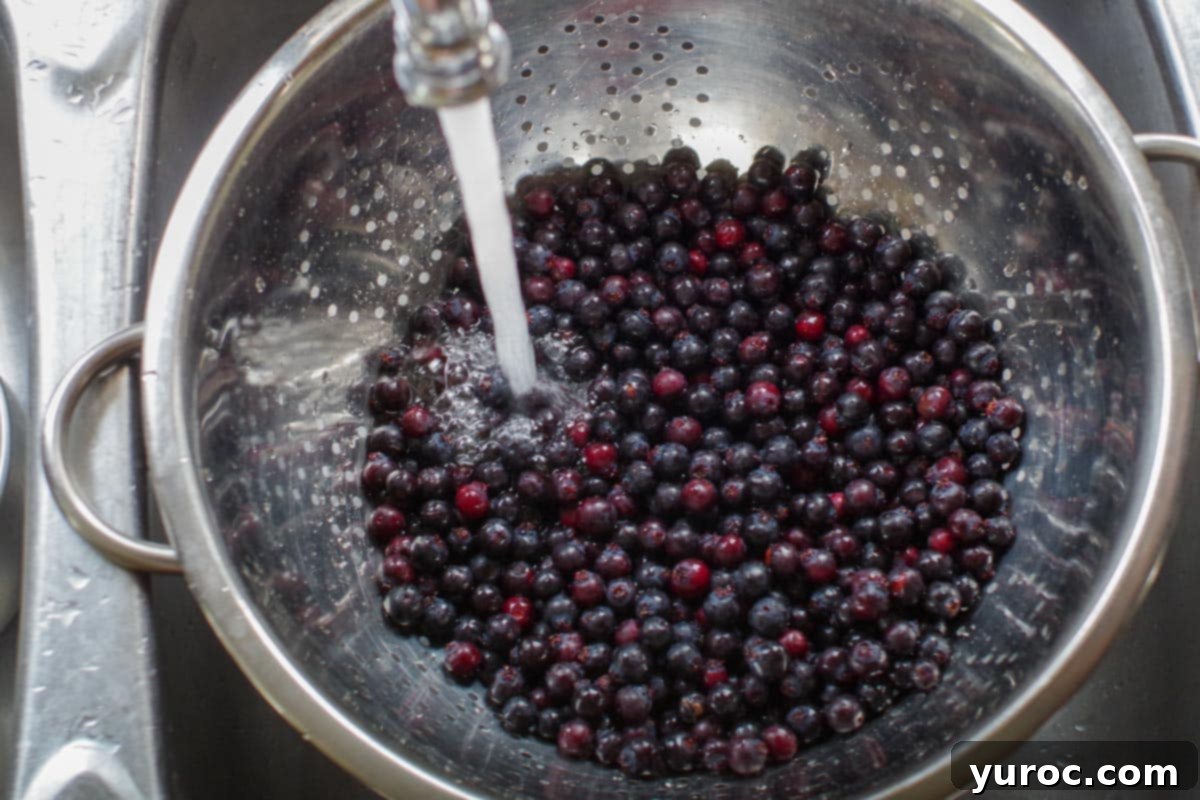
Place the sorted berries into a large sieve or colander. Wash them gently under cool, running water. Avoid soaking the berries, as this can cause them to absorb too much water and become waterlogged. After washing, allow them to sit in the colander for about 10 minutes to drain off as much excess water as possible. This preliminary draining is vital for preventing ice crystal formation during freezing.
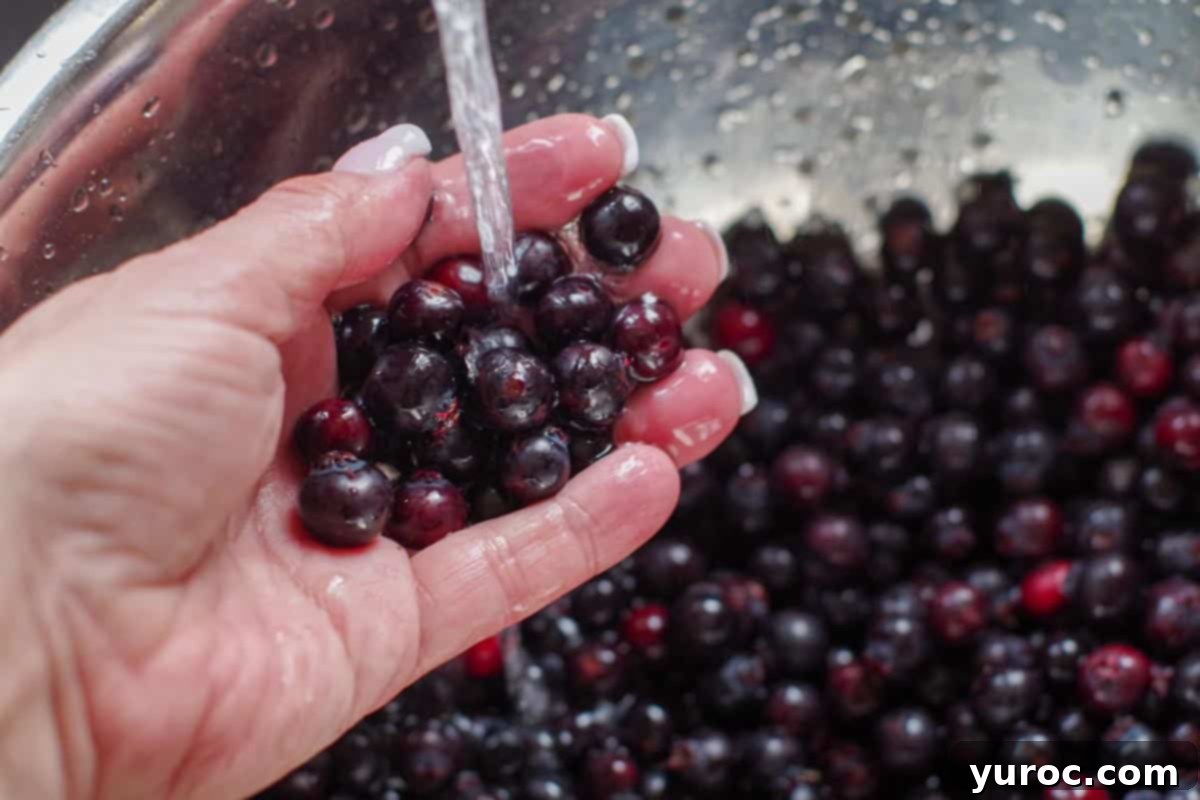
As you rinse, take this additional opportunity to perform a final quality check. Look for any remaining stems, tiny leaves, or even small critters that might have evaded the initial sorting. It’s surprising what you might find – in one recent batch, I discovered two small spiders! This diligent inspection ensures your frozen berries are perfectly clean and ready for consumption.
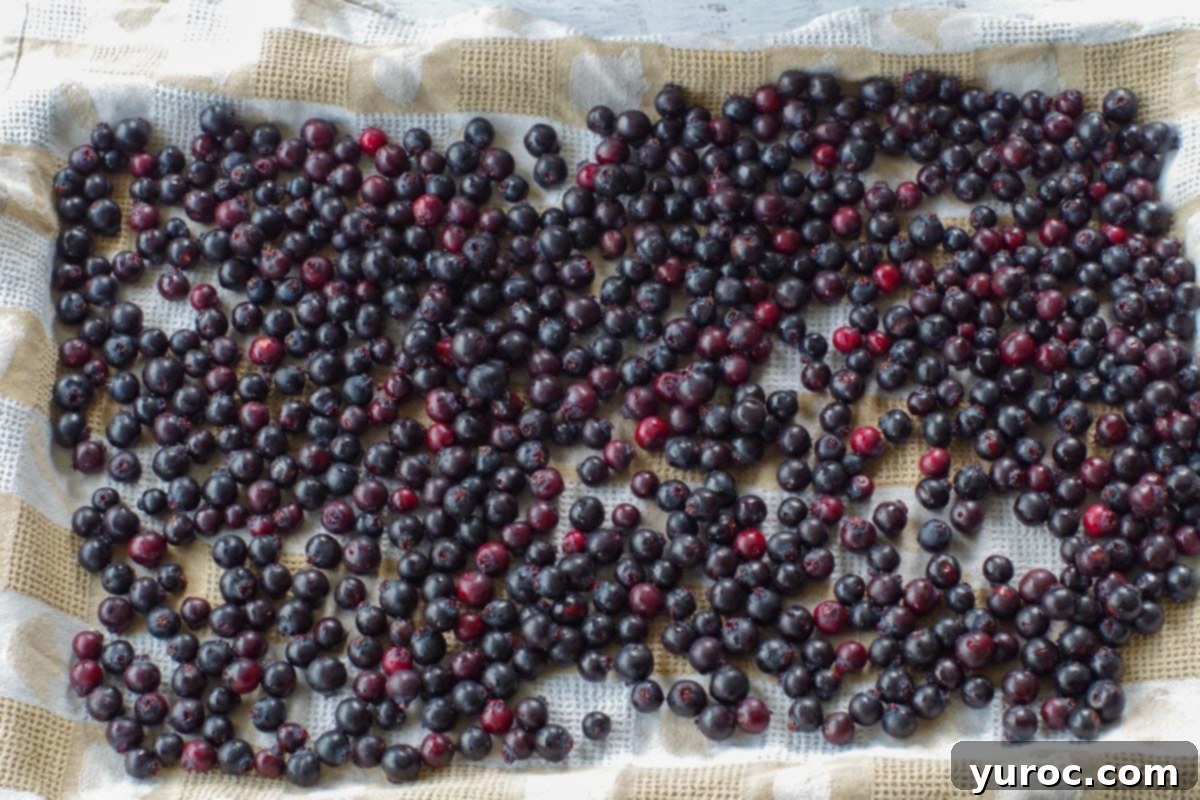
Once drained, spread a clean kitchen towel or several layers of paper towels on baking sheets. Evenly distribute the washed berries over the towel. Then, gently pat them dry with additional paper towels or another clean tea towel. This step is crucial: removing as much surface moisture as possible is essential to prevent ice crystals and freezer burn, which can degrade the texture and flavor of your frozen berries.
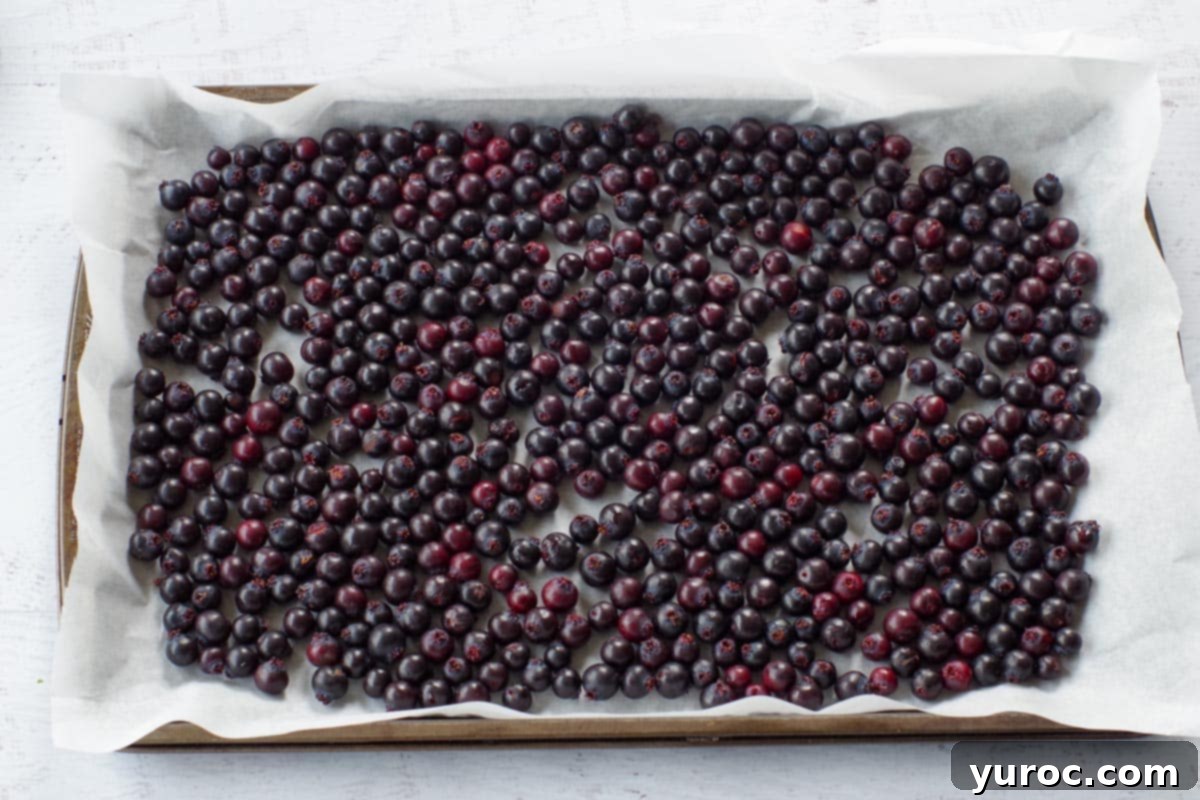
Line a clean cookie sheet with parchment paper. Arrange the thoroughly dried Saskatoon berries in a single layer on the parchment paper, ensuring they don’t touch each other. This “flash freezing” step is vital to prevent the berries from clumping together, allowing you to easily scoop out individual portions later without having to chip away at a solid block.
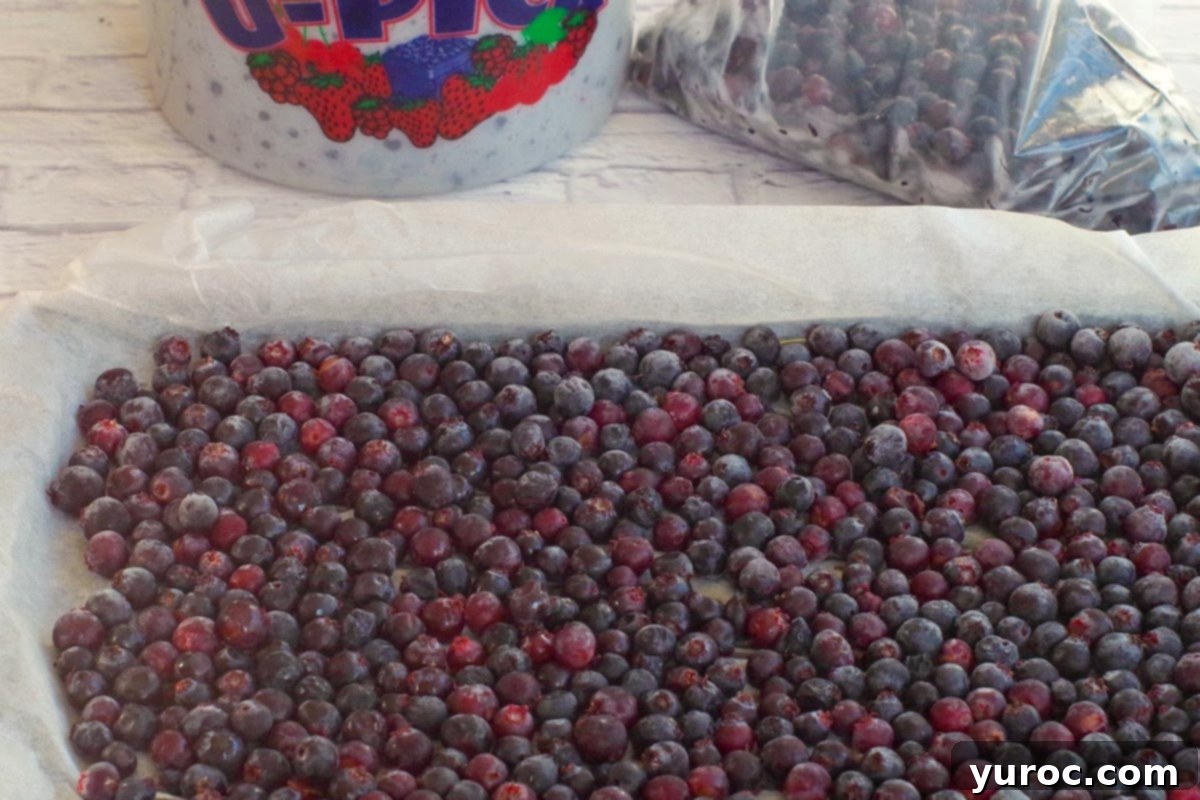
Carefully place the baking sheets with the berries into your freezer. For optimal flash freezing, allow them to freeze for 4-6 hours, or until completely solid. If you have a deep freezer, you can often stack several cookie sheets (3-4 high) to maximize space. Once the berries are individually frozen, transfer them to airtight freezer-safe containers or heavy-duty Ziploc freezer bags. Make sure to press out as much air as possible from the bags before sealing to minimize the risk of freezer burn. Label each bag or container with the date and contents for easy organization and tracking of freshness.
Expert Tips for Freezing Saskatoon Berries Successfully
- Use the freshest berries possible. The quality of your frozen berries directly correlates with the freshness of the berries you start with. Freezing berries at their peak ripeness ensures the best possible flavor, vibrant color, and desirable texture once they are thawed for use. Avoid freezing berries that are already past their prime, as freezing won’t improve their quality.
- Sort and clean in small batches. While it might seem faster to process large quantities at once, working with smaller portions (e.g., 2-3 cups at a time) during sorting and cleaning is far more effective. This allows you to meticulously identify and remove all stems, leaves, unripe berries, overripe or mushy ones, and any tiny insects or debris. A thorough initial clean contributes significantly to the overall quality of your frozen supply.
- Dry berries thoroughly before freezing. This step cannot be overstated. Any residual moisture on the surface of the berries will turn into ice crystals during freezing, leading to a phenomenon known as freezer burn. Freezer burn can alter the texture, color, and flavor of your berries. Patting them dry meticulously with paper towels or clean kitchen towels is effective. For larger batches, a salad spinner used in small quantities (about 1 cup at a time) can significantly speed up the drying process.
- Always flash freeze in a single layer. This is the secret to preventing a giant, unmanageable block of frozen berries. By spreading them in a single layer on parchment-lined baking sheets and freezing them until solid, each berry freezes individually. This means you can easily scoop out exactly the amount you need for a recipe without defrosting the entire batch.
- Don’t overload your freezer trays. When flash freezing, resist the urge to pack too many baking sheets into the freezer at once, especially if your freezer is already quite full. Overloading can impede proper airflow around the trays, slowing down the freezing process. Slower freezing can result in larger ice crystals forming, which negatively impacts the berry’s texture. If necessary, freeze your berries in multiple batches.
- Label clearly with date and quantity. Organization is key to successful long-term food storage. Use freezer-safe labels or a permanent marker to clearly note the date of freezing and the quantity (e.g., “Saskatoon Berries – Aug 2024 – 4 cups”). This practice helps you manage your inventory, ensuring you use older batches first and plan your recipes more efficiently, reducing waste.
- Double-bag for long-term storage. For maximum protection against freezer burn and to maintain optimal quality for extended periods (beyond 6 months), consider double-bagging your frozen berries. Place the sealed freezer bag inside another freezer bag or a rigid, airtight container. This extra layer provides an additional barrier against air exposure and moisture loss, preserving the berries’ flavor and texture for up to a year.
- Measure after thawing. It’s important to remember that frozen berries often lose some water content as they thaw, which can slightly affect their volume. For precision in baking and cooking, always thaw your frozen Saskatoons and drain any excess liquid before measuring them. This ensures accuracy in your recipes, especially those where liquid content is critical.
🍽Essential Equipment for Freezing Saskatoon Berries
To successfully clean and freeze your Saskatoon berries, you’ll need a few basic but essential kitchen tools. Having the right equipment makes the process smoother and ensures the best outcome for your preserved berries:
- A colander or large sieve is indispensable for washing the berries efficiently and allowing excess water to drain away. A large size will accommodate bigger batches, saving you time.
- At least one large baking sheet or tray that fits comfortably in your freezer (or two smaller ones if space is limited). These are crucial for the flash-freezing step, ensuring your berries freeze individually without clumping.
- Parchment paper is used to line the baking sheets, preventing the berries from sticking to the tray and making transfer much easier once frozen.
- Finally, high-quality, heavy-duty Ziploc freezer bags (not regular storage bags) or other airtight freezer-safe containers are essential for long-term storage. Freezer bags are thicker and designed to prevent freezer burn more effectively than standard storage bags.
- Clean kitchen towels or paper towels for thoroughly drying the berries.
- (Optional but recommended) A salad spinner for quick and efficient drying of berries in small batches.
Top Tip: Accelerate Berry Drying with a Salad Spinner
For an even faster and more efficient way to dry your washed Saskatoon berries, consider using a salad spinner. This handy kitchen tool can significantly reduce the drying time compared to simply patting them with towels. However, it’s important to use it correctly to avoid damaging the delicate berries:
- Work in small batches: Avoid overloading the spinner. Adding too many berries at once will make it difficult to spin effectively and could potentially crush the berries. Aim for about 1 to 1.5 cups of berries per spin.
- Gentle spinning: Spin gently a few times until most of the surface moisture is removed. You might need to do a couple of rounds for each batch.
- Final check: Even after using a salad spinner, it’s a good practice to briefly spread the berries on a clean towel or paper towels for a final quick pat-down to catch any lingering droplets before flash freezing.
This method drastically cuts down on moisture, which is your biggest enemy when it comes to preventing ice crystals and freezer burn.
🌡️Storage: Maximizing the Shelf Life of Your Frozen Saskatoon Berries
Proper storage is crucial for maintaining the quality of your frozen Saskatoon berries. When stored correctly in airtight freezer containers or heavy-duty Ziploc freezer bags, these delicious berries can be kept for up to 6 months without significant loss of quality. For even longer preservation, I’ve personally found that double-wrapping them (placing a sealed freezer bag inside another or in a rigid container) can extend their freezer life to a year, or even a little longer.
Regardless of your chosen storage method, always remember the golden rule of freezer organization: label everything! Use a freezer-safe marker to clearly write the name of the contents (“Saskatoon Berries”), the date of freezing, and even the year. This simple step prevents guesswork and ensures you consume the oldest berries first, keeping your freezer inventory fresh and organized. Minimizing air exposure is key to preventing freezer burn, so ensure containers are tightly sealed and as much air as possible is squeezed out of bags.
👪 Serving Size and Portioning Tips
When freezing Saskatoon berries, you have flexibility in how you portion them. You can opt for large freezer bags if you plan on using significant quantities for big recipes like pies or large batches of jam. Alternatively, freezing them in smaller 2-cup portions can be convenient for single recipes or when you only need a handful for a smoothie. However, thanks to the flash-freezing method (where berries are frozen individually on a tray first), they remain loose and easy to scoop out. This means precise pre-portioning into bags isn’t strictly necessary, as you can easily measure out the exact amount you need directly from a larger bag of frozen berries.
The most important consideration for any serving size is the type of container. Always use actual freezer bags or freezer-safe containers designed for long-term cold storage. These materials are thicker and more resilient to the extreme cold, effectively preventing freezer burn, which can compromise the berries’ flavor and texture over time.
How Do You Use Frozen Saskatoon Berries?
Frozen Saskatoon berries are incredibly versatile and can be incorporated into many recipes. Proper thawing and usage techniques ensure the best culinary results:
- Thawing: The best way to thaw frozen Saskatoon berries is slowly. You can leave them in the refrigerator overnight, or on the kitchen counter for a couple of hours until defrosted.
- Microwave Use: Only use the microwave to thaw berries if you are planning to cook with them immediately afterward, as rapid thawing can affect their delicate texture.
- Post-Thaw Preparation: Once defrosted, drain any excess liquid that has accumulated. This is crucial for recipes, especially baked goods, where too much moisture can alter the consistency.
- Measuring: For recipe accuracy, always measure your Saskatoon berries AFTER they have been fully defrosted and drained.
- Texture Considerations: It’s common for Saskatoon berries to become a little tougher in texture after being frozen and thawed. For this reason, they are generally best used in baked goods, cooked sauces, jams, or anything where the cooking process allows the berries to soften up again. While they can be eaten raw after thawing (e.g., in smoothies), their texture might not be as pleasant as fresh berries for direct consumption.
I find myself reaching for frozen Saskatoon berries in almost all my berry-focused recipes. They’re a fantastic ingredient that brings a burst of summer flavor to any dish. If you’re searching for delicious ways to use your frozen Saskatoons, consider a variety of desserts and savory applications. My Saskatoon pie filling and sauce is incredibly popular and can be used in countless ways (a glorious example is pictured below):
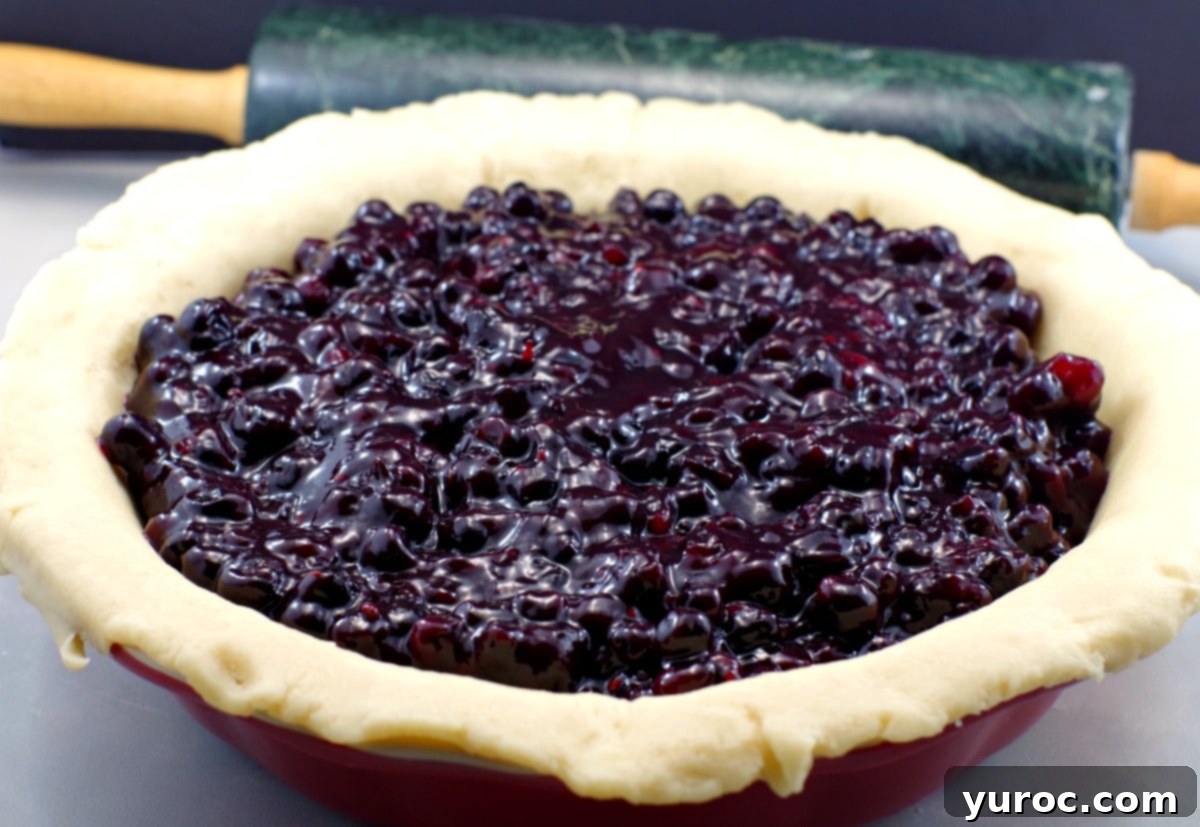
Here are just a few more delicious recipe ideas where frozen Saskatoon berries shine:
- Saskatoon Berry Loaf with Brown Butter Glaze
- Saskatoon Berry Muffins (Dairy-free)
- Saskatoon Berry Tiramisu Dessert Shooters
- Saskatoon Berry Ice Cream (no churn)
- Saskatoon berry crisp (in a mug)
- No Bake Saskatoon Berry Cheesecake (in a jar)
- Saskatoon Berry Dessert Perogies
- Saskatoon Berry Layer Cake
- Smoothies and milkshakes: Add frozen berries directly for a cold, thick drink.
- Oatmeal or yogurt toppings: Thaw slightly or add frozen, and let them gently defrost into your warm breakfast.
For even more inspiration, explore our extensive collection of Saskatoon Berry recipes!
❔ Saskatoon Berry FAQs
Yes, absolutely! Fresh Saskatoon berries are delicious eaten raw, straight off the bush or in salads and cereals. They have a sweet, slightly almond-like flavor and a texture similar to blueberries, making them a delightful snack.
Yes, it is highly recommended to wash Saskatoon berries before freezing to remove any dirt, dust, or small insects. While some believe washing can make the skin a little tougher upon thawing, I haven’t found this to be a significant issue. The key is to ensure they are thoroughly dried with paper towels or clean tea towels after washing and before freezing to prevent ice crystal formation and freezer burn.
The best method for freezing berries, including Saskatoons, is to flash freeze them. This involves spreading the cleaned and thoroughly dried berries in a single layer on parchment-lined cookie sheets. Freeze them for 4-6 hours until solid, then transfer the individually frozen berries to an airtight Ziploc freezer bag or rigid container for long-term storage. This prevents clumping and allows you to use only what you need.
Freezing and thawing can slightly alter the cell structure of Saskatoon berries, leading to a texture that is a bit firmer or chewier compared to fresh berries. This is a normal effect of the freezing process. For this reason, frozen and thawed Saskatoon berries are often best utilized in baked goods, jams, sauces, or other cooked recipes where the heat softens them, rather than being eaten raw.
Yes, vacuum sealing is an excellent method for storing frozen Saskatoons, especially for very long-term preservation. It removes significantly more air than regular freezer bags, drastically reducing the risk of freezer burn and helping to preserve the berries’ flavor, color, and texture for an extended period. Just be sure to flash freeze the berries first so they don’t get crushed by the vacuum seal.
The most effective way to prevent frozen Saskatoon berries from clumping into a solid mass is through flash freezing. By spreading the berries in a single layer on a baking sheet and freezing them solid before transferring them to storage bags, each berry freezes individually. This ensures they remain loose and easy to pour or scoop out in the exact quantity required for your recipes.
No, it is not necessary to add sugar to Saskatoon berries before freezing. They freeze perfectly well on their own. Adding sugar is typically done for specific recipes like jams or pies, or if you prefer a sweeter profile for thawing and eating directly, but it’s not required for preservation.
Absolutely! Frozen Saskatoon berries are ideal for smoothies. You can add them directly to your blender without thawing. They will help create a thick, cold, and refreshing smoothie without the need for additional ice, infusing your drink with their unique flavor.
Freezing fresh Saskatoons is not only incredibly easy but also a fantastic way to extend the enjoyment of this delicious fruit and the incredible taste of summer throughout the entire year. With these simple steps and expert tips, you’ll be able to preserve your harvest and savor homemade treats any time you desire!

🌡️How to Freeze Saskatoon Berries
Print
Pin
Rate
Equipment
Supplies
- Fresh Saskatoon berries (any quantity you wish to freeze)
Instructions
-
Begin by spreading your fresh Saskatoon berries on baking sheets. This method provides an excellent visual overview, making it easier to sort and inspect each berry for quality.
-
Carefully pick out and remove any undesirable elements: this includes small bits of stems, stray leaves, unripe (green or pale) berries, and any soft or mushy Saskatoons. Discard these imperfections to ensure only the best quality berries are frozen.
-
Transfer the sorted berries into a large sieve or colander. Wash them thoroughly under cool, running water. Ensure all surfaces are rinsed to remove dirt and any remaining debris. After washing, allow them to sit in the colander for approximately 10 minutes to drain off initial excess water.
-
Perform another quick quality check during or after washing. This is a final opportunity to spot and remove any overlooked bad berries, stems, leaves, or even small insects. Diligence here guarantees a pristine final frozen product.
-
Lay a clean kitchen towel or several sheets of paper towel on fresh baking sheets. Spread the wet berries evenly over the towel.
Gently pat them completely dry with additional paper towels or another clean tea towel. Thorough drying is critical to prevent ice crystals and freezer burn.
-
Line a clean cookie sheet with parchment paper. Arrange the now thoroughly dried berries in a single layer on the parchment paper, making sure they do not touch each other. This step is known as flash freezing and is essential for preventing the berries from clumping together.
-
Place the baking sheets with berries into your freezer for 4-6 hours, or until the berries are completely solid. You can stack multiple sheets in a deep freezer.
Once individually frozen, transfer the berries to airtight freezer-safe containers or heavy-duty Ziploc freezer bags. Ensure you push out as much air as possible before sealing and label clearly with the date for optimal storage.
Notes
Use the freshest berries possible. The fresher your berries are when you freeze them, the better their flavor, color, and overall texture will be once thawed. Aim to freeze them within a few days of picking or purchase.
Sort and clean in small batches. Processing berries in smaller quantities helps you be more thorough in catching any stems, leaves, unripe or overripe berries, and even tiny insects, ensuring a cleaner and higher-quality final frozen product.
Dry berries thoroughly before freezing. Any excess moisture remaining on the berries will lead to the formation of ice crystals and unsightly freezer burn, which can degrade their taste and texture. Pat berries very dry with towels, or for speed, use a salad spinner in small batches.
Always flash freeze in a single layer. This crucial step involves freezing the berries spread out on parchment-lined baking sheets. It prevents them from clumping together, making it incredibly easy to scoop out just the amount you need later without defrosting the whole batch.
Don’t overload your freezer trays. Stacking too many baking sheets in a cramped freezer can hinder proper airflow and slow down the freezing process. This can result in larger ice crystals and negatively impact berry quality. If necessary, freeze in multiple, smaller batches.
Label clearly with date and quantity. For optimal organization and to track freshness, use freezer-safe labels to include the freezing date and the approximate portion size. This helps in efficient meal planning and prevents food waste.
Double-bag for long-term storage. For preserving berries longer than 6 months, an additional layer of protection is recommended. Place the initial sealed freezer bag inside a second bag or a rigid, airtight container to further reduce air exposure and effectively prevent freezer burn.
Measure after thawing. Keep in mind that frozen berries tend to lose some water and volume as they thaw. For precise recipe results, always thaw your berries completely and drain any excess liquid before accurately measuring them.
⭐ Reviews
How useful was this post?
Click on a star to rate it!
Average rating 4.8 / 5. Vote count: 5
No votes so far! Be the first to rate this post.
