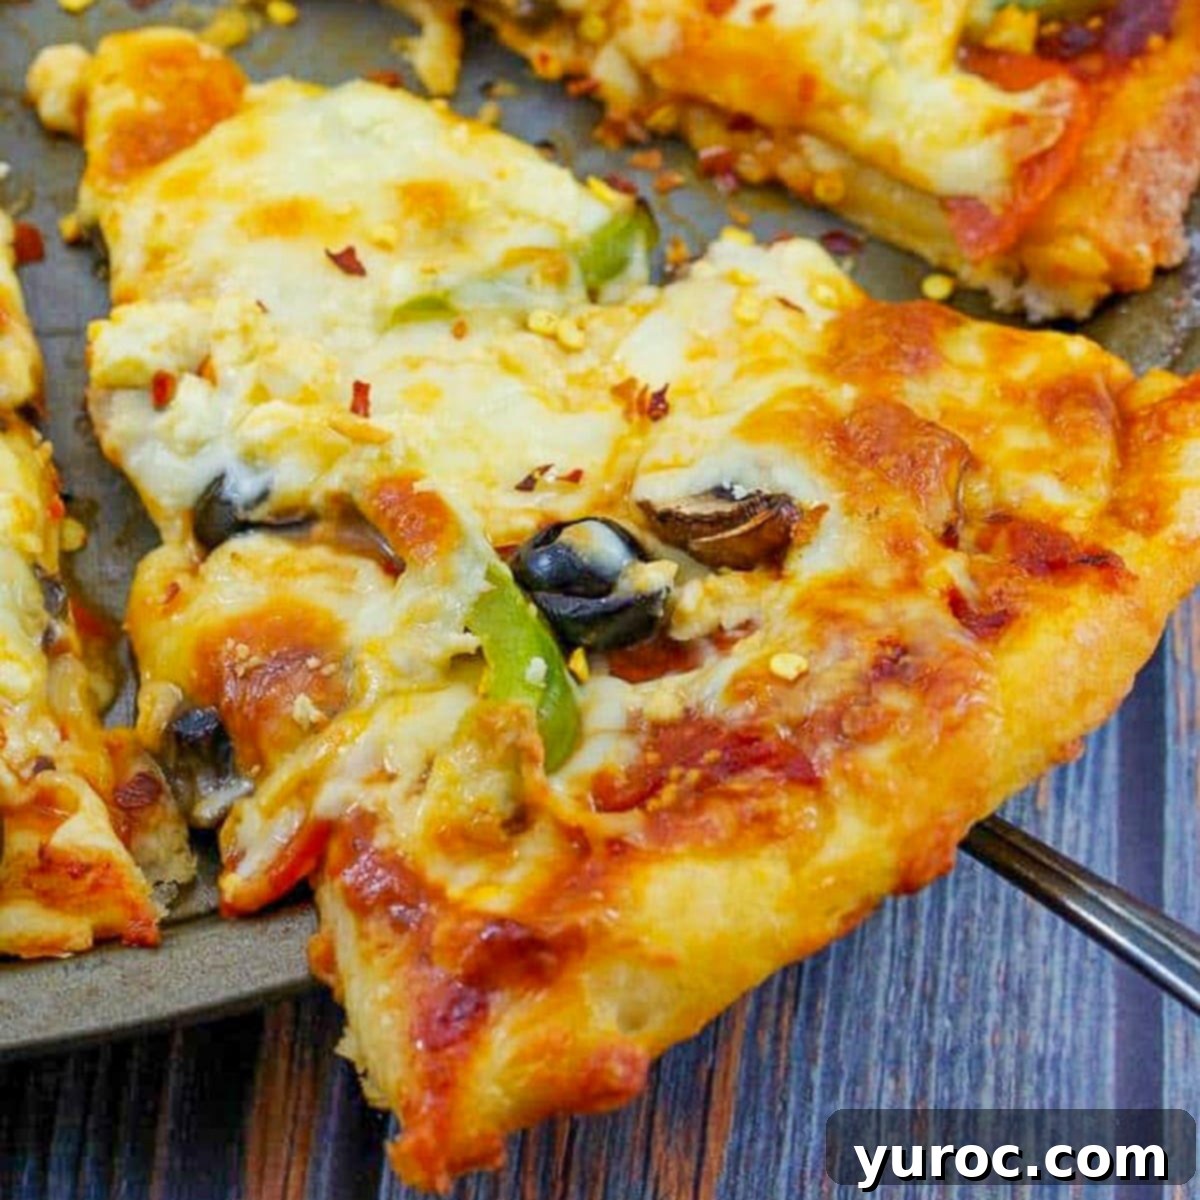
Weight Watchers 2-Ingredient Pizza Dough: Your Ultimate Guide to Low-Point, Crispy Homemade Pizza
Discover the secret to making incredibly delicious, low-point pizza with just two simple ingredients! For too long, this game-changing Weight Watchers 2-Ingredient Pizza Dough seemed like a well-kept secret, but it’s time to share the magic. This easy-to-make dough transforms into a wonderfully crispy crust, making homemade pizza nights a guilt-free pleasure. Best of all, a slice of this pizza dough alone is only 2 Weight Watchers points (without toppings).
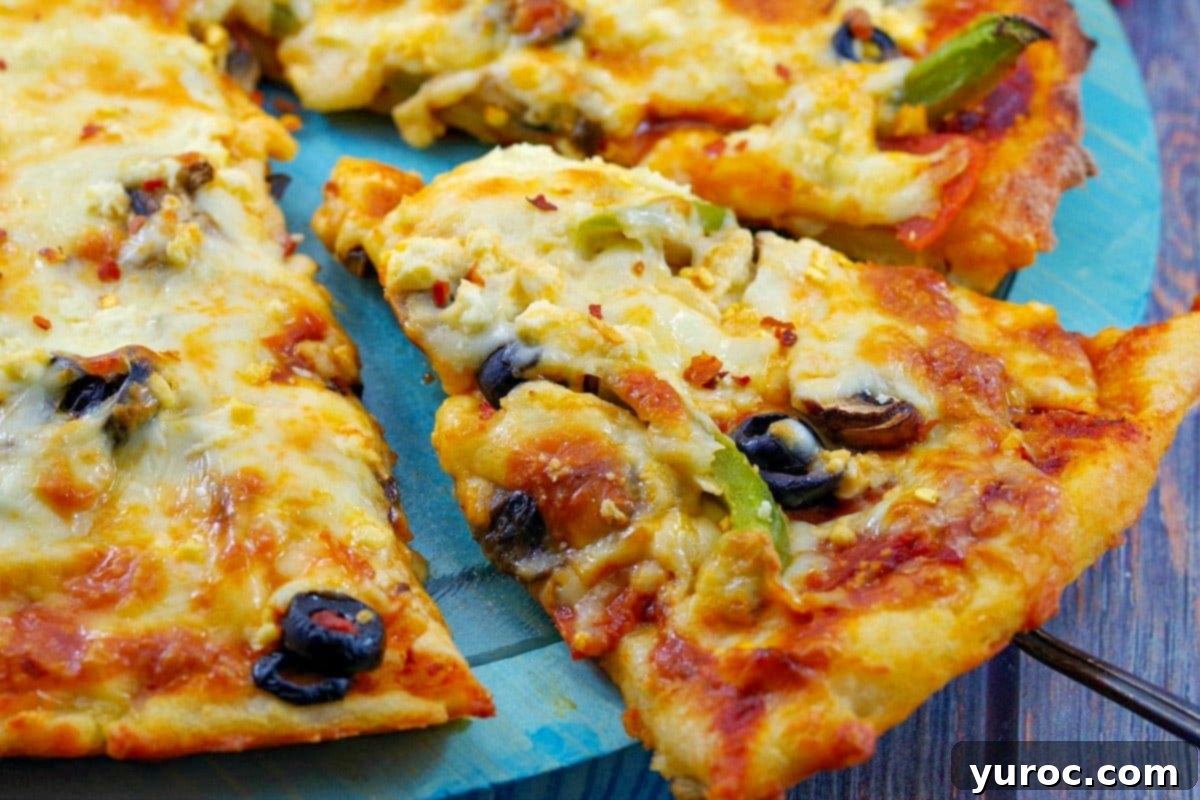
Imagine enjoying a full, satisfying pizza, complete with all your favorite healthy toppings, for just 6 Weight Watchers points per slice! This recipe is a year-round favorite, perfect for cozy pizza nights, thrilling movie marathons, or lively game day gatherings, allowing you to indulge without overdoing it. I love this versatile 2-ingredient dough so much that I’ve incorporated it into many of my other recipes, including my Healthy Big Mac Pizza and my fun Pizza Cupcakes!
🍒Reader Review
“I made this last night and I was very impressed! The dough had a nice crust on the bottom and a doughy/chewy inside!”⭐⭐⭐⭐⭐
If you’re new to the Weight Watchers journey, be sure to explore my comprehensive Weight Watchers Tips & Tricks for guidance and inspiration. And for more delicious meal ideas, check out these fantastic WW Sunday Dinner Recipes, all complete with their point values!
Why You’ll Absolutely Love This Weight Watchers Pizza Recipe
This 2-ingredient pizza dough isn’t just a simple recipe; it’s a culinary revelation for anyone looking to enjoy delicious pizza while staying on track with their health and wellness goals. Here’s why it’s bound to become a staple in your kitchen:
- Incredibly Low Points: Indulge in a generous slice of this pizza, fully loaded with recommended toppings, for an astonishingly low 6 Weight Watchers points. This is roughly half the points of a typical pizza slice, allowing you to enjoy your favorite food without guilt. For those seeking even fewer points, the dough alone is just 2 WW points per slice, and you can easily make substitutions and variations to lower the overall point value further.
- Minimal Ingredients: Simplicity is key! For the dough itself, you only need two foundational ingredients. This cuts down on grocery lists and simplifies the cooking process, leaving you more time to focus on your preferred toppings.
- Effortlessly Easy & Quick: Forget about long rising times and complex dough preparations. This pizza comes together in a flash. You simply blend the two ingredients, roll out the dough, add your desired toppings, and bake. It’s perfect for busy weeknights or when a pizza craving strikes unexpectedly.
- Unbelievable Taste That Pleases Everyone: Prepare to be amazed – no one will suspect this pizza is Weight Watchers friendly! The crust achieves a perfect balance of crispy and chewy that rivals traditional pizza dough. I once surprised my husband, who raved about my homemade pizza, by revealing it was made with this WW dough. He was genuinely shocked, proving that this recipe appeals to everyone, regardless of whether they’re on the Weight Watchers program or not.
- Excellent for Meal Prep: Life gets busy, but your healthy eating doesn’t have to suffer. This pizza offers fantastic flexibility for meal planning. You can prepare the dough in advance, or even bake the entire pizza and store it. It also freezes beautifully, making it an ideal option for convenient, healthy meals whenever you need them.
If you’re a true pizza enthusiast, you might also enjoy my Weight Watchers Better for You Healthy Breakfast Pizza! It’s an incredible start to your day at only ONE WW point per slice! And for the little ones (and the young at heart!), this delightful Healthy Pizza Dippers recipe also features our fantastic 2-ingredient pizza dough.
🥘 Essential Ingredient Notes for Your WW Pizza
The magic of this Weight Watchers Pizza Recipe lies in its incredibly simple 2-ingredient dough: non-fat Greek yogurt and self-rising flour. This combination eliminates the need for any rising time, yet still yields a pizza that’s wonderfully crispy and utterly delicious. You’d truly never guess it’s a Weight Watchers-friendly option!
And don’t worry if you don’t have self-rising flour on hand – it’s incredibly easy to make your own! (See our EXPERT TIP below for simple instructions).
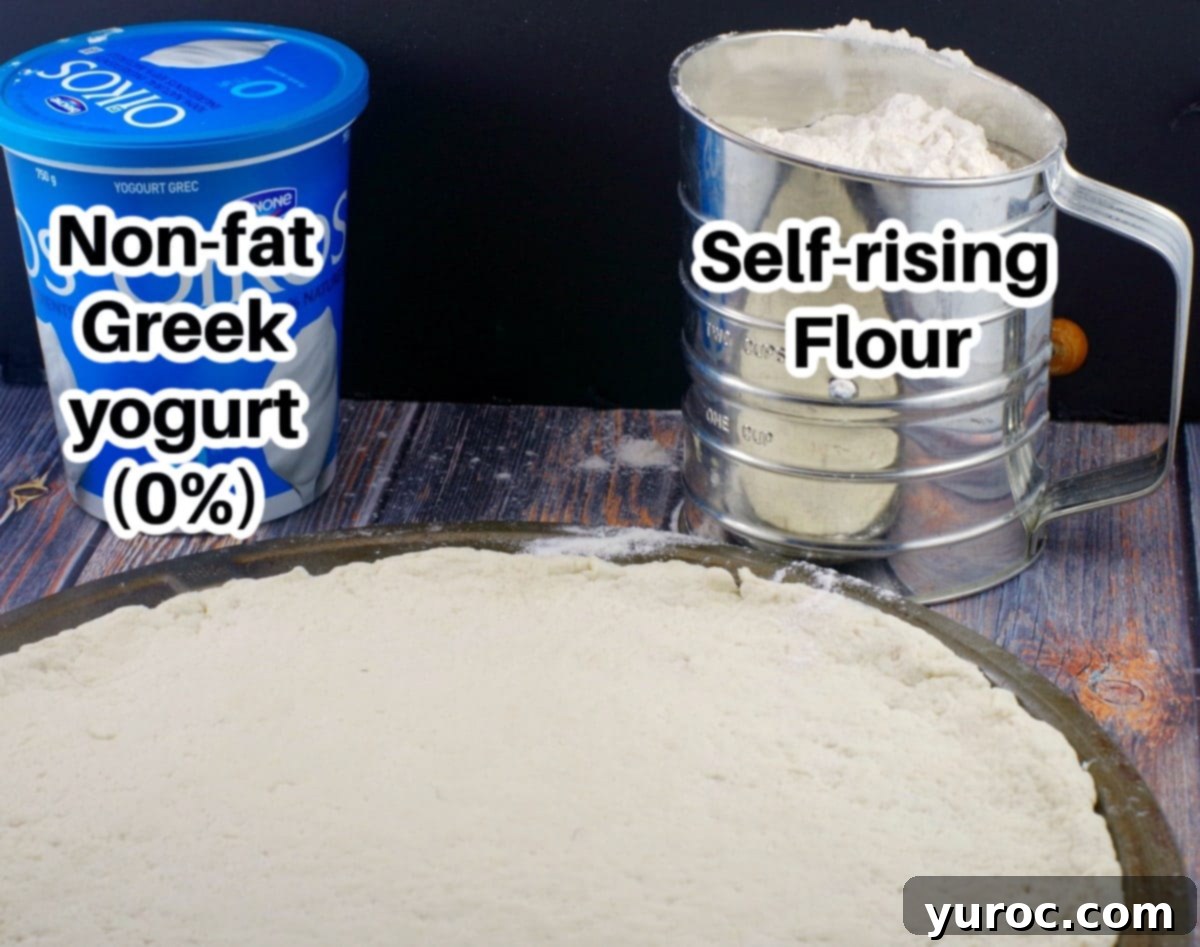
The 2-Ingredient Weight Watchers Dough:
- Non-fat plain Greek yogurt (0%): This is the cornerstone of our low-point dough. Ensure it’s plain and non-fat for the best results and point value. The acidity in the yogurt reacts with the leavening agents in the self-rising flour, creating a light and airy texture.
- Self-rising flour: This flour comes pre-mixed with baking powder and salt, simplifying your recipe even further. If you don’t have it, don’t fret! You can easily make your own (see the “Expert Tip” section for details).
Recommended Toppings (for a 6-point slice):
While the dough is simple, the toppings are where you can truly customize your pizza. These recommended toppings keep the pizza delicious and WW-friendly:
- Green pepper, chopped (adds a fresh crunch and vibrant color)
- Your favorite low-sugar pizza sauce (I personally love the Primo brand for its flavor profile)
- Brown mushrooms, sliced (earthy flavor and meaty texture)
- Canned, sliced black olives (for that classic pizza tang)
- Light feta, crumbled (adds a salty, creamy burst of flavor)
- Turkey pepperoni (a fantastic lean alternative to traditional pepperoni)
- Light mozzarella cheese (provides that essential gooey, cheesy goodness with fewer points)
🍕Creative Variations and Smart Substitutions
One of the joys of homemade pizza is the freedom to customize it exactly to your liking. While our suggested toppings keep the point count low, feel free to experiment with these Weight Watchers-friendly variations:
- Lean Protein Options: Instead of or in addition to turkey pepperoni, consider non-fat ham, turkey bacon, or lean turkey sausage for a savory boost.
- Vegetable Power: Load up on more veggies! Beyond green peppers and mushrooms, think onions, spinach, cherry tomatoes, or zucchini for added nutrients and flavor.
- Cheese Choices: Experiment with different cheeses. In addition to light feta and mozzarella, light or fat-free cheddar can offer a different flavor profile.
- Herb & Spice Boosters: Enhance the flavor with Italian seasoning, a sprinkle of garlic powder for aromatic depth, or a pinch of crushed red peppers for a gentle kick.
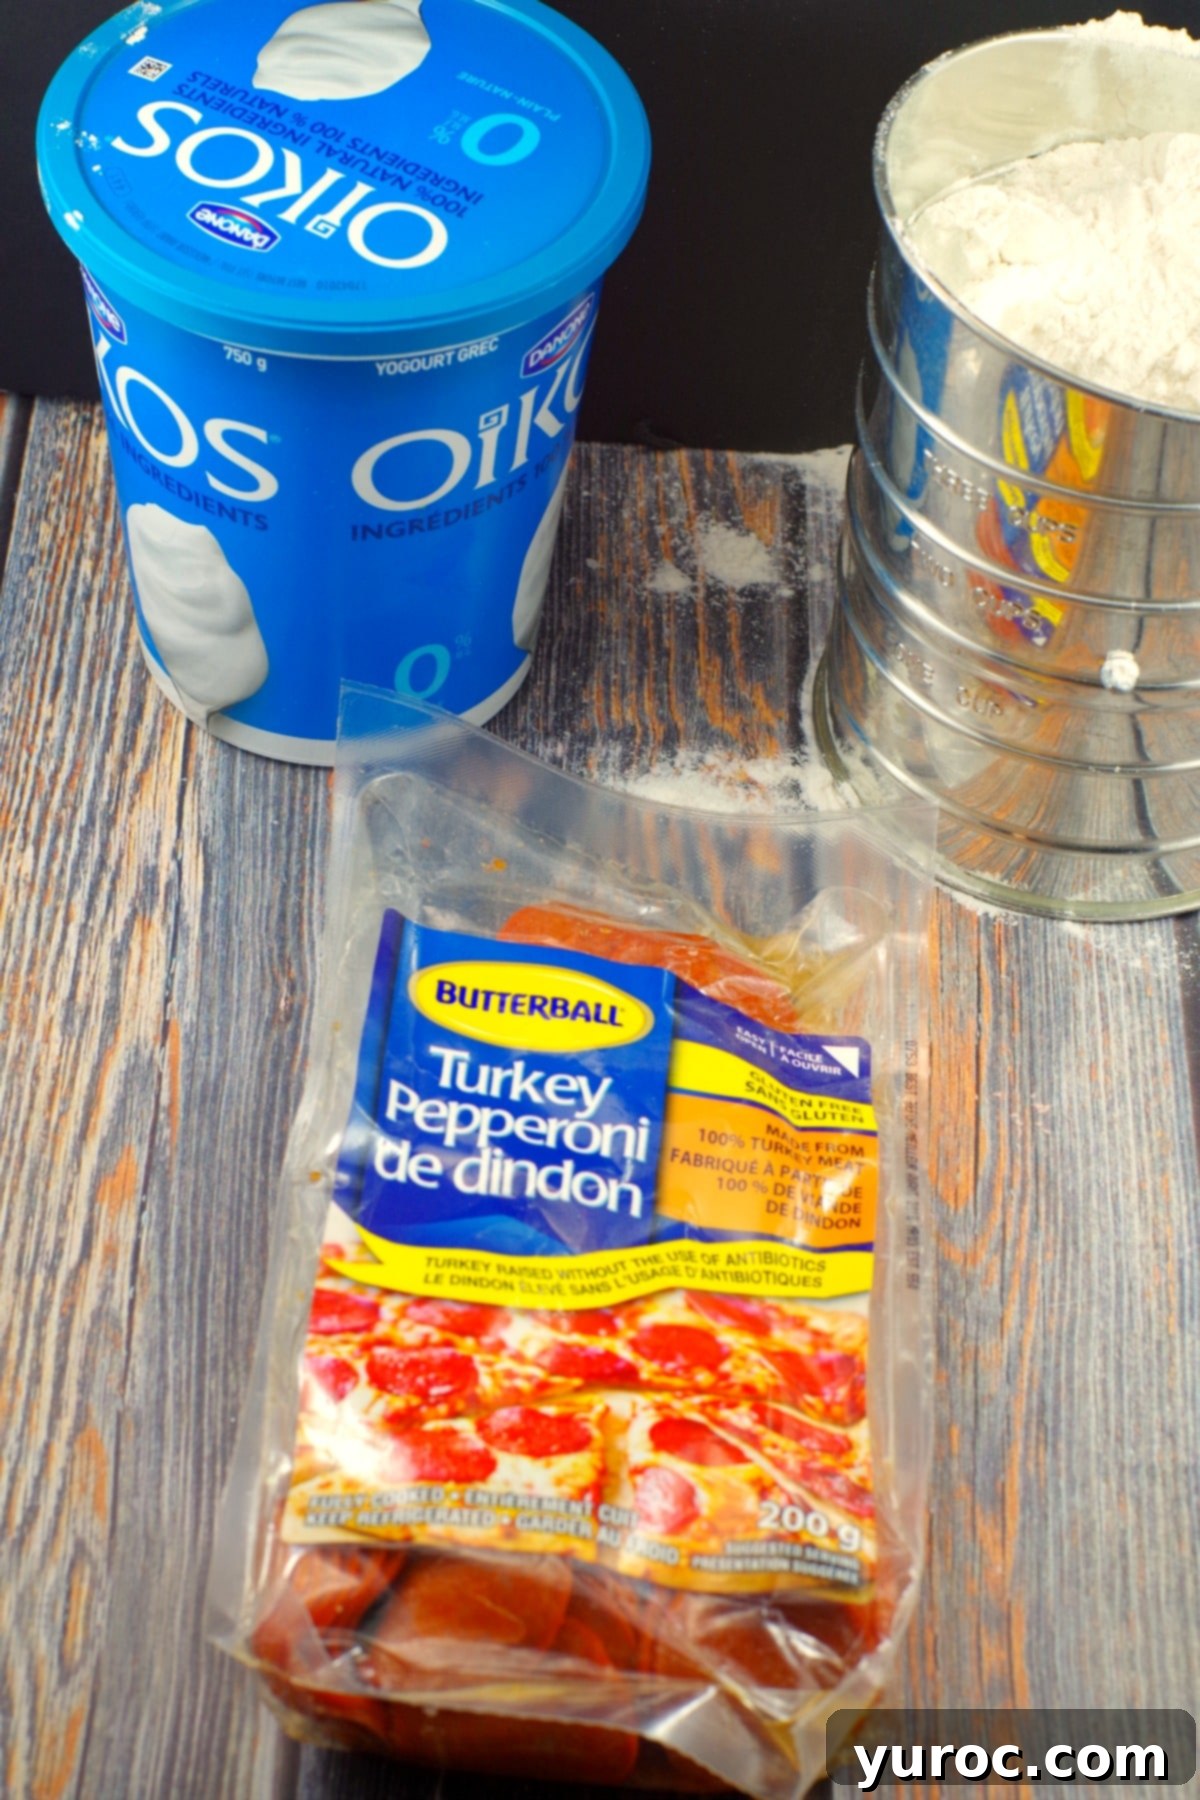
My discovery of turkey pepperoni a few years ago was truly a game-changer for my Weight Watchers pizza. It offers all the savory, slightly spicy flavor of traditional pepperoni but with significantly lower fat and points. Even my kids agree it tastes better! It’s an excellent WW-friendly topping that doesn’t compromise on taste.
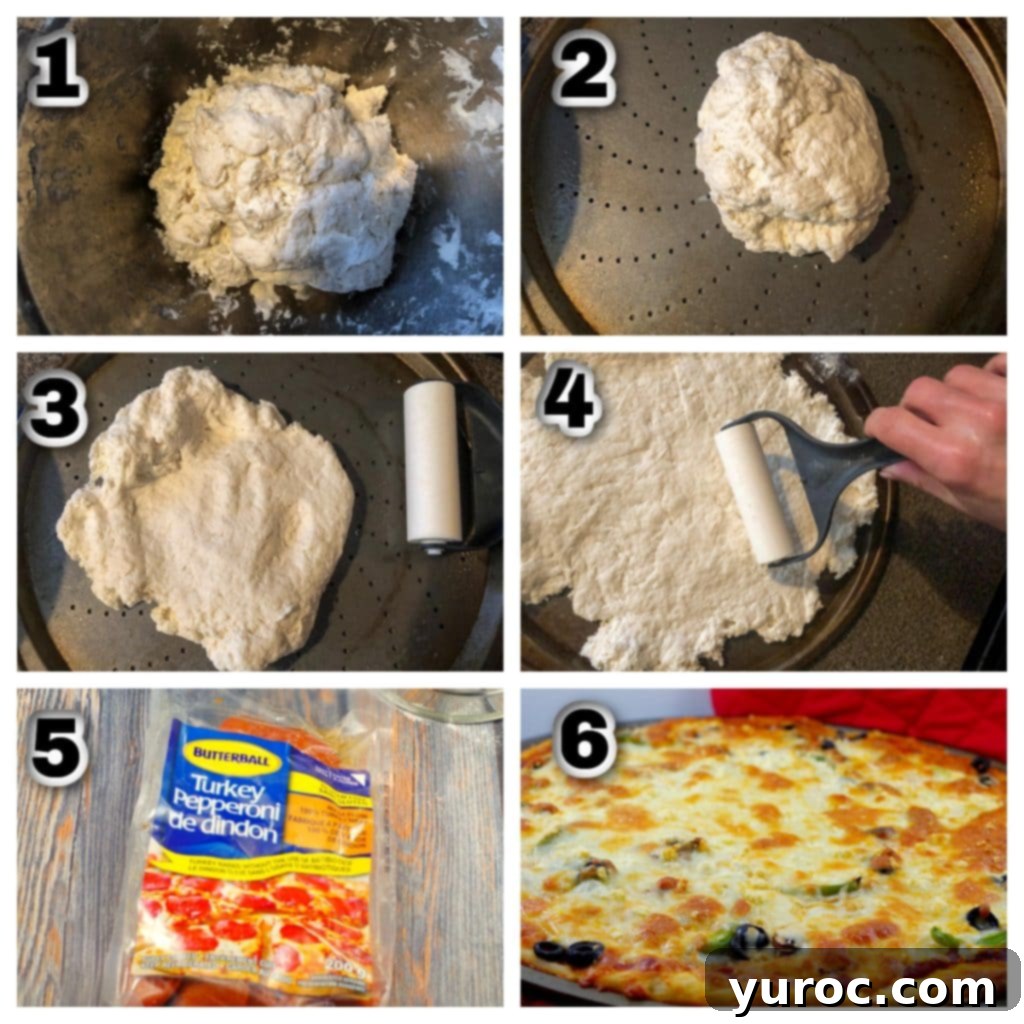
While turkey pepperoni can sometimes be a bit tricky to find, I’ve had good luck locating the Butterball brand at larger Walmart Super Centres. Another fantastic alternative is turkey pepperoni sticks, also often available at Walmart. A 200g package of Butterball turkey pepperoni is typically enough to generously top three pizzas, making it a cost-effective and delicious choice!
What I particularly appreciate about making my own pizza with this dough is the complete control over the crust. If you, like me, aren’t a big fan of overly thick crusts, you’ll love being able to customize it. You can opt for a thinner, crispier crust or a slightly thicker, chewier base. You can even choose to make it without the thick raised edges (technically known as the ‘cornicione’), which is often my preference for a more evenly topped pizza.
🔪 How to Make Your Delicious 2-Ingredient Weight Watchers Pizza
Creating this satisfying Weight Watchers pizza is surprisingly straightforward. Follow these simple steps for a perfect homemade pizza experience:
- Prepare Your Oven and Pan: Begin by preheating your oven to a precise 400°F (204°C). While the oven heats, lightly spray a 14-inch pizza pan with a non-stick cooking spray to prevent sticking and encourage a crispy crust.
- Mix the Dough: In a large mixing bowl, combine the non-fat Greek yogurt and self-rising flour. Stir these two ingredients together using a sturdy spoon or spatula until a thick, shaggy dough begins to form.
- Knead the Dough Ball: Turn the dough mixture out onto a lightly floured surface. Knead the dough gently for a few minutes until it comes together into a smooth, cohesive dough ball. This doesn’t require extensive kneading, just enough to combine everything well.
- Place Dough on Pan: Transfer the freshly kneaded dough ball directly onto your prepared pizza pan.
- Roll Out the Crust: Begin spreading the dough across the pan. You can use a rolling pin for a more even, thin crust, or simply use your hands to gently press and stretch the dough into your desired shape and thickness. Distribute it evenly to cover the pan, deciding how much or how little crust you’d like around the edges.
- Add Your Weight Watchers Friendly Toppings: Now for the fun part! Start by spreading your favorite pizza sauce evenly over the dough. Then, layer your chosen lean meats (like turkey pepperoni), followed by other vegetables, and finally, your light mozzarella or other cheeses. This layering ensures everything cooks beautifully.
- Bake to Perfection: Place the pizza in your preheated oven and bake for 20-25 minutes. The pizza is ready when the crust is lightly golden brown and the cheese is bubbly and melted.
- Optional Crispy Finish (Broil): If you prefer an extra crispy crust or golden-brown cheese, you can briefly switch your oven to broil (around 500°F/260°C) for an additional 1-2 minutes. *Important: Watch it very closely during this step, as it can brown quickly and burn.
- Cool, Cut, and Serve: Once baked, remove the pizza from the oven and let it cool for about 3 minutes. This brief cooling period helps the cheese set and makes it easier to slice. Cut your pizza into 12 equal pieces and serve immediately.
💡 Expert Tip: How to Make Your Own Self-Rising Flour
Self-rising flour is simply all-purpose flour that has baking powder and salt already mixed in. It’s a convenient staple for many recipes, and if you don’t have it on hand, it’s incredibly easy to make your own from scratch!
To prepare your own self-rising flour:
PER CUP: For every 1 cup of all-purpose flour you use, combine it with 1 ½ teaspoons of baking powder and ½ teaspoon of salt. Mix thoroughly to ensure the leavening agents are evenly distributed. (Note: This pizza recipe requires 1.5 cups of self-rising flour, so adjust accordingly if making your own.)
It’s truly remarkable how these two humble ingredients can come together to create such a sensationally delicious pizza. I often wish I had known about this incredible hack in my earlier days on the Weight Watchers program!
One of the biggest challenges for many on a weight management journey is the feeling of drastic restriction, especially when it comes to beloved carbohydrates. I, for one, love my carbs, and this recipe proves that you absolutely can lose or maintain weight without rigid restrictions or completely eliminating entire food groups. It’s all about smart choices and balance.
💡 Expert Tip: Preventing Pizza Dough from Sticking
Rolling out dough can sometimes be a sticky situation, but with a few tricks, you can ensure a smooth process. When you’re rolling out your pizza dough, the key is to constantly flour your rolling pin. This creates a barrier that prevents the dough from adhering to the pin and makes the spreading process much easier.
For an even more effortless experience, I highly recommend using a silicone pastry/pizza rolling pin (affiliate link). The non-stick surface of silicone drastically reduces sticking, often requiring less additional flour, and it’s fantastic for rolling dough directly onto your pizza pan without transfer issues. Alternatively, if you don’t have a pizza pan, you can easily roll the dough onto a 9×13 baking sheet.
💡 Expert Tip: Achieving a Perfectly Crispy 2-Ingredient Dough
If you’re wondering whether this simple 2-ingredient dough can truly deliver a crispy crust, put those concerns to rest! This dough bakes up beautifully, achieving a perfectly crispy and flavorful texture. In fact, if you weren’t told it was a Weight Watchers pizza crust, you’d likely never guess its secret.
The primary trick to keeping your WW pizza dough wonderfully crispy is to use a perforated pizza pan (affiliate link). The perforations allow air to circulate beneath the crust, ensuring even baking and preventing sogginess. Another excellent method for achieving an exceptionally crispy crust is to bake your pizza in a cast iron frying pan (affiliate link). Cast iron retains and distributes heat exceptionally well, leading to a perfectly browned and crispy base.
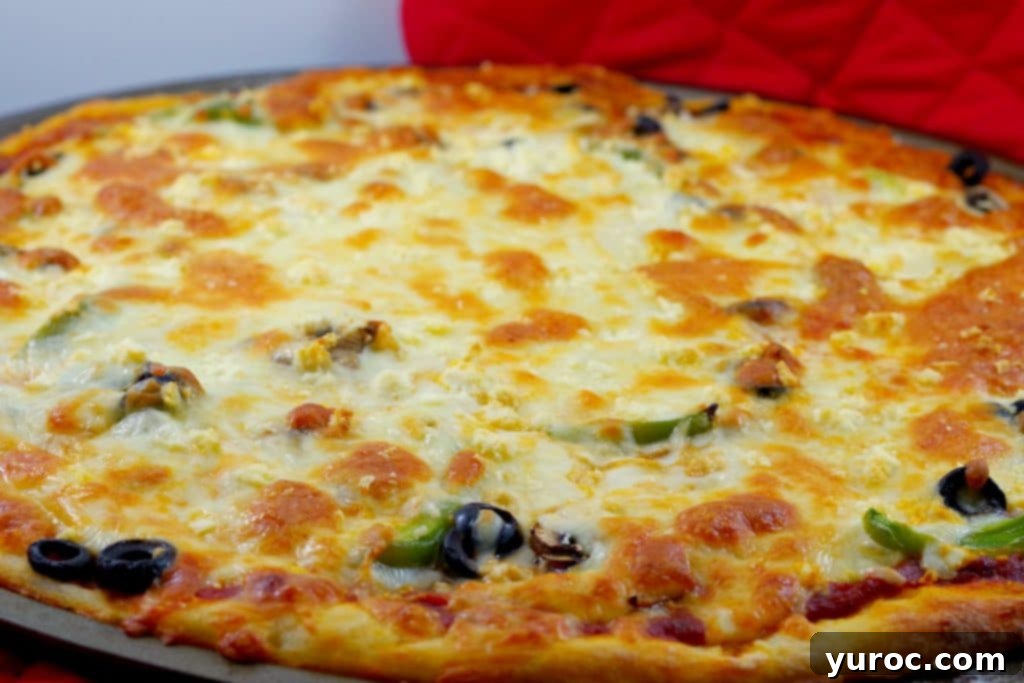
Weight Watchers, at its core, is about balance. This recipe truly embodies that philosophy, proving that you absolutely can treat yourself to pizza without derailing your progress. This pizza makes indulging even easier, as each delicious slice contains at least half the WW points of a typical pizza. It’s become a regular favorite in my home, and even the kids eagerly devour it!
👪 Serving Size & Customization
This Weight Watchers pizza recipe is designed to yield 12 generous servings. Each slice, when prepared with all the recommended toppings, comes in at a mere 6 WW points. If you’re cooking for a larger crowd or simply want to prep extra for future meals, you can easily double or triple the recipe by adjusting the serving size in the recipe card below – the ingredient quantities will automatically scale for you. Just remember to grab additional pizza pans if you’re making multiple pizzas!
🔢 Understanding the WW Points
As mentioned, this satisfying pizza recipe, complete with all recommended toppings, is only 6 Weight Watchers points per slice. This is a significant reduction compared to a typical pizza slice, which often contains double the points. The versatile 2-ingredient dough itself contributes just 2 WW points per slice. *NOTE: For an even lower point count, consider making a delicious vegetarian pizza by skipping the meat toppings altogether!
🌡️ Storage & Meal Prep Tips
This Weight Watchers pizza is not only delicious freshly baked but also holds up well for future enjoyment, making it ideal for meal prepping:
Refrigeration: Leftover pizza can be stored in an airtight container in the refrigerator for up to 4 days. Reheat slices in the oven, toaster oven, or even a pan for best results.
Freezing: This pizza freezes exceptionally well for up to 3 months. I often make two pizzas at once, enjoying one immediately and freezing the other for a quick meal later. For optimal freezing, allow the pizza to cool completely, then double-wrap it tightly in plastic wrap (like Glad Press N’ Seal) directly on the pan before placing it in the freezer. Alternatively, you can slice the cooked pizza into individual portions and freeze them in freezer-safe bags or containers for convenient single-serve meals.
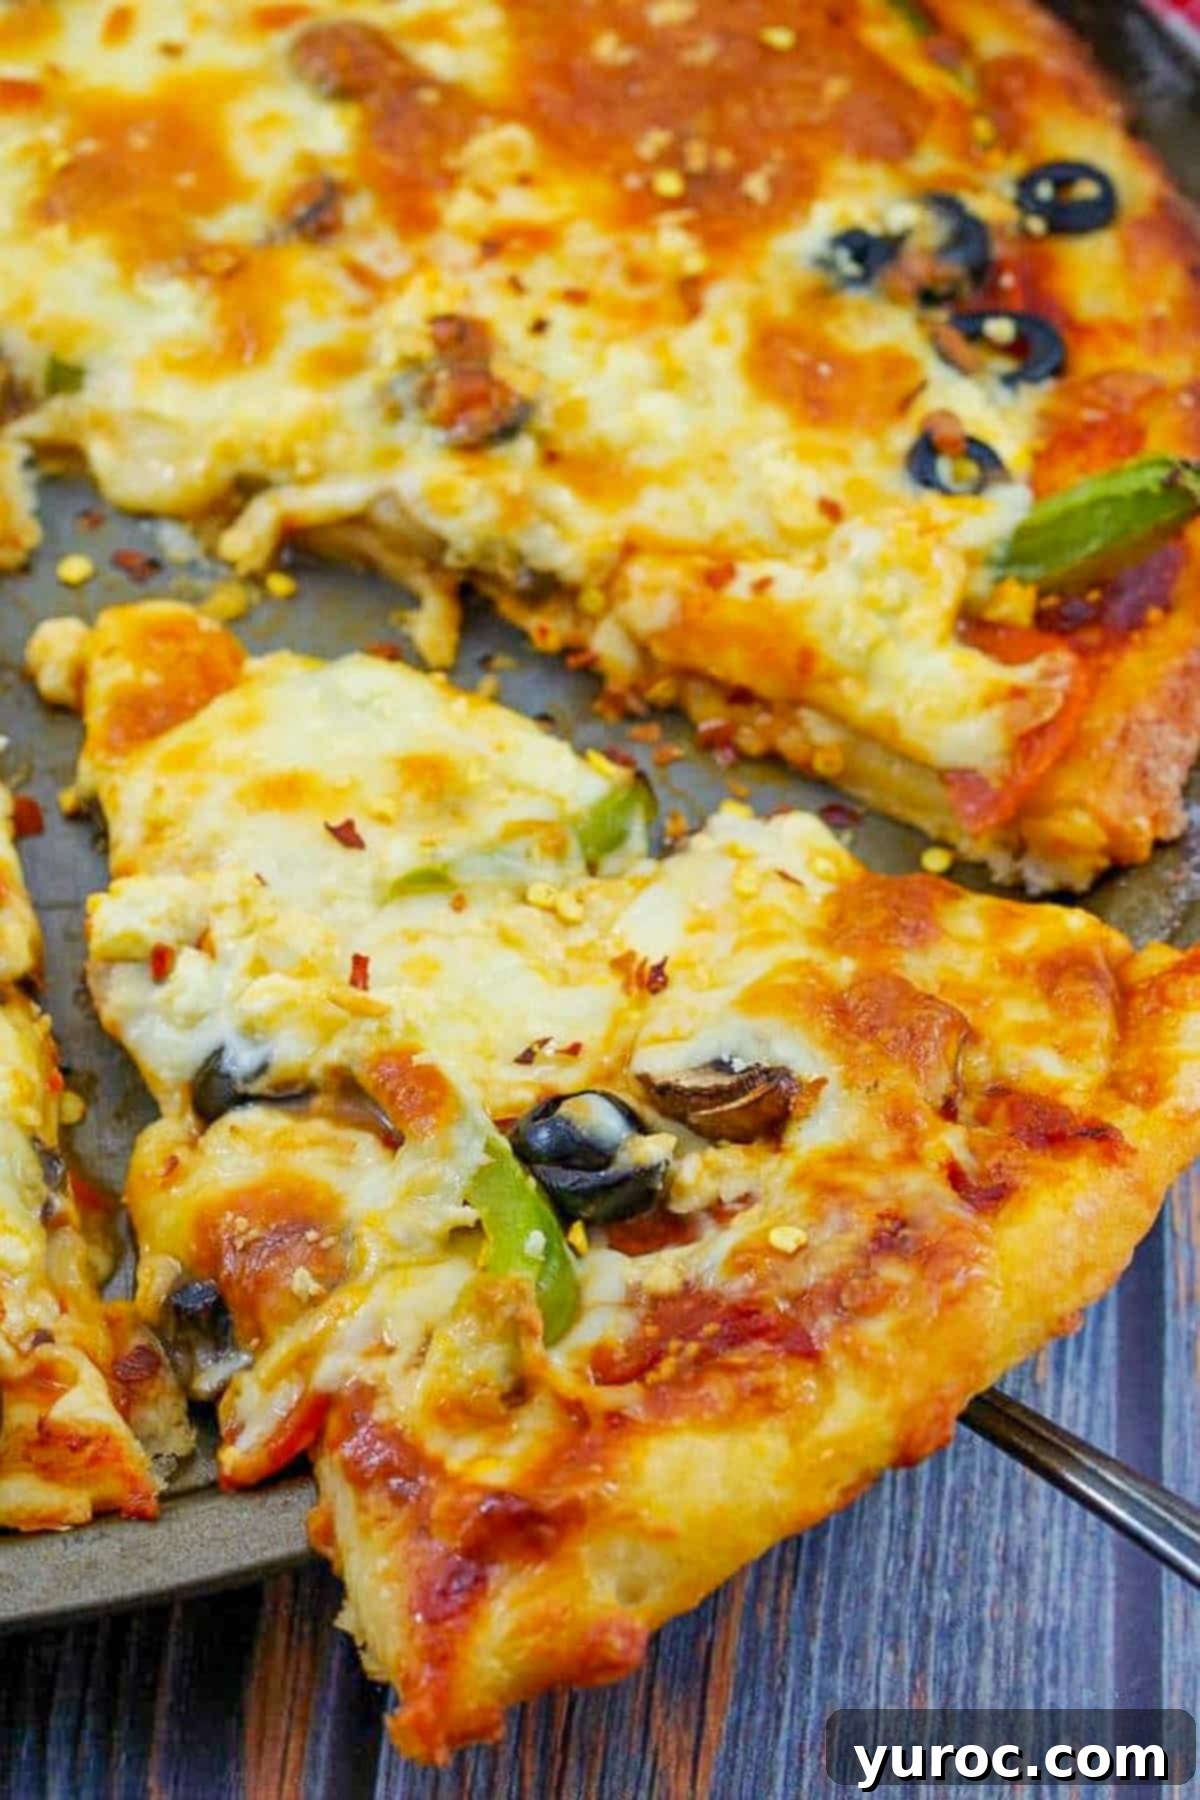
Common Questions About This Weight Watchers Pizza
Absolutely! This pizza is a fantastic option for meal prep. You can prepare the entire pizza (dough and toppings) a day or two in advance. Simply cover it tightly with plastic wrap and store it in the refrigerator until you’re ready to bake. When it’s time to cook, just follow the baking instructions provided in the recipe card.
Yes, it freezes beautifully! For best results when freezing, I recommend baking the entire pizza as directed in the recipe. Once fully cooked, allow it to cool completely. Then, leave it on the same pan it was baked on and double-wrap it securely with plastic wrap (I prefer using Glad Press N’ Seal) before freezing for up to 3 months. Alternatively, you can slice the pizza into individual portions and freeze them in microwave-safe containers for convenient reheating.
Reheating is easy! If frozen, allow the pizza to defrost on the counter for a while or overnight in the fridge (which takes longer). Keep it on the same pan, then preheat your oven to 350°F (175°C). Warm the pizza in the oven for about 10 minutes, or until heated through and crispy. Using a perforated pan helps maintain crispiness. You can also explore other methods by checking out this article on The top 3 ways to reheat pizza for more tips.
So, if you’re battling a pizza craving but want to stick to your Weight Watchers goals, this 2-ingredient pizza dough recipe is your ultimate solution. It delivers a fabulous pizza experience that won’t deplete your point bank, making it a truly satisfying treat!
This Weight Watchers Pizza Recipe, featuring a quick and easy 2-ingredient dough, requires no rising time and offers a remarkably low WW point value. It’s so crispy and utterly delicious that you’ll be surprised it’s a Weight Watchers-approved meal! This recipe is truly a crowd-pleaser that the whole family will adore.
Craving something sweet after your pizza? Be sure to try the versatility of this 2-ingredient dough in my amazing Apple Pie 2 Ingredient Dough Cinnamon Rolls and my delightful single-serving Healthy Cinnamon Roll in a Mug!
📋 Explore More Weight Watchers Recipes
- Healthy Butter Chicken Recipe
- Slow Cooker Mexican Chicken – Healthy & WW friendly
- WW Egg Roll in a Bowl
- Big Mac Salad (Weight Watchers)
Did your family ❤️ this recipe? We’d love to hear from you! Commenting and ⭐ rating recipes is one of the best ways to support your favorite recipe creators. If you LOVED this recipe, please take a moment to comment and rate it in the recipe card below, or share your photos on social media using the hashtag #foodmeanderings and tagging @foodmeanderings!


🍕 Weight Watchers Pizza with 2-Ingredient Pizza Dough
🖨️Print Recipe
📌Pin
💖Save Recipe
⭐Rate
Breakfast, Dinner, Lunch
American
Weight Watchers
12
slices
187
kcal
Terri Gilson
10 minutes
20 minutes
30 minutes
Equipment
Ingredients
2-Ingredient Weight Watchers Dough:
Toppings (for 6 WW points per slice):
Instructions
-
Preheat your oven to 400°F (204°C). Lightly spray a 14-inch pizza pan with a non-stick cooking spray.
-
In a large bowl, stir together the Greek yogurt and self-rising flour until a thick, shaggy dough forms. Transfer the dough onto a lightly floured surface and knead briefly until it forms a smooth ball.
-
Place the dough ball directly onto your prepared pizza pan.
-
Begin rolling or pressing the dough, gradually spreading it evenly across the pan. You can use a rolling pin for a thin, consistent crust or your hands to achieve your preferred thickness.
-
Roll or stretch the dough out to cover the pan, creating as much or as little crust edge as you desire.
-
Top your pizza with your desired Weight Watchers-friendly toppings.
*Always layer the sauce first, then any meats, followed by other vegetables, and finish with the grated cheese on top for best baking results.
-
Bake for 20-25 minutes, or until the crust is lightly browned and cooked through, and the cheese is bubbly.
-
Optional: For an extra crispy and golden-brown finish, turn your oven to broil (500°F/260°C) and cook for an additional 2 minutes, or until the pizza is golden and bubbly. Be sure to watch it very closely to prevent burning.
-
Remove from oven, let cool for 3 minutes, then slice into 12 equal pieces and serve immediately.
Garnish
-
Garnish with a sprinkle of low-fat or fat-free Parmesan cheese, if desired, for an extra touch of flavor.
Notes
How to make self-rising flour:
Self-rising flour is all-purpose flour with baking powder and salt added.
To make your own:
PER CUP: Combine 1 cup of all-purpose flour with 1 ½ teaspoons of baking powder and ½ teaspoon of salt. (Note: this recipe needs 1.5 cups)
How to keep 2 ingredient dough crispy?
If you are worried that this WW 2 ingredient dough might be soggy, put those concerns aside. This dough is perfectly crispy and delicious! You wouldn’t know it was a WW pizza crust. The trick to keep WW pizza dough crispy is to use a perforated pizza pan (affiliate link). Another way to achieve a crispy crust is to bake it in a cast iron frying pan (affiliate link).
How to prevent pizza dough from sticking to the rolling pin:
When rolling out your pizza dough, constantly flour your rolling pin to prevent sticking. I also use a silicone pastry/pizza rolling pin (affiliate link) because it helps roll dough directly onto the pizza pan! Alternatively, you could roll the dough onto a 9×13 baking sheet.
🌡️Storage:
Refrigeration: Store this pizza in an airtight container in the fridge for up to 4 days.
Freezing: It freezes well for up to 3 months. I usually make 2 pizzas and freeze one. The best way to keep it frozen is to double-wrap it in Glad Press N’ Seal and leave it on the pan.
Nutrition
Serving:
1
slice
|
Calories:
187
kcal
(9%)
|
Carbohydrates:
17
g
(6%)
|
Protein:
22
g
(44%)
|
Fat:
2
g
(3%)
|
Saturated Fat:
1
g
(6%)
|
Cholesterol:
25
mg
(8%)
|
Sodium:
617
mg
(27%)
|
Potassium:
228
mg
(7%)
|
Fiber:
1
g
(4%)
|
Sugar:
2
g
(2%)
|
Vitamin A:
265
IU
(5%)
|
Vitamin C:
0.8
mg
(1%)
|
Calcium:
457
mg
(46%)
|
Iron:
0.8
mg
(4%)
Did you make this recipe?
Please leave a star rating and review below!
