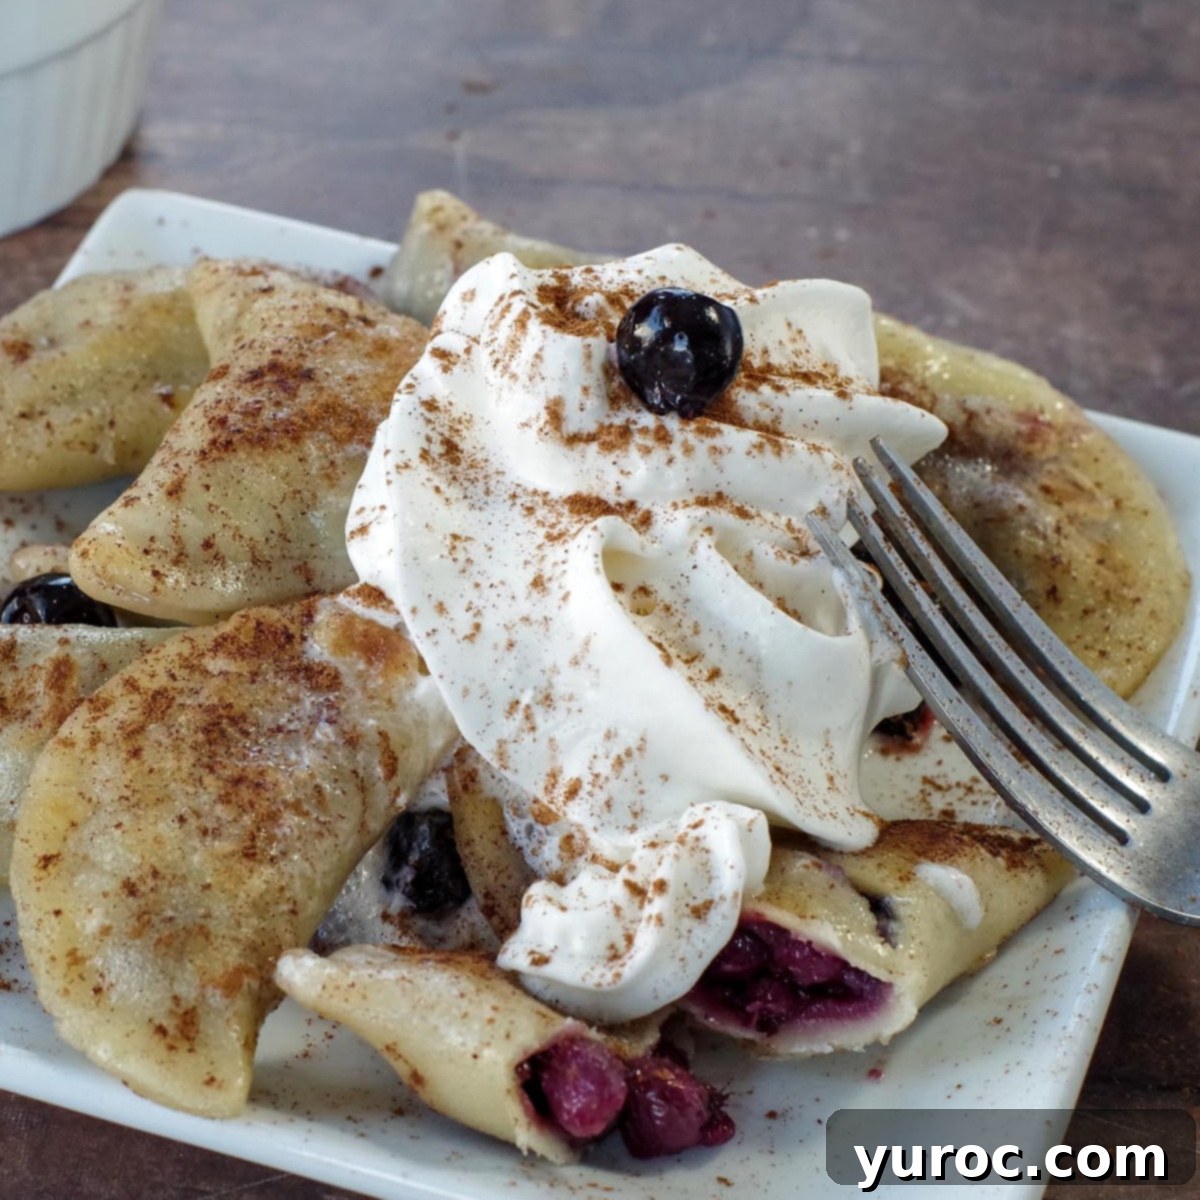
Saskatoon Berry Dessert Perogies: A Sweet Prairie Delicacy
If you’ve never experienced the pure delight of dessert perogies, prepare yourself for an extraordinary culinary journey! These Saskatoon Berry Dessert Perogies offer a wonderfully unique and incredibly delicious way to savor the distinct flavor of Saskatoon berries. Crafted with a luscious, cooked Saskatoon berry filling and enveloped in a tender, easy-to-make perogy dough, they are surprisingly simple to create in your own kitchen. And for those outside the Canadian prairies, fear not – vibrant blueberries make an excellent substitute, ensuring everyone can enjoy this sweet treat.
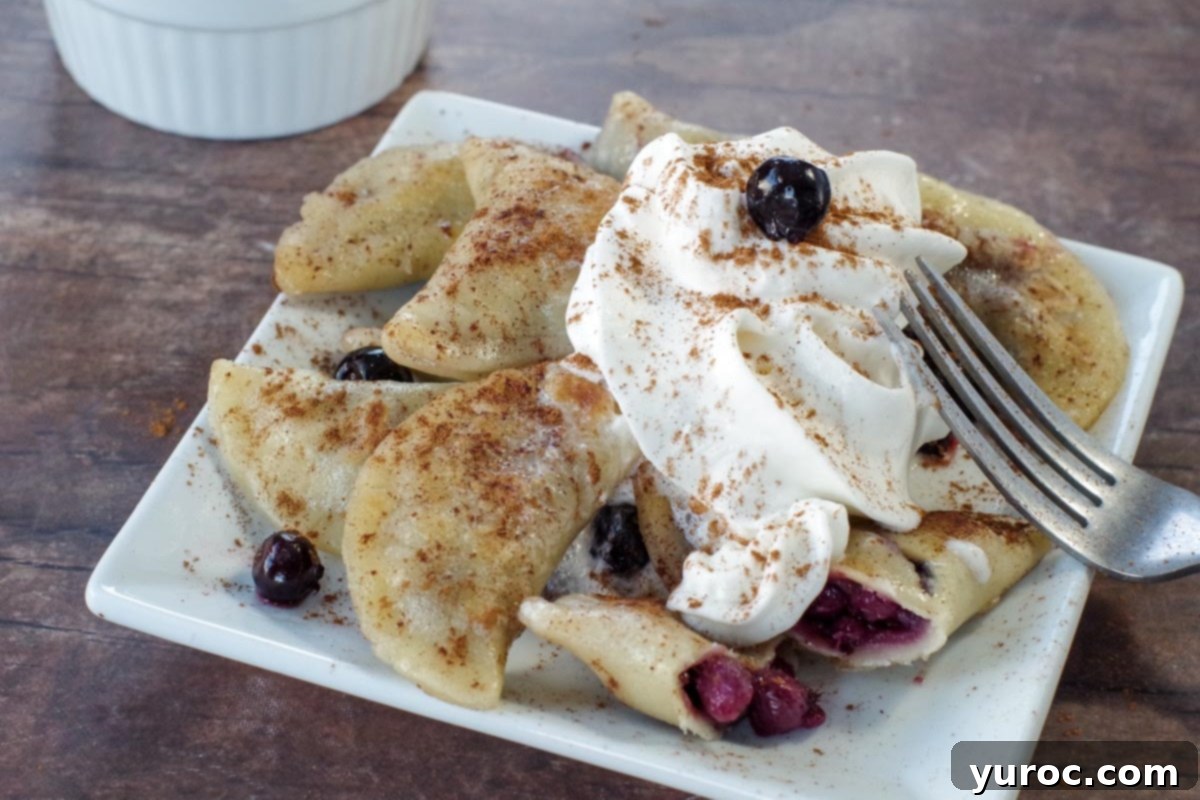
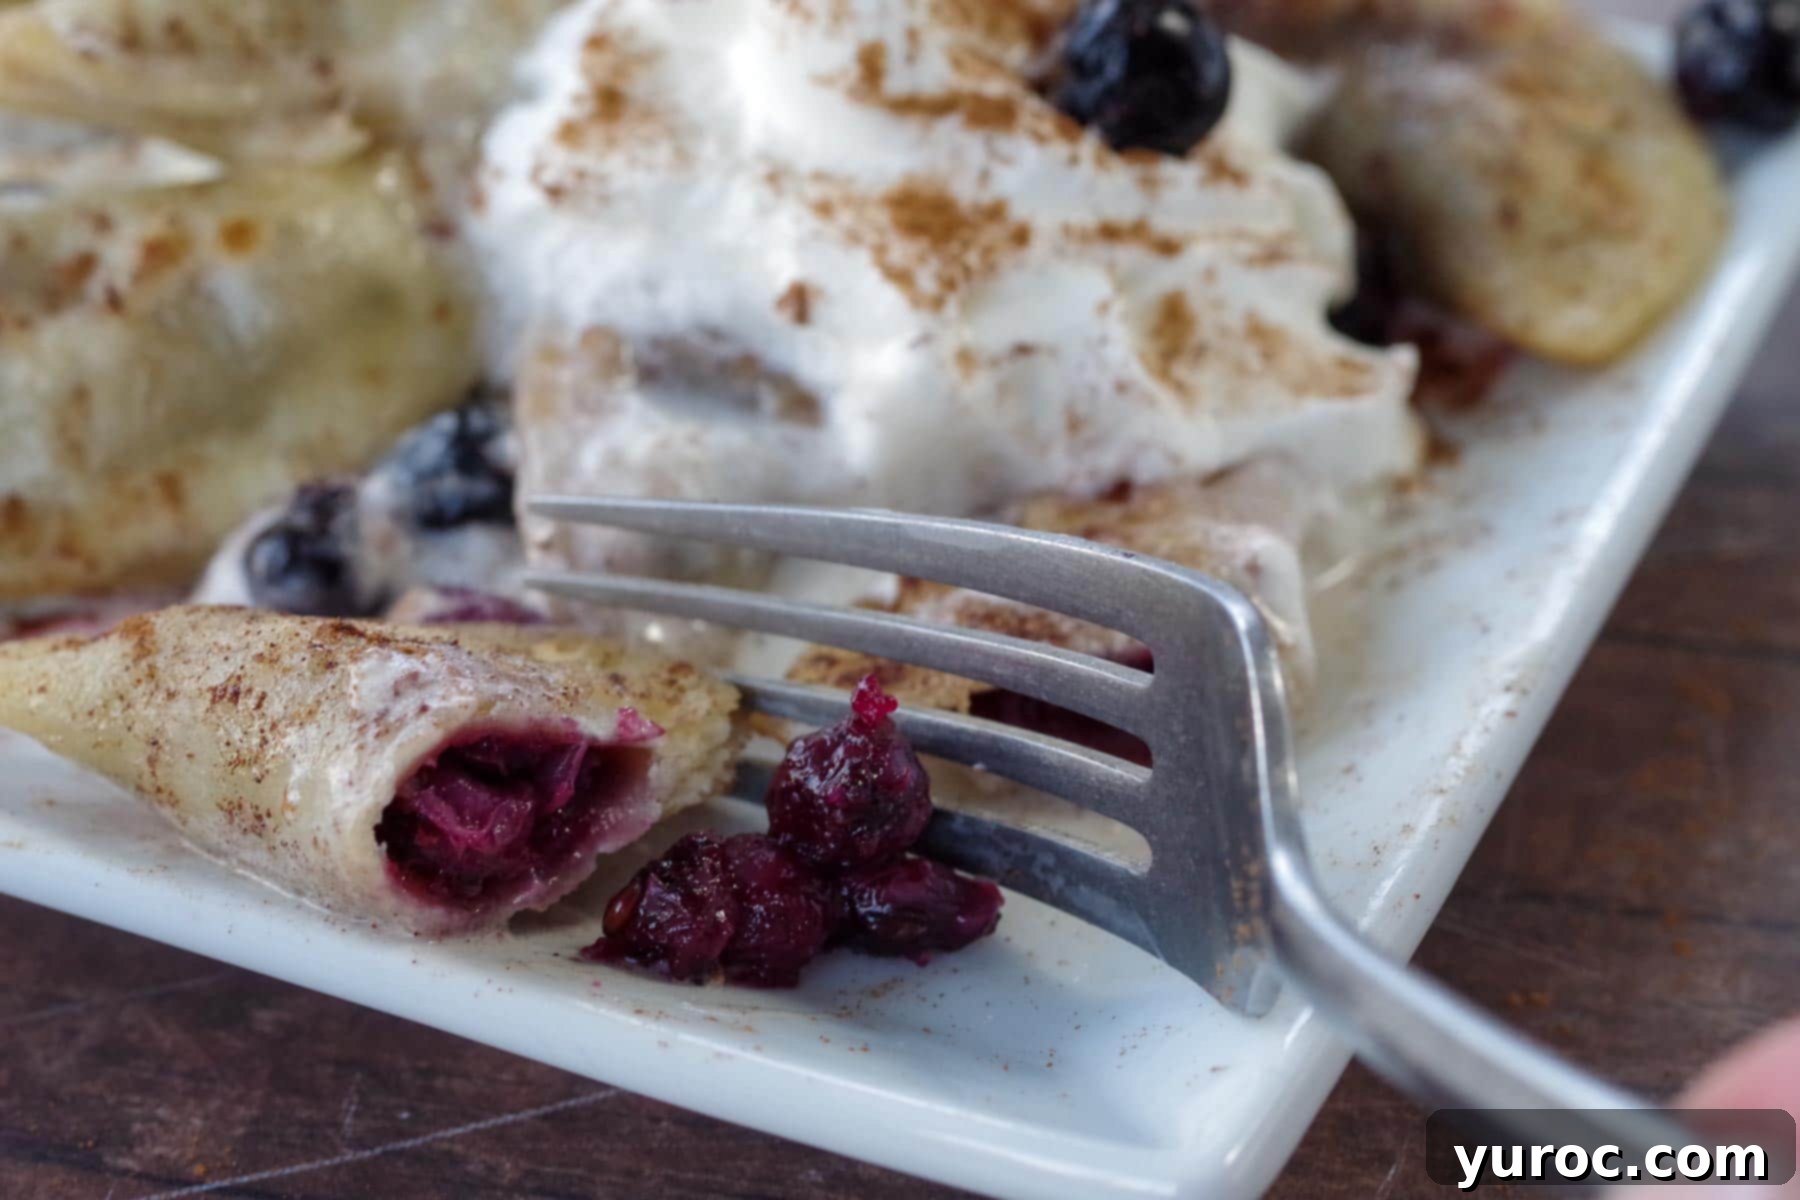
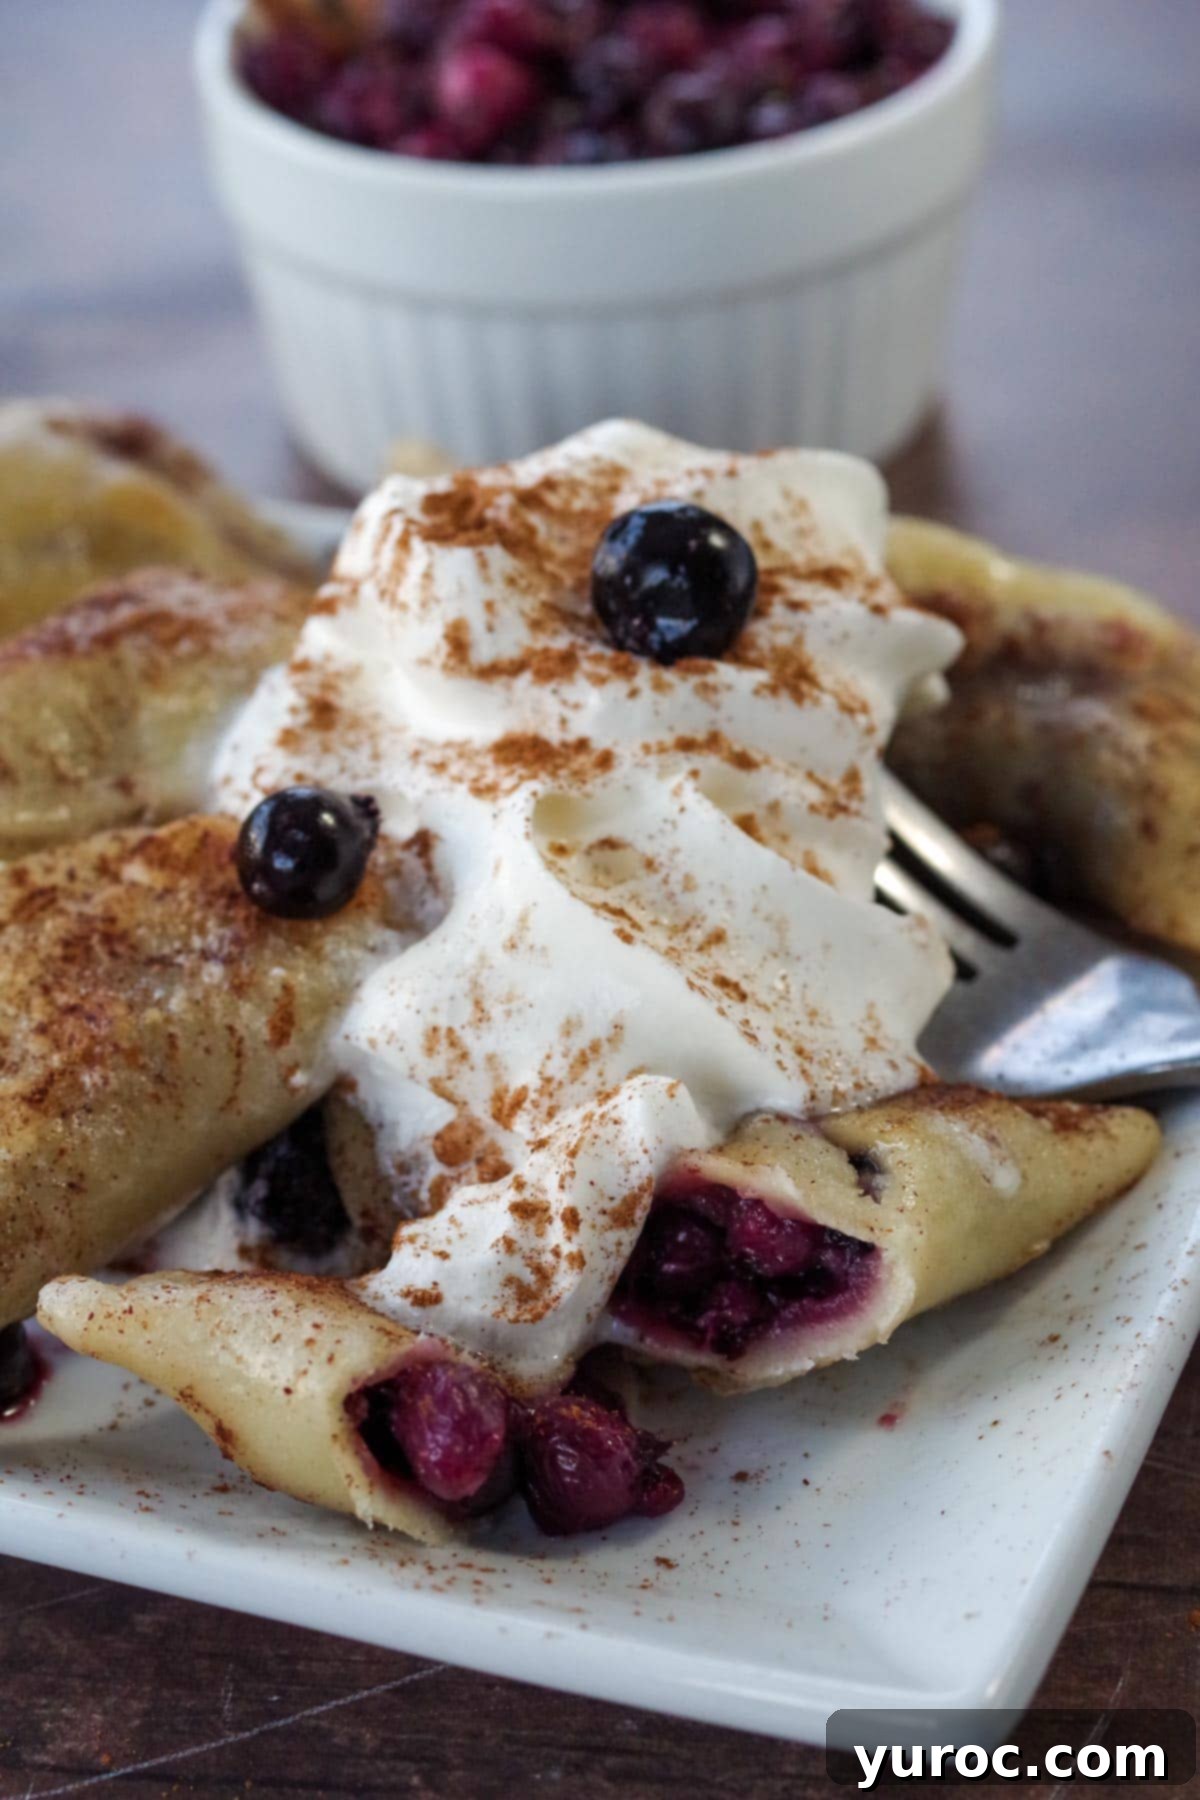
Picture this: delicate perogies, generously filled with a rich, tangy, and sweet Saskatoon berry sauce, then lightly fried to a golden crisp. Topped with a dollop of fluffy whipped cream and a sprinkle of warm cinnamon, they evoke the comforting essence of miniature Saskatoon berry pies – yet, as any perogy enthusiast will attest, they are arguably even better! The soft, chewy dough perfectly complements the juicy berry explosion inside, creating a truly irresistible dessert. These sweet perogies also pair wonderfully as a dessert alongside a hearty meal like this Ukrainian Daughter’s Crock Pot Casserole, offering a delightful contrast to savory flavors.
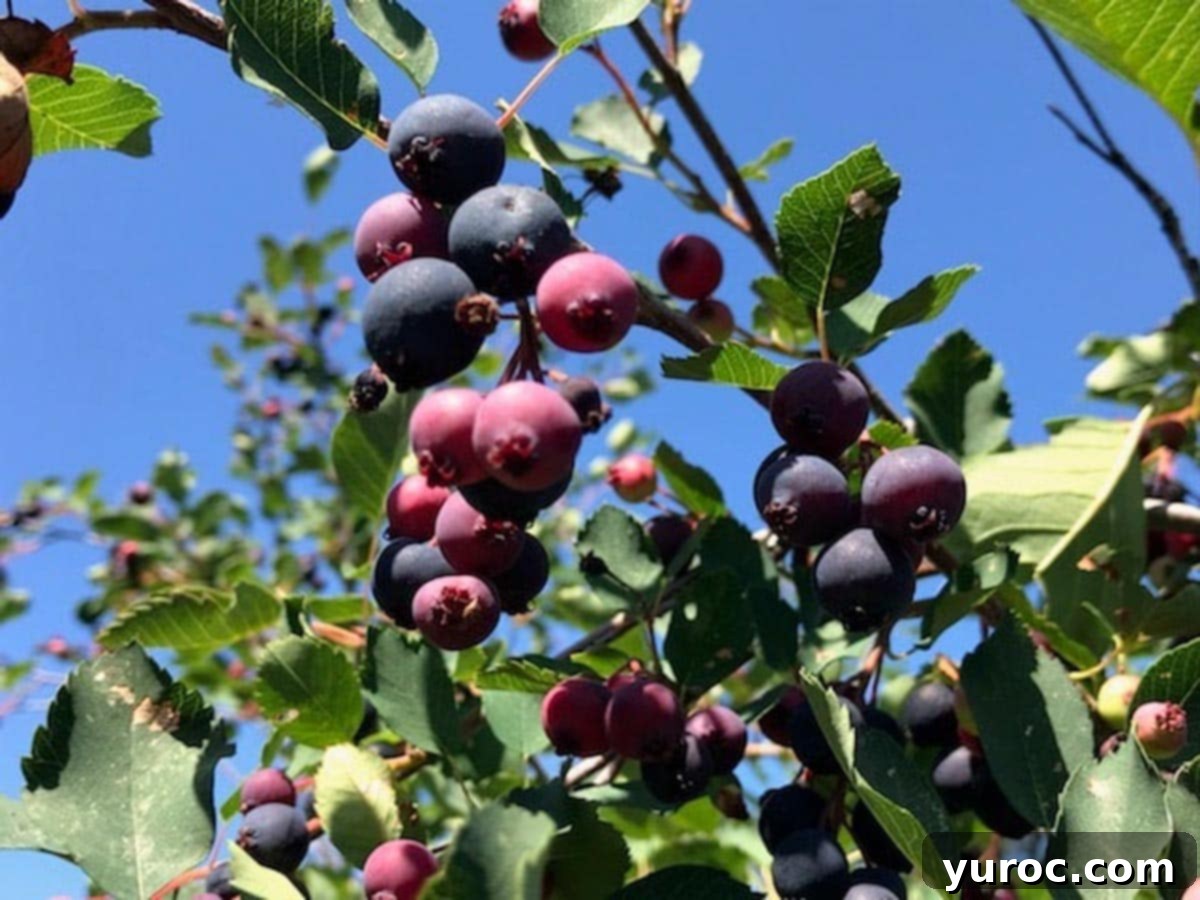
Discovering the Magic of Saskatoon Berries
For those of us who grew up in the vast, open landscapes of the Canadian prairies, Saskatoon berries are a cherished part of our heritage and summer traditions. Also widely known as Juneberries or Service berries in various regions, these humble yet incredibly flavorful berries grow abundantly on bushes. Their season typically arrives between mid to late July and early August, painting the landscape with their deep purple hues.
My childhood memories in Manitoba are filled with adventures of picking Saskatoons directly from the bushes during family camping trips. There’s a certain magic in foraging for your own food, and the sweet reward of these berries made every scratch and sunbeam worth it. Today, I often source my fresh Saskatoons from a local U-pick farm, carrying on that tradition of enjoying nature’s bounty firsthand.
Saskatoon berries boast a unique flavor profile that sets them apart. They offer a delightful blend of sweetness and a subtle tartness, with hints of almond, apple, and even a touch of blueberry. This complex flavor makes them incredibly versatile for both sweet and savory dishes, though they truly shine in desserts.
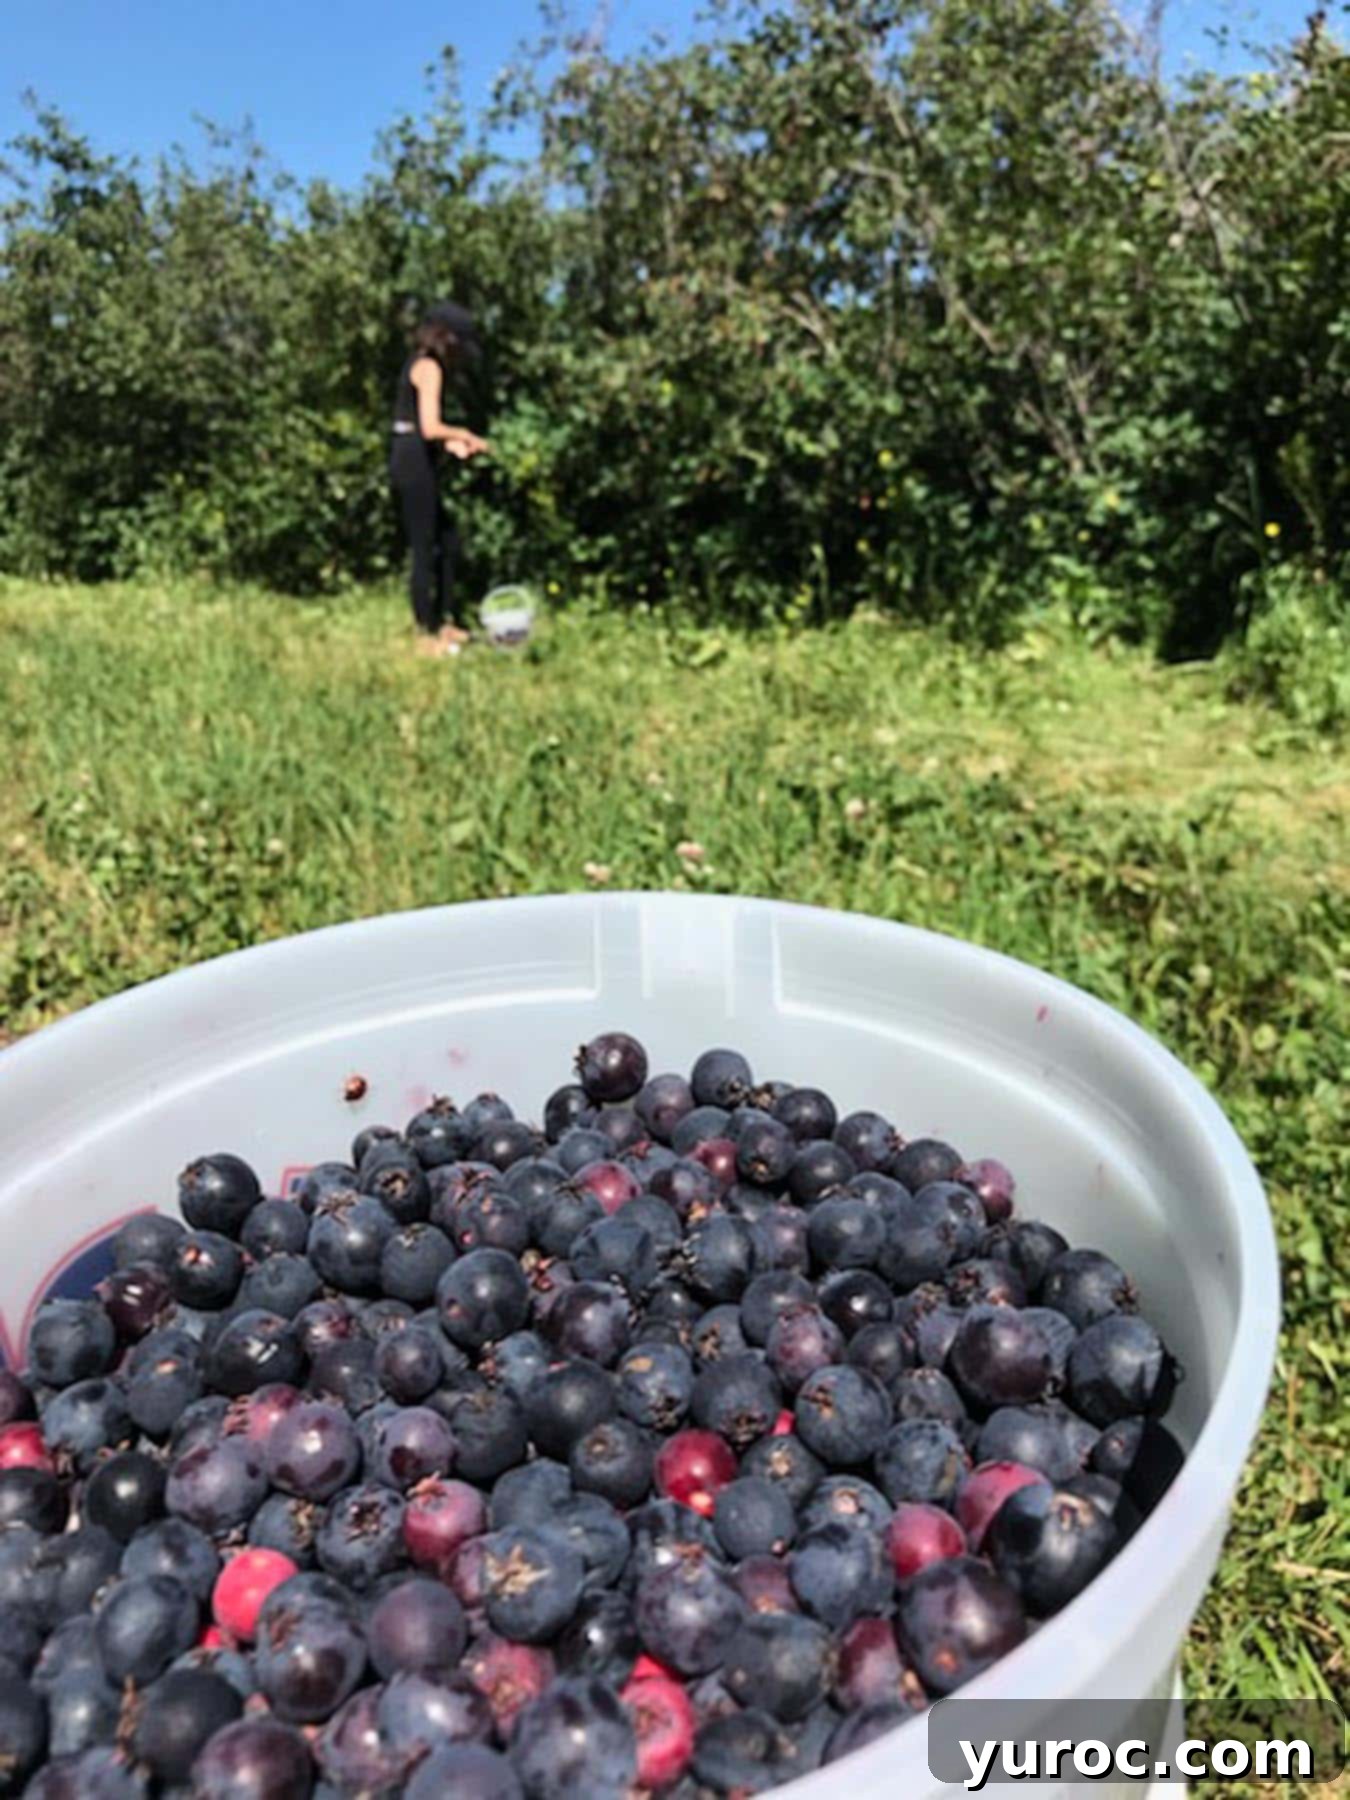
Why Saskatoon Berries are Perfect for Dessert Perogies
The inherent qualities of Saskatoon berries make them an ideal candidate for dessert perogies. When cooked, they release a beautiful, rich purple juice that forms a delectable, thick sauce. This natural thickening quality, combined with their balanced sweet-tart taste, prevents the filling from becoming overly runny or cloyingly sweet. Their small size means they soften beautifully within the perogy, creating a burst of juicy flavor with every bite.
Beyond perogies, Saskatoon berries are incredibly adaptable. I frequently prepare a large batch of Saskatoon Berry Pie Filling and Sauce and freeze it. This convenient method ensures I always have this delicious ingredient on hand for whenever the mood strikes to bake tarts or a classic pie, as shown below. It’s truly a multi-purpose ingredient, also forming the base for my creamy Saskatoon Berry Ice Cream and my elegant Saskatoon Berry Layer Cake. Having this versatile filling ready makes these dessert perogies a breeze to assemble.
The dough for these sweet treats is just as important as the filling. I use the very same reliable and delicious dough recipe that forms the foundation for my savory Cottage Cheese and Potato Perogies. This ensures a consistent, tender, and easy-to-work-with base for your dessert perogies, making the entire process smooth and enjoyable.
🥘 Key Ingredients for Perfect Saskatoon Berry Dessert Perogies
Crafting these delightful dessert perogies requires just a few simple, yet essential, ingredients. Quality ingredients ensure the best flavor and texture for your homemade perogies.
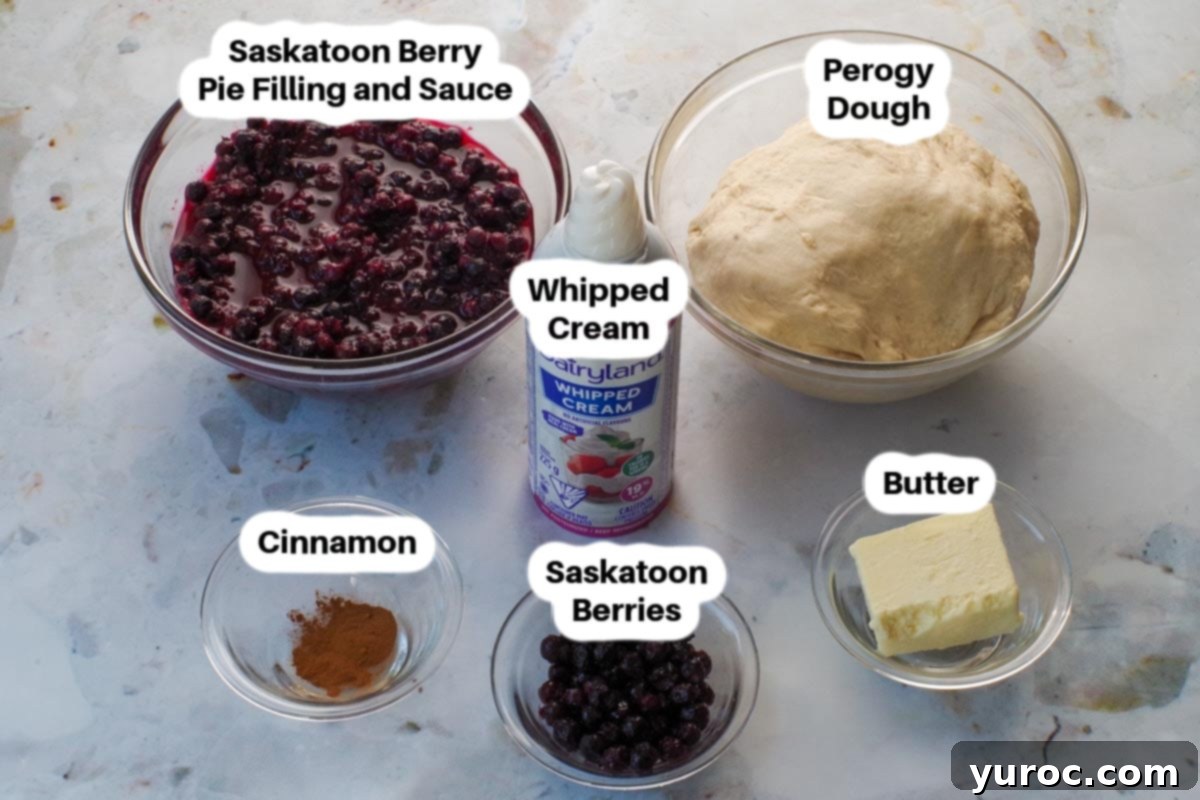
- Saskatoon Berry Pie Filling and Sauce: This is the heart of your dessert perogies. Using a pre-cooked filling is crucial because it ensures the berries are already soft and the sauce is thickened, preventing a watery filling that could cause the perogies to leak or become soggy during cooking. The rich, concentrated flavor of cooked Saskatoon berries is simply unparalleled. If using a frozen batch, remember to defrost and drain any excess liquid thoroughly before use.
- Perogy Dough Recipe: The foundation of any great perogy is its dough. My go-to recipe is a time-tested family tradition, passed down from my husband’s grandmother. It’s genuinely foolproof, resulting in a tender, pliable dough that’s a joy to work with. You’ll likely have all the basic ingredients for this dough already in your pantry, making it convenient and accessible.
- Unsalted Butter: Butter is essential for both flavor and texture. I prefer using unsalted butter to maintain precise control over the overall saltiness of the dish. It’s used for tossing the freshly boiled perogies to prevent sticking and for frying them to achieve that desirable golden-brown crispness and rich, savory-sweet finish.
- Whipped Cream: This is the quintessential topping for these sweet perogies. Its light, airy texture and delicate sweetness perfectly complement the rich berry filling and the slightly crispy dough. For ultimate convenience and a lighter option, I often reach for an aerosol spray whipped cream. However, freshly whipped cream also works beautifully for a more indulgent touch.
- Cinnamon: A simple sprinkle of ground cinnamon adds a warm, aromatic spice that beautifully enhances the berry flavors and the overall dessert experience. It’s a small touch that makes a big difference.
📖 Recipe Variations and Customization Tips
While the Saskatoon berry version is truly special, these dessert perogies are incredibly versatile, allowing for various customizations to suit your taste, dietary needs, or ingredient availability.
- Berry Substitutions: If Saskatoon berries (also known as Juneberries or Service Berries) are difficult to find in your area, don’t let that stop you! Blueberries are an excellent and readily available substitute, offering a similar sweet-tart profile. You can also experiment with other cooked fruit fillings such as cherry pie filling, raspberry sauce, or even a spiced apple compote for a different seasonal twist.
- Dough Alternatives: Feel free to use any perogy dough recipe you are familiar with and prefer. If you have dietary restrictions, you might consider trying a gluten-free perogy dough recipe, though texture and handling may vary. The key is a dough that is pliable and can hold its shape during boiling.
- Creative Toppings: Beyond the classic whipped cream and cinnamon, there’s a world of topping possibilities!
- Ice Cream: A scoop of vanilla bean ice cream melting over warm perogies is heavenly.
- Crème Fraîche or Sour Cream: For a tangy contrast that cuts through the sweetness, a dollop of crème fraîche or even traditional sour cream can be surprisingly delicious.
- Syrups: A drizzle of maple syrup, berry syrup, or even chocolate sauce can elevate the dessert.
- Additional Berries: Fresh Saskatoon berries or other seasonal berries can be added as a vibrant garnish.
- Powdered Sugar: A simple dusting of powdered sugar adds an elegant touch and extra sweetness.
- Nut Toppings: Toasted slivered almonds or chopped pecans could add a textural crunch.
- Weight Watchers Friendly Adjustments: For those mindful of points, these perogies are approximately 2 WW points each on my plan. To keep them lighter:
- Use a light butter or margarine for boiling and frying, or consider air frying them after boiling for a crispy, less-fat-intensive finish.
- When it comes to whipped cream, I highly recommend using a light aerosol spray whipped cream. Many brands, like Dairyland and Gay Lea, offer options that are only about 1 WW point for 3 tablespoons (check your specific plan for exact values). This allows you to enjoy the full dessert experience without compromising your goals.
🔪 How to Make Delicious Saskatoon Berry Dessert Perogies
Creating these dessert perogies follows a similar, time-honored method to making traditional savory perogies, like my Potato and Cottage Cheese Perogies. The process involves boiling them until tender, tossing them in melted butter, and then pan-frying them to a delightful golden crispness. Here’s a detailed breakdown:
Preparation Steps:
- First, prepare your perogy dough. Follow the instructions for the Perogy Dough recipe. This step is crucial, as a well-made dough is key to tender perogies. Allow it to rest as specified in the recipe.
- Next, prepare your Saskatoon berry filling. Use the Saskatoon Berry Pie Filling recipe. This recipe yields approximately 4 cups of filling, which is plenty for a large batch of perogies. Remember the crucial tip: if you’re using frozen Saskatoon berry filling, ensure it’s thoroughly defrosted and any excess liquid is drained to prevent soggy perogies.
Assembly:
Generously flour a large, clean cutting board or work surface. Place your prepared perogy dough on top. Carefully separate the dough into four equal wedges. Working with smaller portions makes the rolling process more manageable.
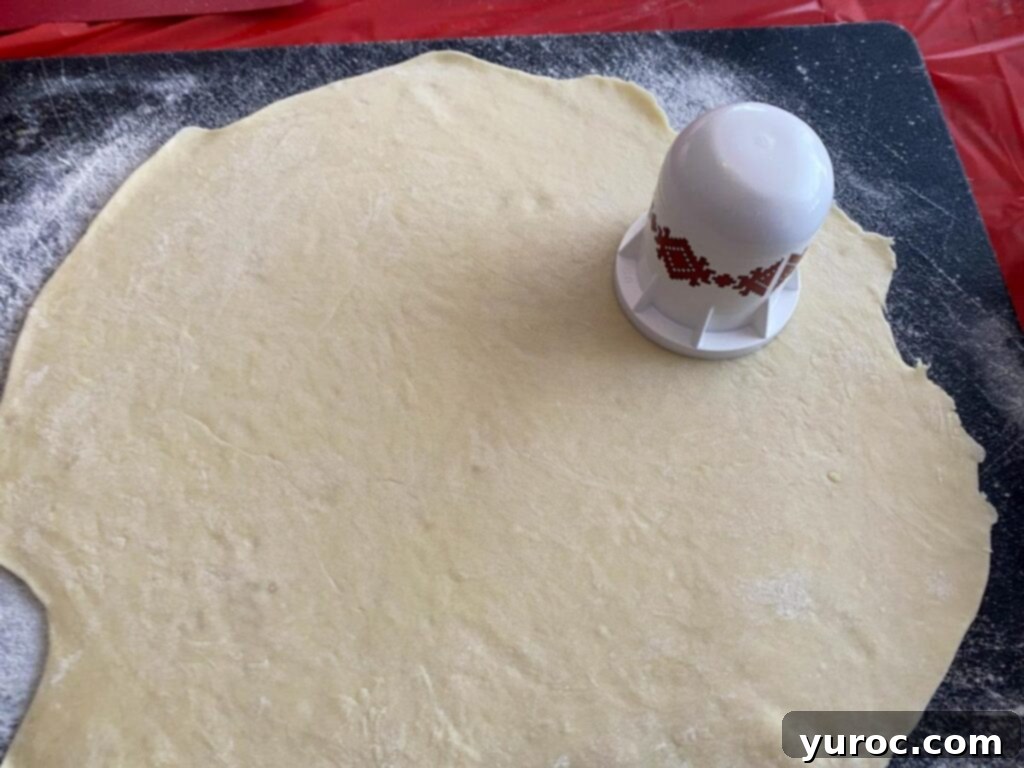
Take one of the four dough wedges and roll it out to an even ⅛-inch thickness. This step can require a fair bit of “muscle,” so be prepared to put some effort in! For a more consistent thickness and less physical strain, consider using a manual pasta maker – it can make this step significantly easier and faster. Repeat with each of the remaining dough wedges.
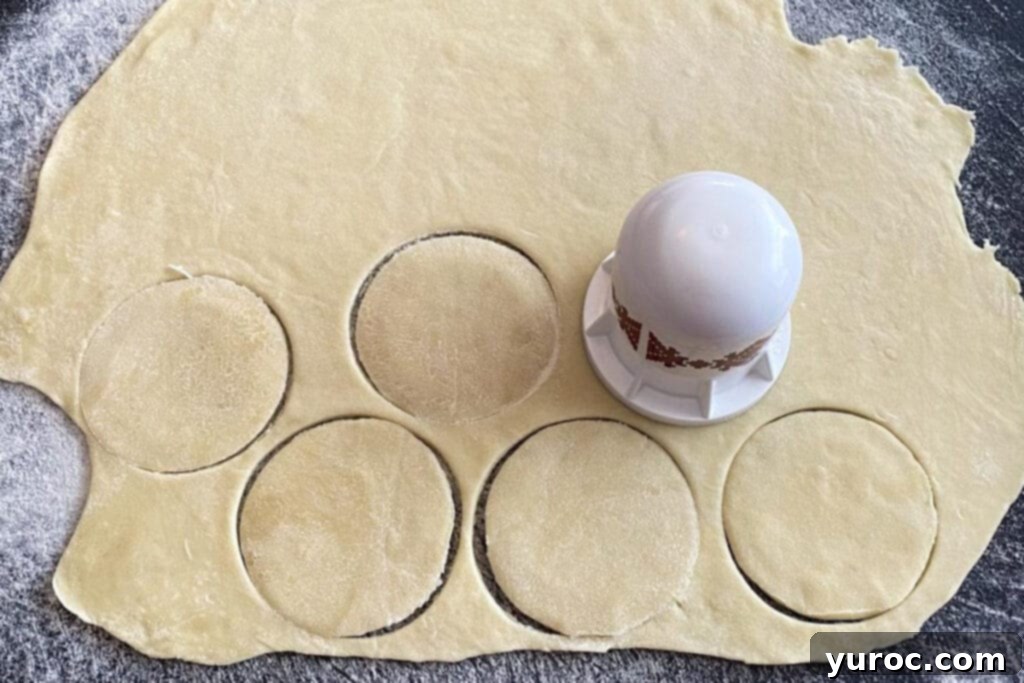
Using a perogy cutter or any round object approximately 2-3 inches in diameter (a glass, cup, or cookie cutter works well), cut circles from the rolled-out dough. I find that a 2.5-inch diameter is ideal for a good filling-to-dough ratio. Gather the dough scraps, re-roll them gently, and cut more circles until all the dough is used.
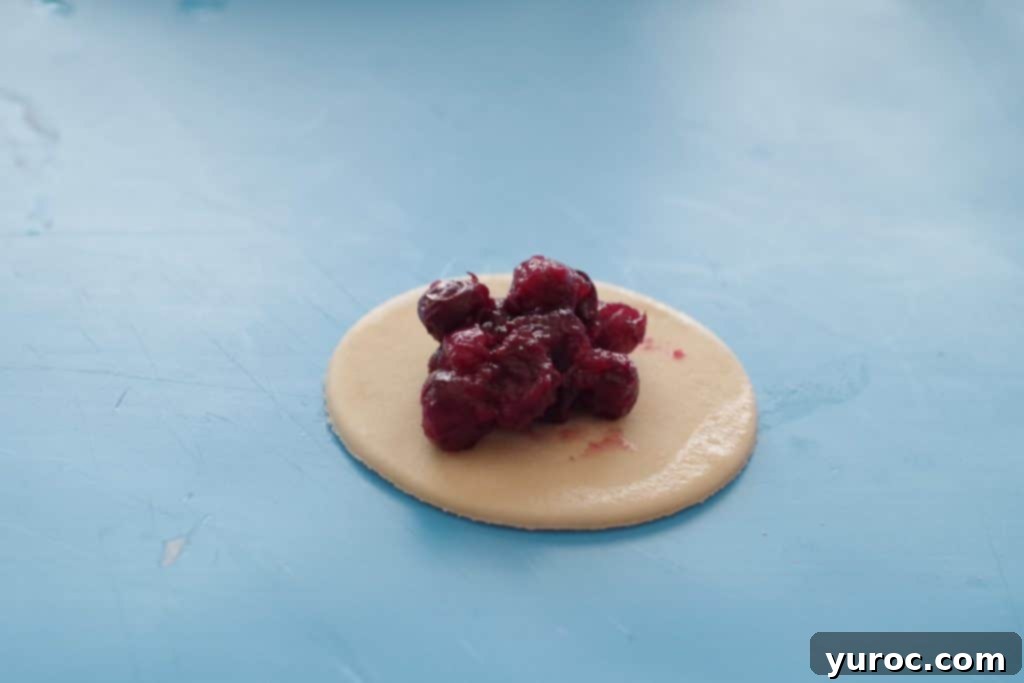
Place a small amount of Saskatoon berry filling, about 1-2 teaspoons, directly in the center of each dough circle. Be careful not to overfill, as this can make sealing difficult. Dip your finger in water and gently run it around the outer edge of each dough circle. This moisture acts as a natural “glue” to help seal the perogy securely.
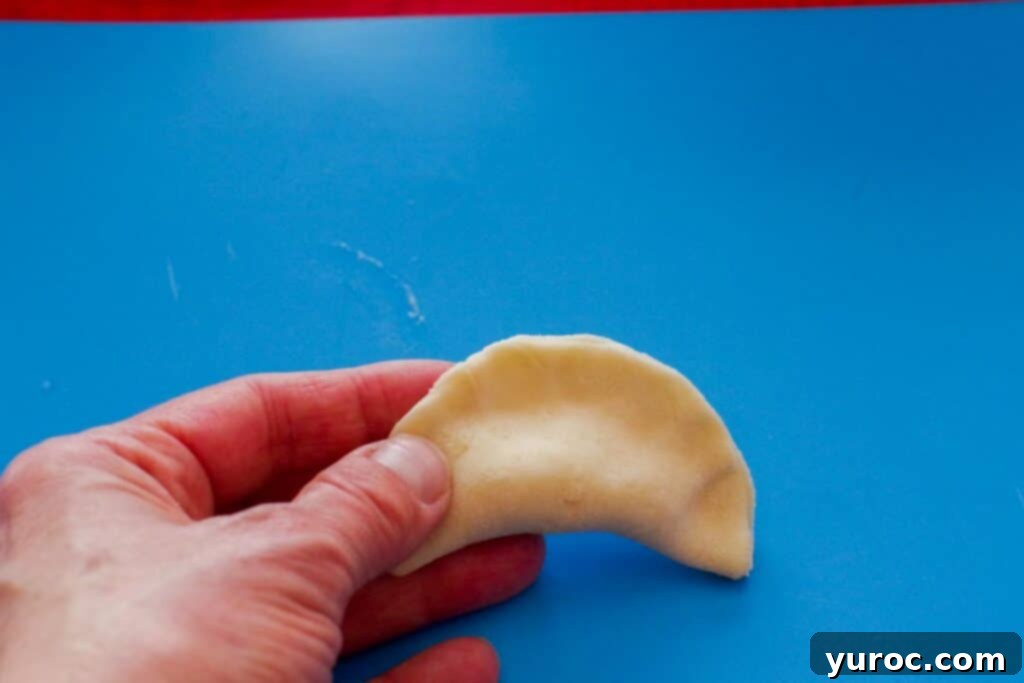
Fold the dough circle in half over the filling, aligning the edges. Start by pinching the dough firmly together in the middle, then work your way around the entire curved edge, pinching and pressing firmly. Ensure the filling remains fully enclosed. Don’t be alarmed if some purple from the berries discolors the outside of the perogy – this will come off in the boiling water. The goal is a completely sealed perogy; any gaps could cause the filling to leak out during boiling.
As you finish assembling, lay the perogies on parchment-lined cookie or baking sheets, ensuring they don’t touch. This is the best method for organizing a large batch.
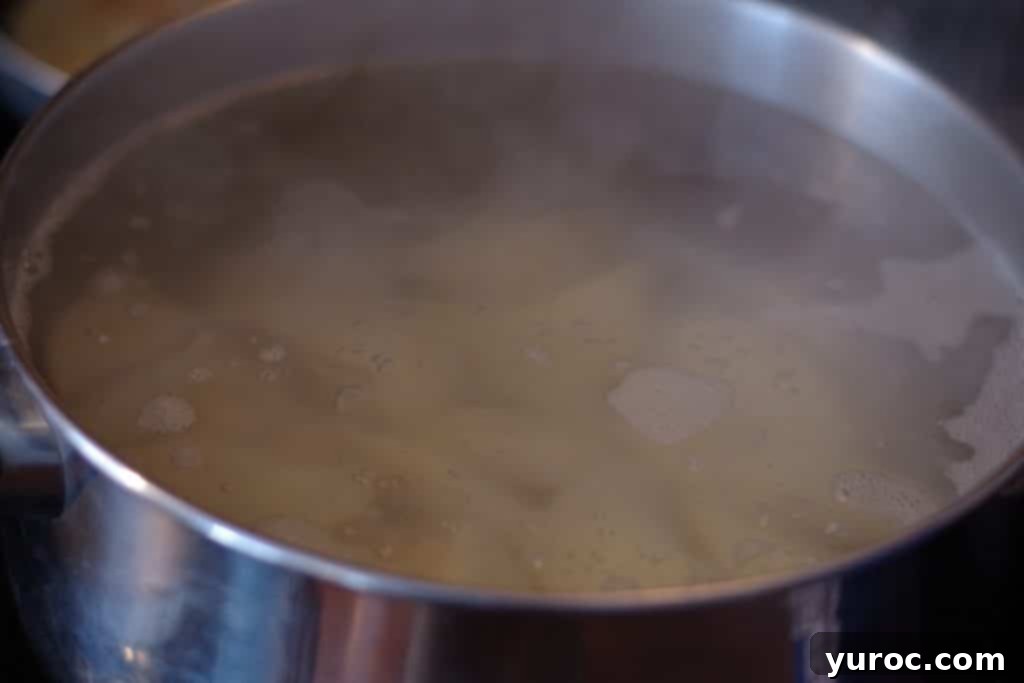
Bring a large pot of salted water to a rolling boil. Carefully add the perogies, about a dozen at a time, to avoid overcrowding the pot. They will sink initially, then float to the top as they cook – this is your signal that they are ready! Remove them with a slotted spoon.
Transfer the boiled perogies to a bowl containing about ⅓ cup of melted unsalted butter. Toss gently to coat them, preventing them from sticking together. If you’re freezing some, this is the point to do it before frying (see storage tips below).
Heat a large frying pan over medium-high heat. Add 2-3 tablespoons of additional butter (or use some from the buttered bowl). Place a single layer of perogies in the pan, being careful not to overcrowd. Fry until golden brown and slightly crispy on one side, then flip and fry until golden brown on the other. Remove from heat.
Garnish and Serve:
Serve your warm, freshly fried Saskatoon Berry Dessert Perogies immediately. Garnish generously with fluffy whipped cream and a dusting of cinnamon. For an extra touch of decadence, a few fresh Saskatoon berries or a drizzle of berry syrup would be divine. Enjoy this sweet prairie delight!
Expert Recipe Tips for Perfect Perogies
Achieving perfectly delicious dessert perogies, whether you’re a seasoned chef or a first-time maker, is all about paying attention to a few key details. These expert tips will help ensure your perogies are tender, flavorful, and beautifully sealed:
- Drain Excess Liquid from Frozen Filling: This is a crucial step if you’re using previously frozen Saskatoon berry sauce. After defrosting, it’s common for some liquid to separate. It is imperative that you thoroughly drain this excess liquid before using the filling. Failing to do so will result in a watery filling that makes your perogies soggy and prone to leaking during the boiling process.
- Utilize a Pasta Maker for Effortless Dough Rolling: While a good quality rolling pin (especially a heavy marble one) can get the job done, a manual pasta maker can be a game-changer. It allows you to achieve a consistent ⅛-inch dough thickness with significantly less physical effort and ensures uniformity across all your perogies, which leads to more even cooking.
- Ensure a Tight Seal to Prevent Leaking: The integrity of your perogy seal is paramount. Before pinching the edges together, lightly moisten them with water. Then, pinch and press firmly all around the perimeter of the perogy. A secure seal prevents the filling from escaping into the boiling water, keeping your perogies intact and flavorful.
- Avoid Overfilling Your Perogies: It can be tempting to load up on filling, but resist the urge! Adding too much filling makes the perogies extremely difficult to seal properly and significantly increases the likelihood of them bursting open while boiling. Stick to the recommended 1-2 teaspoons of filling per perogy.
- Always Use Cooked Berry Filling: Raw berries contain a high water content that will be released during cooking, leading to overly wet perogies and potential leaks. Always use a pre-cooked, thickened fruit filling to ensure a stable and delicious interior.
- Boil Perogies in Small Batches: Overcrowding the pot during boiling can lead to several problems: a drop in water temperature (resulting in undercooked or gummy perogies), uneven cooking, and perogies sticking together. Work in small batches, about a dozen at a time, to allow ample space for them to cook perfectly.
- Freeze Uncooked Perogies Flat for Best Results: If you’re making a large batch to freeze for later, arrange the uncooked perogies in a single layer on a parchment-lined baking sheet. Ensure they are not touching. Freeze them flat until solid (4-6 hours), then transfer them to freezer-safe bags. This prevents them from sticking together and makes it easy to grab only what you need.
- Fry in Batches and Avoid Overcrowding the Pan: Just like boiling, frying in small batches is essential. An overcrowded pan lowers the oil temperature and causes the perogies to steam rather than fry, resulting in a soggy, rather than crispy, exterior. Give them space to achieve that beautiful golden-brown crust.
- Add Butter Gradually During Frying: Start with enough butter to lightly coat the bottom of your frying pan. As the perogies fry and absorb some of the butter, add more small amounts as needed. This gradual addition prevents the butter from burning and ensures even browning without excessive greasiness.
- Perogies Float to the Surface When Cooked: This is your visual cue! Once the perogies float to the top of the boiling water, they are fully cooked through and ready to be removed.
- Garnish Right Before Serving: To preserve the integrity of your toppings and the crispy texture of the fried perogy, add whipped cream, cinnamon, or any syrup immediately before serving. This prevents the toppings from becoming absorbed and making the perogies soggy.
- Test One Perogy First: Before committing to boiling a full batch, cook just one perogy. This allows you to check if the seal is secure, if the dough is cooked correctly, and if the filling tastes perfect. It’s a quick quality control step that can save your entire batch from potential issues.
Weight Watchers Friendly Note: As mentioned in the variations, each perogy is approximately 2 WW points. To further reduce points, consider using a light butter or margarine for frying, or try air frying them after boiling. For the topping, light spray whipped cream is a great choice, typically around 1 WW point for 3 tablespoons on my plan (Dairyland and Gay Lea are good brands to look for).

🍽 Essential Equipment for Perogy Making
While making perogies can be a labor of love, having the right tools makes the process much smoother and more enjoyable. Here’s what you’ll need:
- Rolling Pin: At a minimum, a good sturdy rolling pin is essential for flattening your dough. I personally favor a marble rolling pin (affiliate link). Its weight helps effortlessly roll out dough to an even thickness, requiring less brute force on your part. It’s also incredibly versatile for other baking tasks like pie crusts or fondant.
- Manual Pasta Maker: For those seeking maximum efficiency and perfectly consistent dough thickness, a manual pasta maker (affiliate link) is an excellent investment. It significantly reduces the physical effort required for rolling out the dough and ensures each perogy sheet is uniform, which contributes to even cooking.
- Perogy Cutter or Round Object: To create the characteristic round shape of perogies, you’ll need something to cut your dough into circles. A specialized perogy cutter is ideal, but any round glass, cup, or cookie cutter that is approximately 2-3 inches in diameter will work perfectly.
- Large Pot: For boiling the perogies, a large stockpot is necessary to accommodate batches without overcrowding.
- Slotted Spoon or Spider Strainer: Essential for safely removing the delicate perogies from the boiling water.
- Large Frying Pan: A skillet or frying pan with a wide surface area is needed for frying the perogies to a golden-brown finish.
- Baking Sheets and Parchment Paper: Useful for resting assembled perogies before boiling and for freezing them flat.
🌡️ Storing and Reheating Your Dessert Perogies
These Saskatoon Berry Dessert Perogies are so delicious, you might not have many leftovers! But if you do, or if you’re planning ahead, proper storage ensures you can enjoy them later.
- Fridge Storage: Cooked perogies can be stored in an airtight container in the refrigerator for up to 3 days. When ready to enjoy, simply reheat them in a frying pan with a little butter until warmed through and lightly browned.
- Freezer Storage: Perogies freeze exceptionally well, making them perfect for meal prepping or stocking up on a favorite treat. You can freeze them for up to 3 months.
- Freezing Cooked Perogies: After boiling and tossing in butter (as described in the recipe instructions), spread them in a single layer on parchment-lined baking sheets, ensuring they don’t touch. Freeze until solid (4-6 hours). Once frozen, transfer them to heavy-duty freezer bags or containers. This method prevents them from sticking together in a large clump.
- Freezing Uncooked Perogies: If you prefer to freeze them before boiling, lay the freshly assembled (but unboiled) perogies on parchment-lined baking sheets in a single layer, not touching. Freeze until solid, then transfer to freezer bags. You can then boil them directly from frozen.
- Reheating from Frozen: The best way to reheat frozen perogies (whether cooked or uncooked when frozen) is to fry them in butter. Simply place them directly from frozen into a frying pan with a couple of tablespoons of butter over low to medium heat. Cover the pan initially to help them thaw and warm through, then uncover and fry until golden brown and crispy on each side. This yields the best texture and flavor, much like they were freshly made.
👪 Yield and Adjusting Serving Sizes
This traditional recipe is designed to yield a generous batch, typically around 90 perogies. While this may sound like a lot, trust me, once you and your loved ones start enjoying these sweet delights, they disappear surprisingly quickly! This quantity is also perfect if you plan to freeze some for convenient future treats, ensuring you always have a taste of the prairies on hand.
However, if you’re making a smaller batch or prefer to adjust the yield, the process is simple. In the recipe card below, you can usually click on the number of servings and select your desired quantity. The ingredient amounts will automatically adjust to scale the recipe accordingly. Additionally, if you find yourself with extra dough, you can always freeze half of it for future perogy-making adventures.
❔ Frequently Asked Questions About Saskatoon Berry Dessert Perogies
Yes, absolutely! While Saskatoon berries are the star here, you can easily substitute the filling with blueberry or cherry pie filling, or any other cooked fruit filling that has a good consistency (not too runny).
No, frying is optional but highly recommended. Frying adds a wonderful crispy texture and rich, buttery flavor that elevates the dessert. However, you can serve them straight from boiling for a softer, more dumpling-like experience.
Cooking the berries before filling helps to soften them and thicken their natural juices into a sauce. This prevents the filling from being too watery, which could otherwise make the perogies soggy or cause the filling to leak out during boiling.
Yes, you can! These perogies are great for making ahead. You can prepare and freeze them after boiling and buttering. When you’re ready to serve, simply fry them directly from frozen until golden brown and heated through.
If your dough is too sticky, gradually add a small amount of flour, kneading until it reaches a manageable consistency. If it’s too dry and crumbly, add a tiny bit of water (a teaspoon at a time) and knead until it comes together and is pliable. Humidity can affect dough consistency, so adjustments are sometimes necessary.
Yes, after boiling, you can bake or air fry them for a less traditional but still delicious result. For baking, preheat your oven to 375°F (190°C), toss buttered perogies on a baking sheet, and bake for 15-20 minutes until golden. For air frying, preheat to 375°F (190°C), lightly spray buttered perogies, and air fry for 8-12 minutes, shaking halfway, until crispy.
So, if you’re on the hunt for delicious and unique fruit perogy recipes, these Saskatoon Berry Dessert Perogies are an absolute must-try! They bring a taste of prairie sweetness to your table in a comforting, familiar form.
Did your family ❤️ this recipe? Did you know that commenting and ⭐ rating recipes is one of the best ways to support your favorite recipe creators? If you LOVED this recipe, please comment and rate it in the recipe card or share photos on social media using the hashtag #foodmeanderings or tagging @foodmeanderings!
🍽 More Saskatoon Berry Recipes to Love
- Saskatoon Berry Loaf with Brown Butter Glaze
- Saskatoon Berry Oatmeal Cookies
- Saskatoon Berry Squares


📋 Saskatoon Berry Dessert Perogies Recipe
Print Recipe
Pin
Save RecipeSave Recipe
Rate
Add to Shopping ListGo to Shopping List
Ingredients
- 1 Saskatoon Berry Filling recipe
- Perogy dough recipe
- ⅓ cup unsalted butter, melted approximately
Garnish (optional)
- whipped cream
- cinnamon
- additional Saskatoon berries
Instructions
-
Make dough (https://foodmeanderings.com/cottage-cheese-perogies/) as per instructions, allowing ample time for resting.
-
Prepare Saskatoon berry filling (https://foodmeanderings.com/saskatoon-berry-pie-filling-and-sauce/). This recipe yields approximately 4 cups. Remember to defrost and drain any excess liquid if using frozen filling.
Assembly
-
Flour a large cutting board generously and place your dough on top. Divide the dough into 4 manageable wedges.
-
Roll out one of the 4 dough portions to an even ⅛-inch thickness. This step requires consistent effort, but a pasta maker can make it significantly easier and more uniform. Repeat for all dough wedges.
-
Use a perogy cutter, or any round object about 2-3 inches in diameter (2.5 inches is ideal), to cut circles from the rolled-out dough. Gather and re-roll scraps to maximize your yield.
-
Place about 1-2 teaspoons of the prepared Saskatoon berry filling in the center of each dough circle. Dip your finger in water and run it around the outer edge of the circle; this moisture is vital for a good seal.
-
Fold the dough over the filling and pinch the edges together tightly, starting in the middle and working your way around. Ensure a complete seal to prevent leaks during boiling. (A slight purple stain from the berries is normal and will wash off in the water).
-
Lay the assembled perogies on parchment-lined cookie or baking sheets, ensuring they are not touching. This prepares them for boiling or freezing.
-
Bring a large pot of salted water to a rolling boil. Carefully add perogies in small batches (about a dozen at a time) to ensure even cooking and prevent sticking.
-
Cook perogies in the boiling water. They are ready when they float to the top – this usually takes 2-3 minutes.
-
Remove the cooked perogies from the pot using a slotted spoon.
-
Transfer the boiled perogies to a bowl with about ⅓ cup of melted unsalted butter. Toss gently to coat them, ensuring they don’t stick together. Add more butter as needed depending on the quantity of perogies.
-
*NOTE: If you plan to freeze perogies at this stage (after boiling and buttering), arrange them back onto parchment-lined cookie sheets in a single layer, ensuring they don’t touch. Freeze them flat for 4-6 hours until solid, then transfer to large freezer bags for long-term storage. (This step was not photographed in this instance).
-
Heat a large frying pan over medium-high heat. Add 2-3 tablespoons of additional butter (or use the butter from the bowl the perogies were tossed in, as needed).
-
Place perogies in the hot pan and fry until they are beautifully golden brown and crispy on one side. Flip them over and fry until the other side is equally golden brown. Remove from heat.
Garnish
-
Garnish your warm Saskatoon Berry Dessert Perogies generously with whipped cream, an optional drizzle of syrup, and a dusting of cinnamon. Add additional fresh Saskatoon berries as desired for extra flavor and visual appeal. Serve immediately and enjoy!
Notes
- Draining excess liquid from frozen Saskatoon berry filling.
- Using a pasta maker for easier dough rolling.
- Ensuring perogies are tightly sealed to prevent leaks.
- Avoiding overfilling to prevent bursting.
- The importance of using cooked filling only.
- Boiling perogies in small batches.
- Freezing perogies flat for best results.
- Frying in batches and avoiding overcrowding.
- Adding butter gradually during frying.
- Recognizing when perogies float to the surface as ready.
- Garnishing just before serving.
- Testing one perogy first for quality control.
Weight Watchers friendly: These perogies are approximately 2 WW points each on my plan. For a lighter option, consider using light butter or margarine for frying, or try air frying them after boiling.
If you choose to add whipped cream, I recommend a light aerosol spray real whipped cream. Many brands offer options that are only about 1 WW point for approximately 3 tablespoons on my plan. Dairyland and Gay Lea are examples of brands I use.

Nutrition
