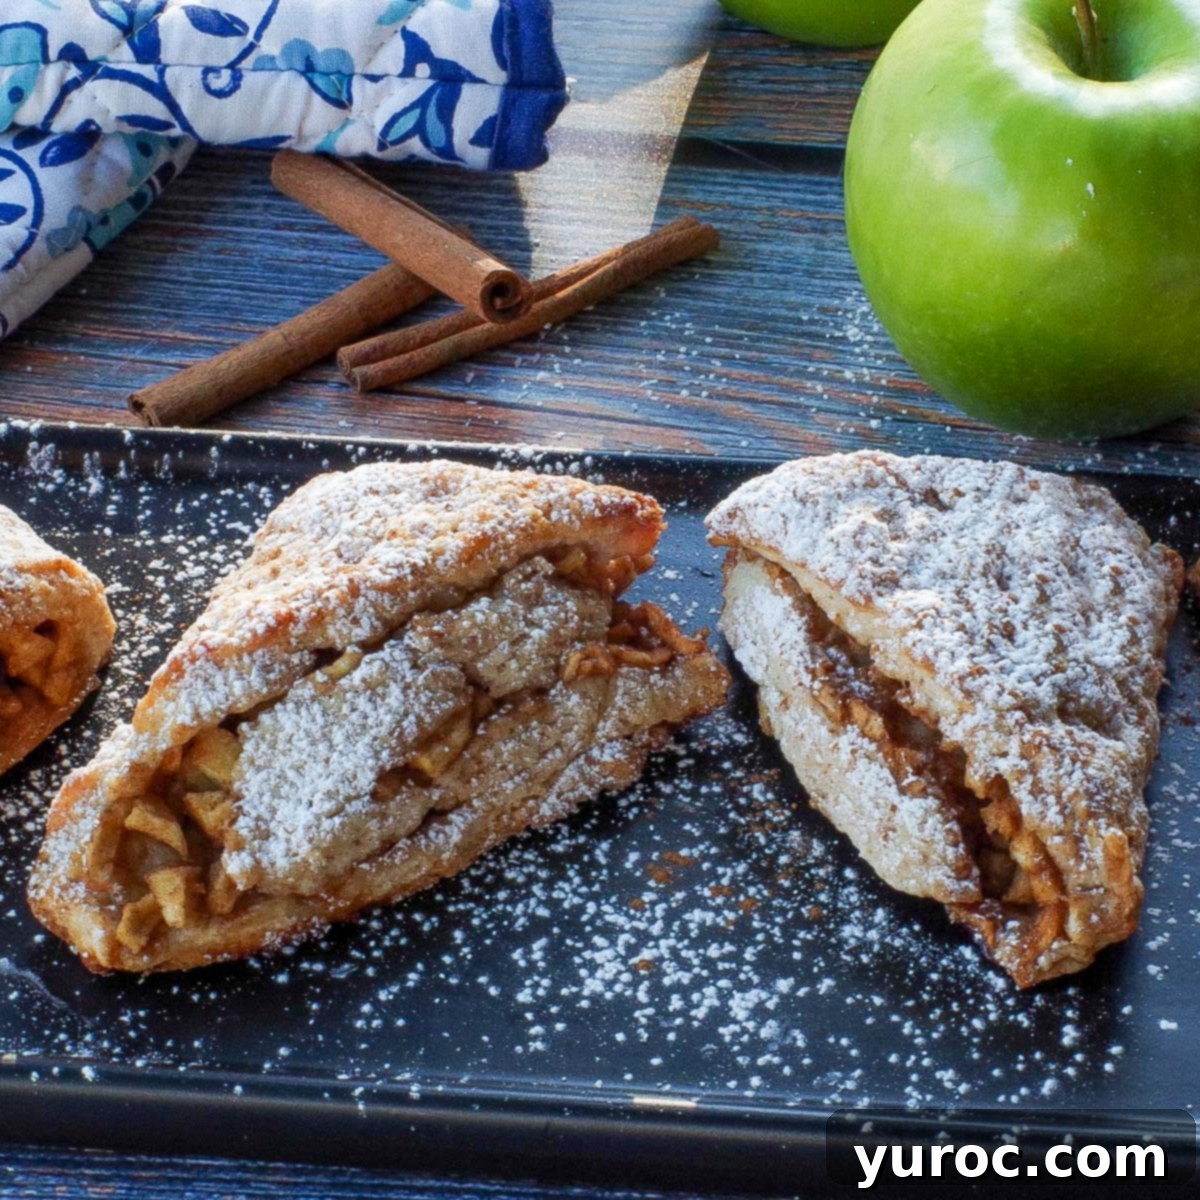
Homemade Apple Cinnamon Scones: Your Ultimate Guide to Flaky, Rustic Perfection
Welcome to the ultimate recipe for Rustic Apple Scones! This unique approach to scone making involves rolling and then slicing the dough, a technique that creates magnificent, buttery layers throughout the pastry. With this method, you’re guaranteed a perfect balance of warmly spiced cinnamon apple and delicate, flaky pastry in every single bite. Say goodbye to dry, crumbly scones and hello to a homemade treat that truly celebrates the flavors of fall.
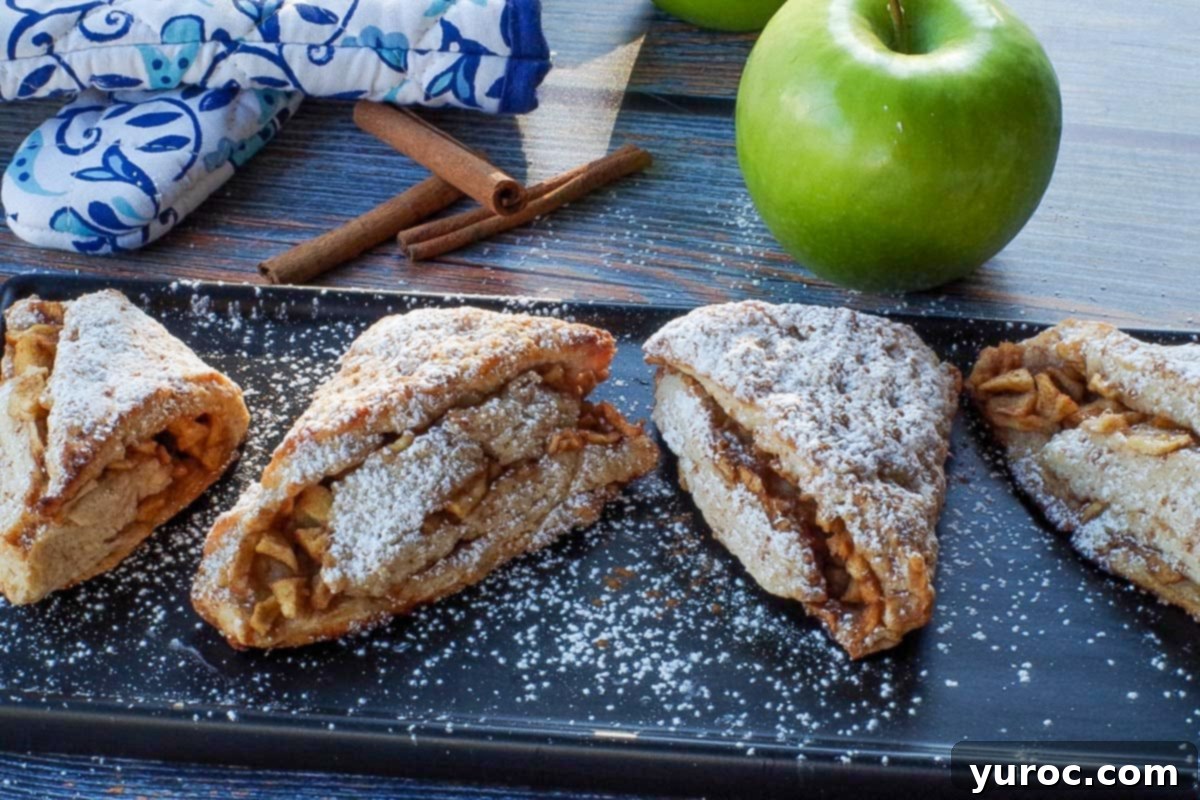
These delightful apple cinnamon scones draw inspiration from my popular Raspberry Lemon Scones, offering a seasonal twist that’s perfect for autumn mornings or cozy afternoon tea breaks. They make an exquisite accompaniment to your morning coffee or a soothing cup of tea. For a truly memorable brunch, pair them with savory options like these Maple Sausage Brunch Bites and a refreshing Old Fashioned Fruit Salad. Whether you’re hosting a breakfast potluck, celebrating Mother’s Day, planning a baby shower or bridal shower, or simply enjoying a sophisticated afternoon tea, these easy apple scones are a charming and delicious choice. They even make a fantastic contribution to a bake sale, sure to be a crowd-pleaser!
Many home bakers find the idea of making scones a bit daunting, fearing they might end up hard, dense, or lacking flavor. It’s true that achieving the perfect scone requires attention to detail, but with the right techniques and a few expert insights, you can consistently bake light, tender, and incredibly flaky apple scones that will have everyone reaching for another. This recipe is designed to guide you through each step, ensuring stunning results every time. Follow the detailed instructions and our comprehensive “Expert Tips” below, and you’ll soon be baking scones so perfect, your friends and family will be begging for the recipe!
Autumn is the season of apples, and what better way to celebrate than with comforting apple-infused treats? If you’re craving more apple-centric breakfast ideas, don’t miss my decadent Apple Walnut Bread with Brown Butter Glaze. And for dinner, these hearty Apple Pork Chops with Apple Sage Sauce are always a hit. Finish your meal with a slice of my Award-winning Apple Pie or some delightful Award-winning Apple Pie Cookies for a truly apple-filled experience!
Essential Ingredients for Perfect Apple Scones
Crafting these delectable apple cinnamon scones begins with a careful selection of fresh, high-quality ingredients. Each component plays a crucial role in achieving the desired flaky texture and rich flavor profile:
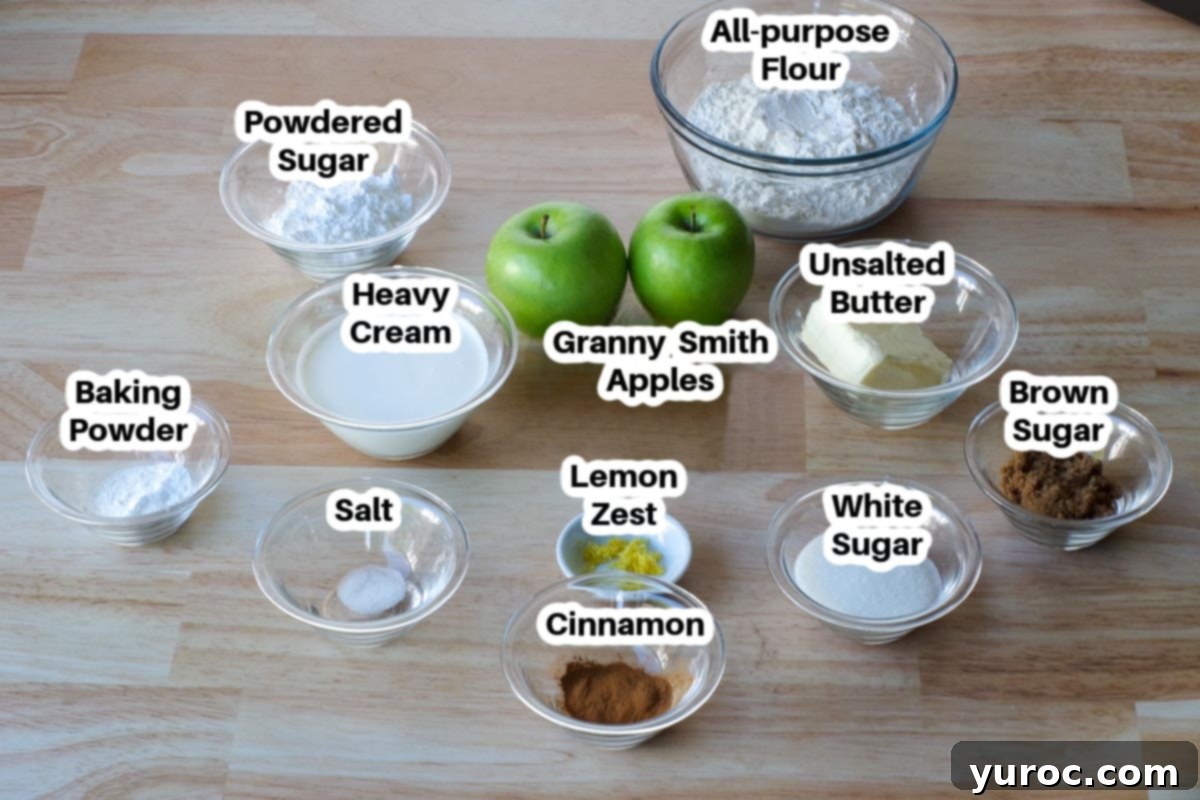
- Lemon Zest: A culinary secret I picked up from a talented chef! Adding fresh lemon zest to the scone dough might seem unconventional, but it provides a bright, subtle citrus note that wonderfully complements the warmth of cinnamon. More than just adding flavor, it acts as a natural enhancer, uplifting the entire profile of the scone. This delightful combination is also a star in my award-winning apple pie recipe!
- Ground Cinnamon: To ensure an intense, aromatic burst of cinnamon in every bite, we incorporate this essential spice into both the scone dough and the apple filling. This layering of flavor guarantees a truly cinnamon-rich experience.
- Unsalted Butter (Frozen): Butter is the cornerstone of flaky scones. It contributes richness, flavor, and helps the scones rise beautifully. Using *unsalted* butter gives you precise control over the overall salt content in your recipe. The crucial technique here is using *frozen* butter. Similar to making a perfect pie crust, as the frozen butter melts during baking, it releases steam, creating tiny air pockets within the dough. These pockets are what give scones their signature flaky, tender interior while maintaining delightfully crisp, crumbly edges. Refrigerated butter, in contrast, can melt too quickly as you handle the dough, leading to a less flaky result.
- Heavy Cream (Whipping Cream): For truly tender and rich scones, heavy cream with a fat content of 33%-35% is indispensable. Its high fat content results in a more luxurious and moist pastry, far superior to what milk or lighter creams can offer. It’s the key to that melt-in-your-mouth texture.
- Granny Smith (Green) Apples: These apples are the ideal choice for baking, especially in scones. Their firm texture ensures they hold their shape beautifully during the baking process, preventing the filling from becoming mushy. Furthermore, their characteristic tartness provides a perfect counterpoint to the sweetness of the scone dough and cinnamon, creating a well-balanced flavor experience.
*A comprehensive list of all ingredients and precise quantities can be found in the recipe card below.
Variations and Substitutions for Your Apple Scones
While this recipe delivers perfectly rustic apple scones, don’t hesitate to customize them to your taste or what you have on hand. Here are some ideas for variations and substitutions:
- Butter Alternatives: If you only have salted butter, you can certainly use it. Just be sure to omit the additional salt specified in the recipe to prevent your scones from becoming too salty.
- Apple Varieties: While Granny Smith apples are recommended for their firm texture and tartness, you can experiment with other apple varieties. Keep in mind that softer apples may break down more during baking, resulting in a mushier filling. Fuji, Honeycrisp, or even Braeburn apples could offer different flavor profiles, but might alter the texture slightly.
- Spice It Up: Enhance the autumn flavors by adding a pinch of nutmeg, allspice, or a pumpkin pie spice blend to your dough or apple filling.
- Add-ins: Consider folding in a handful of chopped walnuts or pecans into the apple mixture for added crunch and nutty flavor. A tablespoon of dried cranberries or raisins could also add a pleasant chewiness and extra sweetness.
- Glaze Options: For an extra touch, drizzle a simple vanilla glaze over the cooled scones. Mix powdered sugar with a tiny bit of milk or cream and a drop of vanilla extract until you reach a pourable consistency.
- Dairy-Free (Carefully): While the recipe relies heavily on dairy for its richness, you could attempt a dairy-free version by using a high-fat plant-based butter alternative and a full-fat canned coconut cream or a thick dairy-free whipping cream. However, results may vary, and the texture might not be as rich or flaky.
Step-by-Step: How to Make Flaky Apple Scones
Unlike many traditional scone recipes that involve shaping the dough into a disc and cutting it into wedges, this method takes a different, more rewarding approach. We’ll roll the dough out and then roll it up, creating distinct layers that ensure the pastry and the cinnamon-spiced apple filling are perfectly and evenly distributed throughout each scone. This guarantees a balanced and flavorful experience in every single bite!
Prep Instructions: Begin by preheating your oven to 400°F (204°C). Position an oven rack in the middle of your oven. Line a standard baking sheet with parchment paper and set it aside. Lightly flour a large plate or a smaller baking sheet, and also set this aside for later use.
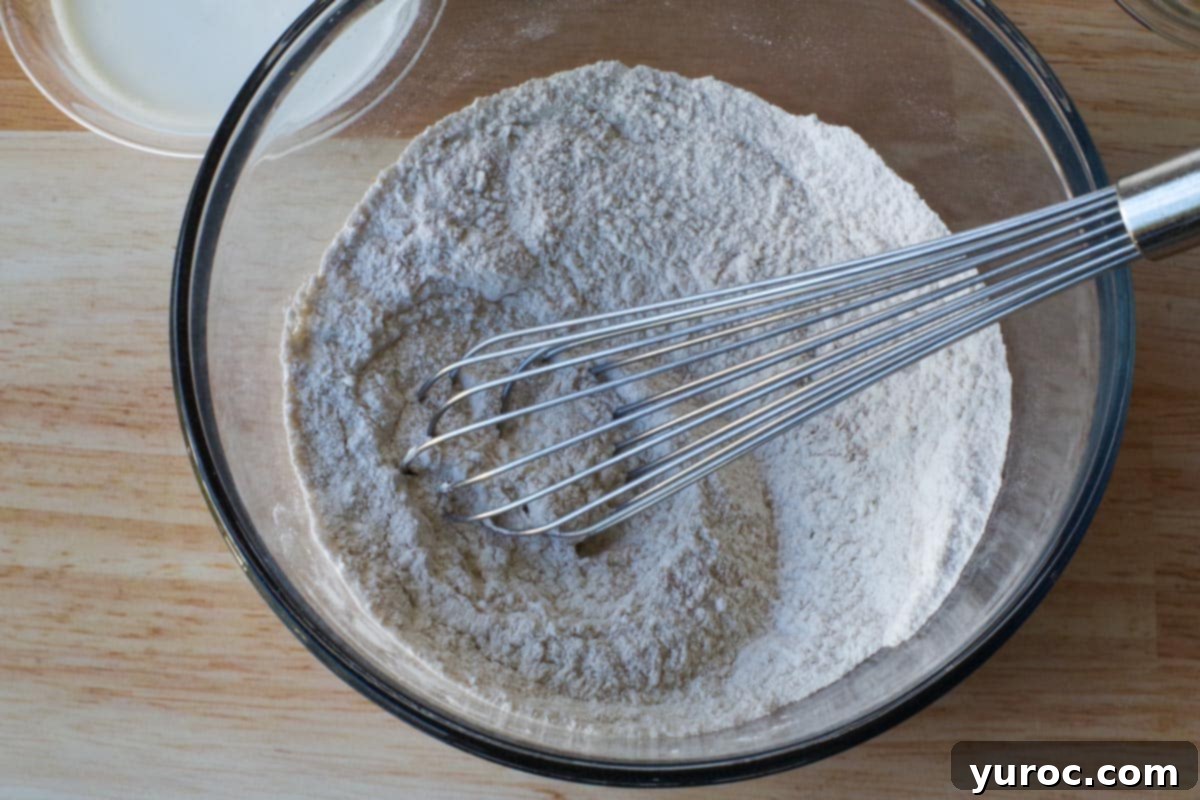
Step 1: In a large mixing bowl, combine all the dry ingredients: the all-purpose flour, ¼ cup of the granulated white sugar, baking powder, fresh lemon zest, 1 teaspoon of the ground cinnamon, and salt. Use a whisk to thoroughly combine these ingredients, breaking up any potential lumps to ensure an even distribution.
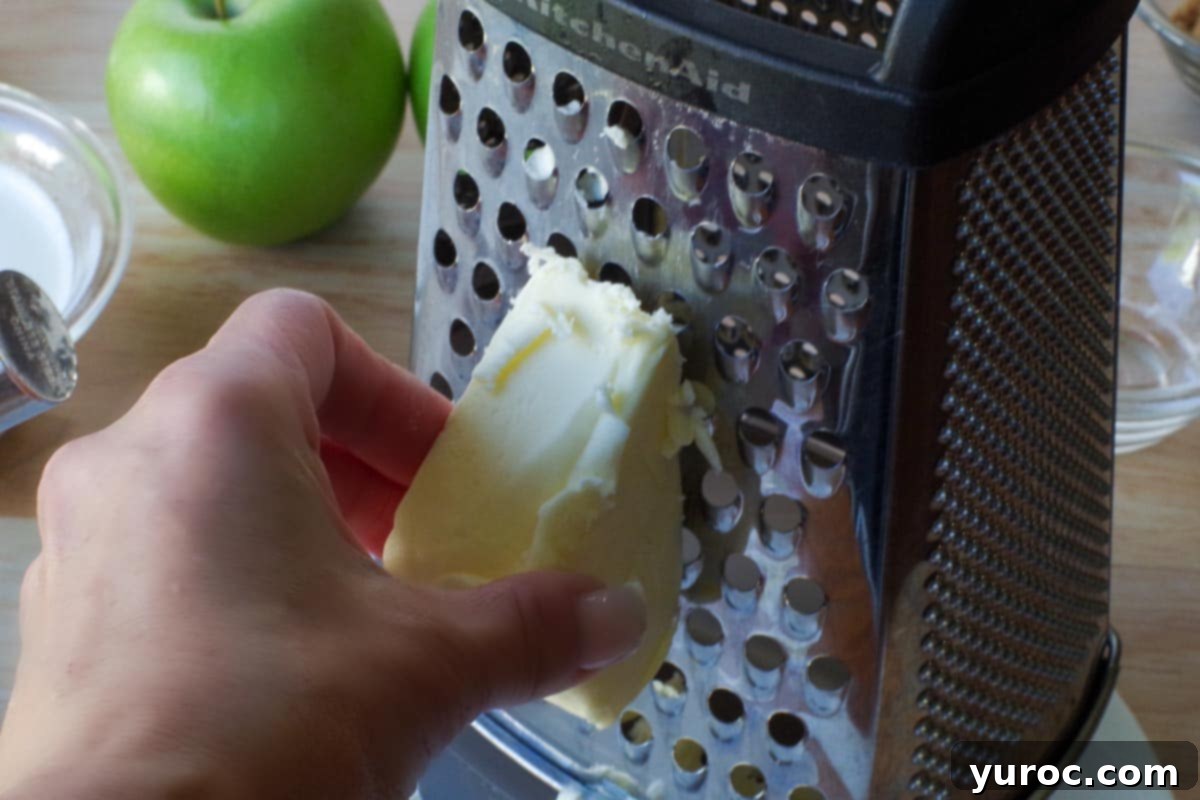
Step 2: Using a cheese grater, carefully grate the frozen unsalted butter directly into the dry ingredient mixture. The frozen butter will create small, consistent pieces that are crucial for developing flaky layers. Alternatively, if you don’t have a grater or prefer another method, you can use a pastry blender or two knives to cut the butter into small, pea-sized pieces within the flour mixture.
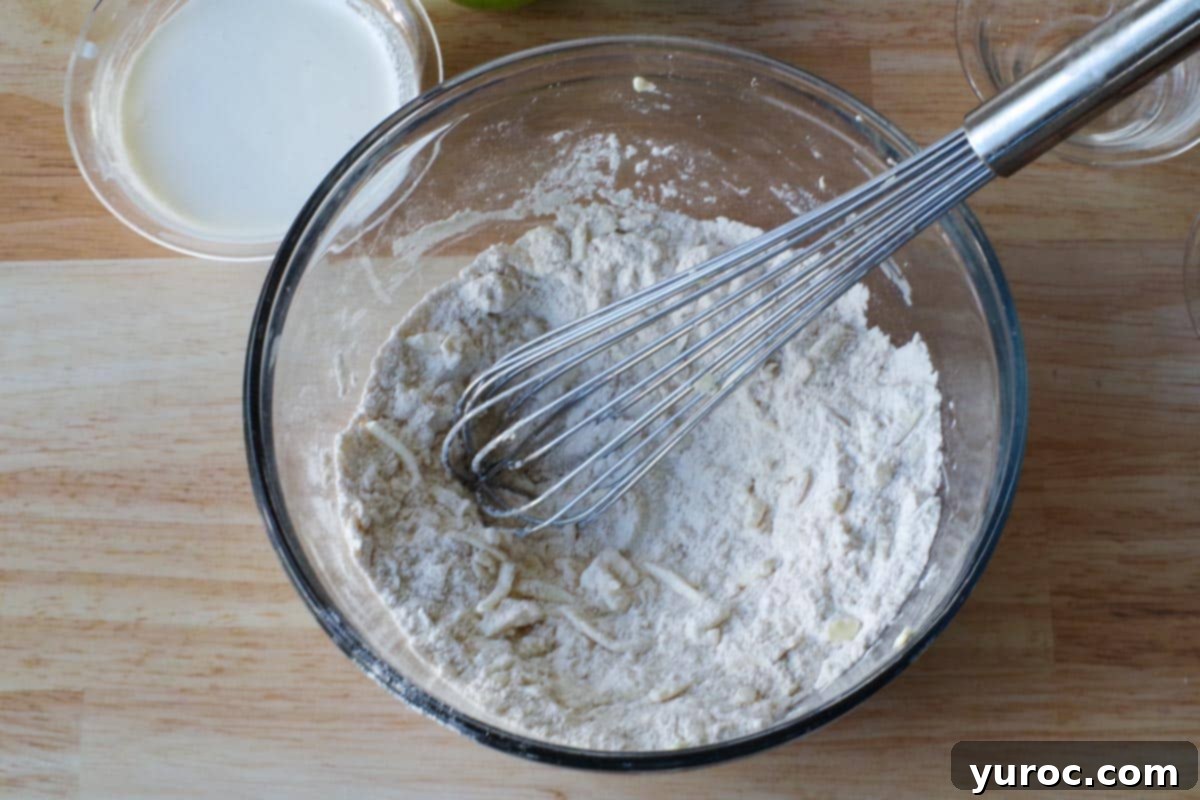
Step 3: Once the butter is grated or cut into small pieces, gently mix it into the flour mixture. You want the butter to be coated in flour, resembling coarse crumbs. Avoid overmixing at this stage to keep the butter as cold as possible.
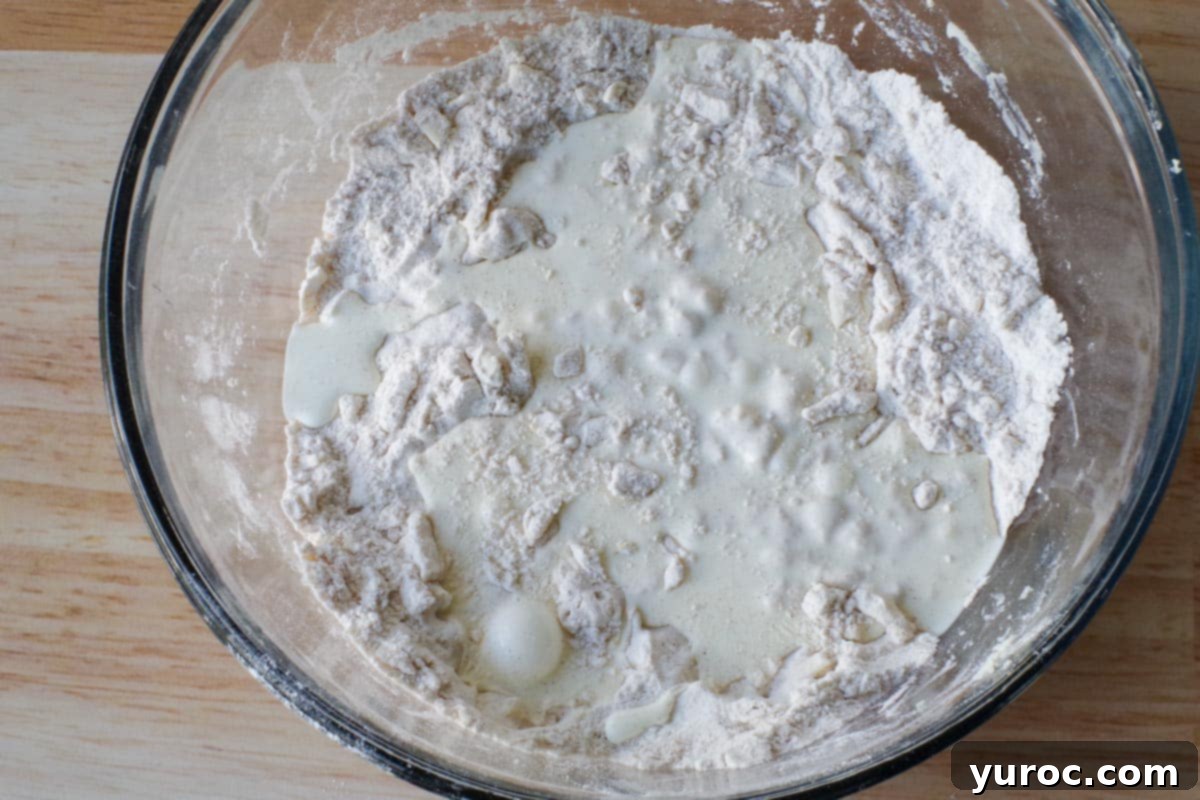
Step 4: Now, pour ¾ cup of the cold heavy cream (whipping cream) into the bowl with your dry ingredients and butter. Ensure the cream is as cold as possible to maintain the integrity of the butter pieces.
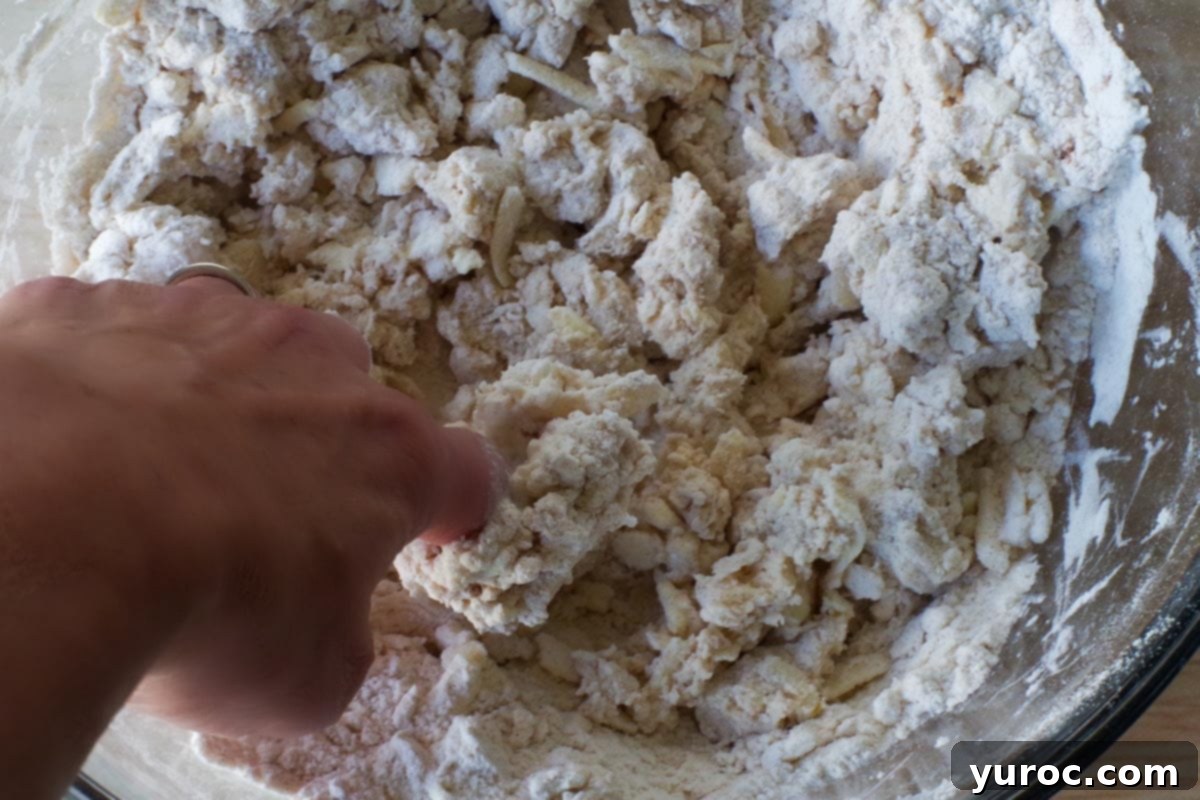
Step 5: Using your fingertips, gently mix the cream into the dry ingredients. Work quickly and minimally until just incorporated. The mixture should form a rough, slightly sticky mound, and it’s perfectly normal if not all the flour is fully incorporated at this point.
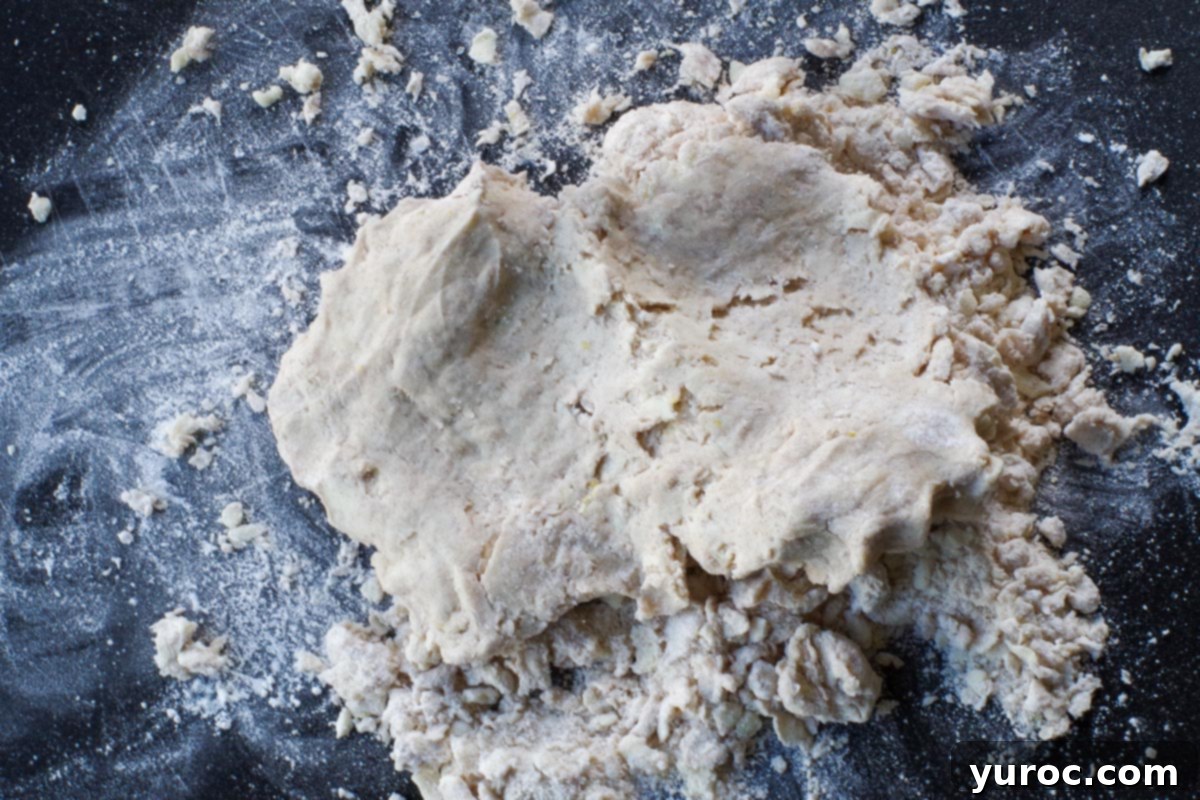
Step 6: Turn the dough and any loose flour out onto a lightly floured work surface. Gently knead the dough just until most of the flour is incorporated and the dough barely holds together. The key here is to avoid overworking the dough, which can lead to tough scones rather than tender, flaky ones.
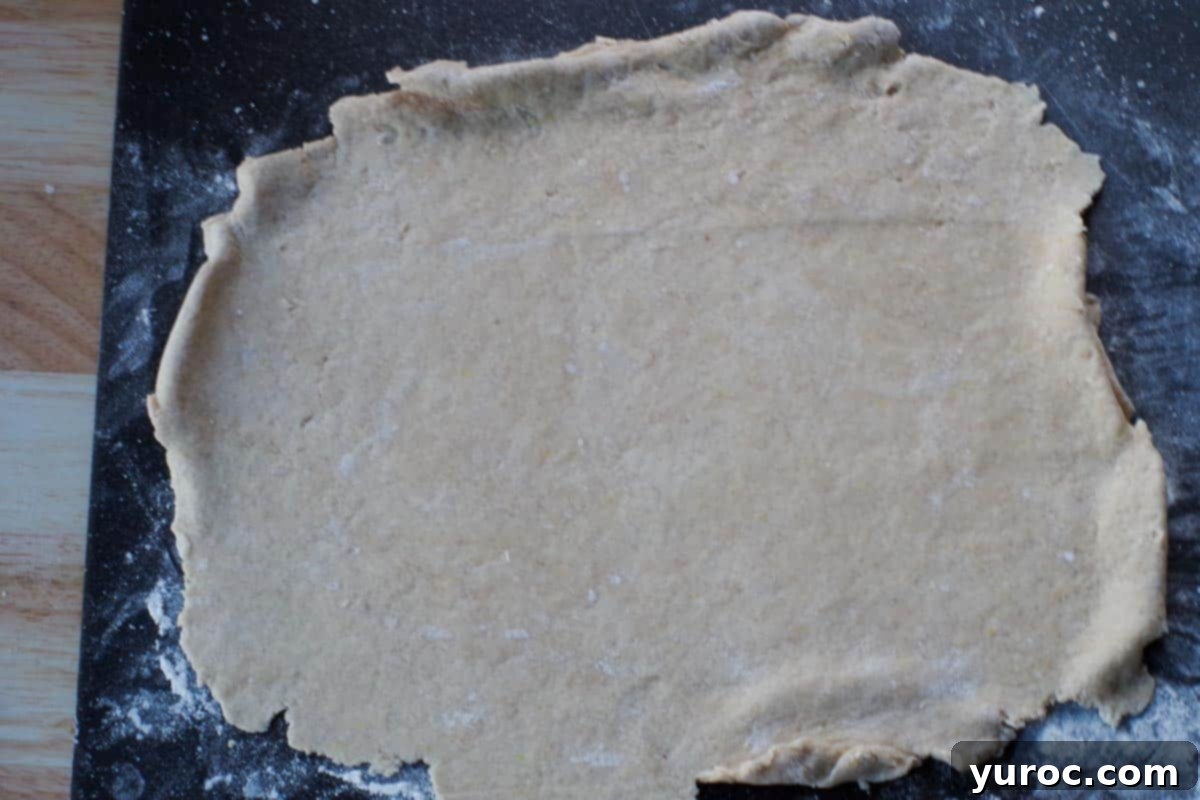
Step 7: Lightly flour your rolling pin and the work surface again. Using your hands, gently press the dough into a rough rectangular shape, orienting the long edge towards you. Then, use the rolling pin to roll the dough into an approximate 8-by-10-inch rectangle. If the dough cracks slightly at the edges, simply push it back together with your fingers. Continue to keep the long edge facing you.
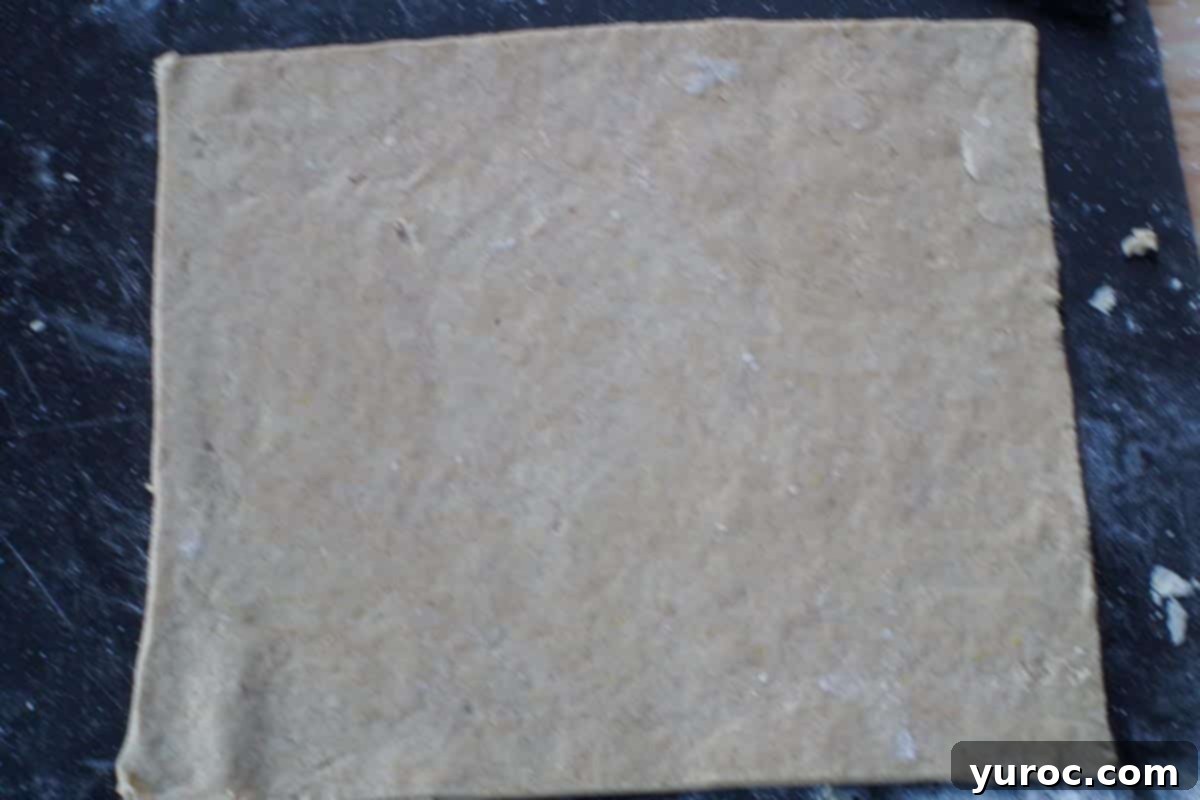
Step 8: For a neater appearance, you can trim the edges of the rolled-out dough with a sharp knife. However, this step is entirely optional and doesn’t affect the taste or texture of the scones, aligning with their “rustic” charm.
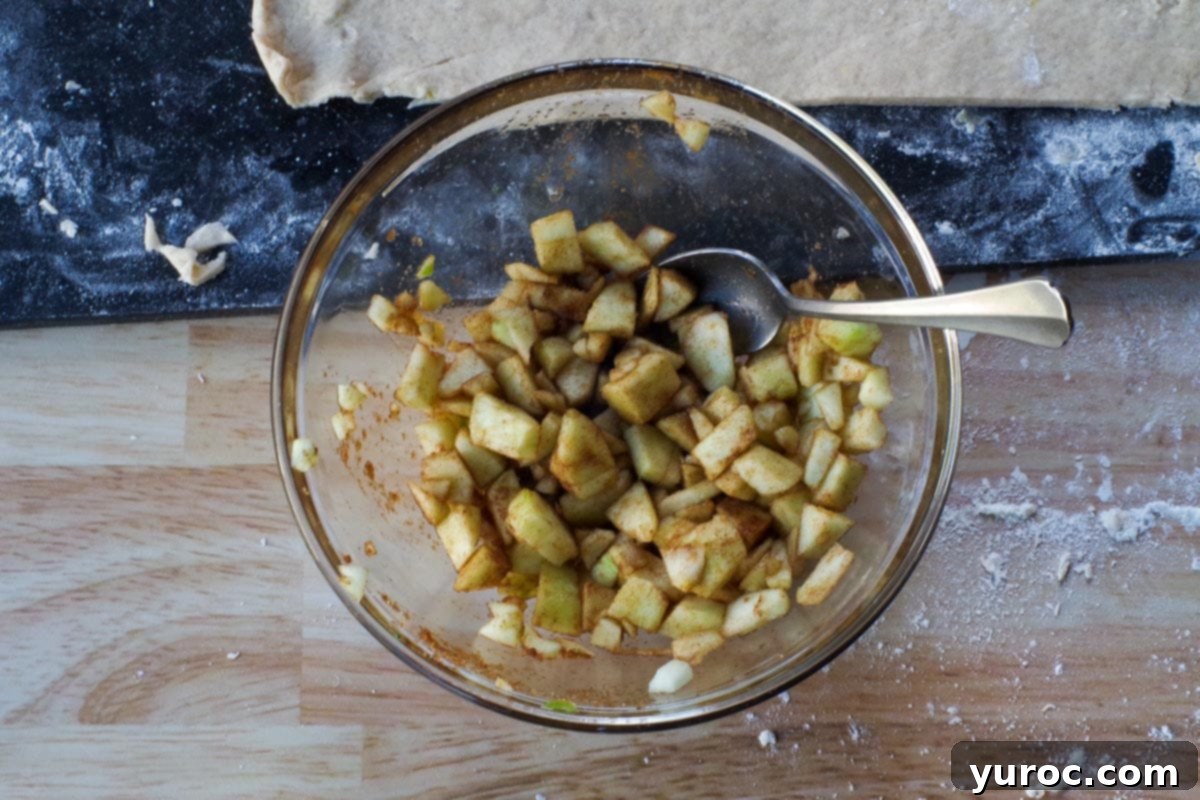
Step 9: Peel, core, and dice your fresh Granny Smith apples into small, uniform pieces. In a separate bowl, toss the diced apples with the remaining 1 teaspoon of ground cinnamon and the brown sugar until they are evenly coated. This creates a flavorful, sweet, and spiced apple filling.
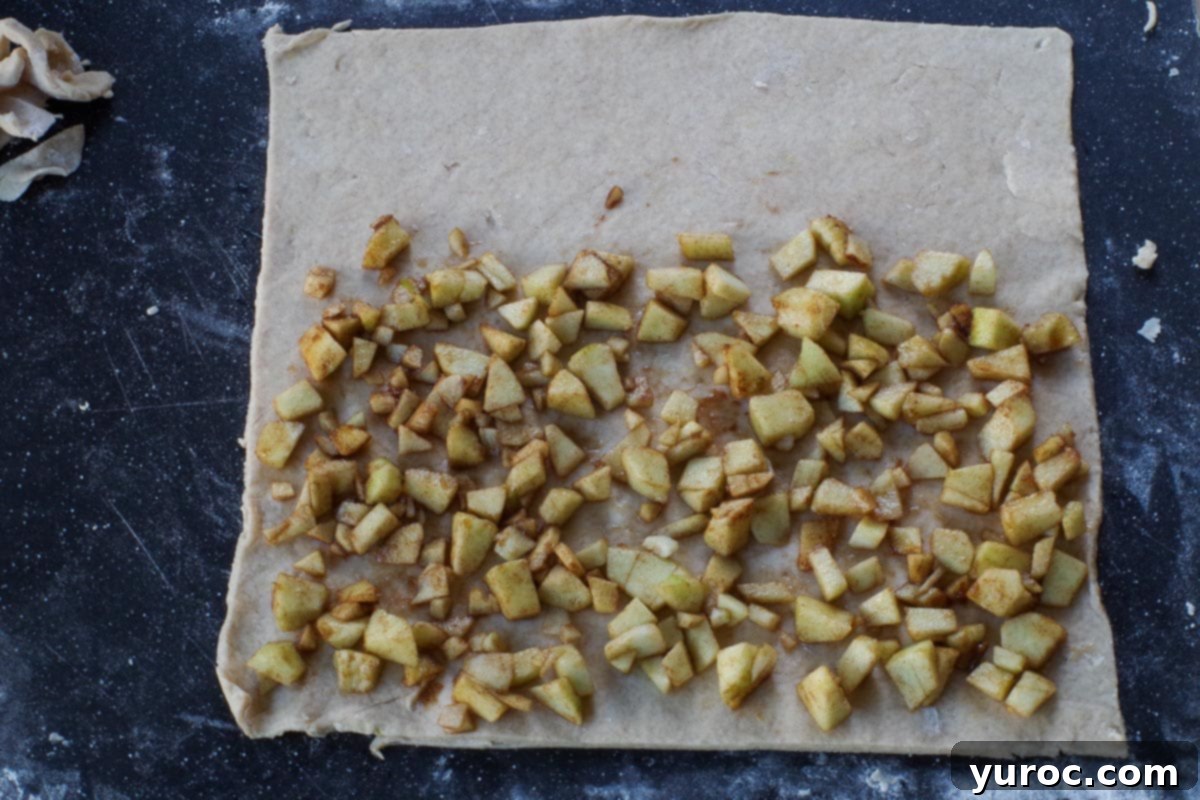
Step 10: Carefully arrange the spiced apple mixture in a single, even layer over the lower two-thirds of the rolled-out rectangular dough. Gently press the apple pieces into the dough to help them adhere, ensuring they stay in place during the folding process.
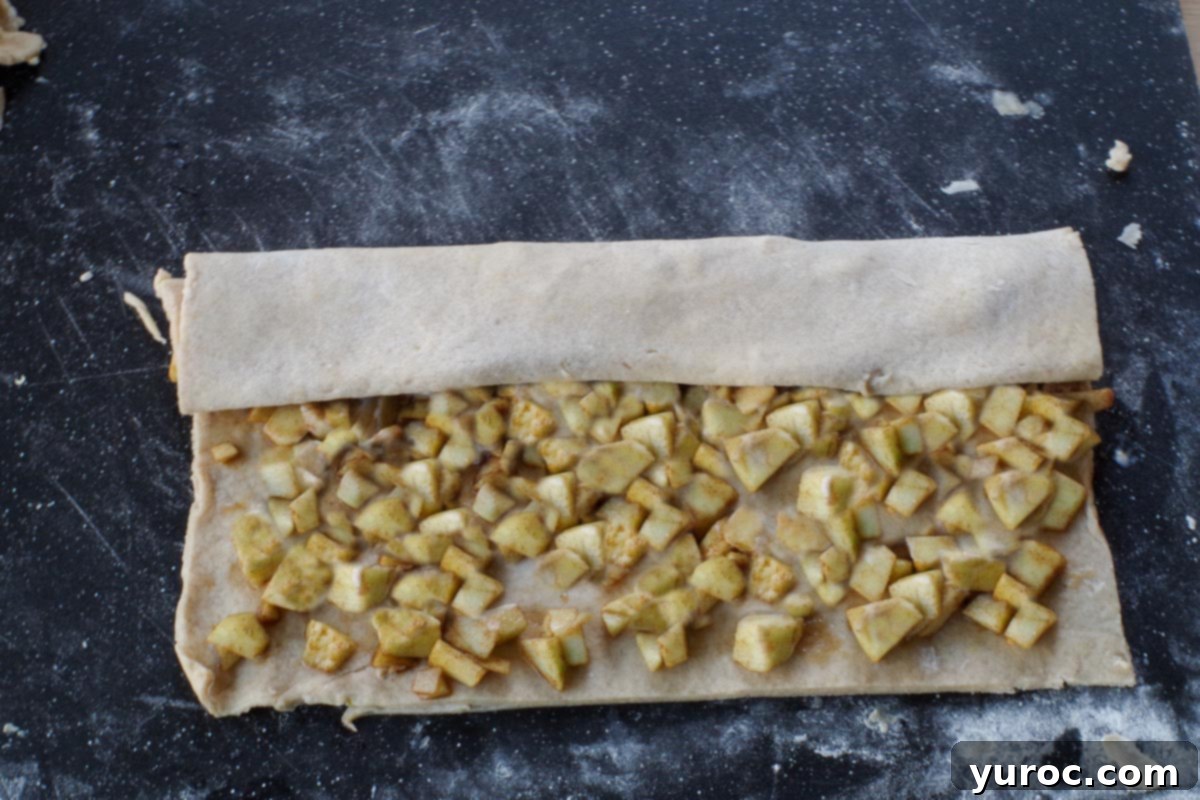
Step 11: Starting with the top third of the dough (the section without apples), carefully fold it down lengthwise over the apple-covered middle section. This is the first fold, creating distinct layers.
As you continue, gently press on the layers to encourage them to meld without flattening the dough too much.
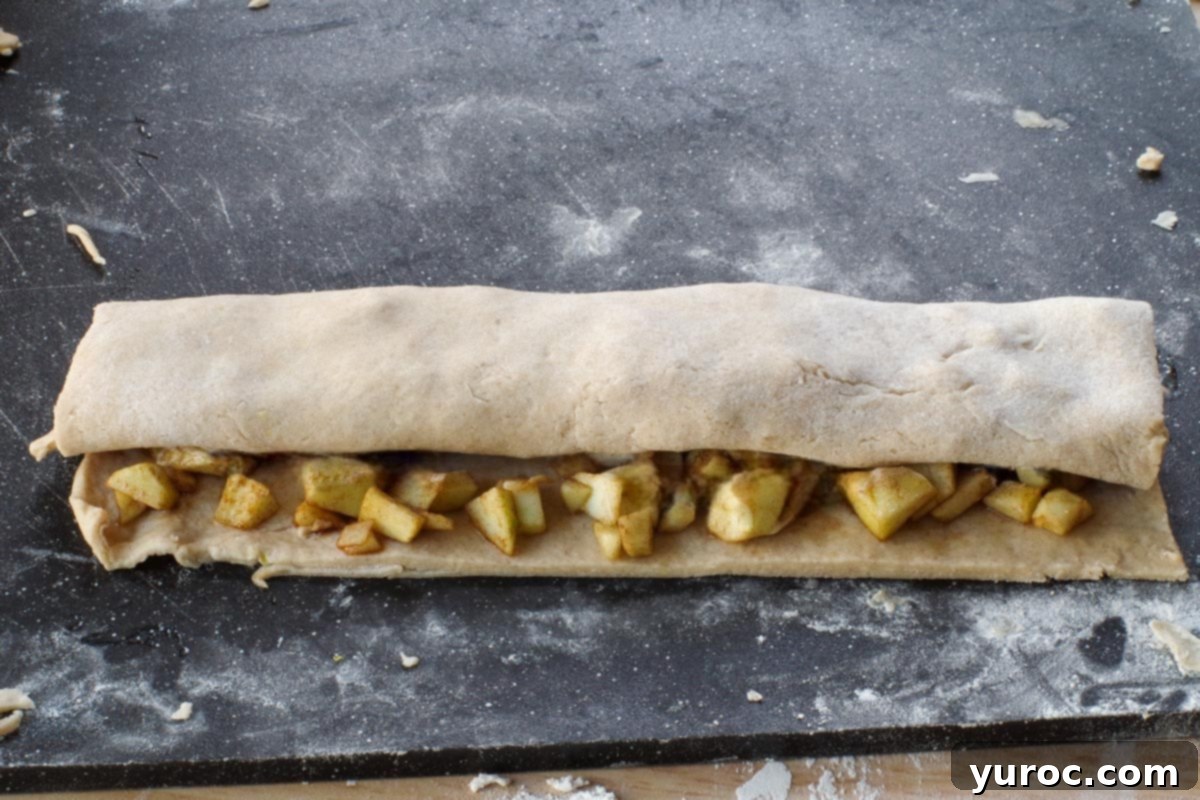
Step 12: Now, fold the remaining bottom third (which is covered with apples and the previously folded layer) over the top. This completes the triple fold, encapsulating the apple filling and creating multiple layers of dough and fruit throughout the scone.
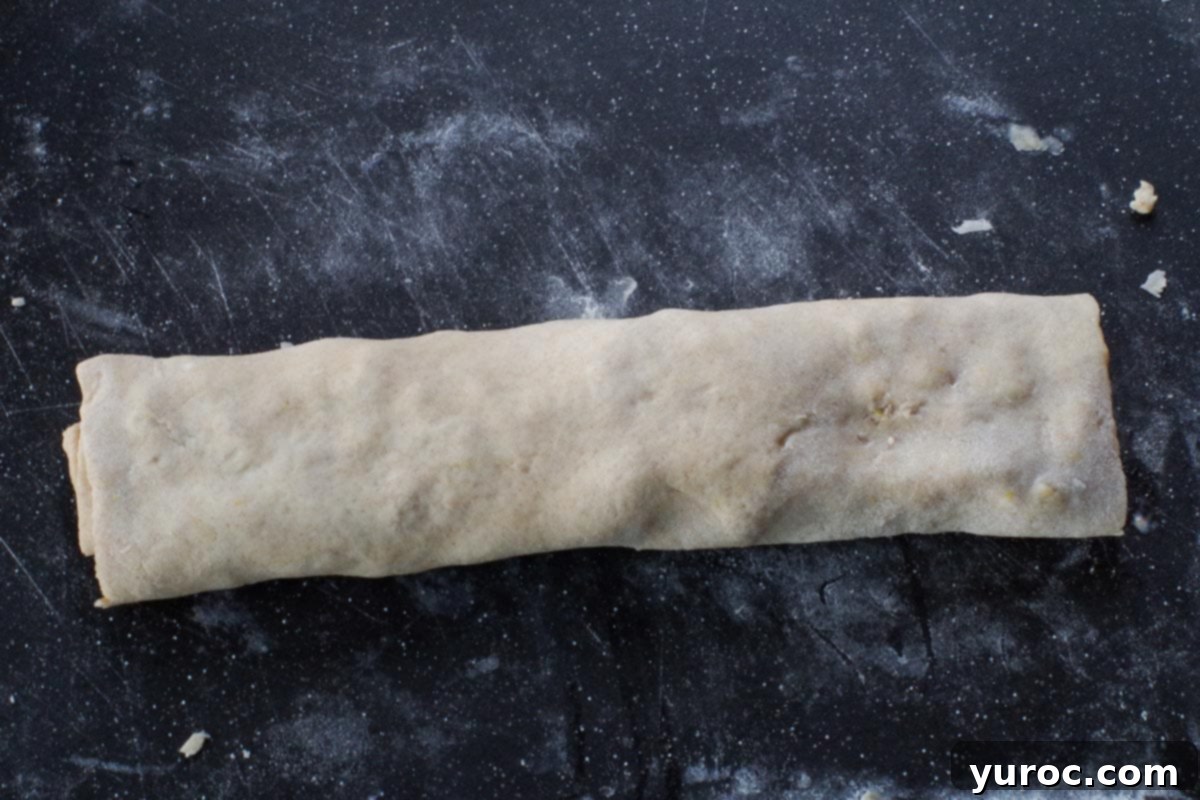
Step 13: Once folded, gently roll the dough log over so that the seam is resting on the bottom. If you find the dough is a bit sticky and adheres to your work surface, use a thin metal spatula or a bench scraper to carefully release it. This log now holds all the delicious layers of dough and apple filling.
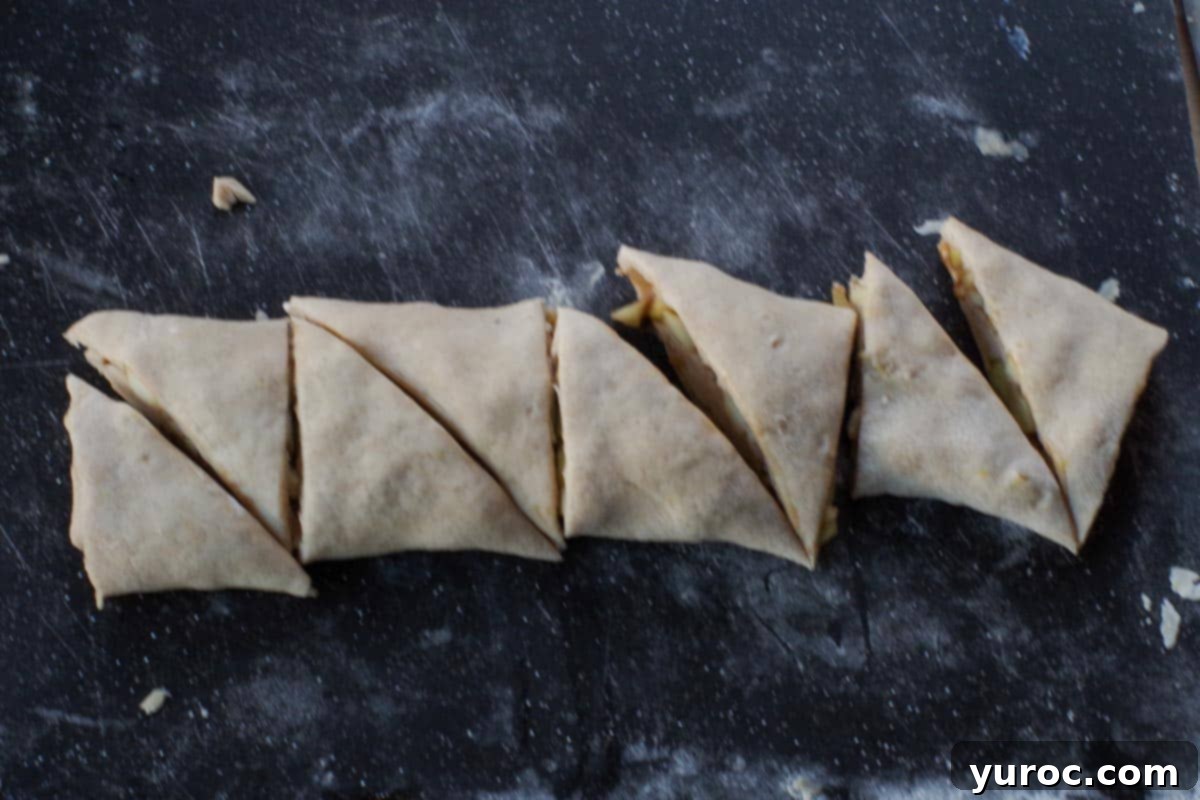
Step 14: Using a very sharp knife, slice the scone dough log crosswise into 4 equal pieces. It’s important to cut straight down rather than using a sawing motion, as sawing can distort the layers and flatten the dough. Once you have 4 rectangular pieces, cut each piece diagonally to form 2 triangles. This yields 8 rustic, triangular scones.
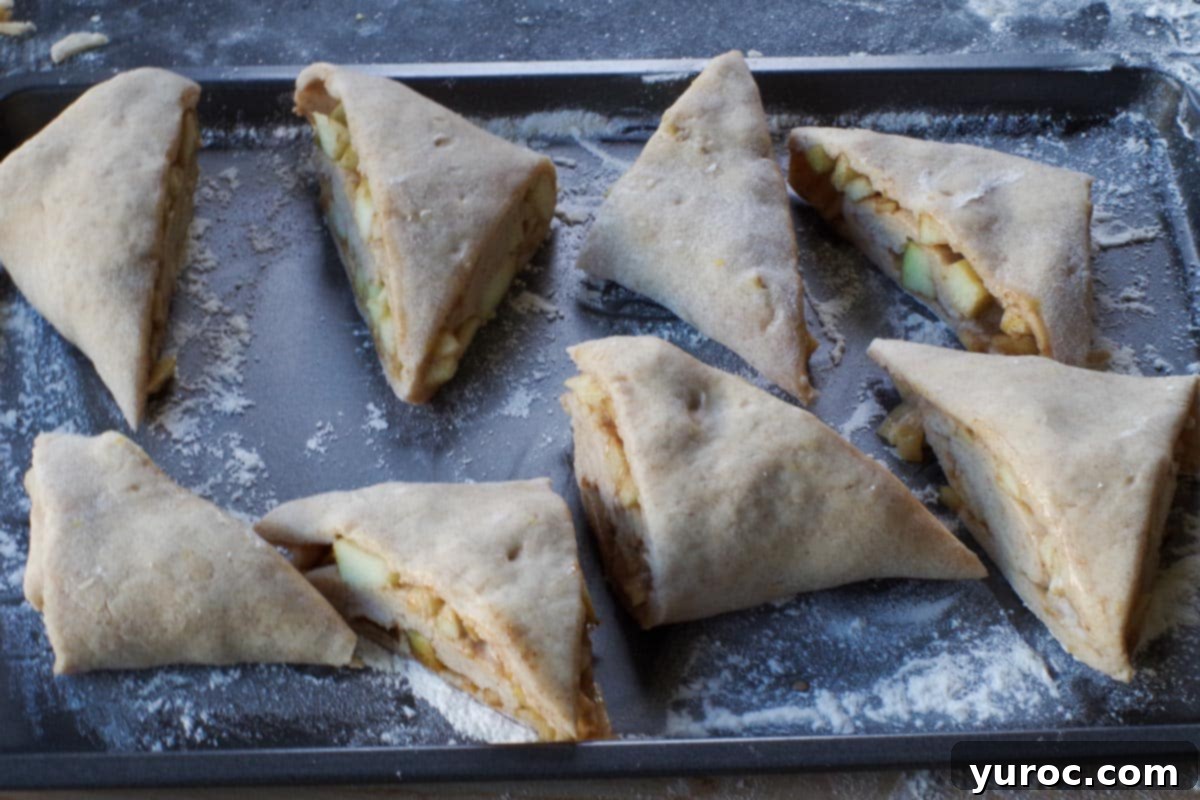
Step 15: Carefully transfer the freshly cut scones to the lightly floured plate or baking sheet you prepared earlier. Place them in the freezer for a brief 10-minute chill. This crucial step helps firm up the butter in the dough, preventing the scones from spreading too much during baking and ensuring maximum flakiness.
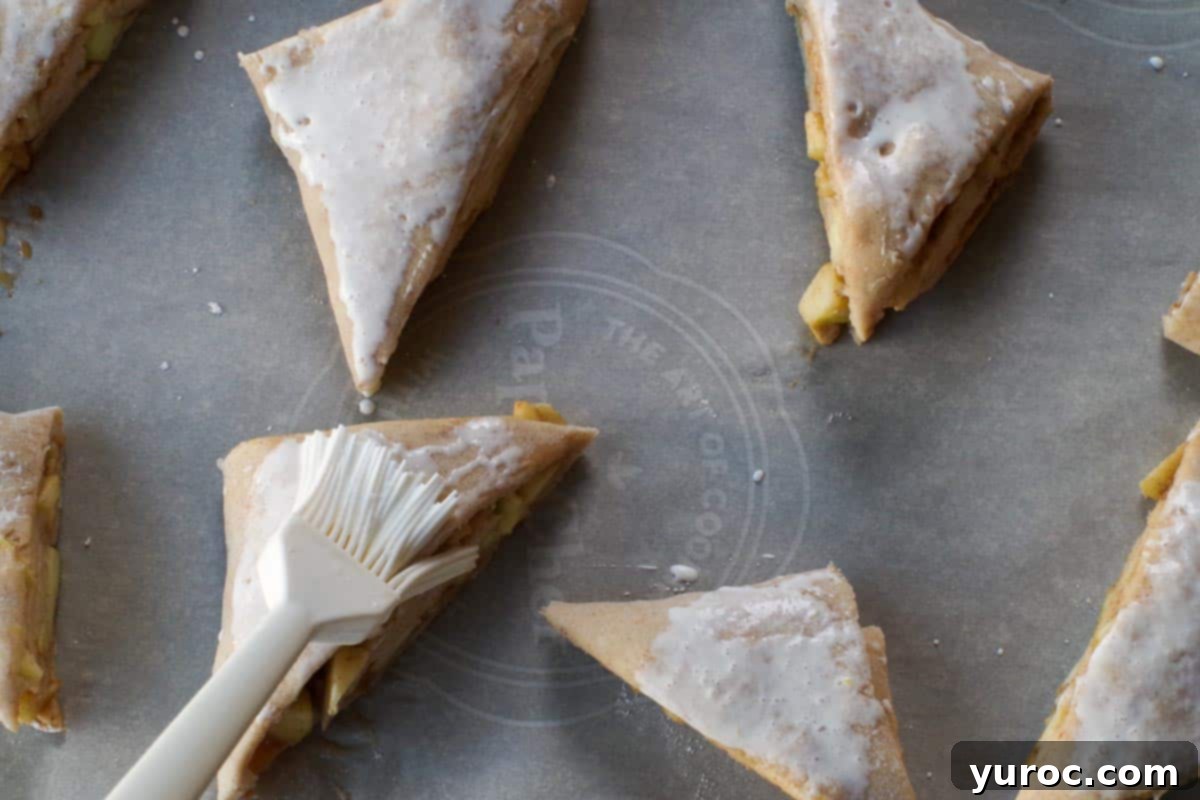
Step 16: After their brief chill, remove the scones from the freezer. Arrange them on the prepared parchment-lined baking sheet, ensuring they are spaced about 2 inches apart to allow for proper air circulation and expansion. Using a pastry brush, apply a thin, even layer of the remaining ½ tablespoon of whipping cream over the tops of each scone. This cream wash will contribute to a beautiful golden-brown crust.
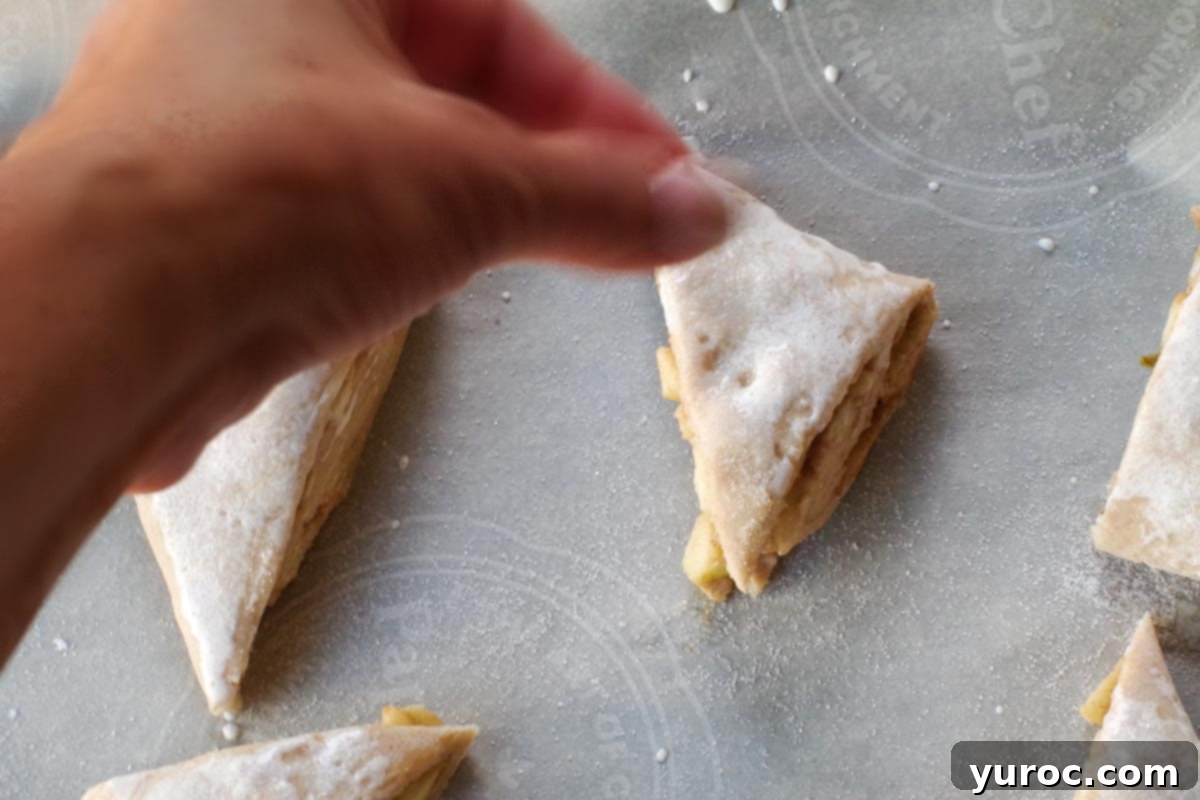
Step 17: Gently sprinkle the remaining 1 teaspoon of white granulated sugar over the cream-brushed tops of the scones. This sugar will caramelize during baking, adding a delicate crunch and extra sweetness to the crust.
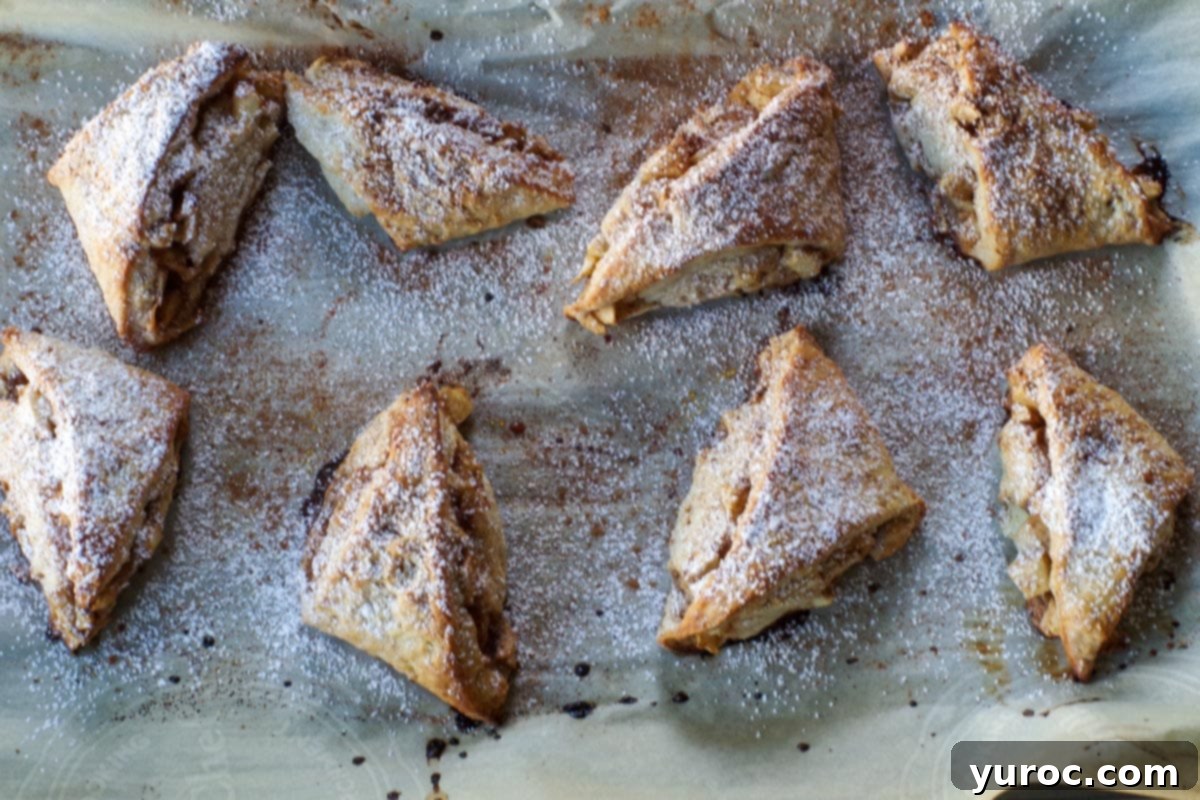
Step 18: Bake the scones in your preheated oven for approximately 20-25 minutes, or until they are beautifully golden brown on both the top and bottom. (For my oven, 23 minutes was the sweet spot.) It’s a good idea to check on the scones at the 15-minute mark. If you notice they are browning too quickly, loosely cover them with a sheet of aluminum foil (sprayed with non-stick cooking spray on the shiny side, facing down) to prevent over-browning. Once baked, let the scones cool on the baking sheet for 5 minutes before carefully transferring them to a wire rack to cool completely. For a final touch of sweetness and charm, dust the cooled scones with powdered sugar and a hint of extra cinnamon just before serving. Enjoy your perfectly rustic apple cinnamon scones!
Expert Tips for Flawless Apple Scones
Achieving light, flaky, and tender scones is easier than you think when armed with these insider tips:
- Always Use Frozen Butter: This is perhaps the most critical tip for flaky scones. When butter is frozen, it melts slower in the oven, creating steam pockets that lift the dough into beautiful layers. If your butter is too warm, it will incorporate too quickly into the flour, resulting in dense, cake-like scones that spread excessively during baking. Grating the frozen butter into small pieces helps it distribute evenly and maintain its cold temperature.
- Measure All Ingredients Precisely: Baking is a science, and successful outcomes depend on accurate measurements. Unlike cooking, where you can often eyeball ingredients, baking requires precision. Use kitchen scales for flour and butter if possible, or ensure proper dry ingredient measuring techniques (e.g., spooning flour into a cup and leveling).
- Sift Flour and Baking Powder Together: Sifting these dry ingredients ensures they are thoroughly combined, which is essential for an even rise and light texture. Lumps of baking powder can lead to uneven rising and a bitter taste.
- Keep All Ingredients COLD: Beyond just the butter, aim for very cold cream and even cold hands if you’re mixing by hand. Cold ingredients inhibit gluten development and keep the fat solid, which are both crucial for preventing the scones from spreading too much and losing their desirable crumbly, flaky, and moist texture.
- Dice Apples Small and Uniformly: Since scones have a relatively short baking time, ensure your apple pieces are finely diced. Small pieces cook through quickly and evenly, becoming tender without turning into complete mush, while also distributing well throughout the dough layers.
- Use High-Quality Heavy Cream (33%-35% Fat): The fat content in your cream directly impacts the richness and tenderness of your scones. Avoid using milk or lighter creams, as they contain less fat and will result in drier, less flavorful, and denser pastries. Heavy cream provides the necessary moisture and richness for a truly indulgent scone.
- Handle the Dough as Little as Possible: Overworking scone dough is a common mistake. The more you knead or handle the dough, the more the gluten develops and tightens. This leads to tough, chewy scones instead of the light, crumbly, and tender texture you’re aiming for. Mix until just combined and knead minimally.
- Don’t Roll the Dough Too Thin: For that perfect rise and internal texture, your scone dough shouldn’t be rolled out excessively thin. Aim for a thickness similar to a good pie dough, generally between ⅛ and ¼ of an inch. This thickness provides enough structure for the steam from the butter to create flaky layers.
- Freeze Unbaked Scones for 10 Minutes: This step is a secret weapon against spreading! A brief chill in the freezer before baking ensures the butter is rock-solid when the scones hit the hot oven, maximizing that initial burst of steam and creating beautiful height and flakiness.
- Monitor Oven Browning at 15 Minutes: Ovens can vary greatly. Keep a close eye on your scones, especially around the 15-minute mark. If they are browning too quickly on top, loosely tent them with a sheet of greased aluminum foil (shiny side down, sprayed with non-stick cooking spray) to prevent burning while allowing the interior to finish baking.
- Always Use Parchment Paper: Lining your baking sheet with parchment paper is not just for easy cleanup. It also helps prevent the bottoms of your scones from over-browning or sticking, ensuring an evenly baked product.
Storage Tips for Freshness
To enjoy your homemade apple cinnamon scones at their best, proper storage is key:
Freshly baked scones are always best enjoyed on the day they are made. However, if you have leftovers, they typically last for a couple of days when stored in an airtight container at room temperature. Leaving them exposed to air for too long can cause them to become dry. For extended freshness, store your scones in the refrigerator, where they will remain delicious for up to 5 days.
If you’re planning to bake these scones a day or two in advance for an event, store them in the fridge and hold off on sprinkling the powdered sugar until just before you’re ready to serve. This keeps the sugar from dissolving and looking messy.
Freezing Baked Scones: These scones freeze beautifully! I highly recommend freezing the baked and completely cooled scones before applying any powdered or confectioners’ sugar. You can store them in a Ziploc freezer-safe bag or any other airtight container to prevent freezer burn. If you do happen to freeze them with powdered sugar already on, don’t worry—you’ll just need to reapply a fresh dusting after thawing, which might make them a touch sweeter.
To Thaw Frozen Scones: Simply leave them out on the kitchen counter for a few hours to thaw at room temperature, or transfer them to the refrigerator overnight. If you prefer them warm, a quick 10-15 second zap in the microwave will bring back their cozy, freshly baked feel.
Serving Size and Adjustments
This delightful Homemade Apple Cinnamon Scones recipe yields 8 generous servings, perfect for a family breakfast or a small gathering. One of the best features of this recipe card is its flexibility! You can easily adjust the serving size to half, double, or even triple the recipe by simply clicking on the serving number in the recipe card below and selecting your desired quantity. The ingredient amounts will automatically update to reflect your choice, making it incredibly convenient to bake for any occasion, big or small.
Baking Hacks and Top Kitchen Tips
Here are a couple of useful tips to make your baking experience even smoother and more enjoyable:
Pre-Portion and Freeze Butter: To always have frozen butter ready for your baking needs, slice a block of butter into various portion sizes (e.g., two ¼-cup portions, one ½-cup portion, and one full cup). Store these pre-portioned pieces in a Ziploc freezer bag. This not only makes baking more convenient but also allows you to buy butter in bulk when it’s on sale, saving you money in the long run. Having frozen butter on hand is a game-changer for scone and pie crust recipes!
Choose a Silicone Pastry Brush: When it comes to applying egg washes or cream to your pastries, I highly recommend using a silicone pastry brush over a traditional natural bristle brush. Silicone bristles are superior because they don’t shed tiny hairs into your food – trust me, no one wants a hair in their scone! Additionally, silicone brushes are heat-resistant, making them versatile for various baking and cooking tasks, and they are significantly easier to clean and more hygienic than natural hair brushes.
What to Serve with Rustic Apple Cinnamon Scones
These delightful apple cinnamon scones are incredibly versatile and pair beautifully with a variety of beverages and breakfast dishes. Their rich, subtly sweet, and flaky profile makes them a welcome addition to any meal:
Naturally, a classic cup of freshly brewed coffee or a comforting mug of hot tea is the perfect partner for these scones. The warmth and slight bitterness of these beverages perfectly complement the sweet apples and spicy cinnamon.
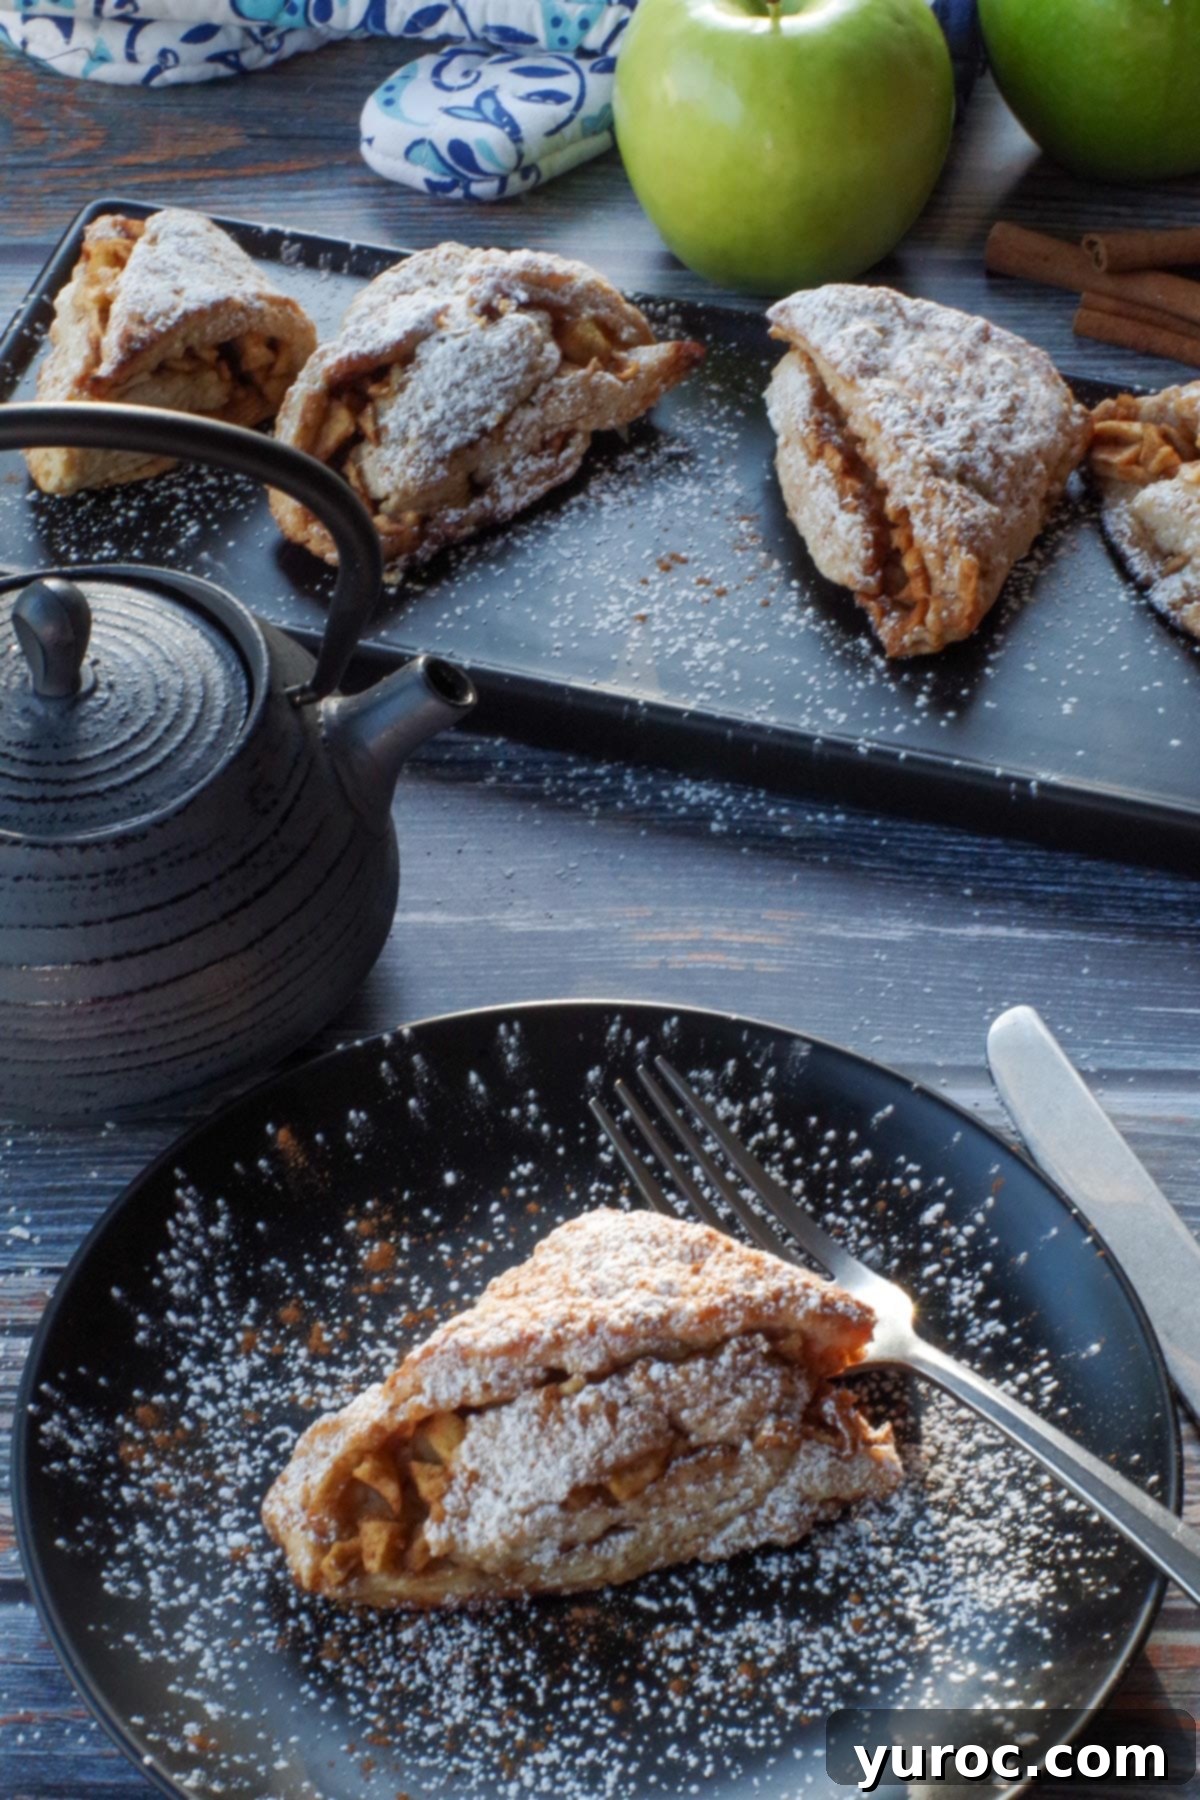
If you’re planning a more elaborate breakfast or brunch, these scones shine alongside heartier dishes. Consider serving them with savory egg preparations such as this satisfying Pierogi Breakfast Casserole (made with frozen pierogies). For a vegetarian-friendly spread, they’re excellent with light and flavorful Mediterranean Breakfast Burritos, a vibrant Sheet Pan Huevos Rancheros (as shown in the image below), or a healthy Avocado Breakfast Bowl (without bread). For an extra touch of indulgence, serve them with homemade clotted cream, your favorite fruit jam, or a dollop of whipped cream.

Recipe FAQs for Apple Scones
Here are answers to some common questions about making these delicious apple cinnamon scones:
Rustic baking embraces unrefined beauty, simplicity, and a warm, inviting feel, often inspired by old-fashioned preparation techniques and locally available ingredients. These apple scones earn their “rustic” title from their charmingly homemade, slightly imperfect aesthetic and unique preparation. Instead of neat, perfectly uniform wedges or rounds, our scones are rolled, folded into layers, and then simply sliced, which beautifully exposes the layers of dough and apple filling. The dough is intentionally not overworked or overly shaped, contributing to their natural, handcrafted appeal. The golden-brown crust, slightly uneven edges, and visible chunks of apple all contribute to their comforting, homey, and utterly rustic character.
To prevent your scones from spreading excessively and losing their beautiful shape and flakiness, there are a few critical steps. First and foremost, ensure you use frozen butter, and keep all your other ingredients, especially the heavy cream, as cold as possible. This prevents the butter from melting prematurely. Secondly, do not skip the crucial step of freezing the unbaked scones for at least 10 minutes before placing them in the oven. This quick chill solidifies the butter, allowing it to create steam and lift the scones upwards rather than outwards during baking.
Dry or overly crumbly scones are typically a result of two common issues: overmixing the dough or adding too much flour. It’s essential to measure your ingredients accurately, particularly the flour, and mix the dough only until it’s just combined. Overmixing develops the gluten too much, leading to a tough, dry texture. Another critical factor is the liquid. Using heavy cream (33%-35% fat) as specified in this recipe is crucial for providing adequate moisture and richness. Substituting with milk or a lighter cream will likely result in a drier product.
Absolutely! These apple scones are fantastic for making ahead. You have a couple of options: you can prepare and freeze the unbaked scone dough as individual scones. When you’re ready to bake, simply place them directly from the freezer into the preheated oven, adding a few extra minutes to the baking time (usually about 5-10 minutes more). Alternatively, you can bake them completely in advance, let them cool, and then store them in an airtight container at room temperature for up to 2 days, or in the refrigerator for up to 5 days. Reheat gently in the microwave or oven for that fresh-baked taste.
If you’ve been searching for a truly delicious, flaky, and fresh Apple Cinnamon Scones recipe that delivers on its promise of rustic perfection, look no further – this is the one you’ve been waiting for!
More Delicious Breakfast Bakes!
Craving more delightful morning treats? Explore these other fantastic breakfast and brunch recipes:
- Brown Sugar Cinnamon Swirl Bread (with Lemon Glaze)
- Carrot Cake Doughnut Muffins Recipe
- Blueberry Cornbread (with lemon)
- Sheet Pan Chocolate Chip Pancakes
Did your family ❤️ this recipe? Did you know that commenting and ⭐ rating recipes is one of the best ways to support your favorite recipe creators? If you LOVED this recipe, please comment and rate it in the recipe card below or share photos on social media using the hashtag #foodmeanderings or tagging @foodmeanderings!

📋Rustic Apple Scones Recipe
Print Recipe
Pin
Save RecipeSave Recipe
Rate
Add to Shopping ListGo to Shopping List
Equipment
-
cutting board
-
grater
-
sharp knife
-
pastry brush
Ingredients
- 2 cups all-purpose flour plus more as needed for dusting
- ¼ cup granulated sugar plus 1 teaspoon for sprinkling
- 1 ½ cups finely chopped Granny Smith apples approximately 2 small or 1.5 medium apples, peeled and cored
- 2 ½ teaspoons baking powder
- 1 teaspoon grated lemon zest from 1 medium lemon
- 2 tablespoons brown sugar
- 2 teaspoons ground cinnamon divided
- ½ teaspoon salt
- ½ cup unsalted butter frozen solid
- ¾ cup heavy cream/whipping cream plus 1 tablespoon for brushing
- ¼ cup powdered sugar/icing sugar for dusting, optional
Instructions
-
Preheat oven to 400°F (204°C) with a rack in the middle. Line a baking sheet with parchment paper and lightly flour a separate plate or small baking sheet; set aside.
-
In a large bowl, whisk together flour, ¼ cup granulated sugar, baking powder, lemon zest, 1 teaspoon cinnamon (from total 2 tsp), and salt to remove any lumps.
-
Grate the frozen unsalted butter into the dry ingredients using a cheese grater. Alternatively, cut in the butter with a pastry cutter or two knives until pea-sized.
-
Gently mix the grated butter into the flour mixture until coated.
-
Pour in ¾ cup of the cold heavy cream.
-
Using your fingertips, mix until just incorporated and a rough, slightly sticky mound forms. Not all flour will be fully incorporated yet.
-
Turn the dough and loose flour onto a lightly floured surface. Gently knead until most of the flour is incorporated and the dough just holds together. Avoid overworking.
-
Lightly flour a rolling pin and the work surface. Form the dough into a rough rectangle (long edge towards you) and roll to approximately 8×10 inches. Press together any cracks.
-
Optionally trim the edges for a neater look, but it’s not required.
-
In a separate bowl, toss peeled, cored, and diced Granny Smith apples with the remaining 1 teaspoon cinnamon and brown sugar.
-
Evenly spread the apple mixture over the lower two-thirds of the dough rectangle, gently pressing them into the dough.
-
Starting from the top (the third without apples), fold the dough lengthwise into thirds.
-
Gently press on the layers as you complete the roll to create good adhesion.
-
Fold the dough over completely until the seam is on the bottom. Use a spatula or pastry scraper if dough sticks.
-
With a sharp knife, slice the dough log crosswise into 4 equal pieces (do not saw). Then cut each piece diagonally to form 2 triangles, yielding 8 scones.
-
Transfer the scones to the floured plate/baking sheet and freeze for 10 minutes to firm up.
-
Remove from freezer and transfer to the parchment-lined baking sheet, spacing 2 inches apart. Brush a thin layer of the remaining ½ tablespoon whipping cream over the tops.
-
Sprinkle with the remaining 1 teaspoon of white granulated sugar.
-
Bake for 20-25 minutes, until golden brown. Check at 15 minutes; if browning too fast, tent loosely with greased foil (shiny side down). Let cool on baking sheet for 5 minutes, then transfer to a wire rack to cool completely. Dust with powdered sugar and a pinch of cinnamon before serving.
Notes
For comprehensive information on storing baked and unbaked scones, including freezing and thawing instructions, please see the “Storage Tips for Freshness” section earlier in the article.
Nutrition
