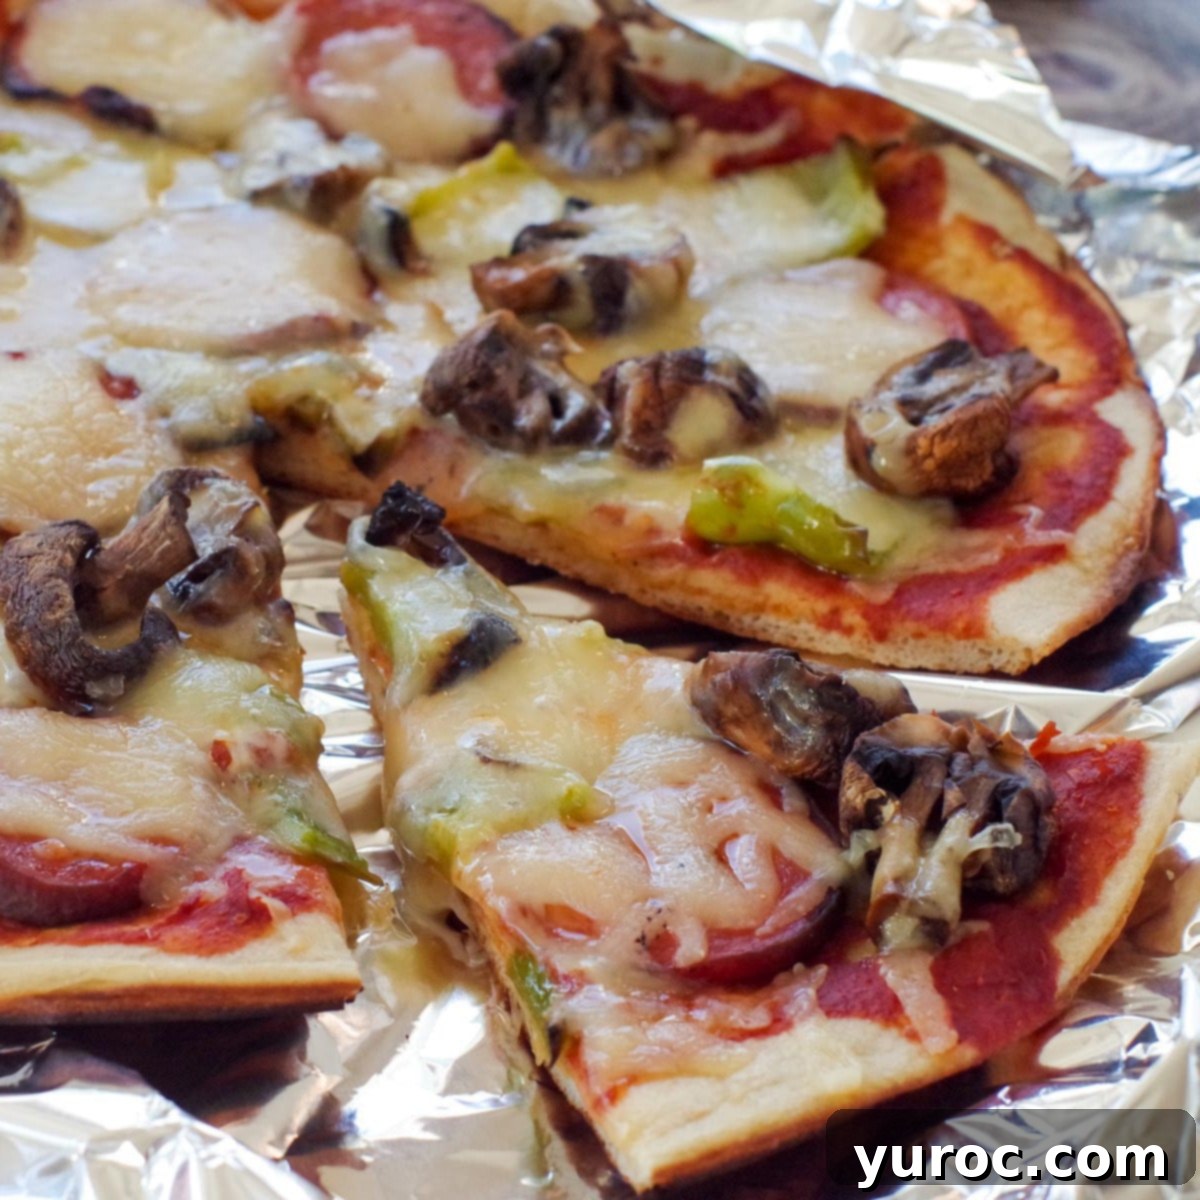
Unforgettable Camping Pizza: Easy Grilled & Campfire Recipes for Your Outdoor Feast
Imagine the aroma of freshly baked pizza wafting through the crisp outdoor air. This isn’t a dream! Our Camping Pizza recipe, featuring delicious grilled toppings, is the ultimate solution for anyone looking to enjoy pizza while surrounded by nature. Whether you’re roughing it on a camping trip, enjoying the comforts of glamping, hosting a backyard cookout, or simply want to avoid heating up your kitchen, this recipe is a game-changer. It’s an incredibly versatile and simple way to bring everyone’s favorite meal to the great outdoors.
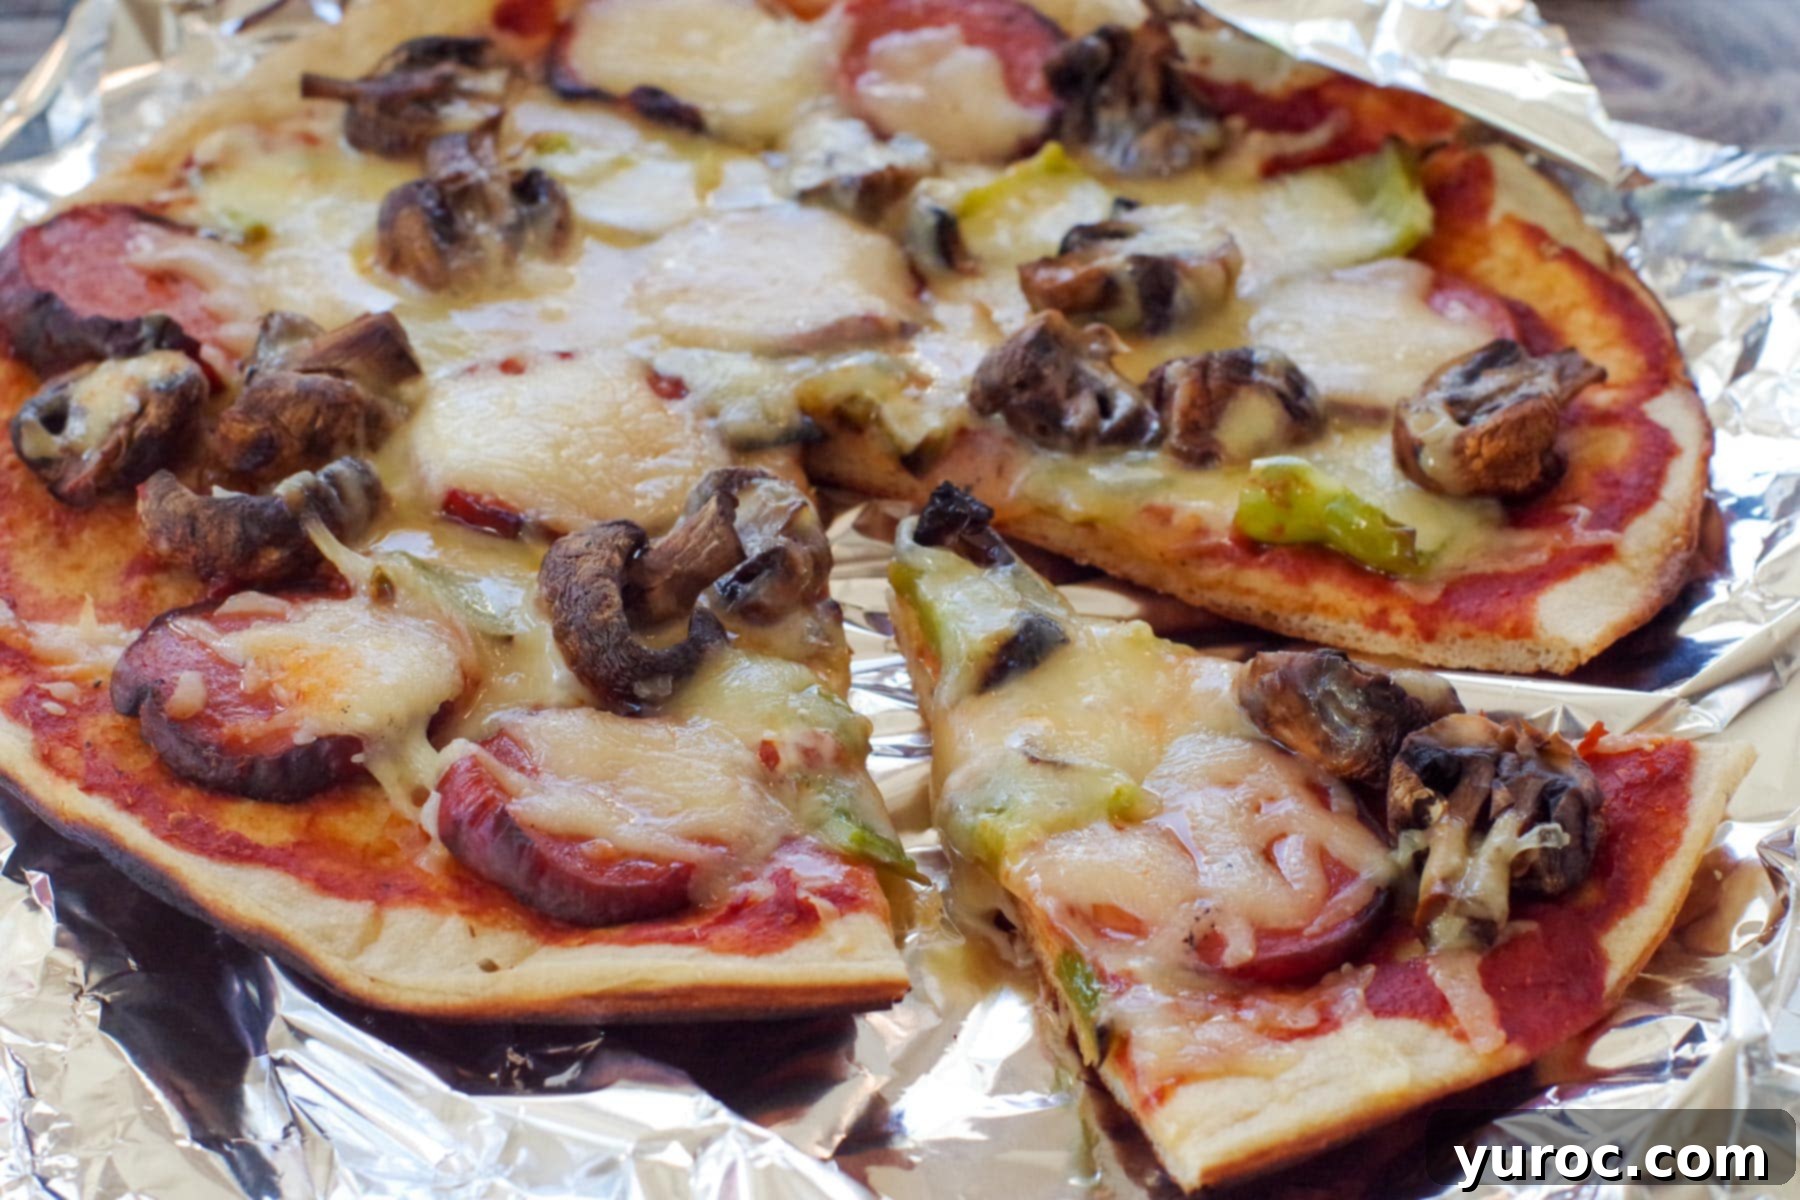
This beloved outdoor pizza recipe is a cherished family tradition from my childhood, proving that some of the best meals are made under the open sky. What makes it truly exceptional is its adaptability: you can prepare it with ease on a BBQ grill, in a sturdy cast iron frying pan over a camp stove, or directly on a roaring campfire. Even better, there’s no need to fuss with homemade dough – we keep it simple by using convenient, store-bought pizza crusts. If you’re searching for exciting and hassle-free camping dinner ideas, this grilled and campfire pizza is guaranteed to turn every adventurer into a happy camper, leaving them satisfied and smiling.
🍕 Ingredient Notes for Perfect Camping Pizza
Our unique camping pizza recipe elevates the experience by featuring specially grilled pizza toppings and the convenience of ready-made pizza crust. The genius lies in grilling your meat and vegetables on skewers *before* they even touch the pizza. This pre-grilling step infuses every bite with an irresistible smoky, barbecue flavor that’s simply unmatched by cooking toppings directly on the crust. It’s a brilliant technique perfect for camping, cookouts, or any backyard grilling adventure!
Essential Grilled Pizza Toppings & Base:
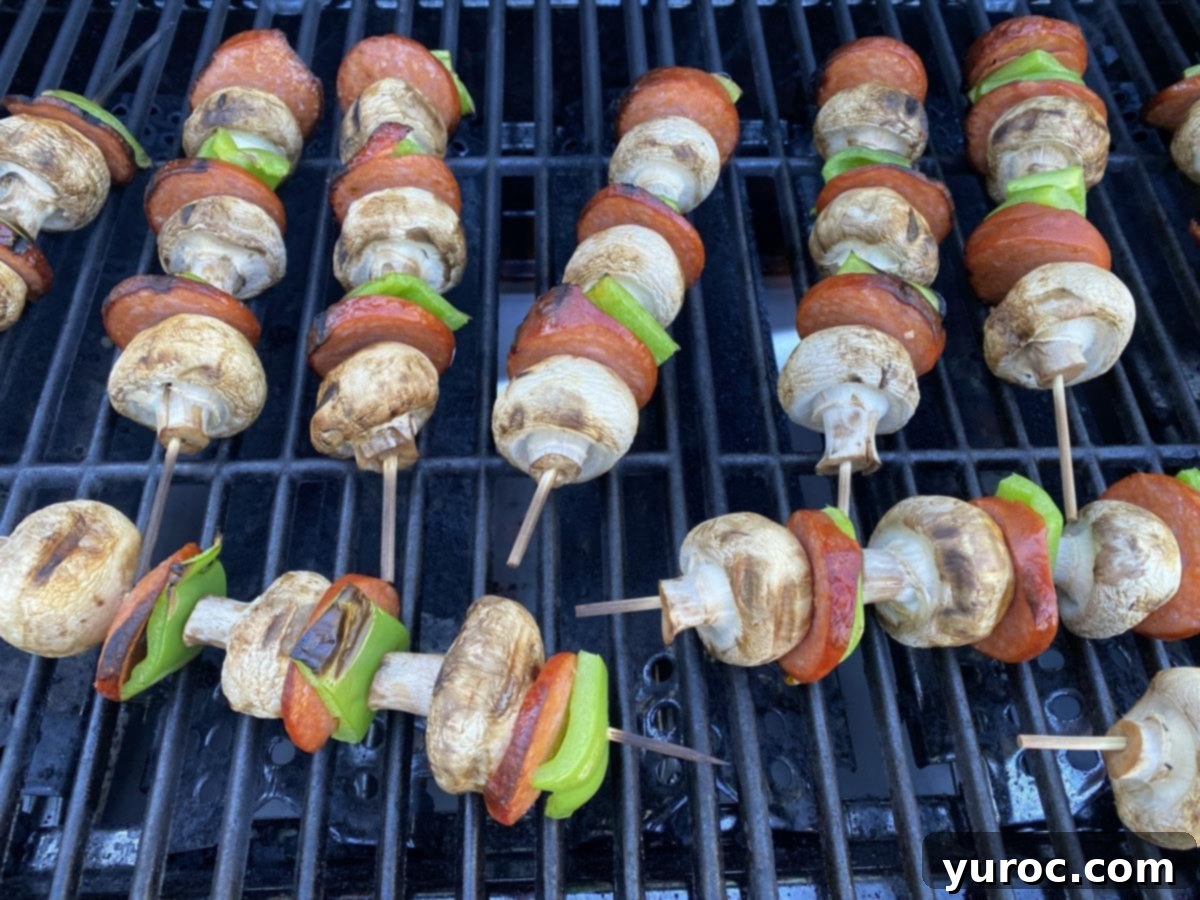
- Pepperoni Slices: For the best results and to prevent charring, we recommend cutting your pepperoni slices a bit thicker than you typically would for a traditional oven-baked pizza. This allows them to grill beautifully without burning.
- Bell Pepper: Green bell peppers add a wonderful freshness and slight crunch. Like the pepperoni, cut them into slightly thicker pieces for optimal grilling texture and to ensure they don’t overcook.
- Fresh White Button Mushrooms: These classic mushrooms are an excellent choice for grilling. They retain their shape and provide a satisfying, mild, earthy flavor and meaty texture when cooked over an open flame or grill.
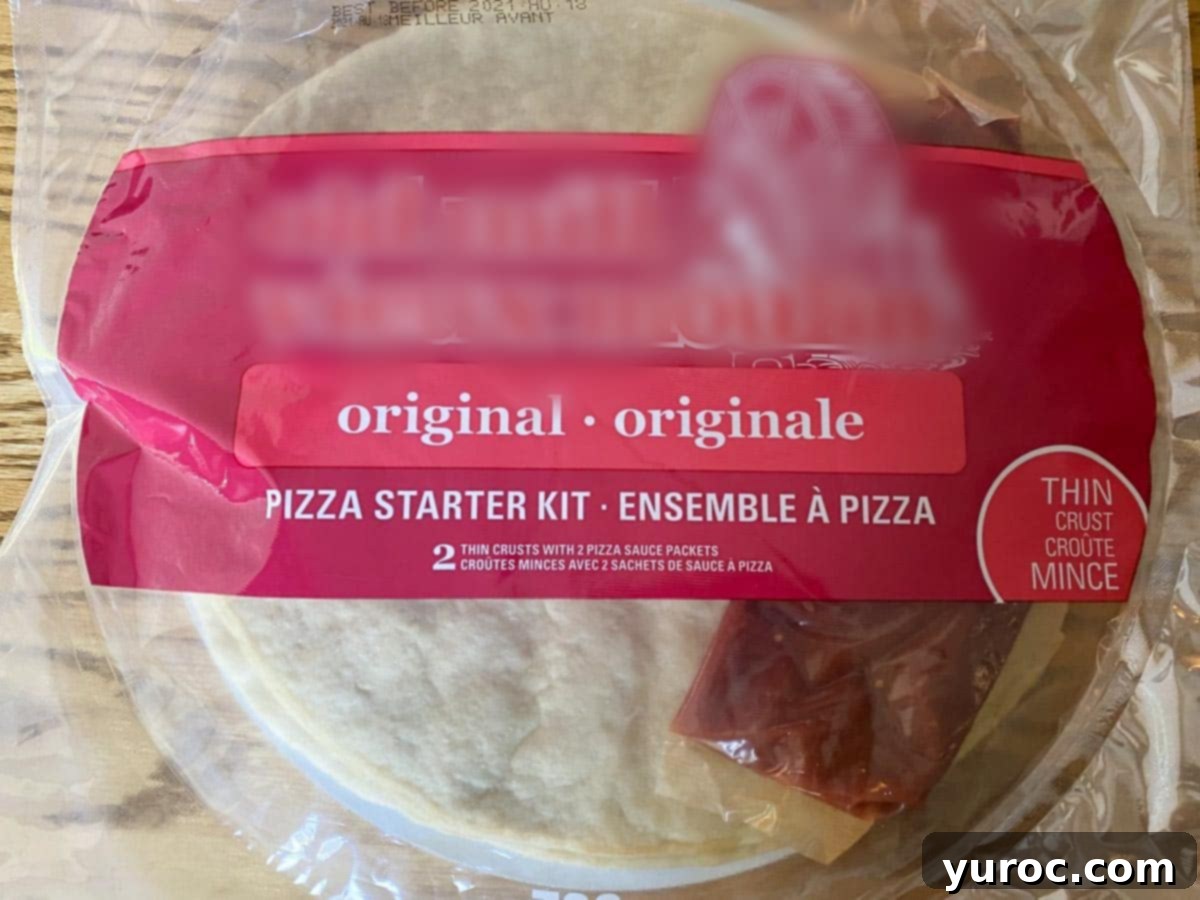
- Ready-Made / Store-Bought Pizza Crusts: The key to quick and easy outdoor pizza! Pre-made crusts are ideal for their convenience and consistent results, whether you’re using a grill or a cast iron pan over a fire.
- Pizza Sauce: Choose your favorite pizza sauce. For ultimate convenience on the go, a squeeze bottle variety (like Catelli) is highly recommended, minimizing mess and making application simple.
- Mozzarella Cheese: Generous amounts of shredded mozzarella are essential for that classic gooey, melted pizza perfection.
*For a complete list of ingredients and precise quantities, please refer to the detailed recipe card below.
📖 Creative Variations & Easy Substitutions
One of the joys of making pizza, especially outdoors, is the freedom to customize it! Don’t hesitate to experiment with different ingredients to match your family’s preferences or whatever fresh produce you have on hand. Here are some fantastic ideas to inspire your next camping pizza creation:
- Topping Adventures: Expand beyond the basics! Consider adding other favorite pizza ingredients to your skewers for grilling. Think vibrant red peppers, sweet cherry tomatoes, savory cubed ham, spicy sausage, or even pineapple chunks for a tropical twist. The rule of thumb: if it can be cooked on a skewer, it’s a potential grilled pizza topping!
- Crust Options: While store-bought pizza crusts are our go-to for convenience, you have other choices. Individual pita breads or smaller pizza shells work wonderfully for personal-sized pizzas, perfect for little hands or diverse tastes. You can also choose between thick or thin crusts. While I personally enjoy thin crust for its crispness, a thicker crust is highly recommended, especially when cooking over an unpredictable campfire, as it offers better heat resistance and is less prone to burning.
- Spice It Up: If you love a bit of heat, elevate your pizza’s flavor profile! Incorporate spicy jack cheese, thinly sliced jalapeños, or other hot peppers for an exciting kick that will awaken your taste buds.
- Sauce Personalization: Any pizza sauce you adore will work beautifully. Many ready-made pizza crust starter kits even come with their own sauce, which is a perfect, no-fuss option for camping.
🔪 Step-by-Step: Crafting Your Delicious Grilled Camping Pizza
Creating this incredible camping pizza is straightforward, and the process is divided into grilling the toppings and then assembling and finishing the pizza on either a BBQ grill or in a cast iron pan over a campfire.
Directions for Grilled Pizza Toppings (Applicable to both methods):
For both the grilled pizza and cast iron pizza approaches, perfectly cooked toppings are crucial. Begin by preheating your grill to a steady 350 degrees F (175 degrees C). Arrange your prepared skewers (with pepperoni, bell peppers, mushrooms, and any other desired additions) on a grilling rack. Cook them for 8-10 minutes with the grill lid closed, rotating occasionally to ensure even browning and to infuse them with that fantastic smoky flavor.
Grill Method: Quick & Easy BBQ Pizza
This method is fantastic for backyard cookouts or campsites equipped with a propane grill. It offers consistent heat and a crisp crust.
Step 1: Grill the Pizza Crust. Carefully place your store-bought pizza crust directly on the grill grates. Keep a very close eye on it, checking regularly, until it’s lightly browned and slightly crisp. If you’re using a thin crust, this can take as little as 2 minutes, so constant vigilance is key to prevent burning.
Step 2: Prepare the Sauce. If you have an additional burner available (e.g., on your camp stove), gently warm your pizza sauce in a small saucepan. Alternatively, and for maximum simplicity, you can directly spread the cold pizza sauce onto the grilled crust while it’s still on the grill.
Step 3: Add Toppings & Melt Cheese. Distribute your pre-grilled toppings evenly over the sauced crust, then sprinkle generously with mozzarella cheese. Turn off the grill completely, close the lid, and allow the residual heat to melt the cheese perfectly. This usually takes just a few minutes until the cheese is bubbling and golden.
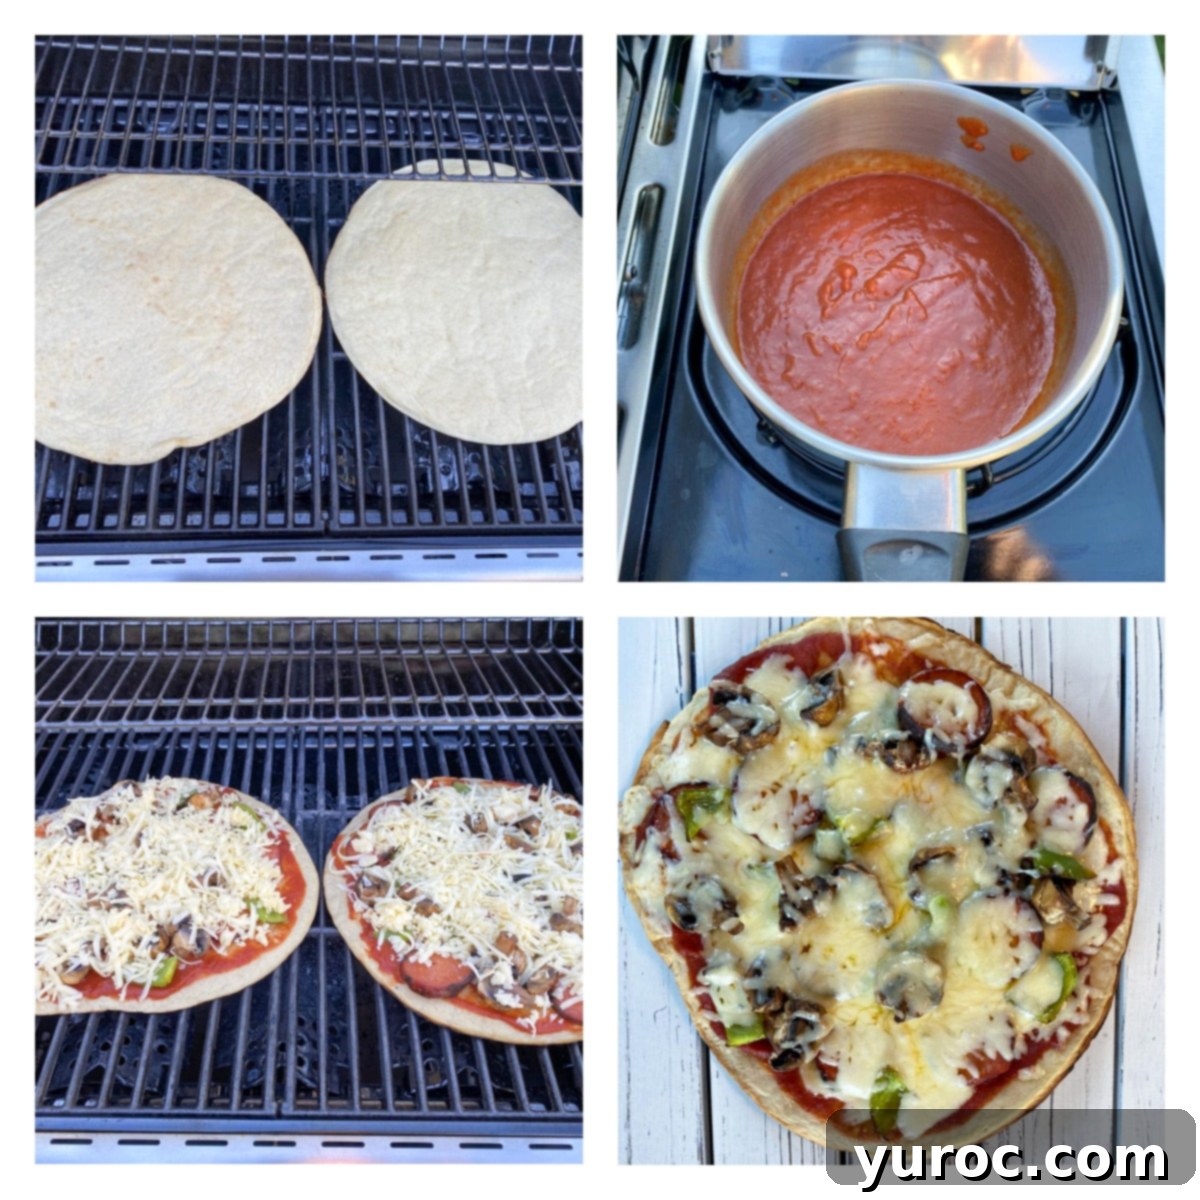
Step 4: Serve and Enjoy! Carefully remove the hot pizza from the grill, slice it into wedges, and savor your delicious outdoor creation immediately!
How to Create a Cast Iron Pizza Oven for Camping (Campfire Method)
If you’re embracing the true wilderness experience, a cast iron pan over an open fire or camp stove is an excellent way to make pizza. A cast iron frying pan (affiliate link) is essential for this method, providing excellent heat distribution and a rustic charm.
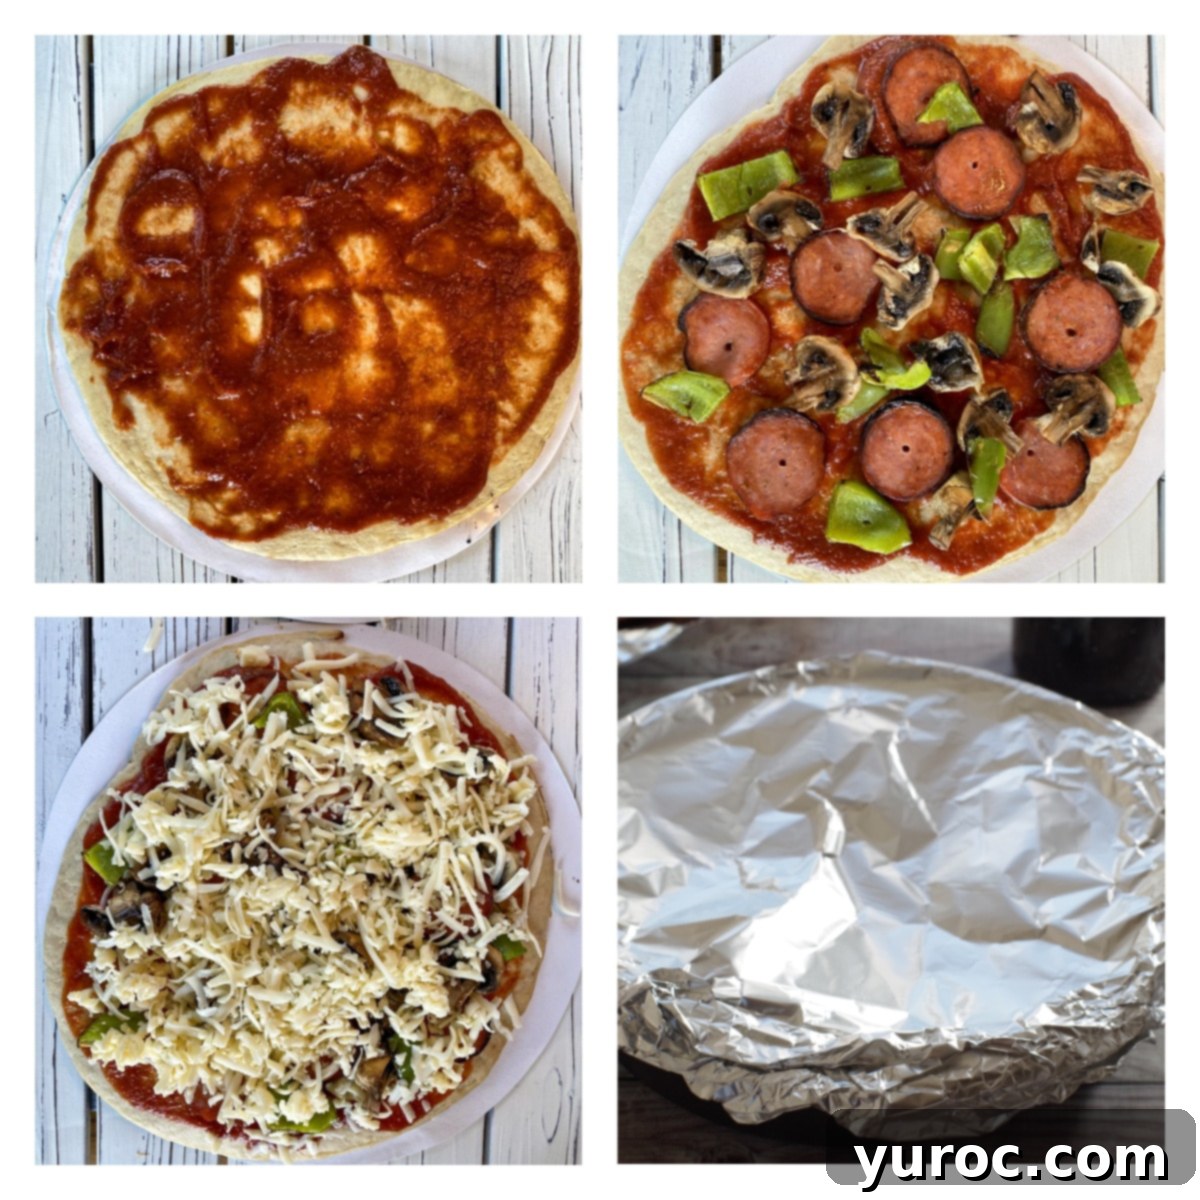
Step 1: Sauce the Crust. Spread your pizza sauce evenly over the store-bought pizza crust. You can do this either directly in the cast iron pan or outside of it and then carefully transfer the sauced crust into the pan.
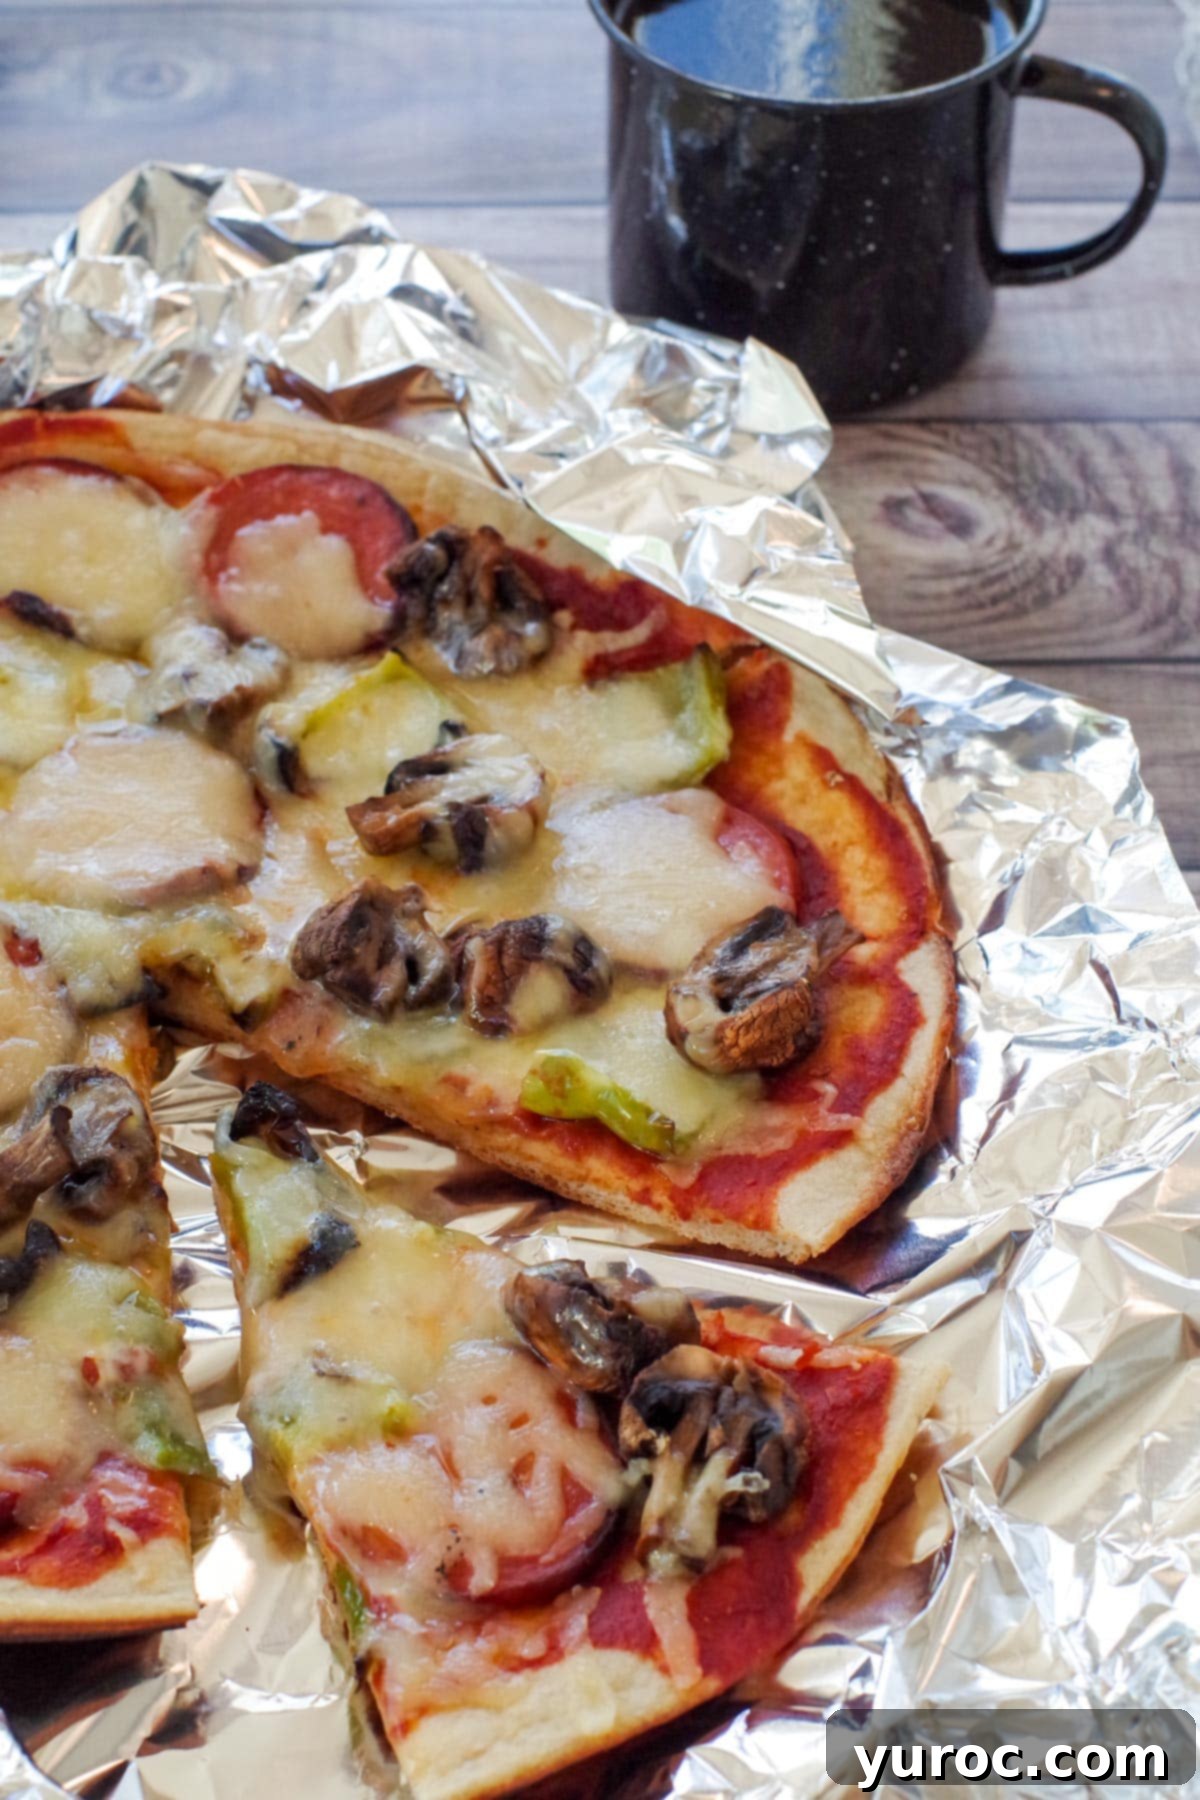
Step 2: Layer Toppings and Cheese. Arrange your beautifully grilled pizza toppings on top of the sauce, followed by a generous layer of mozzarella cheese.
Step 3: Cook to Perfection. To create a makeshift oven, tightly seal the cast iron pan with aluminum foil. Place the covered pan over your heat source (campfire coals or camp stove burner). Cook for approximately 3-5 minutes, or until the cheese is thoroughly melted and bubbly. It’s crucial to keep a very close eye on the pan, especially over open flames, to prevent the bottom of the pizza from burning. Rotate the pan frequently if cooking over an uneven fire.
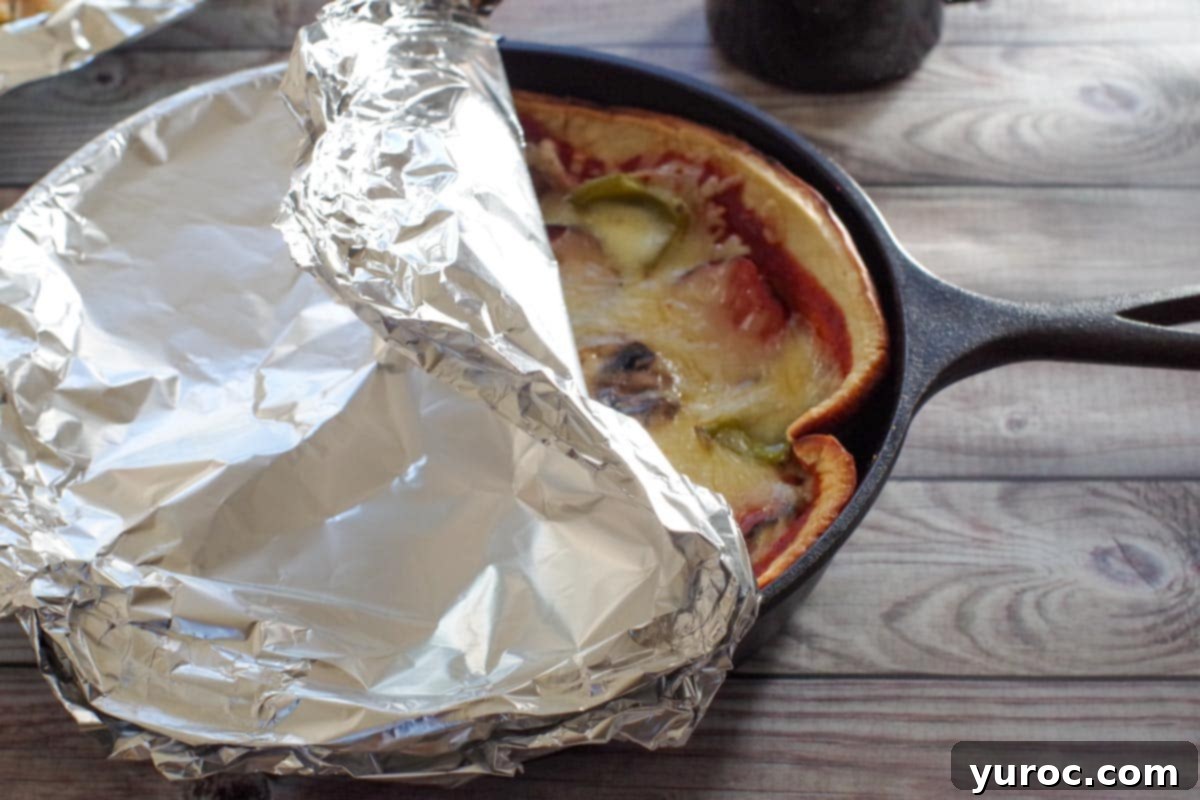
Step 4: Reveal Your Masterpiece. Carefully remove the aluminum foil cover to reveal your perfectly cooked, cheesy campfire pizza.
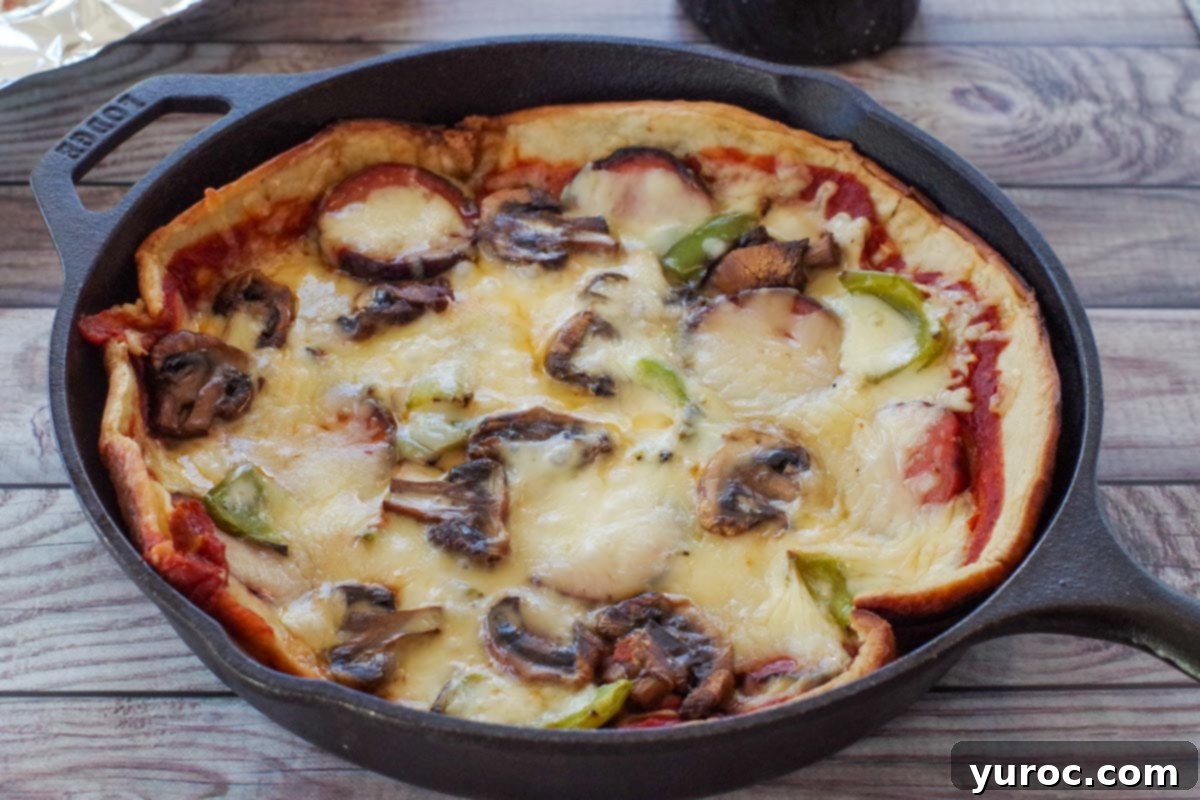
Step 5: Indulge! Slice and serve your rustic cast iron pizza. The smoky flavors and crispy crust will make this a memorable outdoor meal.
💡 Essential Top Tip for Grilling Success
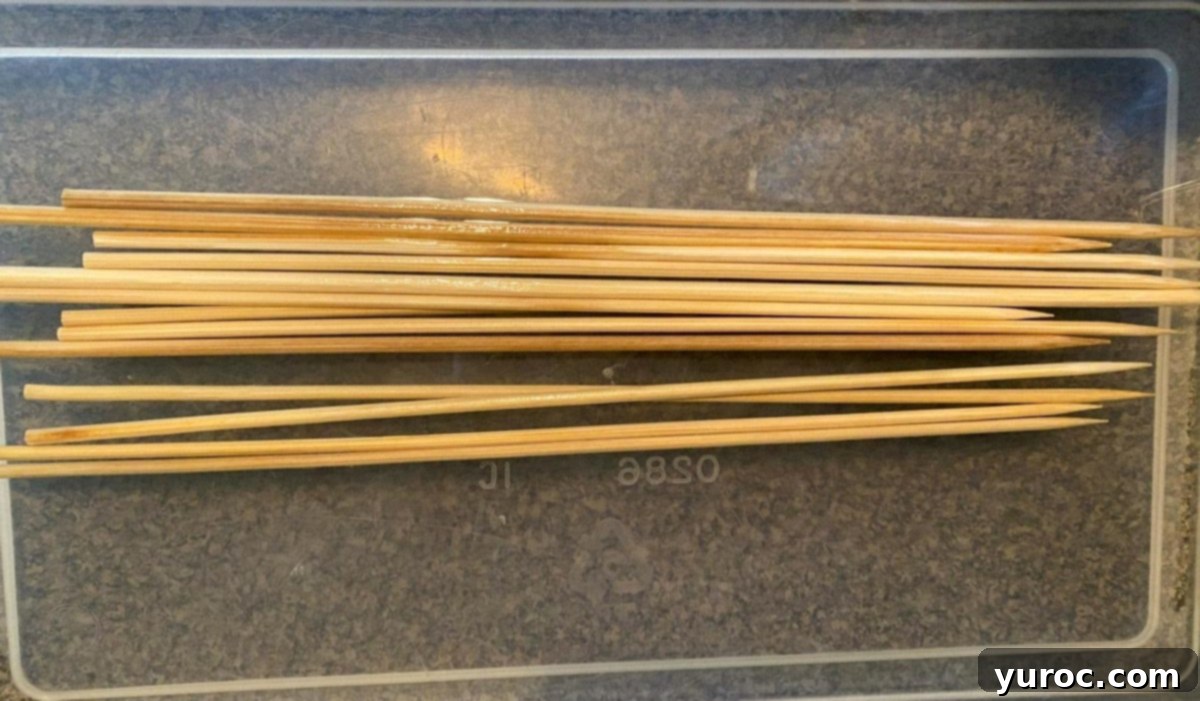
If you opt for wooden skewers for your grilled pizza toppings, a crucial step is to soak them in cold water for at least 10 minutes prior to placing them on the grill. This simple precaution saturates the wood, preventing the skewers from catching fire and charring while you’re cooking your delicious toppings. It ensures your focus remains on the food, not on runaway flames!
✅ Expert Recipe Tips for the Best Outdoor Pizza
Mastering outdoor pizza is easy with these insider tips:
- Always Soak Wooden Skewers: As mentioned, this is a non-negotiable step to prevent flare-ups and ensure your skewers don’t burn before your toppings are cooked.
- Grill Toppings Separately for Superior Flavor: The secret to this recipe’s amazing taste is grilling the toppings on skewers first. This method infuses them with a deep, smoky barbecue flavor that can’t be achieved by simply cooking everything on the pizza at once. It also ensures all toppings are cooked through perfectly.
- Opt for Thicker Crusts When Campfire Cooking: Thin crusts are prone to burning quickly and unevenly over the inconsistent heat of a campfire. A thicker crust offers more insulation, making it much more forgiving and easier to manage, resulting in a beautifully cooked base.
- Preheat Thoroughly for Best Results: Whether you’re using a gas grill, a charcoal grill, or a cast iron pan over a fire, ensure it’s properly preheated before you introduce the pizza crust. This quick initial heat prevents a soggy crust and promotes even, rapid cooking.
- Rotate Cast Iron Pans Over Fire: When using a cast iron pan directly over open flames, remember that campfires often have hot spots. Rotate your pan frequently to distribute heat evenly and prevent any single section of the pizza from burning.
- Avoid Overloading Your Pizza: While tempting, too many toppings can lead to a soggy pizza and make it difficult for the cheese to melt properly. Keep the toppings balanced and remember they are pre-cooked, so a lighter hand is often better.
- Aluminum Foil is Your Lid Substitute: If your cast iron pan doesn’t come with a lid, heavy-duty aluminum foil makes an excellent, tight seal. It traps heat efficiently, creating a mini-oven effect that helps melt the cheese perfectly and cook the pizza through.
- Warm Sauce Ahead (If Possible): If you have an extra burner, gently warming the pizza sauce before spreading it on the crust can help all the ingredients heat through more uniformly. If not, don’t worry, room-temperature sauce works just fine.
- Consider a Grill Mat or Pizza Stone: For more controlled heat and to minimize direct contact with intense flames, especially with thinner crusts, a heat-safe grill mat or a portable pizza stone can be a valuable addition to your camping gear.
👪 Generous Serving Size
This delightful campfire pizza recipe is designed to yield approximately 20 servings, making it perfect for feeding a hungry crowd on your outdoor adventures. However, you have complete flexibility to adjust the recipe to fit your needs! Simply click on the serving number in the recipe card below, and you can easily half, double, or even triple the recipe. The ingredient quantities will automatically adjust, taking the guesswork out of scaling.
🥗 What to Serve with This Camping Pizza Recipe
This hearty camping pizza can be a meal in itself, but it pairs wonderfully with simple, refreshing sides that are easy to prepare and transport for an outdoor setting:
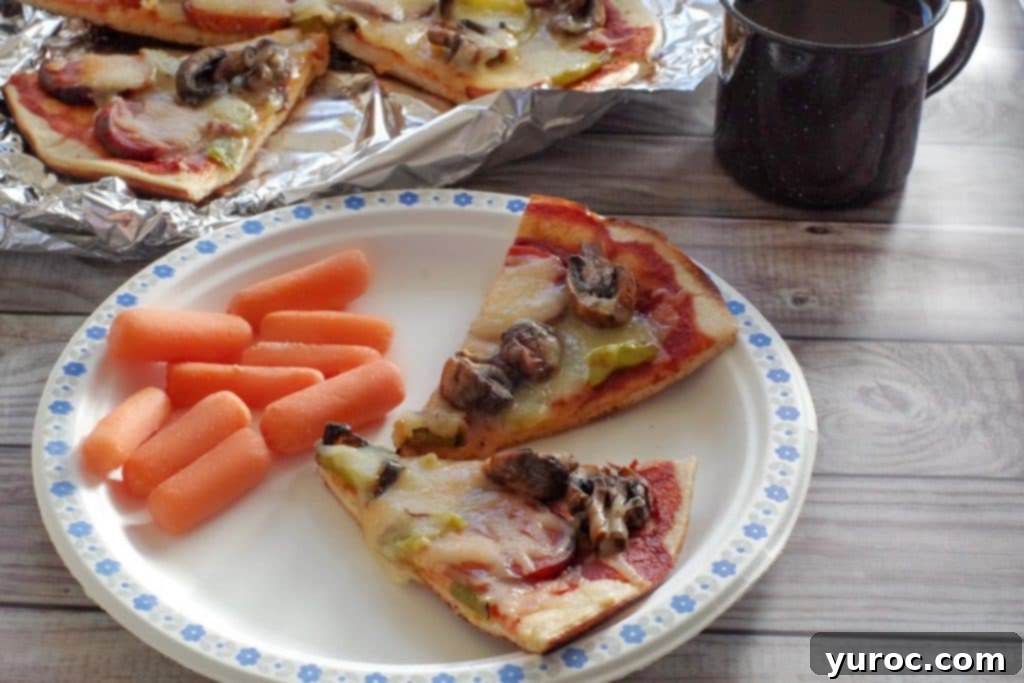
- Fresh Cut Vegetables: Think carrot sticks, cucumber slices, cherry tomatoes, or bell pepper strips. They add a crisp, healthy contrast to the warm pizza.
- Light Side Salad: A simple mixed green salad with a vinaigrette dressing, prepared ahead of time or tossed quickly at the campsite.
- Cucumber Kimchi: For an unexpected and zesty kick, a small serving of homemade cucumber kimchi offers a unique flavor profile that complements the savory pizza.
🌡️ Storage Solutions for Leftover Pizza
Should you be lucky enough to have any leftover camping pizza (a rare occurrence!), you can easily store it. Place any remaining slices in an airtight container and keep it in your fridge or a well-chilled cooler. It will stay fresh and delicious for up to 4 days, ready for a quick reheat the next day.
❔ Frequently Asked Questions About Camping Pizza
To avoid a burnt crust, utilize indirect heat whenever possible. On a grill, place the pizza on a cooler section away from direct flames. When cooking over a campfire, elevate the cast iron pan slightly or position it over glowing embers rather than direct fire. Using a thicker crust also provides better protection against direct heat and reduces the risk of burning, offering a more forgiving cooking experience.
Yes, it’s generally a good practice to lightly oil your grill grates before placing the pizza crust on them. This creates a non-stick surface, ensuring your crust doesn’t adhere to the grill and makes it much easier to flip or remove the pizza once cooked, especially with thinner crusts.
While technically possible, using uncooked dough is generally not recommended for grilling or campfire cooking. It’s significantly harder to achieve an evenly cooked crust without burning, given the less consistent heat sources outdoors. Store-bought, pre-baked crusts are more reliable, quicker to prepare, and deliver better results in outdoor cooking environments.
Reheating leftover camping pizza is simple! You can place it in a covered pan over medium-low heat on a camp stove or a cooler part of the grill. Alternatively, wrap individual slices securely in aluminum foil and warm them gently near the campfire coals for a few minutes until heated through and the cheese is soft again.
So, if you’re eagerly searching for unique and exciting camping food ideas or simple yet delicious grilling pizza recipes for your next outdoor escapade, look no further! This delightful camping pizza is sure to become a beloved staple that your entire family will adore, transforming into a cherished camping tradition for years to come. The blend of smoky grilled flavors and the fun of outdoor cooking creates an experience that’s truly special.
And as you gear up for your adventure, don’t forget to consult this helpful “What to Pack for Camping” article to ensure you haven’t overlooked any essential items for a smooth and enjoyable trip!
📋 More Delicious Camping & Outdoor Recipes
If you loved this camping pizza, explore these other fantastic recipes perfect for your outdoor adventures:
- Grilled Hamburger Foil Packets
- Vacation Meal Plan – Vacation Rental, Cottage & Camping
- Onion Soup Mix Baked Potatoes
- Tacos in a Bag
Did your family ❤️ this recipe? Did you know that commenting and ⭐ rating recipes is one of the best ways to support your favorite recipe creators? If you LOVED this recipe, please take a moment to comment and rate it in the recipe card below, or share your fantastic photos on social media using the hashtag #foodmeanderings or by tagging @foodmeanderings!

🍕 Camping Pizza Recipe
Print Recipe
Pin
Save Recipe
Save Recipe
Rate
dinner, lunch, Main Course
American, Canadian
20
servings
237
kcal
Terri Gilson
15 minutes
10 minutes
25 minutes
Prevent your screen from going dark
Add to Shopping List
Go to Shopping List
Ingredients
-
½
lb
pepperoni
(about a 250 g chub) -
½
lb
mushrooms
(approximately) -
1
green pepper -
2
(10-inch) ready-made pizza crusts
(*or store-bought pizza crusts, use any pizza sauce) -
½
cup
pizza sauce -
1
lb
Mozzarella cheese
Metric
Instructions
-
Slice the pepperoni and green peppers into thicker pieces, then wash the mushrooms. Carefully place all these toppings onto wooden skewers. (Remember to soak wooden skewers in cold water for 10 minutes beforehand to prevent burning – see Expert Tips!)
-
Preheat your grill to a consistent 350 degrees F (175 degrees C). If using a campfire, establish a bed of hot embers.
-
Grill the Pizza Toppings: For both the grilled pizza and cast iron pizza methods, grilling the toppings separately is key for flavor. Place the skewers directly on the grilling rack. Cook for 8-10 minutes with the BBQ lid down, turning the skewers periodically to ensure all sides are beautifully browned and infused with smoky flavor.
Grill Method:
-
Step 1: Place the store-bought pizza crust directly on the preheated grill. Grill until lightly browned and slightly crisp, checking frequently. Thin crusts will cook very quickly, often in about 2 minutes, so watch closely to prevent burning.
-
Step 2: Warm the pizza sauce in a saucepan on an auxiliary burner if available. If not, simply spread the sauce directly onto the grilled pizza crust while it’s still on the grill.
-
At this stage, you can add any additional toppings that don’t require cooking, such as sliced olives or raw hot peppers, as they only need to warm through.
-
Step 3: Arrange the grilled toppings and then sprinkle liberally with mozzarella cheese. Immediately turn off the grill and close the lid, allowing the residual heat to perfectly melt the cheese until it’s bubbly and gooey.
Cast Iron Method:
-
First, chop, skewer, and grill your toppings as described in the general topping instructions above, ensuring they have that delicious smoky flavor.
-
Step 1: Carefully place your store-bought pizza crust into the cast iron pan. Spread the pizza sauce evenly over the crust. (This can be done in or out of the pan before placing it in.)
-
Step 2: Arrange the pre-grilled pizza toppings on top of the sauce, then generously sprinkle with mozzarella cheese.
-
Step 3: Create a lid by tightly sealing the cast iron pan with aluminum foil. Place the pan over your heat source (campfire coals or camp stove) for approximately 3-5 minutes, or until the cheese has melted and is bubbly. Keep a very close eye on it and rotate frequently, as open flames can cause quick burning.
-
Remove the foil cover, slice, and serve warm with simple sides like baby carrots, sliced cucumbers, or a fresh salad. Enjoy your authentic campfire pizza experience!
Notes
Soak Wooden Skewers Before Grilling: Always soak wooden skewers in cold water for at least 10 minutes before placing them on the grill. This crucial step prevents them from charring or catching fire while your delicious toppings cook, ensuring safety and even grilling.
Grill Toppings Separately for Enhanced Flavor: The secret to this camping pizza’s exceptional taste is grilling the meat and vegetables on skewers before assembling the pizza. This process imparts a distinct smoky, barbecue flavor that cannot be achieved by cooking all ingredients directly on the crust, elevating your outdoor meal.
Use Thicker Crusts for Campfire Cooking: When cooking over an open campfire with its often unpredictable heat, opt for thicker pizza crusts. Thin crusts can burn quickly, whereas thicker crusts provide better insulation and more forgiving results, making them ideal for less controlled cooking environments.
Properly Preheat Your Grill or Camp Stove: Ensure your grill or cast iron pan is thoroughly preheated before adding the pizza. Adequate preheating is vital to prevent a soggy crust and guarantees quick, even cooking, leading to a perfectly crisp base.
Rotate Cast Iron Pans Frequently Over Fire: If you’re using a cast iron pan over open flames, remember that heat distribution can be uneven. Rotate the pan regularly to prevent localized hot spots and ensure the bottom of your pizza doesn’t burn, promoting even cooking throughout.
Avoid Overloading the Toppings: While tempting to pile on the ingredients, too many toppings can lead to a soggy pizza and hinder the cheese from melting properly. Keep your toppings balanced and remember they are pre-cooked, so a moderate amount works best for optimal results.
Utilize Foil as a Makeshift Lid: If your cast iron pan lacks a lid, a tightly sealed piece of heavy-duty aluminum foil makes an excellent substitute. It effectively traps heat, creating a mini-oven effect that is essential for melting the cheese evenly and cooking the pizza to perfection.
Warm the Sauce in Advance (If Possible): If you have access to an extra burner, warming the pizza sauce slightly before spreading it onto the crust helps all the ingredients heat through more consistently. This step contributes to an overall warmer, more cohesive pizza, especially when a second heat source isn’t available for the main cooking.
Consider Bringing a Grill Mat or Pizza Stone: For enhanced heat regulation and to minimize direct exposure to intense flames, especially with thinner crusts, a heat-safe grill mat or a portable pizza stone can be a valuable addition to your camping kitchen setup.
Nutrition
Serving:
1
slice
|
Calories:
237
kcal
(12%)
|
Carbohydrates:
21
g
(7%)
|
Protein:
12
g
(24%)
|
Fat:
12
g
(18%)
|
Saturated Fat:
6
g
(38%)
|
Polyunsaturated Fat:
1
g
|
Monounsaturated Fat:
3
g
|
Trans Fat:
1
g
|
Cholesterol:
30
mg
(10%)
|
Sodium:
585
mg
(25%)
|
Potassium:
116
mg
(3%)
|
Fiber:
1
g
(4%)
|
Sugar:
1
g
(1%)
|
Vitamin A:
202
IU
(4%)
|
Vitamin C:
6
mg
(7%)
|
Calcium:
155
mg
(16%)
|
Iron:
1
mg
(6%)
Did you make this recipe?
Please leave a star rating and review below!
