Saskatoon Berry Layer Cake: A Taste of Canadian Summer Perfection
This Saskatoon Berry Cake is an exquisite layer cake that beautifully captures the essence of summer with every delightful forkful! Featuring a luscious Saskatoon berry filling nestled between tender cake layers, infused with even more vibrant Saskatoon berries in the batter, and elegantly crowned with a light, creamy whipped cream frosting, this dessert promises to be an unforgettable experience that will leave everyone craving another slice.
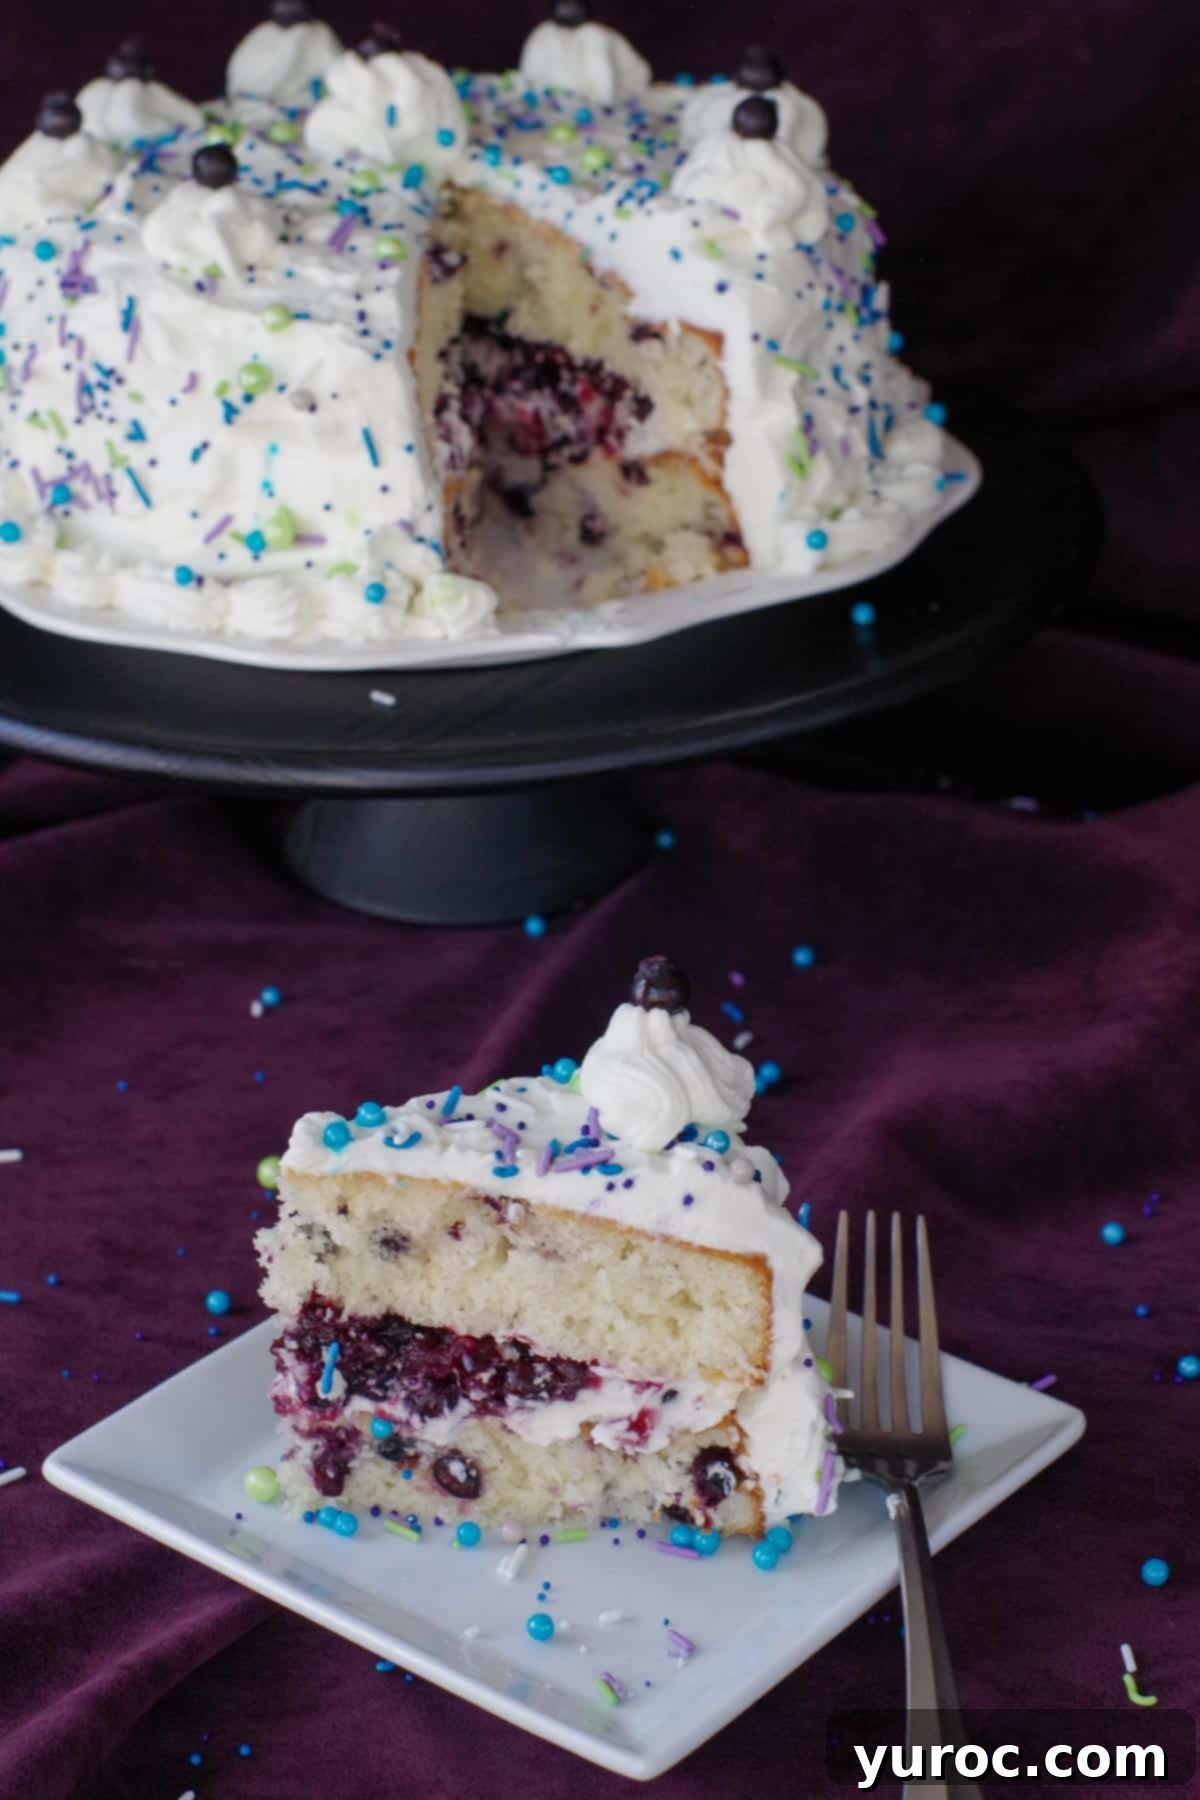
Saskatoon berries, often described as a cross between a blueberry and an almond, boast a unique, slightly nutty, and sweet-tart flavor that truly shines in this cake. This delightful Saskatoon berry cake typically gains immense popularity during the short, precious Saskatoon berry season, which usually spans just a few weeks in mid-July to early August, depending on your geographic location. This makes it an ideal dessert for celebrating birthdays, summer gatherings, casual BBQs, and any special occasion that calls for a truly unique and refreshing treat. Our recipe for this Saskatoon cake was lovingly inspired by a deep appreciation for these distinctive berries and our highly acclaimed Saskatoon berry pie and versatile filling.
If you’re a devoted fan of Saskatoon berries, or simply eager to explore more ways to enjoy their delightful flavor, we highly recommend trying some of our other cherished Saskatoon berry recipes. These include fluffy Saskatoon Berry Pancakes, delightfully chewy Saskatoon Berry Oatmeal Cookies, a comforting Saskatoon Berry Loaf, individual Saskatoon Berry Cheesecakes in a Jar, elegant Saskatoon Berry Dessert Shooters, unique Saskatoon Berry Dessert Perogies, and a creamy, easy-to-make No-Churn Saskatoon Berry Ice Cream (as pictured). For a wholesome breakfast or snack, don’t miss our recipe for the Best Dairy-Free Saskatoon Berry Muffins! Each recipe showcases the versatility and incredible flavor of these beloved berries.
🥘 Essential Ingredients for Your Saskatoon Berry Cake
Crafting this irresistible Saskatoon berry layer cake requires a thoughtful selection of fresh, high-quality ingredients. Here’s a detailed look at what you’ll need to create this summer-inspired masterpiece:
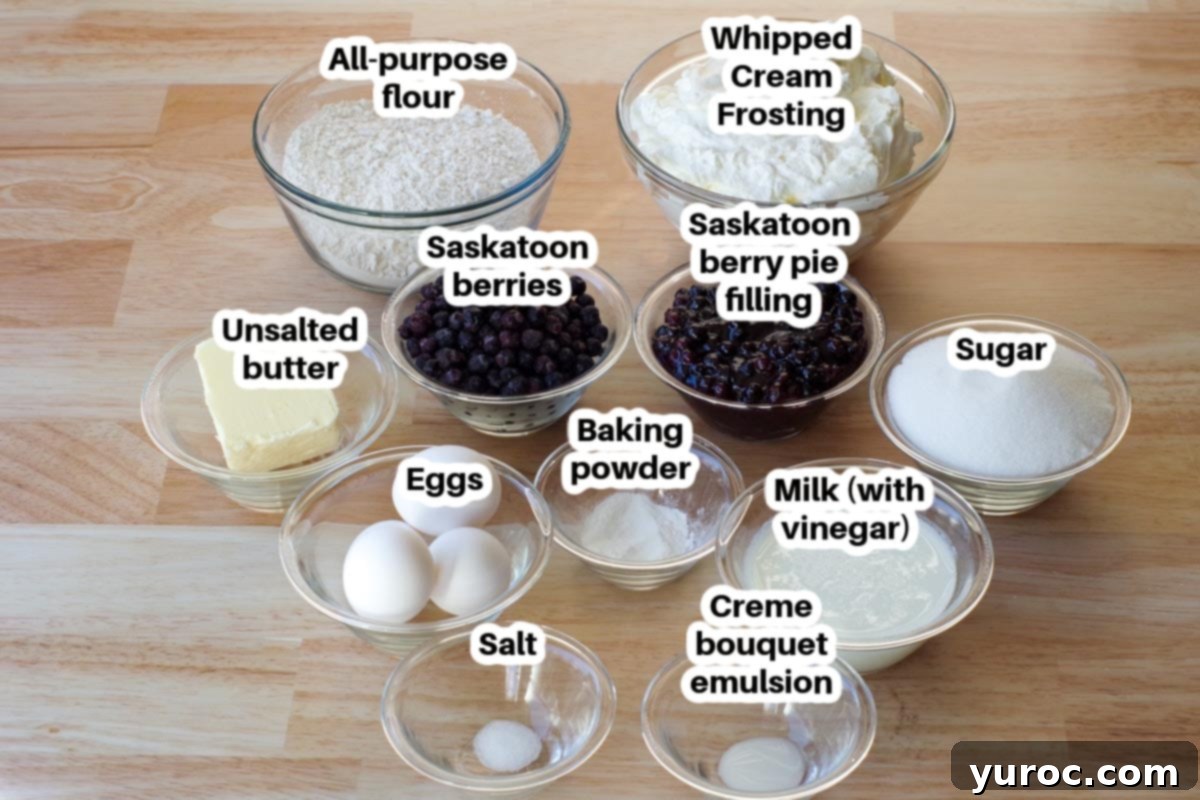
- Unsalted Butter: We opt for unsalted butter in our baking to maintain precise control over the overall salt content of the cake. The amount of salt in salted butter can vary significantly between brands, and controlling it allows for a perfectly balanced flavor profile. Ensure your butter is softened to room temperature for optimal creaming with sugar.
- Eggs (at Room Temperature): For the best results in your cake batter, it is crucial to use eggs that are at room temperature. Room temperature eggs emulsify more effectively with the butter and sugar, creating a smoother, more uniform batter. This also contributes to a lighter, airier cake texture and helps the cake rise more evenly during baking.
- ‘Light Buttermilk (Homemade)’: If you don’t have buttermilk on hand, or prefer a lighter version, you can easily create a substitute. Simply mix 1 cup of regular milk (we typically use 1% for this recipe) with 1 tablespoon of white vinegar. Let it sit for about 5-10 minutes until it slightly curdles. This homemade version mimics the acidity of traditional buttermilk, which reacts with the baking powder to create a tender, moist cake without adding extra calories or the need to purchase a specialty ingredient.
- Creme Bouquet or Vanilla Butter or Princess Cake and Cookies Emulsion: (Affiliate link) If you’re new to the world of baking emulsions, we highly recommend trying them! Emulsions offer a richer, more concentrated flavor compared to traditional extracts, especially because their flavor isn’t “baked out” as easily during the cooking process. “Princess Cake and Cookie Emulsion” is another fantastic option, known for enhancing sugar cookies and frostings beautifully, as is Vanilla Butter. These specialized emulsions are typically not found in regular grocery stores but can be conveniently ordered online or purchased from hobby stores, craft stores, or dedicated cake decorating supply shops. They truly elevate the overall flavor of your baked goods.
- Saskatoon Berries: The star of our cake! You can use either fresh Saskatoon berries, picked during their peak season, or frozen berries. If using frozen, ensure they are fully defrosted and gently patted dry to remove excess moisture before incorporating them into the batter. This prevents the cake from becoming watery and helps the berries distribute evenly.
- Saskatoon Berry Filling: Our homemade Saskatoon berry pie filling and sauce recipe is specifically designed to work perfectly as the decadent filling between the cake layers. Its balance of sweetness and tartness complements the cake beautifully. Making it from scratch allows for the best flavor and texture.
- Stabilized Whipped Cream Frosting: We specifically pair this recipe with our stabilized whipped cream frosting. This choice provides a lighter, airier frosting option that elegantly balances the richness of the cake and its berry filling, ensuring the cake isn’t overly heavy. The stabilization helps it hold its shape and prevents it from weeping, even when sitting out for a short period.
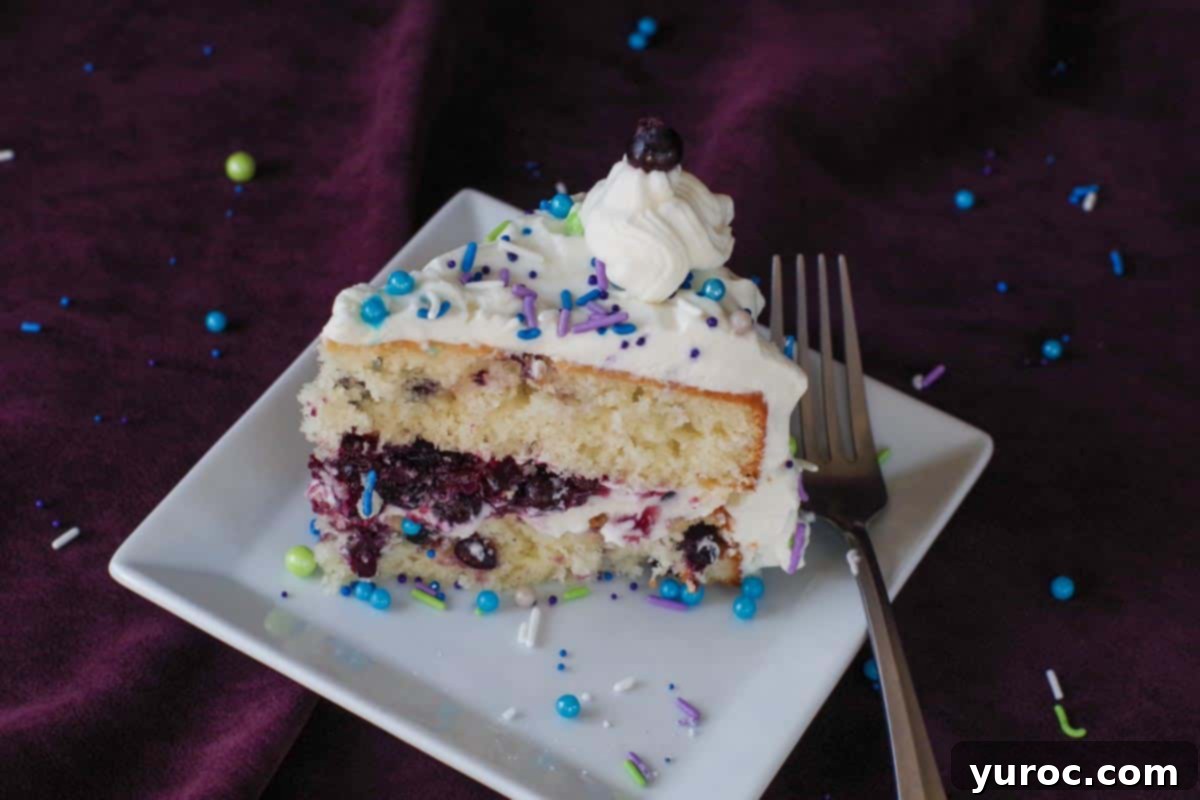
- Sprinkles: For a festive and visually appealing finish, we used blue and purple sprinkles, purchased from a bulk store. However, feel free to use any color or mixture of sprinkles that you prefer to add a personal touch to your beautiful Saskatoon berry cake.
*Please refer to the detailed recipe card below for the full list of ingredients and precise quantities.
📖 Variations & Smart Substitutions to Customize Your Cake
While this Saskatoon Berry Cake recipe is perfect as is, we understand that sometimes you might need to make adjustments based on ingredient availability or personal preference. Here are some excellent variations and substitutions you can consider:
- Saskatoon Berry Pie Filling: If you’re short on time or prefer a convenient option, you can definitely use canned Saskatoon Berry pie filling (affiliate link) instead of making our homemade version. You will need to use the entire 19 oz (540 ml) can of pie filling for this recipe. Canned Saskatoon berry filling is often available at Co-op stores in Western Canada or can be purchased online. Alternatively, if Saskatoon berries are hard to find, this recipe works beautifully with fresh or canned blueberry pie filling, offering a similar delightful fruit flavor.
- Creme Bouquet Emulsion: For a delightful aromatic twist, we love using Creme Bouquet, Princess Cake and Cookies emulsion, or Vanilla Butter emulsion. These provide a deep, complex flavor that stands up well to baking. However, if emulsions are not accessible to you, a perfectly good substitute is 2 teaspoons of high-quality vanilla extract. While the flavor profile will be slightly different, it will still yield a delicious cake.
- Frosting: The stabilized whipped cream frosting provides a light and airy counterpoint to the rich cake. However, you have many options for frosting this cake! You could try our rich 2-ingredient White Chocolate Frosting, or our creamy Whipped Cream Buttercream Frosting. Of course, you can always use your own favorite homemade frosting recipe, or even a good quality store-bought frosting for convenience. Just ensure your chosen frosting complements the berry flavor.
- Sugar: For a slightly deeper, more caramel-like flavor, you can substitute half of the white granulated sugar with packed light brown sugar. This can add an extra layer of warmth to the cake, complementing the natural sweetness of the Saskatoon berries.
🔪 Step-by-Step Guide: How to Bake the Perfect Saskatoon Berry Cake
Follow these detailed instructions to create a beautiful and delicious Saskatoon Berry Layer Cake:
Prep Work (Crucial for a Smooth Baking Process):
- Preheat your oven: Set your oven to 350 degrees F (176 degrees C). Ensure your oven rack is positioned in the very center of the oven for even heat distribution, which is key to perfectly baked cake layers.
- Prepare the Saskatoon berry filling: You’ll need to make our Saskatoon berry filling. Note that you will only require HALF of the recipe for this cake. You have two options: make the full recipe and freeze the remaining half for future use, or simply halve the recipe from the start. This step can be done well in advance – the filling can be refrigerated for several days or frozen for up to 3 months.
- Prepare the whipped cream frosting: Our Stabilized Whipped Cream Frosting can also be prepared a day or two ahead of time and stored in the refrigerator. This advance preparation helps streamline the assembly process on baking day.
- Prepare the “buttermilk”: Add 1 tablespoon of white vinegar to 1 cup of milk and gently stir. Set this mixture aside for 5-10 minutes. The milk will begin to curdle slightly, forming a homemade buttermilk substitute that will add tenderness and moisture to your cake.
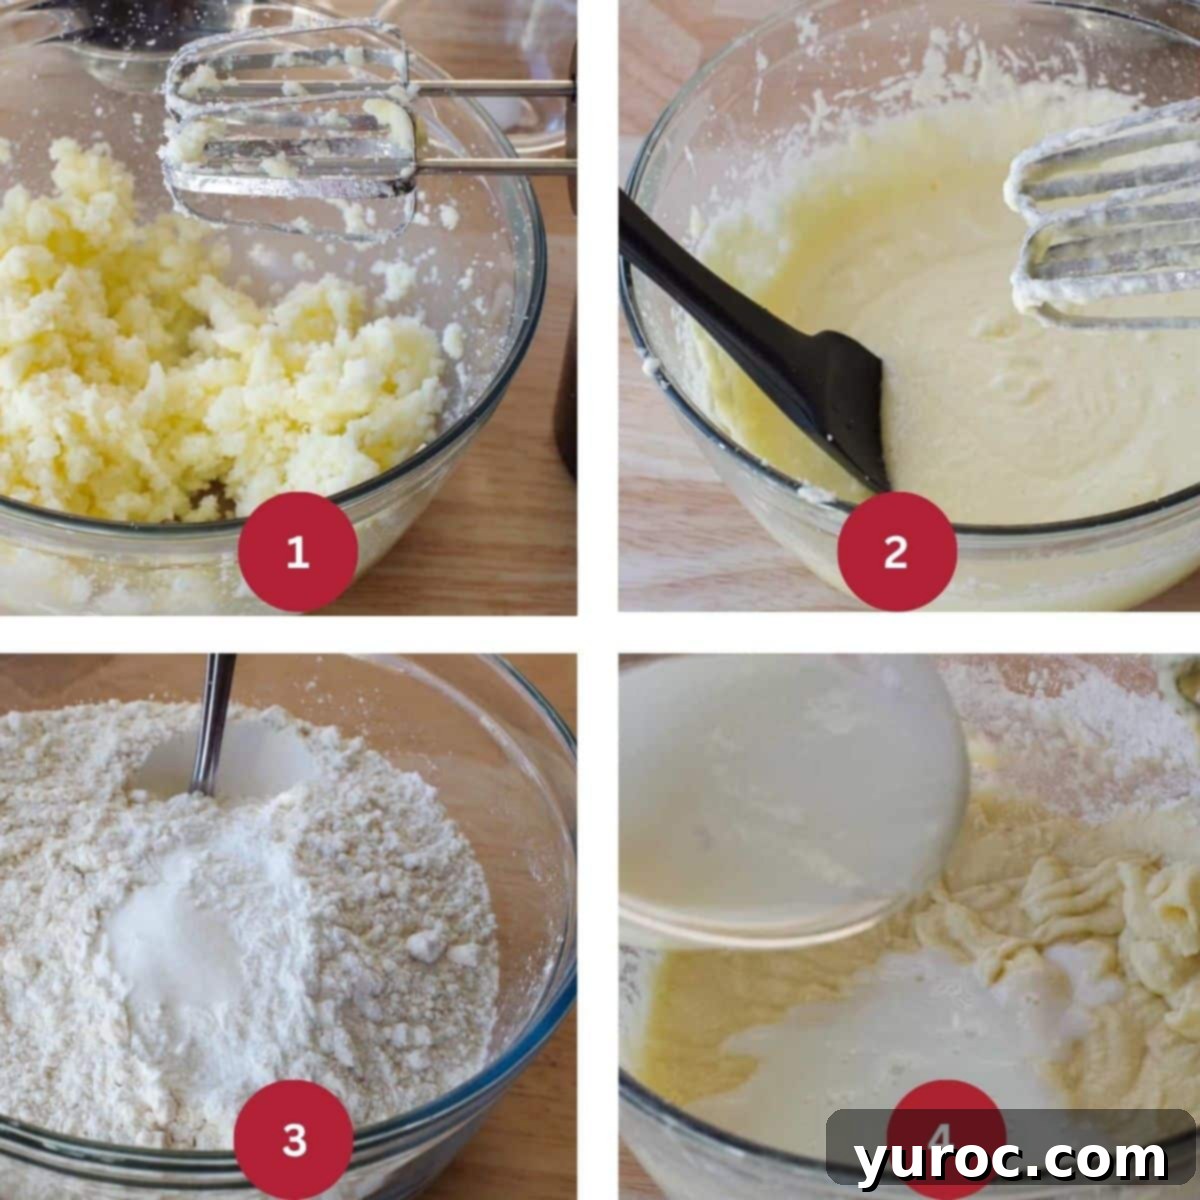
MAKE THE CAKE BATTER (STEP 1 – Wet and Dry Ingredients): In a large mixing bowl, using an electric mixer, cream together the softened unsalted butter and granulated sugar. Beat on medium-high speed for approximately 3 minutes until the mixture is light in color and fluffy in texture, incorporating plenty of air (IMAGE 1). Next, add the eggs one at a time, beating thoroughly after each addition until fully incorporated. In a separate bowl or measuring cup, mix the Creme bouquet (or your chosen emulsion or vanilla extract) into the prepared milk/vinegar mixture (IMAGE 2). In yet another separate bowl, whisk together all the dry ingredients: 2 ¾ cups all-purpose flour, baking powder, and salt (IMAGE 3). Gradually combine the flour mixture with the butter/sugar/egg mixture in two parts, alternating with additions of the milk mixture. Begin and end with the flour mixture, beating well on low speed after each addition until just combined. This method helps prevent overmixing and ensures a tender cake crumb (IMAGE 4).
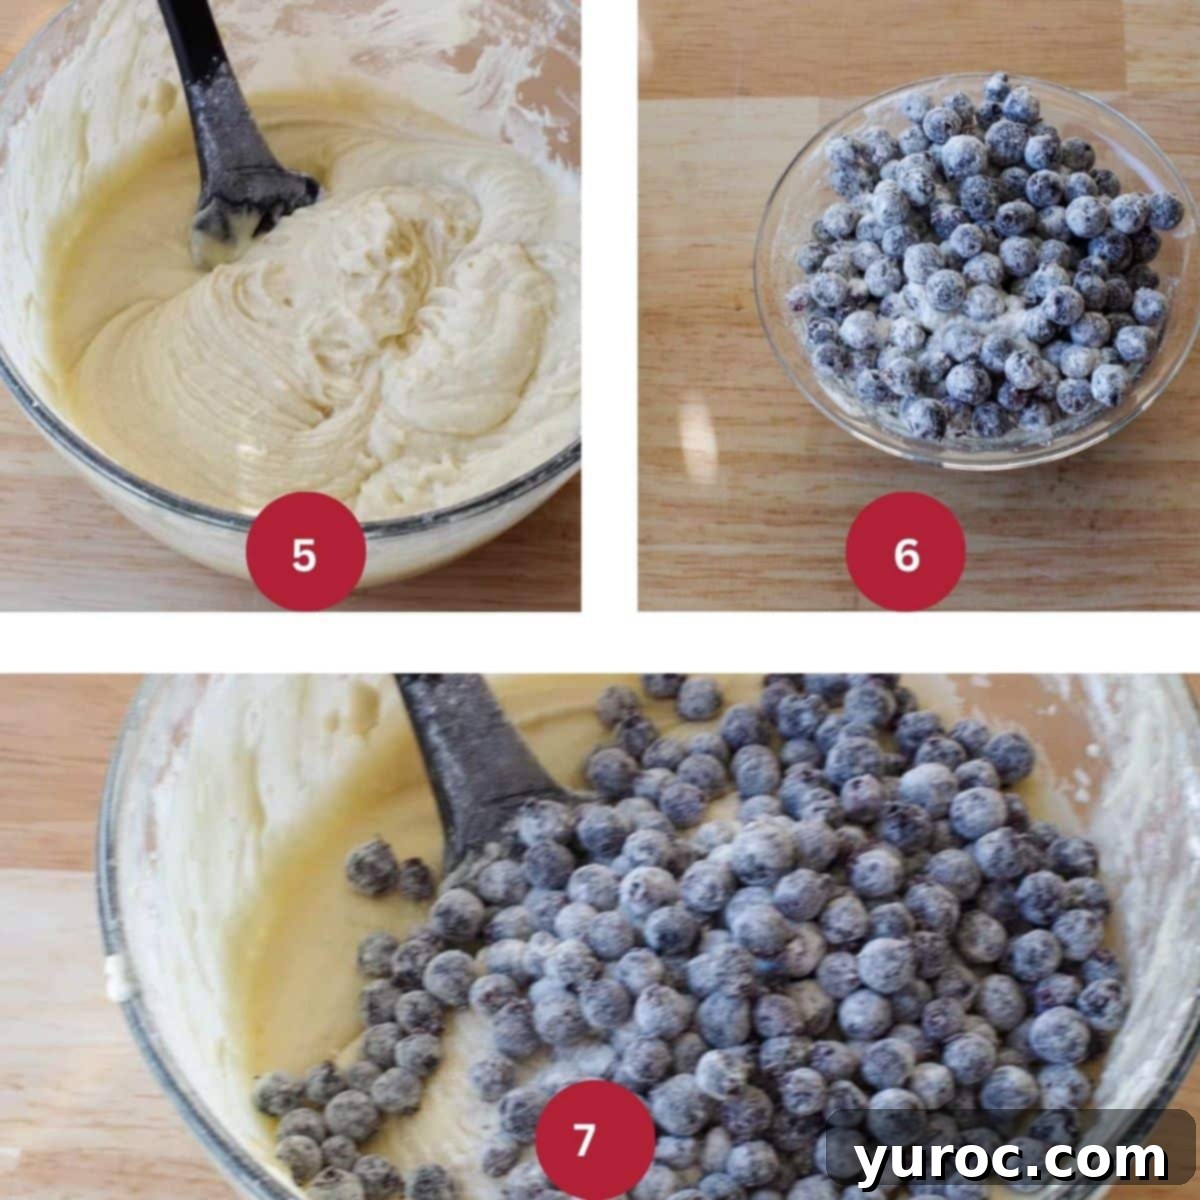
MAKE THE CAKE BATTER (STEP 2 – Incorporating Berries): Continue mixing the batter with an electric mixer on low speed just until all ingredients are thoroughly combined and smooth, being careful not to overmix (IMAGE 5). In a small bowl, gently toss the Saskatoon berries with 1 tablespoon of the remaining flour. This light coating helps to prevent the berries from sinking to the bottom of the cake pans during baking, ensuring they are evenly distributed throughout the layers (IMAGE 6). Carefully fold the floured Saskatoon berries into the prepared cake batter using a spatula. Mix just until they are evenly dispersed. Be very gentle and avoid over-stirring, as excessive agitation can cause the berry juices to bleed into the batter, potentially turning your beautiful cake purple (IMAGE 7).
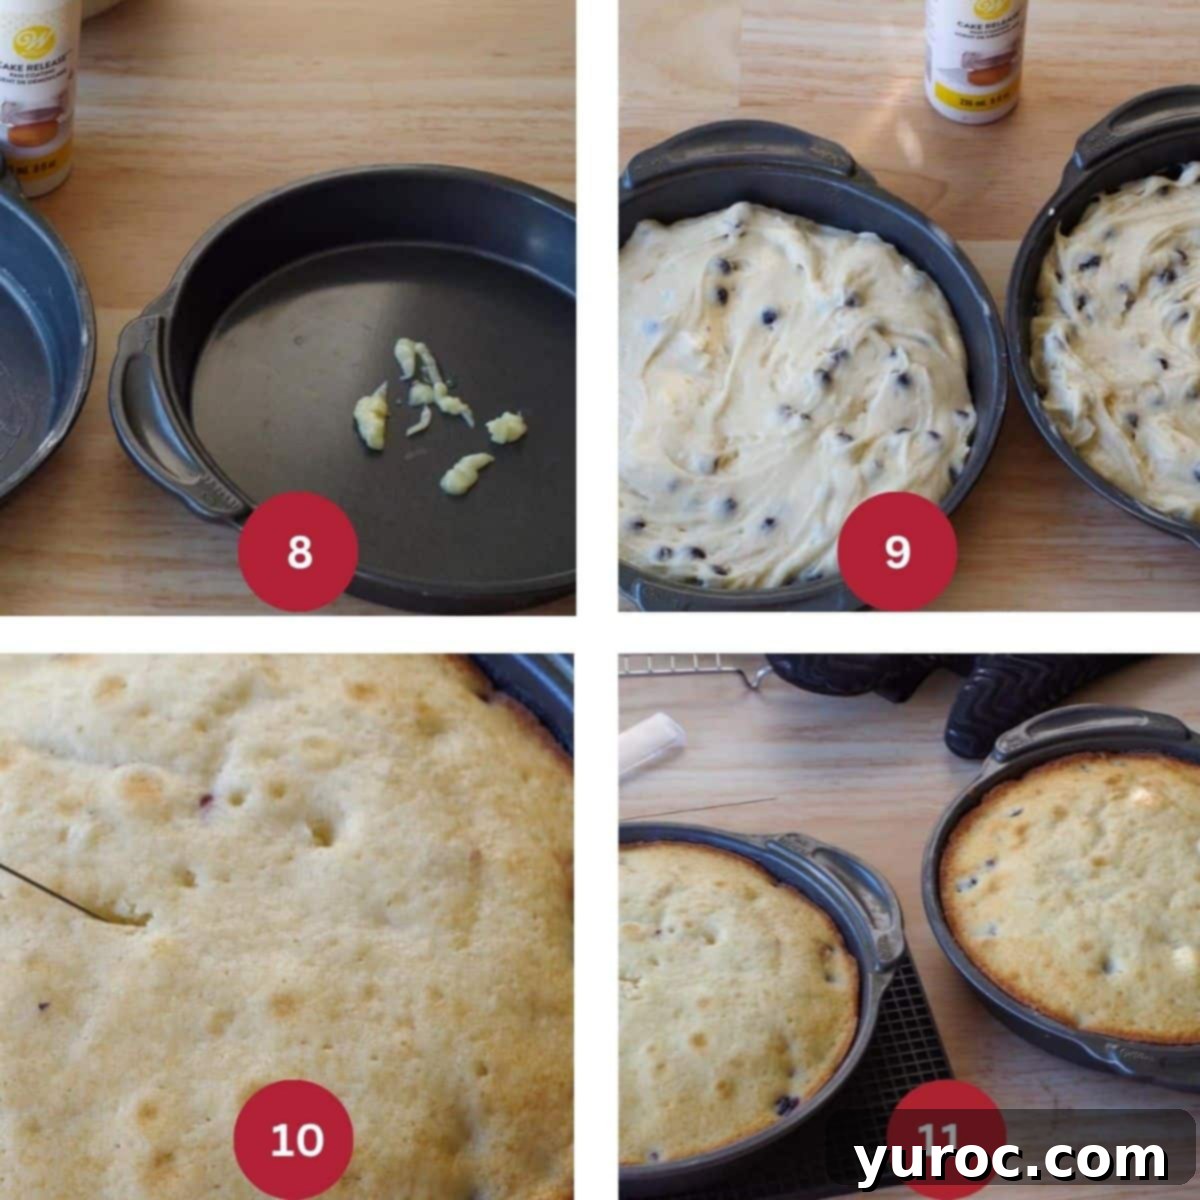
BAKE THE CAKE (STEP 3): Prepare your chosen cake pans by generously greasing and lightly flouring them. For best results and easy release, we highly recommend using a commercial Cake Release spray or paste (affiliate link) (IMAGE 8). Evenly divide the cake batter among your prepared pans, filling each no more than two-thirds full to allow for proper rising without overflowing (IMAGE 9). Bake in your preheated oven at 350 degrees F (176 degrees C) for 25 to 40 minutes. The exact baking time will vary depending on the size and type of pans you use. The cakes are done when a cake tester or wooden skewer inserted into the center comes out clean, and the edges appear golden brown and slightly pulled away from the sides of the pan. For reference, our 2-inch deep, 9-inch round pans took approximately 40 minutes (IMAGE 10). Once baked, remove the cakes from the oven and allow them to cool in their pans on a wire rack for about 10 minutes before attempting to invert them (IMAGE 11).
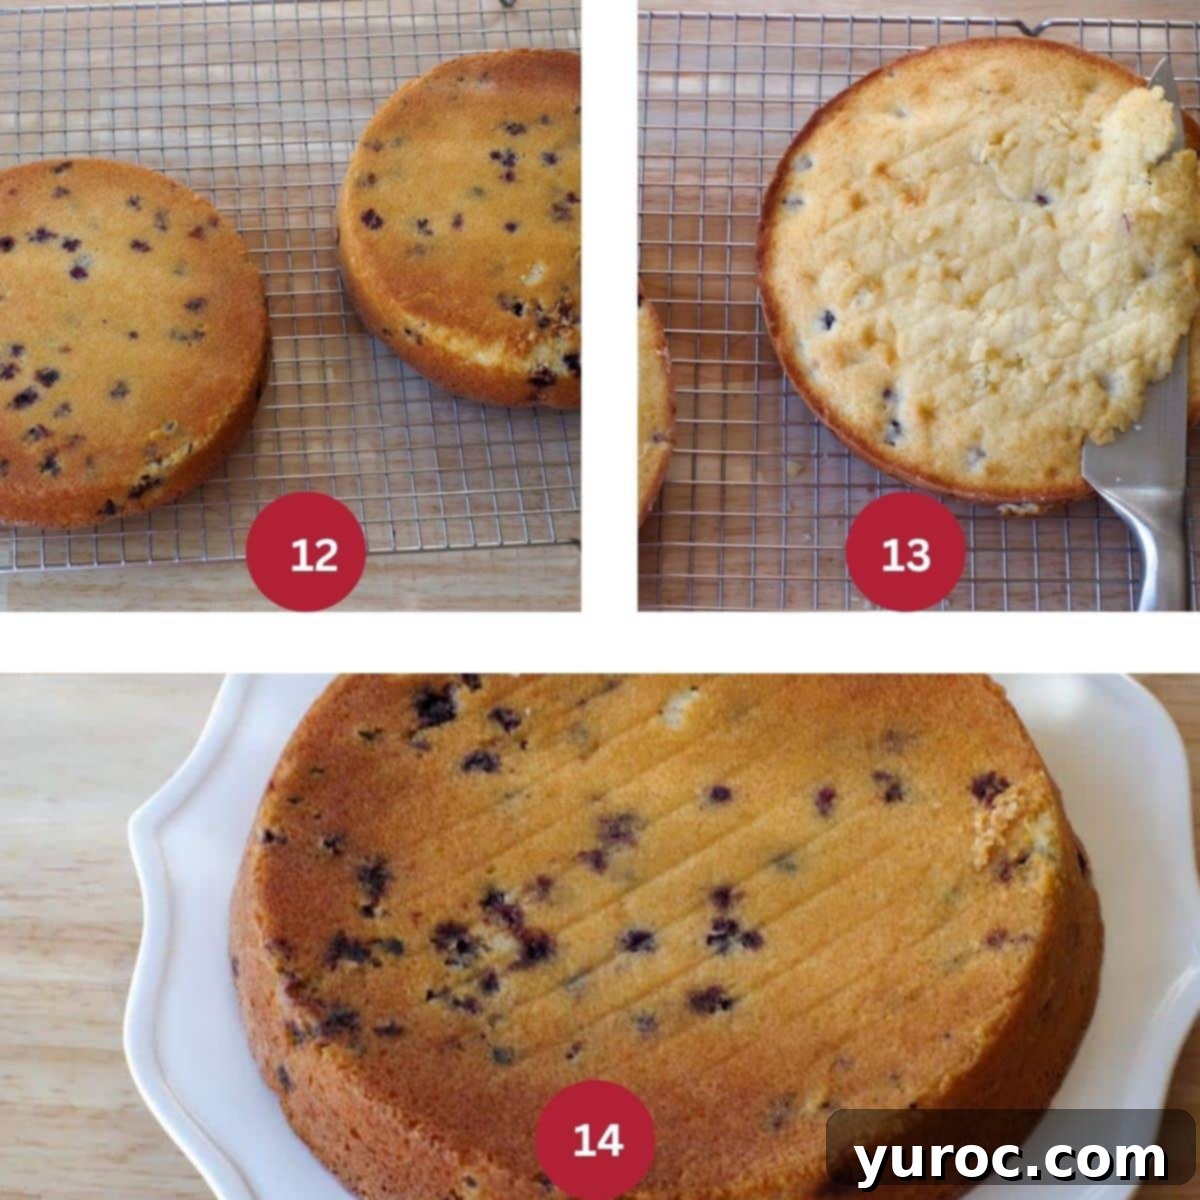
COOL & LEVEL FOR DECORATING (STEP 4): After the initial cooling period in the pans, carefully invert the cakes onto a wire rack to cool completely. This full cooling process usually takes at least 1-2 hours and is essential before assembly and frosting (IMAGE 12). Once fully cooled, use a long, sharp serrated knife or a dedicated wire cake leveler to carefully slice off any domed tops from each cake layer. The goal is to create flat, even surfaces that will stack neatly and create a stable, professional-looking layer cake (IMAGE 13). Finally, for the bottom layer of your cake, place the sliced (cut) side face down onto your chosen serving plate or cake stand. This provides a perfectly flat and stable base for the subsequent layers and frosting (IMAGE 14).
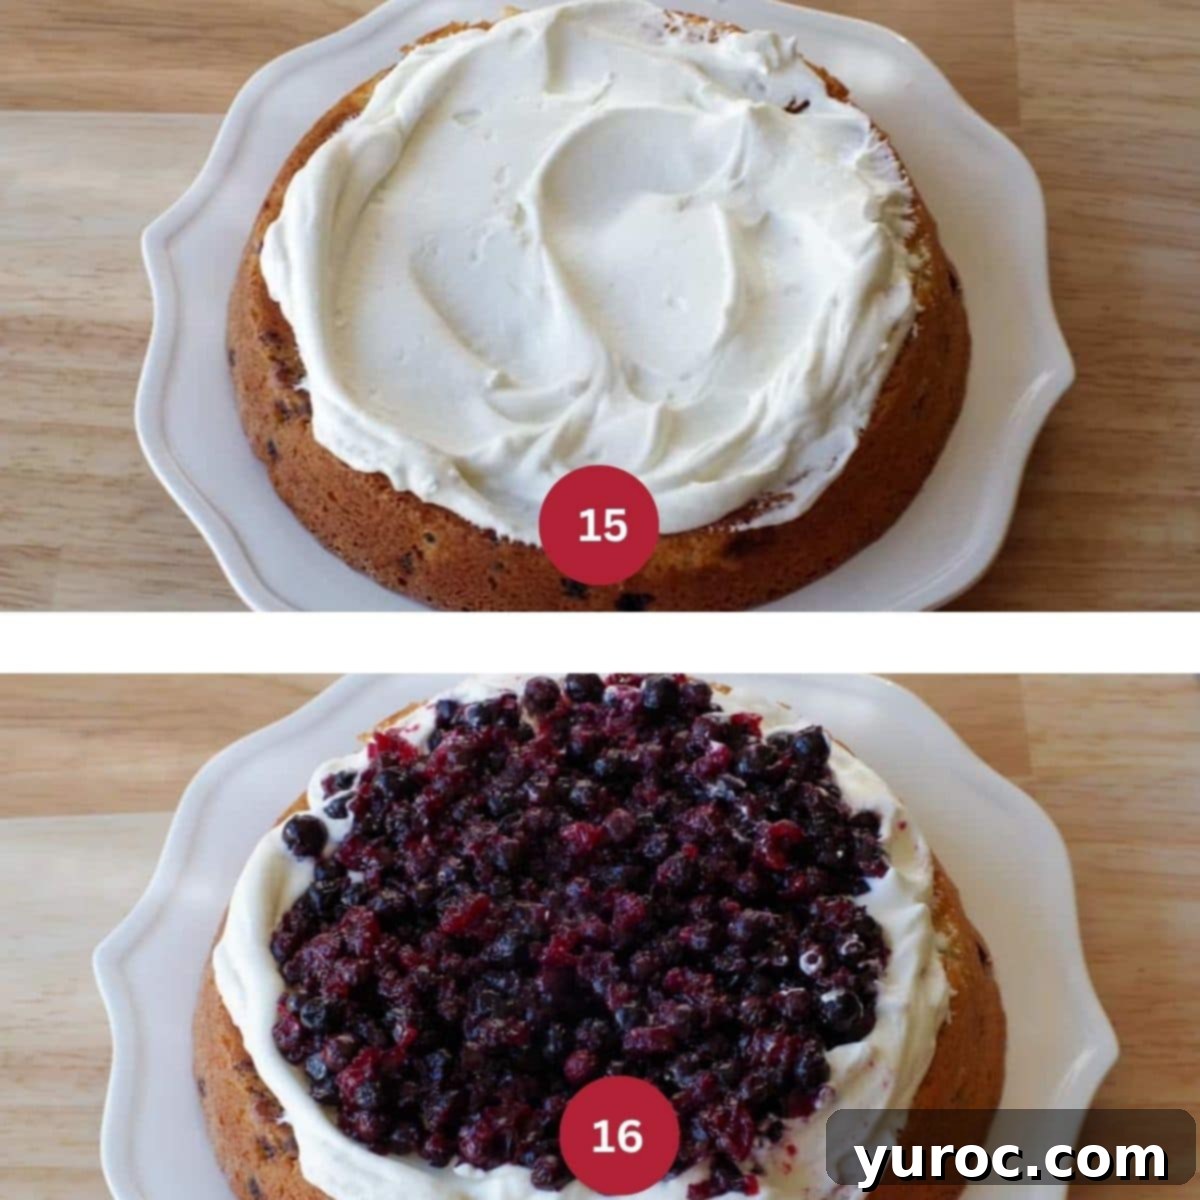
FILL THE CAKE (STEP 5): With your first leveled cake layer on the serving plate, evenly spread about 1 ¼ cups of your prepared whipped cream frosting over the top surface (IMAGE 15). On top of the whipped cream frosting, carefully spoon and spread the Saskatoon berry filling. It is crucial *not* to spread the filling all the way to the very edge of the cake layer. Leave a clean border of approximately ½ an inch, as clearly demonstrated in the image. This border acts as a dam, preventing the fruit filling from seeping out when the next cake layer is placed on top and when the cake is later sliced (IMAGE 16).
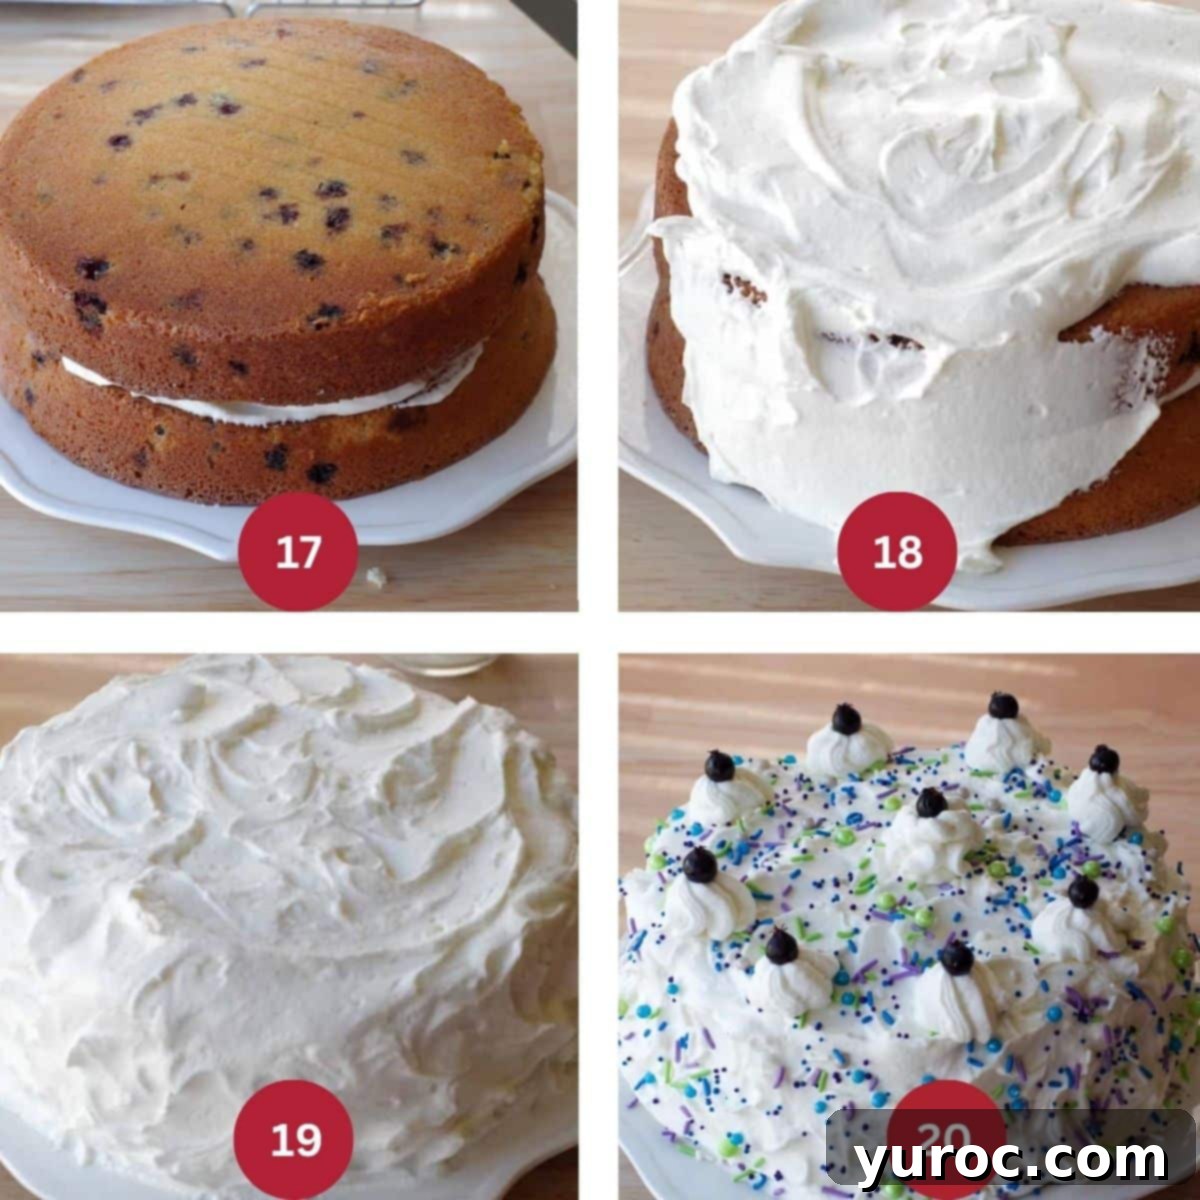
ASSEMBLE, FROST, AND DECORATE THE CAKE (STEP 6): Carefully place the second cake layer on top of the first, with its cut (leveled) side facing down. Align it as perfectly as possible to ensure an even cake (IMAGE 17). Begin to frost the entire cake with the remaining whipped cream frosting. To prevent crumbs from mixing into your pristine frosting, apply a relatively thick patch of frosting to an area, then gently spread it without letting your spatula touch the cake surface directly. Repeat this process until a thin layer of frosting covers the entire cake. This is often called a “crumb coat” (IMAGE 18). Continue applying and smoothing the whipped cream frosting until the entire cake is beautifully covered and appears smooth. Take your time to achieve a neat finish (IMAGE 19). Now for the fun part: decorate your cake! Generously add sprinkles to the top and/or sides. Using a piping bag fitted with your desired tip, create piped decorations on top of the cake, such as rosettes or swirls. Arrange a few fresh Saskatoon berries artfully on top of these piped frosting decorations. For a polished look, add a piped border around the bottom circumference of the cake. For visual guidance, you can find helpful tutorials on how to pipe a border on a cake and how to pipe decorations on a cake (IMAGE 20).
Expert Recipe Tips for Baking Success
Achieving a bakery-quality Saskatoon Berry Cake is easier than you think with these expert tips:
- Utilize Cake Release for Effortless Extraction: To ensure your cake layers emerge from the pans cleanly, without sticking or tearing, apply a generous and even layer of a reliable Cake Release product (affiliate link). This small step makes a huge difference in achieving crumb-free, professional-looking cake layers.
- Brush Away Loose Crumbs Before Frosting: After your cake layers have cooled and you’ve leveled them, use a soft pastry brush (affiliate link) to gently sweep away any loose crumbs from the surface and sides of the cake. This crucial step ensures a much cleaner finish for your final frosting layers and significantly reduces the chances of crumbs marring your smooth frosting.
- Prevent Crumbs from Mixing into Your Frosting: To achieve a flawless, crumb-free frosting finish, especially with delicate whipped cream, employ this technique: apply a generous dollop or thick patch of frosting to an area of the cake. Then, using your spatula, spread the frosting without allowing the spatula to directly touch the cake’s surface. Repeat this method until the cake is covered. This creates a barrier between the crumbs and the main frosting. Alternatively, you can apply a very thin “crumb coat” of frosting, chill the cake for 15-20 minutes to set it, and then apply your final, thicker layer of frosting. Watch this video for a visual guide on how to frost a cake without getting crumbs in the frosting!
- Toss Berries with Flour First: This is a classic baker’s trick! Before gently folding your fresh or defrosted Saskatoon berries into the cake batter, lightly toss them with a small amount of flour (about 1 tablespoon). This thin coating helps the berries suspend more evenly throughout the batter during baking, preventing them from sinking to the bottom of the cake layers and ensuring a burst of berry flavor in every bite.
- Cool Completely Before Decorating: Patience is key in cake decorating! Always allow your baked cake layers to cool completely, preferably on a wire rack, before you even think about assembling or frosting them. Attempting to frost warm cake layers will cause your beautiful whipped cream frosting to melt, slide, or weep, resulting in a messy and disappointing outcome.
- Chill Your Tools and Ingredients for Whipped Cream Frosting: For the most stable and firm whipped cream frosting, ensure your mixing bowl and beaters (or whisk attachment) are thoroughly chilled before you begin whipping. Keeping the frosting cold throughout the decorating process also helps it maintain its structure and prevents it from deflating, making piping and spreading much easier.
- Leave a Border for the Filling: When applying the Saskatoon berry filling between the cake layers, remember to leave a clear border of approximately ½ inch around the edge. Spreading the filling all the way to the edge can cause it to seep out unattractively when the top cake layer is placed on, or when the cake is sliced. The border acts as a neat dam, keeping the filling securely in place.
- Level Your Cakes for Stability: For a structurally sound and aesthetically pleasing layer cake, it’s vital to level your cake layers. Use a sharp serrated knife or a specialized cake leveler to carefully slice off any domed tops. This creates flat, even surfaces that stack beautifully, preventing a leaning cake and ensuring each slice looks perfect.
- Avoid Overfilling the Pans: When dividing your cake batter, do not fill your cake pans more than two-thirds full. Overfilling can lead to overflow in the oven, as well as excessively domed tops or even sunken centers in your cake layers, which are harder to level and can affect the final texture.
- Don’t Overmix the Batter: After adding the dry ingredients to the wet, mix just until combined. Overmixing develops the gluten in the flour too much, leading to a tough, dry cake. A light hand will ensure a tender, moist crumb.
🥗 Delicious Main Dishes to Serve with This Saskatoon Cake
This vibrant Saskatoon berry cake, with its light and fruity flavor, pairs wonderfully with a variety of summer meals and heartier dishes alike! It makes for a perfect dessert to complete a memorable spread.
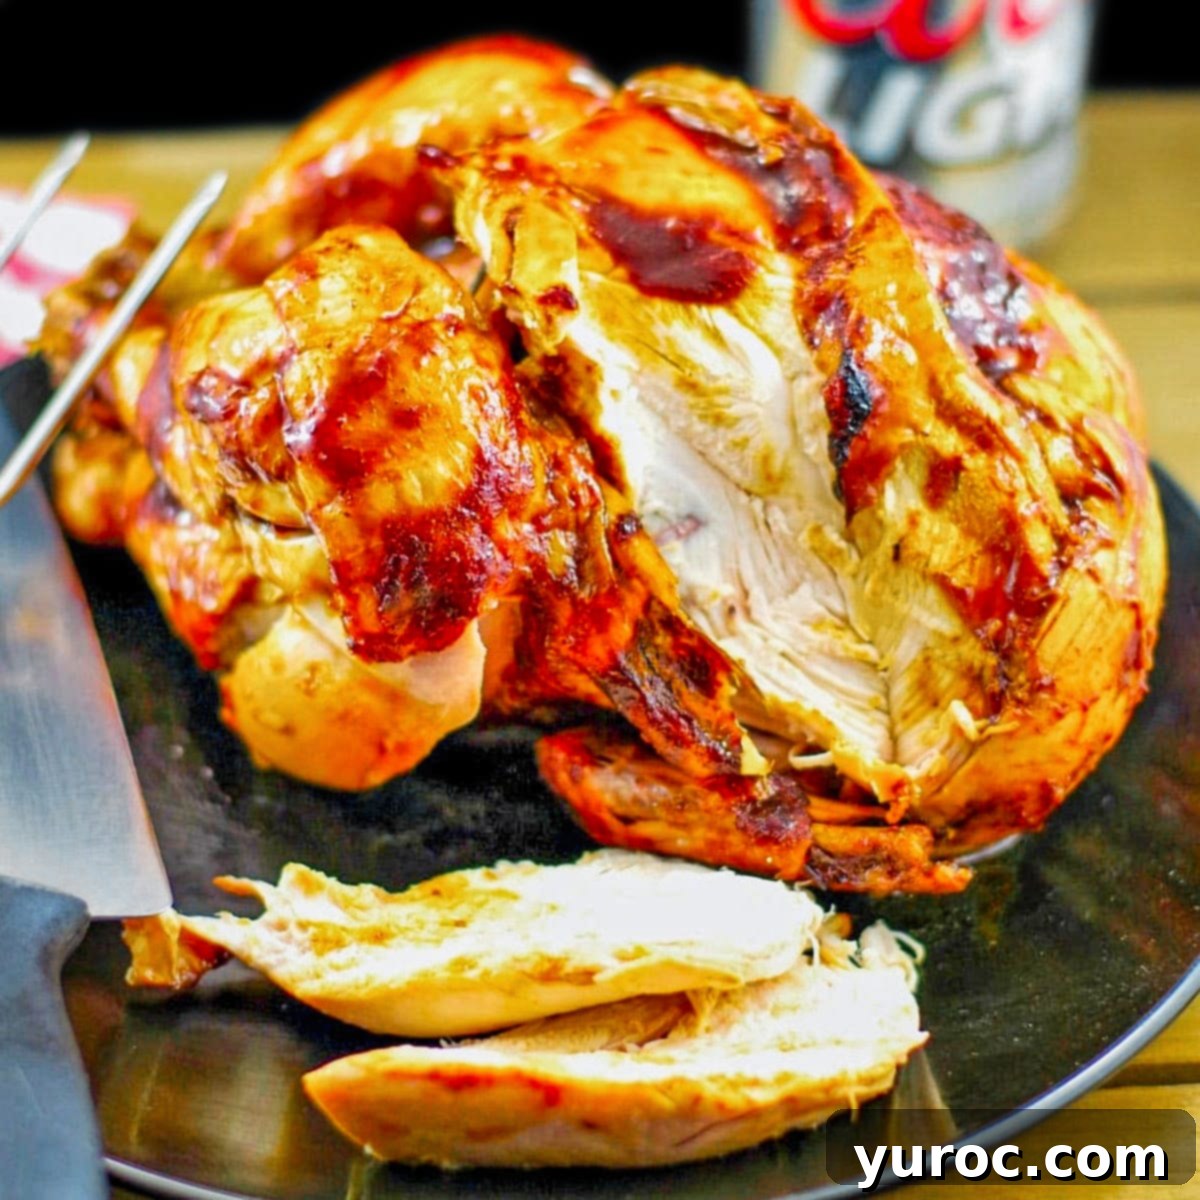
If you’re planning a fantastic grilled feast, this cake would be the ideal sweet ending after savory mains like our flavorful Grilled Steak Salad with Feta and Clamato Dressing, a classic and refreshing Grilled Chicken Caesar Salad, or for a truly impressive centerpiece, our succulent BBQ Beer Butt Chicken (as shown in the image below)! The lightness of the cake provides a delightful contrast to the rich, smoky flavors of grilled meats.
Alternatively, if you’re seeking a more ‘hands-off’ approach to meal preparation or need to feed a larger gathering with minimal effort, this cake is also a fantastic dessert complement to comforting slow cooker meals. Consider serving it after our tender Slow Cooker Pork Pineapple Carnitas, or our incredibly satisfying Slow Cooker Beef on a Bun! The sweet berry notes of the cake will offer a perfect refreshing conclusion to these savory dishes.
👪 Serving Size and Adjustments
This delightful Saskatoon berry layer cake recipe is designed to yield 12 generous servings, making it perfect for family dinners, small gatherings, or special occasions. Should you require more servings for a larger crowd, you can easily adjust the recipe quantities. Simply click on the serving number within the recipe card (typically indicated as ’12 servings’) and select your desired number of servings. The ingredient quantities will automatically scale and adjust to your chosen amount. Please note, however, that if you significantly increase the recipe, you will need to ensure you have additional cake pans of the appropriate size to accommodate the increased volume of batter and filling. Always ensure your oven has enough space for multiple pans and be prepared for potentially slightly longer or adjusted baking times when baking larger batches.
🌡️ Storage Instructions and Make-Ahead Tips
Proper storage is key to enjoying your Saskatoon Berry Cake for as long as possible. Here’s how to keep it fresh and some tips for making it ahead:
Store this beautiful cake in an airtight container in the refrigerator for up to 4 days. The cool environment will help preserve the freshness of the berries and the whipped cream frosting. However, it’s important to note that this cake, once fully decorated with stabilized whipped cream frosting, does not freeze well. Upon defrosting, the whipped cream frosting is likely to lose its structure and “run” or become watery, affecting both the appearance and texture of the cake.
Can I prepare components of this cake ahead of time?
Absolutely, and we highly recommend it to reduce stress on baking day! The individual cake layers can be baked, cooled completely, and then wrapped tightly in plastic wrap and aluminum foil. They can be stored at room temperature for up to 2 days or frozen for up to 3 months. Similarly, the Saskatoon berry filling can be prepared in advance and stored in an airtight container in the refrigerator for up to a week, or frozen for up to 3 months. For optimal texture and presentation, we advise assembling and frosting the cake on the day you plan to serve it. This ensures the freshest taste and the best look for your celebration.
Alternatively, if you desire a cake that can be fully decorated and then frozen, consider using our Whipped Cream Buttercream Frosting. Despite its name, this frosting is made with shortening rather than traditional whipped cream, giving it greater stability and making it much more freezer-friendly. It will hold its shape beautifully after thawing, allowing you to prepare the entire cake well in advance.
❔ Recipe FAQs for Saskatoon Berry Cake
To effectively prevent the luscious Saskatoon berry filling from seeping out, ensure you create a small “dam” of frosting. When spreading the berry filling, leave a clear ½-inch border around the edge of the cake layer. Additionally, you can pipe a ring of frosting around the very edge of the bottom cake layer before adding the filling. This creates an extra barrier. For best results, allowing the assembled, unfilled cake layers to ‘settle’ overnight in the fridge before applying the final frosting can also help them stabilize and minimize leaks.
The most reliable way to check for doneness is to insert a clean wooden skewer, toothpick, or cake tester into the very center of the cake layer. If it comes out clean, or with just a few moist crumbs attached, your cake is fully baked. Additionally, look for visual cues: the edges of the cake should be golden brown and will often start to slightly pull away from the sides of the pan. The top surface should also spring back gently when lightly touched.
The beautiful, deep color of Saskatoon berries can easily bleed into your cake batter if they are handled too aggressively. The primary cause of purple batter is overmixing the berries. To avoid this, gently fold the floured Saskatoon berries into the batter using a spatula, mixing just until they are evenly combined. Minimize stirring and try to incorporate them with as few strokes as possible to keep your batter a lovely light color with vibrant berry specks.
This versatile recipe works well with several pan configurations. For a classic round layer cake, you can use two 9-inch round cake pans, or three 8-inch round pans for slightly taller, more elegant layers. If you prefer a sheet cake format for easier serving to a crowd, a 9×13-inch rectangular pan is suitable. For a single, larger round cake, one 10-inch round pan will also work. When making a layer cake, it’s generally best to avoid pans that are too shallow, as you’ll want the layers to have a good height for both slicing and accommodating the delicious filling.
Yes, absolutely! Frozen Saskatoon berries work wonderfully in this cake. Just be sure to thaw them completely before incorporating them into the batter. Once thawed, gently pat them dry with a paper towel to remove any excess moisture, which could otherwise thin out your batter or make the cake gummy. Tossing them lightly in flour before adding them to the batter will also help prevent them from sinking.
While it’s a layer cake, which can seem daunting, this recipe is quite straightforward for those with basic baking experience. The instructions are detailed, and the tips provided aim to guide you through each step successfully. If you’ve made other cakes before, you’ll likely find this a rewarding and achievable project. Don’t be afraid to try it!
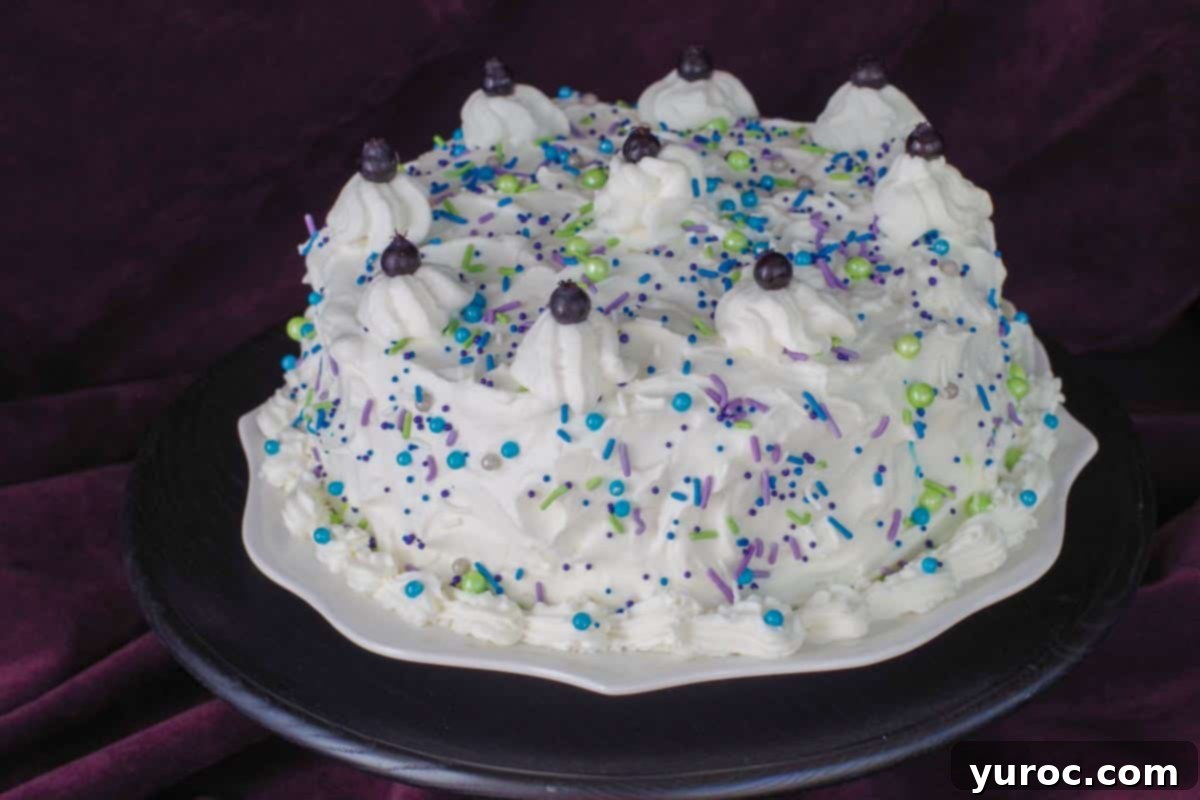
Whether you’ve been fortunate enough to go Saskatoon berry picking and have a bounty of fresh berries, have a stash of frozen Saskatoons waiting to be used, or simply want to try a unique and delectable cake that steps away from the typical fruit pie, this Saskatoon berry layer cake is an absolute must-try! Its tender crumb, sweet-tart berry filling, and light frosting create a symphony of flavors that truly celebrates summer.
🎂 More Delicious Summer Cake Recipes to Enjoy
- Cookie Dough Ice Cream Cake (Dairy Queen Copycat)
- Chocolate Genoise Sponge Cake (with Summer Berries)
- Neapolitan Ice Cream Cake
- Root Beer Float Layer Cake
Did your family ❤️ this recipe? Did you know that commenting and ⭐ rating recipes is one of the best ways to support your favorite recipe creators? If you LOVED this recipe, please take a moment to comment and rate it in the recipe card below, or share your beautiful photos on social media using the hashtag #foodmeanderings and tagging @foodmeanderings! Your feedback means the world to us!

📋 Saskatoon Berry Layer Cake Recipe
Print Recipe
Pin
Save RecipeSave Recipe
Rate
Add to Shopping ListGo to Shopping List
Equipment
-
electric mixer
-
mixing bowl
-
cake tester
Ingredients
- 1 cup unsalted butter softened
- 2 cups white granulated sugar
- 4 large eggs (at room temperature) *It’s important the eggs are at room temperature
- 1 tablespoon white vinegar
- 1 cup milk * I use 1%
- 1 teaspoon Creme bouquet or Vanilla butter or Princess cake and cookies emulsion *Or substitute 2 teaspoon vanilla extract
- 2 ¾ cups All-purpose flour + 1 tbsp
- 2 ¼ teaspoon baking powder
- ½ teaspoon salt
- 1 ½ cups Saskatoon berries fresh or frozen
- ½ recipe Saskatoon berry pie filling https://foodmeanderings.com/saskatoon-berry-pie-filling-and-sauce/
- 1 recipe whipped cream frosting https://foodmeanderings.com/stabilized-whipped-cream-icing/
Topping/Garnish
- sprinkles
- additional Saskatoon berries
Instructions
-
Prep: Preheat oven to 350 degrees F (176 degrees C) and position the oven rack into the center of the oven.
Prepare the Saskatoon berry filling. Note that you will only need HALF of the recipe amount for this cake, so you can either prepare the full recipe and freeze the remainder, or simply halve the recipe. This step can be completed in advance.
Prepare the Whipped Cream Frosting. This can also be done a day or two in advance and refrigerated.
½ recipe Saskatoon berry pie filling, 1 recipe whipped cream frosting
Cake
-
Add 1 tablespoon of white vinegar to the milk and stir gently. Set this aside to allow the “buttermilk” to form while you proceed with other steps.1 tablespoon white vinegar, 1 cup milk
-
In a large bowl, cream together the softened butter and granulated sugar using an electric mixer until the mixture is light, fluffy, and pale in color, typically taking about 3 minutes of beating.1 cup unsalted butter, 2 cups white granulated sugar
-
Add the large room-temperature eggs one at a time to the butter-sugar mixture, beating well after each addition until fully incorporated. In a separate small bowl, mix the Creme Bouquet (or your chosen emulsion or vanilla extract) into the prepared milk/vinegar mixture and set aside.4 large eggs (at room temperature), 1 teaspoon Creme bouquet or Vanilla butter or Princess cake and cookies emulsion
-
In a separate medium bowl, thoroughly whisk together the 2 ¾ cups of all-purpose flour, baking powder, and salt until well combined and lump-free.2 ¾ cups All-purpose flour + 1 tbsp, 2 ¼ teaspoon baking powder, ½ teaspoon salt
-
Gradually add the dry flour mixture to the butter/sugar/egg mixture in two alternating parts with the milk mixture. Begin and end with the dry ingredients, beating well on low speed after each addition until just combined. This prevents overmixing and ensures a tender crumb.
-
Using an electric mixer on low speed, mix the batter until all ingredients are just combined and the batter is smooth. Be careful not to overmix at this stage.
-
In a separate small bowl, toss the 1 ½ cups of Saskatoon berries with the remaining 1 tablespoon of flour. This helps prevent the berries from sinking during baking.1 ½ cups Saskatoon berries
-
Gently fold the floured Saskatoon berries into the cake batter using a spatula until they are just combined and evenly distributed. Avoid over-stirring to prevent the berries from bleeding their color into the batter.additional Saskatoon berries
-
Generously grease and flour your chosen cake pans (e.g., 9×13-inch, three 8-inch rounds, two 9-inch rounds, or one 10-inch round). We recommend using Cake Release (affiliate link) for the easiest removal.
-
Evenly divide the prepared cake batter among your greased and floured pans, filling each pan no more than ⅔ full.
-
Bake in the preheated oven for 25 to 40 minutes, depending on the size of the pans you are using. The cakes are done when a cake tester or toothpick inserted into the center comes out clean.
*For two 9-inch round pans, baking typically takes around 40 minutes.
-
Allow the cakes to cool in their pans on a wire rack for 10 minutes immediately after removing them from the oven.
-
After 10 minutes, carefully invert the cakes onto a wire rack and allow them to cool completely to room temperature before proceeding with assembly and frosting.
-
Once completely cooled, use a serrated knife or cake leveler to carefully slice off any domed tops from each cake layer, creating a flat and even surface for stacking.
-
Place the first leveled cake layer onto your serving plate or cake stand with the sliced (cut) side facing down to create a stable base.
Assembly
-
Evenly spread about 1 ¼ cups of the prepared whipped cream frosting over the top surface of the first cake layer.
-
Carefully spoon and spread the Saskatoon berry filling over the whipped cream frosting. Remember to leave a clear border of approximately ½ an inch from the edge to prevent the filling from seeping out when the top layer is added.
-
Gently place the second cake layer on top of the berry filling, ensuring its cut (leveled) side is facing down. Align the layers as best as possible.
-
Begin frosting the entire cake with the remaining whipped cream. Apply a thin “crumb coat” first to trap any loose crumbs, then chill briefly before applying the final, thicker layer of frosting.
-
Continue applying and smoothing the whipped cream frosting until the entire cake (top and sides) is beautifully covered and looks neat.
-
Decorate your finished cake: Generously add sprinkles to the top and/or sides. Pipe a decorative border around the bottom edge of the cake, and create additional piping designs on top. Finally, artfully arrange a few fresh Saskatoon berries on top of your piped frosting decorations for a stunning visual appeal.
How to pipe a border on a cake
How to pipe decorations on a cake
sprinkles
Notes
- Use Cake Release for Easy Removal. For a crumb-free, professional-looking cake, use a generous amount of Cake Release (affiliate link). This ensures the cakes come out of the pans cleanly without sticking or tearing.
- Brush Away Loose Crumbs Before Frosting. Gently use a pastry brush (affiliate link) to remove any loose crumbs before frosting the cake. This helps you achieve a cleaner finish and reduces the chances of crumbs showing through the frosting.
- Prevent Crumbs in Your Frosting. To avoid crumbs mixing into your whipped cream frosting, apply a thick patch of frosting to an area of the cake, then spread it without touching the surface of the cake, and repeat. Here’s how to frost a cake without getting crumbs in the frosting! You can also do a thin crumb coat to start.
- Do a Crumb Coat (Optional for Extra Neatness). If you want a truly flawless finish, apply a thin layer of frosting over the entire cake (crumb coat) and refrigerate it for 30 minutes before adding the final layer of frosting. This traps stray crumbs and creates a smooth base.
- Toss Berries with Flour First. Mix your Saskatoon berries with a bit of flour before folding them into the batter. This keeps them from sinking to the bottom of the pan during baking and distributes them evenly throughout the cake layers.
- Cool Completely Before Decorating. Always let your cakes cool completely on a wire rack before assembling and decorating. Warm cake layers can melt the frosting and cause it to slide or weep.
- Chill Your Tools and Ingredients for Frosting. For best results when working with whipped cream frosting, chill your mixing bowl and beaters, and keep your frosting cold before decorating. This helps it whip up firmer and hold its shape better during piping and decorating.
- Leave Room for the Filling. When adding the berry filling between the layers, don’t spread it all the way to the edge. Leave about a ½-inch border to prevent it from seeping out when you press down the top cake layer.
- Level Your Cakes for Stability. Use a serrated knife or cake leveler to slice off any domed tops from your cake layers so they sit flat. This gives you a more stable cake and cleaner appearance when frosting and slicing.
- Don’t Overfill the Pans. Fill your cake pans no more than ⅔ full to avoid overflow and ensure even baking. Overfilled pans can result in domed or sunken centers.
🌡️Storage
Store this cake in an airtight container in the fridge for up to 4 days. It does not freeze well as a decorated cake (the whipped cream frosting will run when it defrosts).
Can I make this cake ahead of time?
Yes! The cake layers and berry filling can be made and frozen separately ahead of time (for up to 3 months). Assemble and frost the cake the day of serving for the best texture and presentation.
Alternatively, if you use the Whipped Cream Buttercream frosting, it can be decorated and frozen, as, despite its name, it’s made with shortening, not whipped cream.