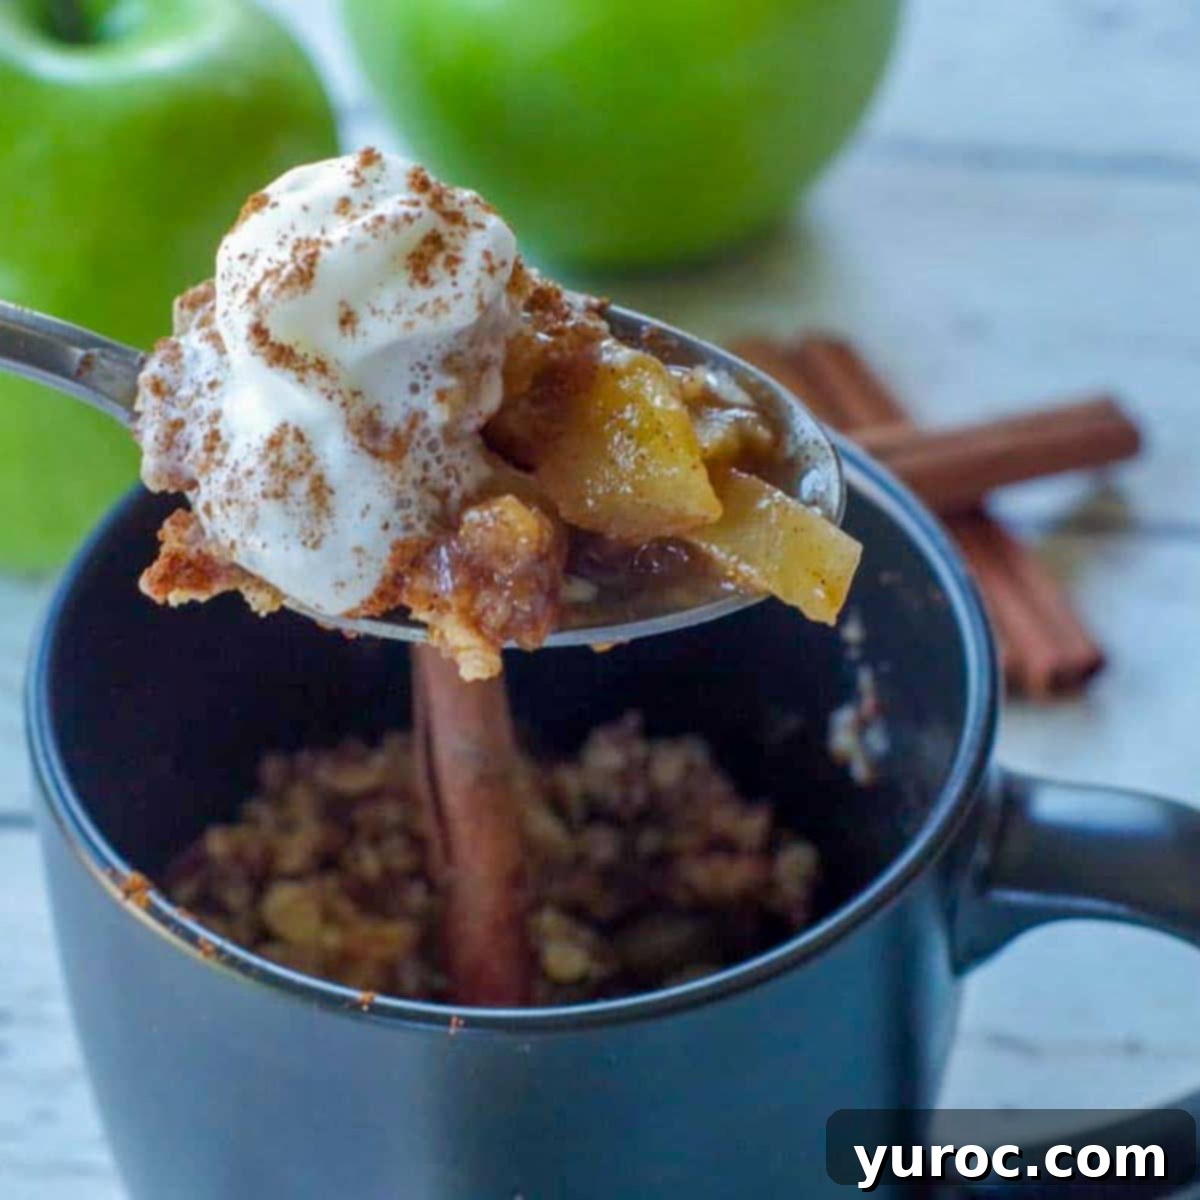
Healthy Microwave Apple Crisp in a Mug: Quick, Delicious & Weight Watchers Friendly
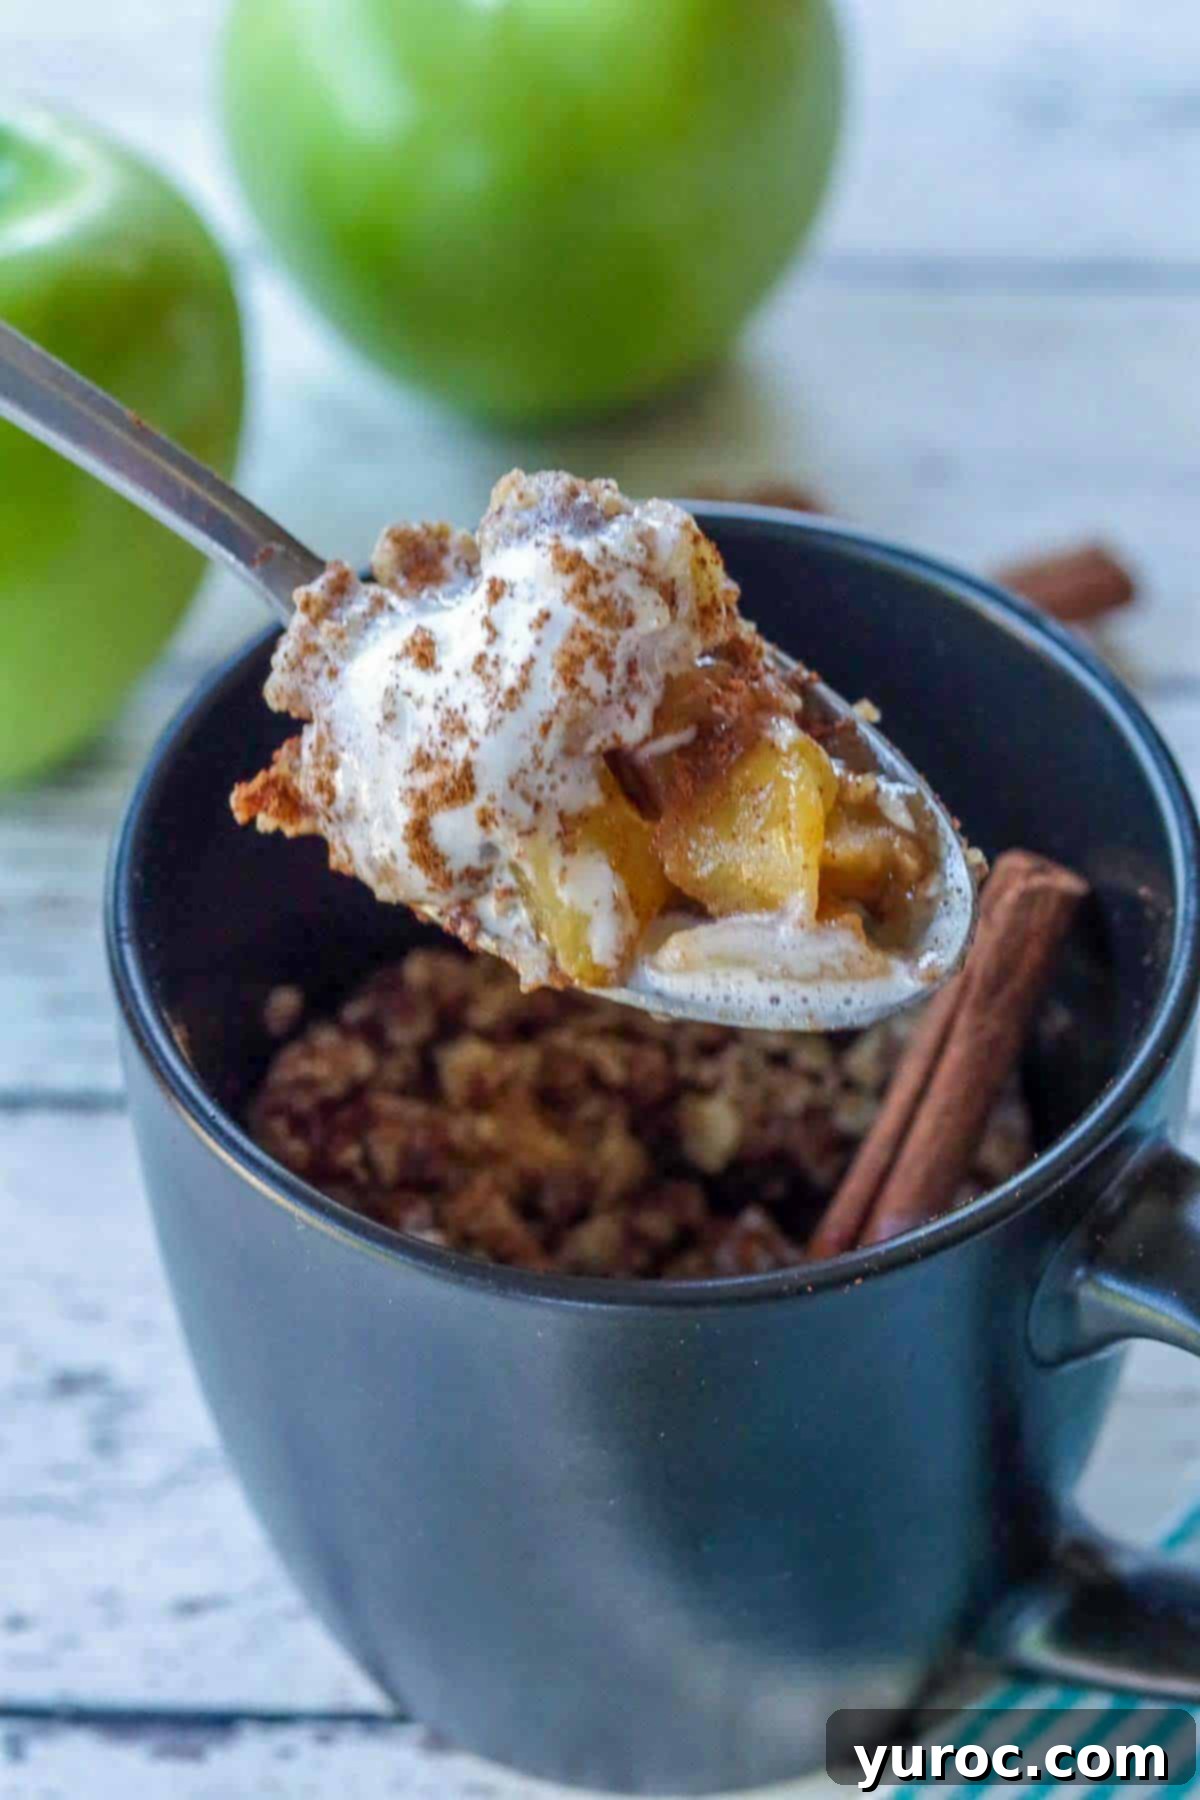
Craving a warm, comforting dessert but short on time and mindful of your health goals? This Healthy Microwave Apple Crisp (in a Mug) is the perfect solution! It’s a delightful single-serving treat that’s not only incredibly healthy but also astonishingly quick and easy to prepare in under 3 minutes. Plus, it’s completely Weight Watchers (WW) friendly, making it an ideal choice for anyone looking for a guilt-free indulgence.
The inspiration for this convenient mug crisp struck while perfecting my Weight Watchers Apple Crisp. The thought of that warm, spiced apple goodness became irresistible, but the idea of baking an entire pan felt overwhelming for a solo craving. That’s when the vision for this individual-sized, microwave-friendly Apple Crisp in a Mug was born – a true testament to instant gratification without compromise.
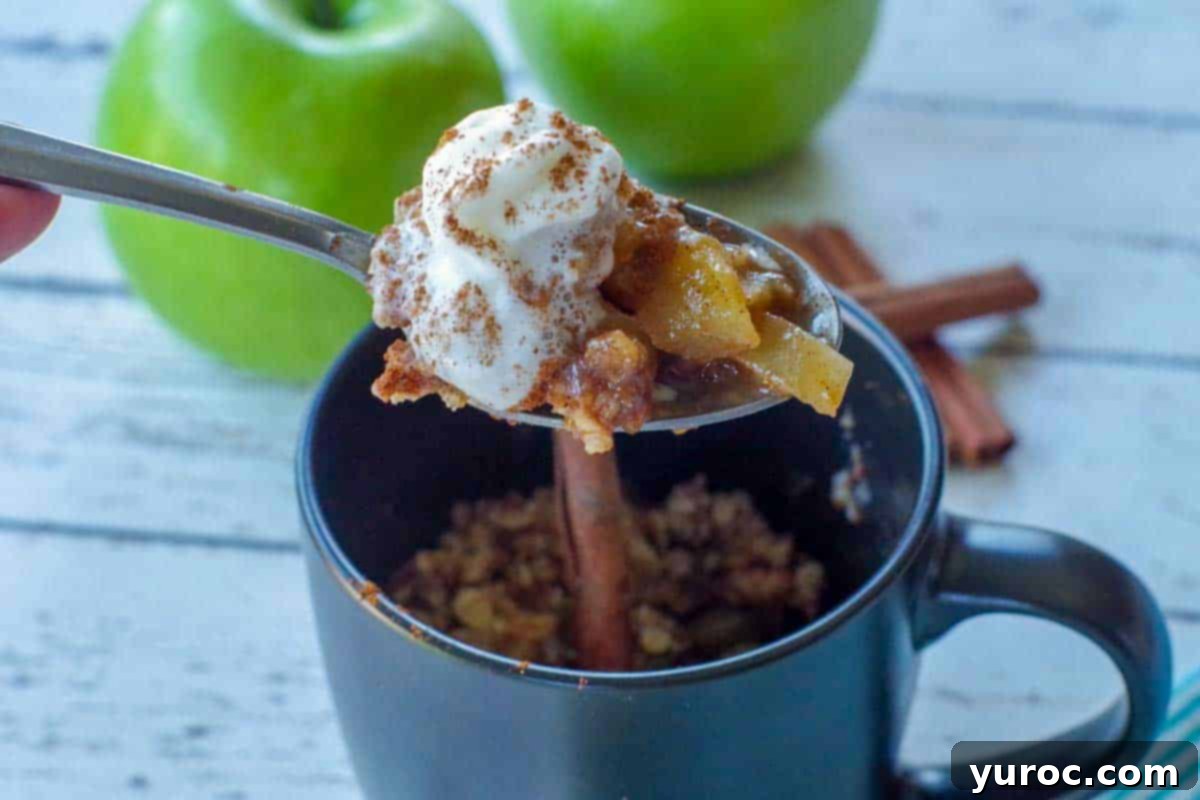
If you’re a fan of speedy microwave mug desserts, possess a persistent sweet tooth, and are on the hunt for a wholesome, fast, and portion-controlled apple crisp that aligns with Weight Watchers principles, your search ends here. This recipe delivers all the classic flavors of a traditional apple crisp, transformed into a personal-sized delight that fits perfectly into your busy schedule and healthy lifestyle. It’s the ultimate smart choice for satisfying those sweet cravings instantly.
🍒Reader Review
“I’m so glad i stumbled upon this recipe as I have one ripe apple and was looking for a small dessert to turn it into. The recipe came out delicious and I literally devoured it before dinner. This recipe is a winner and one I will PIN for use over and over again!” ⭐⭐⭐⭐⭐
Developing this recipe wasn’t without its challenges. It took several attempts to perfectly balance the flavors and achieve the ideal texture while simultaneously reducing the Weight Watchers points to make it truly guilt-free. But the persistence paid off! Even now, as I’m typing out these very words, the mere mention of this mug apple crisp has me heading to the kitchen to whip up another batch. It’s truly that good and that addictive!
🍎 Ingredient Notes for Your Perfect Mug Apple Crisp
Crafting the perfect microwave apple crisp in a mug relies on a few key ingredients. Here’s a deeper dive into what you’ll need and why:
- Fresh Apples: While any apple variety can be used, I highly recommend using crisp, tart apples like green Granny Smith. Their firm texture helps them hold their shape beautifully during microwave cooking, preventing them from becoming mushy. Other great options include Honeycrisp or Fuji for a sweeter profile. Ensure they are peeled, cored, and chopped into small, uniform cubes for even cooking.
- Butter (Light or Regular): For a Weight Watchers friendly option, I opt for light butter, which saves valuable points compared to regular butter (3 WW points vs. 5 WW points). However, if WW points aren’t a concern, feel free to use your preferred regular butter, whether salted or unsalted. It contributes to the rich, classic crisp topping flavor.
- All-Purpose Flour: Standard all-purpose flour provides the structure for the crisp topping. For those seeking a healthier alternative or wanting to boost the fiber content, whole wheat flour can be a fantastic substitute, adding a nuttier flavor. For a gluten-free version, see the “Variations & Substitutions” section below.
- Quick Oats: This recipe specifically calls for quick oats because of their faster cooking time in the microwave. They soften quickly, creating that signature tender-chewy crisp texture. Avoid using instant oats, as they tend to turn into a watery, mushy consistency. Rolled oats can also work if you don’t mind a chewier texture and perhaps an extra 10-15 seconds of cooking time.
- Butter Extract (affiliate link): This is a secret weapon for adding intense butter flavor without the added calories or WW points of actual butter. It significantly enhances the richness of the apple filling. If you don’t have butter extract, you can increase the amount of actual butter by 1 teaspoon (if not worried about extra calories/points) or use vanilla extract, though it won’t replicate the same buttery essence.
- Whipped Cream: A dollop of light real whipped cream from a spray can is the perfect topping. Brands like Gay Lea or Dairyland typically offer 4 tablespoons for just 1 Weight Watchers point, making it an excellent low-point indulgence that elevates the dessert experience. You can also use sugar-free whipped topping for even fewer calories and points.
- Brown Sugar & Cinnamon: These classic ingredients are essential for both the apple filling and the crisp topping, providing that comforting, sweet, and warmly spiced flavor profile that makes apple crisp so beloved.
- Cornstarch: A small amount of cornstarch is crucial for thickening the apple juices, ensuring your filling isn’t watery but rather perfectly gooey and delicious.
- Water: Used in conjunction with cornstarch to create a slurry that thickens the apple filling.
*Please refer to the detailed recipe card below for the full list of ingredients and precise quantities for optimal results.
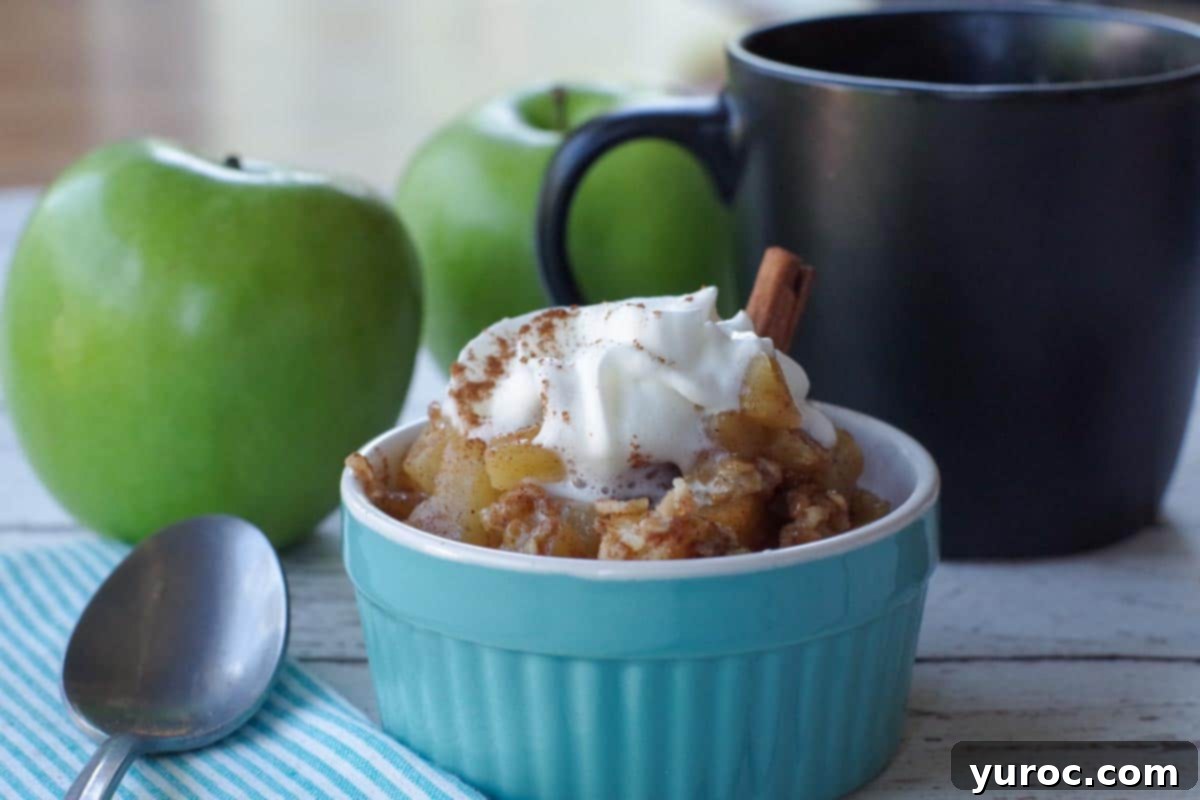
📖 Variations & Substitutions for Your Healthy Apple Crisp Mug
This microwave apple crisp recipe is wonderfully versatile, allowing for various adaptations to suit dietary needs or personal preferences. Don’t be afraid to experiment!
- Brown Sugar Alternatives: If you’re looking to further reduce the WW points or sugar content, consider using a sugar substitute like erythritol, stevia, or monk fruit sweetener. When using monk fruit, remember it’s often much sweeter than sugar, so you’ll typically only need to use half the amount specified for brown sugar. Always check the conversion ratio on your preferred sweetener’s packaging.
- Butter Choices: While I recommend light butter for health benefits, you can absolutely use regular butter (salted or unsalted) if calories are less of a concern. For a dairy-free or vegan option, a plant-based butter substitute works wonderfully in both the filling and the crisp topping.
- Gluten-Free Version: Easily make this recipe gluten-free by substituting the all-purpose flour with your favorite gluten-free flour blend. Ensure your oats are certified gluten-free as well, as some oats can be processed in facilities that handle wheat.
- Spice It Up: Elevate the flavor profile beyond just cinnamon! Add a pinch of nutmeg, allspice, ground cloves, or a dash of pumpkin pie spice to the apple mixture for a more complex and festive aroma.
- Add Nuts or Seeds: For extra crunch and healthy fats, sprinkle a teaspoon of finely chopped walnuts, pecans, or even chia seeds into the oat topping mixture before microwaving.
- Different Fruits: While this is an apple crisp, the concept can be applied to other fruits! Try berries (fresh or frozen), peaches, pears, or even a mix of fruits for a delightful change. Just ensure the fruit is chopped small and adjust sweetness as needed.
- Protein Boost: For a more substantial snack, consider stirring a tiny amount (about ½ scoop) of unflavored or vanilla protein powder into the flour mixture for the topping. This can add a protein punch without drastically altering the taste.
🔪 Step-by-Step: How to Make Mug Apple Crisp
Creating this delicious, healthy apple crisp in a mug is incredibly simple and fast. Follow these easy steps for a perfect single-serving dessert:
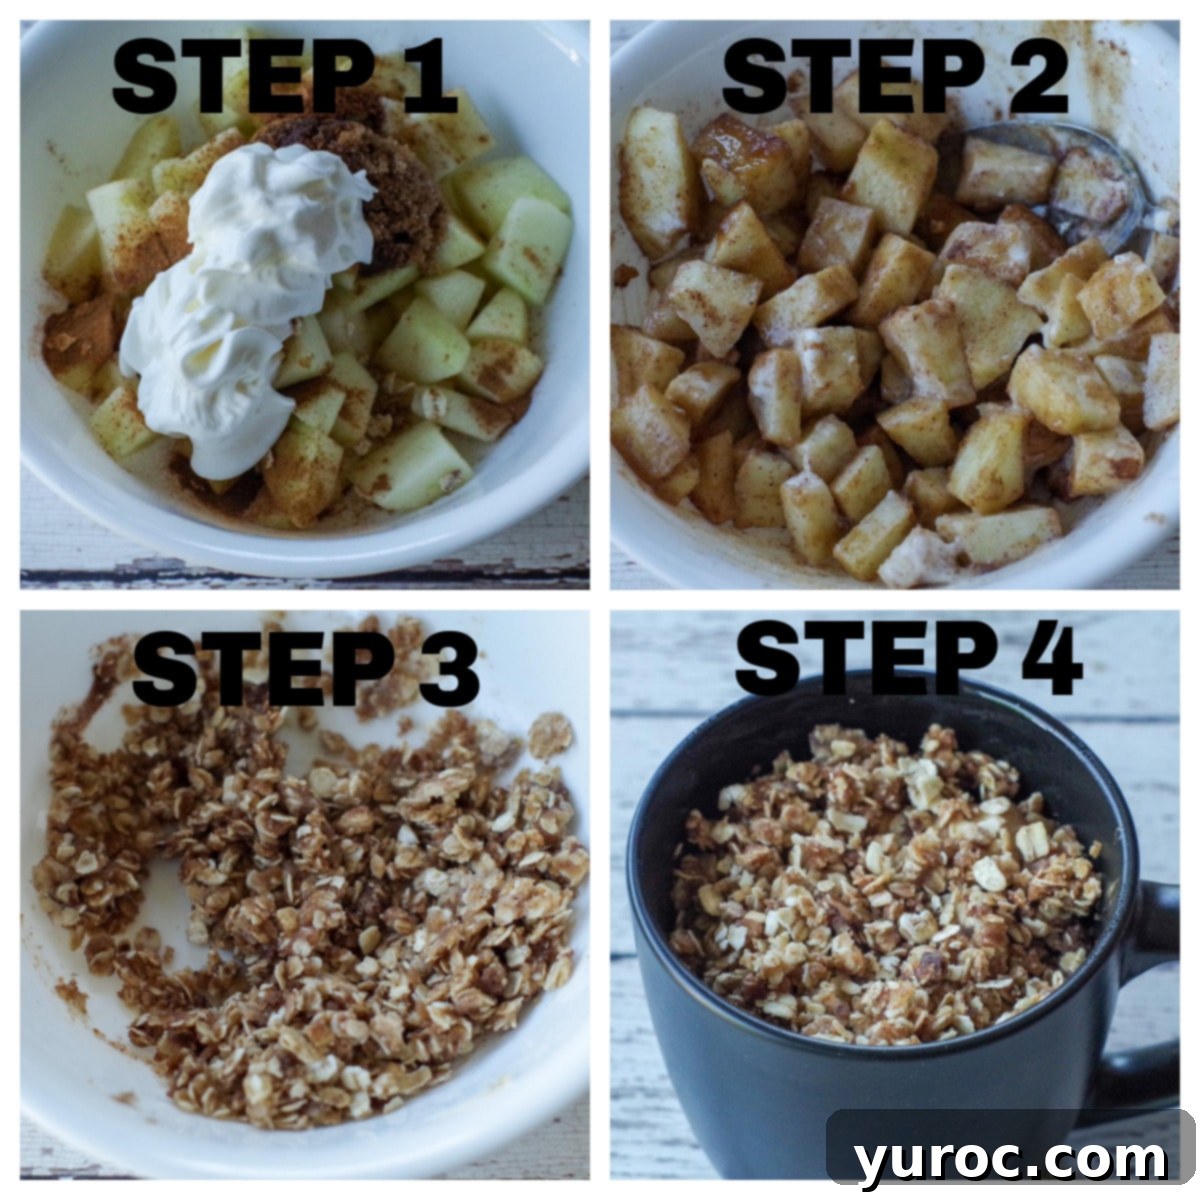
Step 1: Begin by preparing your apple. Carefully peel the apple, remove its core, and then chop it into small, uniform cubes. Aim for pieces that are roughly ¼ to ½ inch in size. This consistency is key for even and rapid cooking in the microwave. Once chopped, place the apple pieces into a small bowl. Toss them with ½ tablespoon of brown sugar, ½ teaspoon of cinnamon, ¼ teaspoon of butter extract (or your chosen substitute), and 2 tablespoons of light whipped cream. This mixture will form the flavorful filling.
Step 2: In a separate tiny bowl, combine 1 tablespoon of water with ¼ teaspoon of cornstarch. Stir this mixture vigorously until the cornstarch is completely dissolved and no lumps remain, creating a smooth slurry. Add this slurry to your apple mixture and stir again to ensure the cornstarch evenly coats the apple pieces. This step is vital for thickening the apple juices during cooking, preventing a watery crisp.
Step 3: Now, prepare the irresistible crisp topping. In another small bowl, combine the rolled oats, the remaining flour, brown sugar, and cinnamon. Stir these dry ingredients together thoroughly. Then, pour in the melted butter and mix until the oats and flour are evenly moistened, creating a crumbly, delicious crisp topping. This mixture should resemble wet sand.
Step 4: Select a microwave-safe mug (preferably a wider one, at least 12-14 oz, to prevent overflow and allow the topping to crisp). Lightly spray the inside of the mug with non-stick cooking spray for easy removal and cleanup. Spoon the prepared apple mixture into the mug, spreading it evenly at the bottom. Then, gently spoon the crisp topping over the apples, making sure it covers the fruit. Microwave the mug for 2 to 2 ½ minutes. The exact cooking time will depend on your microwave’s wattage. For reference, my 1200W microwave achieved perfection in 2 minutes and 20 seconds. You’ll know it’s done when the apples are bubbling and the entire crisp appears slightly reduced in size and cooked through.
Step 5: Once microwaved, carefully remove the hot mug using an oven mitt. The contents will be extremely hot and steaming. Let the apple crisp stand for 1-2 minutes. This brief resting period allows the filling to further thicken and cool slightly, making it safe and more enjoyable to eat. Serve warm, optionally garnished with an extra dollop of light whipped cream and a sprinkle of cinnamon for an extra touch of indulgence.
Expert Recipe Tips for the Best Mug Apple Crisp
Achieving the perfect microwave apple crisp in a mug is simple with a few insider tricks. Here are some expert tips to ensure your dessert is always a success:
- Cut Apples Evenly for Consistent Cooking: This is a crucial step! Dice your apple into small, uniform cubes (about ¼ to ½ inch). This ensures that all the apple pieces cook at the same rate and soften quickly and evenly in the microwave, preventing some pieces from being raw while others are overcooked.
- Choose the Right Mug Size and Shape: Opt for a large, wide, microwave-safe mug (at least 12-14 oz capacity). A wider opening allows for better heat distribution and helps the topping to crisp up more effectively. It also provides enough space to prevent any bubbling apple mixture from overflowing during cooking, saving you from a messy microwave cleanup.
- Never Skip the Cornstarch for a Thick Filling: Cornstarch is your friend here! It acts as a thickening agent for the apple juices, preventing your filling from becoming a watery mess. Make sure to mix the cornstarch slurry thoroughly into the apple mixture before cooking, ensuring it’s fully incorporated for a perfectly gooey, luscious filling.
- Allow It to Stand After Microwaving: Patience is key for the final touch. After microwaving, resist the urge to dive in immediately. Let the mug sit for 1-2 minutes. This resting period allows the apple filling to thicken further as it cools slightly, and it also helps prevent burns from the super-hot steam.
- Adjust Microwave Time Carefully Based on Wattage: Microwaves vary significantly in power. The cooking time provided (2-2.5 minutes for a 1200W microwave) is a guideline. Start with the lower end of the cooking time (e.g., 2 minutes). If the apples aren’t tender enough or the topping isn’t set, cook in additional 10-15 second intervals until it reaches your desired consistency. Keep an eye on it to prevent overcooking.
- Boost the Crisp Topping for Extra Crunch: If you love a really crunchy topping, there are a couple of tricks. You can sprinkle a few extra quick oats on top just before microwaving. For added flavor and texture, a teaspoon of finely chopped nuts like pecans or walnuts can also be mixed into the topping or sprinkled on top.
- Experiment with Flavor Variations: Don’t limit yourself to just cinnamon! Enhance the warm spice blend by mixing in a pinch of nutmeg, allspice, ground ginger, or even a touch of cardamom with the cinnamon. For a hint of extra sweetness and depth, drizzle a tiny amount of maple syrup or honey over the topping before microwaving.
- Prevent Sticking with Non-Stick Spray: A quick spray of non-stick cooking spray in your mug before adding the apple mixture will make cleanup incredibly easy.
I absolutely adore easy recipes like this that simplify dessert making – just combine ingredients in a mug, pop it in the microwave, and in under 3 minutes, you have a delicious, healthy treat! If you share my love for quick and easy microwave mug recipes, you’ll not only fall for this microwave apple crisp, but I’m confident you’ll also enjoy my WW friendly Microwave Chocolate Banana Mug Cake and my savory Microwave Omelette in a Mug!
👪 Serving Size
This healthy apple crisp in a mug is designed as a perfect single-serving dessert, ideal for one person. Sometimes, one is truly all you need for a satisfying treat! However, the recipe is incredibly flexible, and you can easily adjust it to serve as many as you need. Most recipe cards offer a feature where you can click on the serving size and choose the desired number of servings, and the ingredient amounts will automatically adjust accordingly.
Even when scaling up, I highly recommend preparing this single-serving apple crisp in separate, individual mugs. This ensures even cooking and prevents any issues with the topping crisping correctly. If you do choose to microwave more than one mug at a time, be aware that the microwave cooking time will need to be increased. As a general rule, add an additional 15 seconds per extra mug, and always check for doneness, as wattage and quantity can significantly impact cooking times.
🔢 WW Points
This Easy Microwave Apple Crisp recipe is a fantastic choice for those following Weight Watchers, coming in at a friendly 8 WW points per serving (this includes the light whipped cream garnish). It’s a wonderful way to enjoy a sweet treat without derailing your progress.
For those looking to further reduce the Weight Watchers points, consider making a simple substitution: instead of brown sugar, use a zero-point sugar substitute like monk fruit. Remember, monk fruit is often much sweeter than regular sugar, so you’ll typically only need to use half the amount specified for brown sugar. Always double-check the conversion ratio on your specific sweetener’s packaging. Additionally, opting for sugar-free whipped topping can shave off even more points, making this dessert even lighter and more flexible for your dietary goals.
🌡️ Storage & Reheating
Should you somehow manage to have leftovers (it’s a single serving, so it’s a rare feat!), storing this apple crisp in a mug is straightforward. Simply transfer the cooled crisp to an airtight container or cover the mug tightly with plastic wrap. It will keep well in the refrigerator for up to 3 days. While the topping may lose some of its crispiness upon refrigeration, the flavors will still be delicious.
For longer storage, this apple crisp can also be frozen. Place the cooled crisp in a freezer-safe, sealed container and it can be stored for up to 3 months. To reheat, thaw the frozen crisp in the refrigerator overnight, then microwave it for 30-60 seconds, or until warmed through. If reheating from the fridge, a quick 20-30 second zap in the microwave should do the trick. You can always add a fresh sprinkle of oats or nuts and microwave for a few seconds to try and regain some of the crispiness, although it will rarely be as crunchy as freshly made.
⁉️ Recipe FAQs
Yes, absolutely! You can leave the apple peel on if you prefer to retain more fiber and a chewier texture. The peel will soften as it cooks in the microwave, though the apple pieces might not be quite as melt-in-your-mouth tender as when peeled. It’s a great way to add extra nutrients!
A watery apple crisp usually indicates one of two things: either the apple released a significant amount of juice (some apple varieties are juicier than others), or the cornstarch wasn’t fully incorporated into the mixture. To prevent this, ensure you stir the cornstarch slurry very well into the apple filling before cooking. Also, allowing the crisp to stand for a minute or two after microwaving is crucial, as the filling continues to thicken as it cools.
You’ll know your mug apple crisp is perfectly cooked when the apple filling is visibly bubbling around the edges and the topping looks set and slightly toasted, rather than doughy or raw. Since microwave wattage varies, it’s always best to start with the minimum suggested cooking time and add short increments (10-15 seconds) if needed, until it reaches this ideal state.
Yes, you can use frozen chopped apples! Just be aware that frozen apples tend to release more moisture during cooking. You might need to add an extra ¼ teaspoon of cornstarch to the filling mixture to ensure it thickens properly. Also, they may require an additional 30 seconds to 1 minute of microwave time compared to fresh apples.
You can prepare the apple filling mixture and the crisp topping separately a day in advance and store them in airtight containers in the refrigerator. When you’re ready to eat, simply assemble them in the mug and microwave as directed. This is a great meal prep strategy for quick desserts!
Didn’t find the answer you’re looking for?
Ask AI to answer based on this specific recipe
This sweet treat is a tasty little cup of autumn, offering all the comforting flavors of fall in a convenient, healthy package. It’s the perfect way to enjoy the crispness and sweetness of apples any time of the year, not just during the harvest season. Whether you’re curling up with a book, needing a quick snack, or looking for a wholesome dessert after dinner, this mug apple crisp hits all the right notes.
So, whether you call this a healthy apple crisp or a healthy apple crumble in a mug, you’re absolutely going to love its simplicity and incredible taste. And if you’re a fan of single-serving delights, be sure to explore my other popular mug recipes: my Cinnamon Roll in a Mug for a sweet breakfast or brunch, the cozy Crustless Pumpkin Pie in a Cup, the delightful Microwave Rhubarb Crisp (in a mug), and the flavorful Saskatoon Berry Crisp (in a mug)! And for a savory treat, don’t forget my versatile Mug Chicken Pot Pie. Enjoy the convenience of wholesome, delicious food, one mug at a time!
🍰 More Healthy Desserts!
- Chocolate Cereal Clusters
- Healthy Carrot Bread
- No Bake Healthy Rocky Road Bars
- Healthy Blueberry Cornbread
Did your family❤️this recipe? Did you know that commenting and⭐rating recipes is one of the best ways to support your favorite recipe creators? If you LOVED this recipe, please comment and rate it in the recipe card or share photos on social media using the hashtag #foodmeanderings or tagging @foodmeanderings !


📋 Healthy Microwave Apple Crisp (in a Mug) Recipe
Print Recipe
Pin
Save Recipe
Save Recipe
Rate
Dessert, Snack
American
Vegetarian, Weight Watchers
1
serving
344
kcal
Terri Gilson
5 minutes
2 minutes
7 minutes
Prevent your screen from going dark
Add to Shopping List
Go to Shopping List
Equipment
-
apple corer -
vegetable peeler -
microwave safe coffee mug
Ingredients
Topping
-
2
tablespoons
rolled oats (quick oats preferred for faster cooking) -
1
tablespoon
all-purpose flour (or whole wheat/gluten-free flour) -
½
tablespoon
brown sugar (or sugar substitute) -
½
teaspoon
cinnamon -
1
tablespoon
light butter, melted (or regular/vegan butter)
Filling
-
1
large
apple (preferably green, like Granny Smith), peeled, cored, and chopped into small cubes -
½
tablespoon
brown sugar (or sugar substitute) -
½
teaspoon
cinnamon (add a pinch of nutmeg or allspice for variation) -
¼
teaspoon
butter extract (or additional ¼ tsp butter/vanilla extract)
-
2
tablespoons
light whipped cream (from a spray can, for richness in filling) -
1
tablespoon
water -
¼
teaspoon
cornstarch (essential for thickening the filling)
Garnish (Optional)
-
light whipped cream -
cinnamon
Metric
Instructions
-
Peel, core and chop apples into small, uniform cubes. Toss the apple pieces with ½ tablespoon of the brown sugar, ½ teaspoon cinnamon, ¼ teaspoon butter extract, and 2 tablespoons of the light whipped cream. Mix well to coat all the apple pieces thoroughly.
-
In a separate small bowl, add 1 tablespoon of water and ¼ teaspoon of cornstarch. Stir until completely dissolved to create a smooth slurry. Add this slurry to the apple mixture and stir again to ensure even distribution.
-
In another small bowl, combine the rolled oats, flour, the remaining brown sugar, and cinnamon for the crisp topping. Stir the dry ingredients together, then pour in the melted light butter and mix until a crumbly topping forms.
-
Take a microwave-safe mug (12-14 oz recommended), spray it with non-stick cooking spray, and fill it with the apple mixture. Spoon the crisp topping evenly over the apples. Microwave for 2- 2 ½ minutes. The apples should be bubbling, and the crisp will appear slightly reduced in size. Note: Cooking time is based on a 1200W microwave; your timing may vary depending on your microwave’s wattage. For me, 2 minutes and 20 seconds was ideal!
-
Carefully remove the hot mug from the microwave (using an oven mitt is advised). Let it stand for 1-2 minutes until it’s cool enough to eat. Be cautious, as the filling will be extremely hot!
-
Enjoy your warm microwave apple crisp with an additional dollop of light whipped cream (2 tablespoons light whipped cream is included in the 8 WW points calculation) and a sprinkle of cinnamon for garnish.
Notes
-
- Cut apples evenly. Dice the apple into small, uniform cubes so they cook quickly and soften evenly in the microwave. Consistent size is key for uniform tenderness.
-
- Use a large, wide mug. A wider, microwave-safe mug (at least 12-14 oz) prevents spillover from bubbling and allows the topping to crisp up better due to more surface area exposure.
-
- Don’t skip the cornstarch. Cornstarch is essential to thicken the apple juices, ensuring the filling is luscious and gooey, not watery. Make sure it’s well mixed into the apple mixture.
-
- Let it stand before eating. After microwaving, let the mug sit for 1-2 minutes. This brief rest helps the filling thicken further and cools the dessert slightly, preventing burns from hot steam.
-
- Adjust microwave time carefully. Since microwave wattage varies significantly, always start at the lower end of the suggested cooking time. If the apples aren’t tender enough, cook in short 10-15 second intervals until done.
-
- Boost the crisp topping. For a crunchier topping, sprinkle a few extra quick oats or even a teaspoon of finely chopped nuts (like pecans or walnuts) on top before microwaving.
-
- Add flavor variations. Enhance the warmth by mixing in a pinch of nutmeg, allspice, or ground ginger with the cinnamon. For a deeper sweetness, a tiny drizzle of maple syrup or a few chocolate chips over the topping before cooking can be delightful.
🌡️Storage & Reheating:
Store this apple crisp in a mug in an airtight container for up to 3 days in the fridge. Alternatively, cover the mug securely with plastic wrap. For longer preservation, you can freeze it in a sealed container for up to 3 months. To reheat, microwave refrigerated crisp for 20-30 seconds, or thaw frozen crisp overnight and then microwave until warm.
Nutrition
Serving:
1
mug
|
Calories:
344
kcal
(17%)
|
Carbohydrates:
59
g
(20%)
|
Protein:
3
g
(6%)
|
Fat:
13
g
(20%)
|
Saturated Fat:
7
g
(44%)
|
Polyunsaturated Fat:
1
g
|
Monounsaturated Fat:
3
g
|
Trans Fat:
1
g
|
Cholesterol:
30
mg
(10%)
|
Sodium:
108
mg
(5%)
|
Potassium:
320
mg
(9%)
|
Fiber:
8
g
(33%)
|
Sugar:
35
g
(39%)
|
Vitamin A:
476
IU
(10%)
|
Vitamin C:
10
mg
(12%)
|
Calcium:
55
mg
(6%)
|
Iron:
1
mg
(6%)
Did you make this recipe?
Please leave a star rating and review below!
