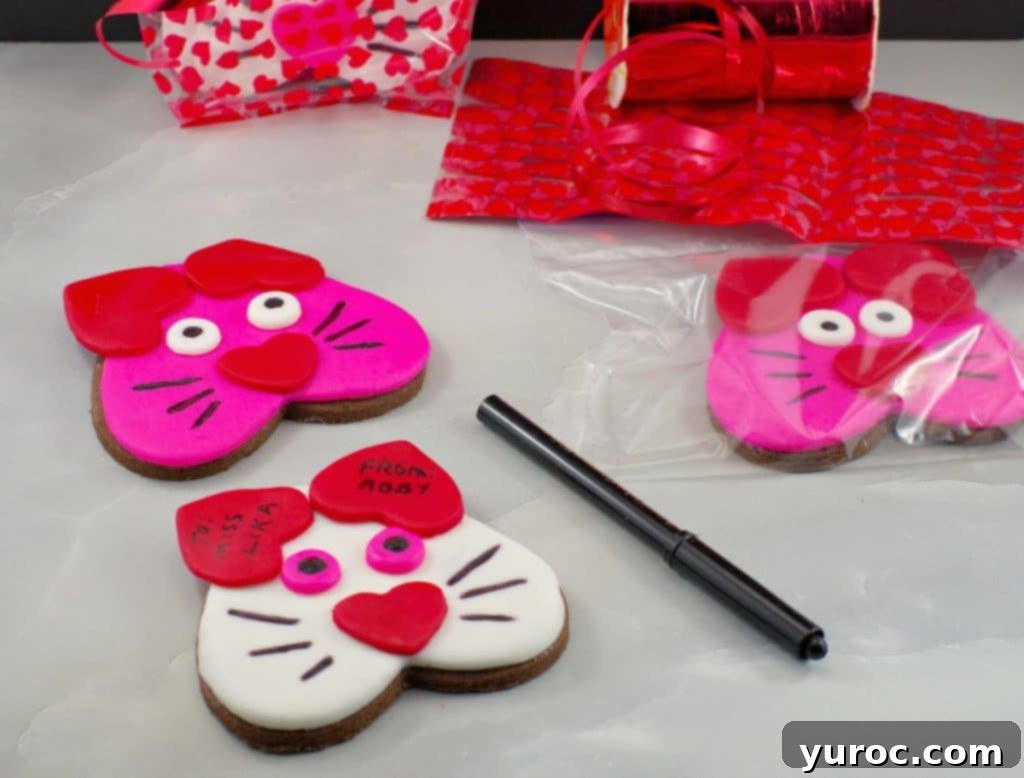
Adorable Heart-Shaped Cat Cookies: The Easiest Fondant Valentine’s Day Treat!
Delight your loved ones this Valentine’s Day with these charming and incredibly easy-to-make **Heart-Shaped Cat Cookies**. Crafted using three different-sized heart cookie cutters and a simple edible marker, these feline-inspired treats are sure to melt hearts. You can follow our delicious rolled chocolate cookie recipe or use your favorite sugar cookie base – either way, they transform into a purr-fectly wonderful edible gift. If you’ve been searching for unique heart-shaped cookie decorating ideas that don’t require expert skills, look no further!
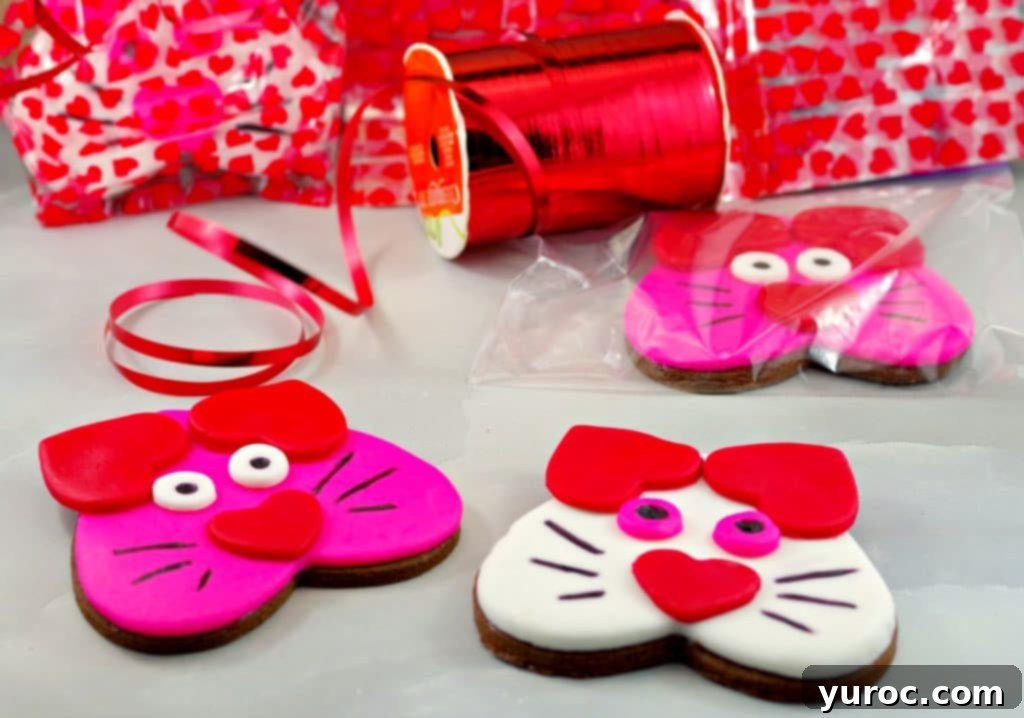
The inspiration for these adorable decorated cat cookies originated many years ago from a charming paper valentine. At the time, I designed these delightful kitty cat cookies as an edible Valentine’s gift for my daughter’s daycare class, and the children absolutely adored them! If the thought of decorating cookies with fondant seems daunting, fear not – these **Valentine Cookies** are surprisingly simple to create, making them much easier than their intricate appearance suggests. Get ready to impress without the stress!
Fondant-covered, heart-shaped cookies are an ideal treat for Valentine’s Day, offering a polished look with minimal effort. My journey into cookie decorating with fondant began precisely because it is significantly simpler than traditional royal icing. I consistently struggled to achieve the perfect consistency required for outlining, flooding, and adding fine details with royal icing. The process often felt like a frustrating hassle, leading to inconsistent results and wasted time.
In contrast, fondant offers a straightforward and forgiving decorating method. You simply roll it out to an even thickness, cut it with the exact same cookie cutter used for your cookie base, and adhere it securely. Bonding additional fondant pieces together – like the ears and noses for our cat cookies – is as easy as applying a tiny drop of water or a small amount of clear syrup. This method makes these fondant cat cookies incredibly accessible for bakers of all skill levels, ensuring a beautiful outcome every time!
Looking for more fun heart-shaped treats beyond cookies? Don’t miss my Homemade Jello Fruit and Vegetable Snacks – another fantastic option for kids!
Why Choose Fondant for Your Valentine’s Day Cat Cookies?
While royal icing offers beautiful intricate designs, it can be a source of stress for many home bakers, particularly beginners. Achieving the right consistency for outlining (thick), flooding (runny), and detailing (medium) can be a delicate balance. Too thick, and it won’t flow; too thin, and it’ll run off the cookie. Fondant eliminates these challenges entirely. It comes ready to use, offers a smooth, even finish, and allows for clean, precise cuts. Mistakes are also much easier to fix with fondant compared to royal icing, making it the perfect medium for these charming cat cookies.
🥘 Essential Ingredients and Supplies for Purr-fect Cat Cookies
Creating these delightful cat cookies requires a few key ingredients and tools. Opting for quality supplies will enhance both the baking and decorating experience, leading to truly impressive results.
- Coffee Granules. Don’t skip this secret ingredient for your chocolate cookies! A small amount of instant coffee granules significantly enhances the rich flavor of chocolate without adding any coffee taste. It deepens the cocoa notes, making your cookies exceptionally delicious. You can use either regular or decaffeinated instant coffee.
- Pink Rolled Fondant, Red Rolled Fondant, and White Rolled Fondant (affiliate links). To simplify the decorating process and save time, it’s highly recommended to purchase fondant that is already pre-colored. This eliminates the need for kneading in gel food coloring and ensures vibrant, consistent hues for your cat cookies. You’ll use these various colors for the main body, ears, and facial features.
- Black Edible Marker. This tool is absolutely ideal for drawing the delicate faces, eyes, and whiskers of your cat cookies. It provides precision and makes the detailing step fun and straightforward. A major advantage of using an edible marker is that mistakes are easy to correct: simply wipe gently with a Q-tip dipped in a little vodka or clear vanilla extract, let it dry, and redraw. For the best results, we highly recommend using the Americolor brand due to its superior flow and vibrant color.
- Set of Heart-Shaped Cookie Cutters. You will need at least three different sizes of heart cookie cutters to create the various components of our cat cookies: one large for the body, one medium for the ears, and one small for the nose. Purchasing a set of graduated sizes is the most economical and convenient way to ensure you have all the necessary shapes.
- Clear Syrup (such as Karo or clear corn syrup). Clear syrup acts as an excellent edible adhesive for attaching fondant pieces to your cookies and to each other. Using a clear variety is important as it makes any small drips or excess virtually invisible, helping to maintain a clean and professional finish on your decorated cookies.
While chocolate is a plain necessity for Valentine’s Day in many households, which is why we’ve chosen this rolled chocolate sugar cookie recipe, you are absolutely free to use any no-fail sugar cookie recipe you prefer. However, we genuinely believe these chocolate cookies are exceptionally delicious! They are designed to be similar to our popular No Fail Sugar Cookies, which means they are specifically formulated to hold their shape beautifully during baking, ensuring your heart-shaped base cookies remain perfectly defined for decorating.
🔪 Step-by-Step Guide: How to Decorate Your Adorable Cat Cookies
Before you begin decorating, ensure your chocolate or sugar cookies are fully baked and completely cooled. Cold cookies provide a firm base for fondant application.
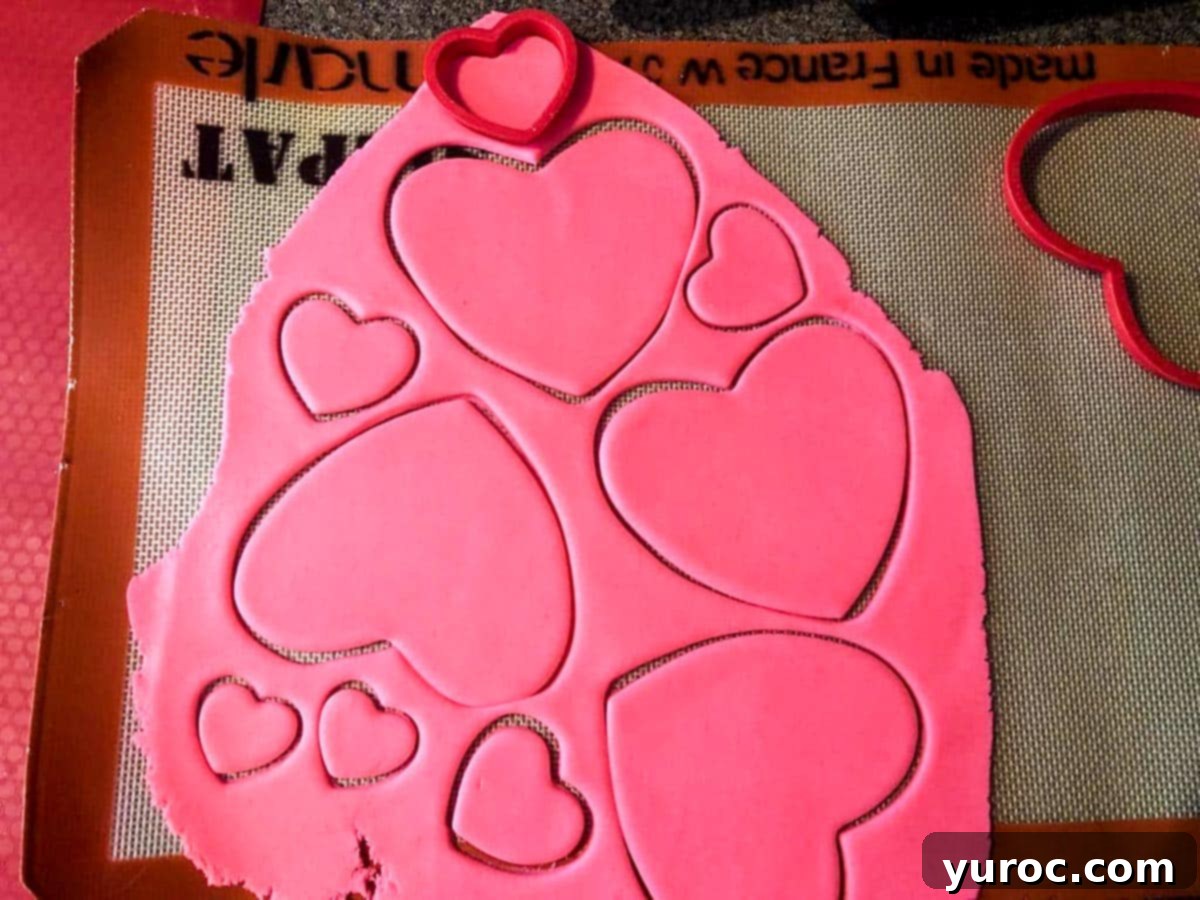
Roll your chosen colored fondant (e.g., pink or red) evenly to about ¼ inch thick. Using your largest heart-shaped cookie cutter, cut out as many hearts as you have cookies. Immediately after cutting, gently transfer these fondant hearts to a clean, flat surface dusted lightly with cornstarch or powdered sugar. Allow these large hearts to dry out for approximately 15 minutes. This crucial step helps them firm up slightly, preventing stretching or distortion when you lift and place them onto the cookies. Simultaneously, use the medium-sized heart cutter to cut out the fondant shapes for the ears, and let them dry alongside the larger hearts.
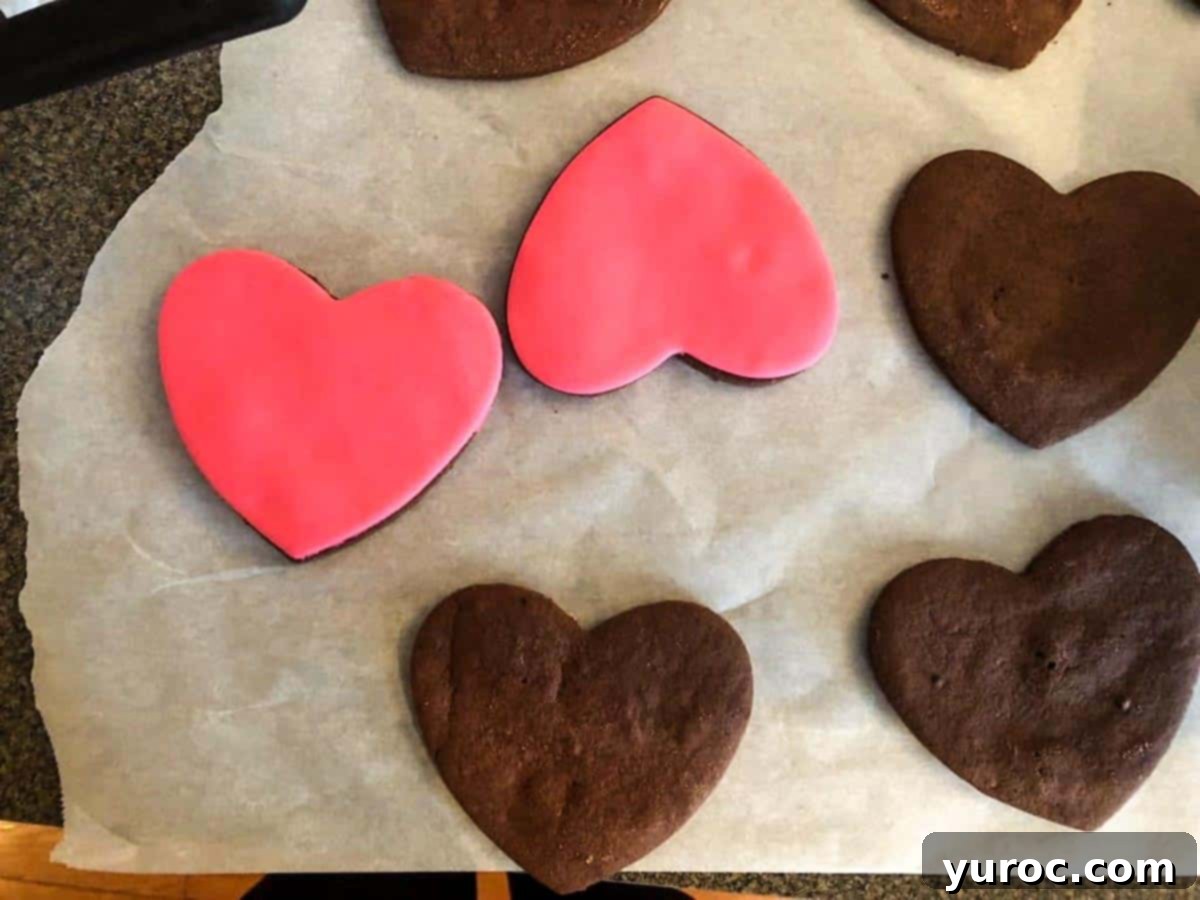
Take one cooled cookie and apply a very thin, even layer of clear syrup (or a dab of water) to its entire top surface. This acts as the adhesive. Carefully lift a dried large fondant heart and gently place it onto the cookie, aligning the edges. Use your fingertips to gently spread the fondant to the edges of the cookie, ensuring it covers the entire surface smoothly and without wrinkles. Repeat this process for all your cookies, creating a vibrant base for your cat designs.
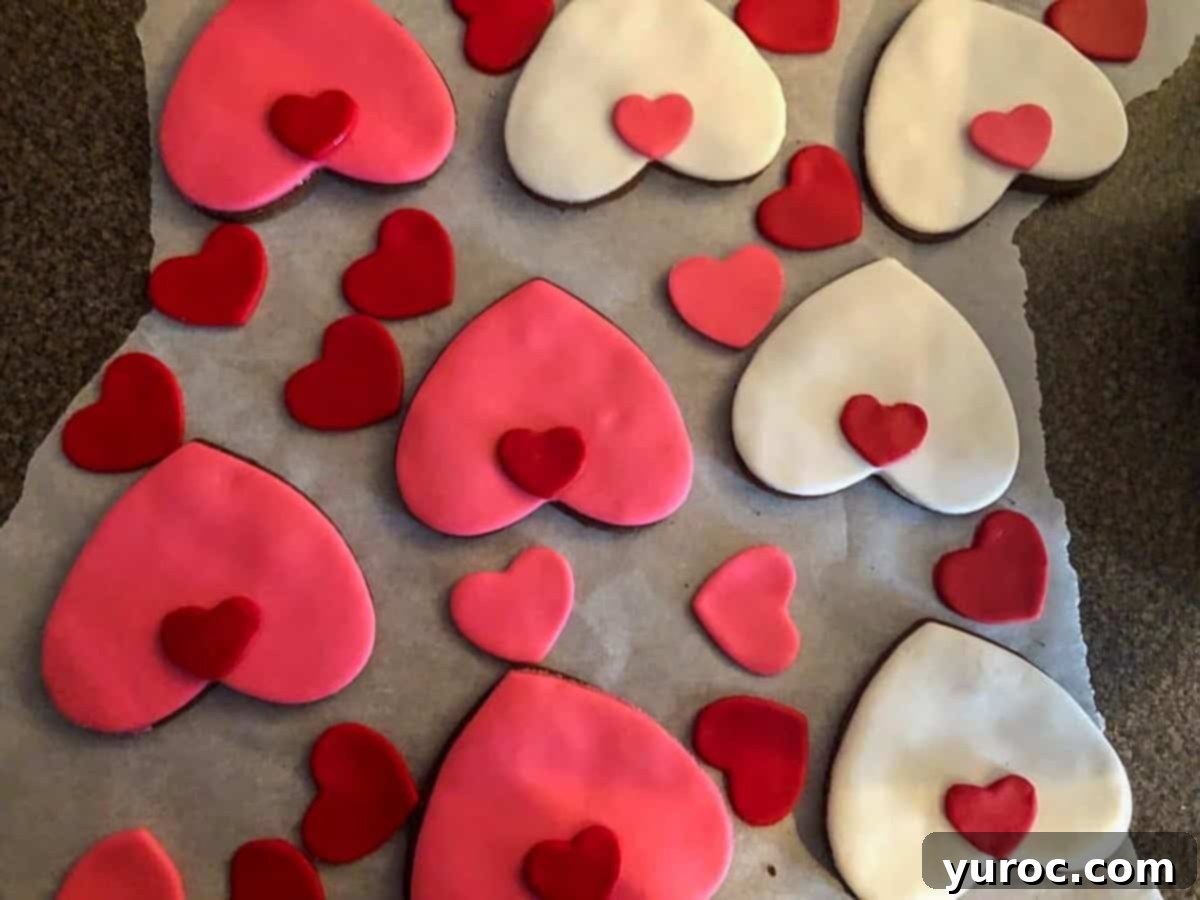
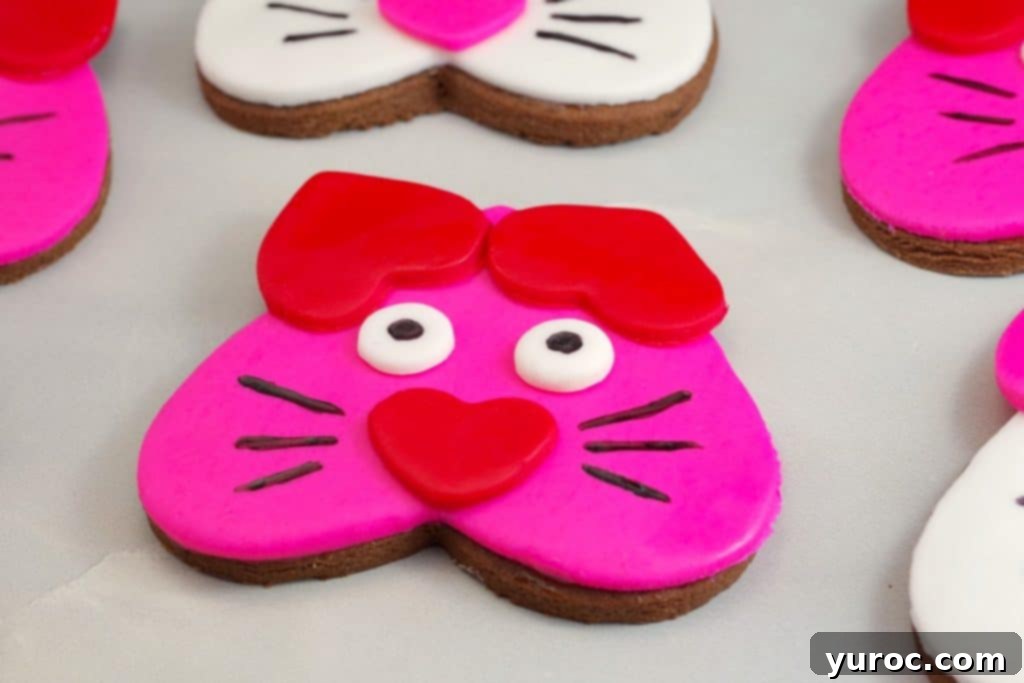
Now, let’s create the cat’s face! For the nose, take your smallest heart-shaped fondant pieces. Turn the main fondant-covered cookie upside down (so the point of the large heart is at the top, representing the chin). Attach a small heart for the nose onto the broader, rounded end of the upside-down large heart. You can adhere it with a tiny dab of clear syrup or a single drop of water. This creates the classic cat nose shape. Feel free to use a contrasting fondant color for the nose for a pop of visual interest!
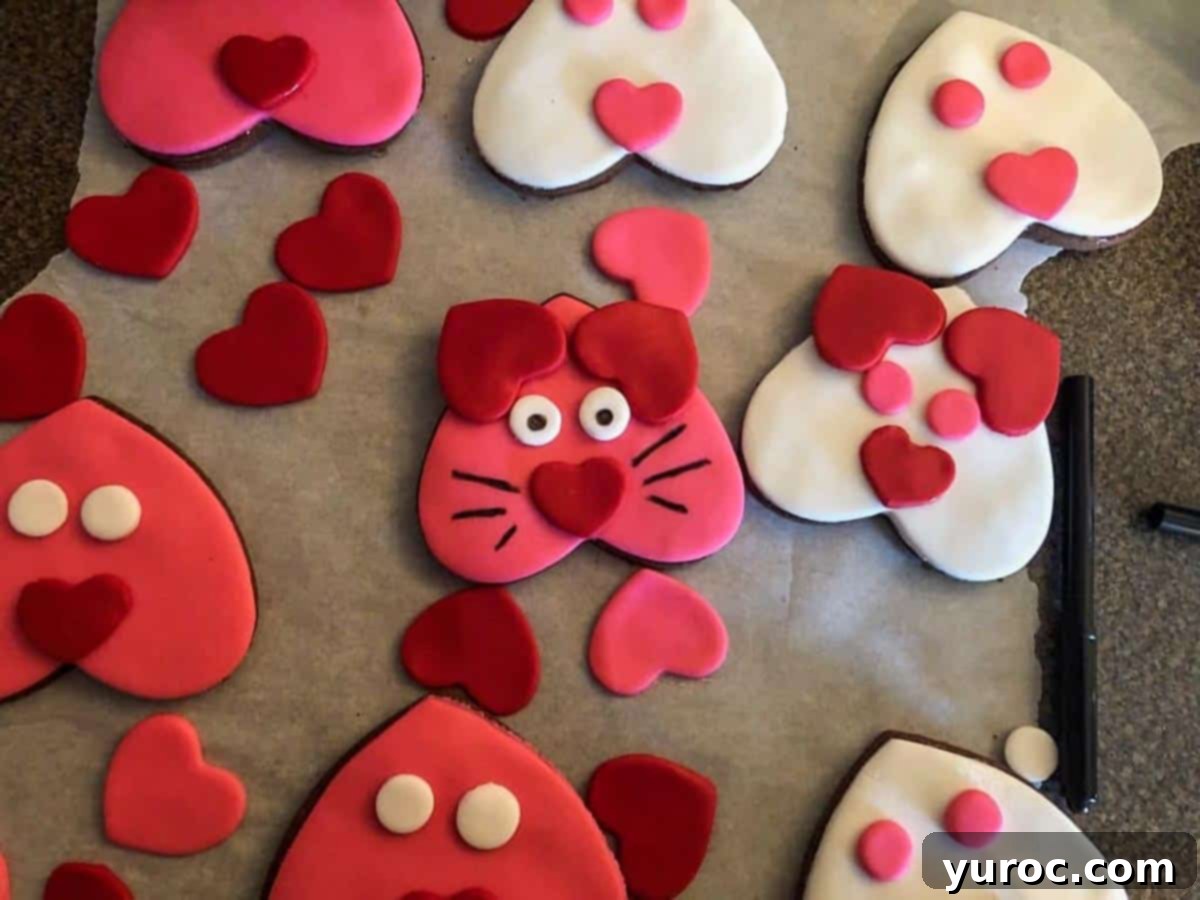
For the ears, take the medium-sized fondant hearts you cut earlier. Turn these hearts upside down as well, and place them at the top of the main heart cookie, spaced evenly to resemble cat ears. If your fondant ears are not dry enough, they might flop over. A helpful trick is to lean the cookies on each other while they dry, allowing the face of one cookie to support the ears of the cookie behind it until they firm up. For the eyes, use a small round cutter (the back of an icing tip works perfectly!) to cut out small circles from white or another contrasting fondant. Adhere both the ears and eyes with a little clear syrup or water.
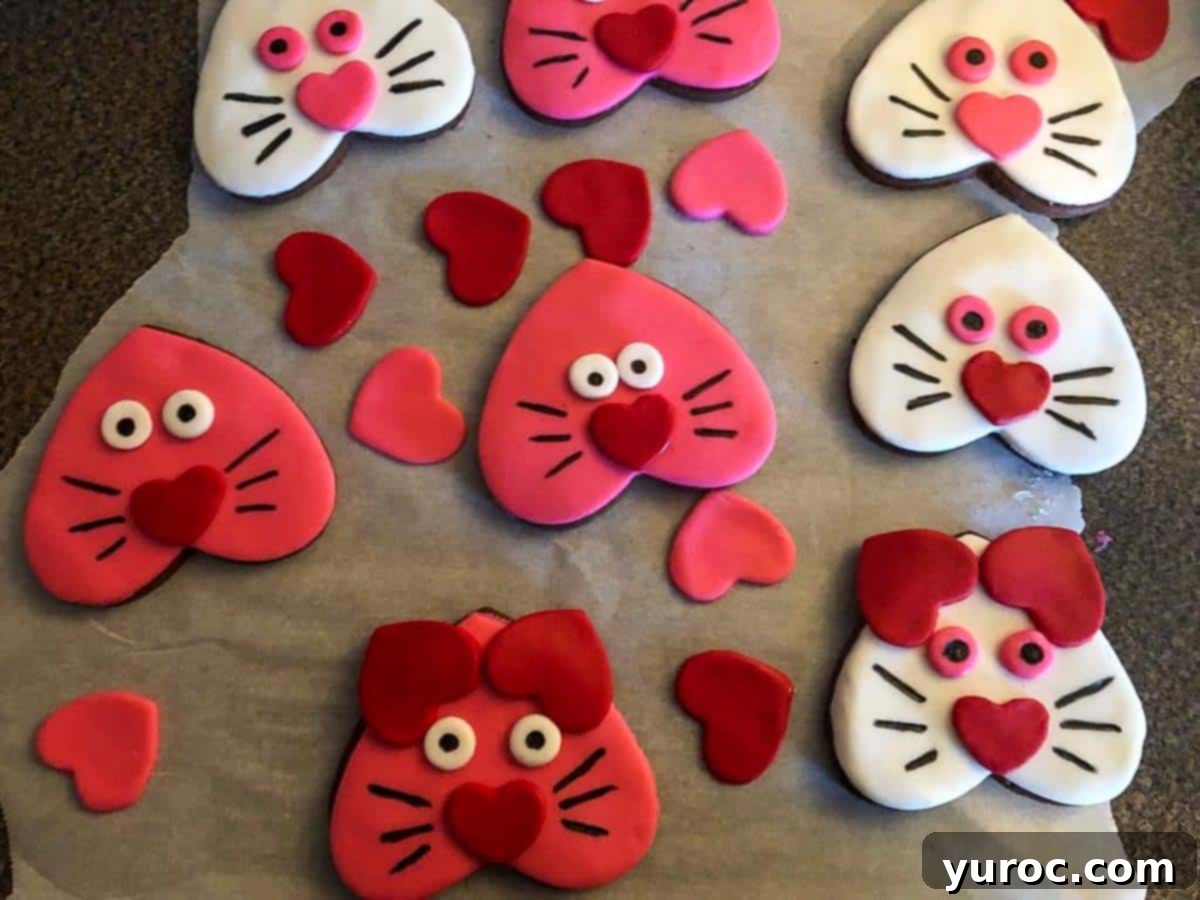
Once the eyes and ears are securely in place and slightly set, it’s time for the personality! Use your black edible marker to carefully draw small circles in the center of the white fondant eyes to create pupils. Then, draw delicate whiskers extending from the sides of the nose. You can also add a small mouth below the nose, if desired, to give your cat cookies even more character. Take your time with these details, as they bring your kitty cookies to life!
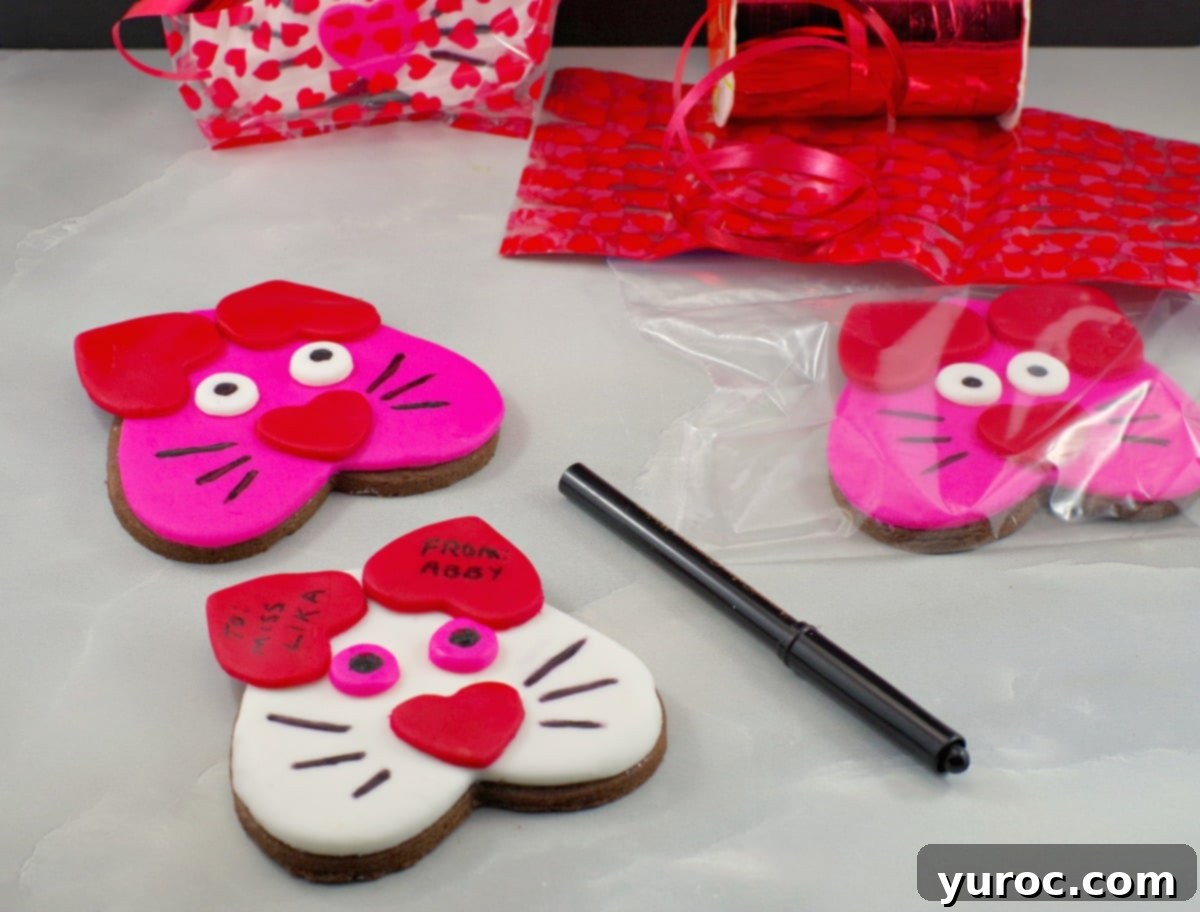
To make these Valentine’s Day treats extra special, use the black edible marker to personalize each cookie. Write names, short messages like “Be Mine,” or “Meow!” on the back or a less decorated area of the cookie. Once personalized, these charming cookies make fantastic gifts. Wrap them individually in small clear cellophane bags, tie them with a pretty ribbon, and present them to friends, family, teachers, or any cat enthusiast. They’re an edible Valentine’s card that’s sure to be cherished!
Expert Tips for Purr-fect Fondant Cat Cookies
Achieving flawless fondant-decorated cookies is simple with these expert tips:
- Use Chilled Dough for Clean Cookie Shapes. For beautifully sharp edges and perfectly defined heart shapes, always chill your cookie dough for at least 30 minutes (or even an hour) before rolling it out and cutting. If the dough starts to soften and become sticky while you’re working, simply pop it back into the fridge for another 10-15 minutes to firm up. This prevents spreading and maintains the integrity of your cookie shape.
- Prevent Fondant from Sticking. When rolling out fondant, lightly dust your work surface and rolling pin with a small amount of cornstarch or powdered sugar. This prevents the fondant from sticking. However, use it sparingly, as too much can dry out the fondant and make it crack. Alternatively, you can apply a very thin layer of shortening to your work surface and rolling pin for a non-stick surface.
- Allow Fondant Pieces to Dry Slightly Before Attaching. After cutting out your large, medium, and small fondant hearts, let them sit undisturbed for about 15 minutes before placing them on the cookies. This brief drying time allows them to firm up slightly, making them easier to handle and less prone to stretching or losing their shape when you transfer them.
- Use a Light Hand with the Syrup Adhesive. When adhering fondant to cookies or attaching fondant pieces to each other, remember that less is more with syrup. Apply only a thin, even layer of clear corn syrup. Too much syrup can cause the fondant to slide around, create a sticky mess, or even make the fondant dissolve slightly. A tiny dab is sufficient for a secure bond.
- Support Floppy Fondant Ears While Drying. If your medium-sized fondant hearts for the ears are a little too soft and prone to flopping, you can easily support them. Lean the decorated cookies against each other or use small crumpled pieces of parchment paper or aluminum foil as props to hold the ears in an upright position until they firm up and dry.
- Test Your Edible Marker on a Scrap Piece First. Before drawing directly on your carefully decorated cat faces, always test your edible marker on a small scrap piece of fondant. This ensures the ink flows smoothly and that you’re comfortable with the pressure and line thickness. If the fondant on your cookie is too soft, let it dry for a bit longer before attempting to draw.
- Easily Fix Mistakes Made with Edible Marker. Don’t panic if you make a drawing mistake with your edible marker! Simply dip a clean Q-tip or a fine brush into a little vodka or clear vanilla extract and gently wipe away the mistake. Allow the area to dry completely before attempting to redraw. The alcohol evaporates quickly, leaving no residue.
- Store in a Single Layer to Avoid Smudging. To protect your beautiful fondant decorations, it’s best to store your finished cat cookies in a single layer. If you need to stack them in a container, place a sheet of parchment paper between each layer to prevent the delicate fondant designs from sticking, smudging, or getting damaged.
- Do Not Refrigerate Fondant-Covered Cookies. Refrigeration causes fondant to “sweat” due to condensation, resulting in tiny beads of water forming all over the surface. This moisture can ruin the smooth finish of your cat cookies and cause colors to bleed or become dull. Always store them at room temperature.
- Freeze Cookies Without Faces for Best Results. If you plan to bake and decorate these cookies in advance for freezing, decorate them up to the fondant application stage (body, ears, nose, eyes), but *do not* draw the faces with the edible marker yet. Wait until the cookies have thawed completely at room temperature and are entirely dry (no longer sticky) before adding the final facial details. This prevents any potential smudging or bleeding of the marker ink caused by moisture during thawing.
👪 Serving Size & Adjustments
This recipe is designed to yield approximately 18 delightful cat cookies. However, you have the flexibility to adjust the quantities to suit your needs. You can easily halve, double, or even triple the recipe. Simply click on the serving number in the recipe card below and select your desired number of servings; the ingredient quantities will automatically adjust, making it convenient to bake for a small gathering or a large party.
🍴 The Purr-fect Edible Valentine’s Day Gift
These adorable chocolate cat cookies aren’t just a treat; they make an absolutely fantastic edible Valentine’s gift for children, friends, teachers, or any dedicated cat lover in your life! Their unique charm and delicious taste make them a memorable alternative to traditional paper cards. Package them in a cute little heart-themed bag, a simple cellophane wrapper, or even a basic zip-lock bag. For an extra special touch, use an edible marker to personalize each cookie with the recipient’s name or a heartfelt message. I initially created these for my daughter’s daycare class years ago, and they were a huge hit. This year, we even made a batch for her dance class, including the instructor, as Valentine’s Day falls on a class day – a truly universally loved treat!
🌡️ Storage Instructions for Freshness
To keep your beautiful cat cookies fresh and delicious, store them at room temperature in an airtight container for up to one week. For best results, place sheets of parchment paper between layers of cookies if stacking. Remember, it’s crucial to *avoid putting them in the fridge*, as the moisture and condensation will cause the fondant to ‘sweat,’ potentially ruining the decoration and texture.
If you wish to make the cookies well in advance and freeze them after applying the fondant base, we recommend holding off on drawing the eyes and whiskers. After removing them from the freezer, allow them to defrost completely at room temperature and air dry thoroughly. There will likely be some moisture on the fondant after thawing, so ensure they are no longer sticky to the touch before adding any edible marker details. This prevents smudging and ensures crisp, clean facial features.
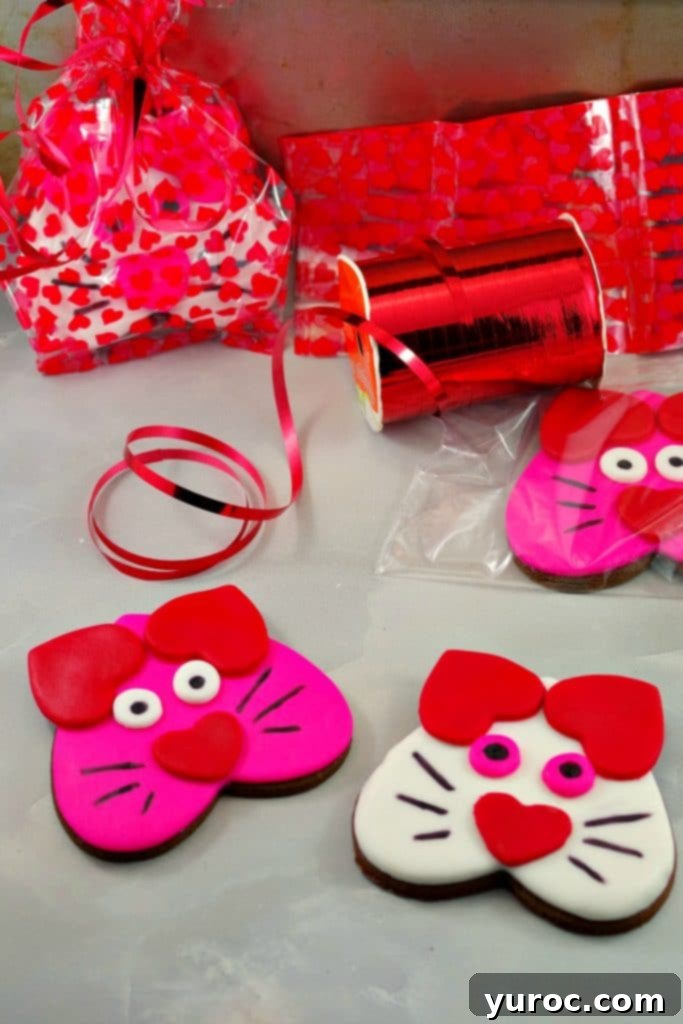
Whether you choose our rich rolled chocolate cookie recipe or your go-to sugar cookie recipe, these charming feline treats are guaranteed to be a wonderful edible Valentine’s Day surprise. Anyone who knows me will tell you I’m a bit cat crazy, but the wonderful truth is, you don’t need to be a devoted cat enthusiast or even a cat owner to absolutely fall in love with these irresistibly cute Valentine’s Day Sugar Cookies!
❔ Recipe FAQs: Your Questions Answered
Absolutely! If you’re pressed for time or prefer not to bake, using pre-made sugar cookies is a fantastic shortcut. Just ensure they have a relatively smooth and flat surface, which is ideal for the fondant to adhere properly without bumps or wrinkles. Look for plain, un-iced sugar cookies for the best results.
Yes, you certainly can! If you have white rolled fondant, you can knead in gel food coloring until you achieve your desired shade. Gel colors are concentrated and provide vibrant results without adding too much moisture. Remember to wear gloves to prevent your hands from getting stained during the coloring process.
While an edible marker offers excellent precision and ease, it’s not your only option. If you don’t have one, you can use a fine-tipped brush with a tiny amount of black gel food coloring or even carefully piped melted dark chocolate (allowed to cool slightly) to create the facial details. The marker is simply the easiest and most forgiving method.
You can, but be aware that royal icing requires a different set of skills and more precision. It involves outlining, flooding, and waiting for layers to dry, which can be challenging for beginners to get right consistently. Fondant is generally much more forgiving and easier to achieve a smooth, professional look, especially for detailed shapes like these cat cookies.
Fondant can dry out quickly when exposed to air. To keep it pliable and easy to work with, always cover any unused portions tightly with plastic wrap. For longer storage during your decorating session, place the wrapped fondant in an airtight container. This simple step will save you from cracked and brittle fondant.
You can bake the cookies up to a week in advance and store them undecorated in an airtight container. Once decorated with fondant, they can be stored at room temperature in an airtight container (with parchment paper between layers) for up to 5-7 days. If freezing, follow the instructions in the storage section to ensure the best results for drawing faces after thawing.
While three sizes are ideal for the distinct body, ear, and nose shapes, you can get creative! You might use one large cutter for the body and then use a knife or a smaller circle cutter to manually shape smaller hearts for the ears and nose. The key is to have varying sizes to create the visual effect of the cat’s features.
If you’re on the hunt for delightful Valentine cookie decorating ideas or charming heart-shaped cookie recipes, then these fondant cat cookies are an absolute must-try! I don’t know about you, but speaking from my childhood memories, I would have wholeheartedly preferred to receive a cute cat cookie Valentine over a traditional paper one any day. They’re fun, unique, and utterly delicious!
❤️ More Sweet Valentine’s Day Recipes to Love
- Sheet Pan Sugar Cookie Pancakes
- No Bake Valentine’s Day Cheesecake Recipe
- Healthy Red Velvet Pancakes (with Sweet Chocolate Cream Cheese Butter)
- Chocolate Red Wine Cupcakes (from box mix)
Did your family ❤️ this recipe? Did you know that commenting and ⭐rating recipes is one of the best ways to support your favorite recipe creators? If you LOVED this recipe, please comment and rate it in the recipe card below or share photos on social media using the hashtag #foodmeanderings or tagging @foodmeanderings! Your feedback means the world to us!

😻Heart shaped Cat Cookie Recipe
Equipment
- heart cookie cutters
- edible black marker
- large mixing bowl
- Rolling Pin
Ingredients
Chocolate Rolled cookies:
- 2 ⅓ cups flour
- ½ cup cocoa
- 2 teaspoons instant coffee granules (regular or decaf)
- ½ teaspoon salt
- 1 cup butter
- 1 teaspoon vanilla
- 1 whole egg
- 1 cup white granulated sugar
Cat Cookie Decorations
- ½ of a 1.5 lb box pink rolled fondant (half of a 24 oz box)
- ½ of a 1.5 lb box red rolled fondant (half of a 24 oz box)
- ½ of a 1.5 lb box white rolled fondant (half of a 24 oz box)
- 1 black edible marker
- 1 set heart shaped cookie cutters
- ¼ cup clear syrup
Instructions
Chocolate Rolled Cookies:
- Preheat oven to 350 degrees F (176 C).
- Whisk flour, cocoa, instant coffee, and salt together in a medium bowl until thoroughly combined.
- In a separate, large bowl, use an electric hand mixer to beat the sugar and softened butter together until the mixture is light and fluffy. Add the egg and vanilla extract, then continue beating until these are well blended into the butter mixture.
- Gradually add the dry flour mixture to the wet butter mixture, keeping the electric mixer on low speed. Mix until the ingredients are just combined and a soft dough starts to form.
- Finish mixing by hand, gently kneading the dough on a lightly floured surface for a minute or two, as you would for bread, until the dough clings together and is smooth. Do not overmix.
- Shape the dough into a disc, wrap it in plastic wrap, and chill it in the refrigerator for at least 30 minutes. This step is crucial for preventing the cookies from spreading during baking and ensuring sharp edges.
- Once chilled, roll the chocolate cookie dough out onto a lightly floured surface to approximately ⅛ inch thick. Use your largest heart-shaped cookie cutters to cut out the cookie shapes.
- Carefully transfer the cut cookie shapes with a spatula to an ungreased baking sheet, leaving a little space between each cookie.
- Bake for 14-16 minutes, or until the edges are firm and the bottoms are lightly browned. The exact baking time may vary based on your oven. Once baked, transfer the cookies immediately to a wire rack to cool completely before decorating.
Decorating :
- Roll your desired color of fondant (e.g., pink or red) to about ¼ inch thick. Using the largest heart cutter, cut out fondant hearts. Place these on a lightly floured surface and let them dry out for approximately 15 minutes for the best results, as this helps them hold their shape. At the same time, cut out the medium-sized hearts for the ears and allow them to dry as well.
- Apply a thin, even layer of clear syrup (or a tiny dab of water) to the top surface of each cooled cookie. Carefully lift a dried large fondant heart and gently place it onto the cookie, ensuring it covers the entire surface and aligns with the cookie’s edges. Gently press and smooth the fondant to secure it.
- For the cat’s face: turn the fondant-covered cookies upside down so the point of the heart is at the top. Take the smallest fondant hearts (perhaps in a contrasting color) and adhere one to the wider, rounded end of each upside-down large heart using a tiny bit of syrup or water to create the nose.
- For the ears: turn the medium-sized fondant hearts upside down as well, and carefully place them at the top of the main cookie heart, spaced evenly, to form the cat’s ears. *If the ears are not dry enough, they may flop. You can lean the cookies against each other to provide support while the ears dry and firm up.For the eyes: use a small round cutter (the back of an icing tip works perfectly!) to cut out small circles from white fondant. Adhere these eye shapes and the ears to the cookie with a small amount of clear syrup or water, pressing gently to secure.
- Once the eyes and ears are secure, use the black edible marker to draw small pupils in the center of the white eyes and delicate whiskers extending from the sides of the nose. You can also add a simple mouth if desired to enhance the cat’s expression.
- If you wish to personalize the cookies, use the black edible marker to write names or short messages, transforming them into unique Valentine’s gifts. Wrap them individually as shown in the photos for a charming presentation.
- Storing: Store your decorated cookies in a long, sealed plastic container between sheets of parchment paper to prevent sticking and damage. They can also be frozen this way. *Important: Do not draw the faces on the cookies if you intend to freeze them! Draw them only after they have thawed and completely air-dried to avoid smudging.
Notes
-
- Use Chilled Dough for Clean Cookie Shapes. For sharp edges and well-defined heart shapes, chill the cookie dough for at least 30 minutes before rolling it out. If the dough softens while cutting, pop it back in the fridge for 10 minutes.
-
- Prevent Fondant from Sticking. Dust your work surface with a small amount of cornstarch or powdered sugar when rolling out the fondant to prevent sticking. However, use it sparingly so it doesn’t dry out the fondant. You can also use a little shortening (a thin layer) on your work surface.
-
- Allow Fondant to Dry Slightly Before Attaching. Cut your fondant hearts and let them dry for about 15 minutes before placing them on the cookies. This helps them hold their shape better and prevents stretching.
-
- Use a Light Hand with the Syrup. Too much syrup can make the fondant slide around or become sticky. A thin, even layer is enough to adhere the fondant securely.
-
- Support the Ears While Drying. If your fondant ears are floppy, lean the cookies against each other or use small supports (like crumpled parchment paper) to hold them in place while drying.
-
- Test Your Edible Marker on a Scrap Piece First. Before drawing on the faces, test your edible marker on a piece of fondant to make sure the ink flows smoothly. If the fondant is too soft, let it dry for a bit before drawing.
-
- Store in a Single Layer to Avoid Smudging. If stacking cookies in a container, place parchment paper between layers to prevent the fondant decorations from getting damaged.
-
- Do not store in the fridge. Refrigeration causes fondant to “sweat”, so it ends up with little beads of water all over it, which can ruin your cat cookies.
-
- Freeze Cookies Without Faces for Best Results. If freezing, decorate up to the fondant stage but wait to draw the faces until after the cookies have thawed and dried completely to avoid smudging.
-
- Fix Mistakes Made with Edible Marker. If you make a mistake with the edible marker, simply dip it in a little vodka or clear vanilla extract to erase it, allow it to dry, and start over!
Nutrition
