Quick & Easy Microwave Easter Egg Fudge: The Ultimate Cadbury Creme Egg & Mini Egg Delight
Are you searching for an incredibly simple yet utterly delightful dessert that captures the spirit of Easter? Look no further! This easy Microwave Easter Egg Fudge is your answer to a quick, delicious, and show-stopping treat. Forget the fuss of a candy thermometer or complicated stovetop methods; this recipe brings together the magic of two beloved Cadbury classics – creamy Easter Creme Eggs and crunchy Cadbury Mini Eggs – into one irresistible fudge that practically melts in your mouth.
Perfect for spring gatherings, Easter celebrations, or as a highly sought-after item at your next bake sale, this fudge is designed for maximum flavor with minimal effort. Its vibrant colors and rich chocolatey taste, complemented by the iconic gooey center of Creme Eggs and the satisfying crunch of Mini Eggs, make it a truly unforgettable dessert. Get ready to experience an ultimate Easter egg party in every single bite!
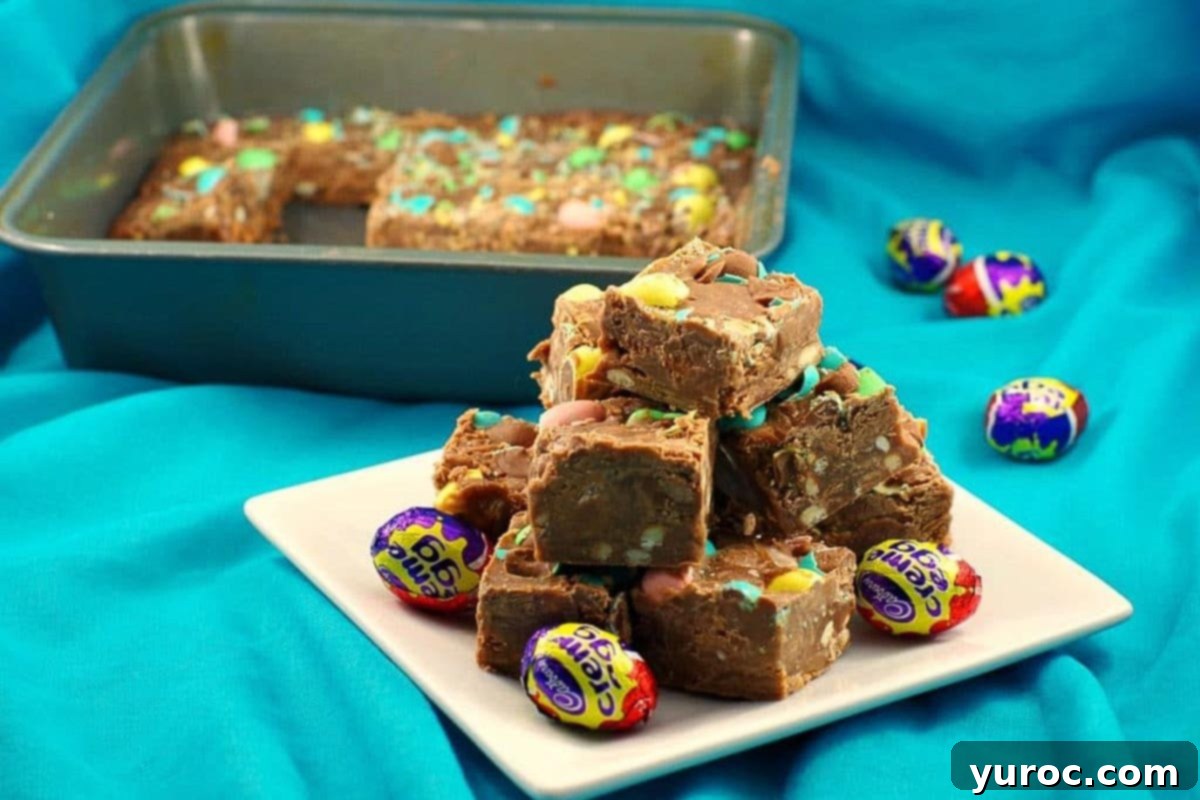
While Easter Egg Fudge is undeniably popular during the holiday season, its cheerful appearance and crowd-pleasing taste make it an excellent choice for any spring bake sale or casual dessert offering. This particular recipe was lovingly inspired by my Easter Creme Egg Icebox Cake – An Easy Easter Dessert, which also celebrates the delightful flavors of Cadbury.
If you find yourself utterly captivated by the charm of Cadbury Easter Creme Eggs and Mini Eggs, much like I am, you’ll be thrilled to explore more of my creations. Don’t miss out on my delightful Mini Egg Cupcakes and the decadent Easter Creme Egg Chocolate Swiss Roll! Each recipe aims to maximize the joy these iconic candies bring.
My first encounter with a Cadbury Easter Creme Egg dates back to my childhood. The sight of its creamy white and yellow fondant center initially struck me as a bit too realistic, making it, to be honest, a tad unappetizing at first glance. It took some convincing to even try one! However, after that very first bite, I was completely smitten. The unique sweetness and gooey texture are truly something special. While Easter Creme Eggs are amazing on their own, imagine combining them with the satisfying crunch of Mini Eggs, all nestled within a rich, smooth fudge? It’s a combination that truly was meant to be, creating a harmonious blend of textures and flavors that’s simply divine.
✨ Why Choose Microwave Fudge? The Easiest Path to Sweet Perfection
Opting for the microwave method to make fudge is a game-changer, especially if you’re new to candy making or simply pressed for time. Here’s why it’s the superior choice for this Easter Egg Fudge:
- Unbeatable Speed: Traditional fudge recipes often demand constant stirring over a stovetop for extended periods. The microwave significantly slashes cooking time, allowing you to go from ingredients to a chilled fudge in a fraction of the time.
- Effortless Simplicity: Say goodbye to double boilers and intricate temperature control. The microwave simplifies the melting process into just a few short bursts, making it incredibly accessible for cooks of all skill levels.
- No Candy Thermometer Needed: This is perhaps the biggest perk! Many fudge recipes rely on precise temperature readings for perfect consistency. Our microwave method bypasses this entirely, ensuring smooth, creamy results without any special equipment.
- Minimal Mess: With fewer pots and pans involved, cleanup is a breeze. Most of the work happens in a single microwave-safe bowl, leaving you more time to enjoy your delicious creation.
- Kid-Friendly (with Supervision): The reduced cooking time and simpler process make it a fun activity for families. Children can assist with crushing candies and decorating, under adult supervision, making it a wonderful Easter bonding experience.
🥘 Ingredient Notes
To whip up this spectacular Easter Creme Egg Fudge, you’ll need a handful of readily available, simple ingredients. The quality of your ingredients directly impacts the final taste and texture, so choose wisely!
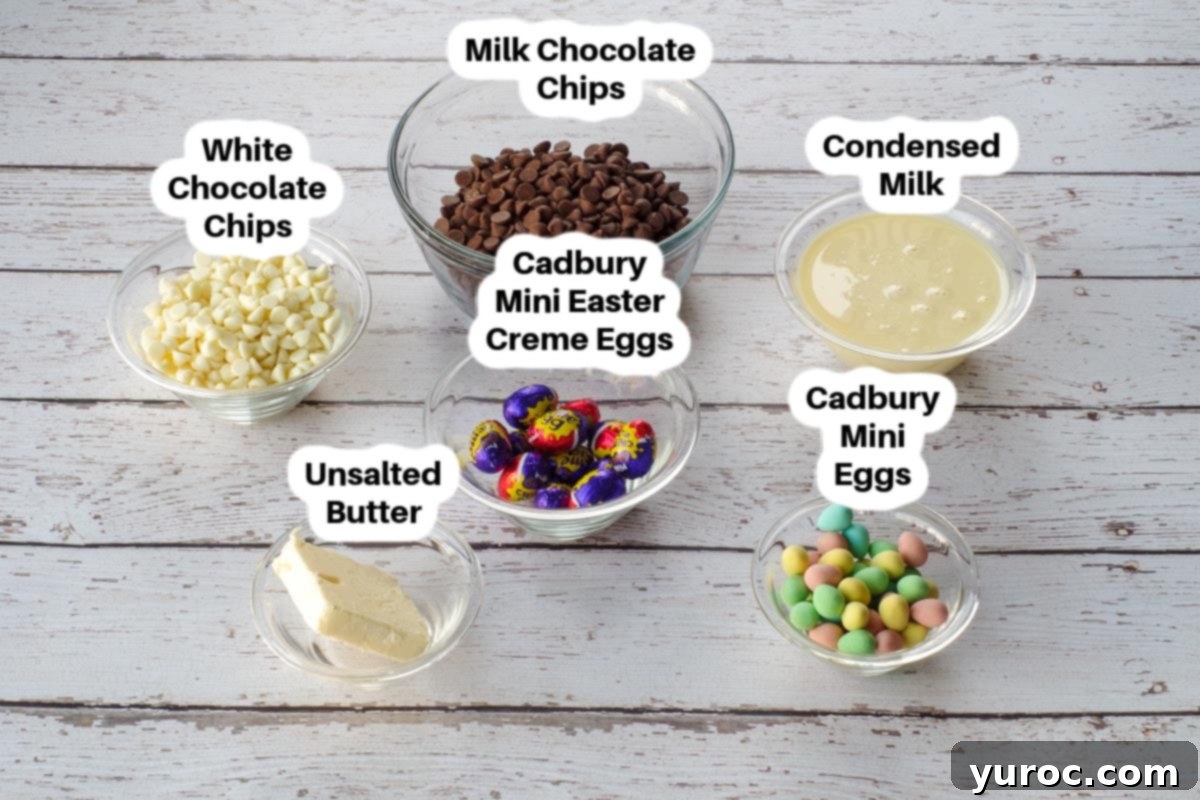
- Sweetened Condensed Milk. This is the magical ingredient that gives microwave fudge its signature creamy, smooth texture without needing a candy thermometer. It acts as both a sweetener and a binder, ensuring your fudge sets perfectly. Make sure it’s *sweetened* condensed milk, not evaporated milk, as they are very different!
- Milk Chocolate Chips. For that classic, sweet, and rich fudge flavor, milk chocolate chips are truly the best choice in this recipe. Brands like Hershey’s, Cadbury, or Ghirardelli are excellent options for their consistent melting properties and delicious taste.
- White Chocolate Chips. Adding white chocolate chips not only contributes to the sweetness but also helps achieve a lighter, creamier base, enhancing the overall texture and color of the fudge, making the vibrant Easter eggs pop even more.
- Butter. We recommend using unsalted butter. This allows you complete control over the salt content in your fudge. Different brands of salted butter can vary significantly in their saltiness, so unsalted is the safest bet for consistent results.
- Cadbury Mini Easter Creme Eggs (affiliate link). These iconic treats with their unique gooey, sweet fondant center are what make this fudge truly special and distinctly “Easter.” If mini eggs are hard to find, you can absolutely use the larger Cadbury Easter Creme Eggs; just chop them into smaller, bite-sized pieces before incorporating them into the fudge.
- Cadbury Mini Eggs (colored). The vibrant, candy-coated crunch of these mini eggs adds a delightful textural contrast and a pop of festive color to the fudge. They’re used both inside the fudge mixture and as a decorative topping.
*Please refer to the detailed recipe card below for the precise list of ingredients and quantities required to make this delicious fudge.
📖 Variations & Substitutions: Customize Your Easter Fudge
One of the best things about this microwave fudge recipe is its versatility. Feel free to get creative with these variations and substitutions to tailor the fudge to your taste preferences or whatever Easter candy you have on hand!
- Chocolate Base: While milk chocolate provides a classic, sweet flavor, you can easily swap it for dark chocolate chips if you prefer a richer, less sweet fudge. A combination of milk and dark chocolate chips can also create a wonderfully balanced flavor profile.
- Cadbury Mini Easter Creme Eggs & Mini Eggs Alternatives: The beauty of Easter candy is the variety! You can completely change the character of this fudge by swapping out the Cadbury eggs for other festive treats. Consider crushed Reese’s Peanut Butter Eggs for a sweet and salty twist, caramel-filled chocolate eggs for an extra gooey texture, or even solid chocolate bunnies or eggs chopped into small pieces. Just be sure to crush or chop any larger candies so they integrate well into the fudge.
- Butter Options: If you only have salted butter on hand, it can be used in place of unsalted butter. Keep in mind that your fudge will have a slightly saltier taste, which some people enjoy as it can balance the sweetness. No need to adjust any other ingredients.
- Add a Flavor Boost: Enhance your fudge with a splash of extract! A teaspoon of vanilla extract is always a welcome addition, or try peppermint extract for a refreshing twist, especially if pairing with dark chocolate.
- Nutty Crunch: For added texture and flavor, gently fold in a ½ cup of chopped nuts like pecans or walnuts along with the crushed Cadbury Creme Eggs.
- Colorful Sprinkles: After pressing the crushed mini eggs onto the top, sprinkle some additional festive Easter sprinkles for an extra pop of color and celebratory feel.
🥚 History of the Cadbury Creme Egg: A Timeless Easter Icon
The Cadbury Creme Egg holds a special place in the hearts of many, a seasonal treat eagerly awaited each spring. Its history dates back surprisingly far, showcasing Cadbury’s long-standing tradition of chocolate innovation. The very first chocolate egg filled with sugary treats was introduced by Cadbury in 1875. Fast forward to 1923, and they began producing chocolate eggs specifically filled with cream, laying the groundwork for the modern Creme Egg.
However, the iconic chocolate egg as we recognize it today, with its distinctive fondant yolk and shell, wasn’t actually invented until 1963. These delightful confections initially debuted under the name “Fry’s Creme Eggs.” It wasn’t until 1971 that they officially rebranded to “Cadbury Creme Eggs,” cementing their place in Easter history. Today, these cream-filled eggs are produced by various companies worldwide, with Hershey’s holding the market rights in the United States. Their enduring popularity and unique appeal make them a cornerstone of Easter celebrations and a perfect addition to this festive fudge. You can delve deeper into the fascinating history of the Easter Creme Eggs HERE.
🔪 How to Make Easter Egg Fudge: Step-by-Step Perfection
Making this incredible Easter Egg Fudge is surprisingly straightforward, thanks to the microwave method. Follow these simple steps for a flawless batch every time:
PREP: Begin by preparing your baking pan. Spray an 8×8 inch square baking pan generously with non-stick cooking spray, ensuring all corners and sides are coated. For even easier removal and clean cuts, you can alternatively line the pan with parchment paper, leaving an overhang on two sides to create “handles” for lifting the set fudge later.
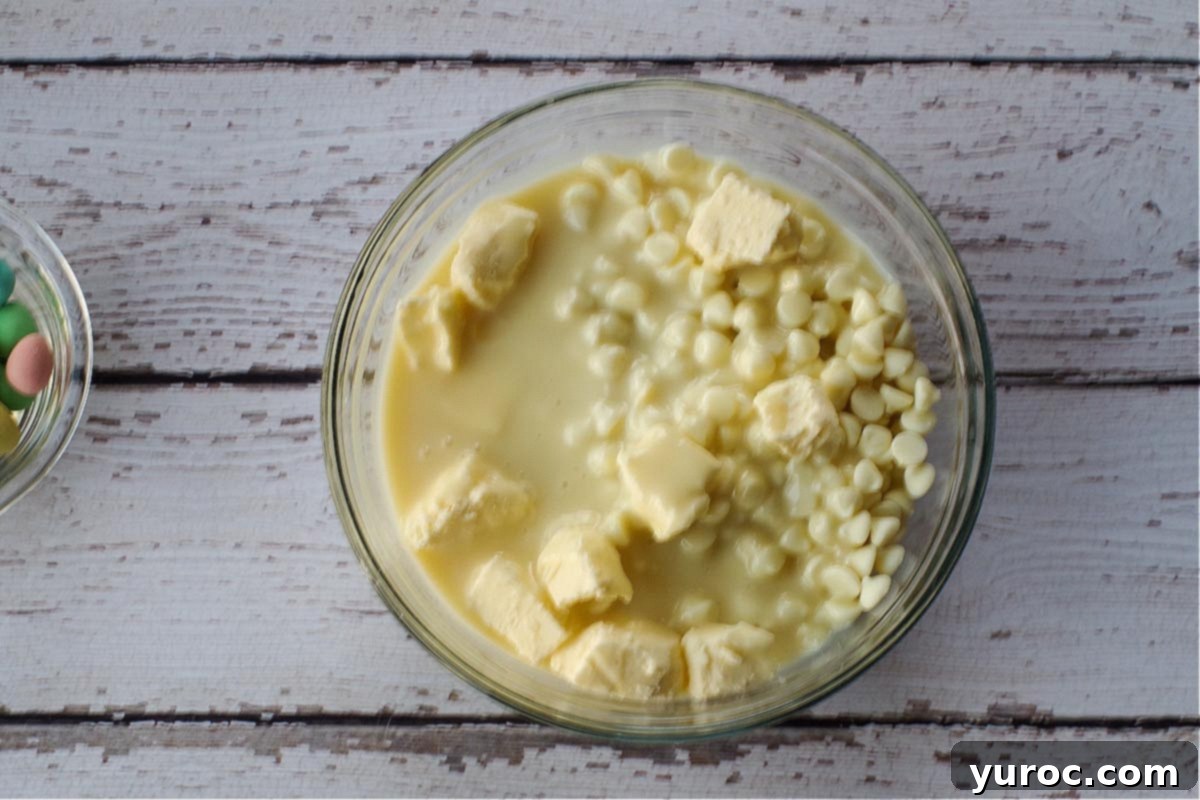
- Step 1: Combine Ingredients. In a large, microwave-safe bowl, combine your measured milk chocolate chips, white chocolate chips, sweetened condensed milk, and butter. Ensure the bowl is spacious enough to accommodate stirring without spills.
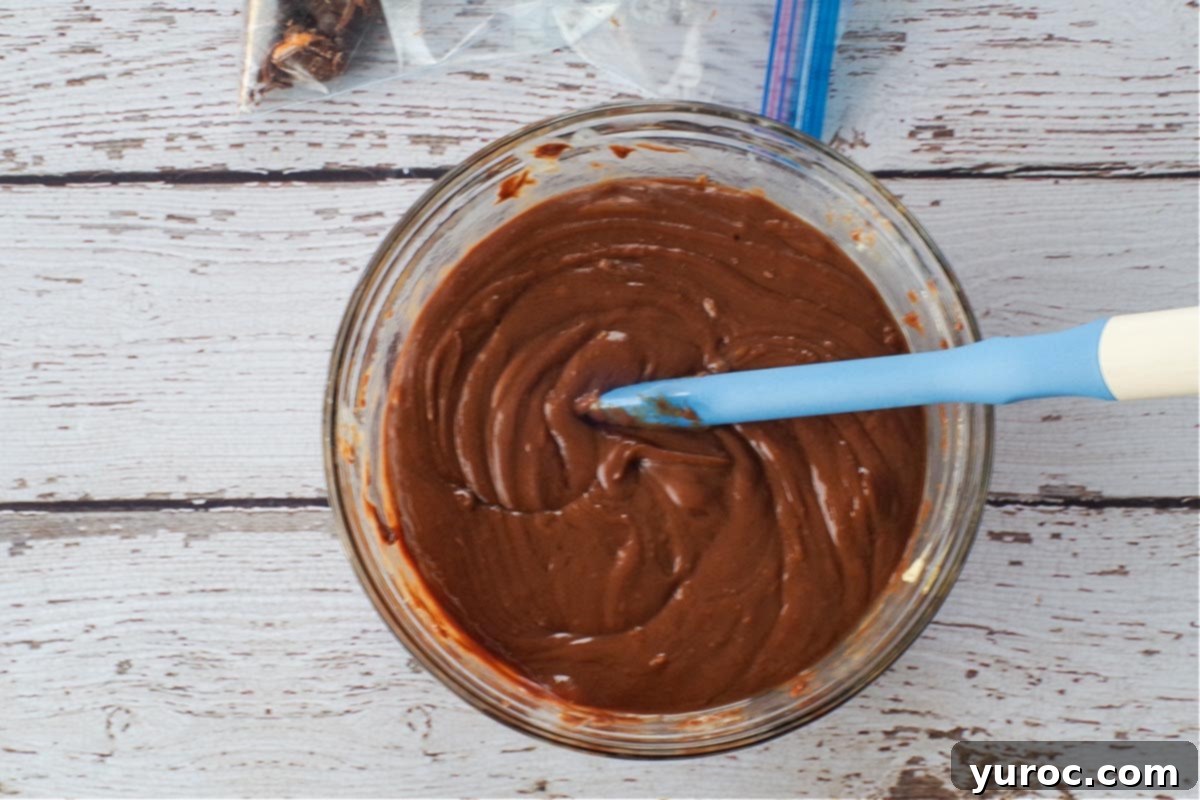
- Step 2: Microwave and Stir. Heat the mixture in the microwave on HALF POWER (50%) for approximately 4-5 minutes. This gentle heat is crucial for preventing the chocolate from scorching or seizing. Stir the mixture thoroughly every 1-2 minutes initially, and then more frequently (every 30 seconds) during the last 2 minutes of heating. You want to heat it just until the chocolate mixture is fully melted and beautifully combined into a smooth, glossy consistency. Depending on your microwave’s wattage and age, and because white chocolate chips tend to melt a bit slower, this process may take up to 6-8 minutes, or even 10 minutes for some. Patience and frequent stirring are key to achieving perfect smoothness without a candy thermometer!

- Step 3: Crush Mini Creme Eggs. While the chocolate mixture is melting, prepare the Cadbury Mini Easter Creme Eggs. Place about 12 of them in a sturdy Ziploc bag. Using a hammer or a rolling pin, gently but firmly crush the eggs into small, irregular pieces. Don’t pulverize them; you want distinct chunks to add texture and recognizable Creme Egg goodness to the fudge.

- Step 4: Fold in Crushed Creme Eggs. Once your chocolate mixture is perfectly melted and smooth, remove it from the microwave. Gently fold the crushed mini Easter Creme Eggs into the warm chocolate mixture using a spatula. Stir just until they are evenly distributed throughout the fudge; avoid overmixing.
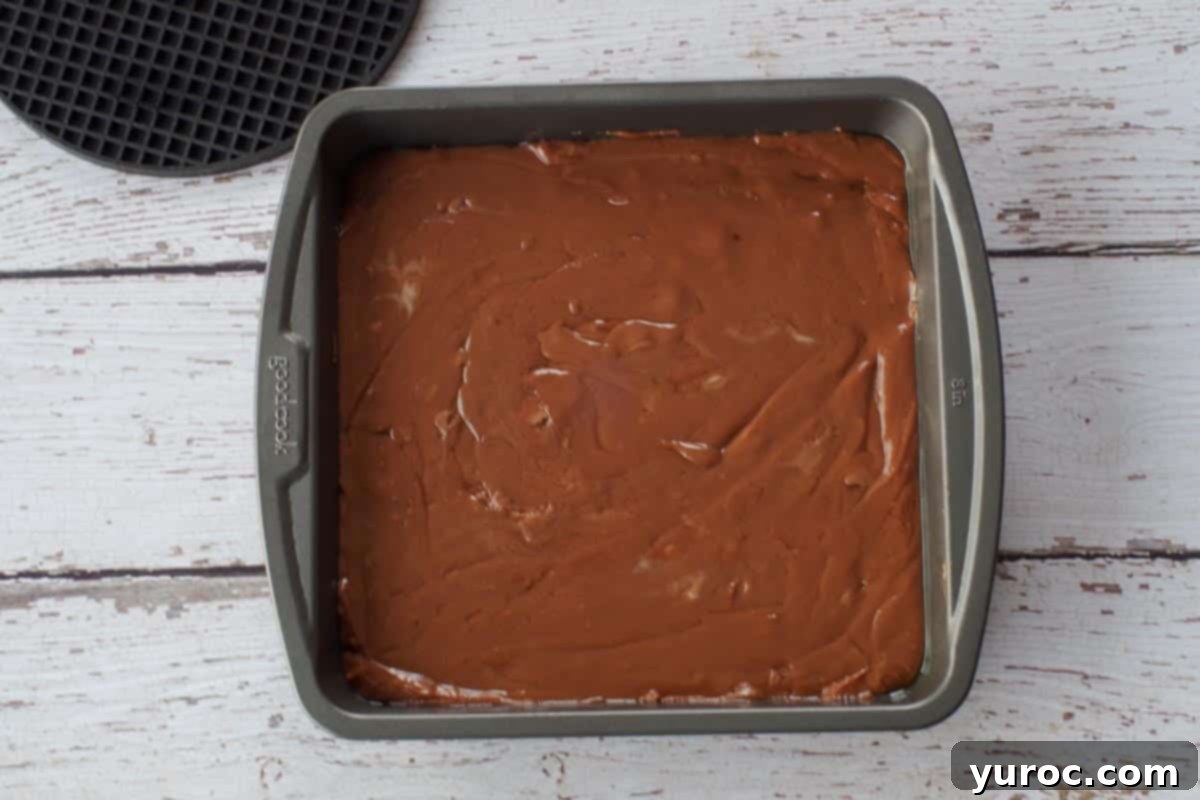
- Step 5: Transfer to Pan. Promptly transfer the fudge mixture into your prepared 8×8 inch pan. Use a spatula to spread and smooth the top evenly, ensuring the fudge is distributed from edge to edge with a consistent thickness.
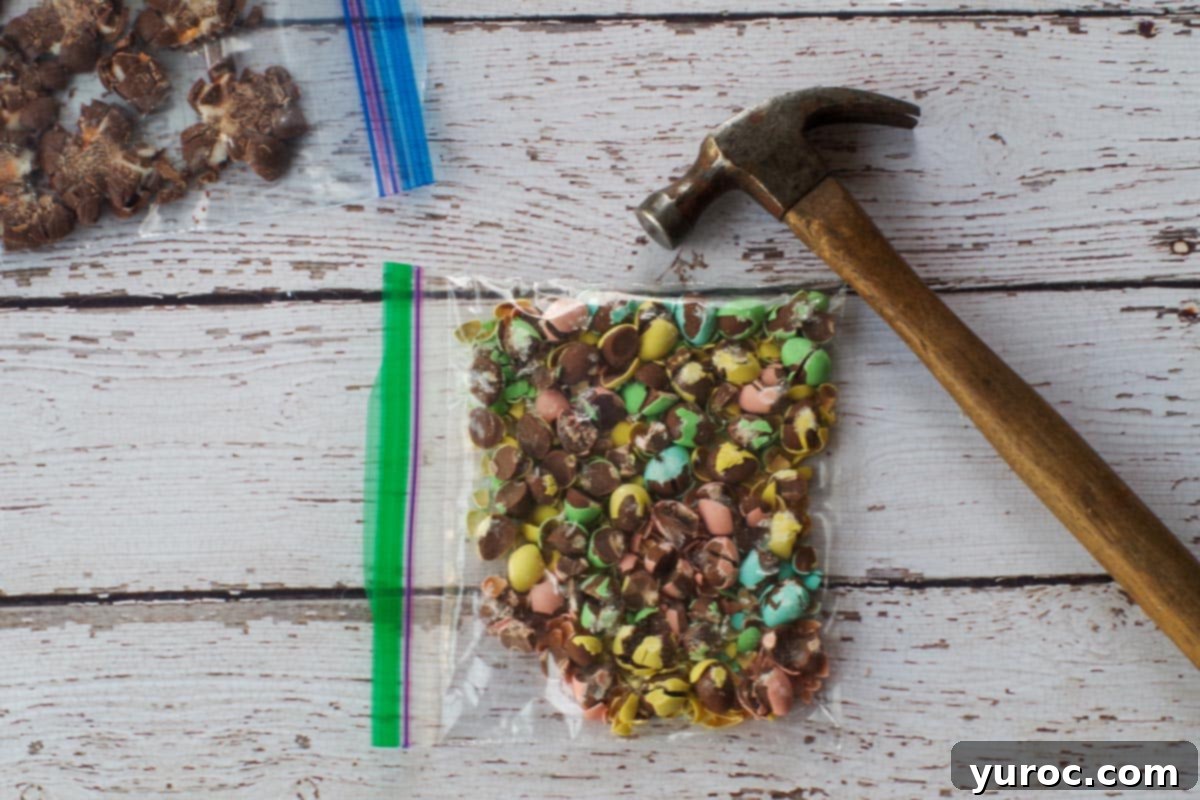
- Step 6: Prepare Mini Egg Topping. Take about ½ cup of Cadbury Mini Eggs (the colored ones are great for visual appeal). Place them in a Ziploc bag and gently crush them with a rolling pin or hammer. For the topping, you might prefer slightly larger, less crushed pieces than those mixed into the fudge, as this adds a lovely visual texture.
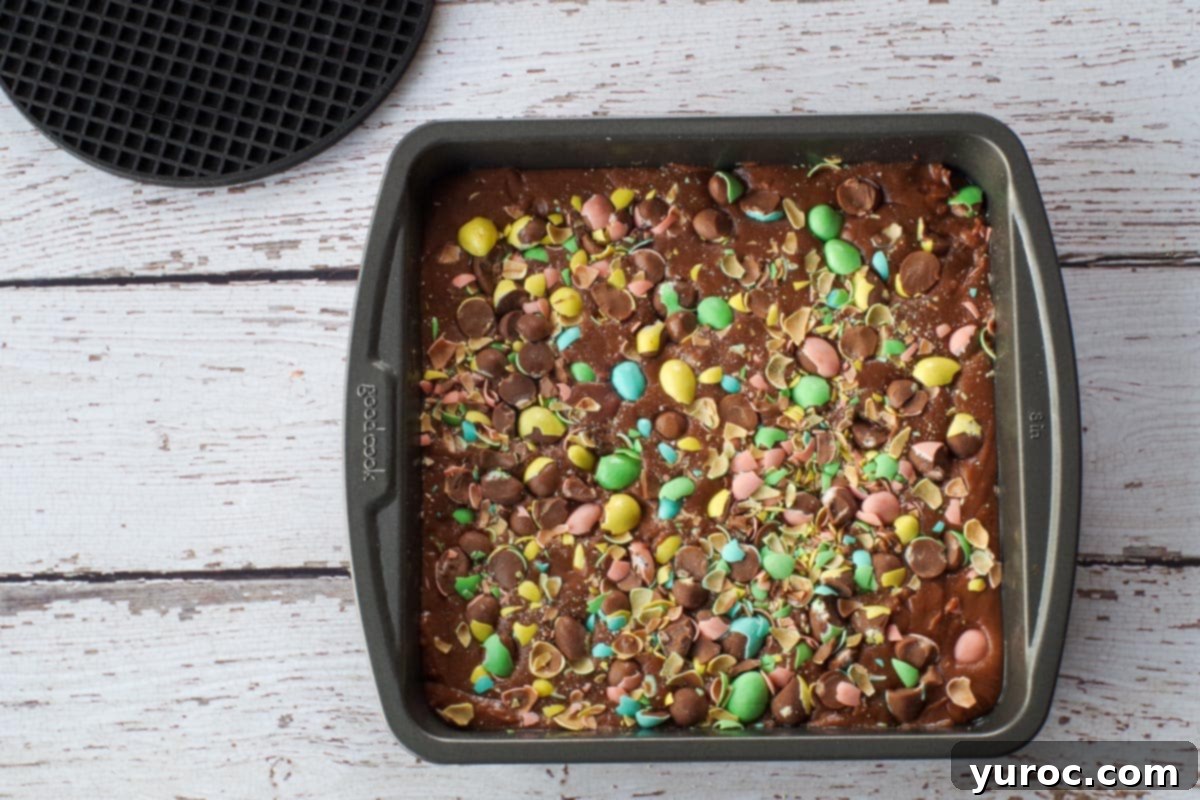
- Step 7: Add Topping. Evenly sprinkle the lightly crushed Cadbury Mini Eggs over the entire surface of the fudge in the pan. Gently press them down with the back of your spatula or your fingertips to ensure they adhere to the fudge and don’t fall off when sliced.
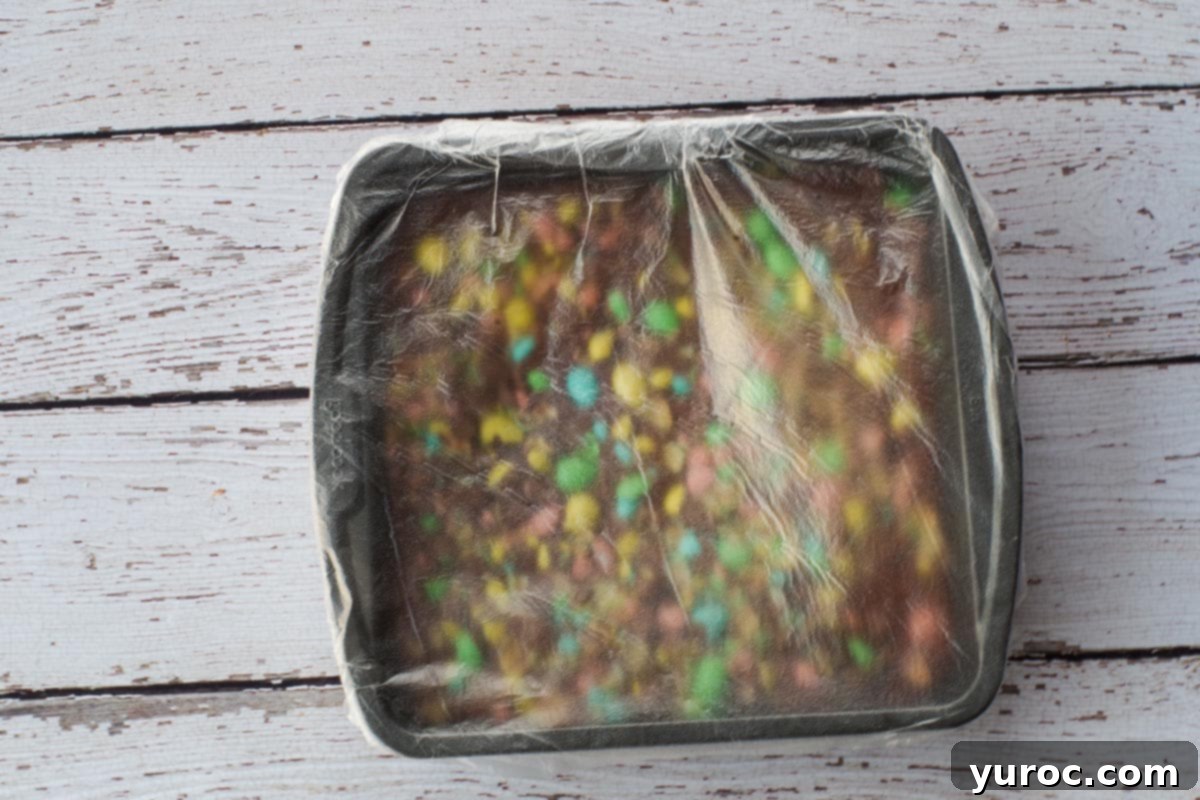
- Step 8: Chill and Serve. Cover the pan tightly with plastic wrap and refrigerate the fudge until it is completely set and thoroughly cooled. This typically takes about 90 minutes, but it can be left longer for firmer results. Once firm, remove the fudge from the pan (using the parchment handles if applicable), slice it into 25 even squares (5 rows each way), and prepare to enjoy this delightful Easter treat!
✅ Expert Recipe Tips for Perfect Fudge Every Time
Achieving perfectly smooth and creamy fudge is easier than you think, especially with these expert tips. Pay close attention to these details for the best possible results with your Microwave Easter Egg Fudge:
- Use High-Quality Chocolate. The foundation of great fudge is great chocolate. Using a good-quality milk chocolate, such as Hershey’s, Cadbury, or Ghirardelli, will ensure a superior taste and a wonderfully smooth, rich texture. Cheap chocolate can sometimes have undesirable additives that affect melting and taste.
- Melt Chocolate at 50% Power. This is perhaps the most critical tip for microwave fudge. Zapping chocolate on full power can quickly scorch it, leading to a gritty, seized, or burnt mess. Always melt your chocolate at 50% power, stirring diligently every 30-60 seconds. This gradual melting process ensures the chocolate heats evenly and melts into a beautifully smooth consistency.
- Avoid Chocolate Seizing: Keep Everything Dry! Water is chocolate’s arch-nemesis! Even a tiny droplet of water or a wisp of steam can cause melted chocolate to “seize,” turning it into a grainy, lumpy, unworkable mass. To prevent this:
- Use completely dry bowls and utensils: Ensure your microwave-safe bowl, spatula, and any other tools are absolutely moisture-free before they come into contact with the chocolate.
- Avoid condensation: If your chocolate chips or butter were stored in the fridge, let them come to room temperature before melting. Cold ingredients can cause condensation when heated, introducing unwanted moisture.
- Don’t use a wet spoon: Even a damp spatula or spoon can ruin your chocolate, so always dry them thoroughly before stirring.
- Be Gentle When Mixing. Once your chocolate is melted and smooth, and you add the crushed Creme Eggs, stir gently. Overmixing can incorporate too much air into the fudge, which can lead to a crumbly or less dense texture. Stir only until the ingredients are just combined for that desirable smooth and creamy consistency.
- Line the Pan for Easy Removal. This simple step makes a world of difference. Lining your 8×8-inch pan with parchment paper, leaving generous overhangs on two sides, creates convenient “slings.” Once the fudge is set, you can easily lift it out of the pan in one piece for clean, effortless cutting. If parchment isn’t available, make sure to grease the pan extremely well with non-stick cooking spray.
- Don’t Rush the Chilling Process. Patience is a virtue when making fudge. Allow the fudge to set completely in the refrigerator for at least 90 minutes. If it feels too soft after this time, don’t worry – simply refrigerate it longer, or for a quicker firm-up, pop it into the freezer for 30 minutes. A fully chilled fudge will slice cleanly and hold its shape perfectly.
- Cut with a Warm Knife for Clean Edges. For perfectly smooth, professional-looking squares, use a sharp knife. Run the knife under hot water for a few seconds, wipe it completely dry, and then slice through the fudge. Repeat this warming and drying process between each cut to prevent sticking and ensure immaculate edges.
- Perfect for Bake Sales & Gifting! This fudge is not just a treat; it’s a guaranteed crowd-pleaser and a fantastic item for bake sales or thoughtful gifts. Make extra batches because it’s sure to be a hit! Package individual squares in small cellophane bags tied with festive ribbons, or arrange them in cute Easter-themed boxes for a charming presentation.

👪 Servings & Presentation: Making Your Fudge a Festive Hit
Kids, and adults alike, adore Easter Creme Eggs, Mini Eggs, and any chocolate eggs, no matter the time of year! That’s why I initially created this recipe for a spring bake sale, and the response was absolutely phenomenal. This fudge was the very first item to sell out, and I quickly regretted not making quadruple the amount!
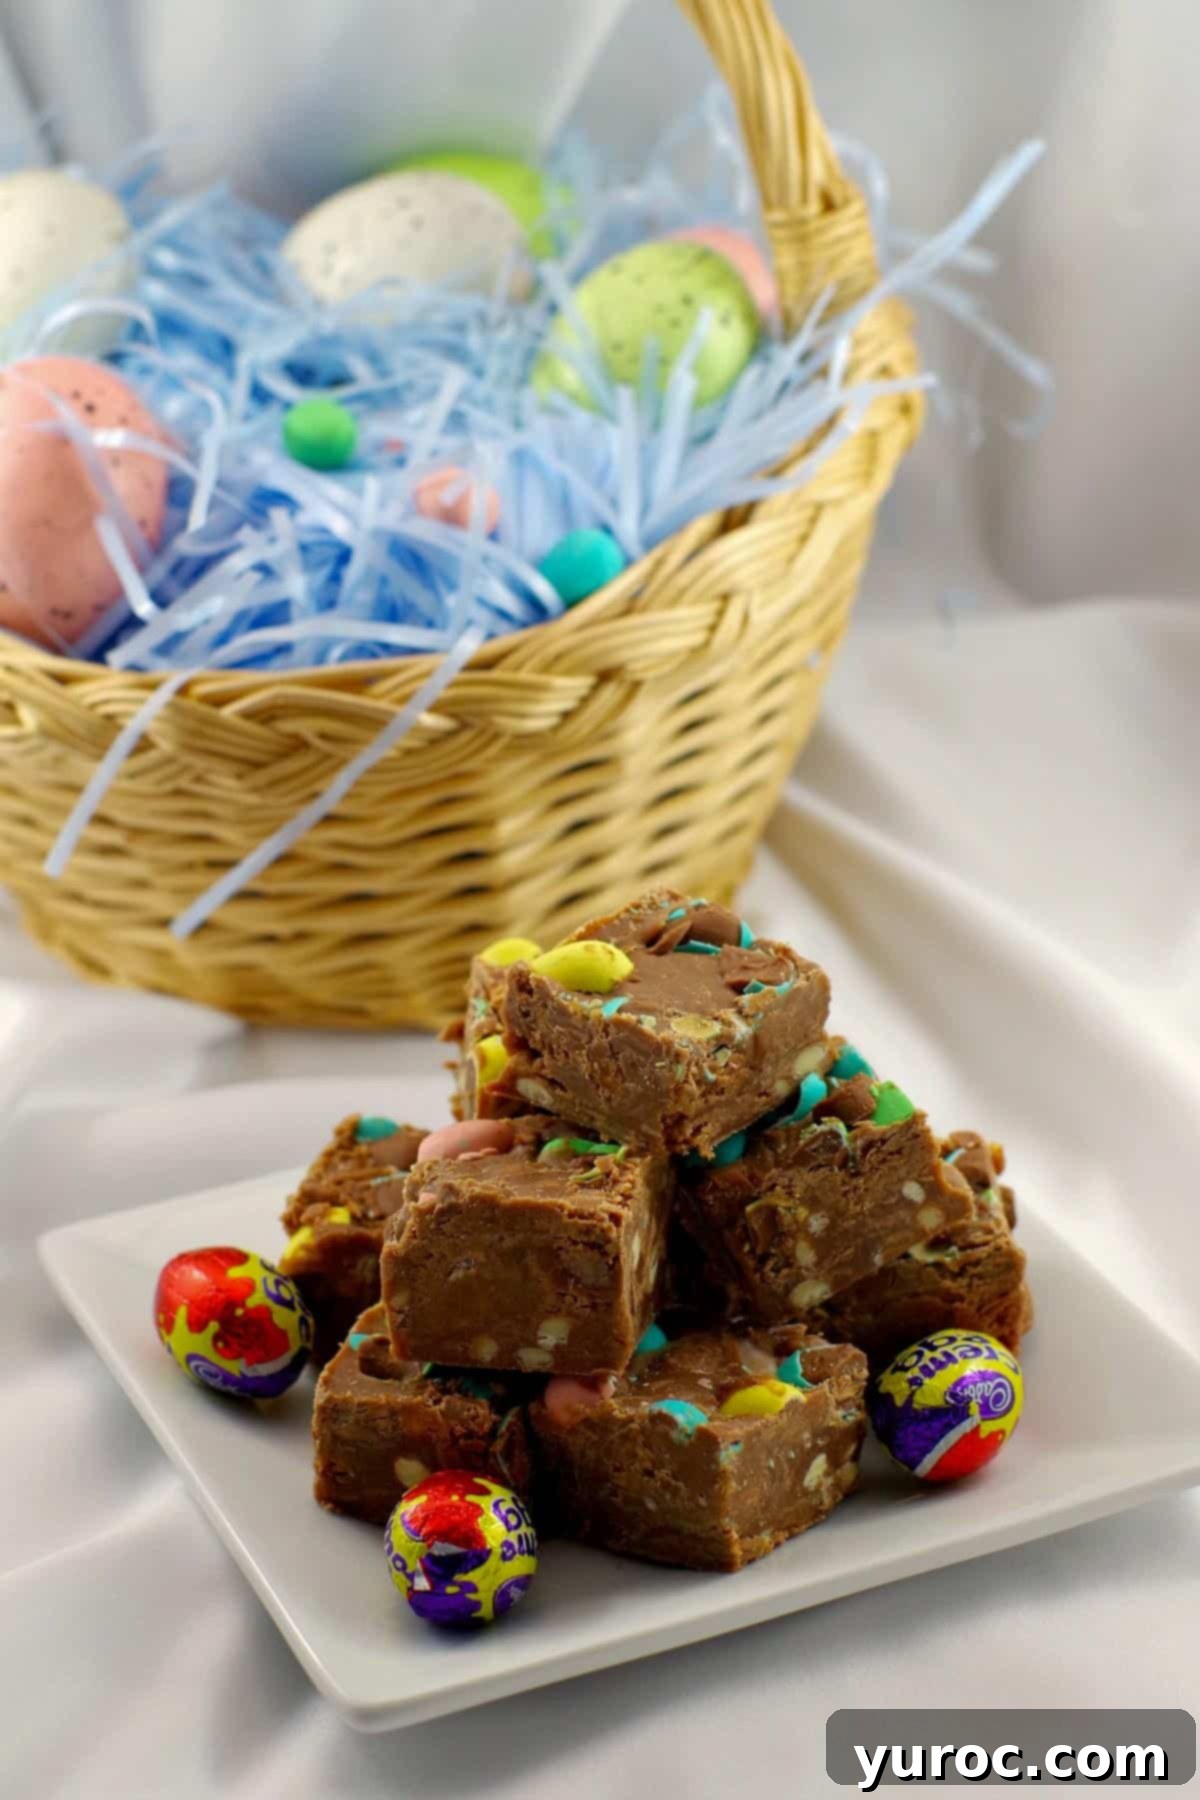
This Easy Easter Fudge recipe is designed to yield 25 small, perfectly portioned pieces, similar to the size you see in the accompanying photos. This makes it ideal for sharing, bake sales, or simply enjoying a manageable sweet treat. However, if you’re planning a larger event or want to make a big batch for gifting, you have complete flexibility! Simply click on the highlighted servings number in the recipe card below, and you can easily adjust the recipe quantities to produce as many servings as your heart desires.
So, whether you’re looking for an easy, crowd-pleasing bake sale idea or a delightful dessert for your family, these vibrant fudge squares are a must-try!

And if your bake sale happens to be scheduled after Easter, or you’re simply looking for a clever way to utilize leftover holiday treats, this recipe is absolutely perfect! It’s a brilliant way to transform any surplus Easter chocolate eggs (if you’re lucky enough to have any left!) into another fantastic dessert.
🌡️ Storage & Make-Ahead Tips for Your Fudge
This delightful Mini Egg Fudge is not only easy to make but also incredibly convenient to store, making it an excellent candidate for preparing ahead of time for any event or craving.
For short-term storage, keep your Easter Egg Fudge in the fridge in an airtight container. When stored properly, it will retain its freshness and creamy texture for 4-5 days. If you’re simply storing it overnight or for a very short period, loosely covering the pan with plastic wrap will suffice. However, for maximum freshness and to prevent any odors from the fridge, an airtight container is always best.
One of the best features of this Cadbury Egg fudge is that it freezes exceptionally well! This means you can prepare it well in advance for Easter celebrations, bake sales, or unexpected guests. To freeze, wrap the entire block of fudge (or individual slices) tightly in plastic wrap, then again in aluminum foil, and place it in a freezer-safe bag or container. It will keep beautifully in the freezer for up to 2-3 months. When you’re ready to enjoy, simply thaw it in the refrigerator overnight or at room temperature for a few hours. Just a friendly warning: consider making 3-4 times more than you think you’ll need, especially if you’re serving it where Cadbury Creme Eggs are a known favorite – this fudge is destined to be a hot seller!
❔ Recipe FAQs: Your Questions Answered
Here are some frequently asked questions to help ensure your Easter Egg Fudge is a complete success:
Absolutely! While the microwave method is incredibly convenient, you can certainly make this fudge using a traditional stovetop double boiler. Place a heat-safe bowl over a saucepan of simmering water (ensuring the bowl doesn’t touch the water). Add all the melting ingredients (chocolate chips, condensed milk, butter) to the bowl and stir frequently over low heat until fully melted and smooth. This method requires a bit more active stirring but yields equally delicious results.
Grainy fudge often results from overheating the chocolate or introducing too much moisture. The key steps to avoid this are to heat the chocolate mixture in the microwave on half power (50%) and stir it frequently. This ensures a slow, even melt. Overheating or using full power can cause the chocolate to seize or burn, leading to a grainy texture. Also, ensure all your bowls and utensils are completely dry.
If your fudge turns out too soft, it most likely means it hasn’t been chilled for a sufficient amount of time, or the chocolate mixture might have been slightly over-mixed before it was allowed to set. Don’t despair! Simply return it to the fridge and let it chill longer, preferably for another hour or two. For quicker and firmer results, you can place it in the freezer for about 30 minutes.
If you find yourself with a small amount of leftover sweetened condensed milk, don’t let it go to waste! Transfer it to an airtight container and store it in the fridge for up to 7 days. For longer storage, you can freeze it in an airtight container for up to 3 months. It’s great for adding to coffee, other desserts, or even a savory dish like a creamy curry!
While prevention is always key, if your chocolate unfortunately seizes (becomes thick, lumpy, and grainy), you can attempt to rescue it. Try stirring in a very small amount (half a teaspoon at a time) of warm vegetable oil, melted butter, or even heavy cream. Stir vigorously until it smooths out. This doesn’t always work perfectly, but it’s worth a shot before discarding the batch. The best strategy, however, is to melt slowly at 50% power and ensure no moisture enters the chocolate.
But even if you’re not planning a bake sale or typically shy away from overly sweet treats, you’ll still be absolutely enchanted by this quick and easy Easter Cream Egg Microwave Fudge. Its balanced sweetness and delightful textures are sure to win over anyone you share it with!
So, whether you’re satisfying a serious sweet tooth, hunting for fun Easter desserts, or simply craving a rich chocolatey treat, you’ll undoubtedly love this delicious and straightforward fudge recipe. It’s truly a celebration of all things sweet and festive.
And if you’re on the hunt for more incredibly easy fudge recipes to expand your repertoire, be sure to try my equally simple Microwave Sugar Cookie Fudge, which tastes just like a frosted sugar cookie! Or for something truly unique, give this Rootbeer Float Fudge a try – it astonishingly tastes exactly like a classic root beer float!
Happy Easter, and happy baking!
🍪 More Bake Sale & Sweet Treat Recipes
As mentioned, this Easter Egg Fudge was an undeniable hit at my last bake sale! But if you’re looking for other proven crowd-pleasers or simply more delightful recipes to add to your collection, be sure to check out some of my other best-selling creations:
- Strawberry Milkshake Cookies
- Butter Tart Slice
- Mini Cherry Cheesecakes (with Oreo crust)
- Whipped Shortbread Cookies (with cornstarch)
Did your family ❤️ this recipe? Did you know that commenting and ⭐rating recipes is one of the best ways to support your favorite recipe creators? If you LOVED this recipe, please take a moment to comment and rate it in the recipe card below, or share your amazing photos on social media using the hashtag #foodmeanderings or by tagging @foodmeanderings! Your feedback helps others discover delicious recipes and supports our work!


📋 Microwave Easter Egg Fudge Recipe
Equipment
- 8×8 pan
Ingredients
- 1 300ml can condensed milk
- 2 cups milk chocolate chips
- 1 225 g -bag white chocolate chips (about 1 ¼ cups)
- ¼ cup butter
- 12 Cadbury mini creme eggs smashed/chopped
- ½ cup Cadbury mini eggs (colored) light crushed/broken
Instructions
- Spray an 8 inch square baking pan with non-stick cooking spray. Or alternatively, you can line it with parchment paper.
- Place milk chocolate chips, white chocolate chips, sweetened condensed milk, and butter in a large microwave-safe bowl.1 300ml can condensed milk, 2 cups milk chocolate chips, 1 225 g -bag white chocolate chips (about 1 ¼ cups), ¼ cup butter
- Heat in the microwave on HALF POWER /50% for 4-5 minutes, stirring every 1-2 minutes and more (every 30 seconds) towards the end/last 2 minutes. *You want to heat it just until the chocolate mixture is melted and completely combined. It may take up to 10 minutes, as the white chocolate chips tend to melt slower.
- Meanwhile, crush 12 mini Easter cream eggs. *I put them in a ziplock bag and crush them with a hammer (or rolling pin).12 Cadbury mini creme eggs
- When the chocolate is melted, gently stir crushed mini Easter cream eggs into the chocolate mixture.
- Gently crush mini eggs with a hammer or a rolling pin.½ cup Cadbury mini eggs (colored)
- Sprinkle crushed mini eggs on top of the fudge and gently press into fudge.
- Cover and refrigerate until set and completely cool (about 90 minutes ) Slice into 25 (5 rows each way)squares and enjoy!
Notes
- Use High-Quality Chocolate. The better the chocolate, the better the fudge! Use a good-quality milk chocolate like Hershey’s, Cadbury, or Ghirardelli for the best taste and texture.
-
- Melt Chocolate at 50% Power. Microwaving on full power can scorch the chocolate, causing it to seize and become grainy. Always melt at 50% power, stirring every 30-60 seconds to ensure smoothness.
-
- Avoid Chocolate Seizing: Keep Everything Dry! Water is chocolate’s worst enemy! Even a tiny drop of water or steam can cause the chocolate to seize (become grainy and lumpy). To prevent this: Use completely dry bowls and utensils – Make sure your mixing bowl, spatula, and any other tools are moisture-free before melting chocolate, Avoid condensation – If your chocolate was in the fridge, let it come to room temperature before melting to prevent moisture buildup.Don’t use a wet spoon – Even a damp spatula or spoon can cause issues, so always dry them thoroughly before stirring.
-
- Be Gentle When Mixing. Overmixing can introduce air bubbles and create a crumbly texture. Stir only until combined for a smooth and creamy consistency.
-
- Line the Pan for Easy Removal. Using parchment paper with overhanging edges makes it super easy to lift out the fudge for cutting. If you don’t have parchment, grease the pan well with non-stick spray.
-
- Don’t Rush the Chilling Process. Let the fudge set completely in the fridge for at least 90 minutes before slicing. If it’s too soft, refrigerate longer or pop it in the freezer for 30 minutes for firmer results.
-
- Cut with a Warm Knife for Clean Edges. Run a sharp knife under hot water, wipe it dry, and then slice for smooth, even squares. Repeat between cuts for best results..
-
- Perfect for Bake Sales & Gifting! Make extra, because this fudge is a hit! Package it in cute Easter-themed boxes or bags for gifts, bake sales, or Easter celebrations.