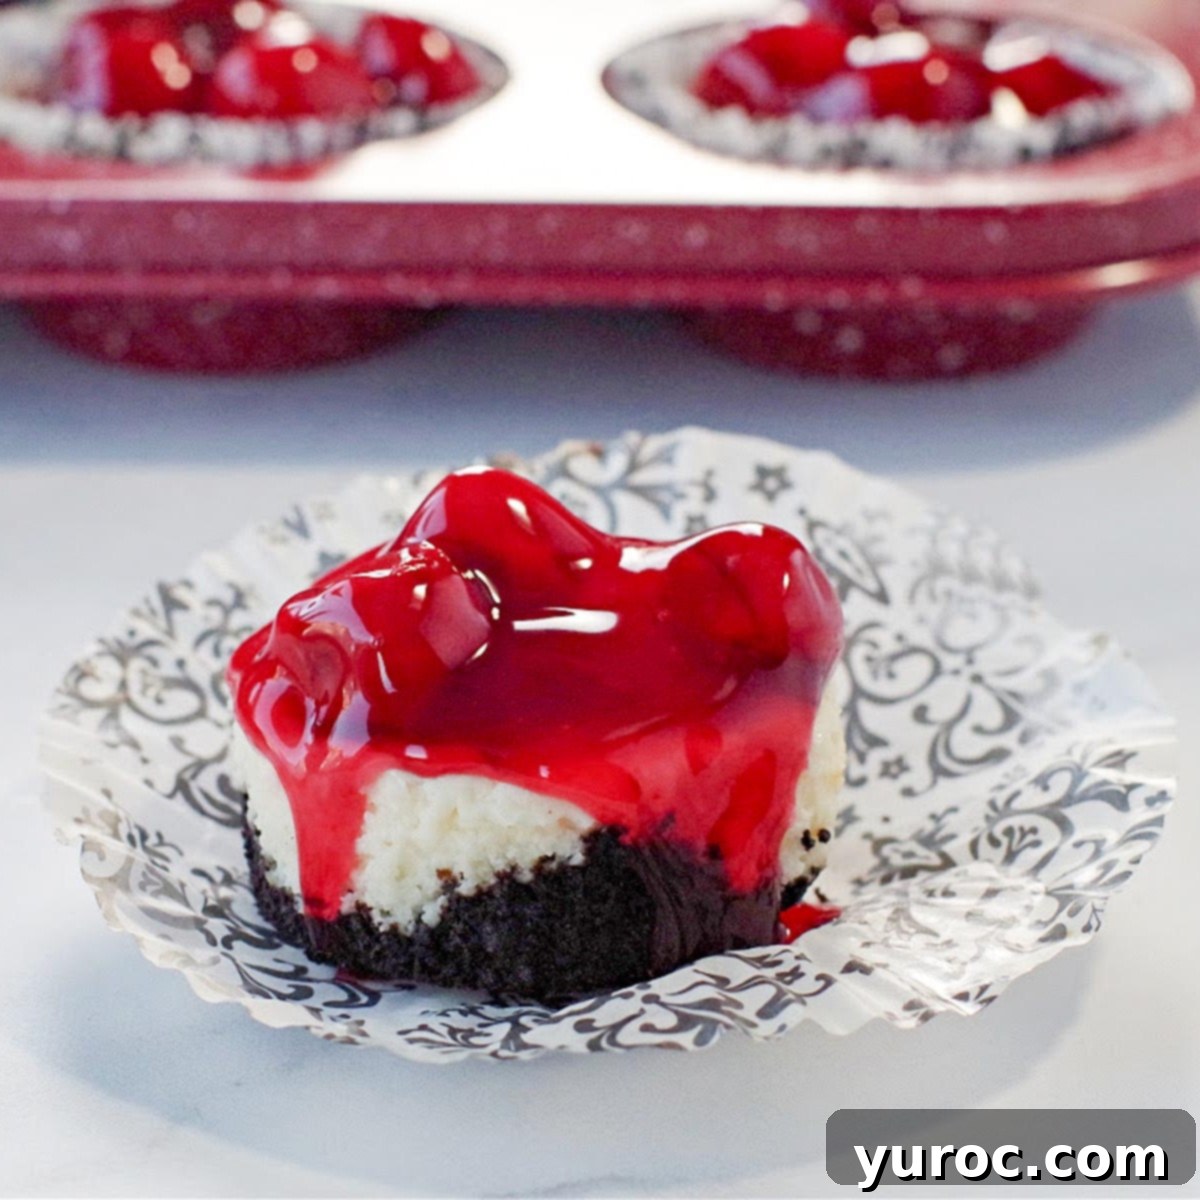
Easy Mini Cherry Cheesecakes with Oreo Crust: The Ultimate Party Dessert
There’s something uniquely delightful about individual desserts. They offer perfect portion control, look incredibly appealing, and grant you the simple pleasure of enjoying a treat all to yourself without any sharing dilemmas. These delightful Mini Cherry Cheesecakes, featuring a rich Oreo cookie crust, are precisely that kind of dessert. Baked conveniently in muffin tins, they are quick and straightforward to prepare, topped with luscious cherry pie filling.
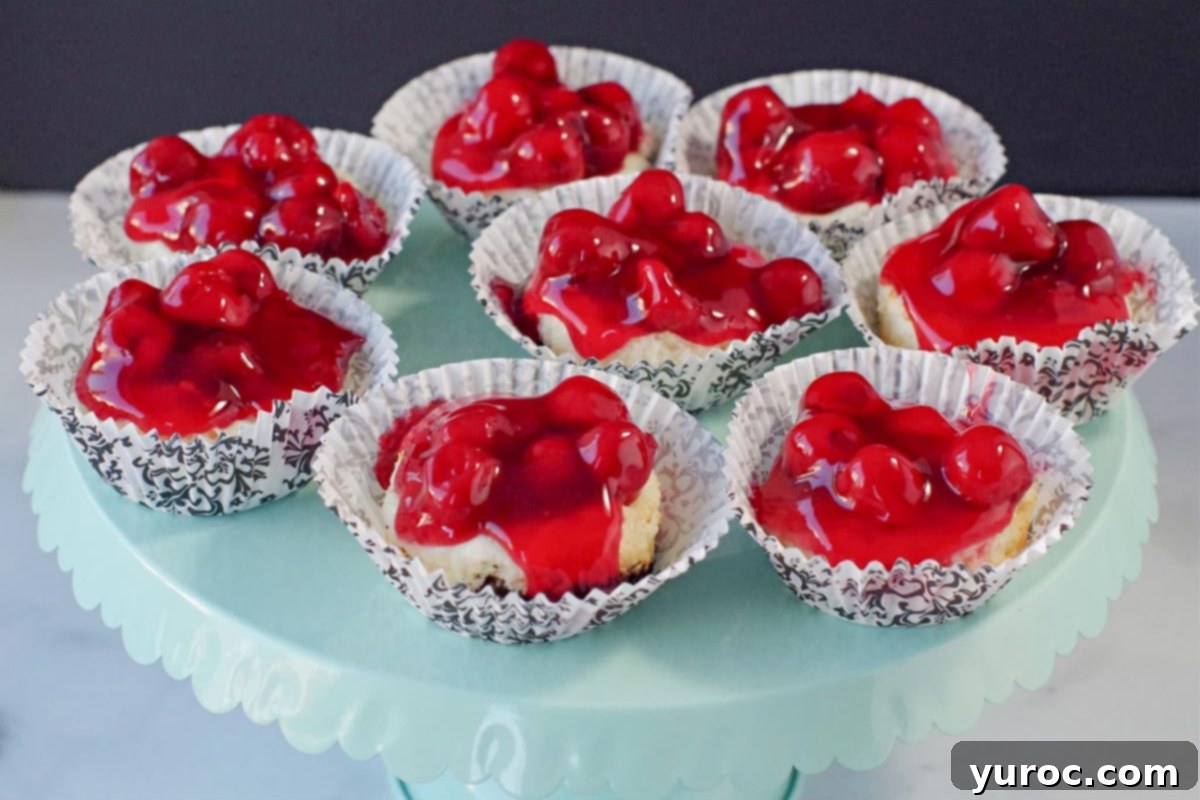
These individual cheesecakes are more than just a sweet treat; they’re a fantastic centerpiece for any gathering. Their perfect bite-sized form makes them ideal finger food for a wide array of special occasions. Imagine them gracing the dessert table at baby showers, adding cheer to game day festivities, perfect for potlucks, celebrating national holidays like Canada Day, showing appreciation on Mother’s Day, ringing in the New Year on New Year’s Eve, or simply enhancing any celebration with a touch of elegance and convenience.
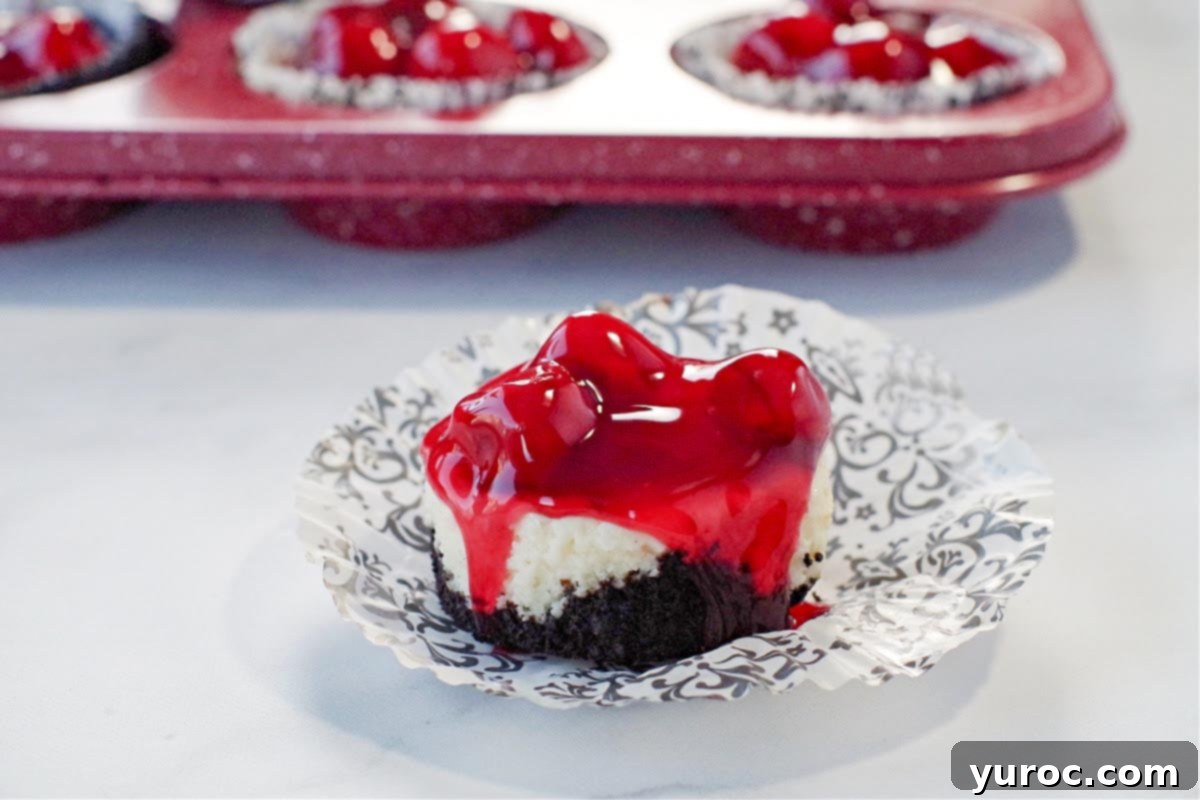
Their charming size and effortless elegance make them a wonderful choice for various events. Whether you’re hosting a sophisticated afternoon tea or a casual backyard barbecue, these mini cheesecakes fit right in. They eliminate the need for plates and forks, making them a truly mess-free dessert that guests can easily pick up and enjoy. This convenience, combined with their irresistible flavor, ensures they’re always a crowd-pleaser and a popular item at any bake sale.
If you have a love for mini desserts, you absolutely must explore some other fantastic recipes like my Raspberry Tiramisu Tarts and my decadent Chocolate Avocado Mousse & Strawberry Mini Desserts. These are perfect examples of how small treats can deliver big flavor!
The journey of these mini cherry cheesecakes began for me many years ago when my Auntie Sue brought her original recipe to my niece’s baby shower. They were an instant hit, and I immediately recognized them as the quintessential baby shower food – easy to eat, universally loved, and perfectly portioned. That unforgettable experience, nearly 15 years ago, stayed with me, and I finally got around to asking her for the cherished recipe!
More recently, these delightful cheesecakes made a reappearance as a star component of our finger food New Year’s Eve buffet. Their festive appeal and ease of consumption made them a perfect fit for a celebratory spread, proving their versatility across different types of gatherings.
🥘 Essential Ingredient Notes
Crafting the perfect mini cherry cheesecake starts with understanding the role of each ingredient. Here’s a closer look at what you’ll need and why:
- Oreo Baking Crumbs: These crumbs form the foundation of our delightful crust. They provide a rich, chocolatey base that beautifully complements the creamy cheesecake filling and tart cherry topping. If you can’t find pre-made Oreo baking crumbs, don’t worry! You can easily substitute them with any brand of chocolate baking crumbs or even crush whole Oreo cookies yourself. A food processor makes quick work of this, but a Ziploc bag and a rolling pin work just as well for a homemade touch.
- Unsalted Butter: We opt for unsalted butter to give you complete control over the flavor profile of your cheesecakes. This allows you to add salt as needed without worrying about an overly salty crust. Melted butter is crucial for binding the cookie crumbs into a firm, delicious base.
- Lemon Juice and Lemon Zest: These aren’t just for flavor; they play a vital role in balancing the sweetness of the cheesecake. Lemon juice adds a bright, tangy note that cuts through the richness of the cream cheese, while the zest provides a fragrant, aromatic lift, enhancing the overall freshness of the dessert.
- Canned Cherry Pie Filling: For convenience and consistent results, canned cherry pie filling is an excellent choice. It’s readily available, economical, and provides a vibrant, sweet-tart topping with minimal effort. While homemade is always an option, the canned version ensures these mini cheesecakes remain a quick and easy dessert.
*See the recipe card below for a full list of ingredients and precise quantities.
📖 Creative Variations to Try
While the classic mini cherry cheesecake is a treat on its own, there are plenty of ways to customize this recipe to suit your preferences or the occasion:
- Topping Adventures: Don’t limit yourself to just cherry! This recipe is incredibly adaptable to various fruit toppings and fillings.
- Other Canned Fillings: Experiment with canned apple pie filling, blueberry pie filling, or even a mixed berry blend. These are just as convenient and offer a different flavor profile.
- Homemade Fillings: If you prefer a homemade touch, consider my delicious Saskatoon berry pie filling for a unique regional twist, or a classic homemade apple pie filling. My homemade apple cinnamon topping would also be exquisite.
- Fresh Fruit: For a lighter, fresher option, top your cooled cheesecakes with fresh berries (strawberries, raspberries, blueberries) or any other seasonal fresh fruit you enjoy. A light glaze or a dusting of powdered sugar can enhance their presentation.
- Crust Innovations: The Oreo crust provides a fantastic chocolatey base, but you can certainly explore other options:
- Classic Graham Cracker Crust: A traditional choice for cheesecakes, a graham cracker crust offers a buttery, slightly sweet flavor. Simply mix crushed graham crackers with melted butter and a touch of sugar.
- Other Cookie Crusts: Consider using other crushed cookies like vanilla wafers, shortbread cookies, or even gingersnaps for a spiced version. The key is to ensure the crumbs are fine and bind well with melted butter. You can easily crush whole cookies in a food processor or by hand.
- Cupcake Liner Styles: The beauty of baking these in muffin tins is the flexibility in presentation.
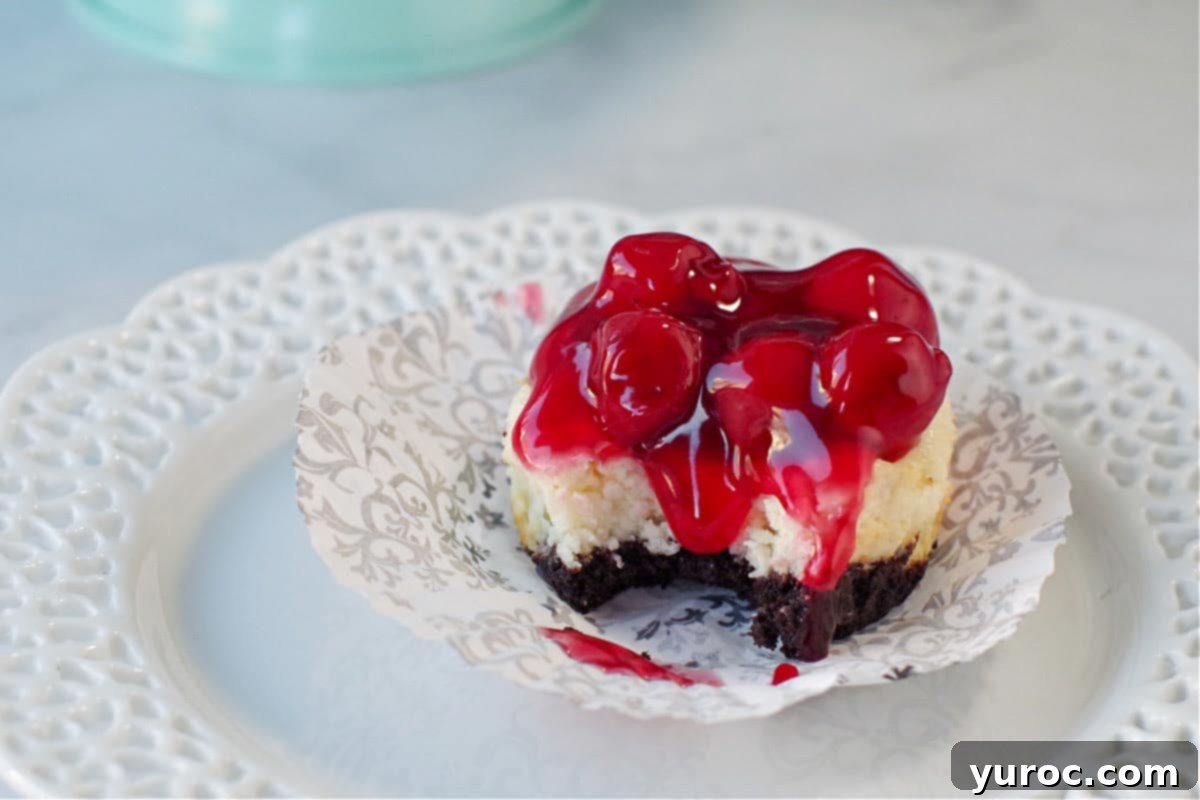
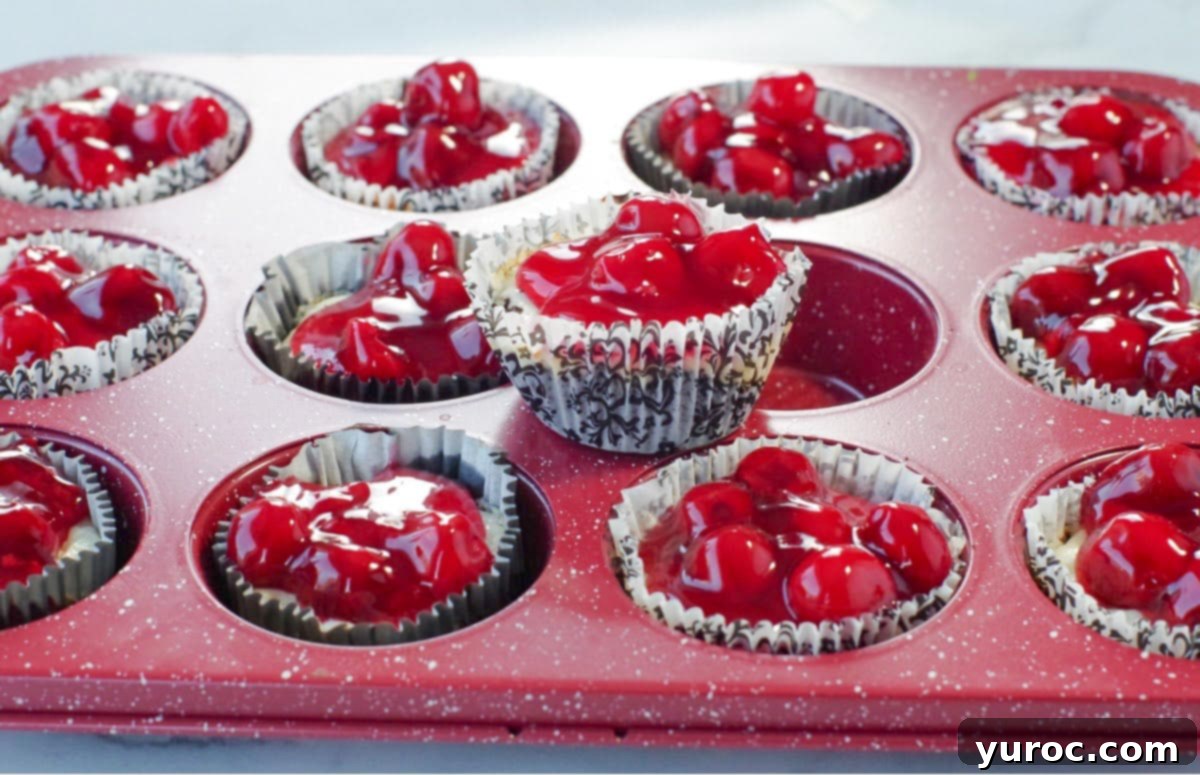
- Decorative Liners: Elevate the look for special events like baby showers, weddings, or holiday parties by using fancier paper liners. The elegant Damask Cupcake/Muffin liners (affiliate link) used in the photos add a touch of sophistication.
- Standard or Foil Liners: For everyday enjoyment, regular paper muffin liners or foil tart liners work perfectly.
- Post-Bake Transfer: An insider tip: if you only have plain liners but want a more decorative look, you can bake the cheesecakes in the plain liners, let them cool, and then carefully transfer them to more attractive paper cupcake liners just before serving.
The combination of chocolate and cherry is a timeless classic, a truly match-made-in-heaven flavor duo. When you introduce the creamy, tangy notes of cheesecake into this mix, you elevate it to an entirely new level of deliciousness. And let’s be honest, a touch of chocolate always makes everything better, adding depth and richness that is simply irresistible.
🔪 Step-by-Step: How to Make Mini Cherry Cheesecakes
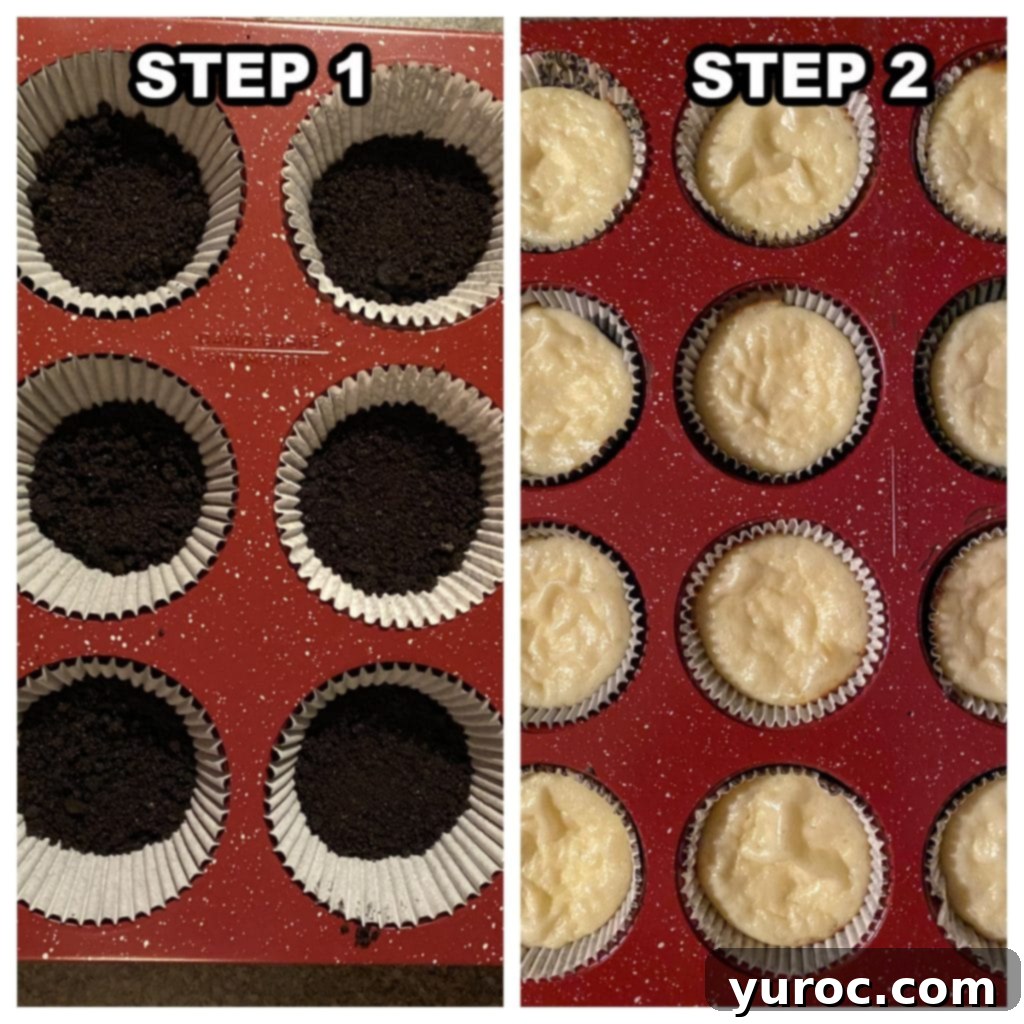
- Begin by preheating your oven to 375°F (190°C). Prepare your muffin pan by lining it with paper cupcake/muffin cups or foil tart liners. In a medium bowl, combine the Oreo/chocolate baking crumbs with the melted butter. You won’t need a food processor for this step; a fork or spoon works perfectly.
- Spoon approximately one tablespoon of the crumb mixture into the bottom of each lined muffin cup, then gently pat it down to form an even, firm crust. Divide the mixture evenly among all 18 liners.
- In a large mixing bowl, using an electric hand mixer on medium-low speed, beat together all the remaining ingredients (cream cheese, granulated sugar, eggs, lemon juice, lemon zest, and vanilla extract). Mix for about 45 seconds to 1 minute, until the mixture is light, fluffy, and well combined, ensuring there are no lumps.
- Carefully spoon the creamy cheesecake mixture into the prepared paper muffin/cupcake liners, filling each cup approximately two-thirds full. Distribute the filling evenly among all 18 crusts.
⏲️ Baking and Cooling Instructions
- Bake the mini cheesecakes in your preheated oven at 375°F (190°C) for exactly 15 minutes. The edges should appear set, and the centers might have a slight jiggle.
- Once baked, remove the muffin tin from the oven and let the cheesecakes cool in the tin for approximately 10 minutes. This allows them to set further and makes them easier to handle.
- After the initial cooling period, carefully transfer the cheesecakes to a wire rack to cool completely. This is a crucial step before adding the topping. Once fully cooled, generously spoon the cherry pie filling onto the top of each cheesecake.
- For best results, refrigerate the finished mini cheesecakes for at least an hour (or until ready to serve). Chilling helps the cheesecake set firm and enhances the flavors.
💡 Tips for Cheesecake Perfection
Achieving a flawless mini cheesecake is easy with these essential tips:
- Embrace Room Temperature Ingredients: This is arguably the most important tip for any cheesecake! Ensure your cream cheese and eggs are at room temperature before you start mixing. Cold ingredients won’t emulsify properly, leading to a lumpy batter. Room temperature ingredients blend smoothly and effortlessly, creating a perfectly homogenous and creamy cheesecake texture without the need for excessive mixing.
- Resist Overmixing the Batter: Once your ingredients are combined, stop mixing. Overmixing introduces too much air into the batter, which can cause your cheesecakes to puff up excessively in the oven and then fall dramatically, resulting in cracks and a grainy, rather than smooth, texture. A short, gentle mix is all that’s needed.
- Keep Speeds Low: When using an electric mixer, always stick to medium-low or low speeds. High-speed mixing, much like overmixing, incorporates too much air. This excess air creates bubbles that expand during baking and collapse upon cooling, leading to unsightly cracks on the surface of your beautiful cheesecakes.
- Patience with Cooling Before Topping: It’s tempting to add the cherry pie filling immediately, but resist the urge! Ensure your cheesecakes are completely cool before applying the topping. If you add the topping to warm cheesecakes, the filling will become runny and spread, losing its attractive presentation and potentially making the crust soggy.
👪 Serving Size Adjustment
This recipe yields 18 perfectly sized mini cherry cheesecakes, making it ideal for sharing or enjoying over several days. The versatility of this recipe means you can easily adjust the yield. Should you need more or fewer cheesecakes, simply navigate to the recipe card below and click on the “servings” number. You can then select your desired number of servings, and the ingredient quantities will automatically adjust to match your preference. This feature makes it effortless to scale up for a large party or scale down for a smaller, more intimate gathering.
🌡️ Storage Guidelines
Proper storage ensures your mini cheesecakes remain fresh and delicious for as long as possible:
- Refrigerator Storage: Any leftover mini cheesecakes should be stored in an airtight container. Placed in the refrigerator, they will maintain their freshness and delightful texture for up to 3 days. This makes them a fantastic make-ahead dessert for busy hosts.
- Freezer Storage: This recipe is also freezer-friendly, allowing you to prepare them well in advance. To freeze, omit the cherry pie topping. Once the cheesecakes are completely cooled, place them in an airtight freezer-safe container or wrap them individually in plastic wrap and then foil. They can be stored in the freezer for up to 3 months. When you’re ready to serve, thaw the cheesecakes completely in the refrigerator, and then add the cherry pie filling just prior to serving to ensure the best texture and presentation.
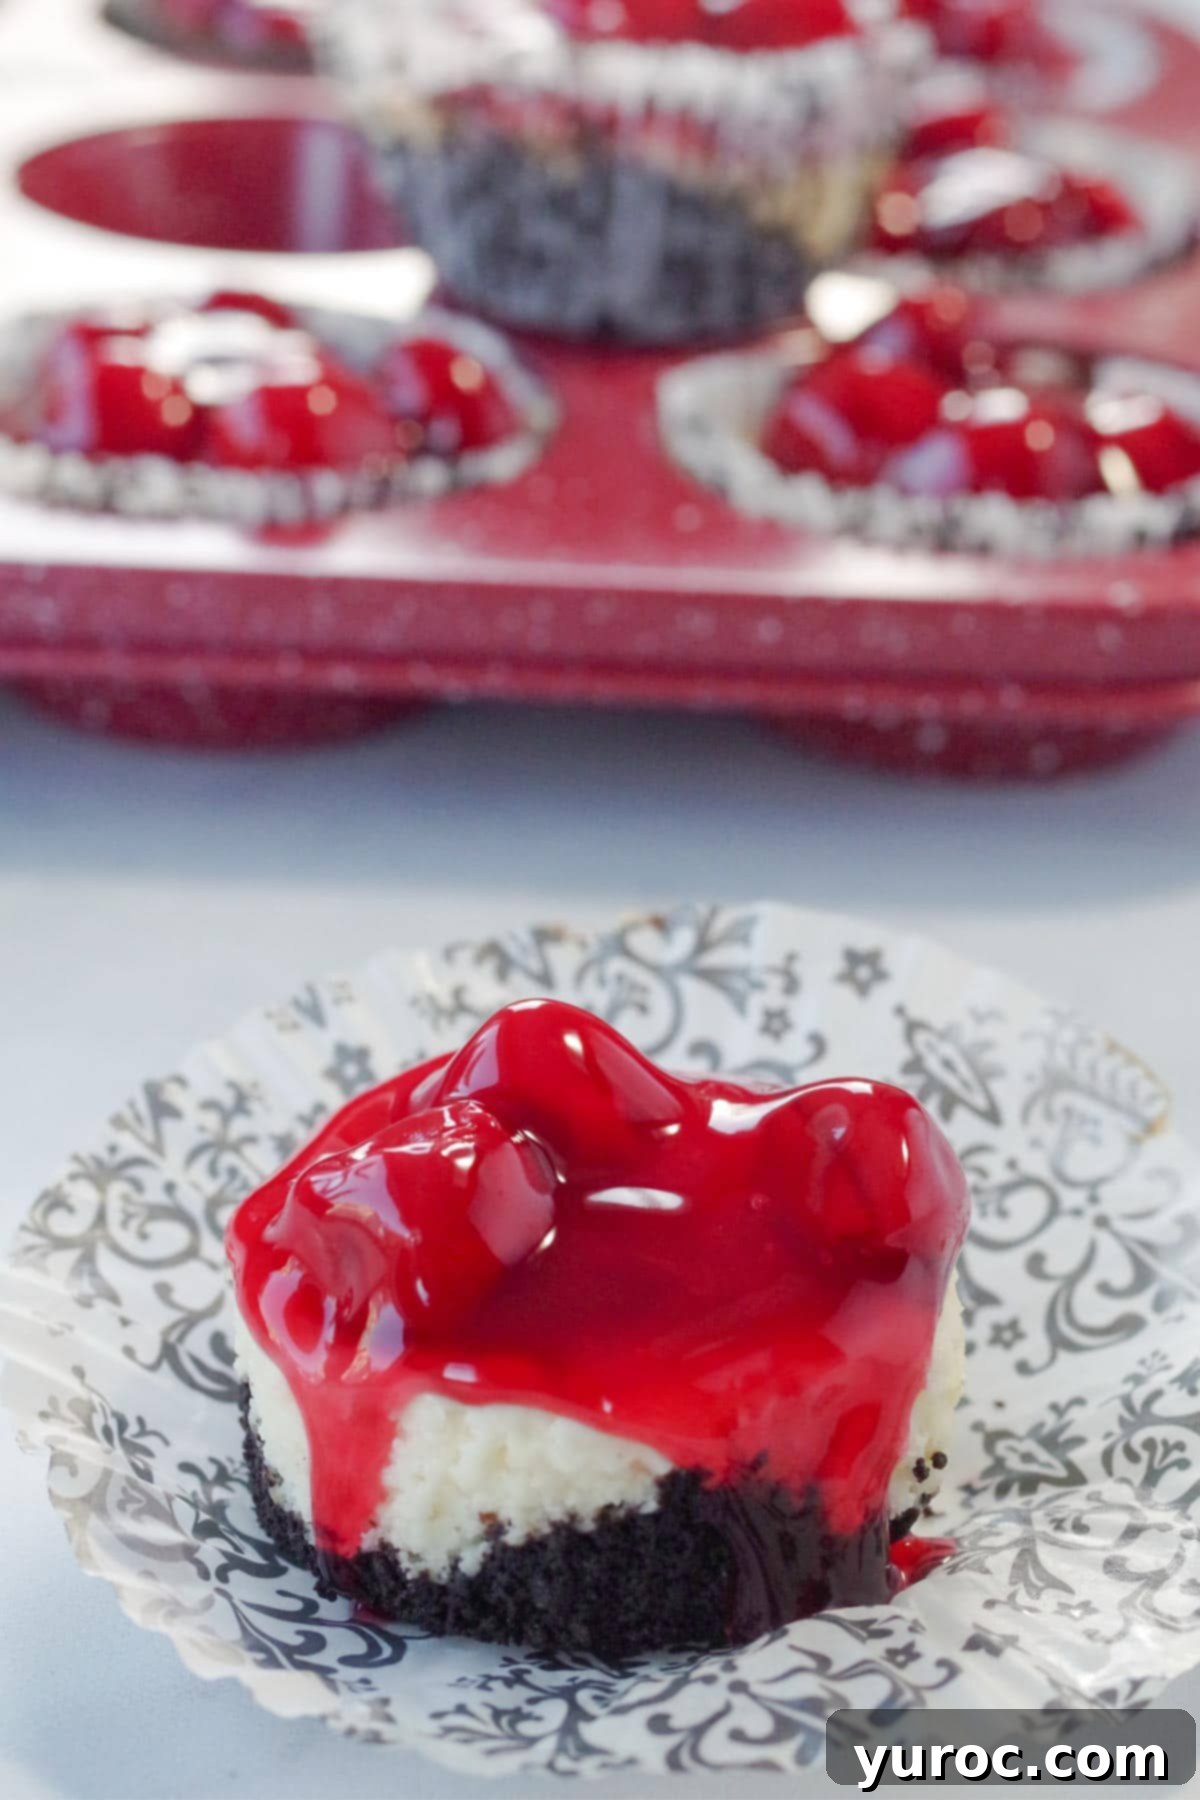
For many, miniature cheesecakes simply exude a sense of fun and festivity that a larger, traditional cheesecake might not. This perception is partly because finger foods, by their very nature, tend to be more enjoyable and less formal than sit-down meals. We often encounter finger foods at vibrant parties and joyous celebrations, which instantly associates them with good times. The best part of serving finger food desserts like these mini cheesecakes is the sheer simplicity they offer – you can completely skip the fuss of plates and forks, allowing everyone to simply grab a treat and dig in without any extra clean-up or formalities. They embody convenience and indulgence in one perfect bite.
❔ Recipe FAQs
Absolutely! These delightful mini cheesecakes are perfect for meal prepping or preparing for an event. They can be made up to two days in advance. Once fully cooled, store them in an airtight container in the fridge. For the best presentation, hold off on adding the cherry pie topping until just before you’re ready to serve them.
There are a few reasons this might happen. First, ensure the crust is firmly pressed into the bottom of the liner – a loose crust can make removal difficult. Secondly, it’s crucial to let the cheesecakes cool completely before attempting to remove them; warmth can cause them to stick. For easier removal, consider using foil baking liners or parchment paper liners, which tend to release more smoothly than standard paper liners.
Yes, you certainly can! Using a mini muffin tin will produce adorable, bite-sized cheesecakes, perfect for a tasting platter or a larger crowd. Just be sure to adjust your baking time accordingly. For mini muffin tins, the baking time will typically be shorter, around 10-12 minutes. Always monitor them closely to prevent overbaking, as they cook much faster in smaller molds.
If you’re on the hunt for easy mini baked cheesecakes or simple mini cheesecake recipes, this mini cherry cheesecakes recipe is an absolute winner. The genius lies in baking them in standard muffin tins with muffin liners, meaning you don’t need to invest in any specialized equipment or springform pans. This makes them incredibly accessible for any home baker.
So, whether your plans include a joyous baby shower, an exciting Super Bowl party, a festive New Year’s celebration, a romantic Valentine’s Day dinner, or a casual backyard BBQ, these Mini Cherry Cheesecakes are the quintessential quick and easy dessert. Their delightful flavor and charming presentation make them the perfect sweet ending for any occasion.
Ultimately, if you’ve been craving mini Oreo cheesecake cupcakes, you’ve found your new favorite recipe right here. These cheesecakes perfectly blend the beloved flavors of Oreo and cherry into a convenient, irresistible bite!
📋 Explore More Cheesecake Delights!
- Birthday Cake Cheesecake (No Bake)
- Light Pumpkin Cheesecake (with Oreo Crust)
- Strawberry Rhubarb Cheesecake (No Bake)
- No Bake Saskatoon Berry Cheesecake (in a jar)
Did your family ❤️ this recipe? Did you know that commenting and ⭐ rating recipes is one of the best ways to support your favorite recipe creators? If you LOVED this recipe, please comment and rate it in the recipe card or share photos on social media using the hashtag #foodmeanderings or tagging @foodmeanderings !

📋 Mini Cherry Cheesecakes (with Oreo crust) recipe
Equipment
- electric mixer
Ingredients
Crust
- 1 ½ cups Oreo cookie baking crumbs
- 4 tablespoon butter, melted
- 2 – 8 oz pkgs of cream cheese (2 cups) * I use light cream cheese (at room temperature)
Filling
- ¾ cup white granulated sugar
- 2 eggs
- 1 tablespoon lemon juice * I used Realemon lemon juice from concentrate. If you use the juice from a real lemon, use 2 tbsps
- 1 teaspoon lemon zest (optional)
- 1 teaspoon vanilla
Topping
- 540 ml can of cherry pie filling (About 18 oz)
Instructions
- Preheat oven to 375 F/190 C. Line muffin tin with paper cupcake/muffin liners or foil tart liners.
- Mix Oreo baking crumbs with melted butter in a bowl.1 ½ cups Oreo cookie baking crumbs, 4 tablespoon butter, melted
- Place mixture in the bottom of each paper liner, patting down, dividing evenly between all 18.
- Cheesecake mixture: Beat the rest of the ingredients together with an electric hand mixer, on medium-low speed ( EXCEPT cherry pie filling) for about 45 seconds to 1 minute until fluffy.2 – 8 oz pkgs of cream cheese, ¾ cup white granulated sugar, 2 eggs, 1 tablespoon lemon juice, 1 teaspoon lemon zest (optional), 1 teaspoon vanilla
- Spoon cheesecake batter into paper muffin/cupcake liners on top of base/crust to ⅔ full (dividing between all 18.)
- Bake cheesecake at 375 degrees F (190 degrees C) for 15 minutes.
- Cool for about 10 minutes. When cool, top with cherry pie filling.540 ml can of cherry pie filling
- Refrigerate until ready to serve.
Notes
- Room temperature ingredients. Make sure your eggs and cream cheese are at room temperature. This will ensure you get a lump-free cheesecake batter that you don’t have to overmix to acheive a homogenious and smooth batter.!
- Don’t overmix the batter. Overmixing can ruin the structure and texture of your cheesecake and lead to cracks and a grainy texture.
- Don’t mix on high speed. Mix on medium -low or low. Mixing on high speed adds to much air, which can also cause your cheesecake to crack.
- Cool before adding topping. If you add topping before your cheesecake is cooled it will run.
-
- Fridge: Leftover cheesecakes can be stored in an airtight container for up to 3 days in the fridge.
-
- Freezer: This recipe freezes well for up to 3 months in a sealed container. But don’t put the topping on the individual cheesecakes until they are completely defrosted, and just prior to serving.
