Authentic Grilled Greek Ribs: Juicy, Tender, and Flavorful Mediterranean BBQ Recipe
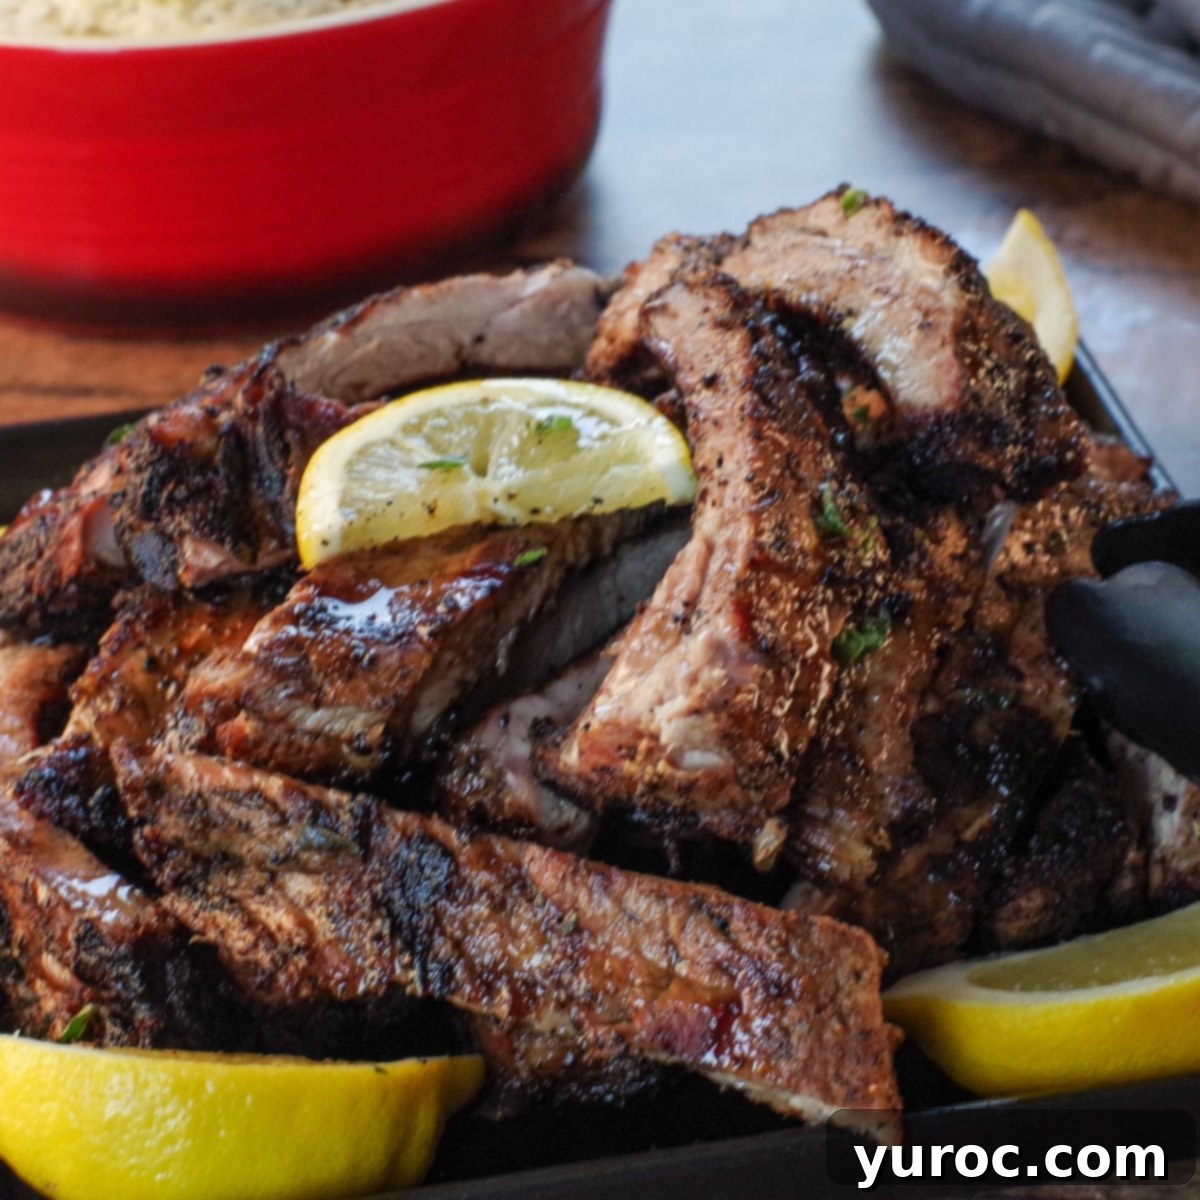
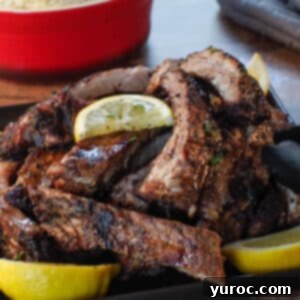
Prepare your taste buds for an unforgettable culinary experience with these incredible **Grilled Greek Ribs**! This cherished family recipe, honed over years by my husband, is a true standout in our home and consistently receives rave reviews. It’s more than just a meal; it’s a celebration of vibrant Mediterranean flavors, perfectly combined with succulent, tender pork. Imagine juicy baby back ribs, infused with aromatic lemon, pungent garlic, and earthy oregano, all grilled to absolute perfection, creating a delightful char and a depth of flavor that words simply cannot capture. These ribs aren’t just good; they’re truly spectacular.
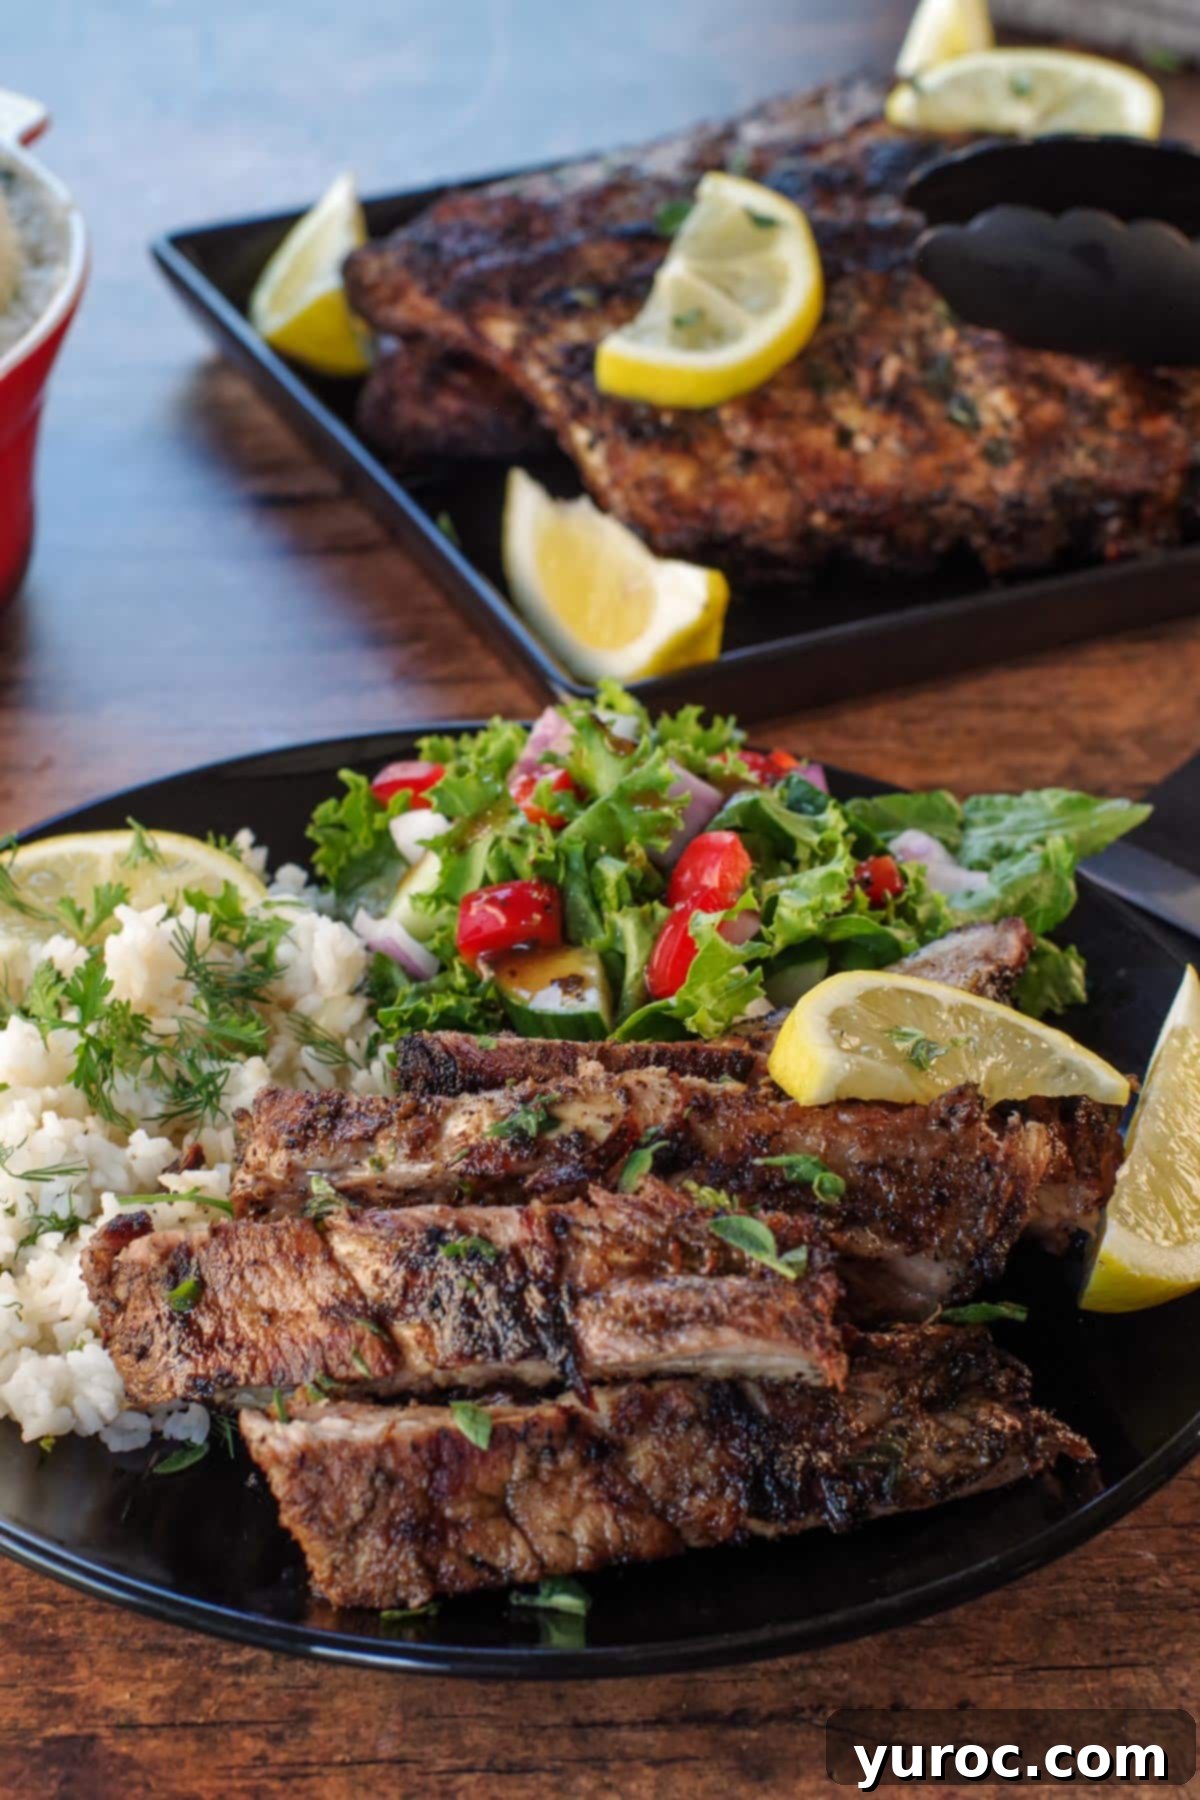
While ideally enjoyed straight from the grill, these Greek ribs are a fantastic dish any time of year. Whether you prefer the classic outdoor barbecue experience or the convenience of an indoor grill, this recipe adapts beautifully. For those who, like me, believe grilling is a year-round sport—even if it means shoveling snow to reach the BBQ—outdoor grilling will always be the preferred method (blizzards permitting, of course!). The smokiness and char from an open flame truly elevate the Mediterranean marinade, creating a taste sensation that’s hard to beat.
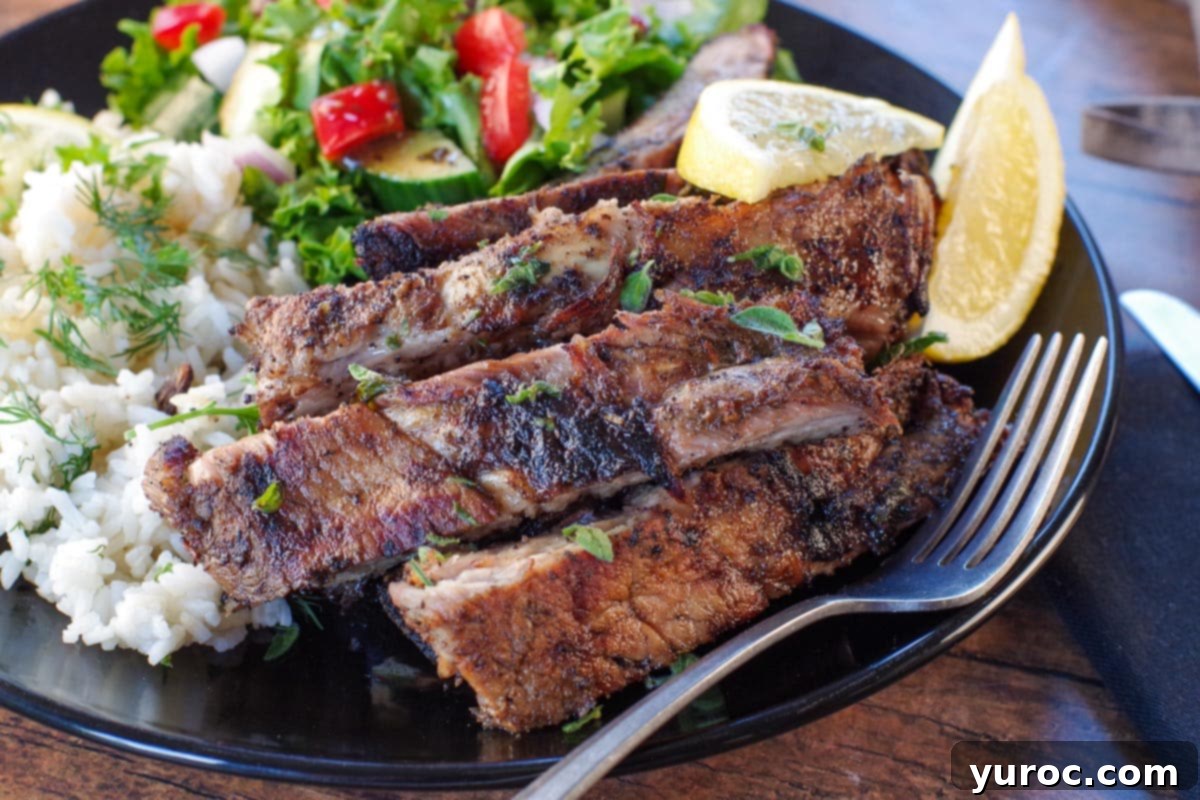
These versatile ribs make an outstanding main course for any dinner occasion. They also serve as a remarkably tasty appetizer or crowd-pleasing snack for gatherings. When planning a complete meal, these Greek-style ribs pair exquisitely with classic Mediterranean accompaniments such as Creamy Greek Style Potatoes or Fluffy Lemon Greek Rice, alongside a fresh, crisp Greek salad. The bright, tangy flavors of the ribs perfectly complement the richness of potatoes or rice, creating a balanced and satisfying feast.
The origin of this beloved recipe is a testament to culinary passion and exploration. It’s a masterful blend of techniques and flavors my husband gathered during his youth, working in various restaurants, infused with his unique personal touch and flair for exceptional taste. This journey through professional kitchens allowed him to refine his craft, leading to this incredibly delicious and consistently praised recipe that has become a staple in our family.
Essential Ingredient Notes for Flavorful Greek Ribs
To craft these mouthwatering BBQ Greek Ribs, you’ll need a selection of quality ingredients that work in harmony to create their signature Mediterranean profile:
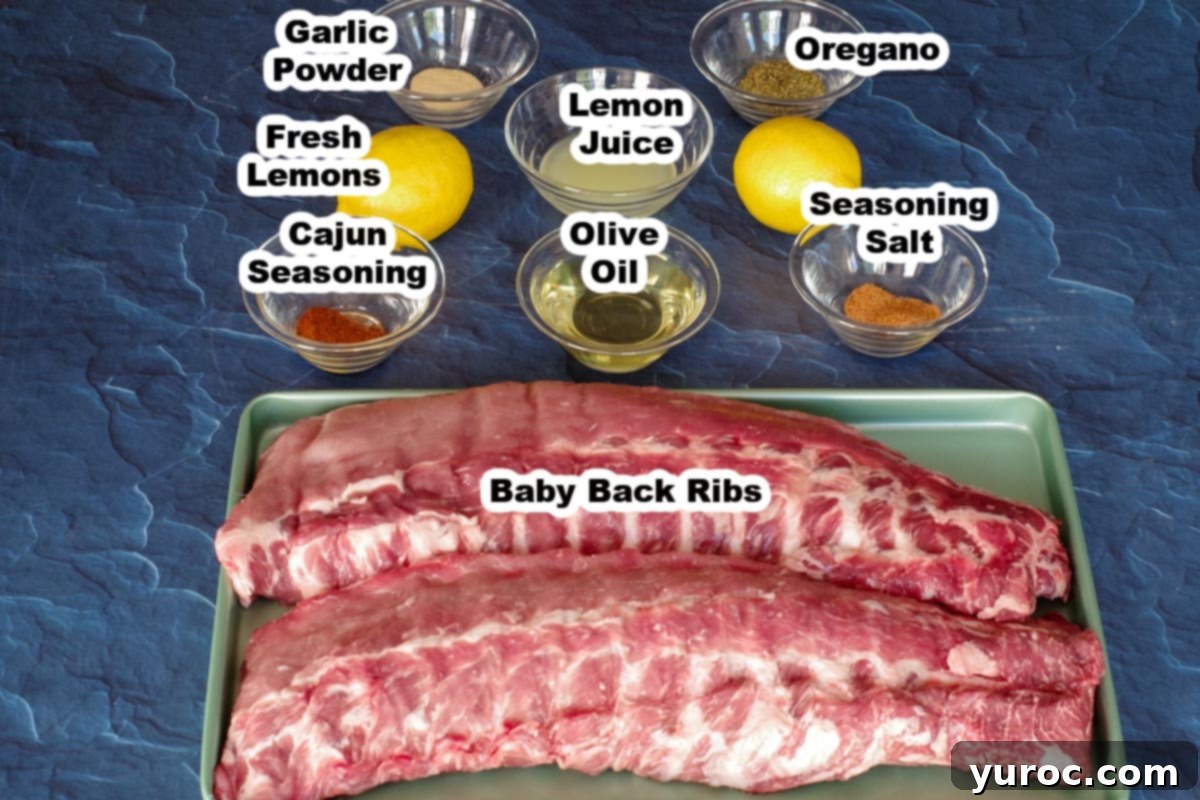
- Pork Baby Back Ribs: The foundation of this incredible dish. While various types of ribs exist, baby back ribs are unequivocally the top choice for this recipe. They are renowned for their exceptional tenderness and leaner meat compared to spareribs, making them incredibly succulent when grilled. Baby back ribs are cut from the loin section of the hog, above the spareribs, and their popularity stems from their ideal meat-to-bone ratio and delicate texture. When selecting, look for racks with good meat coverage and minimal exposed bone.
- Olive Oil: A cornerstone of Mediterranean cooking, olive oil plays a crucial role beyond just lubrication. It not only helps to infuse the rich Greek flavors deep into the meat but also contributes to the beautiful glazing and searing process during grilling. This creates an almost caramelized crust on the exterior of the ribs, locking in moisture and adding another layer of irresistible taste and texture. High-quality extra virgin olive oil is recommended for the best flavor.
- Lemon Juice (from concentrate): This is a key ingredient for achieving that distinctive bright, tangy Greek flavor. We specifically recommend lemon juice from concentrate because it typically offers a more intense and consistent flavor profile compared to fresh lemon juice, meaning you don’t need to use as much to get a powerful citrus punch. Furthermore, concentrate often has a longer shelf life and can be a more economical choice, ensuring you always have this essential ingredient on hand.
- Garlic Powder: Garlic is indispensable in Greek cuisine. Using garlic powder here ensures an even distribution of flavor across the entire surface of the ribs, penetrating the meat consistently. Unlike minced fresh garlic, which can sometimes burn on the grill, garlic powder provides a subtle yet robust garlicky essence that permeates the marinade beautifully.
- Dried Oregano: This aromatic herb is a defining characteristic of Greek cooking. Dried oregano, particularly Mediterranean or Greek oregano, delivers a potent, savory, and slightly peppery flavor that is absolutely essential for these ribs. It infuses the marinade with an authentic taste that transports you straight to the Greek Isles.
- Seasoning Salt: A blend of salt, herbs, and spices that enhances the overall flavor of the ribs, ensuring they are well-seasoned from the inside out. It provides a balanced savory base.
- Cajun Seasoning: While not traditionally Greek, a touch of Cajun seasoning adds a fantastic layer of complexity and a subtle, delightful kick to the ribs. It introduces a hint of smoky spice that complements the bright Mediterranean notes without overpowering them. Adjust the amount to your preference for spice.
*See the comprehensive recipe card below for the full list of ingredients and precise quantities.
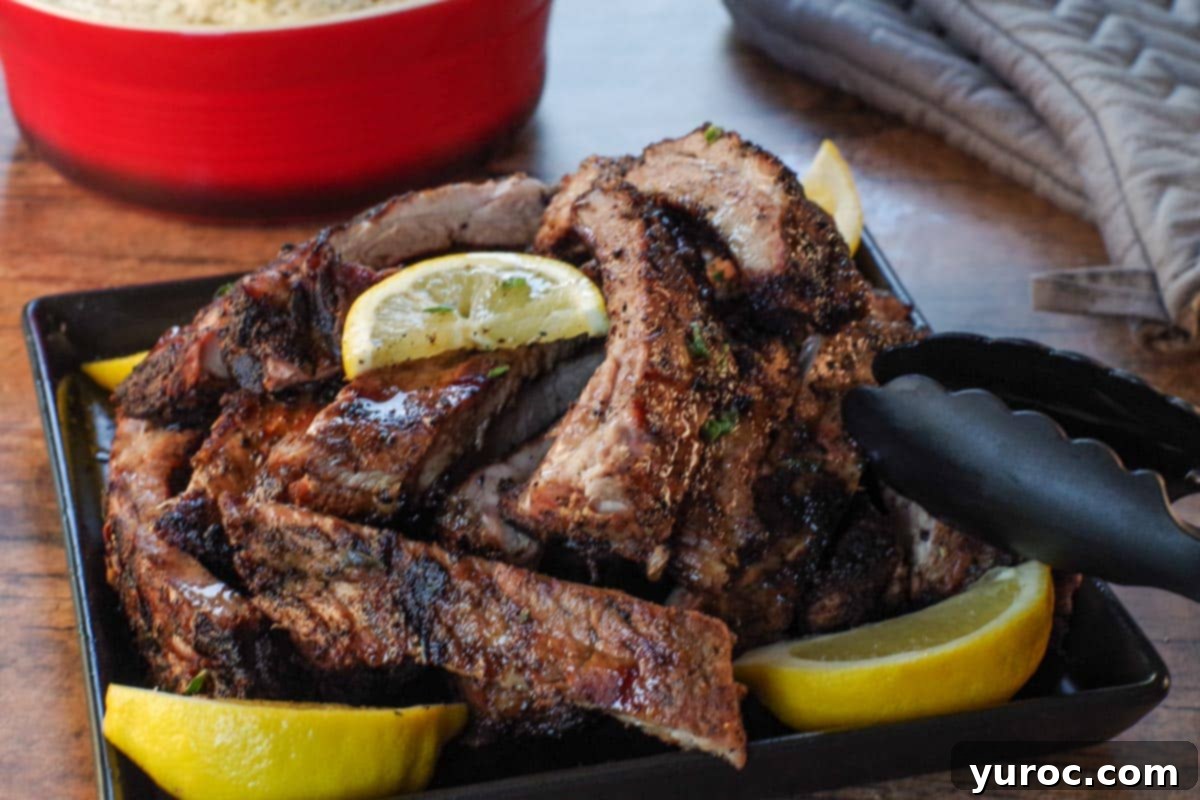
Customizing Your Greek Ribs: Variations & Substitutions
One of the beauties of cooking is the ability to adapt recipes to your taste and what you have on hand. Here are some fantastic variations and substitutions for these Greek Ribs:
- Ribs: While pork baby back ribs are highly recommended for their tenderness and lean profile, you absolutely can experiment with other cuts. Beef back ribs offer a richer, beefier flavor and can be substituted; however, cooking times will vary. Spareribs are another option, but be aware they are generally larger, fattier, and require a significantly longer cooking time. If using spareribs, you’ll need to increase the grilling duration and potentially lower the heat to ensure they cook through without burning the exterior. Always monitor internal temperature for doneness.
- Oregano: For an even fresher aromatic touch, swap dried oregano for fresh. As a general rule, use three times the amount of fresh herbs compared to dried. My husband typically uses dried in the marinade for intensity, and I love to garnish with fresh sprigs to brighten the final dish. If you’re a keen gardener, you might even have your own dried herbs from a summer harvest—learn how to dehydrate your herbs in an air fryer HERE for maximum flavor retention.
- Lemon Juice: If you prefer to use fresh lemons, feel free! Just remember that fresh lemon juice is typically less concentrated than bottled concentrate, so you’ll need to double the amount specified in the recipe to achieve the same zesty tang. Using fresh lemons also adds a lovely vibrant aroma.
- Garlic: Instead of garlic powder, you can opt for fresh garlic cloves, finely minced. For the best flavor, aim for about 2-3 cloves per tablespoon of garlic powder. Fresh garlic will offer a sharper, more pungent flavor, which some might prefer, but be mindful that it can burn more easily on the grill.
- Spicy Kick: For those who love a bit of heat, easily transform these ribs into a spicy delight! Increase the amount of Cajun seasoning or add a pinch of red pepper flakes or a dash of hot paprika to the marinade. A teaspoon of Aleppo pepper could also provide a mild, fruity heat.
- Additional Lemon Intensity: To amplify the bright lemon flavor even further, consider adding some finely grated lemon rind (lemon zest) to the marinade. The zest contains concentrated lemon oils that will infuse the ribs with an intense citrus aroma and taste, making them even more irresistible.
- Herbal Twist: Beyond oregano, a small amount of fresh thyme or rosemary could be added to the marinade for a slightly different aromatic profile, though oregano remains the star.
Step-by-Step Guide: How to Make Irresistible Greek Ribs on the Grill
Creating perfectly grilled Greek ribs starts with a crucial preparatory step: removing the membrane. This often-overlooked detail makes a world of difference in the final product, ensuring your ribs are wonderfully tender and packed with flavor.
Why remove the membrane? The silverskin, or membrane, on the underside of the ribs can become tough, chewy, or rubbery when cooked. Furthermore, it acts as a barrier, preventing your delicious marinade and seasonings from penetrating the meat effectively. Removing it is key to achieving fall-off-the-bone tender pork ribs for your BBQ. Luckily, this task is surprisingly simple once you know the trick.
How to remove the membrane from baby back ribs (visual learners, check out the VIDEO below as well!):
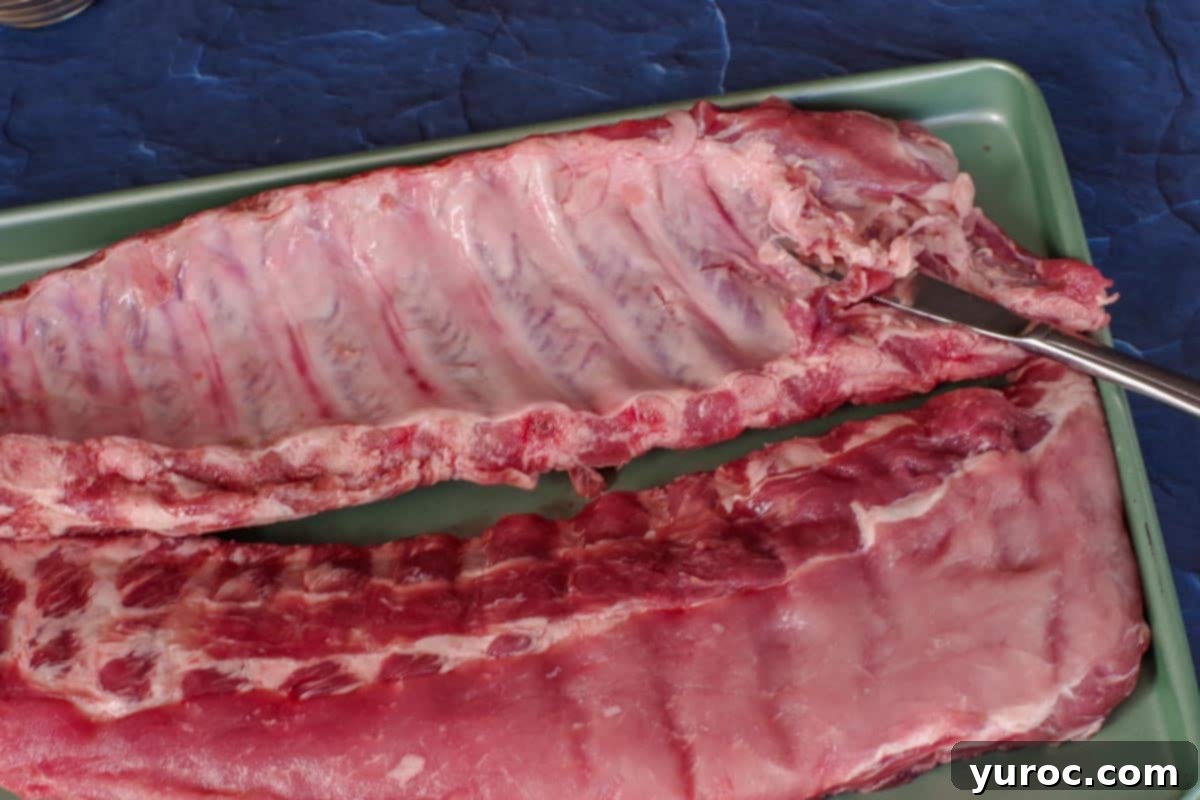
Begin by locating the membrane on the underside (concave side) of the ribs. Slide a blunt object, such as a butter knife or the handle of a spoon, underneath the membrane at one end of the rack. Gently work it to loosen the membrane from the bone. Avoid using a sharp knife here, as the surface is slippery, and you risk injury. A butter knife provides enough leverage without the danger.
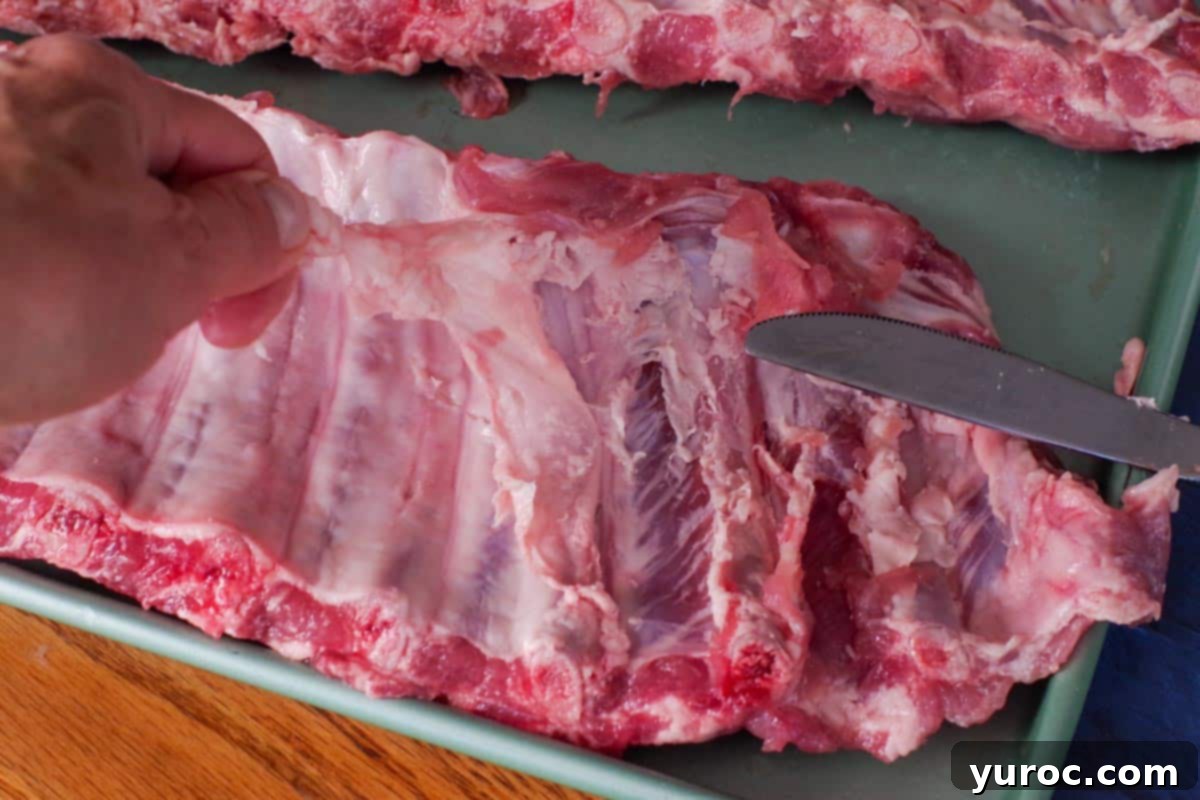
Once you’ve managed to loosen a small section of the membrane, grasp it firmly with your fingers and begin to pull it back from the ribs. It might be a little stubborn at first, but with a steady pull, it should start to peel away.
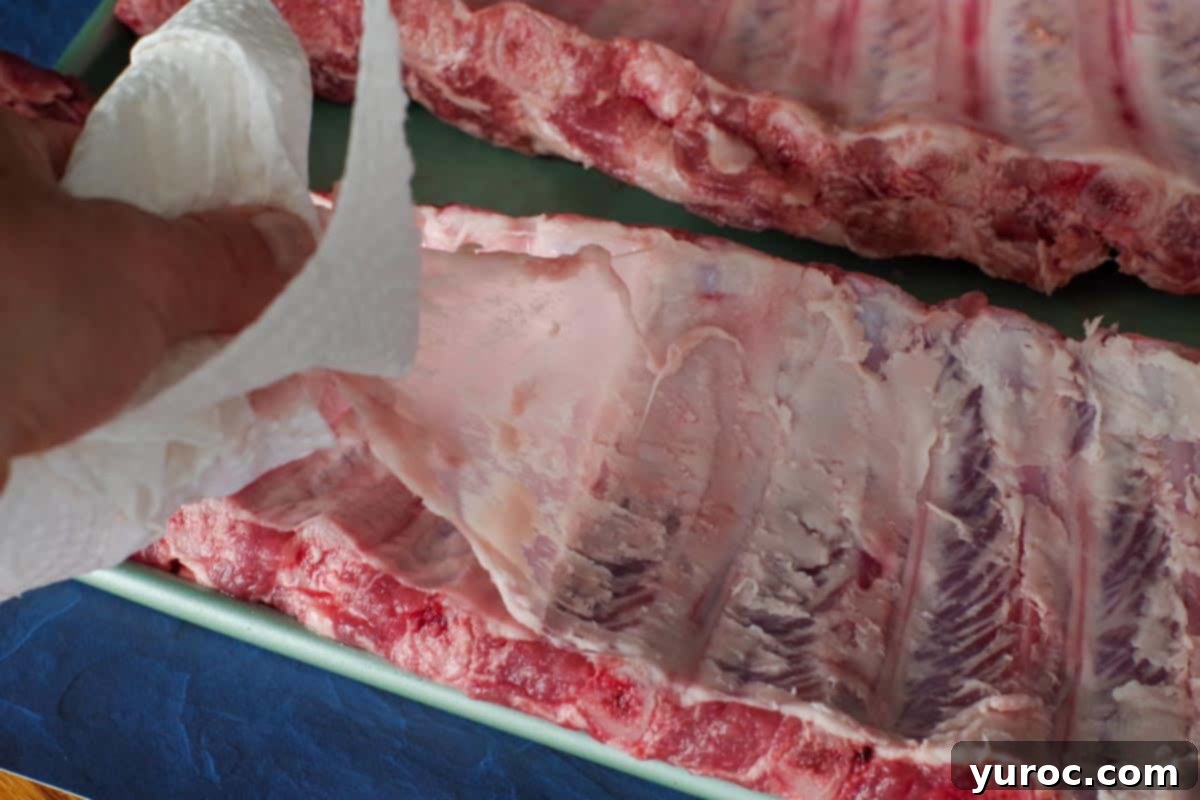
As you continue to pull the membrane back, you’ll find it can be quite slippery. To get a much better and more secure grip, use a paper towel. The paper towel provides excellent traction, preventing the membrane from slipping through your fingers. Continue pulling steadily and evenly.
Maintain a firm hold with the paper towel and continue to pull the entire membrane all the way back until it completely detaches from the rack of ribs. It should come off in one relatively clean piece, leaving the underside of your ribs ready to absorb all the wonderful Greek flavors.
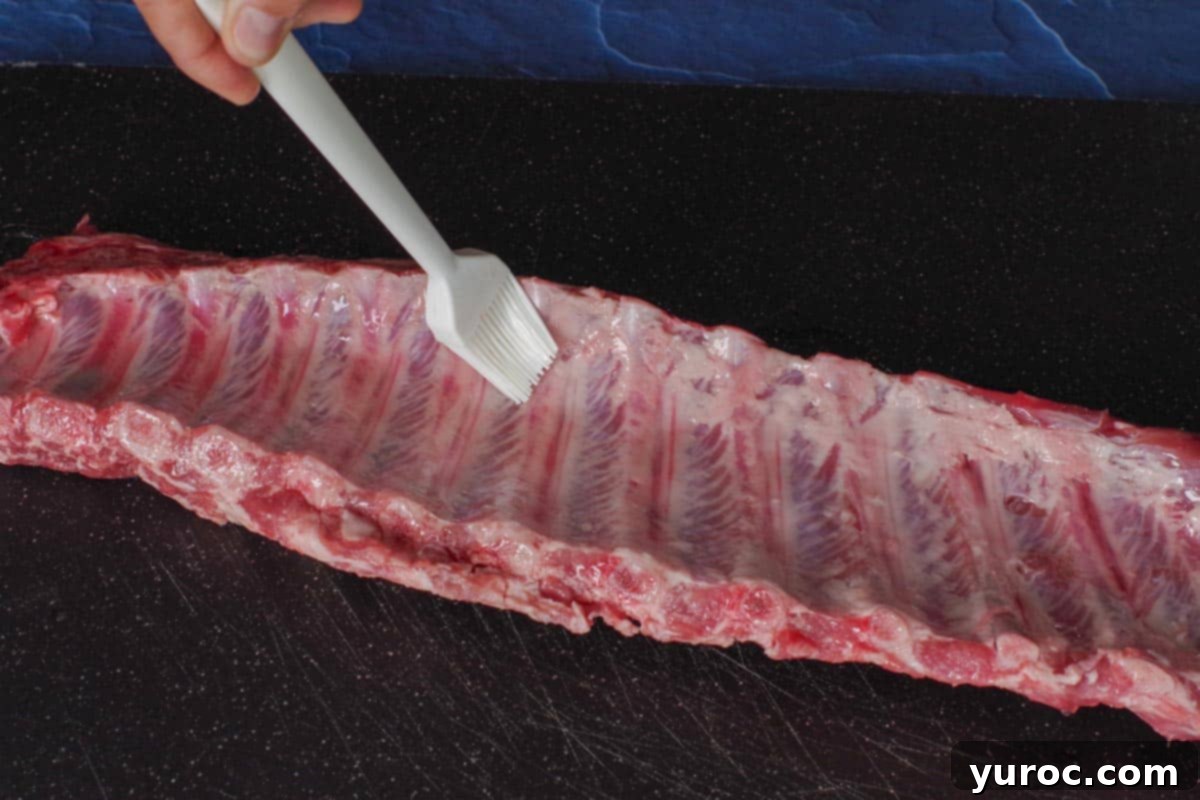
Place the prepared racks of ribs on a large rimmed baking sheet, in a deep baking pan, or in a long plastic or glass container. The rim is important to contain the liquid marinade. (Note: A cutting board was used in the photos for clearer demonstration purposes). Lightly brush the entire surface of the concave/underside of both racks of ribs with olive oil. This initial layer helps the seasonings adhere and initiates the flavor infusion.
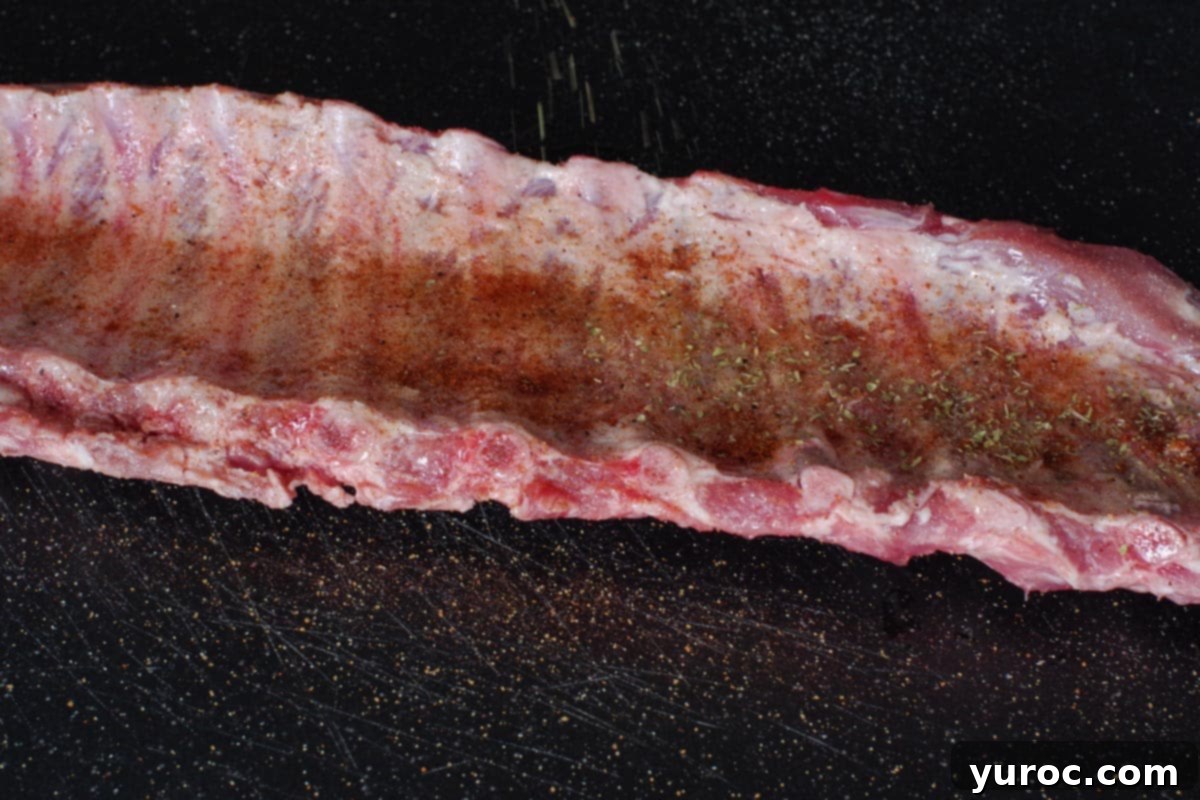
Generously sprinkle half of the garlic powder, seasoning salt, Cajun seasoning, and oregano evenly over the olive-oiled side of both racks. Follow this by pouring half of the lemon juice over the seasoned ribs. Make sure to **reserve the other half** of the olive oil, lemon juice, and all the dry spices in a small bowl for the other side of the ribs.
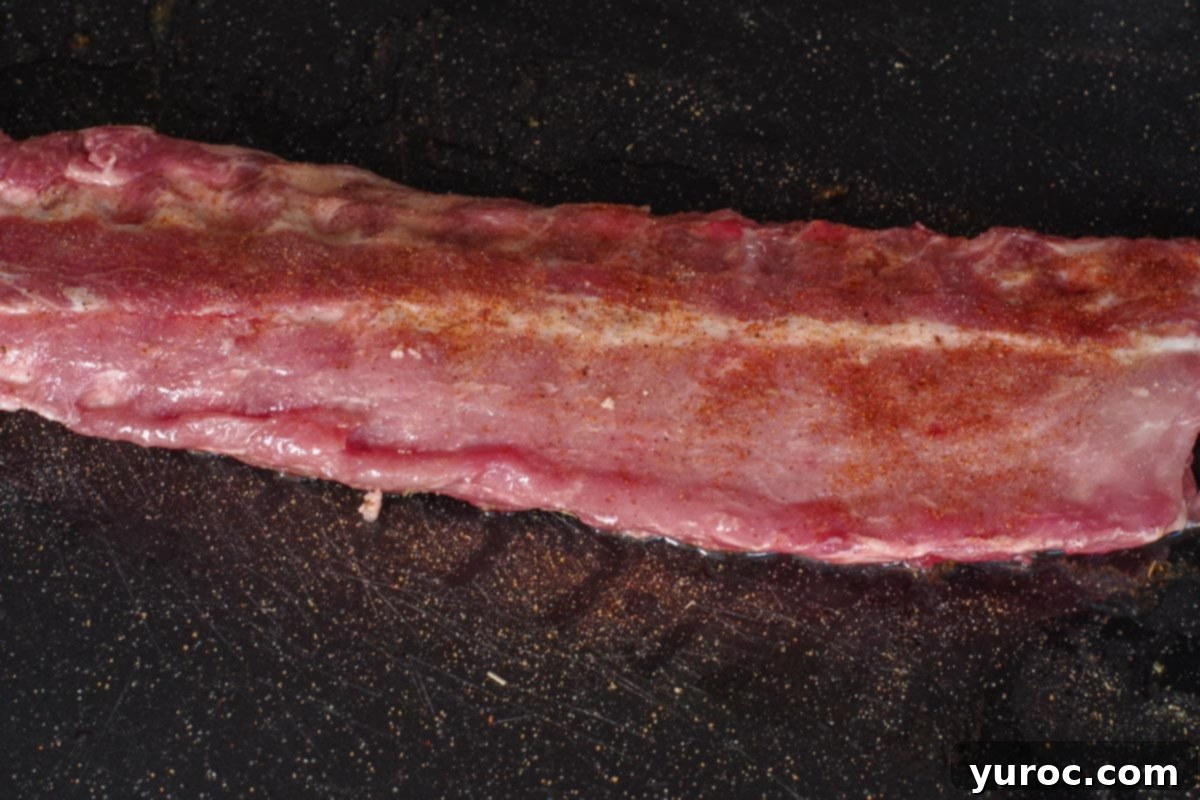
Carefully flip the ribs over to the other side and repeat the process: brush with the reserved olive oil, then sprinkle with the remaining garlic powder, seasoning salt, Cajun seasoning, and oregano. Pour the rest of the lemon juice over the ribs. If you’re using a rimmed baking sheet, pour any collected marinade from the sheet back onto the ribs. Use your hands or a brush to thoroughly rub and blend all the spices and liquids into the meat on both sides. This ensures every inch of the ribs is coated. For optimal flavor and tenderness, place the seasoned ribs in a large container or an extra-large Ziploc bag and refrigerate to marinate for a few hours, or ideally, overnight. While not strictly necessary if you’re short on time, extended marination greatly enhances the final taste and texture.
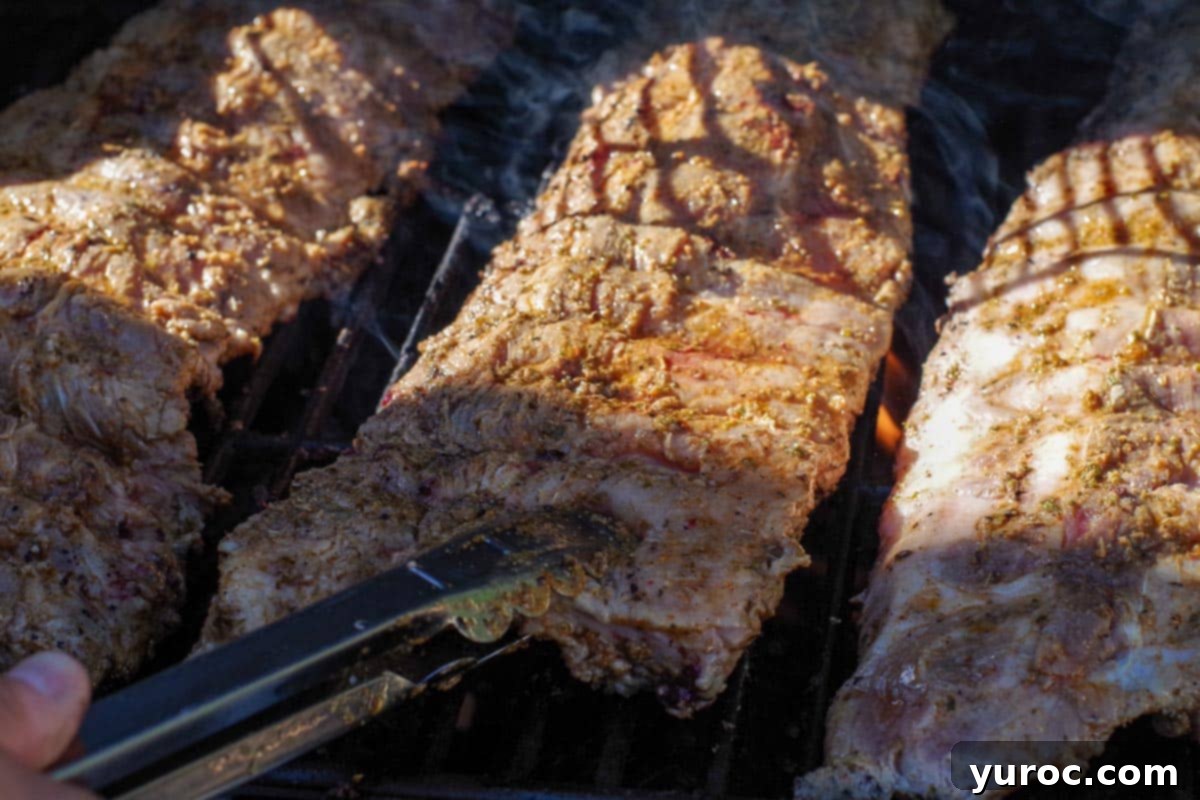
Preheat your grill to a high temperature, around 450 degrees F (230 degrees C). Once hot, place the marinated ribs on the grill grates with the concave side facing down. Grill for approximately 7-10 minutes. The goal here is to achieve a beautiful golden-brown sear with some desirable charring. This initial high heat caramelizes the marinade and creates a delicious crust. However, it’s crucial to keep a very close eye on them, as grilling times can vary significantly between BBQs, and you want to prevent them from burning.
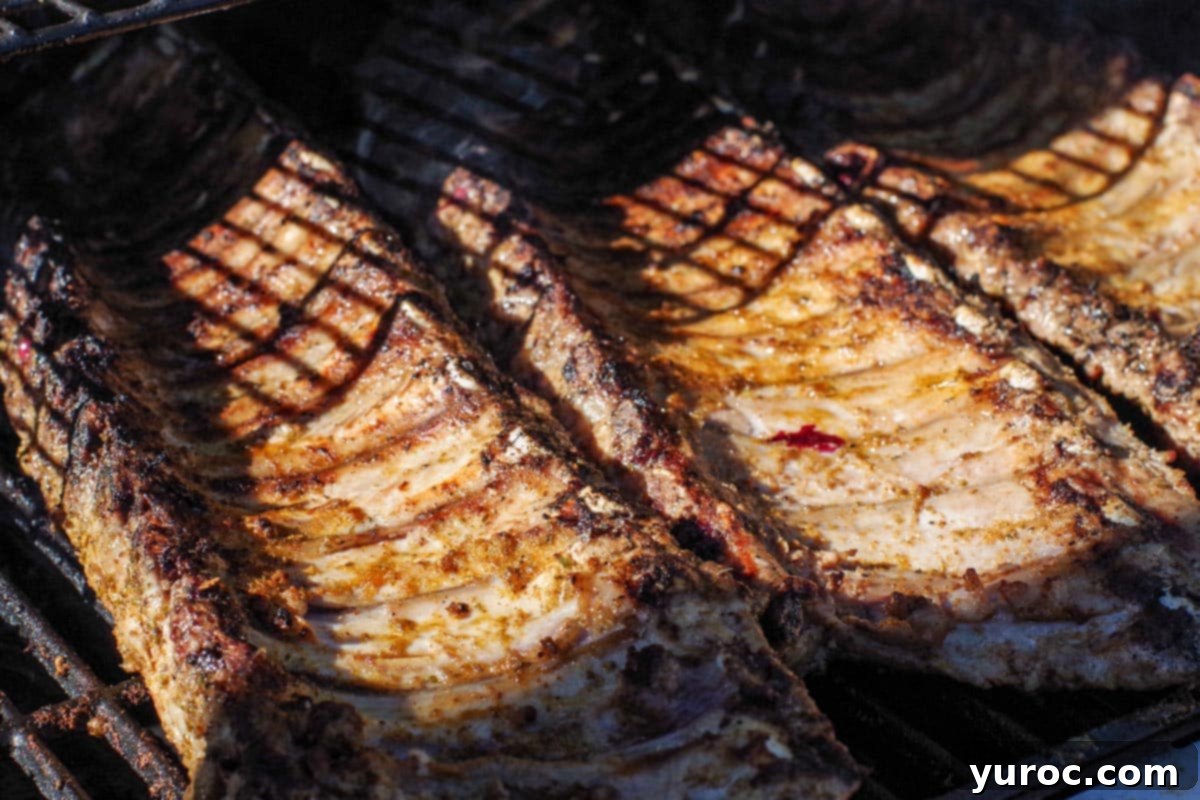
After the first side has developed a golden crust and slight char, carefully flip the ribs using grill tongs. Grill the second side for another 7-10 minutes on medium-high heat until it also turns golden brown and achieves a beautiful char. Continue to monitor closely to prevent over-charring or burning.
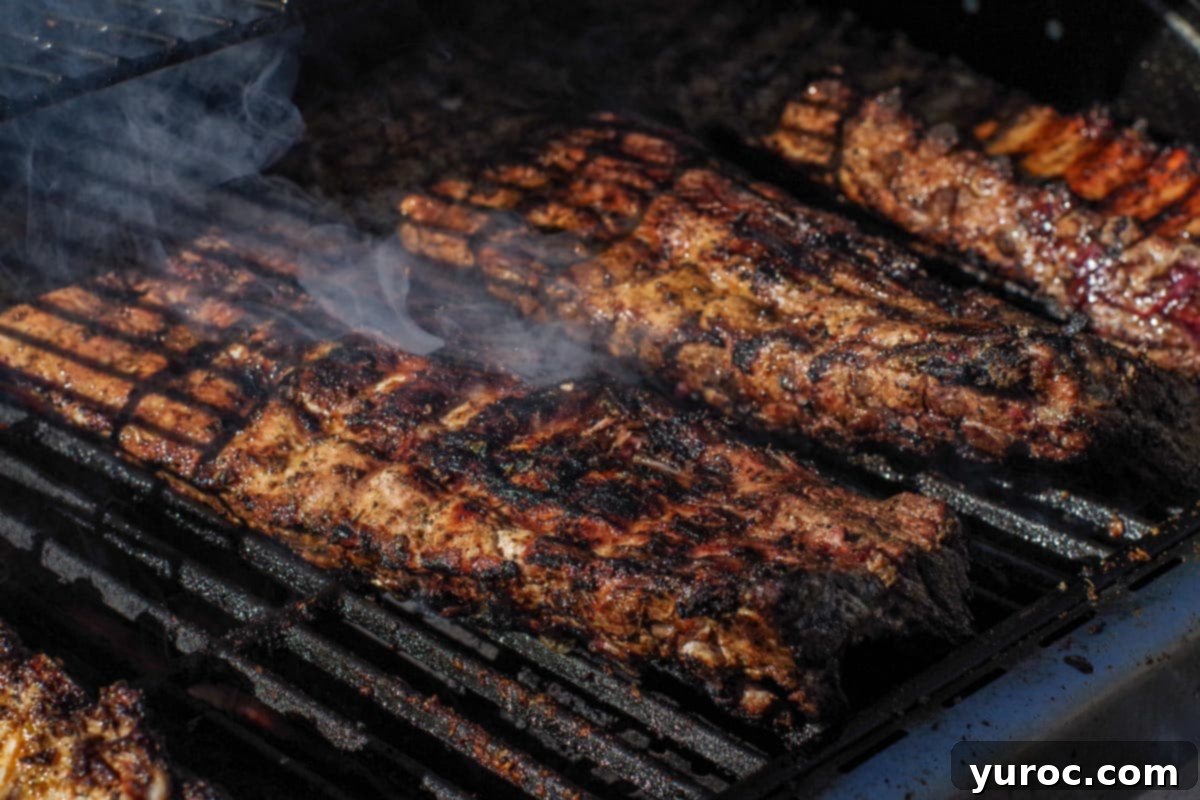
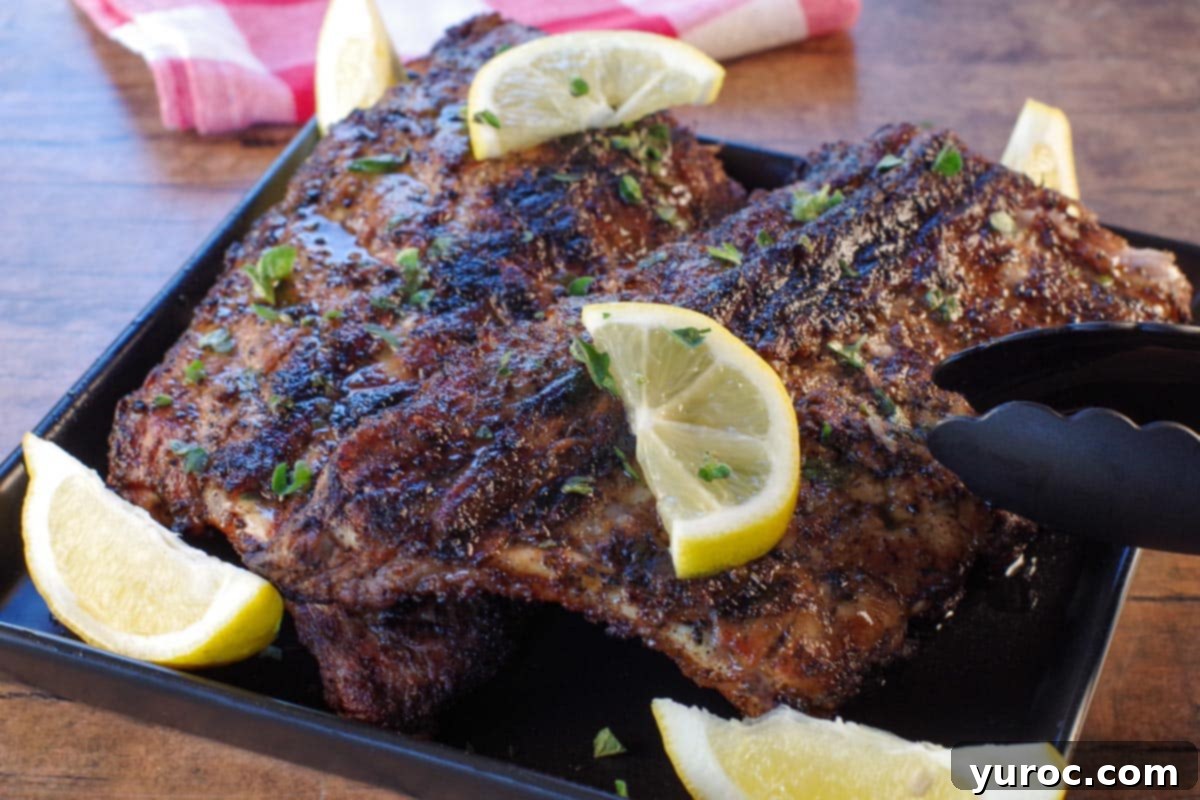
Reduce the grill temperature to medium, around 350 degrees F (175 degrees C). Continue cooking the ribs, turning them occasionally, until they reach an internal temperature of 145 degrees F (63 degrees C) in the thickest part of the meat (refer to our Top Tip below for precision) and are no longer pink inside. Once cooked, transfer the ribs to a cutting board. For a final flourish, sprinkle with fresh oregano, if desired, and garnish generously with fresh lemon wedges. Slice the ribs into individual portions by cutting between the bones with a sharp knife. Serve immediately with extra halved lemons for squeezing.
Grilling Hint: After removing the ribs, let your grill run on high for 4-5 minutes to burn off any marinade remnants and food particles. Then, clean the grates thoroughly. I highly recommend using this bristle-free grill brush(affiliate link) for safe and effective cleaning.
Pro Tips for Perfect Greek Ribs Every Time
- Membrane Removal is a Game Changer: Never skip this crucial step! Taking the time to remove the membrane from the back of the ribs is essential for two reasons: it allows the flavorful Greek marinade to penetrate deeply into the meat, ensuring every bite is seasoned, and it prevents that undesirable chewy, rubbery texture on the underside of the cooked ribs. Your patience here will be rewarded with incredibly tender results.
- Utilize a Paper Towel for Superior Grip: The membrane can be notoriously slippery, making it tricky to pull off. The secret to a clean, easy removal is to use a paper towel. Grab the loosened membrane with the paper towel for enhanced grip, allowing you to peel it off in one smooth, continuous motion. This simple trick prevents frustration and ensures complete removal.
- Prioritize Marinating for Maximum Flavor (If Time Allows): While these ribs are delicious even with a quick seasoning, marinating them for at least a few hours or, ideally, overnight, makes a significant difference. The extended soak in the lemon-garlic-oregano mixture allows the flavors to meld and penetrate deeply, resulting in exceptionally tender and intensely flavorful ribs. If you are truly short on time, a generous squeeze of fresh lemon juice just before grilling can help brighten the flavors, but marination is always best.
- An Instant-Read Thermometer is Your Best Friend: Precision is key to perfectly cooked ribs. For the most accurate results and to avoid both undercooked or overcooked, dry ribs, always use an instant-read thermometer (affiliate link). Pork ribs are safely cooked and at their juiciest when they reach an internal temperature of 145°F (63°C). Insert the thermometer into the thickest part of the meat without touching the bone.
- Embrace the Char: Don’t be afraid to let your ribs develop a beautiful char during the initial high-heat grilling phase. This char isn’t just for looks; it caramelizes the sugars in the marinade and develops complex, smoky flavors that are a hallmark of expertly grilled meat. Just remember to keep a close eye on them and turn frequently to achieve an even char without burning.
- Allow for Resting Before Slicing: Patience is a virtue, especially after grilling. Once the ribs are cooked, transfer them from the grill to a cutting board and let them rest uncovered for at least 5-10 minutes before slicing into individual portions. This resting period allows the meat fibers to relax and the juices to redistribute throughout the ribs, ensuring every bite is incredibly juicy and tender.
- Maintain a Clean Grill with a Bristle-Free Brush: Food safety and grill longevity are important. After you’ve finished grilling, crank the heat back up for a few minutes to burn off any lingering marinade or food particles. Then, clean your grill grates with a **bristle-free grill brush**. This prevents potentially dangerous wire bristles from detaching and possibly ending up in your food, keeping your grill safe and in pristine condition for future use.
Delectable Pairings: What to Serve with Greek Style Ribs
These flavorful Greek ribs are the star of the show, but choosing the right side dishes can truly complete the Mediterranean dining experience. Here are some of our top recommendations:
- Lemon Greek Rice: A light and fluffy rice pilaf infused with lemon and herbs. Its brightness cuts through the richness of the ribs beautifully.
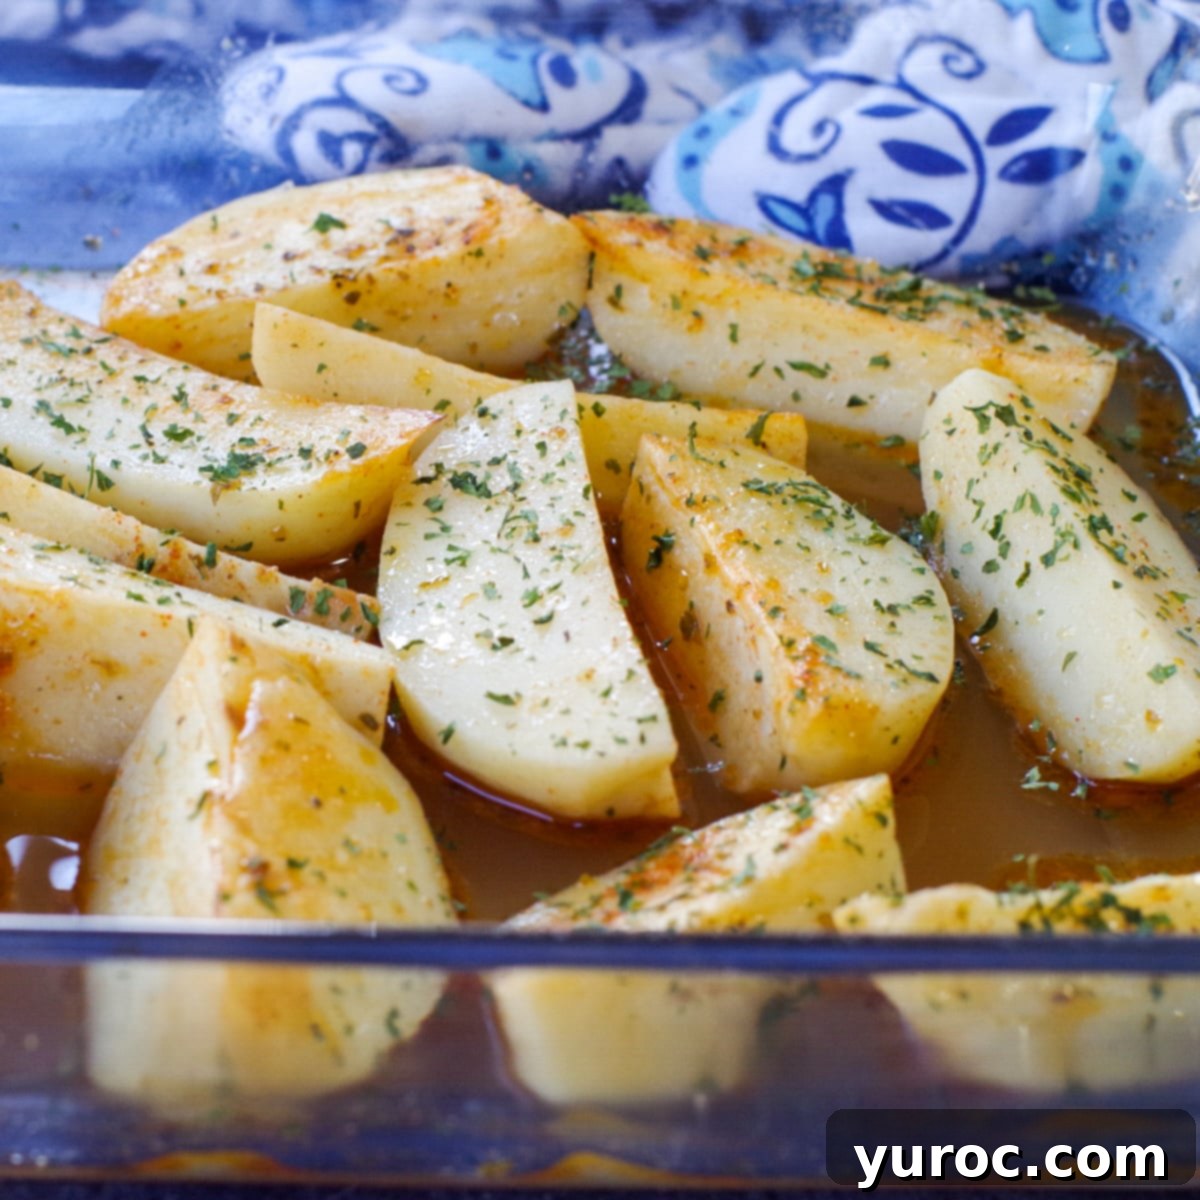
- Greek-Style Roasted Potatoes (shown): Crispy on the outside, tender on the inside, and bursting with lemon, garlic, and oregano. These are a classic and highly complementary side for Greek ribs.
- Easy Greek Pasta Salad: A refreshing cold pasta salad loaded with olives, feta, tomatoes, and a tangy vinaigrette. Perfect for a summer BBQ.
- Healthy Potato Salad: A lighter version of a classic, providing a creamy yet fresh contrast to the grilled meat.
- Pita Bread: Warm, soft pita bread is ideal for soaking up any delicious juices and for making impromptu mini rib sandwiches.
- Traditional Greek Salad: A simple yet vibrant salad with crisp lettuce, cucumbers, tomatoes, red onion, olives, and feta cheese, dressed with a light olive oil vinaigrette. Its freshness balances the rich flavors of the ribs.
- Tzatziki Sauce: While not a side dish itself, a dollop of cool, creamy tzatziki (yogurt, cucumber, garlic dip) can be a wonderful accompaniment, offering a refreshing counterpoint to the savory ribs.
Storage and Reheating Instructions for Leftover Ribs
Should you be lucky enough to have any leftovers of these delectable Greek ribs (which is rare in our house!), proper storage ensures they remain delicious for future enjoyment.
- Refrigeration: Store cooked and cooled Greek ribs in an airtight container in the refrigerator for up to 3-4 days. Ensure they are completely cool before sealing to prevent condensation, which can make them soggy.
- Freezing: For longer storage, these ribs freeze beautifully. Place individual ribs or whole racks in a freezer-safe airtight container or heavy-duty freezer bags. They can be frozen for up to 3 months. Thaw overnight in the refrigerator before reheating.
- Reheating:
- Oven Method (Recommended): Preheat your oven to 300°F (150°C). Place the ribs in a baking dish, add a tablespoon or two of water or chicken broth to keep them moist, and cover tightly with foil. Reheat for 20-30 minutes, or until warmed through. For a slightly crisper exterior, remove the foil for the last 5-10 minutes.
- Grill Method: For a smoky refresh, reheat on a preheated grill over medium-low heat. Wrap the ribs loosely in foil or place them on the cooler part of the grill, turning occasionally until heated through. Be careful not to dry them out.
- Microwave (Quickest, least ideal): While possible, microwaving can sometimes make ribs chewy. Heat in short bursts (30-60 seconds) until warmed, checking frequently.
Serving Size: Adjusting for Your Crowd
This recipe is designed to yield 4 generous servings, with each serving consisting of approximately half a rack of succulent ribs. However, the beauty of this recipe lies in its adaptability! You can easily adjust the quantities to perfectly match the size of your gathering. Whether you need to halve the recipe for a cozy dinner for two, or double or even triple it for a larger party (a common practice in our house because everyone always wants more!), simply click on the serving number in the recipe card and select your desired yield. The ingredient quantities will automatically adjust, making meal prep a breeze. We often find ourselves doubling or tripling this recipe, not just for guests, but to ensure there are plenty of delicious leftovers to enjoy!
Top Tip for Perfectly Cooked Ribs
For truly perfectly cooked ribs, eliminate guesswork and rely on an instant-read thermometer (affiliate link). This kitchen tool is indispensable and ensures your pork ribs are cooked to optimal tenderness and safety without having to cut into the meat. Insert the thermometer into the thickest part of the meat, avoiding the bone. Pork ribs should always be cooked to a minimum internal temperature of 145 degrees F (63 degrees C) for safe consumption, though many prefer to cook them to a slightly higher temperature (up to 190-200F for fall-off-the-bone tenderness) for an even softer texture. Just be sure to monitor to prevent dryness.
Frequently Asked Questions About Greek Ribs
It is highly, highly recommended. The membrane, also known as silverskin, is a tough layer of tissue on the underside of the ribs that can become incredibly chewy and rubbery when cooked, negatively impacting the texture. Removing it allows the marinade to fully penetrate the meat, resulting in significantly more tender, flavorful, and enjoyable ribs. It’s a small step that makes a huge difference in the final quality of your dish.
For this particular Greek ribs recipe, boiling the ribs beforehand is not necessary, especially when using pork baby back ribs. Baby back ribs are naturally very tender and cook beautifully on the grill without pre-boiling. Boiling can sometimes diminish flavor and make the ribs mushy. Our grilling method, combined with marination and proper temperature control, ensures perfectly tender results every time.
Absolutely! If you don’t have access to a grill, if the weather isn’t cooperating, or if you simply prefer indoor cooking, these Greek ribs can be baked in the oven. After marinating, place the ribs on a baking sheet lined with foil (for easy cleanup) and bake them in a preheated oven at 300°F (150°C) for approximately 2.5 to 3 hours, or until they are incredibly tender. For that desirable charred effect, you can finish them under the broiler for a few minutes after baking, keeping a close watch to prevent burning.
You can extend the marinating time for these ribs up to 24 hours. Marinating for this duration truly allows the vibrant Greek flavors to intensify and tenderize the meat even further, resulting in an incredibly rich taste. However, we advise against marinating for much longer than 24 hours. The acidity from the lemon juice in the marinade can start to break down the meat’s proteins too much, potentially leading to a mealy texture.
The “Greek” designation for these ribs comes from the signature blend of Mediterranean ingredients used in the marinade. The core flavors are lemon, garlic, and oregano, which are staples in traditional Greek cuisine. This combination imparts a bright, tangy, and earthy aroma and taste that is instantly recognizable as authentically Greek, transforming ordinary pork ribs into a Mediterranean delight.
If you’re craving more delicious rib recipes after trying these, be sure to give my Slow Cooker Beer Ribs with a rich BBQ sauce a try for a different, equally satisfying flavor profile!
Discover More Greek-Inspired Delights
Love the flavors of Greece? Explore more of our favorite Greek recipes that bring the vibrant tastes of the Mediterranean to your table:
- Chicken Souvlaki Wrap
- Greek Pasta Toss
- Grilled Greek Chicken Burgers
- Greek Lasagna Cups
Did your family truly ❤️ this recipe? Did you know that commenting and ⭐rating recipes is one of the best ways to support your favorite recipe creators? If you LOVED this recipe, please take a moment to comment and rate it in the recipe card below, or share your delicious photos on social media using the hashtag #foodmeanderings or by tagging @foodmeanderings! Your feedback means the world to us!

Grilled Greek Ribs Recipe
Equipment
- bbq
- grill tongs
Ingredients
- 2.4 kg pork back ribs *about 5 lbs
- ⅓ cup olive oil
- ⅓ cup lemon juice (from concentrate)
- ½ tablespoon seasoning salt
- 1 tablespoon Cajun seasoning
- 2 tablespoon garlic powder
- 2 tablespoon oregano
Garnish
- 3 fresh lemons
Instructions
- *A quick note: For the most flavorful and tender ribs, it is highly recommended to marinate this recipe for a few hours or ideally, overnight. However, if you’re pressed for time, you can still achieve delicious results without a long marination; just be sure to squeeze extra fresh lemon juice on the cooked ribs for a burst of brightness!
- First, prepare your pork back ribs by removing the membrane: Slide a blunt object (like a butter knife or the back of a spoon) underneath the membrane on the underside/concave side of the ribs to loosen it. This prevents the slippery surface from causing cuts.2.4 kg pork back ribs
- Once you’ve loosened a section of the membrane, grasp it firmly with your fingers and begin to pull it back from the ribs.
- To get a better grip and prevent slipping, use a paper towel to hold the membrane as you continue to pull it back.
- Continue holding onto it with the paper towel and pull it all the way back until it completely comes off the entire rack.
- Place the prepared ribs on a large rimmed cookie sheet, baking pan, or a similar container to catch any liquids. (A cutting board was used in images for demonstration purposes). Brush the surface of the concave/underside of both racks of ribs with olive oil.⅓ cup olive oil
- Sprinkle half of the garlic powder, seasoning salt, Cajun seasoning, and oregano evenly over the oiled side. Then, pour half of the lemon juice over the seasoned ribs. Remember to save the remaining olive oil, lemon juice, and dry spices for the other side.⅓ cup lemon juice (from concentrate), ½ tablespoon seasoning salt, 1 tablespoon Cajun seasoning, 2 tablespoon garlic powder, 2 tablespoon oregano
- Flip the ribs over and repeat the oil, spice, and lemon juice application on the other side. Pour any remaining marinade from the tray onto the ribs. Use your hands or a brush to thoroughly mix and rub all the seasonings into the meat. Place the ribs in the fridge to marinate.*Ideally, marinate for a few hours or overnight for best flavor, but it’s optional if you’re in a rush.
- Preheat your grill to a high temperature, around 450 degrees F (230 degrees C). Place the ribs on the grill with the concave side facing down. Grill for approximately 7-10 minutes, aiming for a golden-brown sear with a little char. Keep a very close eye on them to prevent burning, as grill temperatures can vary.
- Flip the ribs to the other side and grill for another 7-10 minutes on medium-high heat until that side is also golden brown and slightly charred.
- Reduce the grill temperature to medium (around 350 degrees F / 175 degrees C). Continue cooking, turning occasionally, until the internal temperature of the ribs reaches 145 degrees F (63 degrees C) in the thickest part of the meat (refer to the Top Tip section for more detail), and there is no pink visible inside.
- Once cooked, remove the ribs from the grill and let them rest for 5-10 minutes. Then, with a sharp knife, carefully cut the racks into individual ribs by slicing between the bones.
Garnish
- Garnish your beautiful grilled Greek ribs by sprinkling on fresh oregano, if desired, and arranging fresh lemon wedges around them. Squeeze additional fresh lemon juice over the ribs just before serving to enhance their vibrant flavor.3 fresh lemons
Notes
-
- Removing the Membrane Makes a Huge Difference. Always take the extra moment to remove the membrane from the back of the ribs. This crucial step not only allows the vibrant marinade to penetrate the meat more effectively but also eliminates the chewy, rubbery texture, guaranteeing exceptionally tender results.
-
- Use a Paper Towel for Enhanced Grip. When removing the slippery membrane, a simple trick is to use a paper towel. This provides a much better grip, making it easier to pull the membrane off in one clean, swift motion without it slipping through your fingers.
-
- Don’t Skip the Marinating (If You Can Help It). While not strictly mandatory, marinating the ribs for several hours or even overnight profoundly infuses them with flavor and contributes significantly to their tenderness. If time is short, a good squeeze of fresh lemon juice over the cooked ribs can still brighten the overall flavor.
-
- Rely on an Instant-Read Thermometer. For perfectly cooked ribs and to avoid any guesswork, always use an instant-read thermometer. Aim for an internal temperature of 145°F (63°C) in the thickest part of the meat to ensure they are safely cooked and juicy.
-
- Embrace That Delicious Char. Don’t shy away from a little charring during the initial grilling phase! High heat helps to caramelize the marinade and develop a rich, smoky flavor and appealing texture. Just be diligent and keep a close eye on the ribs to ensure they don’t burn.
-
- Allow Them to Rest Before Cutting. Once removed from the grill, let the ribs rest for 5-10 minutes before slicing. This critical step allows the juices to redistribute throughout the meat, ensuring that every bite is incredibly tender and moist.
-
- Clean Your Grill with a Bristle-Free Brush. After grilling, let the grill run for a few minutes to incinerate any remnants. Then, clean the grates thoroughly with a **bristle-free brush** to keep your grill safe and in optimal condition, preventing stray bristles from contaminating your food.
