Delicious & Easy Leftover Halloween Candy Tarts: A Sweet Transformation!
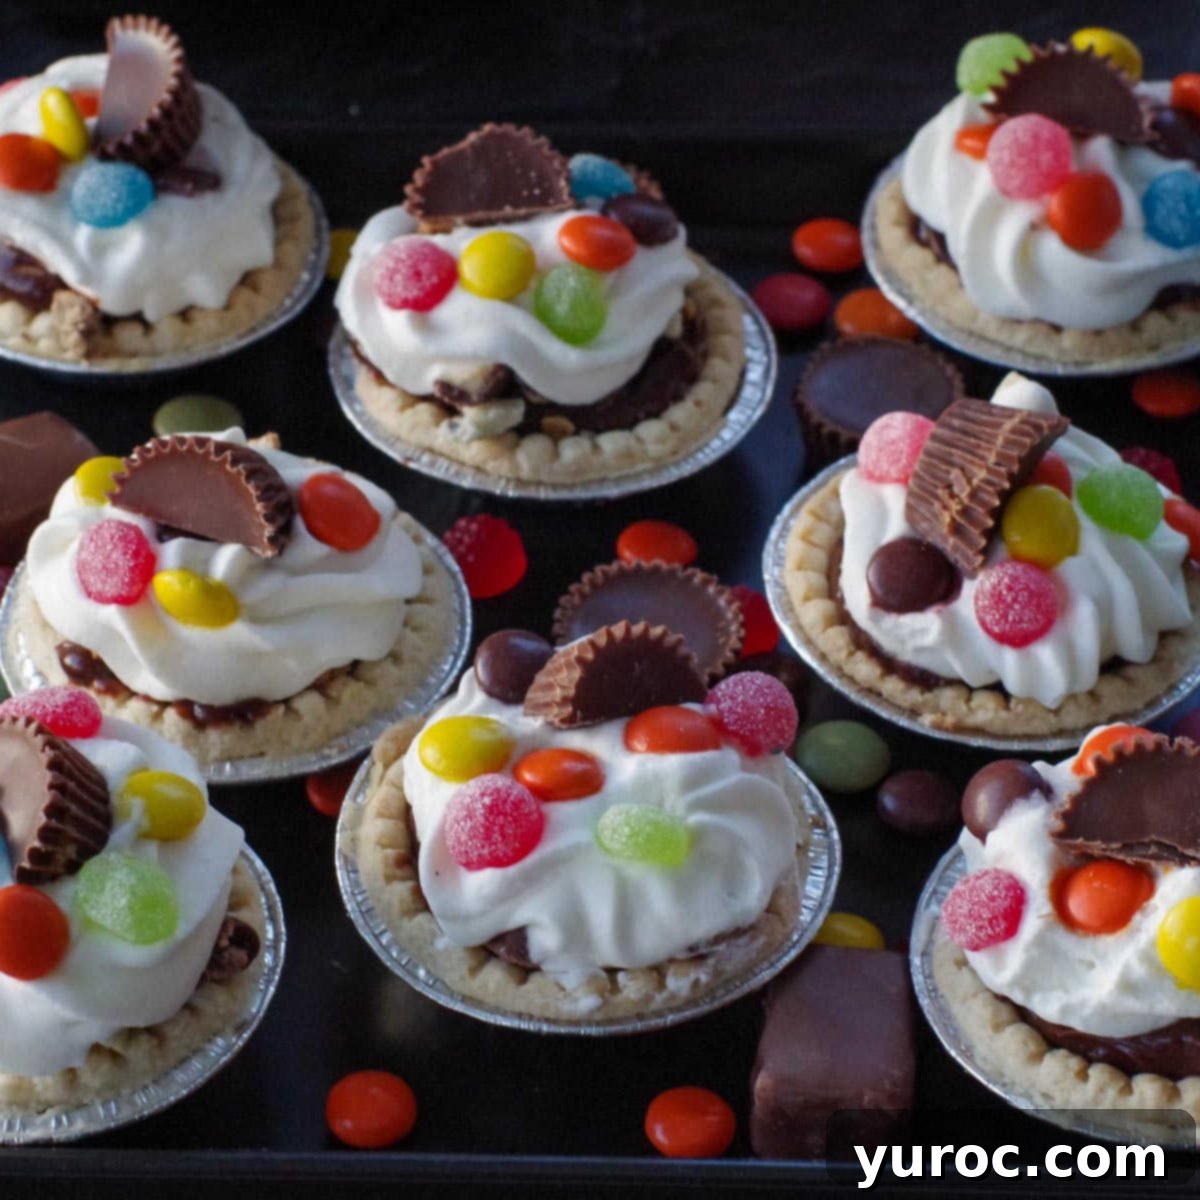
Halloween night is over, the costumes are put away, and the trick-or-treating bags have been sorted. While my household, usually featuring ravenous teenage candy enthusiasts, rarely sees a surplus of Halloween sweets, this year was an exception! November 1st arrived, and to my surprise, I had a generous stash of candy still lingering. Instead of letting it slowly disappear, I decided to give it a delicious new life with these amazing Leftover Halloween Candy Tarts! These delightful individual desserts offer a creative and incredibly fun way to enjoy your Halloween haul in a fresh and exciting form. And what pairs perfectly with a medley of chocolate bars and sugary treats? You guessed it – even more chocolate! These irresistible candy tarts feature a rich, creamy instant chocolate almond pudding base, all nestled in a flaky pastry shell, then crowned with fluffy whipped cream and a colorful assortment of your favorite leftover Halloween candy. It’s a dessert that truly celebrates the spirit of the season, even after the costumes are off!
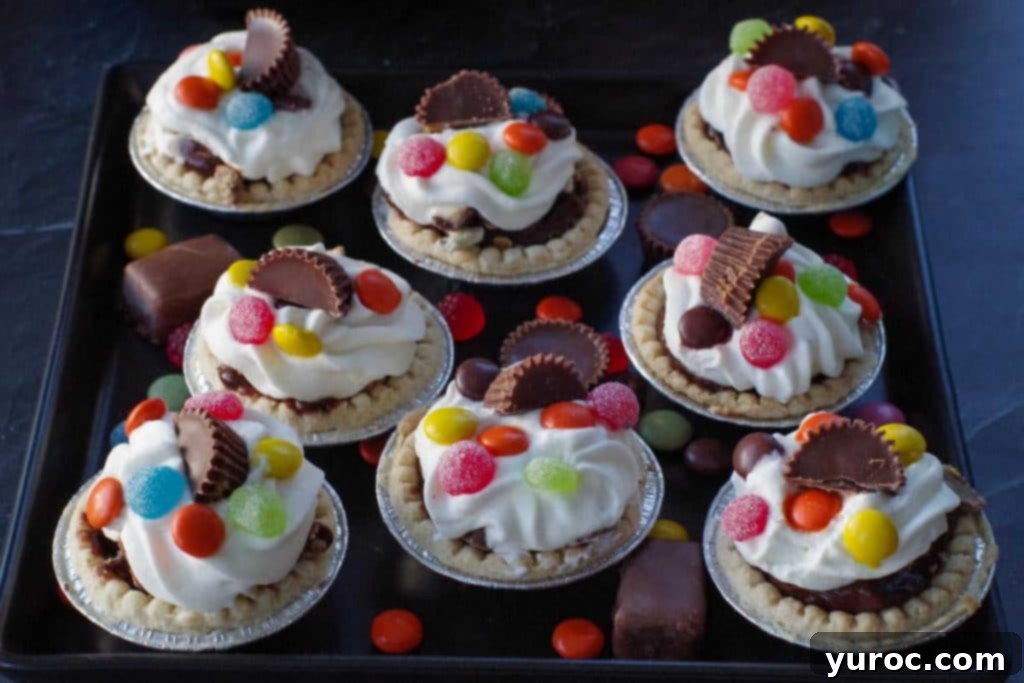
The true genius of this recipe lies in its perfect balance. The delicate, buttery pastry shell provides a wonderful counterpoint to the intense sweetness of the candy and the rich filling. It’s a surprisingly easy Halloween dessert that you can whip up in about 20 minutes – perfect for pre-Halloween party prep or post-Halloween indulgence. So, if you’re wondering what on earth to do with that mountain of leftover Halloween candy and actively searching for creative recipes, your quest ends here! This fantastic recipe not only gives your candy a delicious new purpose but also offers a refreshing departure from the usual cookie bars or simple candy munching. Prepare to transform your Halloween leftovers into an unforgettable dessert experience that everyone will rave about!
Why You’ll Adore These Leftover Candy Halloween Tarts
These Halloween Candy Tarts are more than just a recipe; they’re a solution to a common post-Halloween dilemma and a fantastic treat in their own right. Here’s why they’ll quickly become a favorite:
- Effortlessly Transportable: Their individual size makes these Halloween Tarts incredibly convenient for packing and sharing. Whether you’re heading to a potluck, a school event, a Halloween party, or a friendly gathering, these tarts travel beautifully and are easy to serve. No need for messy slicing or complicated plating – just grab and go!
- Remarkably Easy to Make: Simplicity is key with this recipe. Especially if you opt for pre-made components like store-bought tart shells and ready-to-eat pudding snacks, the assembly process is incredibly fast and foolproof. Even making the pudding from a mix is a breeze, making this a perfect last-minute dessert option.
- Fantastic Make-Ahead Option: Need to get a head start on your party preparations? You can assemble these delightful tarts up to two days in advance. This flexibility is a lifesaver when you have a busy schedule, allowing you to focus on other tasks knowing your dessert is already taken care of.
- Cleverly Uses Up Halloween Candy: This is the ultimate perk! Instead of letting excess Halloween candy sit around or be consumed in a less exciting manner, this recipe transforms it into something special. You only need a few basic pantry ingredients and, of course, that leftover candy, making it a sustainable and fun way to manage your holiday bounty.
- Versatile for All Tastes: With endless possibilities for candy combinations and pudding flavors, these tarts can be customized to suit any preference. This means you can create a variety of different tarts from a single batch, ensuring there’s something for everyone.
- A Guaranteed Crowd-Pleaser: Who doesn’t love chocolate, whipped cream, and candy? These tarts are designed to delight, offering a rich, sweet, and playful dessert that appeals to both kids and adults. They’re sure to be a hit at any event, sparking conversations and smiles.
This inventive leftover Halloween candy recipe draws inspiration from other fan-favorite Halloween treats on this site, such as my whimsical Boo Batter No-Churn Ice Cream and the festive Halloween Jack o’lantern Candy Cupcakes. Both are generously loaded with candy, proving just how much fun and flavor you can unlock from your trick-or-treat spoils!
As I mentioned, leftover candy is usually a non-issue in our bustling home, thanks to two very efficient teenage candy-eaters. However, this particular year was truly different – we found ourselves with an abundance of both chocolate and various other candies. Ironically, I had even proactively asked my husband to purchase extra Halloween candy in advance, specifically with the intention of developing a “leftover” candy recipe. Why? Because I’ve heard countless stories from others facing the perennial post-Halloween candy dilemma, and I wanted to create a delicious solution. And so, here we were, with a massive, vibrant stash of candy just begging for a creative outlet. It was truly a delightful problem to have, and it led directly to the creation of these fantastic tarts!
Essential Ingredients for Your Leftover Candy Tarts
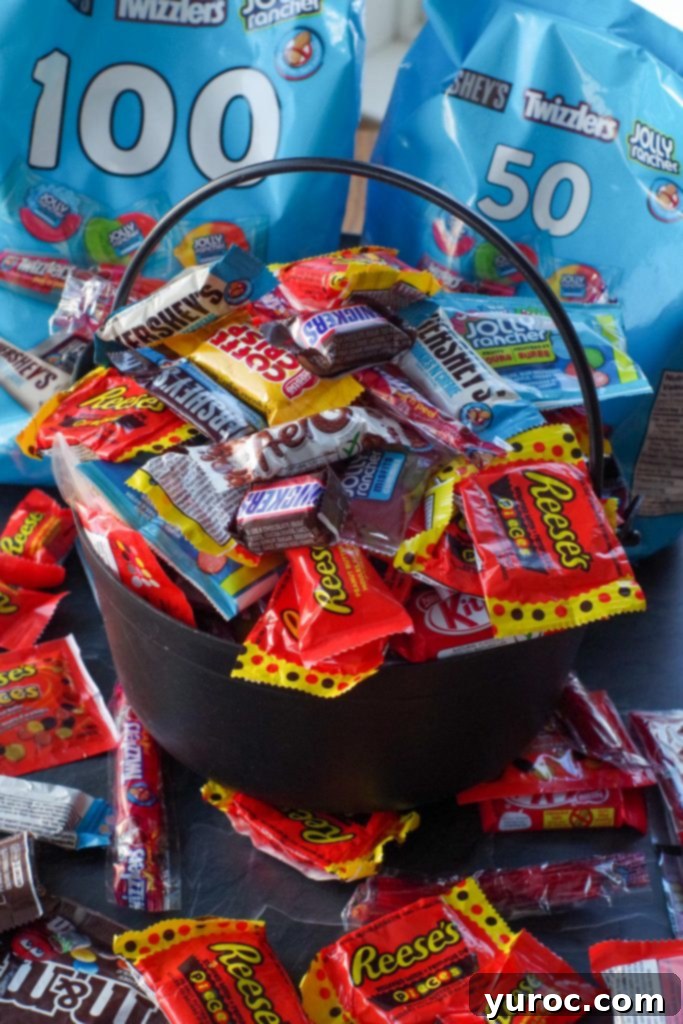
If you’re eager to discover creative and delicious ways to utilize your Halloween candy leftovers, this Leftover Halloween Candy Tart recipe is your perfect guide. You’ll be pleased to know that it requires only a handful of readily available ingredients to bring this sweet vision to life:
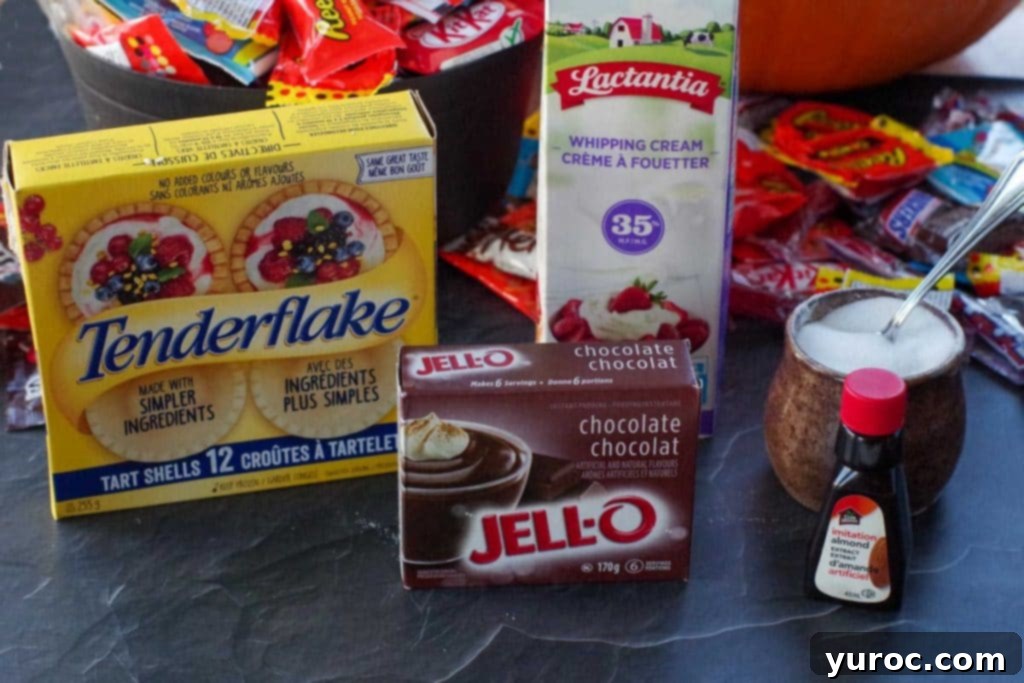
- Ready-Made Tart Shells: To keep this recipe quick and easy, I highly recommend using good quality store-bought tart shells. My personal preference is for brands like Tenderflake, as they deliver a wonderfully flaky texture that’s very close to homemade, providing an excellent base for your tarts. Be cautious with generic or “no-name” brands, as some can have an overly salty taste that might detract from the dessert’s overall sweetness.
- Instant Chocolate Pudding Mix: A classic and versatile choice, instant chocolate pudding serves as the deliciously rich and creamy foundation for these tarts. Its quick setting time makes assembly a breeze, and its deep chocolate flavor perfectly complements a wide array of candies.
- Heavy Whipping Cream (33-36% fat): This ingredient is crucial for creating that luxurious, airy whipped cream topping. The higher fat content ensures a stable, decadent whip that holds its shape beautifully. This homemade whipped cream pairs exquisitely with both the crisp tart shell and the velvety chocolate pudding. As an alternative for speed, you can use store-bought aerosol whipped cream, but be sure to read my “Top Tip” section for best results when using it.
- Almond Extract: Just a small dash of almond extract elevates the flavor profile of the chocolate pudding, adding a subtle, sophisticated nutty note that makes these tarts truly unique and irresistible. It’s a wonderful secret ingredient that brings out the best in the chocolate.
- Your Leftover Halloween Candy: This is the undisputed star of the show! The beauty of this recipe is its adaptability. I love using a mix of chopped chocolate bars (think Kit Kats, Snickers, Twix), Reese’s peanut butter cups, colorful Smarties, and even some chewy Jolly Rancher gummies. The key is to aim for a balance of textures and flavors. While a combination of sweet and slightly tart candies works wonders, be mindful not to overpower the tarts with too many intensely sour options. Chop larger candies into manageable pieces for easier eating and better distribution.
*Refer to the comprehensive recipe card below for precise quantities and additional details.
Creative Variations & Smart Substitutions for Your Candy Tarts
This recipe is incredibly flexible, allowing you to customize your Leftover Halloween Candy Tarts to suit your taste preferences or whatever ingredients you have on hand. Don’t be afraid to get creative!
- Candy Selection: The sky’s the limit when it comes to the candy! While this recipe is perfect for actual leftover Halloween candy, you can also purchase specific candies if you have a favorite. Think beyond just chocolate: Kit Kats, Twix bars, Milky Way chocolate bars, Butterfinger candy bars, Heath bars (aka Skor bars), Reese’s Pieces, and Reese’s Peanut Butter Cups are all fantastic chocolatey choices. For a burst of color and different textures, consider sweet tarts, M&Ms, chewy Jolly Rancher gummies, or even classic candy corn. You could even incorporate elements like edible cookie dough (just swap out raisins for chocolate chips!). *A crucial note: I strongly advise against using hard candy in this recipe, as it can be difficult to eat and may not integrate well with the other soft textures. A sprinkle of festive Halloween sprinkles can also add a charming visual touch.
- Pudding Flavor: Feel free to experiment with different pudding varieties to create unique flavor profiles. White chocolate pudding offers a milder, sweeter base, while pistachio or butterscotch pudding can introduce intriguing new dimensions. For ultimate convenience, you can bypass making pudding from scratch entirely by using pre-made pudding cups (like Snack Packs) – simply open and fill!
- Whipped Topping Alternatives: If you’re short on time or prefer a lighter option, store-bought whipped topping (like Cool Whip) or even aerosol spray whipped cream can be used in place of homemade whipped cream. Remember to add spray whipped cream just before serving to prevent it from deflating (see Top Tip for more details).
- Flavor Extracts: Beyond almond, a variety of extracts can infuse your tarts with different aromas and tastes. Consider peppermint extract for a festive twist, a touch of cake batter extract for a “boo batter” inspired flavor, or classic vanilla extract to enhance the sweetness. Choose an extract that complements your chosen candy mix.
- Tart Shell Options: While store-bought tart shells are fantastic for saving time, if you enjoy baking, you can certainly make your own pie dough. My No-Fail Pie Crust (Cold Water Pastry) recipe provides a reliable and delicious homemade option that will elevate your tarts even further.
- Weight Watchers (WW) Friendly Adaptation: For those looking for a lighter dessert, these tarts can be adapted. Use a non-fat whipped topping and sugar-free instant pudding mix to significantly reduce the calorie and sugar content without sacrificing too much flavor.
Crafting Your Leftover Candy Halloween Tarts: A Step-by-Step Guide
Making these delightful Halloween Candy Tarts is a straightforward and enjoyable process. Follow these simple steps to transform your candy stash into an irresistible dessert!
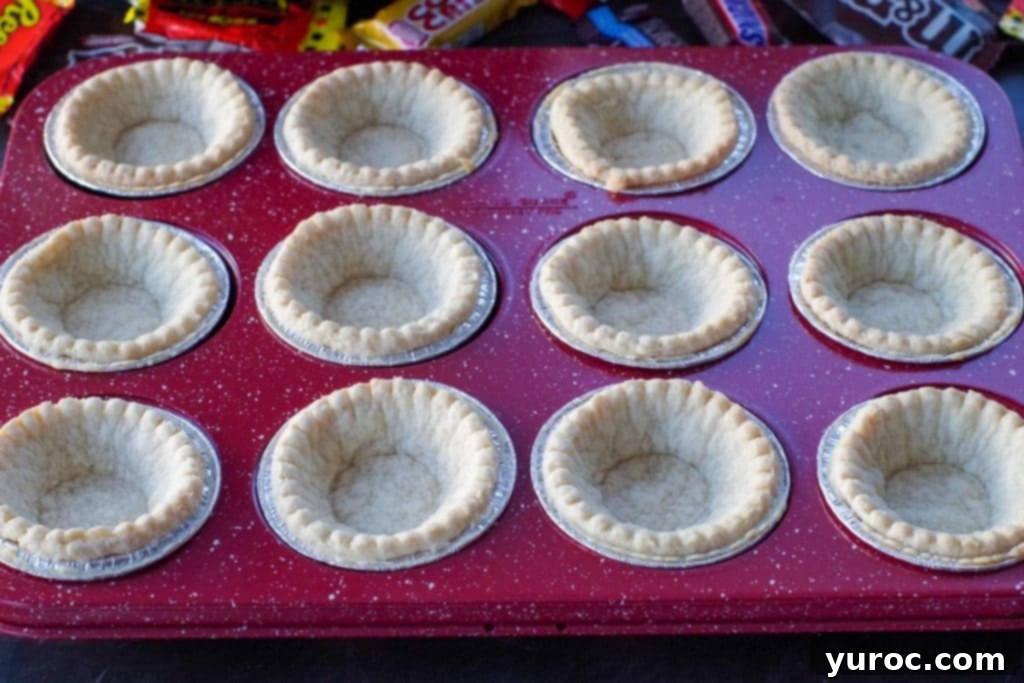
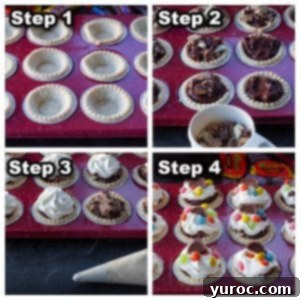
Step 1: Prepare the Tart Shells and Pudding. Begin by baking your store-bought tart shells according to the instructions provided on their package. Once baked, set them aside to cool completely. While the shells are cooling, prepare your instant chocolate pudding. In a large mixing bowl, combine the pudding mix with the required amount of milk (or dairy-free alternative) as per the package directions. Whisk thoroughly until the pudding begins to thicken. If you’re using pre-made snack pack pudding cups (as mentioned in the variations section), you can simply skip this step and proceed to assembly.
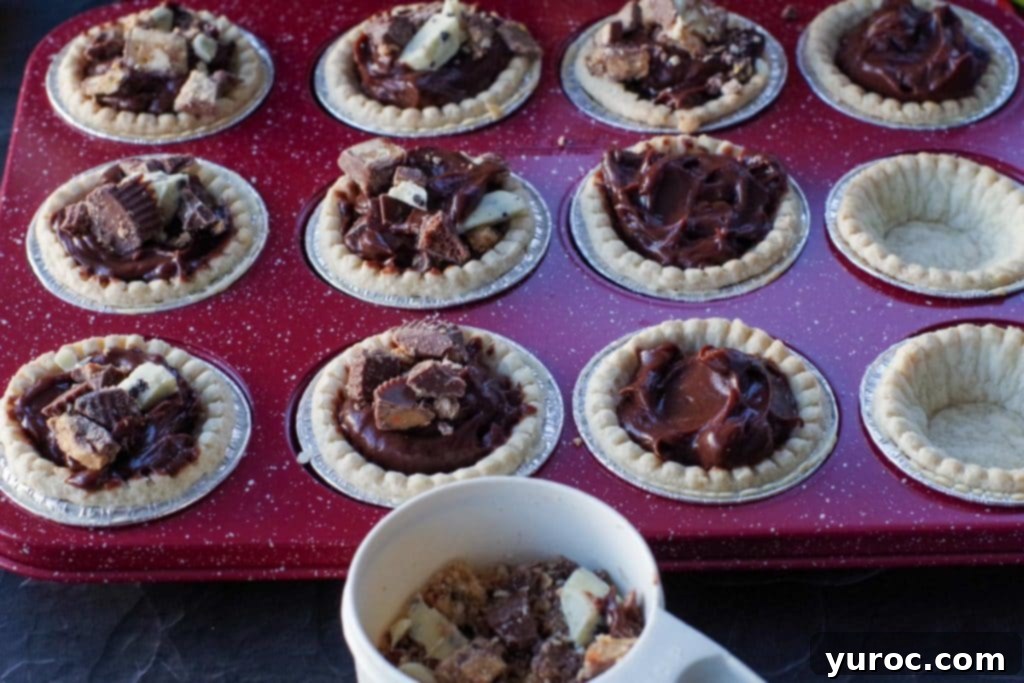
Step 2: Fill with Pudding and First Layer of Candy. Once the tart shells are cool, it’s time to add the delicious filling. Spoon approximately two tablespoons of the prepared instant pudding into each cooled tart shell, creating a smooth, even base. Next, take one cup of your chopped chocolate candies (this could be a mix of various chocolate bars or peanut butter cups) and divide it evenly among the twelve tarts, scattering the pieces directly on top of the pudding layer. This creates a delightful surprise in every bite.
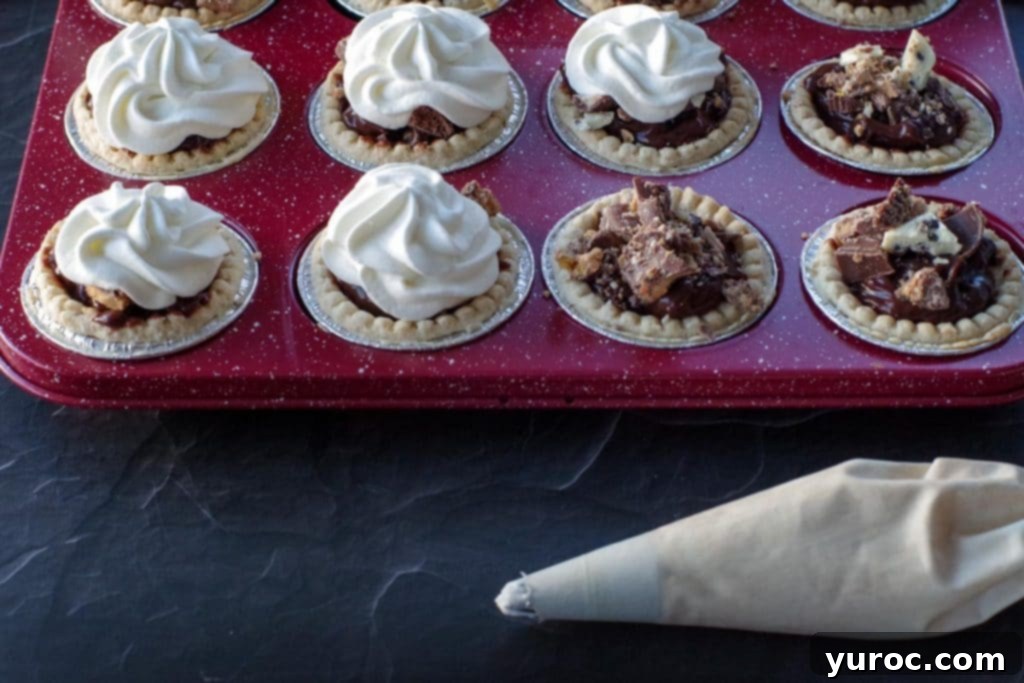
Step 3: Add the Whipped Cream Topping. Now for the luscious topping! Pipe or spoon an even amount of whipped cream onto each tart. If you’re making your own whipped cream, ensure it’s beaten to stiff peaks (see my “Top Tip” below for guidance on this). If using a piping bag with a decorative tip (like a 1M star tip), you can create elegant swirls that make your tarts look professionally made. Distribute the whipped cream evenly across all twelve tarts for a consistent and appealing presentation.
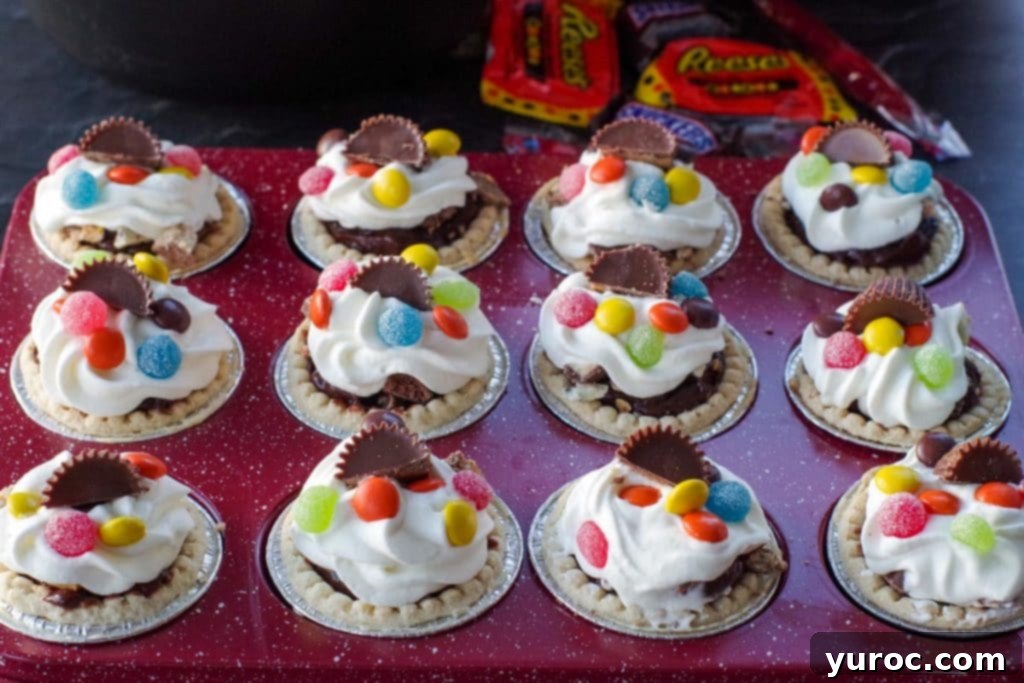
Step 4: Garnish with More Candy Pieces. The grand finale! Generously top each whipped cream-laden tart with an additional scattering of smaller, colorful candy pieces. This is where your Smarties, Reese’s Pieces, Jolly Rancher gummies, or other small candies come into play. For an extra flourish, you can place a small, prominent piece of candy, like half a mini Reese’s peanut butter cup, on top of each tart. This not only adds visual appeal but also provides another burst of flavor and texture. Arrange them attractively in your muffin tin or on a platter, and get ready to impress!
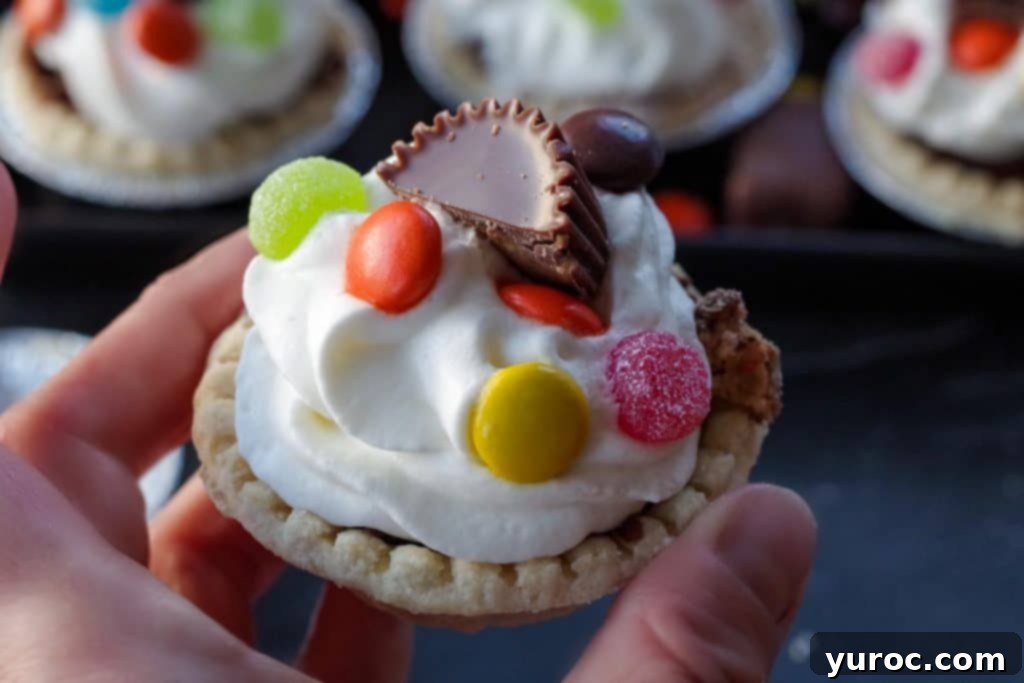
Pro Tip: Achieve a Polished Look! For an extra special presentation, I highly recommend using a pastry bag fitted with a 1M star tip to pipe the whipped cream onto your tarts. This technique creates beautiful, elegant swirls that look much more appealing and professional than simply spooning the whipped cream on. It’s a small effort that makes a big difference in the final aesthetic of your dessert.
Storing Your Leftover Halloween Candy Tarts
Proper storage is key to keeping your delicious Leftover Halloween Candy Tarts fresh and enjoyable. Since they contain perishable ingredients like dairy, they require refrigeration.
Immediate Storage: Store the assembled tarts in an airtight container in the refrigerator. This will keep them fresh and delicious for up to 2 days. Be sure to place them in a single layer or use parchment paper between layers to prevent the whipped cream from getting squashed.
Make-Ahead Prep: If you plan to make these tarts in advance, it’s best to store the components separately in airtight containers for up to 4 days. This means keeping the baked tart shells, prepared pudding, and whipped cream (if homemade) in separate containers. When you’re ready to serve, simply assemble them fresh. If you intend to pipe homemade whipped cream and want it to hold its shape beautifully for a longer period (especially if making it more than a day in advance), make sure to stabilize it. Refer to my “Top Tip” section below for an easy method to stabilize whipped cream.
Freezing Advice: Unfortunately, these delightful tarts do not hold up well to freezing. The texture of the pudding and whipped cream can become compromised upon thawing, leading to a watery and unappetizing result. It’s best to enjoy them fresh or within the recommended refrigeration period.
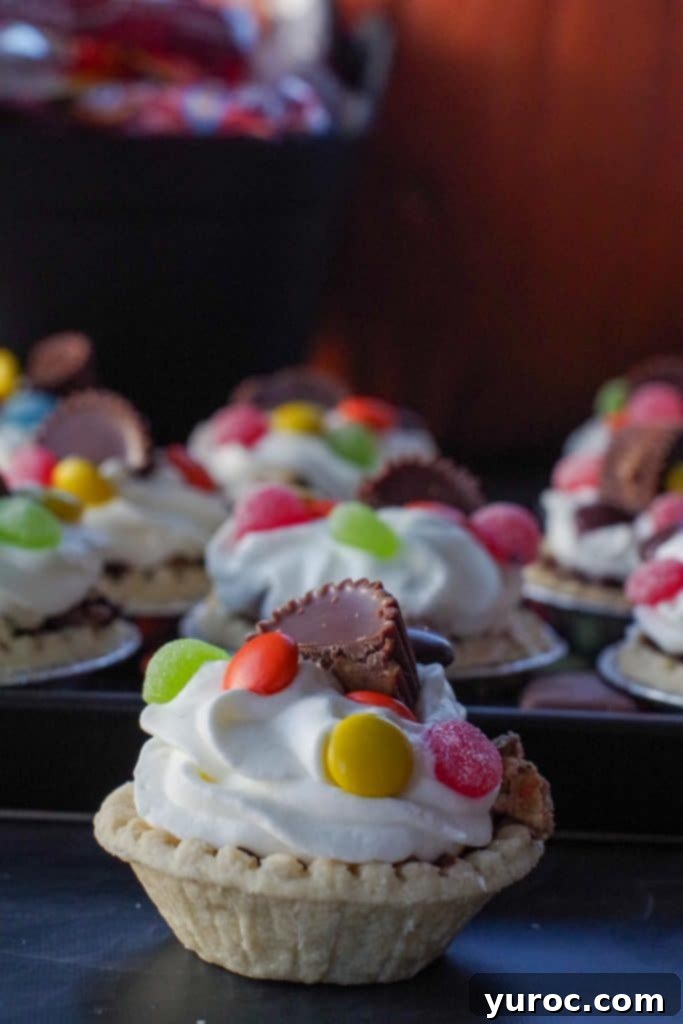
Serving Size & Adjustments
This easy and delicious tart recipe yields a generous batch of 12 individual tarts, making it perfect for sharing with family and friends at any gathering. However, the beauty of this recipe lies in its adaptability. You can effortlessly adjust the quantities to suit your specific needs.
Adjusting the Recipe: If you’re hosting a smaller get-together or simply want fewer tarts, you can easily cut this recipe in half. Conversely, for larger parties or events, you can double or even triple the recipe to accommodate more guests. To do this, simply click on the serving size displayed on the recipe card below (it’s highlighted in blue). A pop-up will appear, allowing you to select your desired number of servings, and the ingredient amounts will automatically adjust accordingly, saving you the hassle of manual calculations.
Equipment Note for Larger Batches: Keep in mind that if you decide to double or triple the recipe, you will likely need additional tart pans or muffin tins to bake all the shells simultaneously. Plan ahead to ensure you have enough equipment for your desired yield.
Top Tip for Perfect Whipped Cream
Achieving beautifully stable whipped cream is crucial, especially if you plan to make your tarts in advance. Nothing is more disappointing than a perfectly piped swirl that quickly deflates! The best way to ensure your homemade whipped cream holds its lovely shape for an extended period is to stabilize it. While gelatin is a common choice, I find piping gel (affiliate link) to be a far simpler and more effective solution. You’ll need approximately 2 tablespoons of piping gel for every cup of heavy whipping cream. The trick is to add the piping gel when your whipped cream has reached the soft peaks stage – that’s when it forms gentle mounds but doesn’t quite hold stiff peaks yet. Continue beating after adding the gel until you achieve firm, glossy peaks. If you store this stabilized whipped cream in the fridge for a day or two and notice it losing a little stiffness, you can always give it a quick beat with an electric mixer to bring it back to stiff peaks.
On the other hand, if you opt for the convenience of a spray bottle of whipped cream, it’s important to add it just prior to serving. Aerosol whipped cream contains propellants and is much lighter in texture, meaning it melts and deflates quite quickly. Applying it right before presentation ensures your tarts look their best and the whipped topping is at its fluffiest.
Helpful Video Tutorial
If you’re unsure about the technique for beating whipped cream to stiff peaks, a common kitchen challenge, don’t worry! I’ve got you covered. This short, informative video provides clear visual instructions: How to whip whipping cream to stiff peaks. Watching this quick tutorial will give you the confidence to achieve perfectly peaked whipped cream every time, ensuring your tarts have that professional, impressive finish.
If you’ve been on the hunt for truly delicious and easy leftover Halloween candy recipes, you are absolutely going to adore these straightforward and festive Halloween candy tarts! They are a delightful dessert that not only saves your excess candy from oblivion but also transforms it into a special treat that’s perfect for any occasion. Say goodbye to plain candy and hello to a new favorite way to celebrate the season’s sweetest treasures!
Discover More Clever Leftover Recipes
Don’t let any delicious ingredients go to waste! If you love the idea of transforming leftovers into new and exciting meals, explore these other fantastic recipes:
- Healthy Leftover Ham Pasta with Peas
- Cosmo Cranberry Aioli
- Cranberry Sauce Coffee Cake (with leftover cranberry sauce)
- Healthy Leftover Turkey Wraps
Did your family ❤️ this recipe? Did you know that commenting and ⭐ rating recipes is one of the best ways to support your favorite recipe creators? If you LOVED this recipe, please comment and rate it in the recipe card or share photos on social media using the hashtag #foodmeanderings or tagging @foodmeanderings!

🎃🍬Leftover Candy Halloween Tarts Recipe
Print Recipe
Pin
Save RecipeSave Recipe
Rate
Add to Shopping ListGo to Shopping List
Equipment
-
electric mixer
-
muffin tin
-
piping bag
Ingredients
- 12 tart shells * I use store-bought
- 170 g – box of instant chocolate pudding *you will have leftover
- ¼ teaspoon almond extract
- 1 cup whipped cream *it will double in volume
- 1 tablespoon white granulated sugar
- 2-3 cups leftover Halloween candy
- 2 tablespoon piping gel (optional)
Instructions
-
Bake tart shells as per instructions on package. Cool.
-
Meanwhile, in a large bowl, make up box of instant chocolate pudding as per package directions * If using prepared snack pack pudding (see variations), skip this step
-
Mix almond extract into pudding.
-
Beat whipped cream to soft peaks, add white granulated sugar and beat to stiff peaks *If using a prepared whipped topping (see variations) skip this step *See video in post for instructions on how to beat whipped cream to stiff peaks
-
Gather candy you are using and chop up larger pieces ( chocolate bars etc..). I used 1 cup of chopped chocolate bars and Reese’s peanut butter cups.
Assembly:
-
Add approximately 2 tablespoon of chocolate pudding to each tart shell.
-
Add chocolate, dividing evenly by 12 tarts.
-
Add whipped cream, dividing evenly by 12 tarts
-
Add on candies such as smarties, Reese’s pieces, and Jolly Rancher gummies. Top with a piece of chocolate (I used ½ a mini Reese’s peanut butter cup)

Notes
