Bright & Airy Lemon Daffodil Cake: A Naturally Yellow Springtime Delight (Low-Fat & WW Friendly)
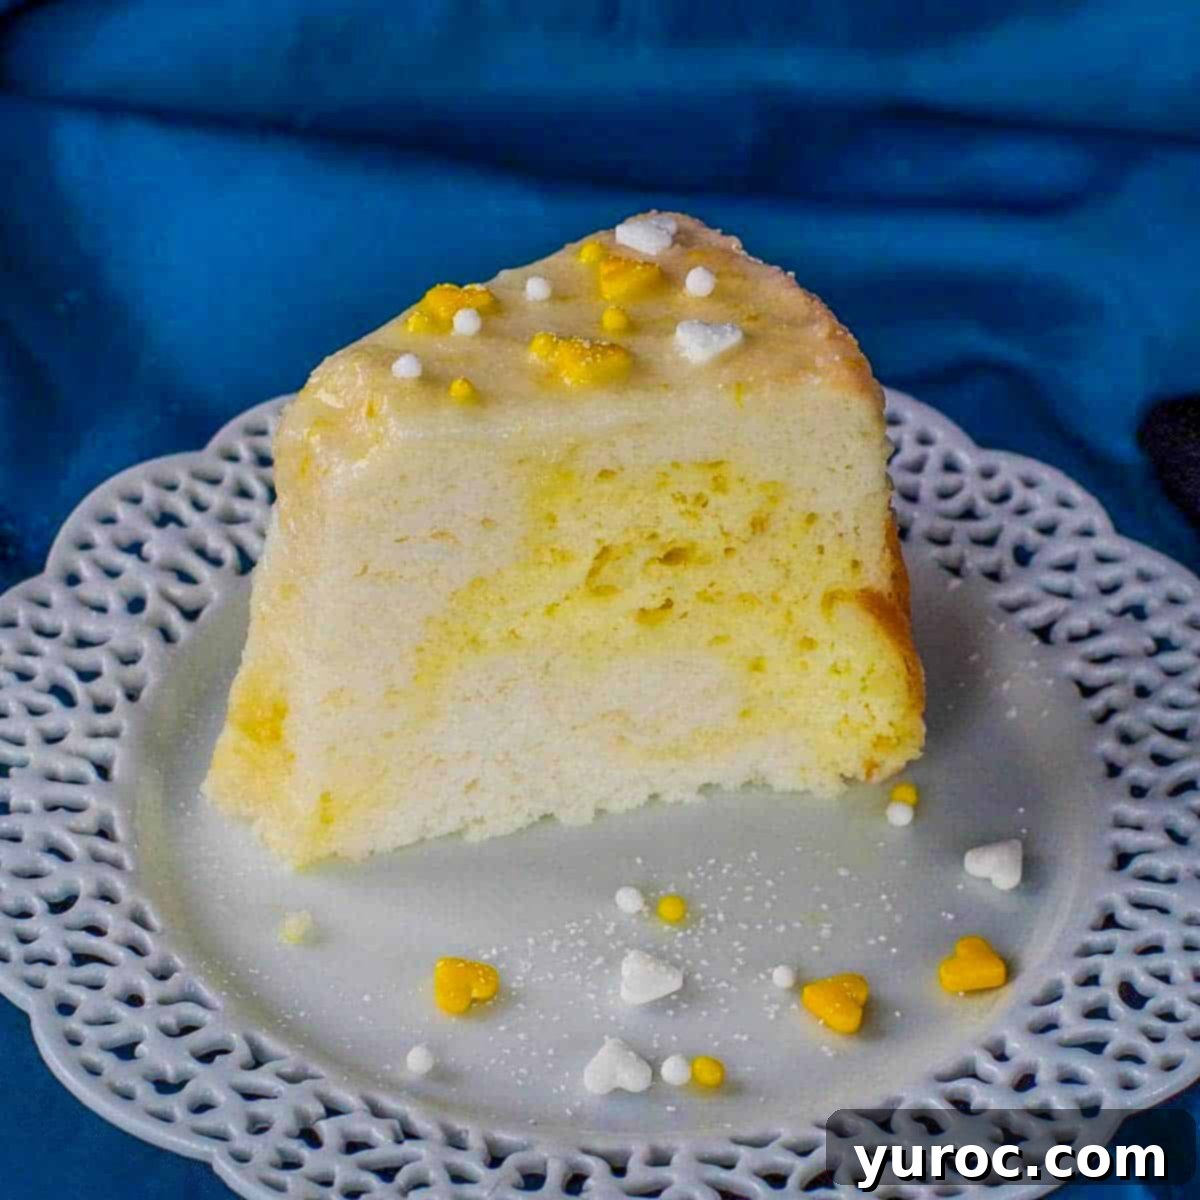
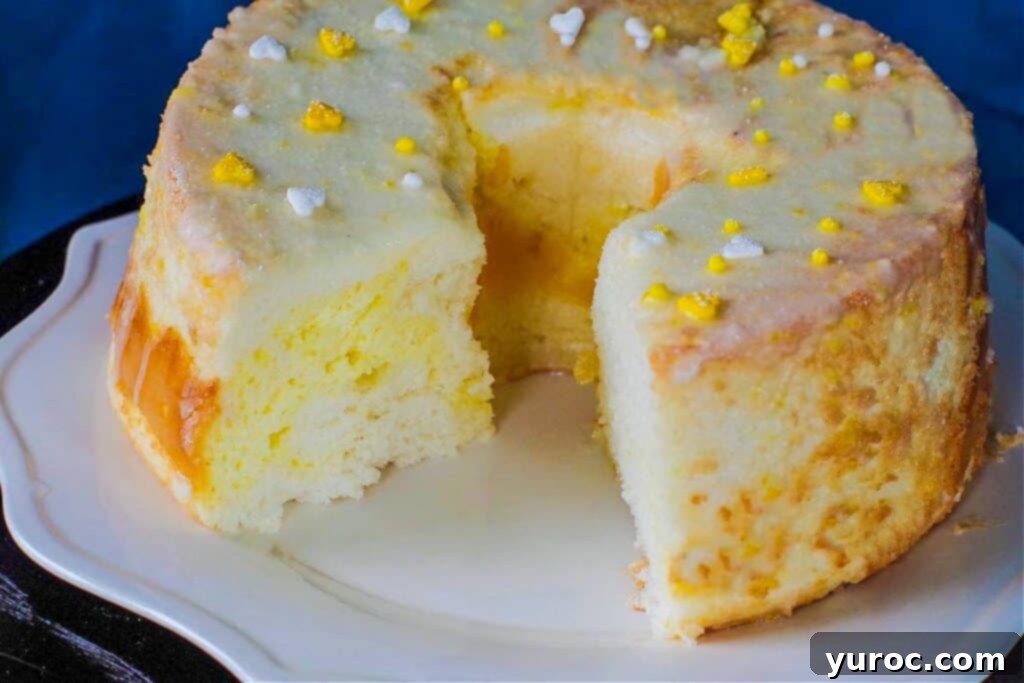
Step into spring with this exquisite **Lemon Daffodil Cake**, a truly delightful dessert that captures the essence of the season. This cake is renowned for its light, airy texture and a vibrant, cheerful yellow hue that comes naturally from egg yolks, without the need for artificial colors. Topped with a simple yet zesty lemon glaze, it’s not only a feast for the eyes but also a treat for the palate. As a low-fat and Weight Watchers friendly option, it’s the perfect guilt-free indulgence for Easter dessert, Mother’s Day brunch, birthdays, or any gathering during the spring and summer months.
The Daffodil Cake is a classic, old-fashioned recipe, charming bakers and eaters alike for generations. While it offers a rewarding baking challenge, the result is a beautifully layered cake that combines the delicate lightness of angel food cake with the rich, golden softness of a sponge cake. For those looking for a quicker path to this stunning dessert, there’s also an option to use a cake mix. This updated recipe provides a lighter, Weight Watchers-friendly version (check below for current WW points) of the beloved vintage Daffodil Cake.
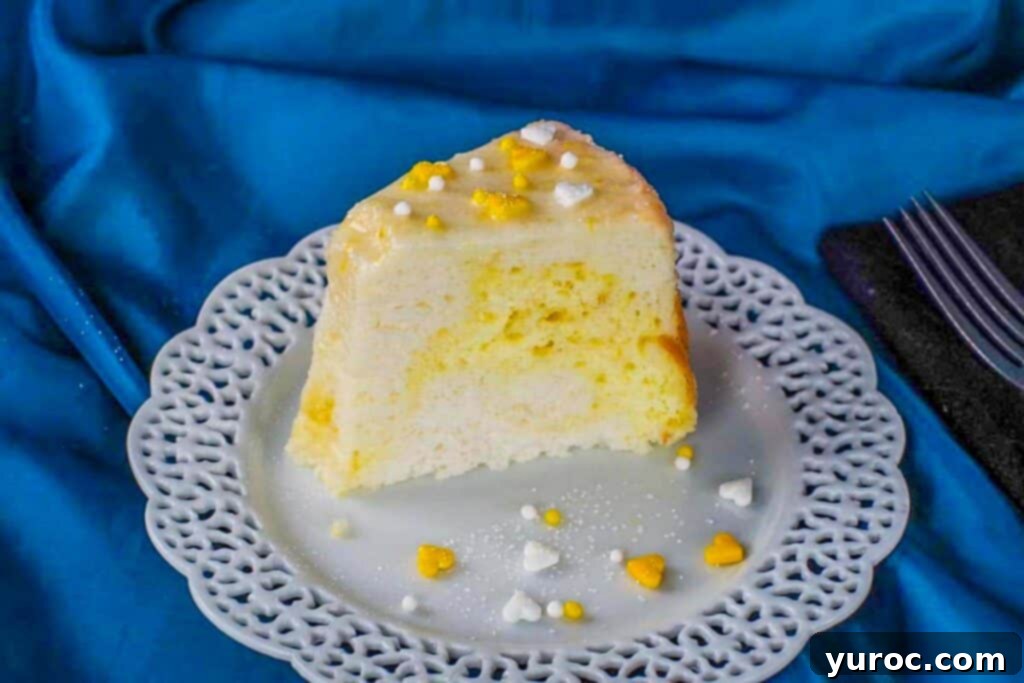
If you’re a fan of bright, citrusy desserts, you might also enjoy my Old Fashioned Lemon Pie or my Old Fashioned Lemon Bread for more lemon-infused goodness!
🍋 Ingredient Notes for Your Lemon Daffodil Cake
Crafting this delightful Old-fashioned Lemon Daffodil Cake involves a thoughtful selection of ingredients, creating a harmonious blend of white angel food cake and golden sponge cake batters. Here’s a closer look at what you’ll need and why each component is vital for achieving the perfect result:
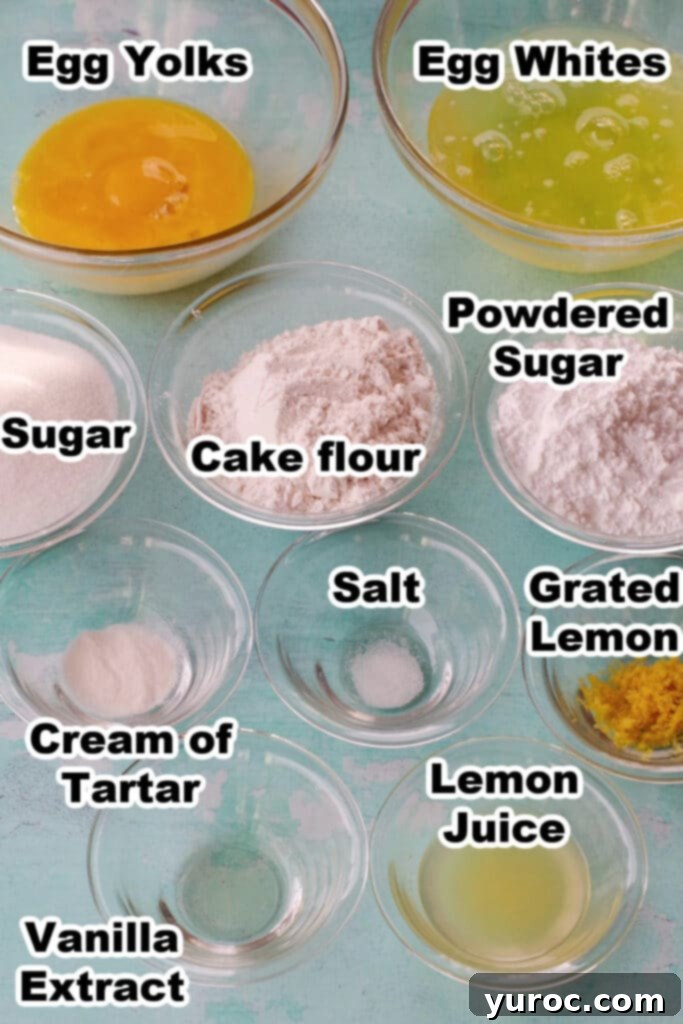
- Cake Flour: This is a crucial ingredient for a truly tender cake. Cake flour has a lower protein content compared to all-purpose flour, which means it forms less gluten. The result? A softer, finer, and more delicate crumb—exactly what you want for an airy angel food cake component. If you don’t have cake flour on hand, don’t worry; you can easily make your own substitution at home (see variations below).
- Cream of Tartar: This acidic powder plays a vital role in stabilizing whipped egg whites. It helps them reach their maximum volume and maintain a strong, airy structure, preventing them from deflating after whipping. While there are substitutions available, for the best and most consistent results, it’s highly recommended to use cream of tartar as specified in the recipe.
- Vanilla Extract: To ensure the white batter remains beautifully bright and untinted, I recommend using a clear vanilla extract. This prevents any yellowing that traditional vanilla might cause in the white portion of your cake.
- Fresh Lemon Juice and Zest: The star of this lemon daffodil cake! Using fresh lemon juice and finely grated zest provides an authentic, bright, and vibrant lemon flavor that permeates both the yellow batter and the delightful glaze.
- Granulated Sugar: Essential for both sweetness and structure in the cake. It helps to stabilize the egg whites and contributes to the cake’s tender texture.
- Confectioners’ Sugar (Powdered Sugar): Used exclusively for the lemon glaze, it dissolves quickly to create a smooth, pourable topping with a lovely sweet and tangy finish.
- Eggs (Whites and Yolks Separated): The foundation of this cake! Twelve egg whites form the light angel food batter, while six egg yolks create the rich, golden sponge cake layer. Ensuring they are at room temperature is key for optimal volume when whipping.
- Salt: A pinch of salt balances the sweetness and enhances all the flavors in the cake.
*Refer to the full recipe card below for precise quantities and a complete list of ingredients.
📖 Enhance Your Daffodil Cake: Variations & Substitutions
This Lemon Daffodil Cake recipe is wonderfully versatile, allowing for several adjustments to suit your preferences, dietary needs, or pantry availability. Explore these variations and substitutions to make the cake truly your own:
- Angel Food Cake Mix Shortcut: If you’re short on time or seeking a simpler baking process, an angel food cake mix can be a fantastic alternative. Prepare the cake mix according to the package directions. Once the batter is ready, divide it into two equal portions. You can then proceed with step #7 of our recipe (creating the yellow batter and combining the two). For a healthier option, consider using a sugar-free box cake mix.
- Boost the Yellow Color: While this recipe prides itself on its natural yellow hue from egg yolks, you can enhance the vibrancy if you desire a brighter yellow. Add a drop or two of lemon yellow food coloring to the egg yolks after they are beaten and when you incorporate the lemon juice and zest. For best results and richer shades, I recommend using high-quality Wilton icing colors over standard grocery store food coloring.
- Homemade Cake Flour: No cake flour in your pantry? No problem! You can easily create a substitute using all-purpose flour. For every 1 cup of cake flour required, measure 1 cup of all-purpose flour, remove 2 tablespoons, and replace them with 2 tablespoons of cornstarch. Sift this mixture together thoroughly before using to ensure an even distribution and a finer texture.
- Cream of Tartar Alternatives: Cream of tartar is ideal for stabilizing egg whites, but if you don’t have it, there are some simple substitutions like lemon juice or white vinegar. Use about ½ teaspoon of lemon juice or white vinegar for every 1 teaspoon of cream of tartar. However, if possible, I strongly recommend sticking to the cream of tartar as written in the original recipe for optimal egg white stability and volume.
- Glaze and Frosting Options: The provided lemon glaze in the recipe card offers a perfect balance of sweetness and tang. However, feel free to use your favorite glaze or even a frosting. A Stabilized Whipped Cream frosting would be an excellent, light choice that complements the airy cake beautifully. Other options include a simple buttercream or a cream cheese frosting for a richer flavor profile.
- Creative Decorations: Unleash your creativity with decorations! Yellow and white sprinkles can add a festive touch. You can also cut out delicate fondant flowers or use fresh, edible flowers to garnish the cake, making it truly picture-perfect. **Important Note:** While the cake is named “Daffodil,” **do NOT use actual daffodils for garnish as they are toxic.**
Safe Edible Flowers Include: Pansies, Lavender, Violas, Violets, Roses, Marigold, Cornflower, Carnations, Chrysanthemums, Day Lily, Hibiscus, Peony, Chamomile, Freesia, Gerber Daisy, Lisianthus, Queen Anne’s Lace, and Primrose, Sunflowers. For a more extensive list of safe flowers and which parts are edible, refer to this comprehensive guide. - Daffodil Cupcakes: Transform this cake into individual treats by making Daffodil Cupcakes! Follow the same batter preparation process, but instead of pouring into a tube pan, divide the batters into cupcake liners. Bake for approximately half the time (15-18 minutes) or until a cake tester inserted into the center comes out clean and the tops are lightly golden brown. Be aware that baking in smaller batches may increase your total preparation time.
🔪 How to Make a Dazzling Lemon Daffodil Cake
Making this beautiful Lemon Daffodil Cake is a rewarding experience that combines precise technique with artistic layering. Follow these steps carefully to achieve a light, airy, and visually stunning dessert:
Step 1: Preparation (The Crucial First Step)
Begin by preheating your oven to 350 degrees F (176 degrees C). Set aside an ungreased 10-inch tube pan or angel food cake pan. It is absolutely critical **NOT to grease the pan** for this type of cake. The batter needs to cling to the sides of the pan to climb and create its signature airy, tall structure. Greasing will cause the cake to deflate.
Step 2: Crafting the White Cake Batter (Part 1 – Dry Ingredients & Egg Whites)
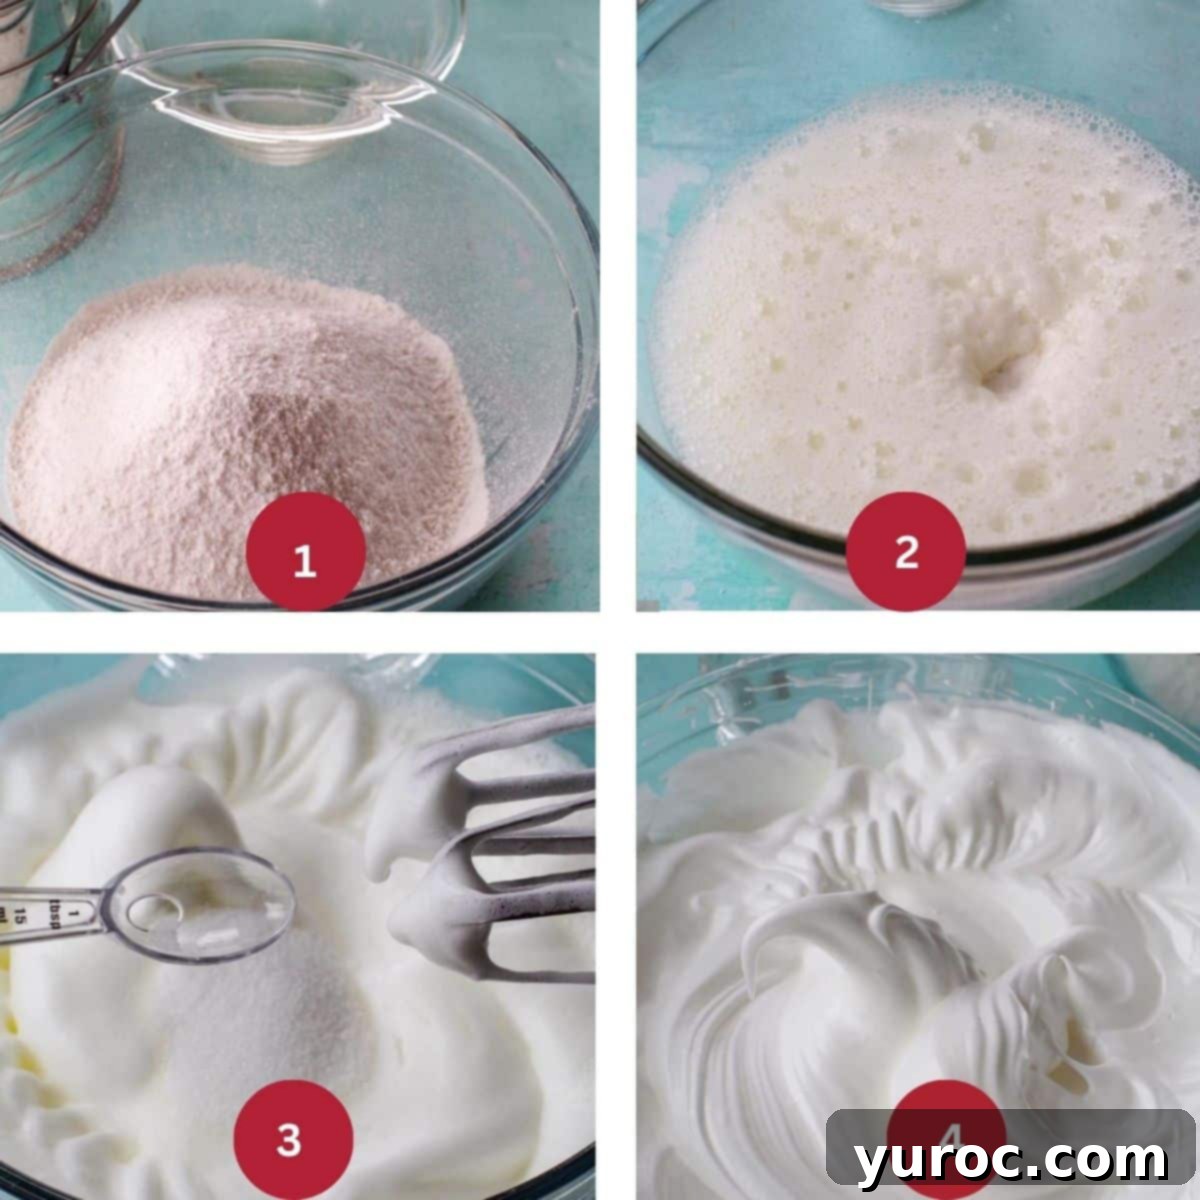
First, sift the cake flour and ¼ cup of the granulated sugar into a small bowl. This step helps to aerate the flour and remove any lumps, ensuring a smoother batter later (IMAGE 1). In a separate, very clean large bowl (free of any grease), use an electric mixer on medium speed to beat the egg whites until they become foamy, which typically takes about 30 seconds to 1 minute (IMAGE 2). Add the cream of tartar, clear vanilla extract, and salt to the foamy egg whites. Increase the mixer speed to medium-high and continue beating until soft peaks form, meaning the peaks curl slightly when the beaters are lifted (about 45 seconds to 1 minute) (IMAGE 3).
Gradually, beat in the remaining 1 cup of granulated sugar, adding it 2 tablespoons at a time. Continue beating until stiff, glossy peaks form. The egg whites should hold their shape firmly when the beaters are removed (IMAGE 4).
Step 3: Crafting the White Cake Batter (Part 2 – Folding the Flour)
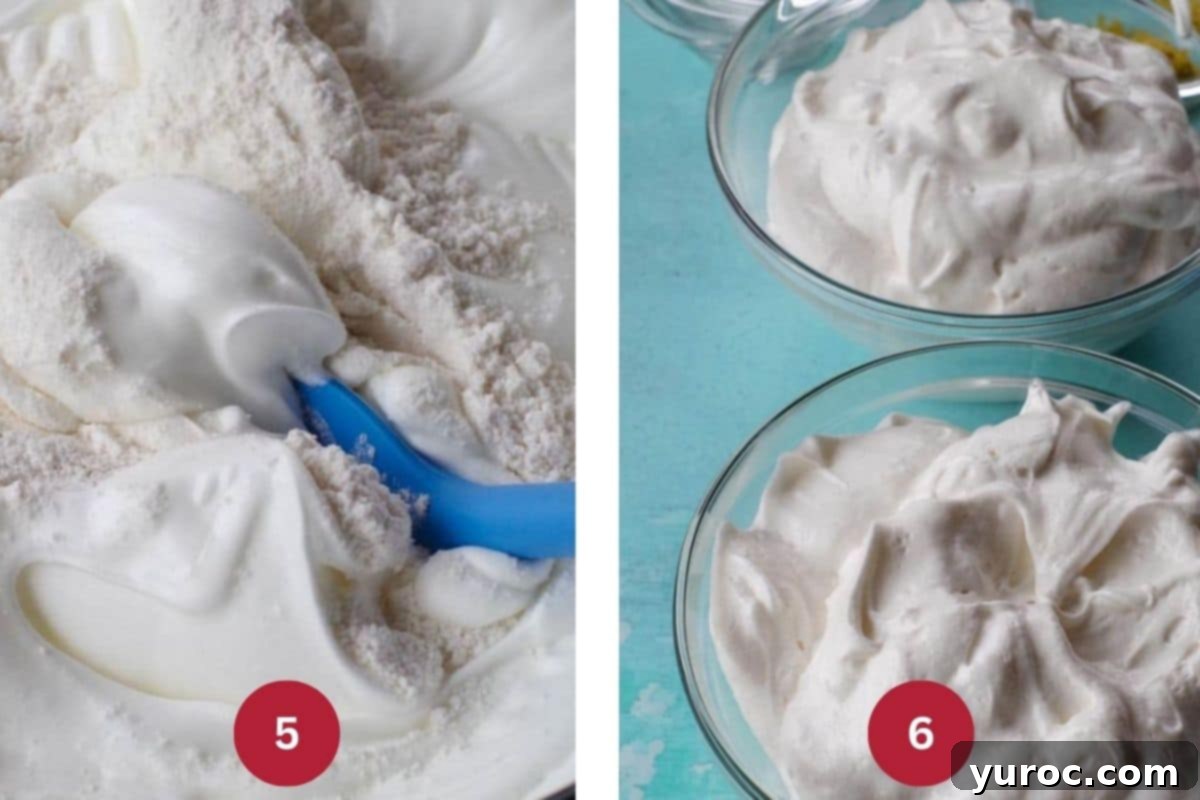
Gently sift one-quarter of the flour-sugar mixture over the stiff egg-white mixture. Using a large rubber spatula, carefully fold the flour into the egg whites using an up-and-over motion, just until blended. Overmixing will deflate the delicate egg whites. Repeat this process with the remaining flour mixture, adding it in quarters, until everything is just combined (IMAGE 5). Once the white batter is complete, divide it equally into two separate bowls (IMAGE 6).
Step 4: Preparing the Yellow Cake Batter
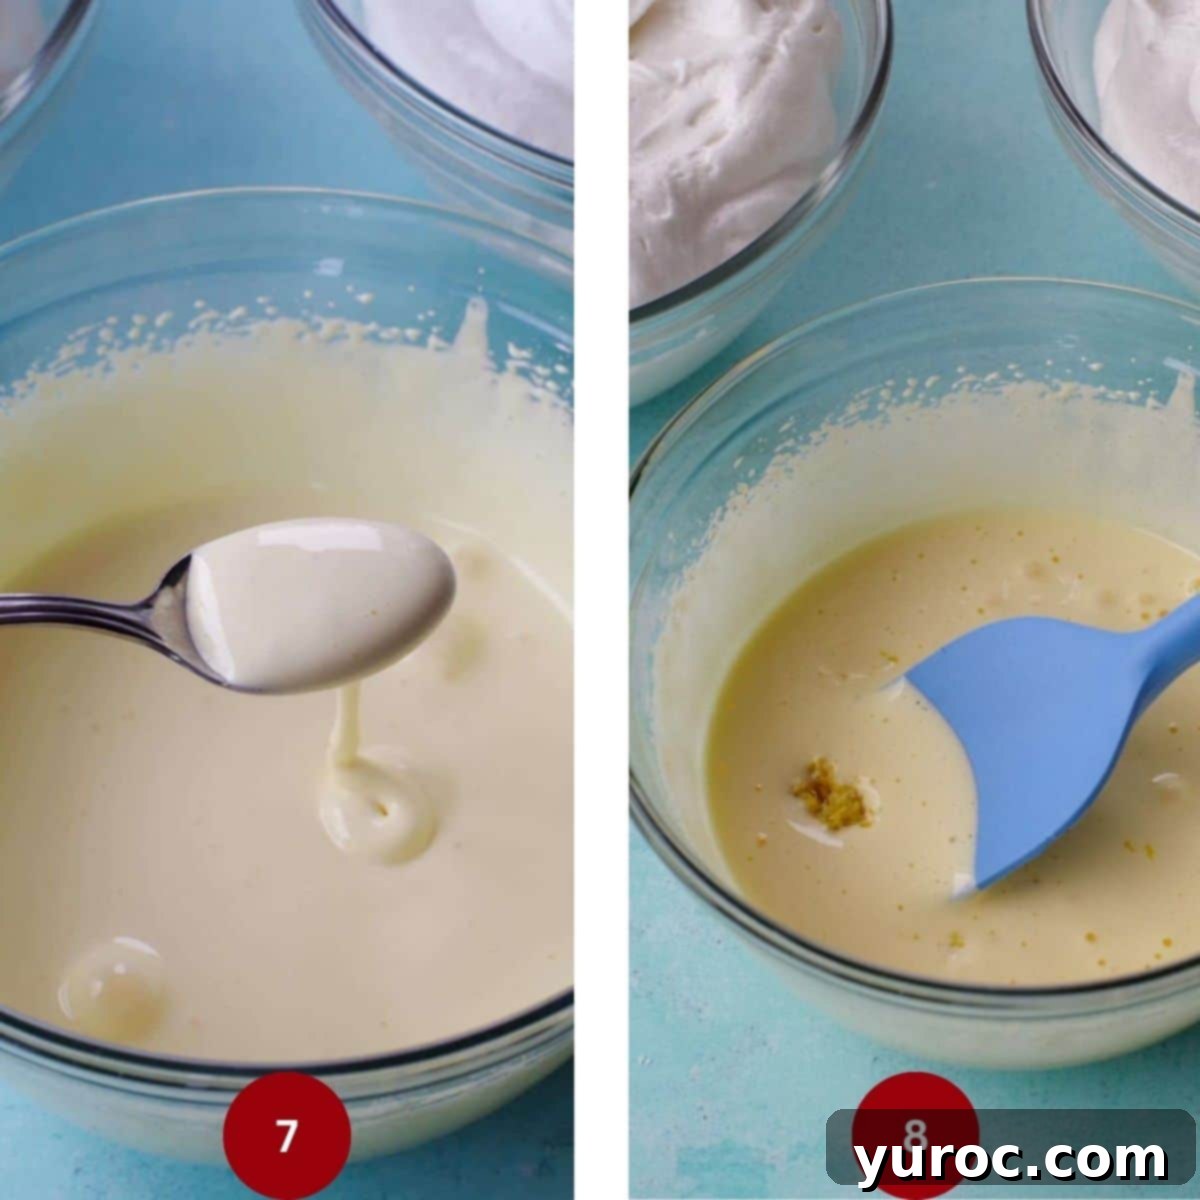
In a small, clean bowl, beat the 6 egg yolks with an electric mixer on high speed for about 5 minutes. The yolks should transform into a thick, pale yellow, fluffy consistency, similar to a rich gravy (IMAGE 7). This aeration is key to the sponge cake texture. Gently fold 1 tablespoon of fresh lemon juice and 2 teaspoons of grated lemon zest into the beaten egg yolk mixture. The lemon brightens the color and infuses the characteristic lemon flavor (IMAGE 8).
Step 5: Layering and Marbling the Batters
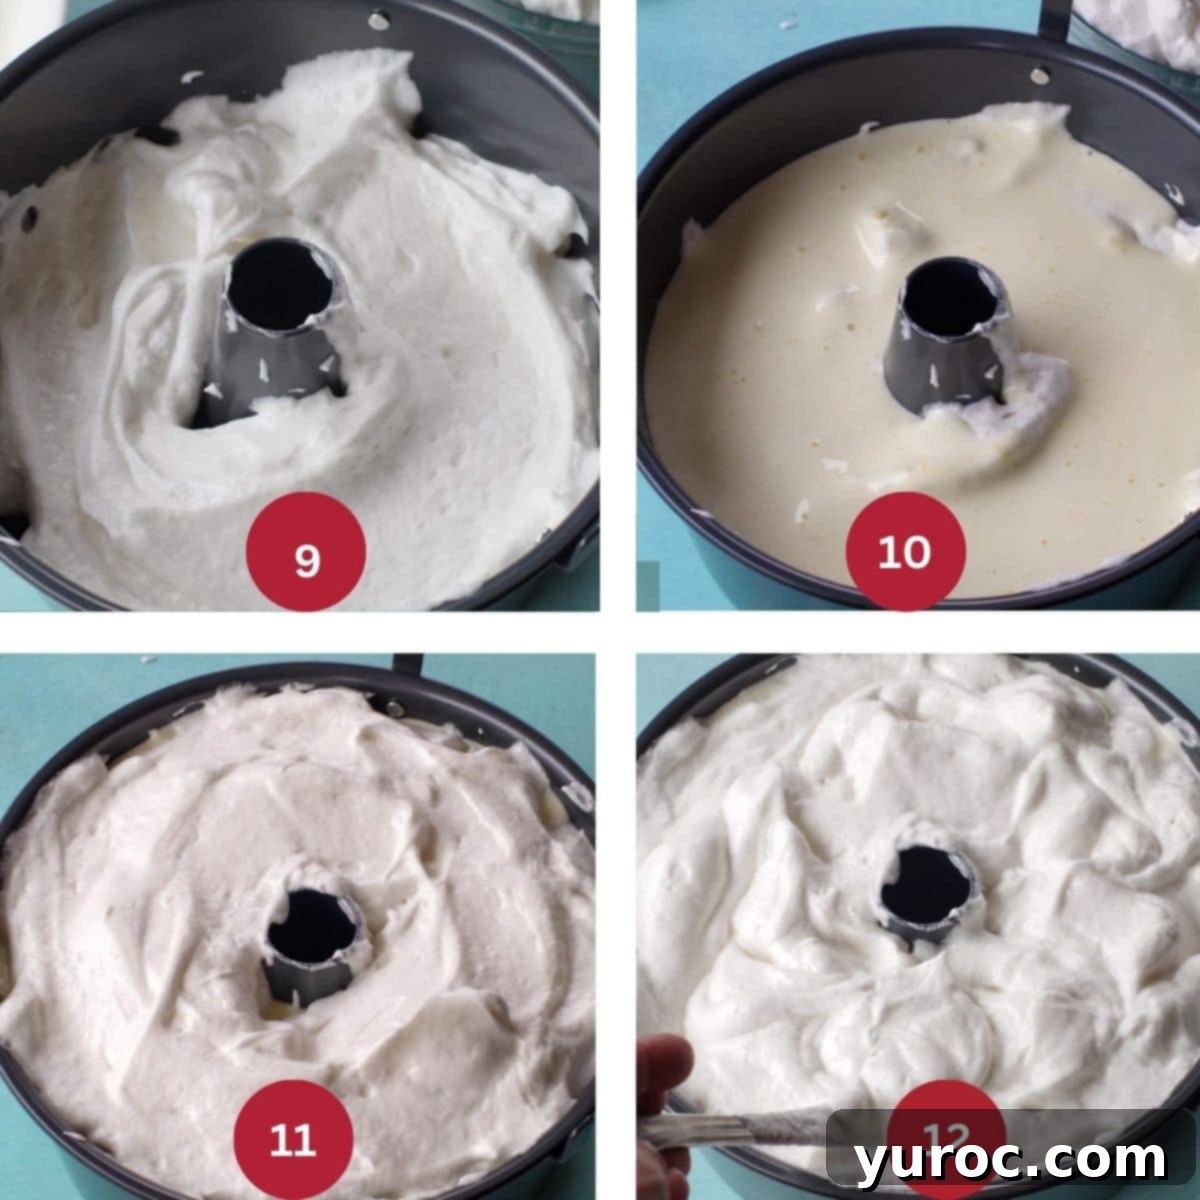
Now, it’s time to assemble your beautiful daffodil cake. Carefully add one bowl of the white egg white batter to the bottom of the ungreased tube pan, spreading it as evenly as possible (IMAGE 9). Next, gently spoon the entire egg yolk mixture (yellow batter) on top of the first layer of white batter (IMAGE 10). Finally, carefully add the second bowl of white egg white batter on top of the yellow layer, spreading it to cover (IMAGE 11). To create a subtle marbled effect, gently run a thin-bladed knife through the batters. Lift the knife up each time you swirl it to avoid overmixing and blending the colors too much. You want distinct, yet gently swirled layers, not a fully mixed batter (IMAGE 12).
Step 6: Baking and Cooling (Patience is Key!)
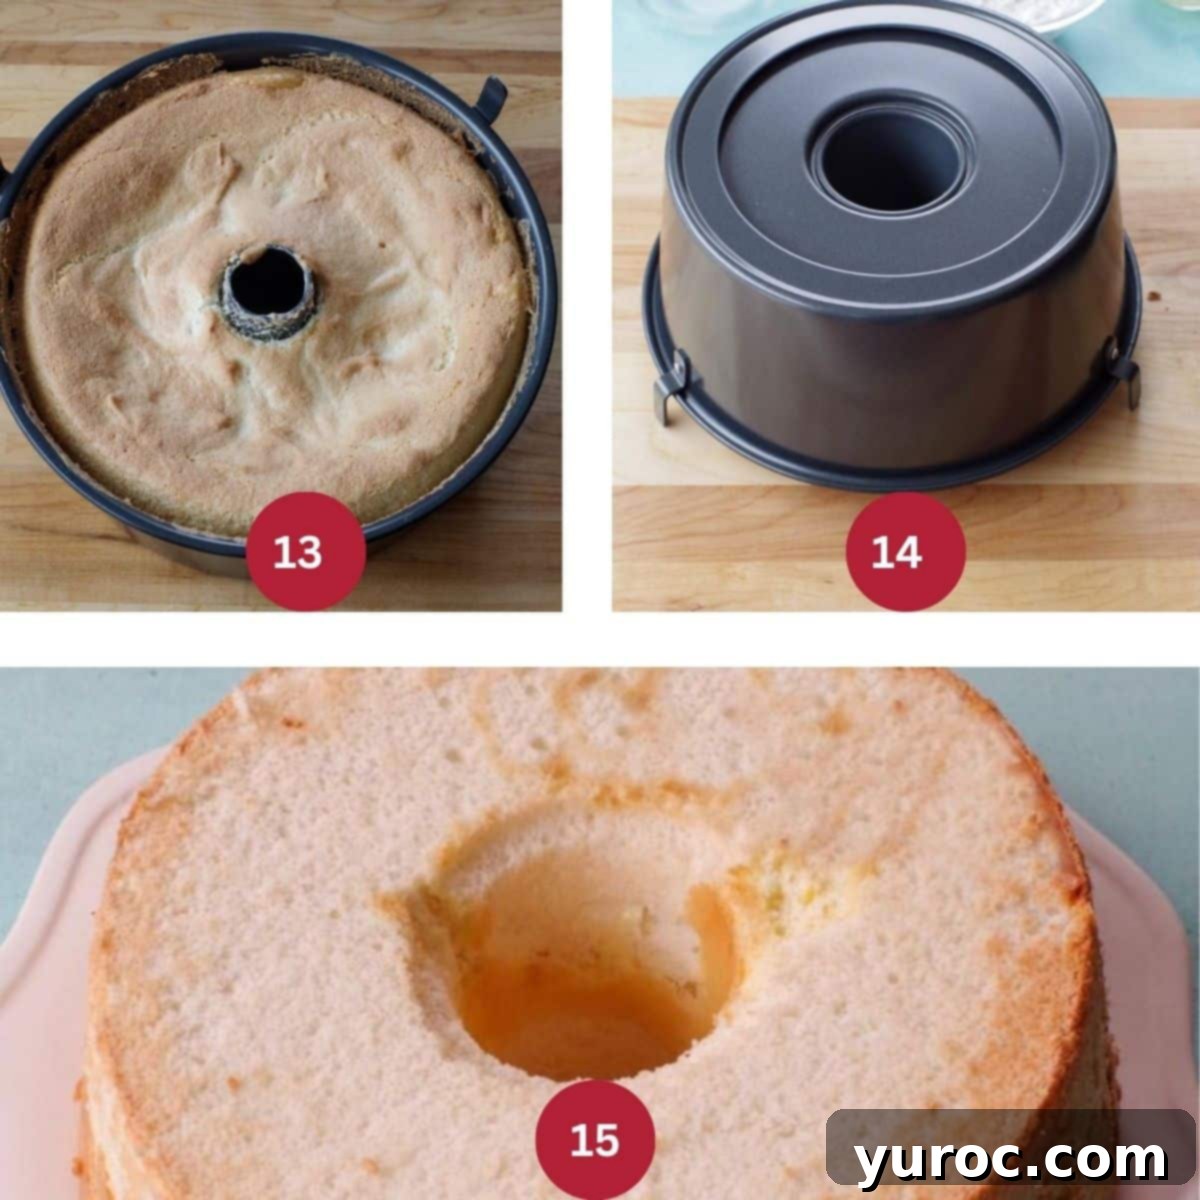
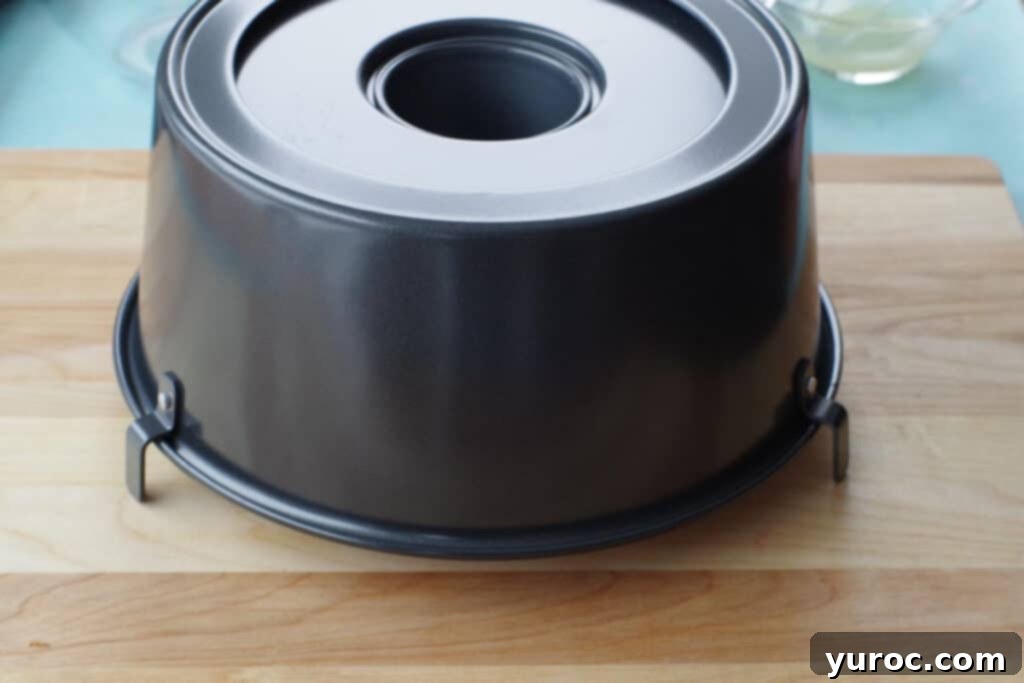
Immediately place the filled tube pan into the preheated oven. Bake for 35-40 minutes, or until the cake springs back lightly when touched and the top is a delicate golden brown (IMAGE 13). Once baked, the most crucial cooling step begins: immediately invert the cake. If your angel food cake pan has “feet” (as seen in the image), simply flip it over onto a cutting board or wire rack. If it doesn’t, invert it onto the neck of a bottle or an inverted metal funnel. Allow the cake to cool *completely* in this inverted position for 2-3 hours. This prevents the delicate cake from collapsing under its own weight (IMAGE 14).
Once fully cooled, run a thin spatula or knife around the sides of the pan and the center tube to loosen the cake. Carefully unmold the cake onto a serving plate (IMAGE 15).
Step 7: Glazing and Decorating (The Finishing Touch)
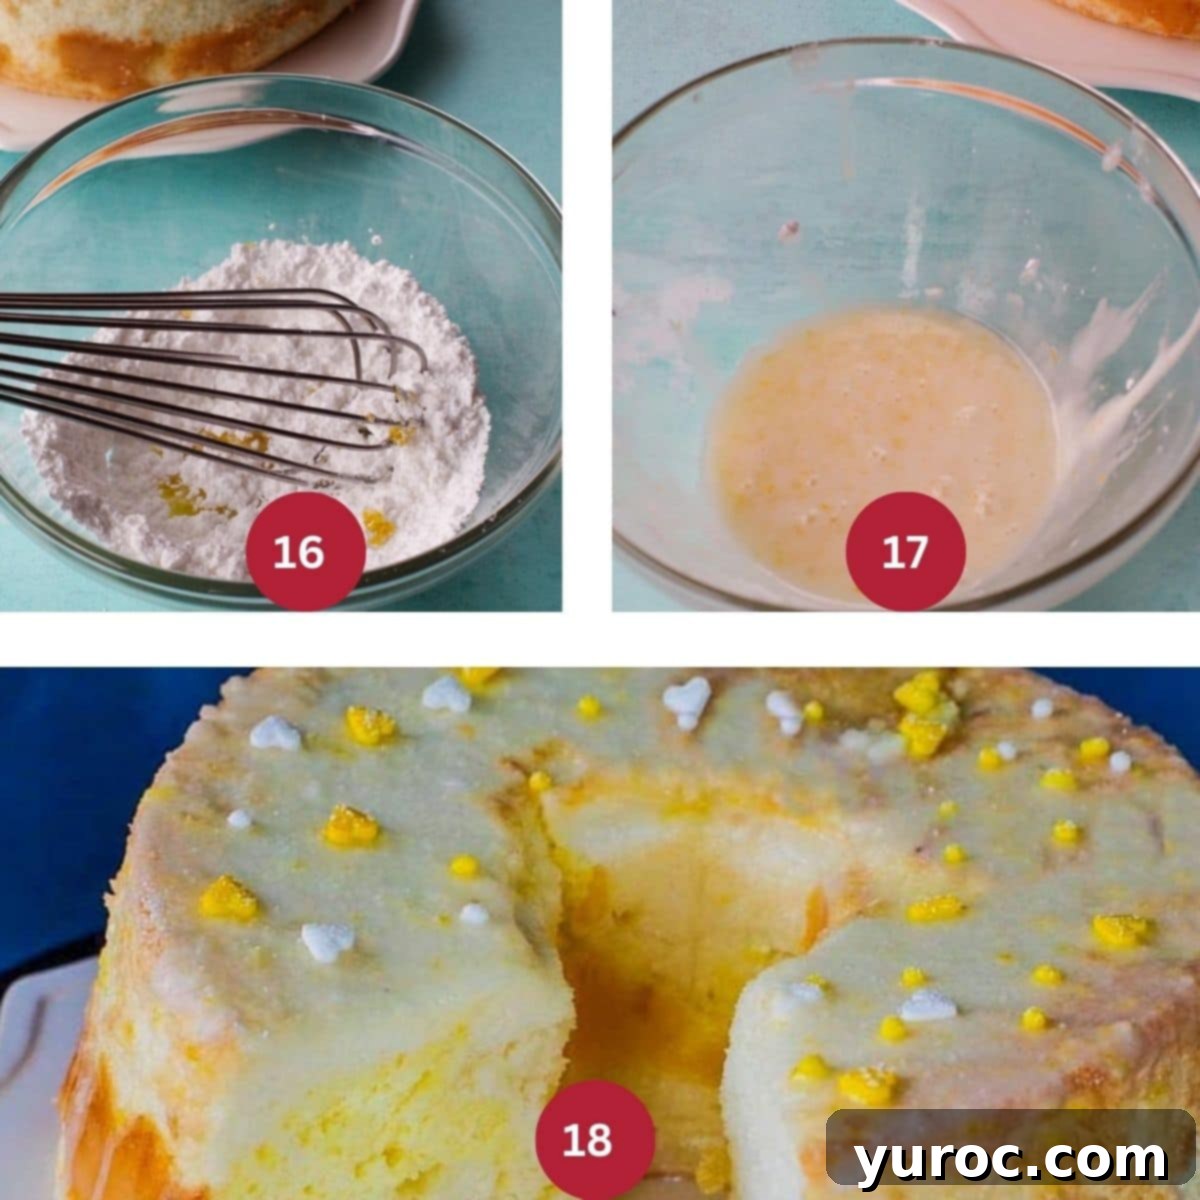
To prepare the lemon glaze, whisk together the sifted confectioners’ sugar, 2-3 tablespoons of fresh lemon juice, and the remaining 1 teaspoon of lemon zest in a small bowl until the mixture is smooth and lump-free (IMAGE 16). Adjust the consistency by adding a little more lemon juice, a teaspoon at a time, until you achieve a thick, pourable glaze. It should be thick enough to spread easily and slowly run down the sides of the cake, but not so thin that it completely drips off (IMAGE 17).
Evenly spread the glaze over the top of the cooled cake. Allow the cake to stand for about 30 minutes for the glaze to set. You can pop it into the fridge or freezer for a few minutes to speed up this process if needed. Finally, garnish your beautiful Lemon Daffodil Cake with edible flowers, yellow and white heart sprinkles, or any other festive decorations to celebrate the occasion (IMAGE 18).
💡 Expert Recipe Tips for the Perfect Lemon Daffodil Cake
Achieving a light, airy, and beautifully structured Lemon Daffodil Cake requires attention to detail. Here are some expert tips to ensure your baking success:
- Separate Eggs Carefully: This is perhaps the most critical step. Even a tiny speck of egg yolk (which contains fat) in the egg whites can prevent them from whipping up to stiff peaks. To minimize risk, separate each egg individually over a small bowl first. If a yolk breaks, transfer that white to a discard bowl and use a new egg. Once a white is successfully separated, transfer it to your large mixing bowl for whipping.
- Use Room Temperature Eggs: Eggs at room temperature whip up to a greater volume than cold eggs. This results in a lighter, fluffier cake. To quickly bring eggs to room temperature, place them in a bowl of warm water for 5-10 minutes before separating.
- Sift Flour for Lightness: Sifting the cake flour, especially with sugar, is vital for an ultra-fine, light batter. This process aerates the flour and removes any lumps, contributing to the cake’s tender crumb. For an even more delicate texture, consider sifting the flour mixture twice.
- Fold Gently: When incorporating the sifted flour mixture into the beaten egg whites, and later when combining the white and yellow batters, always use a large rubber spatula and a gentle folding motion. Overmixing will deflate the carefully whipped egg whites, leading to a denser, less airy cake. The goal is to just combine the ingredients while preserving as much air as possible.
- Cool Completely Upside Down: Angel food cakes and daffodil cakes are incredibly delicate when hot. Cooling the cake upside down is essential to prevent it from collapsing under its own weight as it cools and sets. If your tube pan lacks built-in “feet,” carefully invert it over the neck of a sturdy bottle or a metal funnel. Ensure the cake is completely cool before attempting to remove it from the pan; rushing this step can cause structural damage.
- Avoid Greasing the Pan: For this type of cake, a clean, ungreased tube pan is non-negotiable. The batter needs to cling to the sides of the pan to “climb” as it rises, creating its characteristic high, airy structure. Greasing the pan would cause the batter to slip down, resulting in a flat, dense cake.
- Master the Marbling Technique: For that signature daffodil effect, a subtle marble is key. After layering the batters, run a thin-bladed knife gently through them just once or twice. Be careful not to over-mix, as this will blend the white and yellow batters completely, losing the beautiful distinct layers. A few careful swirls are all you need.
- Check for Doneness Accurately: The cake is done when the top is lightly golden brown and springs back when gently touched in the center. Avoid the temptation to open the oven door too frequently during baking, especially in the first 20-25 minutes, as sudden temperature changes can cause the cake to deflate.
👪 Serving Size & Adjustments
This Lemon Daffodil Cake recipe yields approximately 16 generous servings, making it perfect for family gatherings or celebrations. If you need to adjust the recipe to serve more or fewer guests, you can easily do so. In the recipe card below, simply click on the serving number to automatically adjust the ingredient quantities to half, double, or triple the recipe as needed. Keep in mind that for larger batches, you may require additional angel food cake pans.
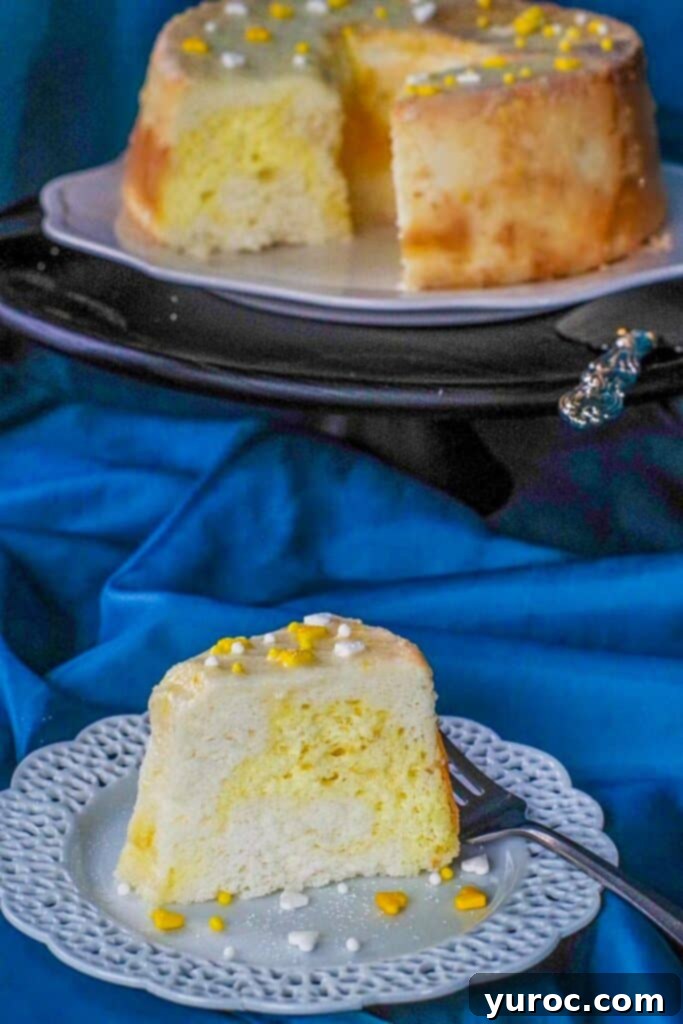
🔢 Weight Watchers Points for Lemon Daffodil Cake
The original Daffodil Cake recipe, from which this is adapted, was featured in a Weight Watchers magazine many years ago, typically coming in at around 5 points on the plan at that time. However, with the current Weight Watchers program, this delicious and naturally flavored Lemon Daffodil Cake is approximately 10 WW points per serving.
While 10 points might seem like a fair amount for a dessert, for a cake of this caliber, it’s remarkably low compared to many other options. If you’re looking to further reduce the points, you have a few options. Incorporating sugar substitutes or artificial sweeteners for some of the granulated sugar can significantly lower the point value. For those who prefer natural alternatives, monk fruit sweetener is an excellent choice. When using monk fruit, remember it is often sweeter than sugar, so you’ll typically need to use about half the amount of sugar specified – for instance, ¾ cup of monk fruit for 1 ½ cups of sugar, adjusting to taste.
🥗 Perfect Pairings: Spring Meals to Serve with this Cake
This light and refreshing Lemon Daffodil Cake is an ideal dessert to complement a variety of spring and summer meals. Its bright lemon flavor and airy texture provide a perfect finish to rich or savory dishes. Consider pairing it with:
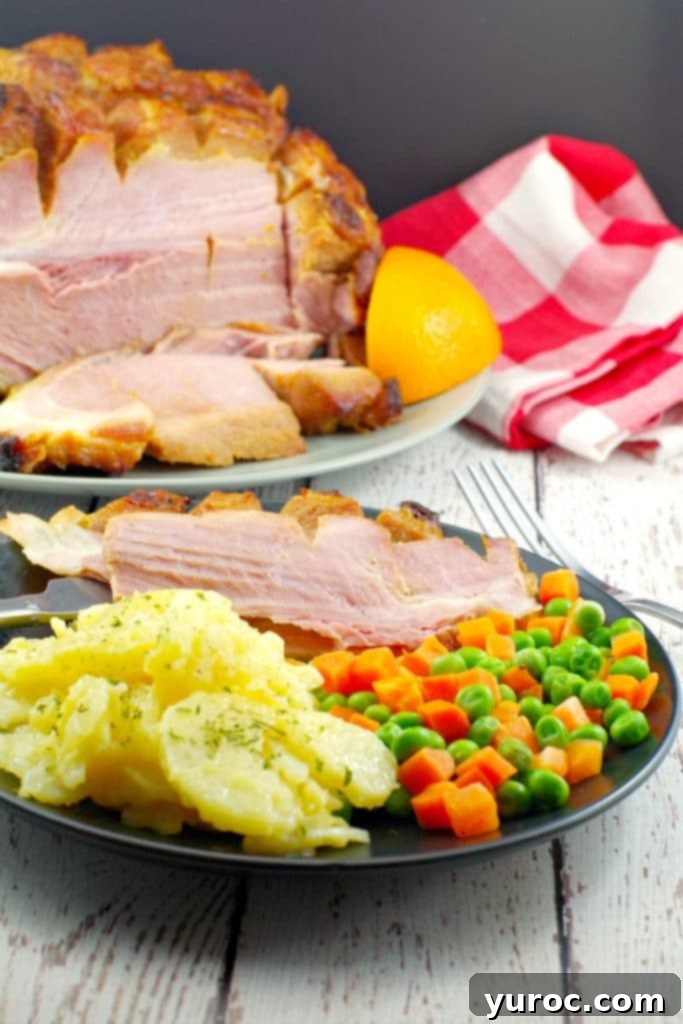
- My Picnic Ham with Orange Glaze Recipe (as shown in the image below), where the sweet and tangy glaze of the ham would beautifully contrast with the cake’s lemon notes.
- Creamy and flavorful Chipotle Mashed Potatoes for a touch of savory warmth.
- Sweet and wholesome Healthy Roasted Carrots with Brown Sugar, offering a delightful balance of vegetables and a hint of sweetness.
For more inspiration, be sure to check out my comprehensive Easter brunch menu ideas, where you’ll find other fantastic dishes that would pair wonderfully with this cheerful cake!
🍽 Essential Equipment for Lemon Daffodil Cake
To successfully bake this light and airy Lemon Daffodil Cake, you’ll need a few key pieces of equipment:
- Angel Food Cake Pan (or Tube Pan): This is an absolute necessity. A 10-inch tube pan with a removable bottom is ideal. The tall, straight sides are crucial for the batter to climb as it bakes, creating the characteristic height and delicate texture. Remember, these pans are specifically designed NOT to be greased.
- Electric Mixer: Whether a stand mixer with a whisk attachment or a powerful hand mixer, an electric mixer is essential for properly whipping the egg whites to stiff peaks and beating the egg yolks to the correct fluffy consistency.
- Sifter: A sifter ensures your cake flour is well-aerated and free of lumps, contributing to the fine crumb of the cake.
- Large Rubber Spatula: Indispensable for gently folding the flour into the egg whites, and later for carefully marbling the batters, without deflating the air.
- Small Bowls and Large Bowls: For separating eggs and mixing batters.
I personally recommend an angel food cake pan with feet (affiliate link). These convenient feet allow you to simply invert the pan to cool, eliminating the need to find a bottle or funnel to prop it up. It makes the critical cooling step much easier!
🌡️ Storage & Make-Ahead Tips
Proper storage ensures your Lemon Daffodil Cake remains fresh and delicious. Here are the best ways to keep your cake:
- Refrigeration: Store this cake in an airtight container in the refrigerator for up to 3 days. This helps maintain its delicate texture and fresh lemon flavor.
- Freezing: You can absolutely make this cake in advance and freeze it! Allow the baked cake to cool completely, then wrap it tightly in plastic wrap and then in aluminum foil. It can be frozen for up to 1 month. When you’re ready to serve, thaw it overnight in the refrigerator.
- Glaze Application for Frozen Cake: For the best presentation and texture, I highly recommend preparing and applying the lemon glaze just before serving. The glaze takes about 30 minutes to set, so simply thaw your cake, then whip up the fresh glaze and spread it over the top about half an hour before you plan to enjoy it.
Note: The yellow in the cake may appear brighter in photos than it does in reality due to lighting. If you desire a more intensely bright yellow, you can add about 1 teaspoon of lemon-colored food coloring to the egg yolk mixture. For superior color saturation and consistency, Wilton icing colors are recommended over standard grocery store food colorings.
🥚 What to Do with Leftover Egg Yolks
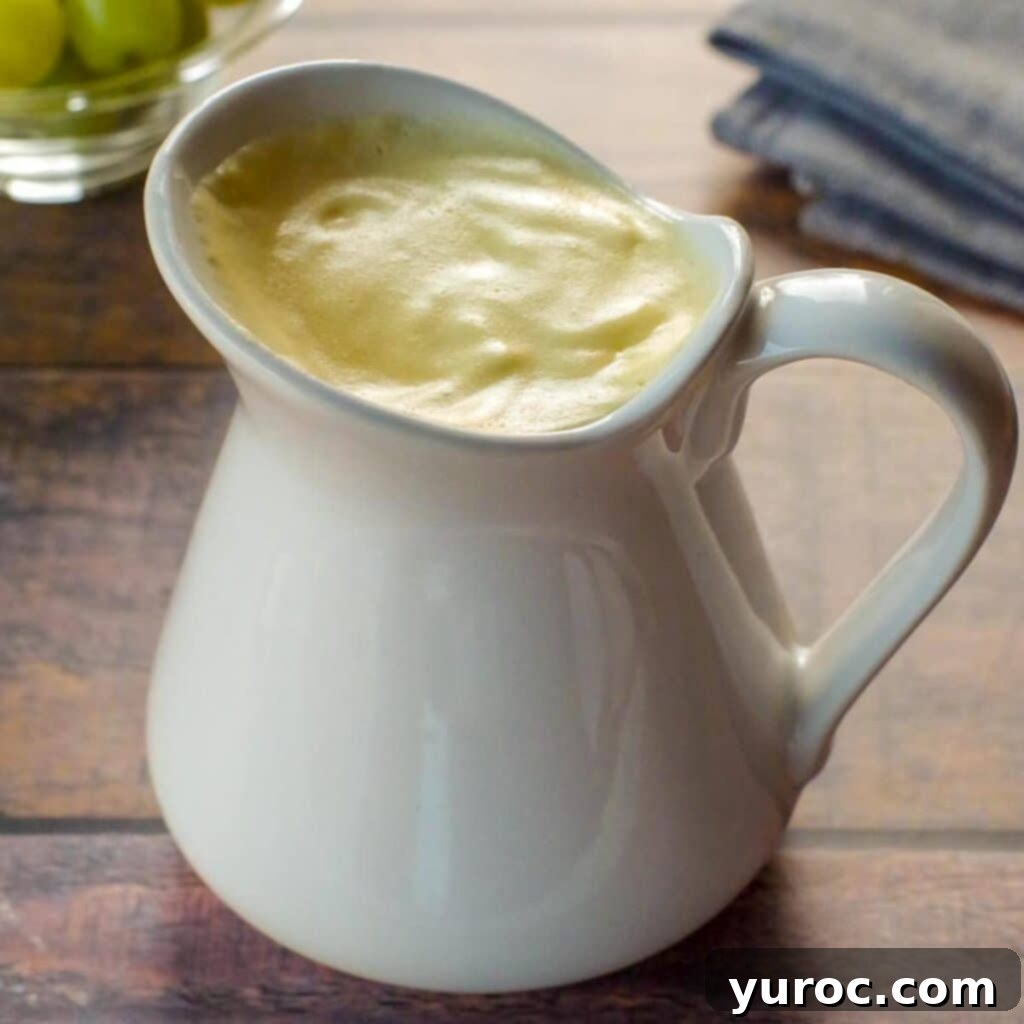
This recipe calls for 12 egg whites but only 6 egg yolks for the yellow batter, leaving you with 6 leftover egg yolks. Don’t let them go to waste! Egg yolks are packed with flavor and richness and can be used in a variety of delicious recipes. I highly recommend using them to make my light, healthy, and Weight Watchers friendly Healthy Hollandaise Sauce. It’s a fantastic way to utilize those extra yolks and elevate your next meal.
You could even make a double batch of this Hollandaise sauce! It’s perfect for creating quick and healthy versions of Healthy Eggs Benedict, drizzling over perfectly cooked salmon, or enhancing steamed asparagus or broccoli. This sauce adds a luxurious touch without compromising your healthy eating goals.
❔ Recipe FAQs
Daffodil cake is a classic, old-fashioned (or vintage) cake that beautifully combines two distinct batters: a white, airy angel food cake batter and a rich, golden sponge cake batter made with egg yolks. These are gently swirled together and baked in a tube pan, creating a stunning two-toned effect reminiscent of a daffodil flower.
Daffodil cake, similar to angel food cake, relies heavily on whipped egg whites for its delicate, airy structure. When hot, this structure is very fragile. Cooling the cake upside down prevents it from collapsing or shrinking under its own weight as it gradually cools and sets, ensuring it retains its tall, fluffy volume. If your tube pan has integrated “feet,” simply invert it onto those. Otherwise, carefully place the center tube over the neck of a sturdy bottle or an inverted metal funnel.
Yes, you can! If you don’t have cake flour, you can create a suitable substitute. For every 1 cup of cake flour required, measure 1 cup of all-purpose flour, then remove 2 tablespoons of flour and replace them with 2 tablespoons of cornstarch. Sift this mixture together thoroughly (preferably twice) before using to achieve a lighter texture similar to cake flour.
Several factors can cause a daffodil cake to not rise as expected. Ensure your egg whites are beaten to stiff peaks and that you are very gentle when folding in the flour mixture to avoid deflating them. Using room temperature eggs helps achieve maximum volume. Also, confirm your oven temperature is accurate; an oven that’s too cool can prevent proper rise, while one that’s too hot can set the crust too quickly, hindering expansion. Lastly, avoid opening the oven door during the first 20-25 minutes of baking, as this can cause a sudden temperature drop and lead to the cake collapsing.
🌷 More Spring Cake Inspiration
- Strawberry Jello Angel Food Cake Dessert
- Healthy & Light Carrot Cake
- Weight Watchers Pina Colada Angel Food Cake
- Easter Creme Egg Swiss Roll
Did your family ❤️ this recipe? Did you know that commenting and ⭐ rating recipes is one of the best ways to support your favorite recipe creators? If you LOVED this recipe, please comment and rate it in the recipe card or share photos on social media using the hashtag #foodmeanderings or tagging @foodmeanderings!
📋 Lemon Daffodil Cake Recipe
This Old-fashioned Lemon Daffodil Cake is a fun, cheerful lemon flavored spring cake with a light and airy texture, featuring a simple lemon glaze. This cake has no artificial color and the yellow hue comes naturally from the separation of the egg whites and egg yolks. It’s also low-fat, WW friendly and is perfect for Easter Dessert or any spring or summer celebration!
Pin
Save Recipe
Course: Dessert, Snack
Cuisine: American
Special Diet: Vegetarian, Weight Watchers
Servings: 16 servings
Calories: 212 kcal
Author: Terri Gilson
Prep Time: 30 minutes
Cooling Time: 2 hours 35 minutes
Total Time: 3 hours 5 minutes
Equipment
- Angel food cake pan with feet
- Electric mixer
- Sifter
Ingredients
- 1 cup cake flour
- 1 ½ cup sugar
- 12 egg whites
- 1 teaspoon cream of tartar
- 1 teaspoon vanilla extract
- ¼ teaspoon salt
- 6 egg yolks
- 4 tablespoon fresh lemon juice
- 3 teaspoon grated lemon zest
- 1 ½ cup powdered sugar/confectioners sugar, sifted (for glaze)
Instructions
- Preheat oven to 350 degrees F (176°C). Set a 10-inch tube pan nearby. **DO NOT grease the pan**; this type of cake needs to cling to the sides to rise properly. Sift the cake flour and ¼ cup of the granulated sugar into a small bowl.
- With an electric mixer on medium speed, beat the egg whites in a large, very clean bowl until foamy, about 30 seconds to 1 minute.
- Add the cream of tartar, vanilla extract, and salt. Increase the speed to medium-high and beat until soft peaks form (about 45 seconds to 1 minute).
- Gradually beat in the remaining 1 cup of granulated sugar, adding 2 tablespoons at a time.
- Continue beating until stiff, glossy peaks form that hold their shape.
- Sift one-quarter of the flour mixture over the egg-white mixture and, with a large rubber spatula, gently fold it in just until blended. Repeat with the remaining flour mixture, one quarter at a time, until fully combined, being careful not to overmix.
- Divide the egg white batter equally into two separate bowls.
- With the mixer on high speed, beat the 6 egg yolks in a small bowl until thick and fluffy, about 5 minutes. It should be the consistency of thick, pale yellow gravy.
- Gently fold in 1 tablespoon of the lemon juice and 2 teaspoons of the lemon zest into the beaten egg yolks.
- Add one bowl of the white egg white batter to the bottom of the tube pan.
- Carefully spoon the entire yellow egg yolk mixture on top of the first layer of white batter.
- Then, add the second bowl of white egg white batter over the top of the yellow layer.
- Gently run a thin-bladed knife through the batters once or twice to create a subtle marble effect. Lift the knife up each time you swirl it to avoid over-blending the colors.
- Immediately place the pan in the oven and bake for 35-40 minutes, or until the cake springs back lightly when touched and the top is lightly browned.
- Immediately invert the cake onto the feet of the pan (if it has them) or over the neck of a bottle/inverted metal funnel, and cool completely for 2-3 hours.
- Once completely cool, run a spatula around the sides of the pan and the center tube to loosen the cake. Unmold the cake onto a serving plate.
- To make the glaze: whisk together the sifted confectioners’ sugar, 2-3 tablespoons of lemon juice, and the remaining 1 teaspoon of lemon zest in a small bowl until smooth.
- Add enough of the remaining lemon juice, a little at a time, to make a thick but pourable glaze that can be spread over the top and will slowly run down the sides of the cake without being too thin.
- Spread the glaze evenly over the top of the cake. Let the cake stand until the glaze is set (about 30 minutes). You can place it in the fridge or freezer for a few minutes to speed up setting.
- Garnish with sprinkles or edible flowers as desired.
Notes
Recipe Tips:
- Separate Eggs Carefully: Ensure no egg yolk gets into the whites, as even a tiny bit of fat can prevent the egg whites from reaching stiff peaks. Separate each egg over a small bowl first, then transfer the whites and yolks into separate larger bowls.
- Room Temperature Eggs: Using room temperature eggs allows them to whip up to a greater volume, resulting in a lighter, fluffier cake. To quickly bring eggs to room temperature, place them in a bowl of warm water for 5-10 minutes.
- Sift Flour for Lightness: Sifting the cake flour with sugar helps create a finer, lighter batter. Repeat the sifting process twice for the best texture.
- Fold Gently: When incorporating the flour and the egg yolk mixture into the beaten egg whites, use a gentle folding motion with a large rubber spatula. Overmixing can deflate the batter, resulting in a denser cake.
- Cool Completely Upside Down: Cooling the cake upside down prevents it from collapsing. If your tube pan doesn’t have feet, place it over a bottle or metal funnel. Make sure the cake is completely cool before removing it from the pan to maintain its structure.
- Avoid Greasing the Pan: Do NOT grease the tube pan. The batter needs to cling to the sides to rise properly, creating that airy texture.
- Marbling Technique: For a subtle marbled effect, run a knife gently through the batter just once or twice. Over-mixing will blend the batters too much, losing the distinct layers of white and yellow.
- Check for Doneness: The cake is done when it springs back lightly when touched and is golden brown on top. Avoid opening the oven door frequently, as this can cause the cake to deflate.
🌡️Storage
Store this cake in an airtight container in the fridge for up to 3 days.
You can make this cake in advance and freeze it, but I would recommend making the glaze and glazing the cake just before you serve it (30 minutes in advance, as this is how long it takes for the glaze to set.)
NOTE: The yellow in this cake looks brighter in the photos than in does in reality. If you want a bright yellow, use some lemon colored food coloring (1 tsp). I recommend using Wilton icing colors, not grocery store food coloring.
Nutrition
Serving: 1 slice | Calories: 212kcal (11%) | Carbohydrates: 48g (16%) | Protein: 5g (10%) | Fat: 1g (2%) | Saturated Fat: 1g (6%) | Polyunsaturated Fat: 1g | Monounsaturated Fat: 1g | Cholesterol: 5mg (2%) | Sodium: 99mg (4%) | Potassium: 108mg (3%) | Fiber: 1g (4%) | Sugar: 40g (44%) | Vitamin A: 8IU | Vitamin C: 3mg (4%) | Calcium: 6mg (1%) | Iron: 1mg (6%)
Did you make this recipe? Please leave a star rating and review below!
Rate this Recipe
