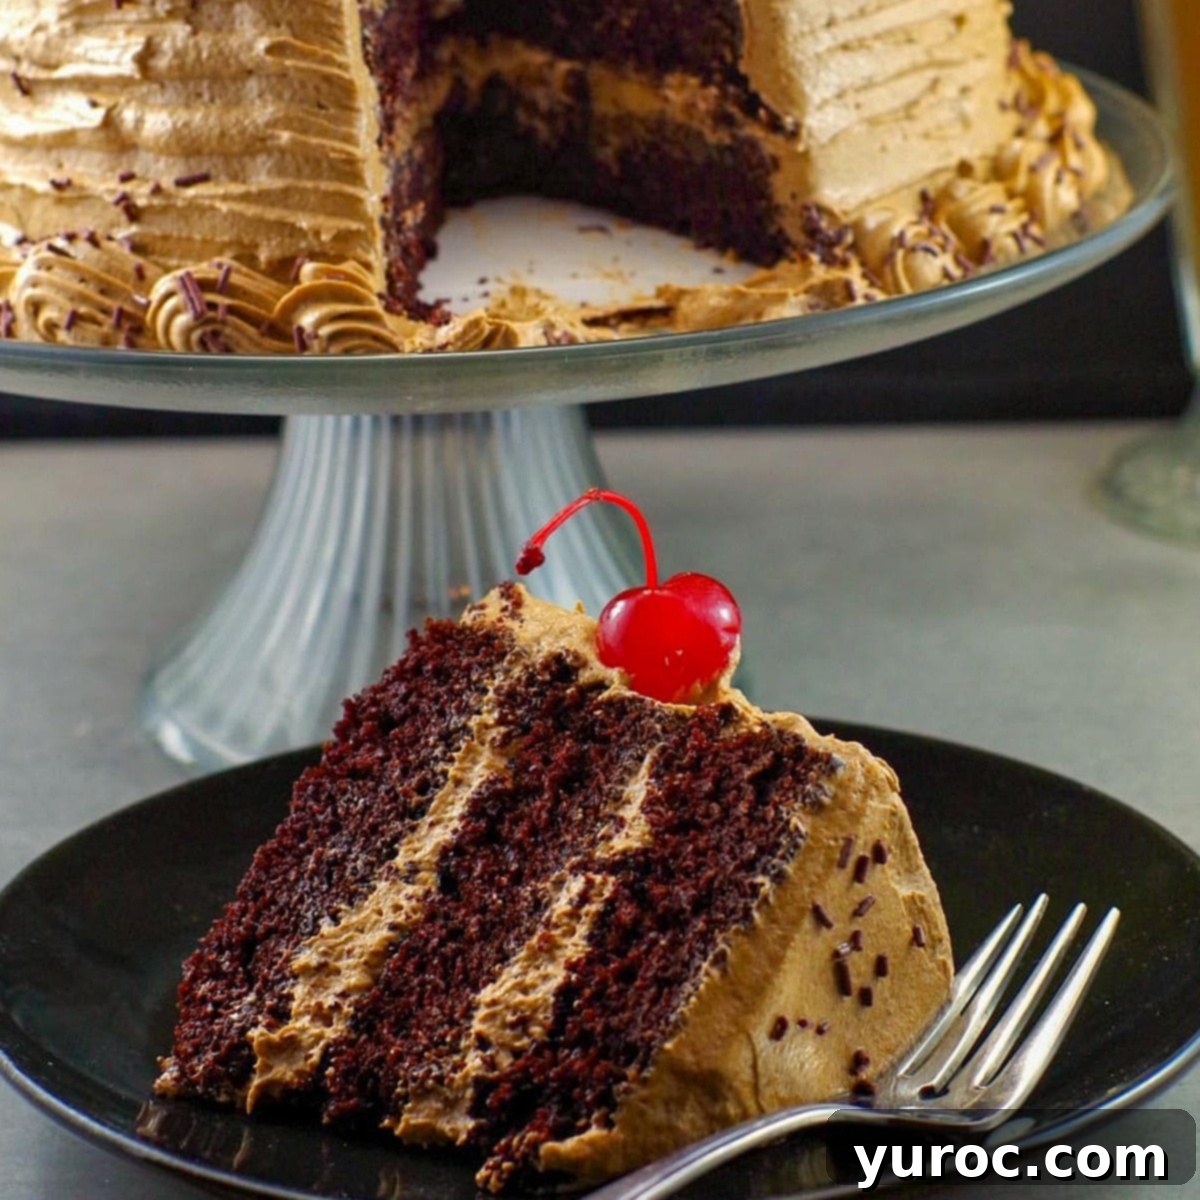
The Ultimate Root Beer Float Layer Cake: A Nostalgic & Decadent Celebration Treat
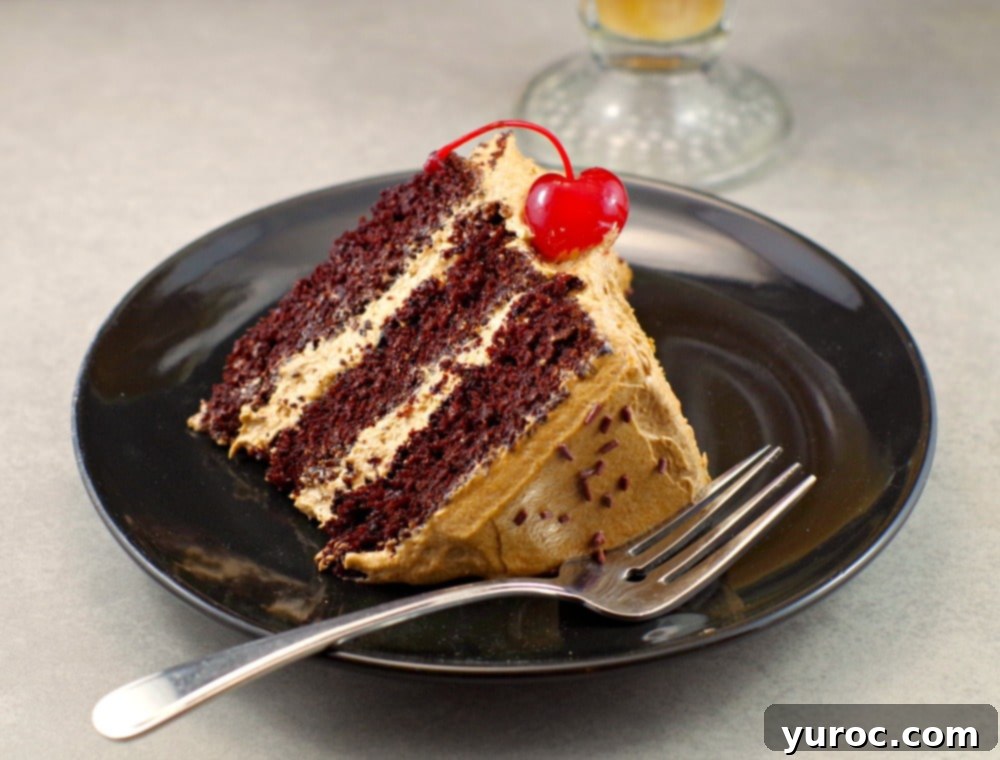
If you’re searching for a show-stopping dessert that will delight root beer enthusiasts of all ages, or simply need an unforgettable chocolate birthday cake, look no further than this incredible Root Beer Float Layer Cake! This isn’t just any cake; it’s a culinary tribute to the classic soda fountain treat. Each bite delivers the unmistakable flavor of a fizzy root beer float, perfectly balanced with moist chocolate cake and a dreamy, light frosting. It’s truly an ultimate summer cake, an ideal birthday cake, or a heartfelt Father’s Day cake, guaranteed to bring smiles.
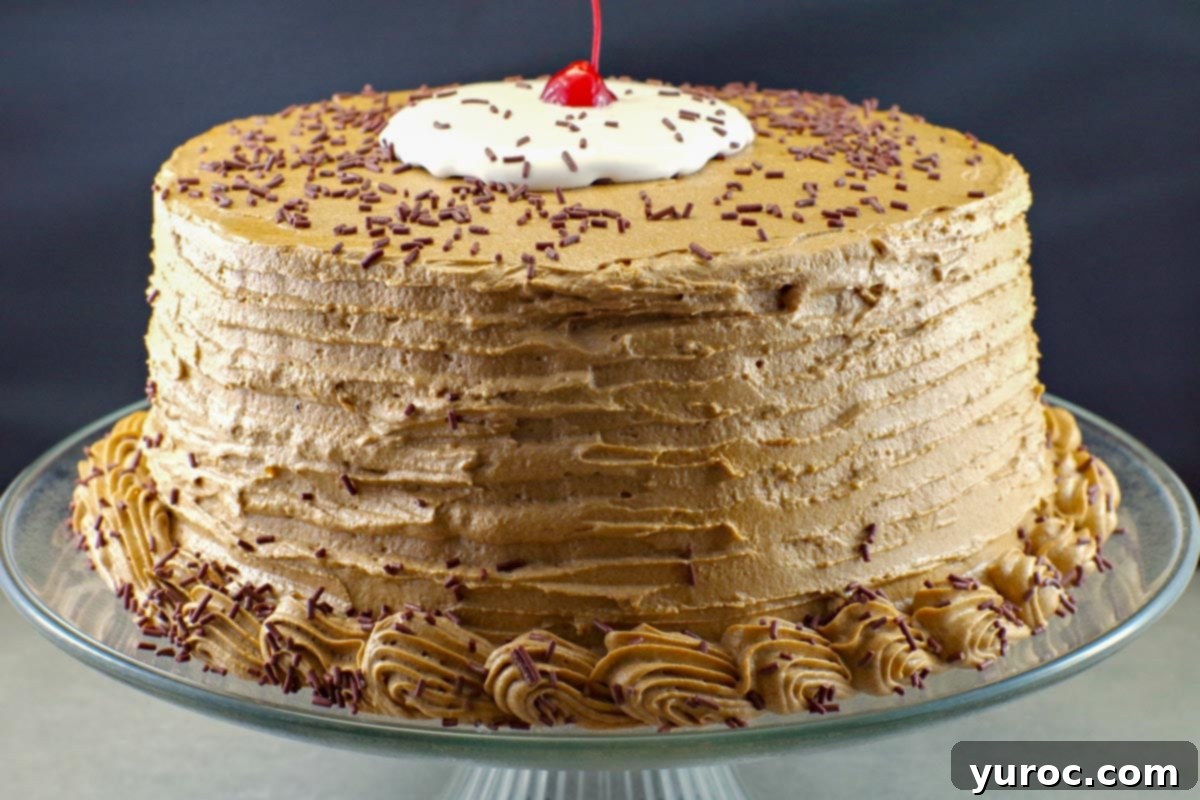
Imagine this: rich chocolate cake layers, infused with the distinct essence of root beer extract, then generously painted with a homemade root beer syrup that locks in moisture and amplifies the flavor. The result is an incredibly moist cake, beautifully complemented by a light, fluffy, and perfectly sweet shortening-based icing (think classic Crisco frosting). To complete the iconic root beer float experience, this masterpiece is crowned with ethereal marshmallow fluff, artfully arranged to mimic melting ice cream, and finished with a vibrant maraschino cherry. If you’re on the hunt for impressive birthday cake recipes or a unique dessert for any festive occasion, this root beer cake is absolutely IT! It even pairs wonderfully with hearty summer meals such as a delicious Slow Cooker Beef on a Bun and savory Slow Cooker New England Baked Beans.
🍒Reader Review
“Made this today for my son’s birthday, and his first response was that it tasted like a tootsie roll – it was delicious! Lots of work, but well worth the effort when all is said and done. We went with the icing recipe on this blog, and it was exactly what the cake needed- a light and delicate frosting to counter the richness of the cake. Definitely on file for other parties for sure. Thanks for sharing this one!”⭐⭐⭐⭐⭐
This Root Beer Float Layer Cake holds a special place in our home – it’s my husband’s absolute favorite birthday cake and the most frequently requested dessert! I’ve had the pleasure of baking it for him countless times, and every single time, our entire family devours it with such enthusiasm that there are never any leftovers to freeze. In fact, they’re often quite disappointed when every last crumb is gone within a day or two! It’s a testament to how universally loved this unique root beer cake truly is. Whether you’re a child or an adult, if you appreciate the distinctive taste of root beer and are searching for a truly special birthday cake recipe, you are guaranteed to fall in love with this cake!
And for those who simply can’t get enough of that wonderful root beer flavor, you absolutely must give my Root Beer Float Fudge a try! It’s another fantastic way to enjoy the classic taste in a different, equally delightful form.
🥘 Essential Ingredients for Your Root Beer Float Cake
This remarkable cake starts with a rich chocolate cake base, intricately flavored with root beer extract. To elevate the root beer experience and ensure maximum moistness, each layer is then brushed with a carefully reduced root beer syrup. The combination delivers an intensely authentic root beer flavor that truly sets this cake apart.
For the cake layers, you’ll need the following key ingredients:
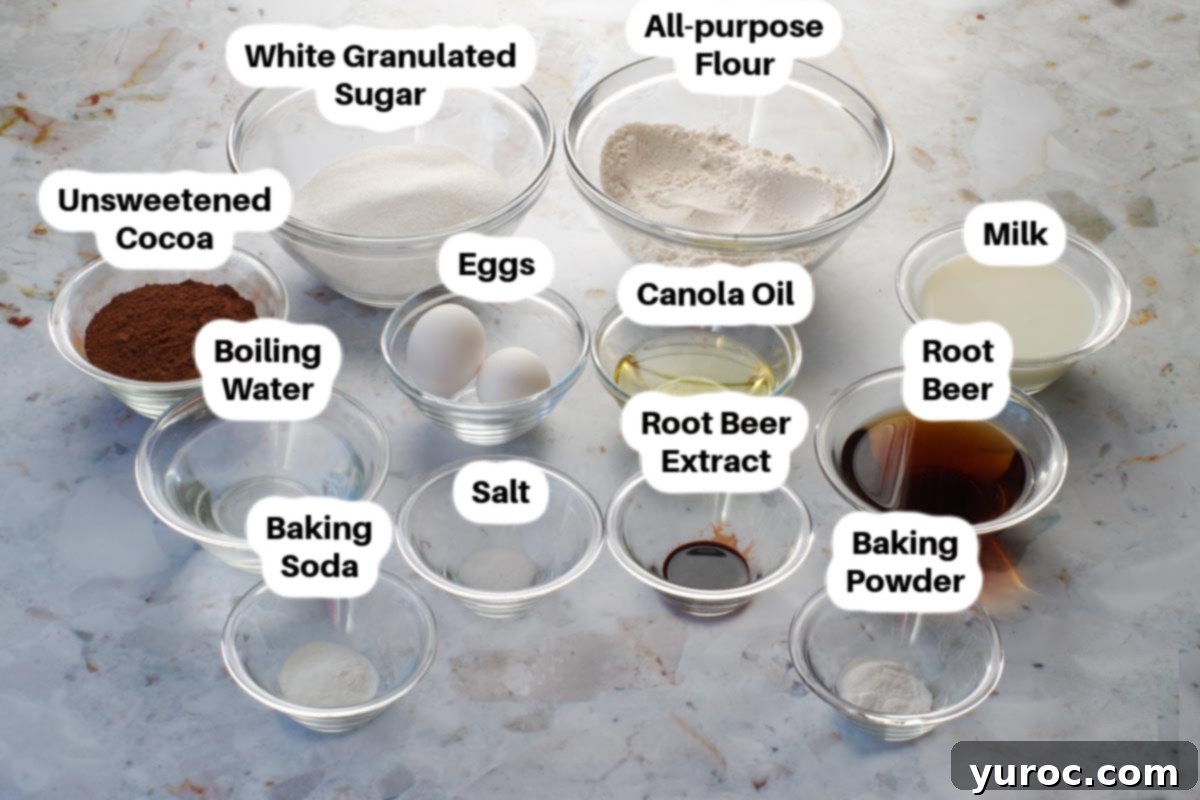
- Unsweetened Cocoa Powder: This isn’t just for a chocolate flavor; the cocoa actually enhances and deepens the overall root beer taste, creating a more complex and satisfying profile for this chocolate root beer cake.
- Root Beer Soda: Crucially, you must use regular root beer, not diet. I’ve tested this recipe with diet root beer, and it simply doesn’t yield the same rich flavor or desired texture due to artificial sweeteners. Stick to the classic for the best results in your root beer cake.
- Root Beer Extract: For an intensely potent root beer flavor without altering the liquid balance of the batter or frosting, concentrated root beer extract is essential. (You can often purchase high-quality root beer extract HERE on Amazon if it’s difficult to find in your local stores). I typically use two bottles of this concentrated extract for the cake batter and an additional bottle for the frosting to ensure a robust flavor throughout.
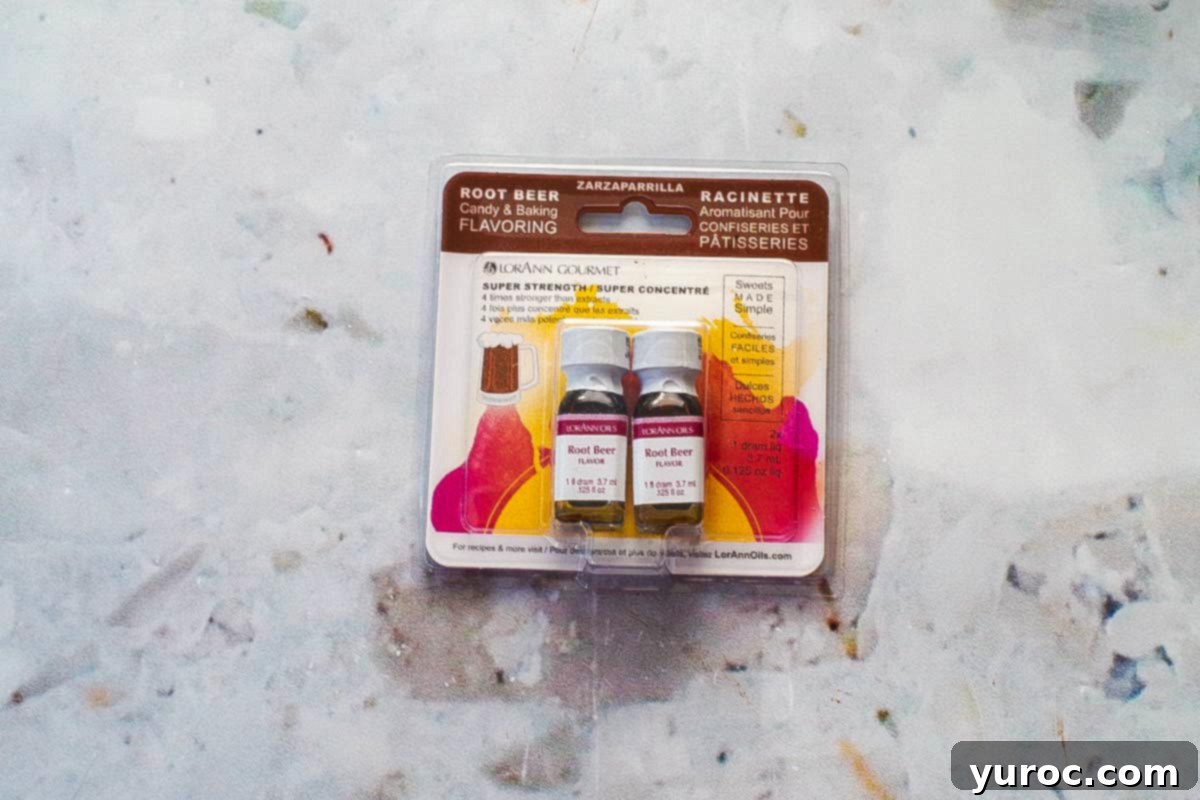
The frosting for this root beer cake is a real game-changer. It’s my signature whipped cream buttercream, which is a beautifully light, airy, and not-too-sweet shortening-based icing. What makes it extra special is the inclusion of meringue powder (you can conveniently purchase Wilton Meringue Powder HERE if needed). This unique combination creates a stable, silky smooth frosting that truly is the best I’ve ever tasted, providing the perfect counterpoint to the rich cake. I finish the cake with a dollop of marshmallow fluff on top, perfectly replicating the look of melting vanilla ice cream over a classic root beer float, making this a truly immersive dessert experience. While this root beer cake recipe might take a couple of hours from start to finish, the extraordinary flavor and stunning presentation make every moment of effort incredibly worthwhile. It’s the ideal centerpiece for any special celebration!
For the delightful root beer frosting and garnish, here’s what you’ll need:
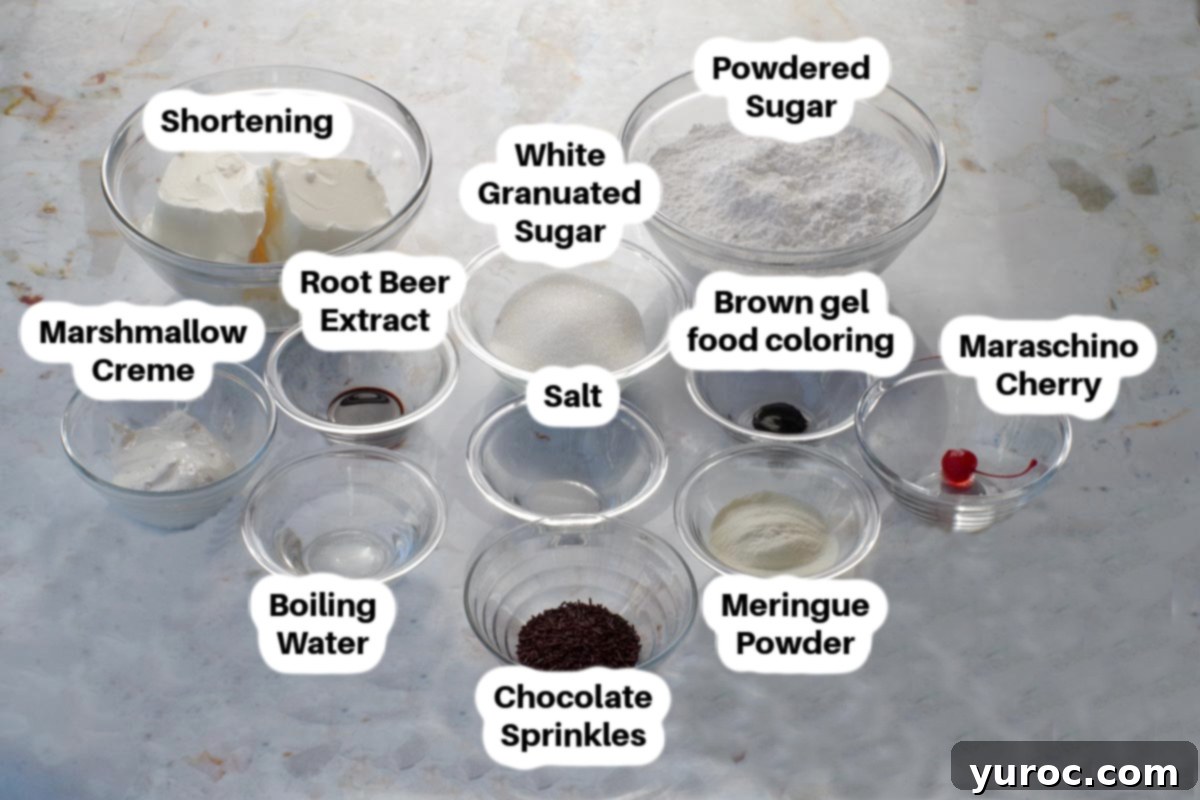
- Shortening: I generally opt for brands like Crisco or Tenderflake. Using shortening instead of butter in this frosting yields a remarkably light, fluffy, and stable texture that doesn’t require refrigeration. This makes it ideal for summer gatherings as it holds up beautifully in warmer temperatures.
- Meringue Powder: This ingredient is crucial. It acts as a safe and stable alternative to fresh egg whites, providing the necessary structure and airy quality for our whipped buttercream. Do NOT substitute with raw egg whites in this recipe.
- Brown Gel Icing Color: To achieve that perfect root beer hue, a gel food coloring is essential. Liquid grocery store food coloring won’t provide the depth of color needed without altering the frosting consistency. I recommend using Wilton or Americolor brands, which can be found at craft stores, cake decorating shops, or ordered online.
- Marshmallow Fluff or Creme: Either marshmallow fluff or marshmallow creme works perfectly here, depending on what’s more readily available in your area. You can also easily order these online. (I personally used the creme for this particular cake).
- Maraschino Cherries: For that classic root beer float garnish, choose maraschino cherries with stems. These are sometimes referred to as cocktail cherries.
- Chocolate Sprinkles: I prefer using jimmies (the long, cylindrical sprinkles) for their texture and appearance, which are distinct from the round, sphere-like non-pareils. They add a nice finishing touch to our root beer float layer cake.
*Refer to the full recipe card below for a complete and precise list of all ingredients and quantities needed.
📖 Creative Variations & Smart Substitutions
This Root Beer Float Layer Cake is wonderfully adaptable! While the original recipe is a tried-and-true favorite, here are some ideas to customize it to your taste and occasion:
- Frosting Customization: My Whipped Cream Buttercream Frosting forms the perfect base for this cake, infused with root beer extract and tinted with brown food coloring. Its light and delicate texture is truly the ideal complement to the rich chocolate root beer cake layers. A fantastic feature of this frosting is its stability; it can be stored at room temperature for up to two months. When you’re ready to use it again, a simple re-whipping with a spatula will restore its wonderful fluffiness.
- Alternative Frosting Options: If you desire a frosting with more pronounced chocolate notes and a subtler root beer flavor, consider using a different frosting. Excellent choices include my 2-Ingredient White Chocolate Whipped Cream Frosting (Ganache) for a luxurious touch, or my rich Chocolate Frosting (without butter) for a deep cocoa experience.
- Root Beer Cupcakes: To transform this recipe into charming root beer float cupcakes, simply fill your cupcake liners with batter and brush only the tops with the root beer syrup after baking. Reduce the baking time significantly to approximately 15 minutes, or until a cake tester inserted into the center of a cupcake comes out clean.
- Elegant Bundt Cake: For a different presentation, pour the entire cake batter into a well-greased bundt cake pan. Bake for 50-60 minutes, or until a cake tester comes out clean. Once cooled, you can drizzle with the root beer syrup and a simplified version of the frosting.
🔪 Step-by-Step Guide: Crafting Your Root Beer Float Layer Cake
Creating this stunning Root Beer Float Layer Cake is a truly rewarding experience. Follow these detailed steps for a perfect result:
PREP WORK: Begin by preheating your oven to 350 degrees F (175 degrees C). Prepare three 8-inch round cake pans by greasing them thoroughly. I highly recommend using Wilton Cake Release for effortless removal. Set these prepared pans aside.
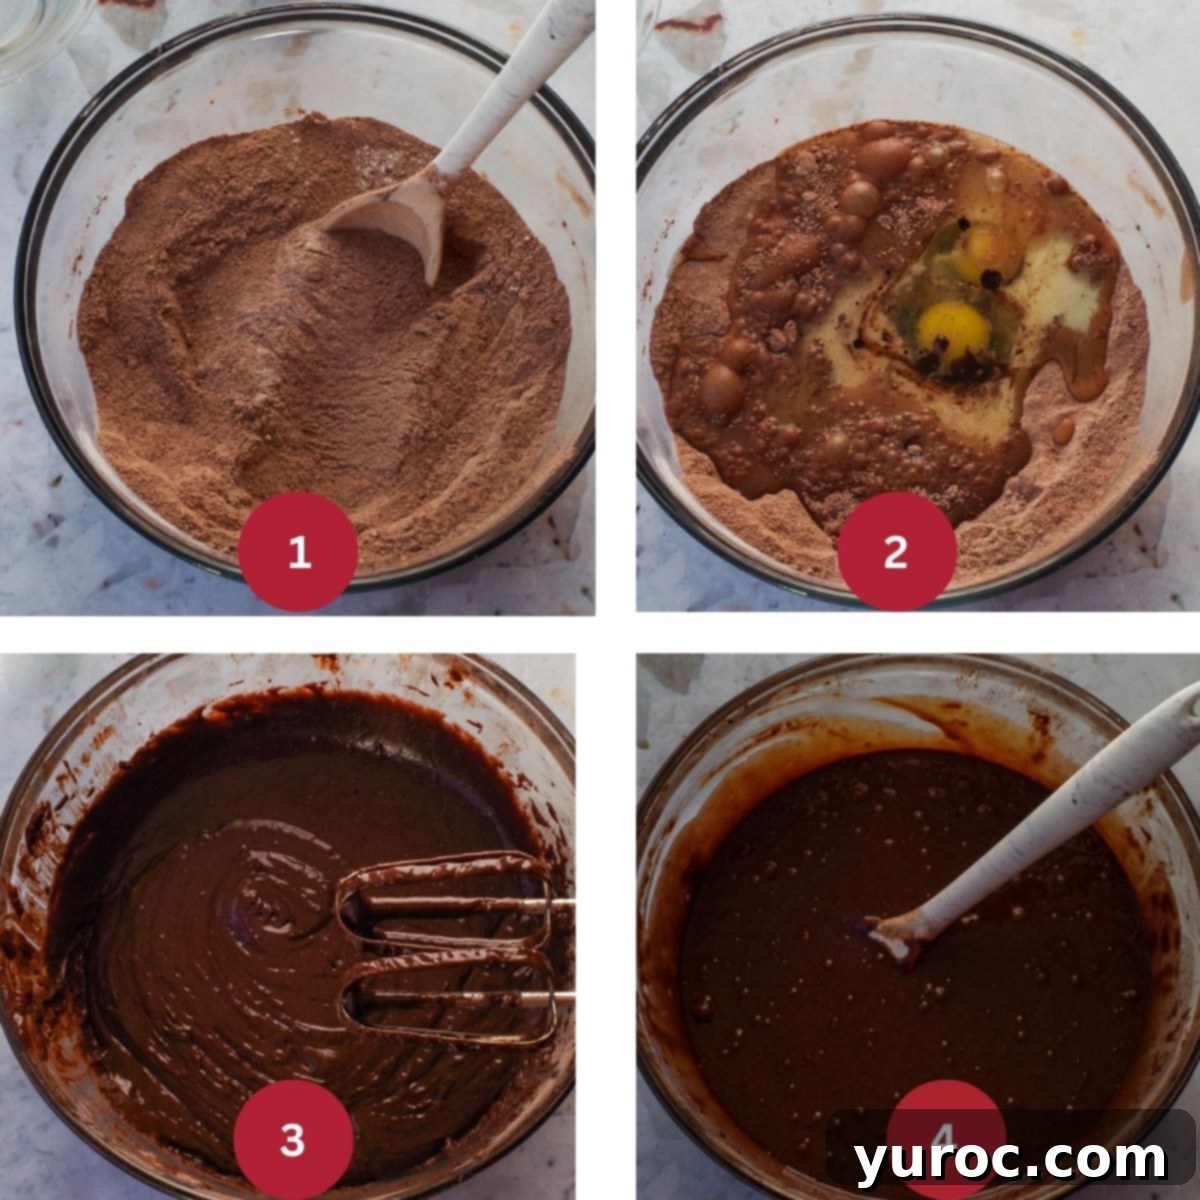
STEP 1: MIX THE CAKE BATTER: In the large bowl of a stand mixer, fitted with the paddle attachment, combine all your dry ingredients: flour, white granulated sugar, cocoa powder, baking powder, baking soda, and salt (IMAGE 1). Mix briefly to ensure they are well combined. Next, add the wet ingredients directly into the flour mixture: eggs, milk, oil, and the concentrated root beer extract (IMAGE 2). Beat the mixture on medium speed for exactly 2 minutes until it’s smooth and well incorporated (IMAGE 3). Finally, slowly pour in the boiling water while continuing to mix for another minute, or until the batter is perfectly combined and appears slightly runny (IMAGE 4). This hot water method helps create an incredibly moist cake.
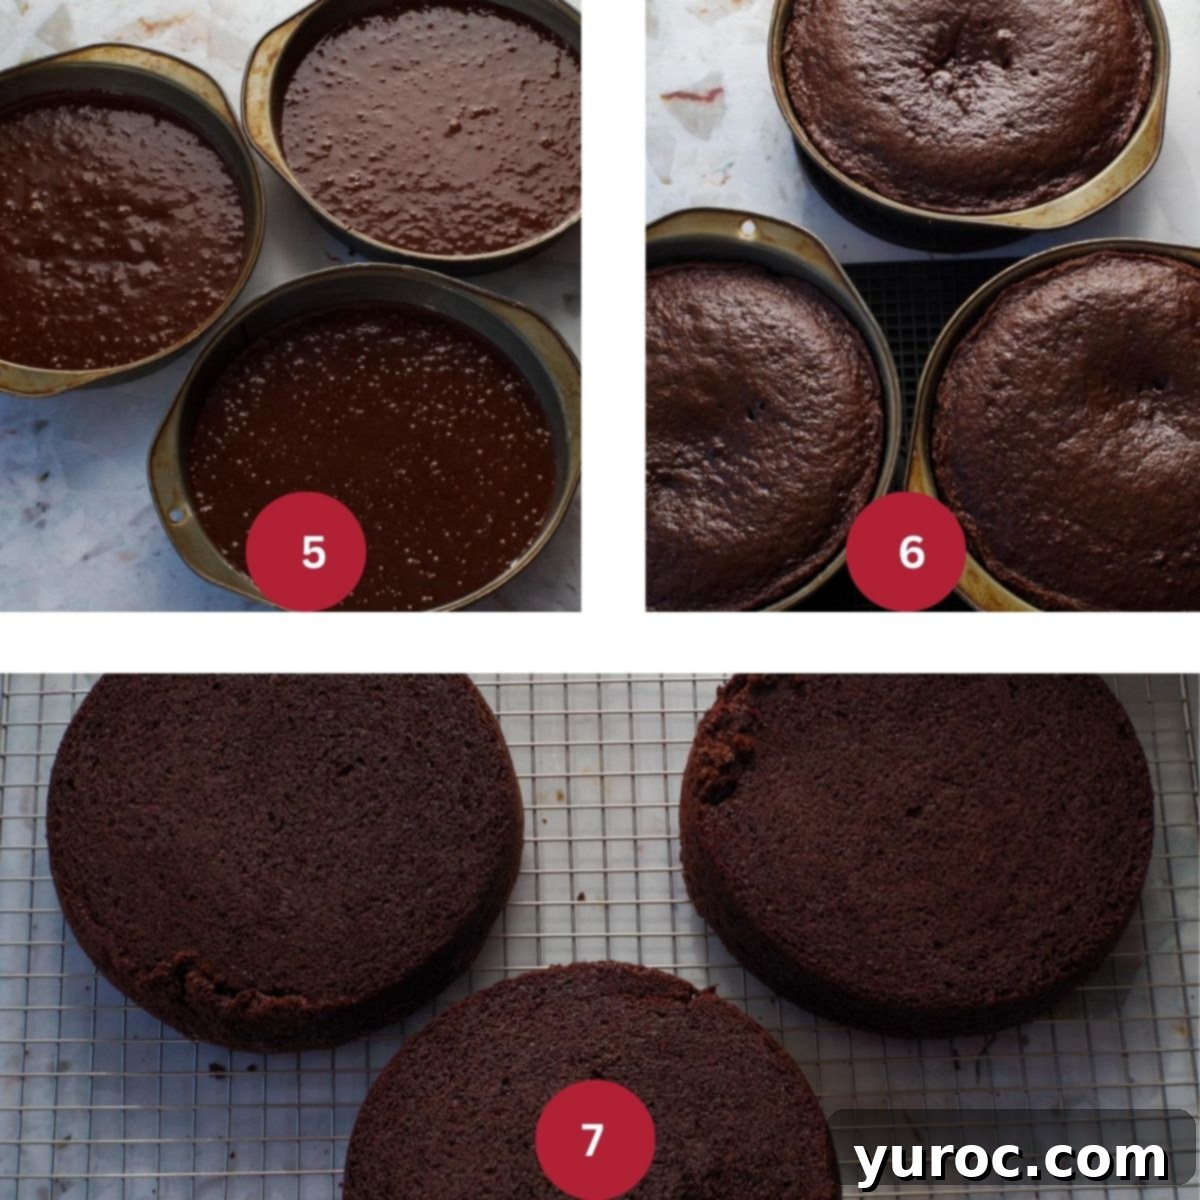
STEP 2: BAKE THE CAKE LAYERS: Divide the prepared cake batter evenly among your three 8-inch cake pans, ensuring each pan is about two-thirds full. Remember, the batter will be somewhat runny, which is completely normal for this recipe (IMAGE 5). Transfer the pans to the preheated oven and bake for approximately 30 minutes. You’ll know the cakes are done when a cake tester (like a toothpick) inserted into the center comes out clean, and/or the top of the cake springs back gently when lightly touched (IMAGE 6). While baking strips can help achieve perfectly flat tops, I often find it simpler to just level the cakes after they cool. Once baked, let the cakes cool in their pans for about 10 minutes before carefully inverting them onto a wire rack to cool completely (IMAGE 7).
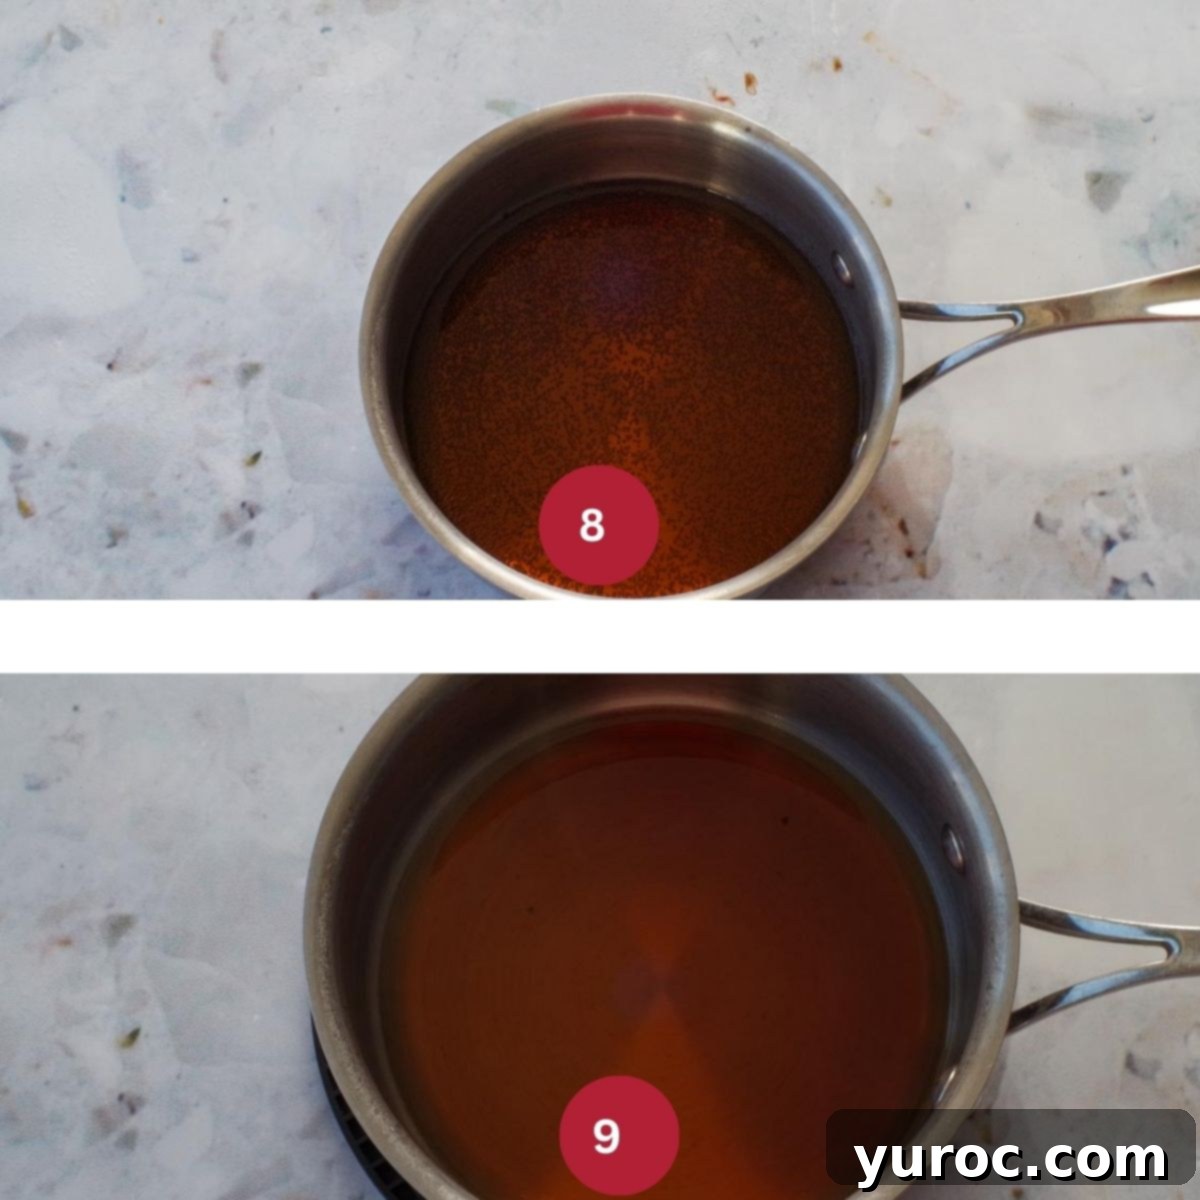
STEP 3: PREPARE THE ROOT BEER SYRUP: While your cake layers are cooling, prepare the root beer syrup. Pour the root beer soda into a heavy-bottomed saucepan (IMAGE 8). Bring it to a boil over medium-high heat, then reduce the heat and let it simmer until the liquid has reduced by half. It will transform into a delightful, concentrated syrupy liquid (IMAGE 9). This reduction intensifies the root beer flavor, making it perfect for brushing onto the cake layers.
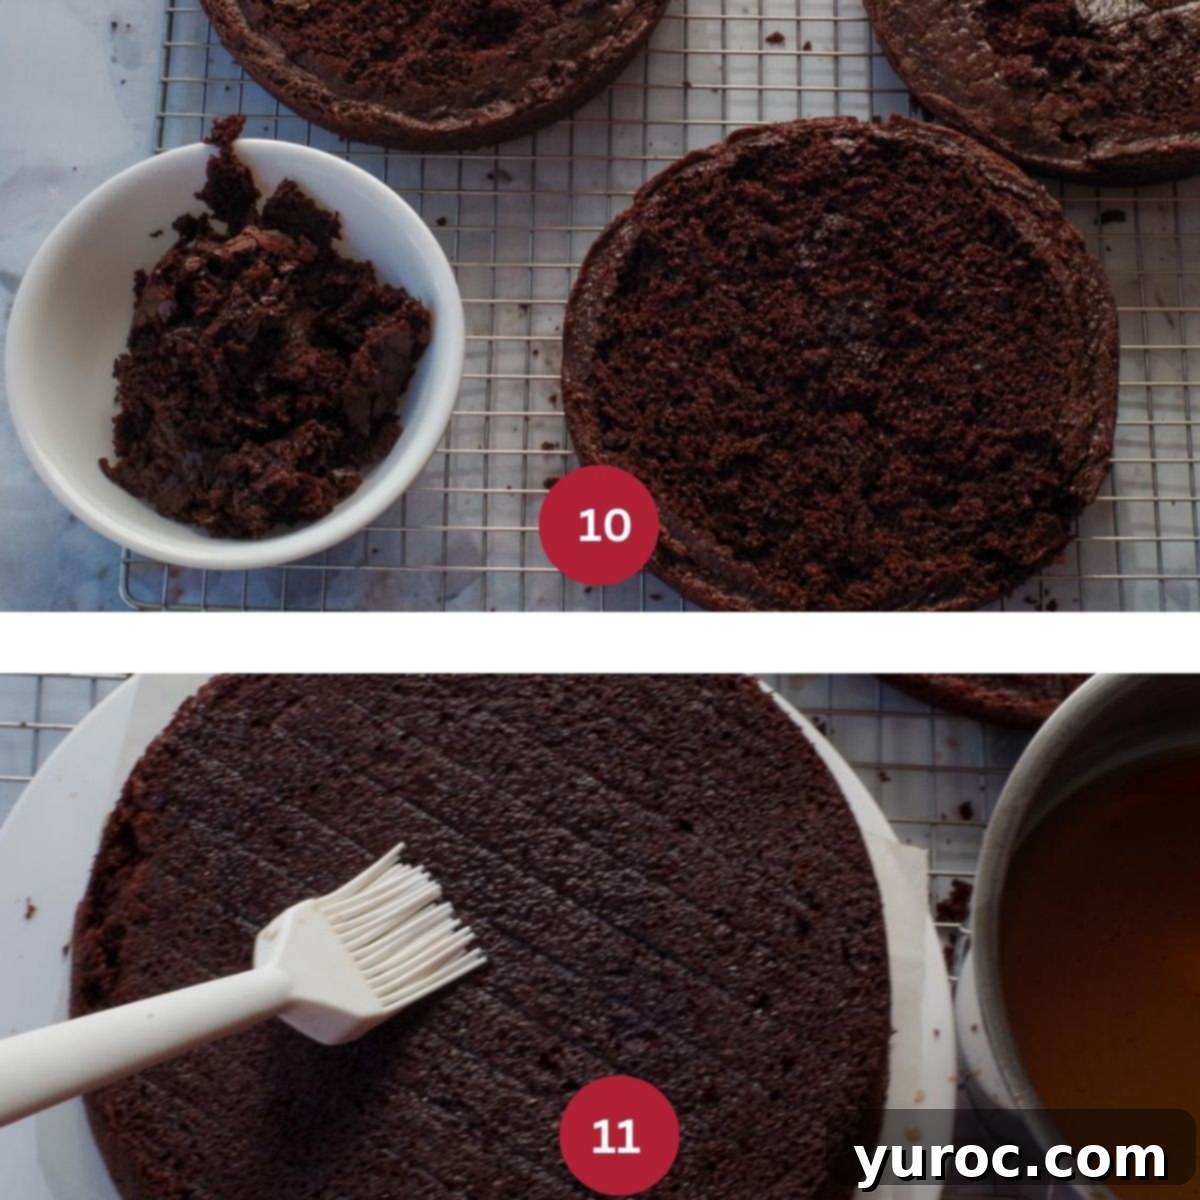
STEP 4: LEVEL AND MOISTURIZE THE CAKE LAYERS: Once the cakes are completely cool, use a sharp serrated knife or a dedicated cake leveler to trim off any domed tops, creating perfectly flat layers (IMAGE 10). This ensures a stable and beautiful finished cake. Next, generously brush each cake layer with the prepared root beer syrup/concentrate (IMAGE 11). The syrup will soak in, adding incredible moisture and an extra boost of root beer flavor. For the best results, cover the brushed cake layers in plastic wrap (or place them in an airtight container) and refrigerate for several hours or even overnight. While not strictly critical if you’re short on time, this chilling period allows the flavors to meld beautifully and makes the layers easier to handle when frosting. If time is a constraint, you can chill them in the fridge while you prepare the frosting, then proceed with decorating.
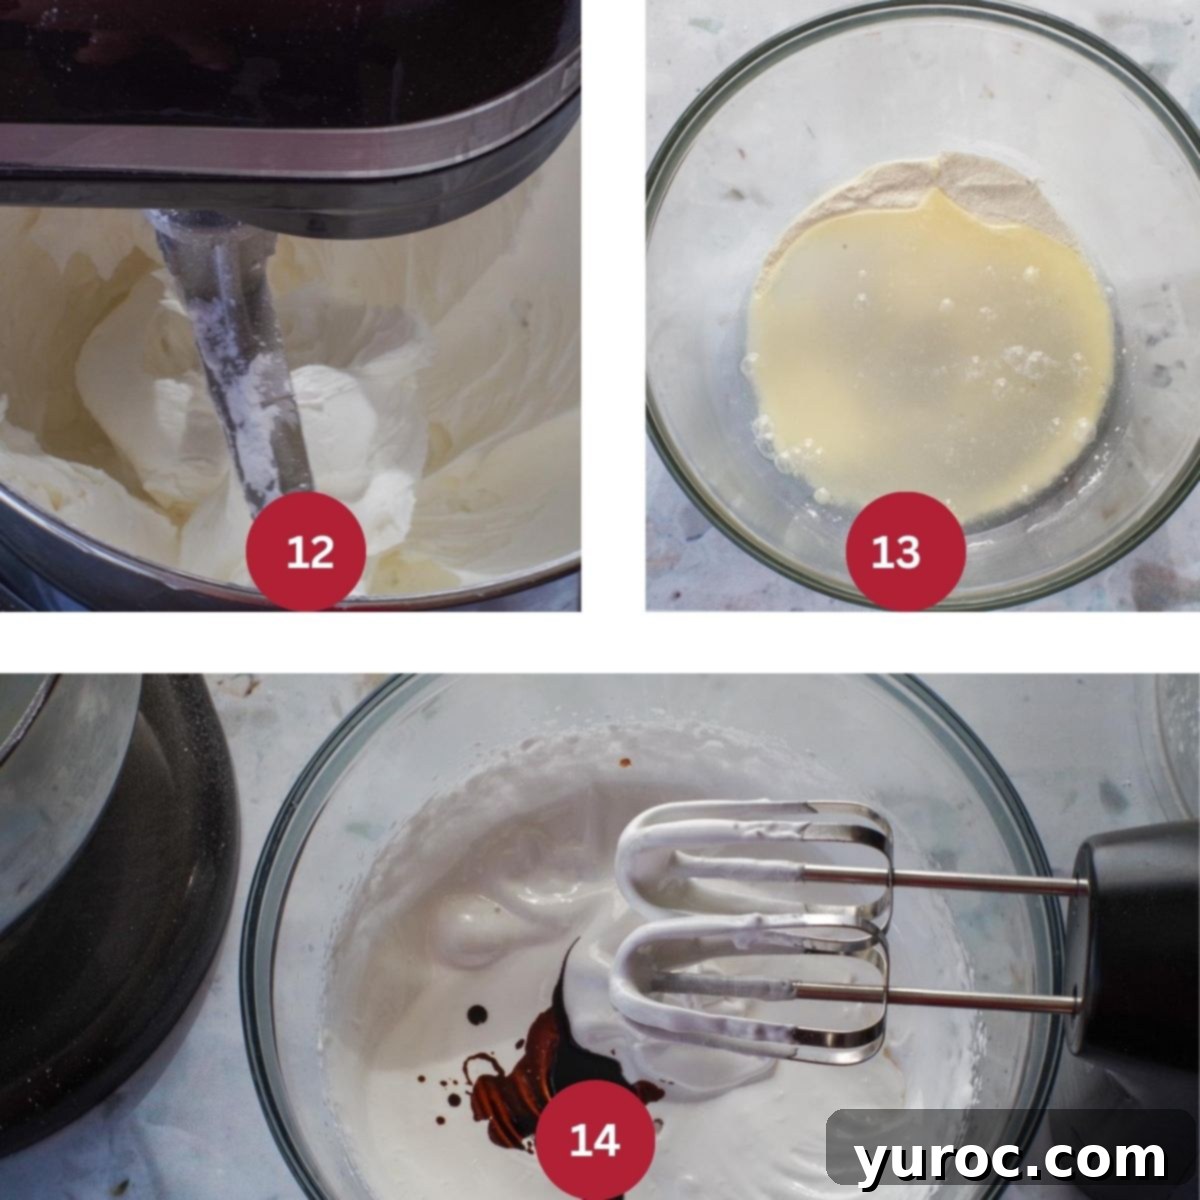
STEP 5: PREPARE THE WHIPPED CREAM BUTTERCREAM FROSTING (PART 1): This frosting is made in two parts for optimal fluffiness. First, place the shortening into the bowl of a stand mixer. Gradually add the sifted powdered sugar. Beat this mixture on medium-high speed for about 5 minutes until it becomes exceptionally creamy, light, and fluffy (IMAGE 12). Transfer this mixture to a separate bowl and set it aside. In a very clean, large stand mixer bowl (ensure it’s free of any grease, which can prevent meringue from whipping), combine the dry ingredients for the second part: granulated sugar, salt, and meringue powder (IMAGE 13). Immediately add the boiling water to this mixture and beat on high speed. Continue beating for approximately 8 minutes, or until stiff, glossy peaks form. As the mixture thickens and begins to stiffen, incorporate the root beer extract (IMAGE 14).
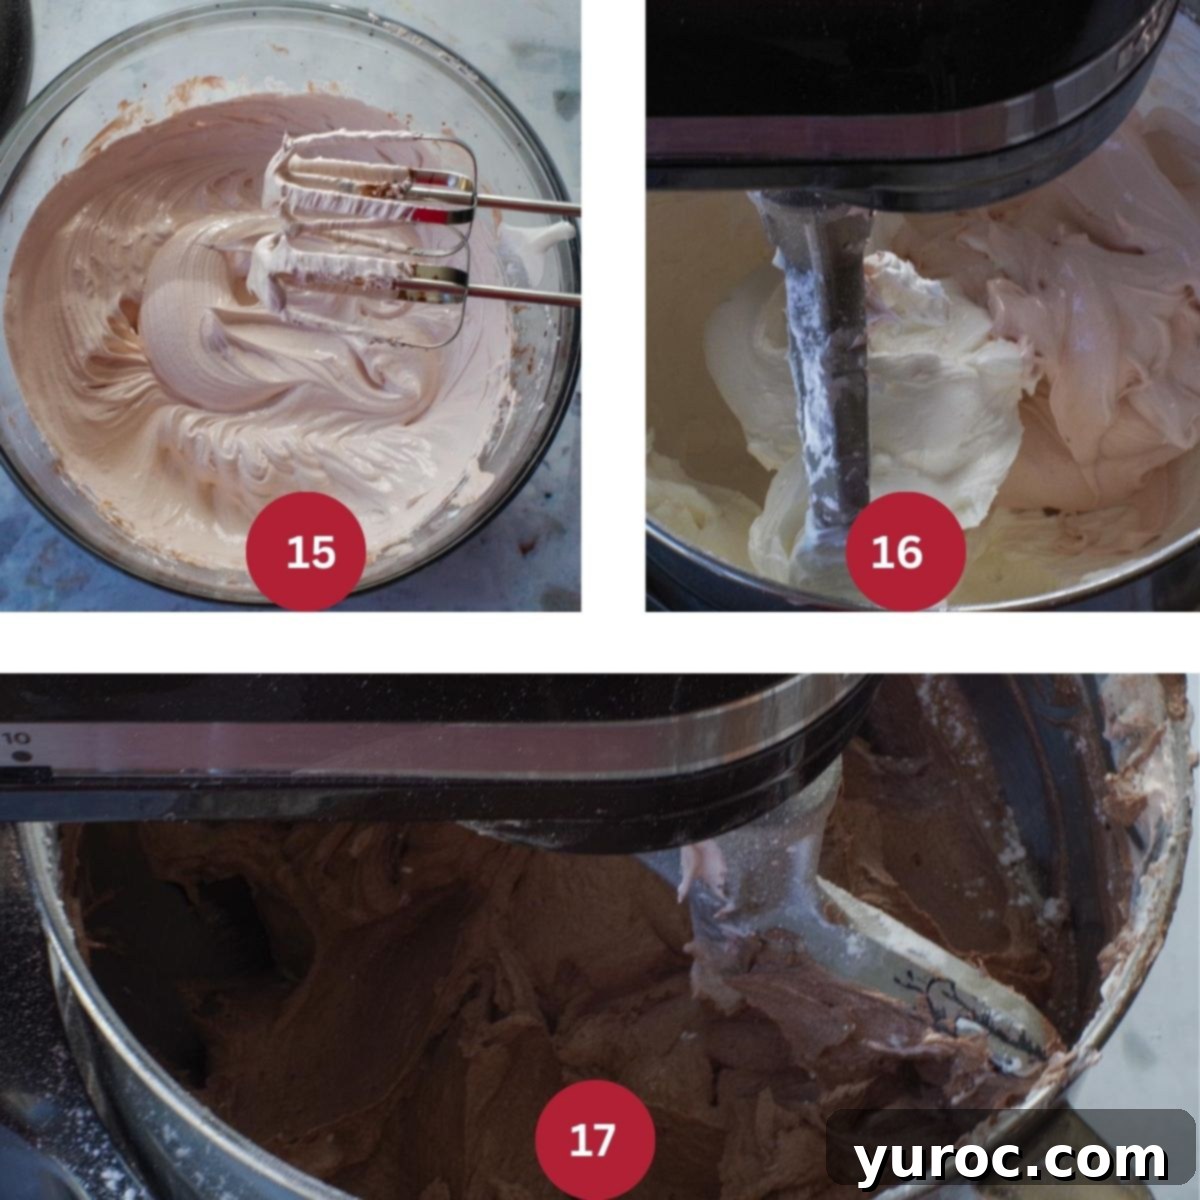
STEP 5: PREPARE THE WHIPPED CREAM BUTTERCREAM FROSTING (PART 2): Continue beating the meringue mixture until the root beer extract is fully combined (IMAGE 15). Now, gently fold the reserved shortening-powdered sugar mixture into the meringue mixture. Return the combined frosting to the stand mixer and beat for another 8 minutes on medium-high speed (IMAGE 16). The resulting frosting will be incredibly light, airy, and creamy. At this point, you can add a few drops of brown gel food coloring to achieve a subtle root beer color, if desired (IMAGE 17). Cover the bowl. It’s crucial: DO NOT REFRIGERATE this frosting, as it performs best at room temperature and maintains its light texture.
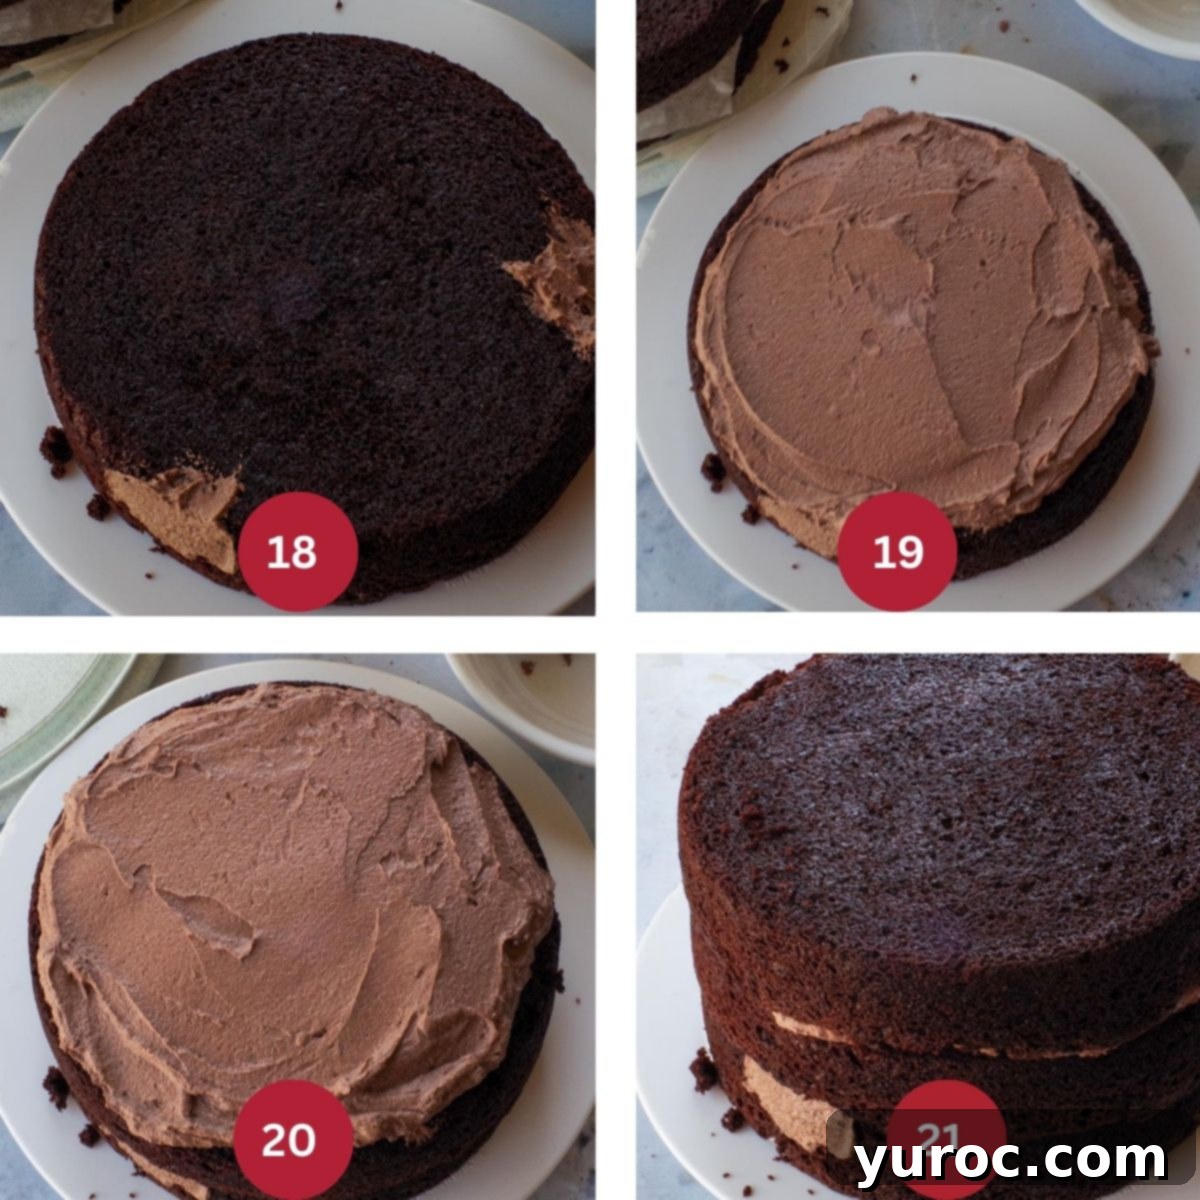
STEP 6: ASSEMBLE AND FILL THE CAKE: Carefully transfer your first cake layer to your chosen cake plate or stand. If any small holes or pieces broke off during removal from the pans, don’t worry! You can easily “patch” them with a bit of frosting to fill the gaps or reattach pieces (IMAGE 18). Spread an even layer of your prepared root beer frosting over the first cake layer (IMAGE 19). Gently place the second cake layer on top, aligning it carefully. Add another generous layer of frosting over the second cake (IMAGE 20). Finally, position the third and final cake layer on top, completing your cake stack (IMAGE 21).
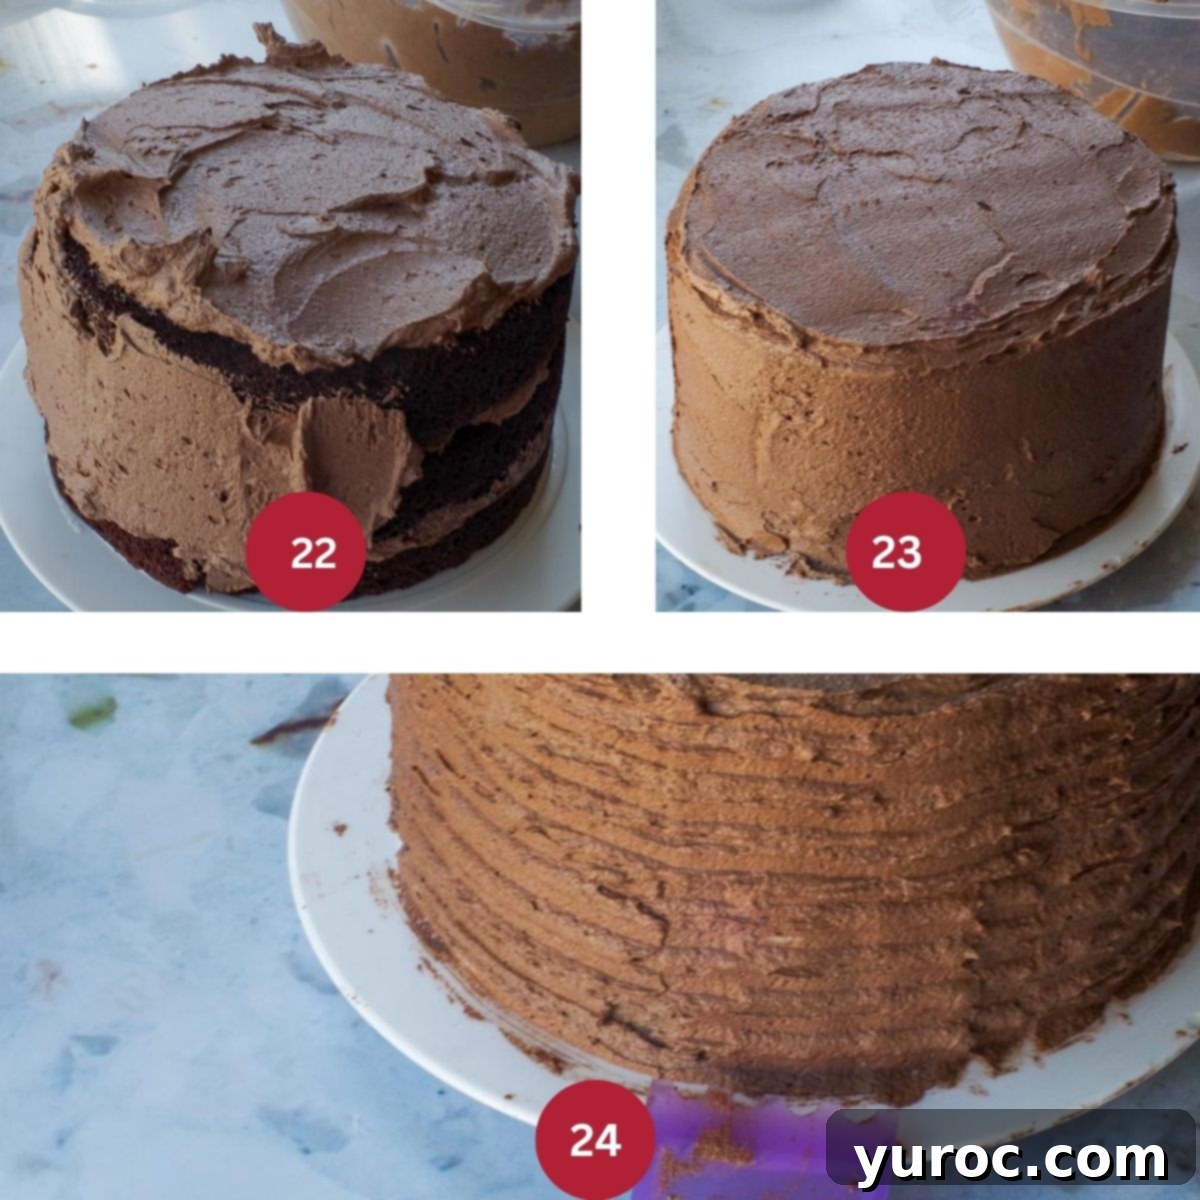
STEP 7: FROST THE CAKE: Before applying the main frosting, use a clean pastry brush to gently brush off any loose crumbs from the cake. For a smooth, crumb-free finish, you can opt for a “crumb coat” (see expert tips below). Apply a thin layer of frosting all over the cake, refrigerate for 15-30 minutes to set, then proceed with the final coat. When applying the main frosting, use a separate bowl for the frosting you’re actively working with to prevent crumbs from contaminating the entire batch (IMAGE 22). Using an offset spatula, spread the frosting from the thickest part outwards, smoothing as you go. For an extra smooth finish, dip your spatula in hot water and dry it before smoothing the cake. Once the cake is fully frosted, run a cake comb along the sides to create a decorative texture (a video demonstration is linked below) (IMAGE 23, 24).
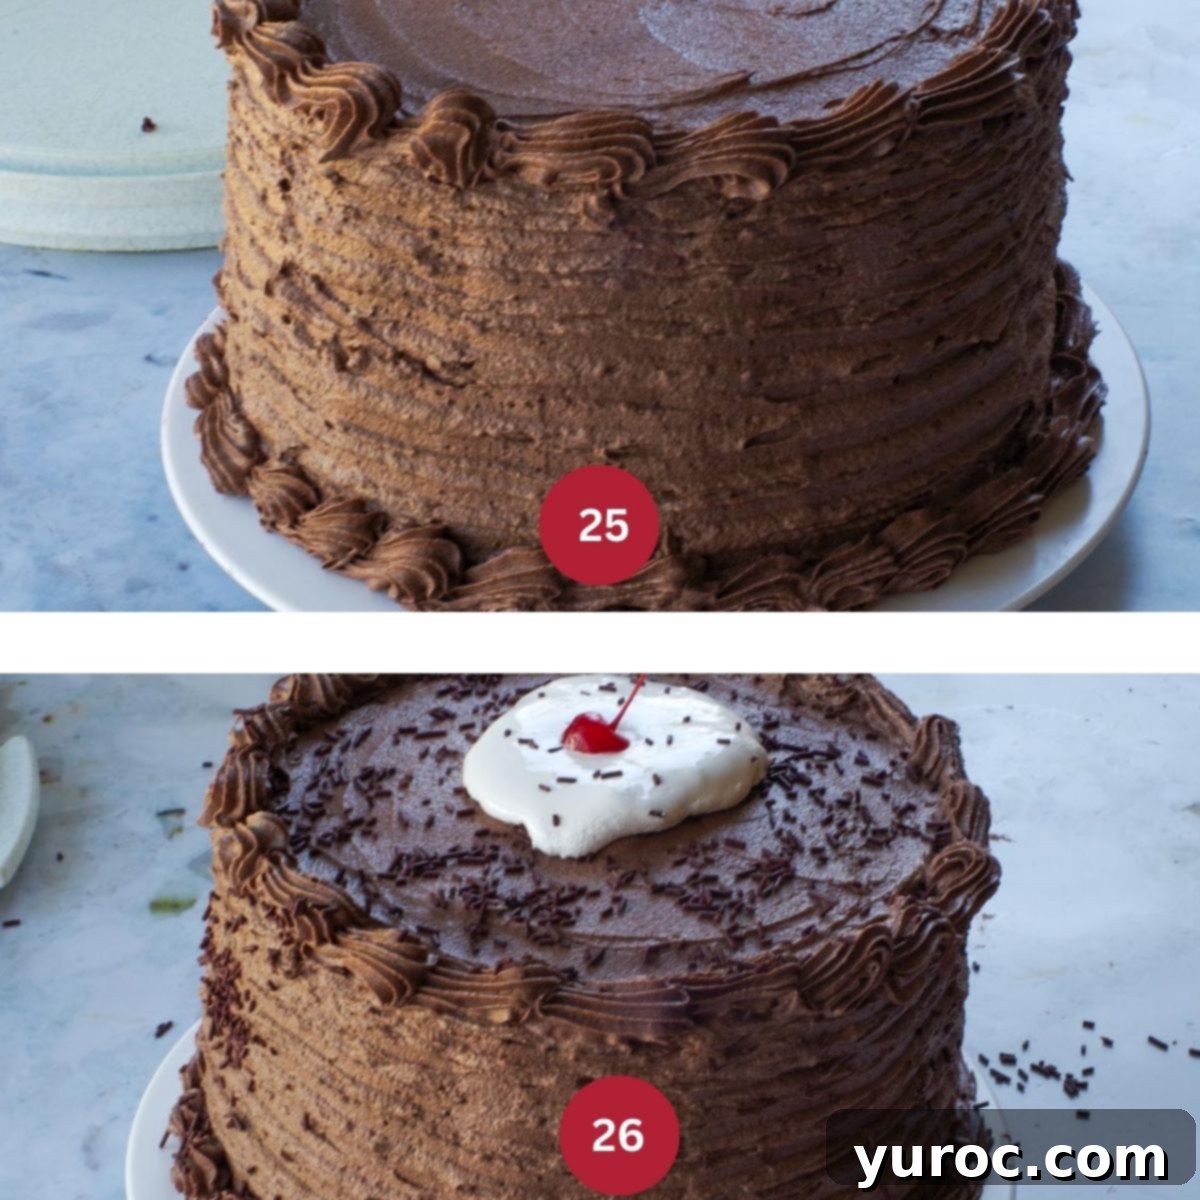
STEP 8: DECORATE YOUR ROOT BEER FLOAT CAKE: To give your cake a polished look, pipe a decorative border along the top edge and around the base using a #21 frosting tip (the top border is optional, but adds a nice touch) (IMAGE 25). For the ultimate root beer float visual, add a generous dollop of marshmallow creme (or fluff) directly in the center of the cake, designed to look like a scoop of melting vanilla ice cream. Crown this with a bright maraschino cherry. Finally, gently toss chocolate sprinkles onto the sides of the cake, or artfully arrange them on top, to complete this delightful root beer cake experience (IMAGE 26). For an truly immersive dessert, I highly recommend serving each slice of this root beer float cake with an extra scoop of vanilla ice cream!
🎥 Helpful Video Tutorials
If you’re new to cake decorating or just want to refine your techniques for this root beer cake, these videos offer excellent visual guidance:
Combing a Cake for Texture: Adding texture to the sides of your cake with a comb is a simple yet effective decorating technique, and it works beautifully on this Root Beer Float Layer Cake. If you’ve never tried it, watch this helpful video: How to ice and comb a cake. *Important Note: Skip the refrigeration part mentioned in the video, as this particular whipped buttercream should NOT be refrigerated!
Mastering a Shell Border: A classic shell border, typically created with a #21 tip, is a popular and elegant way to finish cakes. I use a slightly looser shell border for this design. If you’re unsure how to create this decorative edge, this video will guide you: How to make a shell border with a #21 tip (the demonstration for the #21 tip is the third one in the video).
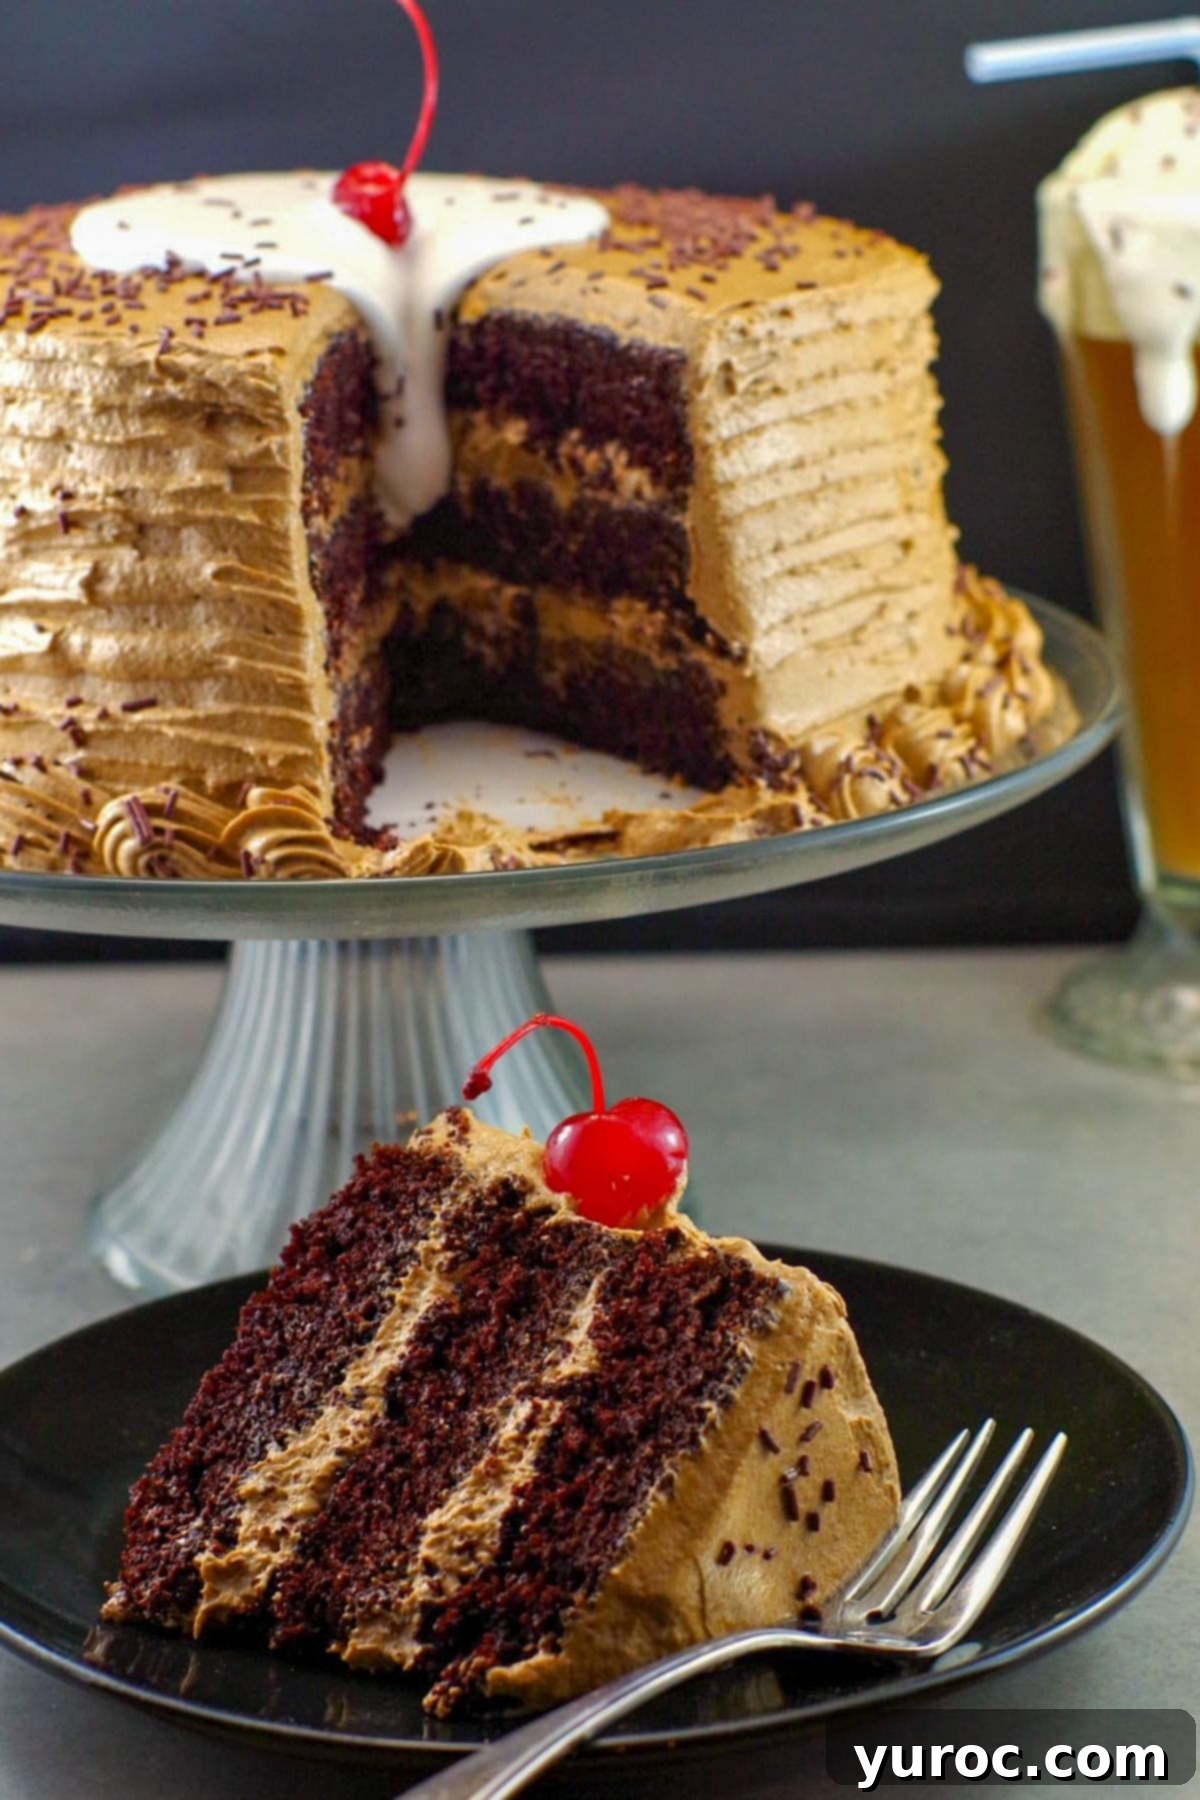
Top Expert Recipe Tips for Root Beer Cake Success
- Embrace Room Temperature Ingredients: This is a golden rule in baking! Ensuring your eggs and milk are at room temperature allows them to emulsify and blend much more smoothly into the cake batter. This leads to a finer, more uniform crumb and an overall lighter, more even-textured root beer cake.
- Select Your Root Beer Wisely: The type of root beer you choose can significantly impact the final flavor of your cake. Avoid diet root beer, as artificial sweeteners can produce an unpleasant aftertaste when baked. Similarly, some root beer brands have very strong wintergreen or licorice notes that can be overpowering. Opt for a classic, well-balanced root beer brand like A&W or Barq’s for the most authentic and delicious root beer float flavor.
- Never Skip the Root Beer Syrup: This step is not just about adding flavor; it’s crucial for the cake’s moistness. Brushing the baked cake layers with the concentrated root beer syrup infuses them with deep flavor and ensures a tender, juicy crumb. If you’re pressed for time, you can prepare the syrup while the cake layers are baking to maximize efficiency.
- Plan Ahead for Optimal Flavor and Texture: For the absolute best results, allow your cake layers to chill overnight in the refrigerator after brushing them with the root beer syrup. This resting period gives the root beer flavors ample time to fully develop and meld with the chocolate, creating a more harmonious taste. Furthermore, chilling firms up the cake layers, making them significantly easier to handle, level, frost, and slice cleanly.
- Whip Your Frosting Thoroughly: Achieving that ultra-fluffy, light-as-air texture in this whipped buttercream frosting requires diligent whipping. Make sure to beat each component thoroughly, especially the meringue powder and sugar mixture. This aeration is where the structure and volume of your frosting truly come from. Don’t rush this step!
- Troubleshooting Runny Frosting: If, for any reason, your frosting appears too soft or runny, don’t despair! You can typically fix this by beating in a bit more sifted powdered sugar, a tablespoon at a time, until the desired consistency is reached. Alternatively, a brief 15-minute chill in the refrigerator can help it firm up. Be cautious about adding more shortening unless absolutely necessary, as too much can result in a greasy texture.
- Master the Crumb Coat: For a flawlessly smooth and professional-looking finish on your Root Beer Float Layer Cake, a crumb coat is your secret weapon. Apply a very thin layer of frosting all over the cake first – this will trap any loose crumbs. Chill the cake in the refrigerator for 15-30 minutes to set this layer, then proceed with applying your final, thicker coat of frosting. This ensures a pristine, crumb-free exterior.
- Do Not Refrigerate This Frosting (Once Made): Unlike many butter-based frostings, this shortening-based whipped buttercream is designed to be stable at room temperature and actually performs best when not refrigerated. Chilling it can cause it to become hard, stiff, and lose its signature fluffy, delicate texture.
- Decorate Marshmallow Fluff Just Before Serving: If you’re using marshmallow fluff or creme to create the “melted ice cream” effect on top of your root beer cake, I recommend applying it closer to the time of serving. While delicious, marshmallow fluff can slowly slide or absorb into the frosting over extended periods, potentially diminishing its visual appeal.
👪 Serving Size & Adjustments
This Root Beer Float Layer Cake recipe yields one impressive 8-inch, 3-layer cake, perfectly sized to serve approximately 14 people. Of course, the exact number of servings will depend on how generously you slice each piece. For your convenience, you can easily adjust the recipe’s quantities: simply click on the serving number in the recipe card below and select your desired number of servings. The ingredient amounts will automatically adapt to your chosen yield.
🥗 What to Serve with Your Root Beer Float Cake
This delightful Root Beer Float Cake is an absolute standout for any summer birthday celebration or festive occasion, particularly perfect for Father’s Day! Its nostalgic flavors make it a versatile dessert that pairs wonderfully with a variety of meals. Consider serving it after a casual summer BBQ, alongside delicious options like Pulled Pork on a Bun, or a refreshing Grilled Steak Salad (as shown in the image below) for a lighter, yet satisfying, contrast.
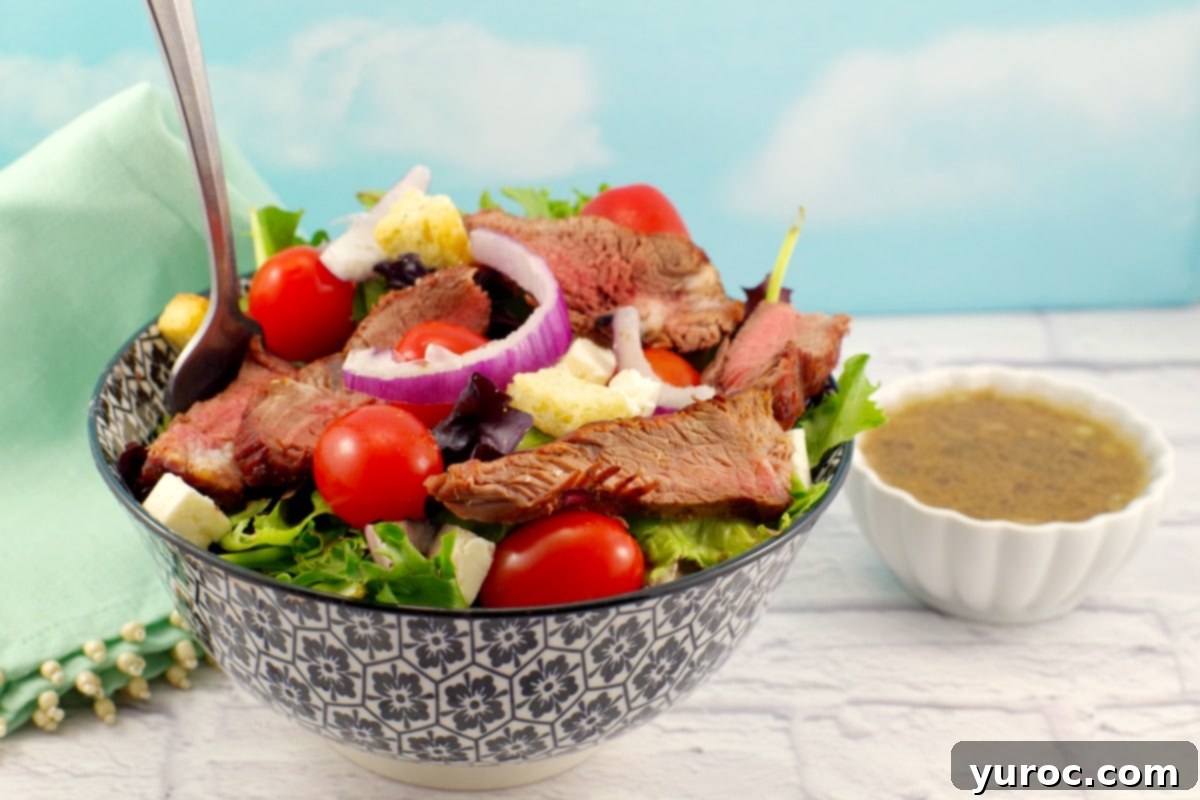
Beyond casual fare, this decadent root beer cake also complements more special birthday dinners beautifully. Imagine concluding a meal of comforting Baked Beef Cannelloni or a rich, make-ahead Make-Ahead Lasagna (with no-boil noodles) with a slice of this unique dessert. The sweet, nostalgic flavor of the root beer cake provides a fantastic balance to savory main courses, creating a truly memorable dining experience.
🌡️ Storage Guidelines for Your Root Beer Float Cake
Proper storage is key to enjoying your delicious Root Beer Float Layer Cake for as long as possible:
- Room Temperature Storage: This layer cake, thanks to its stable shortening-based frosting, can be stored in an airtight container at room temperature for up to 2 days. For longer preservation, freezing is recommended.
- Freezing Leftovers: Any leftover slices or the entire cake can be frozen. Place slices in a sealed, freezer-safe container for up to 3 months. For your convenience, you can even freeze this cake FULLY DECORATED in a sealed extra-large cake carrier (affiliate link) for up to 1 month. When you’re ready to enjoy it again, simply defrost the cake at room temperature. The frosting holds up beautifully to freezing and thawing!
❔ Recipe FAQs for Your Root Beer Float Cake
While a stand mixer, especially with a paddle attachment, is indeed ideal for this recipe – particularly for achieving the perfect light and fluffy texture of the frosting – it’s not strictly mandatory. If you don’t own a stand mixer, a powerful hand mixer can certainly work, though you should be prepared for longer mixing times to reach the desired creamy and airy consistency. If you only have one mixer, you’ll need to allocate extra time for making the frosting in separate batches. A crucial tip: ensure your beaters are thoroughly cleaned between whipping the shortening mixture and the meringue mixture. Any residual grease from the shortening can prevent the meringue from whipping up properly into stiff peaks.
The root beer syrup is ready when it has noticeably reduced its original volume by about half. You’ll observe a change in consistency: it will be thicker than the original soda and should lightly coat the back of a spoon. It will also have a more intense, concentrated root beer aroma. It’s important to avoid over-reducing the syrup, as it can become too thick, overly sticky, or even crystallize, which wouldn’t provide the desired moistness and flavor when brushed onto the cake layers.
Absolutely! This versatile root beer cake batter can easily be adapted for a sheet cake. Instead of dividing it into three 8-inch round pans, simply pour the entire batter into a single 9×13-inch baking pan. Bake it at the same oven temperature (350°F/175°C) for a slightly longer duration, typically 35-40 minutes, or until a wooden skewer or toothpick inserted into the center of the cake comes out clean. Keep in mind that you might not require as much frosting for a single-layer sheet cake as you would for a three-layer stacked cake.
Yes, this root beer cake is an excellent candidate for making ahead, which is a huge advantage given its multi-step process! You can bake the cake layers up to two days in advance. Once baked and brushed with the root beer syrup, tightly wrap each layer in plastic wrap and refrigerate. The frosting can also be prepared in advance; just store it in a covered container at room temperature. Before assembly, give the frosting a good stir or a quick whip with a spatula to restore its fluffy texture. Because this cake involves several components and steps, I frequently prepare it in stages over two days to make the process more enjoyable and less rushed.
While technically possible to use butter, it’s not recommended for this specific frosting recipe if you want to achieve the exact light, fluffy, and stable texture described. Shortening creates a much whiter, lighter frosting that holds up better at room temperature, especially in warmer climates or for cakes that will sit out. Butter will result in a denser, richer frosting that is more prone to melting or softening and will require refrigeration.
If you’re seeking the ultimate happy birthday cake or a unique dessert that evokes nostalgic memories, this Root Beer Float Layer Cake is truly it!
And for more fantastic Father’s Day cake ideas or other decadent treats, be sure to try my rich Chocolate Guinness Cake with Chocolate Irish Cream Frosting!
🍰 More Irresistible Cake Recipes!
- Red Velvet Ice Cream Cake Recipe
- Birthday Cake Cheesecake (No Bake)
- Chocolate Genoise Sponge Cake (with summer berries)
- Cookie Dough Ice Cream Cake (Dairy Queen Copycat)
Comments & Reviews
Did you know that leaving comments and rating recipes is one of the most impactful ways to support your favorite recipe creators? If you absolutely loved making and enjoying this Root Beer Float Layer Cake, please take a moment to comment and rate it in the recipe card below. We’d also be thrilled if you shared photos of your creation on social media using the hashtag #foodmeanderings or by tagging @foodmeanderings! Your feedback helps us continue to share delicious recipes like this one.
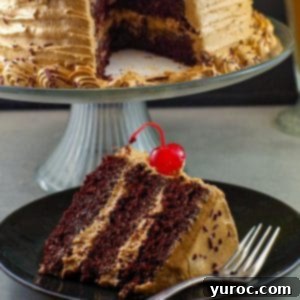

🎂 Root Beer Float Layer Cake Recipe
Print Recipe
Pin
Save RecipeSave Recipe
Rate
Add to Shopping ListGo to Shopping List
Equipment
-
stand mixer
-
8 inch layer cake pans
-
pastry bag
-
couplers
-
large cake comb
-
#21 icing tip optional
Ingredients
For the Root Beer Chocolate Cake:
- 2 cups granulated sugar
- 1 ¾ cup all-purpose flour
- ¾ cup unsweetened cocoa powder
- 1 ½ teaspoon baking powder
- 1 ½ teaspoon baking soda
- ¾ teaspoon salt
- 1 cup milk, at room temperature
- ½ cup canola oil
- 2 large eggs, at room temperature
- 2 tablespoon root beer extract *I use 2 bottles of Lorann’s concentrated root beer extract
- 1 cup boiling water
- 1 cup root beer soda (not diet)
For the Whipped Cream Buttercream Frosting:
Part 1 (Shortening Base):
- 1 lb. powdered sugar (sifted)
- 2 ½ cups shortening * I use Crisco or Tenderflake for best texture
Part 2 (Meringue Base):
- ¾ cup white granulated sugar
- ½ teaspoon salt
- 3 tablespoon meringue powder
- ½ cup (less 2 tbsp) boiling water
- 1-2 teaspoon Brown gel food coloring (optional) I use Wilton icing coloring- you may need more, depending on what brand you use
- 1 tablespoon root beer extract *I used 1 bottle of Lorann’s concentrated root beer extract (pictured in ingredients section)
For Garnish:
- 1 maraschino cherry (with stem)
- 2-3 tablespoon marshmallow fluff/creme
- 1-3 tablespoon chocolate sprinkles (jimmies preferred), add as many as you desire
Instructions
-
Preheat oven to 350 degrees F (175 degrees C). Prepare three 8-inch cake pans by greasing and flouring, or by using a baking spray like Wilton Cake Release (https://amzn.to/3mh24FK -affiliate link). Set aside.
-
In the bowl of a stand mixer with the paddle attachment, combine the dry ingredients: granulated sugar, all-purpose flour, unsweetened cocoa powder, baking powder, baking soda, and salt. Mix briefly to combine.2 cups granulated sugar, 1 ¾ cup all-purpose flour, ¾ cup unsweetened cocoa powder, 1 ½ teaspoon baking powder, 1 ½ teaspoon baking soda, ¾ teaspoon salt
-
To the flour mixture, add the room temperature eggs, milk, canola oil, and root beer extract. Beat on medium speed for 2 minutes until well combined.1 cup milk, ½ cup canola oil, 2 large eggs, 2 tablespoon root beer extract
-
Slowly pour in the boiling water while continuing to mix for another minute, or until the batter is thoroughly combined and appears slightly runny.1 cup boiling water
-
Divide the cake batter evenly among the three 8-inch prepared cake pans, filling each approximately two-thirds full. The batter will be slightly runny, which is normal.
-
Bake for about 30 minutes, or until a cake tester inserted into the center comes out clean and/or the tops of the cakes spring back when lightly touched. Allow cakes to cool in their pans for 10 minutes before carefully inverting them onto a wire rack to cool completely.
-
While the cakes are cooling, prepare the root beer syrup. Pour the root beer soda into a heavy saucepan. Bring to a boil, then reduce heat and simmer until the liquid has reduced by half, forming a syrupy concentrate. Brush the warm cake layers generously with this root beer concentrate and allow them to finish cooling.
Once cool, wrap each cake layer individually in plastic wrap and refrigerate for several hours or overnight for best flavor development and easier handling. This step is highly recommended for optimal results, though not strictly critical if you’re short on time.
1 cup regular root beer soda (not diet)
For the Whipped Cream Buttercream Frosting:
Part 1 (Shortening Base):
-
In the bowl of a stand mixer, place the shortening and gradually add the sifted powdered sugar. Beat for about 5 minutes until the mixture is very creamy, light, and fluffy. Set this mixture aside in a separate bowl.2 ½ cups shortening, 1 lb. powdered sugar (sifted)
Part 2 (Meringue Base):
-
In a very clean, large stand mixer bowl, combine the dry ingredients for this part: white granulated sugar, salt, and meringue powder. Add the BOILING water immediately and begin mixing on high speed.¾ cup white granulated sugar, ½ teaspoon salt, 3 tablespoon meringue powder, ½ cup (less 2 tbsp) boiling water
-
Continue beating until stiff, glossy peaks form, which typically takes about 8 minutes. Once the mixture starts to stiffen, add the concentrated root beer extract.1 tablespoon root beer extract
-
Now, combine both the shortening mixture (Part 1) and the meringue mixture (Part 2) in the stand mixer bowl. Beat them together for another 8 minutes until the frosting is exceptionally light, creamy, and uniform. If desired, add 1-2 teaspoons of brown gel food coloring to achieve a subtle root beer hue. Cover the frosting. Important: DO NOT REFRIGERATE this frosting, as it is designed to be stable at room temperature.1-2 teaspoon Brown gel food coloring (optional)
-
This frosting can be stored at room temperature for up to 1 month in an airtight container. Before each use, simply whip it vigorously with a spoon or spatula to restore its characteristic fluffiness. This recipe yields enough frosting to generously ice one 3-layer, 8-inch cake.
Assembly & Garnish:
-
Transfer the cooled, syrup-brushed cake layers to your chosen cake plate or stand. Stack and fill the cake layers evenly with frosting, then proceed to frost the entire cake. For a decorative finish, run a cake comb along the sides (refer to the video tutorial linked above for guidance). Optionally, pipe a decorative shell border along the top and bottom edges using a #21 icing tip.
-
To complete the root beer float aesthetic, add a dollop of marshmallow fluff or creme to the center of the cake. Place a maraschino cherry (with stem) on top of the marshmallow fluff, and then sprinkle generously with chocolate sprinkles around the edges or over the entire top.1 maraschino cherry, 2-3 tablespoon marshmallow fluff/creme, 1-3 tablespoon chocolate sprinkles
-
For the ULTIMATE root beer float dessert experience, I highly recommend serving each slice of this cake with a scoop of creamy vanilla ice cream on the side!
Notes
- Use room temperature ingredients. Bringing your eggs and milk to room temperature helps them incorporate more easily into the batter, resulting in a smoother, more even-textured cake.
- Choose the right root beer. Avoid using diet root beer or brands with strong wintergreen or licorice notes, as they can give the cake an off-putting flavor. A classic, well-balanced root beer works best (e.g., A&W or Barq’s).
- Don’t skip the syrup step. Brushing the layers with root beer syrup not only boosts flavor but also adds critical moisture. If you’re short on time, you can make the syrup while the cakes bake to save a few minutes.
- Make ahead for best flavor. Allowing the cake to chill overnight after brushing with syrup gives the flavors time to develop and helps the cake firm up for easier frosting and slicing.
- Whip the frosting well. To get the ultra-fluffy texture in the whipped buttercream, be sure to beat each part thoroughly, especially the meringue powder and sugar mixture-this is where the structure comes from.
- Fix a runny frosting. If your frosting is too soft or runny, beat in a bit more powdered sugar or chill it for 15 minutes. Avoid adding more shortening unless necessary, as it can make it greasy.
- Crumb coat for a smooth finish. Apply a thin layer of frosting first to catch crumbs, chill for 15-30 minutes, then add your final coat. This gives you a cleaner, more polished result.
- Don’t refrigerate the frosting. This frosting is stable at room temperature and actually performs best unrefrigerated. Refrigerating it can make it hard and dull the fluffiness.
- Decorate just before serving (optional). If using marshmallow fluff for the “melted ice cream” effect, apply it closer to serving time for the best visual appeal, as it may slowly slide or absorb into the frosting over time.
Helpful Video Tutorials:
Combing a cake: Combing a cake is a very simple decorating technique, and it works very well on this root beer cake. If you’ve never done it, then check out this video: How to ice and comb a cake. *skip the refrigeration part, as this whipped buttercream should NOT be refrigerated!
Making a Border: A shell border is what you’ll typically see used on cakes, using a #21 tip. I make a loose shell border. If you are not sure how to do a shell border, then check out this video: How to make a shell border with a #21 tip (it’s the 3rd one).
Nutrition Information
