No Bake Strawberry Rhubarb Cheesecake: Easy, Creamy, and Perfect for Summer
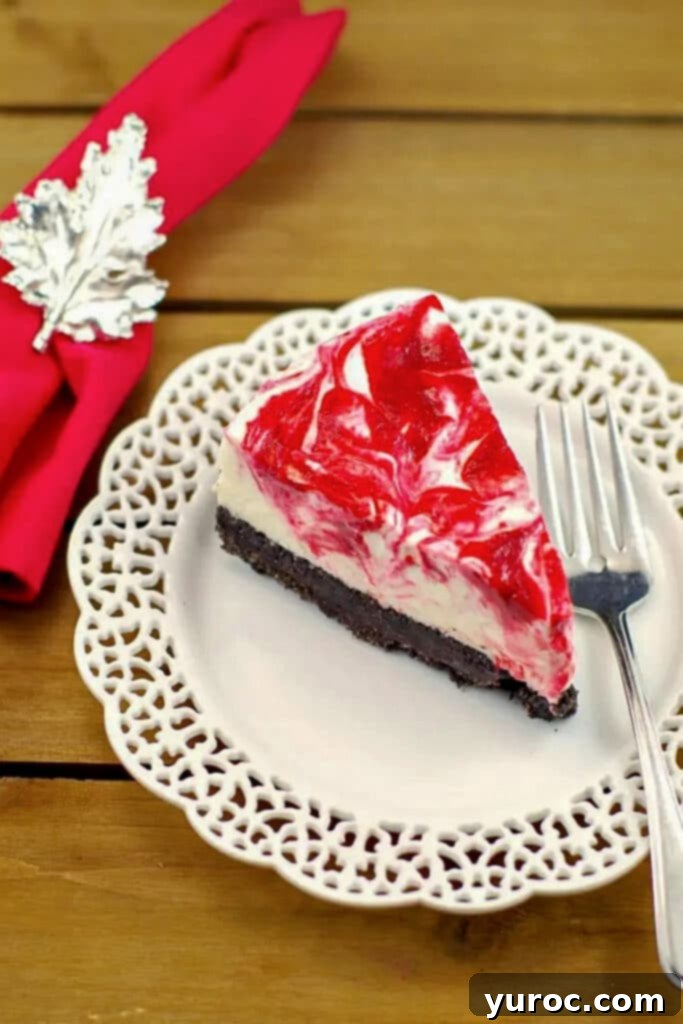
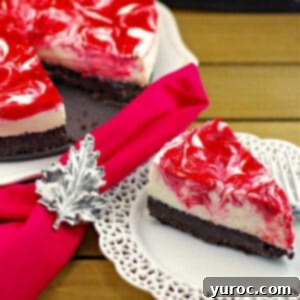
Recreate cherished summer memories with this delightful No Bake Strawberry Rhubarb Cheesecake! It’s a lighter, refreshing dessert that perfectly balances sweet and tart flavors. This cheesecake features a rich dark chocolate crust, a creamy white chocolate filling, and a beautiful swirl of vibrant red rhubarb and strawberries. A subtle hint of licorice from fennel adds an unexpectedly delicious twist, elevating this dessert beyond the ordinary. The best part? You won’t even need to turn on your oven, making it an ideal treat for warm weather gatherings or simply when you crave something special without the fuss.
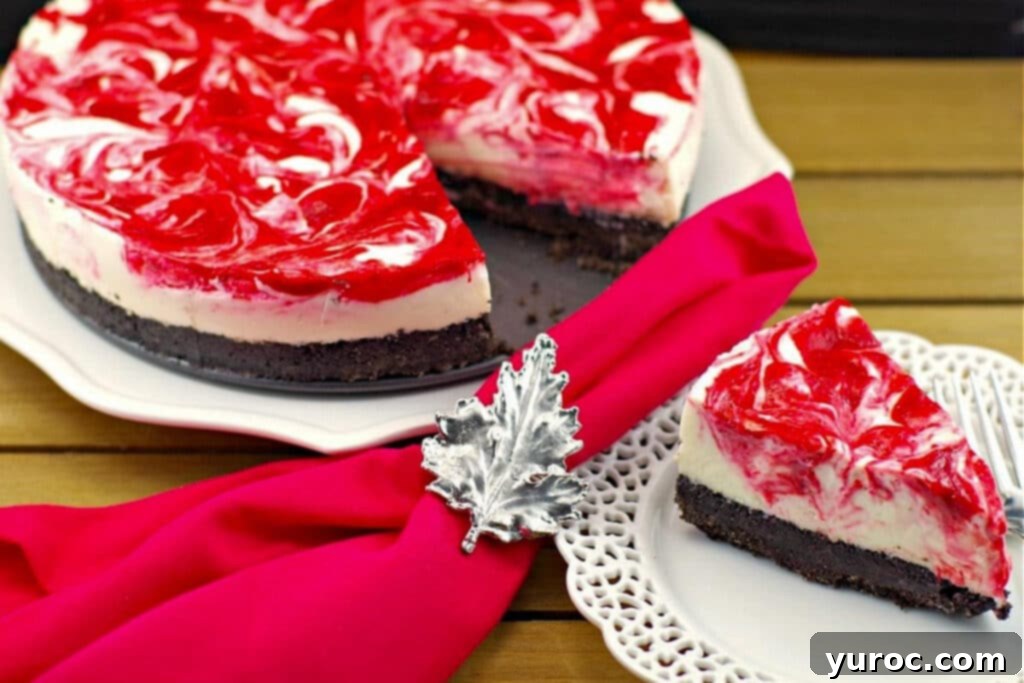
This no-bake rhubarb cheesecake is a quintessential summer dessert, perfectly suited for the peak of rhubarb season. However, its versatility means you can enjoy it year-round by simply using fresh or frozen rhubarb. For those in Canada, this striking red and white dessert makes an absolutely perfect centerpiece for your Canada Day celebrations. This recipe evolved from my popular Skinny Pumpkin Cheesecake and inspired my equally delicious No Bake Rhubarb Cream Cheese Bars, showcasing the endless possibilities with no-bake desserts!
The Timeless Charm of Rhubarb: A Nostalgic Ingredient
Rhubarb holds a special place in the hearts of many, evoking fond memories of childhood summers. I come from a lineage of passionate gardeners, with my Baba, Grandma, and Aunt all cultivating thriving plots where they found immense joy. Even my mother, who discovered her green thumb later in life, consistently grew rhubarb during my younger years. Back in the 1970s, it felt like nearly every yard in Manitoba had a patch of rhubarb, whether intentionally planted or not – it simply thrived, a testament to its hardy nature.
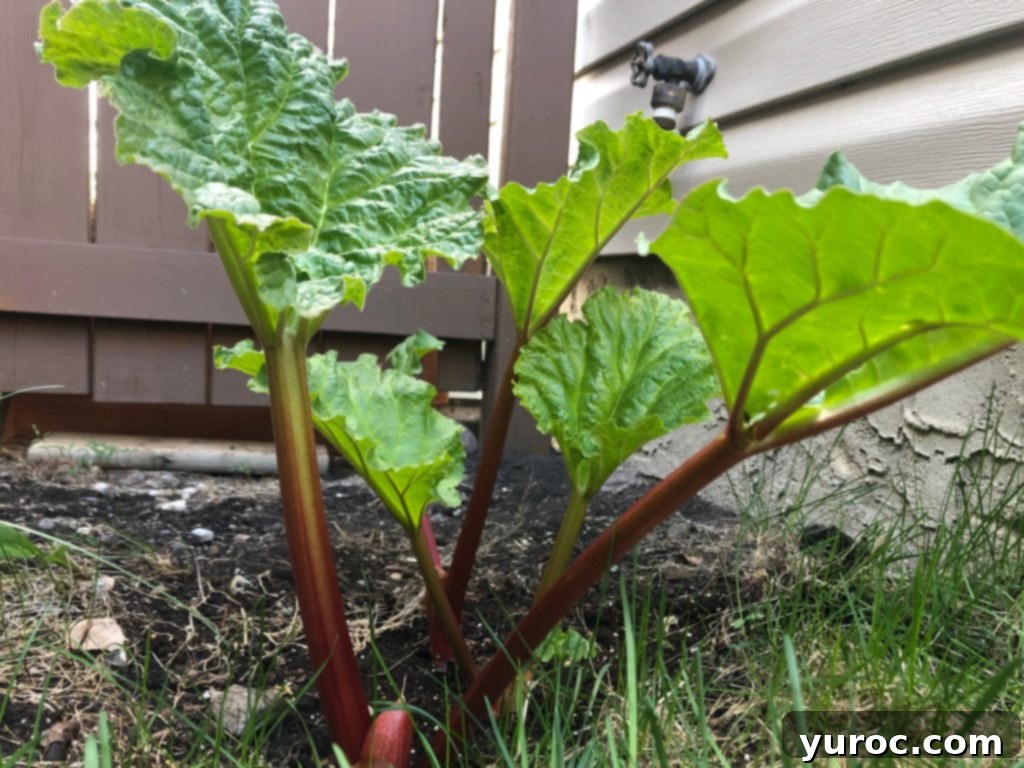
I always dreamed of having my own rhubarb plant, but city life in Calgary presented different challenges compared to the wild growth I remembered in Manitoba. Finally, a few years ago, I planted some, and I’m now reaping the delicious benefits! Despite getting two harvests each season, I still find myself wishing for even more of this wonderfully tart stalk, a clear sign of how much I adore its unique flavor in desserts. Rhubarb, though botanically a vegetable, is legally and culinarily considered a fruit due to its common use in sweet dishes. It’s low in calories and a good source of Vitamin K, making it a surprisingly healthy addition to your diet.
If you share my love for rhubarb, you’ll definitely want to explore my other popular rhubarb recipes. Each offers a unique way to enjoy this seasonal favorite: Rhubarb Squares, Rhubarb Meringue Torte, Rhubarb Cookies, Rhubarb Dessert (No Bake), Rhubarb Coffee Cake Recipe, and my super quick Microwave Rhubarb Crisp (in a mug)!
🥘 Essential Ingredients for Your Strawberry Rhubarb Cheesecake
Crafting this delicious no-bake cheesecake requires a selection of quality ingredients. Here’s a closer look at what you’ll need for this strawberry rhubarb cheesecake recipe, along with some important notes to ensure your dessert turns out perfectly:
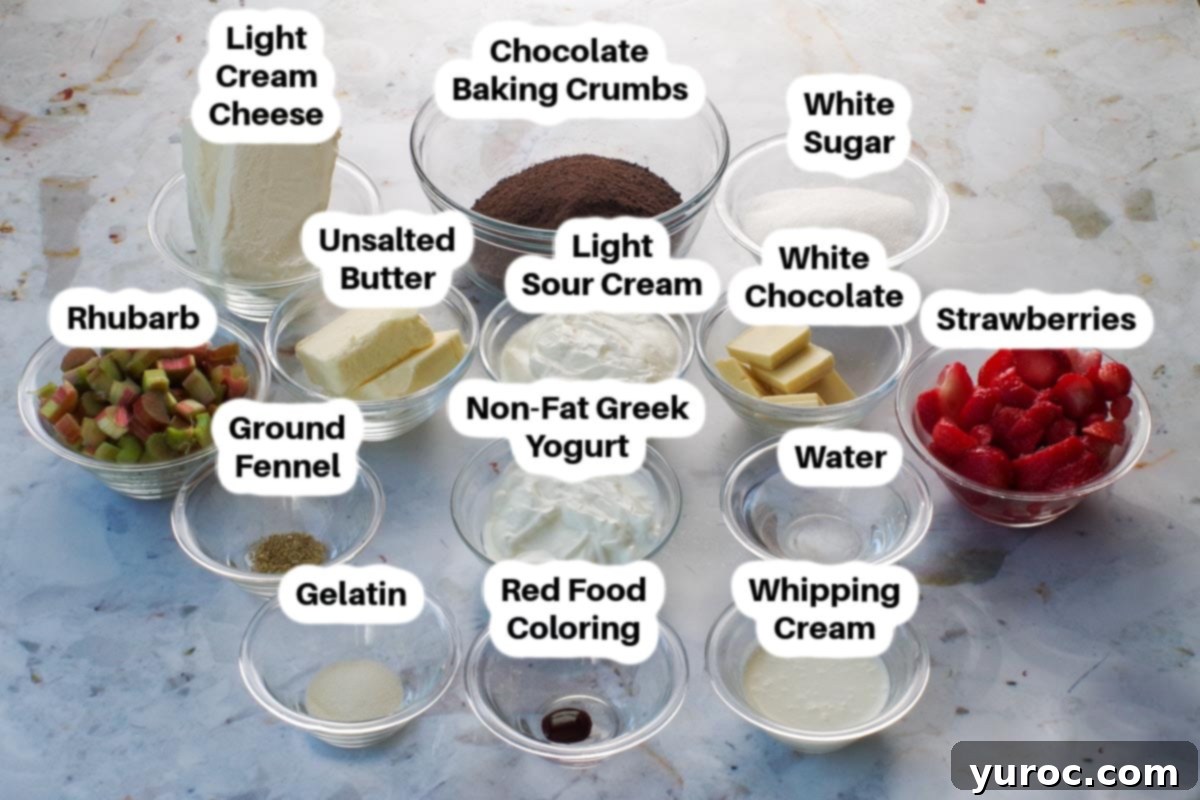
- Chocolate Baking Crumbs: Since traditional Oreo baking crumbs are hard to find, I now use generic chocolate baking crumbs. For a richer, homemade crust, you can also crush Oreo thins or regular Oreo cookies in a food processor, similar to my No Bake Black Forest Cheesecake. Remember that using whole Oreos will add more calories and Weight Watchers points due to the cream filling. The dark chocolate provides a wonderful contrast to the creamy filling and tart fruit.
- Unsalted Butter: Using unsalted butter gives you complete control over the salt content in your baking. Salted butter brands can vary significantly in their salt levels, which can affect the final flavor of your dessert.
- Light Cream Cheese: When selecting “light” or “low-fat” cream cheese, always check the nutritional label. Some budget or generic brands can have surprisingly similar fat content to name-brand regular cream cheese. For best results and optimal setting in no-bake cheesecakes, I highly recommend using Philadelphia brand cream cheese, as it consistently delivers a superior texture. Ensure it’s at room temperature before mixing to prevent lumps.
- Ground Fennel: This ingredient is key to the unique flavor profile of this cheesecake, offering a delicate hint of licorice that beautifully complements the rhubarb and strawberry. If you can only find whole fennel seeds, you can easily grind them using a coffee grinder or a mortar and pestle. Grinding ensures the flavor is evenly distributed throughout the fruit swirl.
- Rhubarb and Strawberries: Both fresh and frozen fruit work perfectly for this recipe. If you’re using frozen rhubarb and strawberries, remember to defrost them thoroughly and drain any excess liquid before cooking. This step is crucial for preventing a runny fruit swirl and ensuring the cheesecake sets properly.
- White Chocolate: For a smooth, creamy filling, it’s essential to use high-quality white chocolate baking bars. White chocolate chips contain stabilizers that prevent them from melting properly, often resulting in a grainy or lumpy texture in your cheesecake. Melt it gently and carefully to avoid seizing.
- Whipping Cream (Heavy Cream): You’ll need cold liquid whipping cream with a fat content of 35% to 36%. Do not whip it beforehand; it should be added in its liquid state to achieve the desired creamy consistency and help the cheesecake set.
- Red Food Coloring (Optional): For that vibrant red marble effect, especially if you’re aiming for a Canada Day-themed dessert, I recommend using a gel paste red food coloring like Americolor super red gel paste. Gel pastes provide intense color with less product, preventing the “red dye taste” that can sometimes come with liquid grocery store dyes. If a vibrant red isn’t a priority, feel free to omit it.
- Gelatin Crystals: Gelatin is crucial for helping this no-bake cheesecake set firmly. Ensure you follow the instructions for blooming it properly, as detailed in the recipe steps, to activate its setting power.
- Sugar: White granulated sugar provides the necessary sweetness to balance the tartness of the rhubarb and complements the rich white chocolate.
- Greek Yogurt: Non-fat Greek yogurt adds a pleasant tang and contributes to the cheesecake’s lighter, yet still creamy, texture.
📖 Creative Variations & Smart Substitutions
While this recipe is delicious as written, feel free to get creative and customize it to your preferences or dietary needs with these variations and substitutions:
- Alternative Crust Options: Instead of chocolate baking crumbs, you can easily use regular graham cracker crumbs for a classic cheesecake base. For a delightful spicy-sweet twist, try crushing ginger cookies to create the crust – it pairs wonderfully with rhubarb. If you happen to find chocolate graham crackers (though they are often discontinued), those would also make an excellent choice.
- Dairy Fat Content: If you’re not concerned about keeping the cheesecake light, you can certainly use full-fat cream cheese, sour cream, and Greek yogurt for an even richer, more decadent texture and flavor. This will result in a denser, creamier cheesecake.
- Fruit Combinations: While strawberry and rhubarb are a classic pairing, feel free to experiment with other berries. Raspberries or cherries would also provide a beautiful red hue and tart flavor that complements rhubarb well.
- Fennel Alternative: If fennel isn’t to your liking or you don’t have it on hand, you can omit it entirely for a more traditional fruit-forward cheesecake flavor. Alternatively, a tiny pinch of cardamom or a scraped vanilla bean could add a different aromatic depth.
🔪 Step-by-Step: Crafting Your No Bake Strawberry Rhubarb Cheesecake
Follow these detailed instructions to create your perfect no-bake cheesecake. Each step is designed for clarity and success:
PREP: Before you begin, lightly spray the bottom of an 8-inch or 9-inch springform pan with a non-stick cooking spray. This will ensure easy removal of your finished cheesecake.
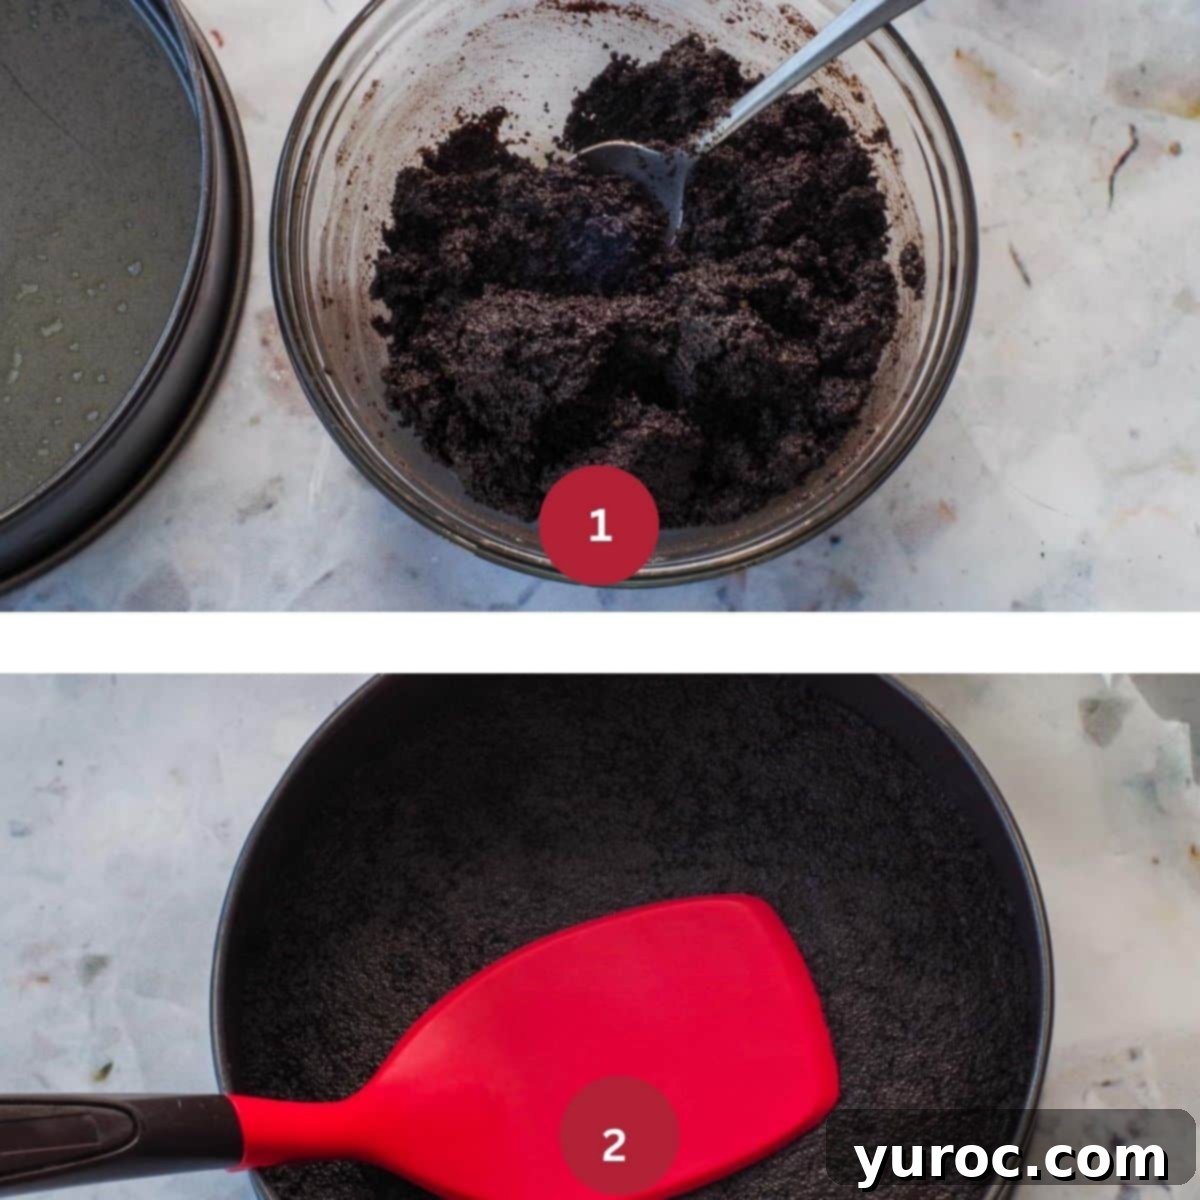
MAKE THE CRUST (STEP 1): In a medium-sized mixing bowl, combine the chocolate baking crumbs with ⅔ cup of melted unsalted butter. Mix these ingredients thoroughly until all the crumbs are uniformly moistened and you have a thick, crumbly paste (Image 1). Transfer this mixture to the prepared springform pan. Use a rubber spatula (a flat silicone spatula turner works exceptionally well) to firmly and evenly press the mixture into the bottom of the pan, tapering it neatly at the edges (Image 2). This firm press is crucial for a stable crust. Once pressed, cover the pan with plastic wrap and refrigerate for at least 15 minutes to allow the crust to set slightly.
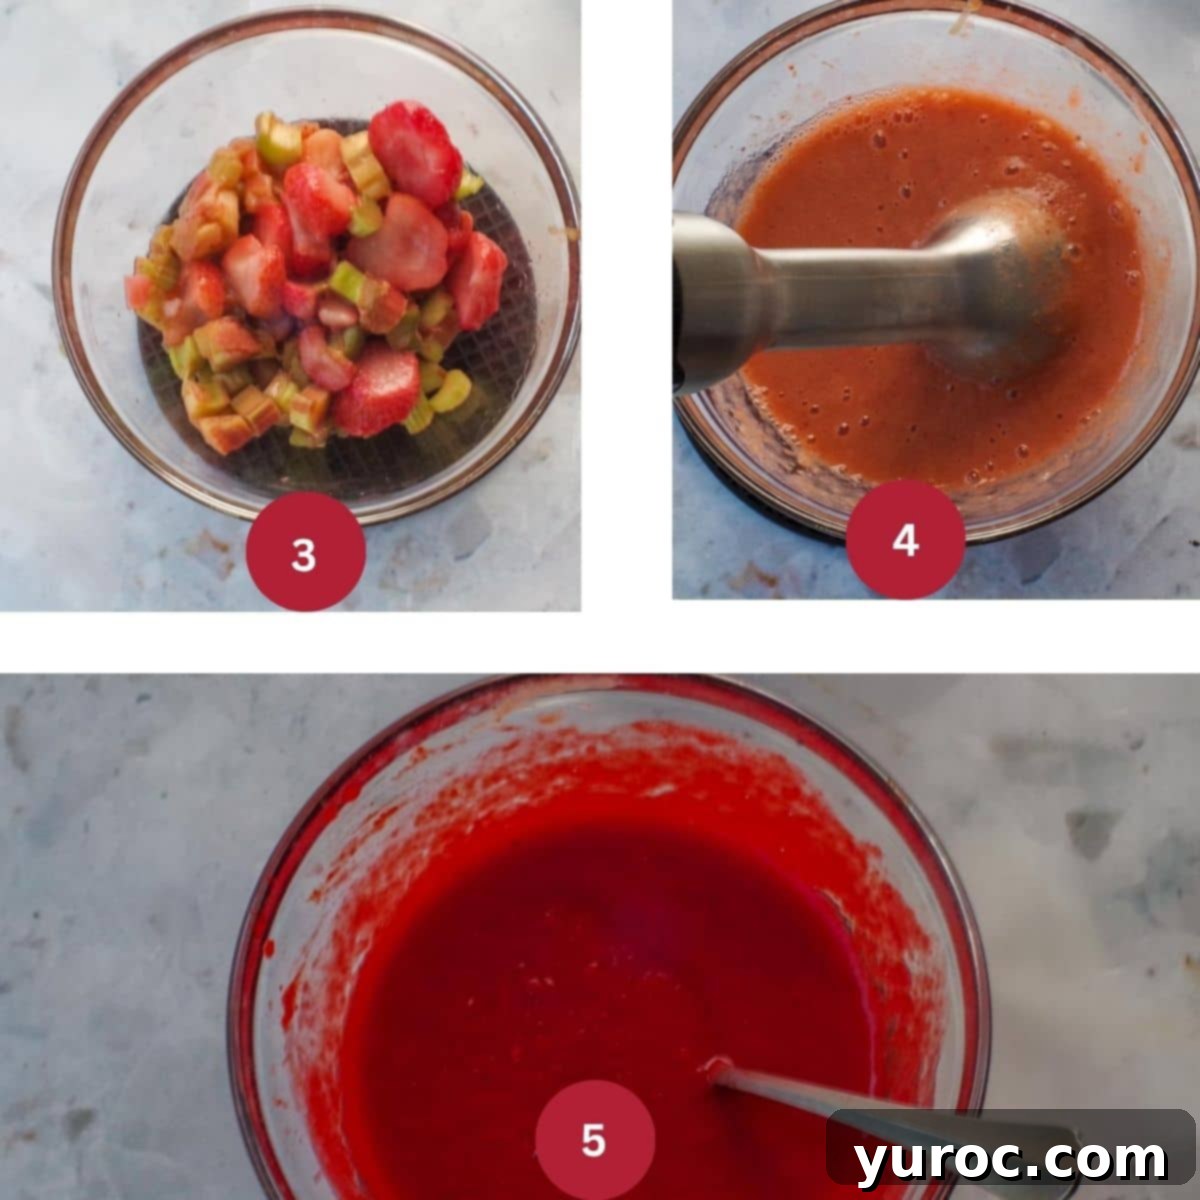
PREPARE THE STRAWBERRY RHUBARB SWIRL (STEP 2): Place your fresh or defrosted (and well-drained) rhubarb and strawberries in a microwave-safe bowl. Cook them in the microwave for approximately 3 ½ minutes, or until softened. After cooking, it’s absolutely vital to drain any excess liquid thoroughly; this prevents your swirl layer from becoming watery and affecting the cheesecake’s set (Image 3). Transfer the cooked fruit to a food processor or use an immersion blender (as shown) to puree the mixture for about 1 minute until smooth (Image 4). Finally, stir in the ground fennel and the red gel food coloring (if using) to achieve a vibrant hue (Image 5). Set this mixture aside.
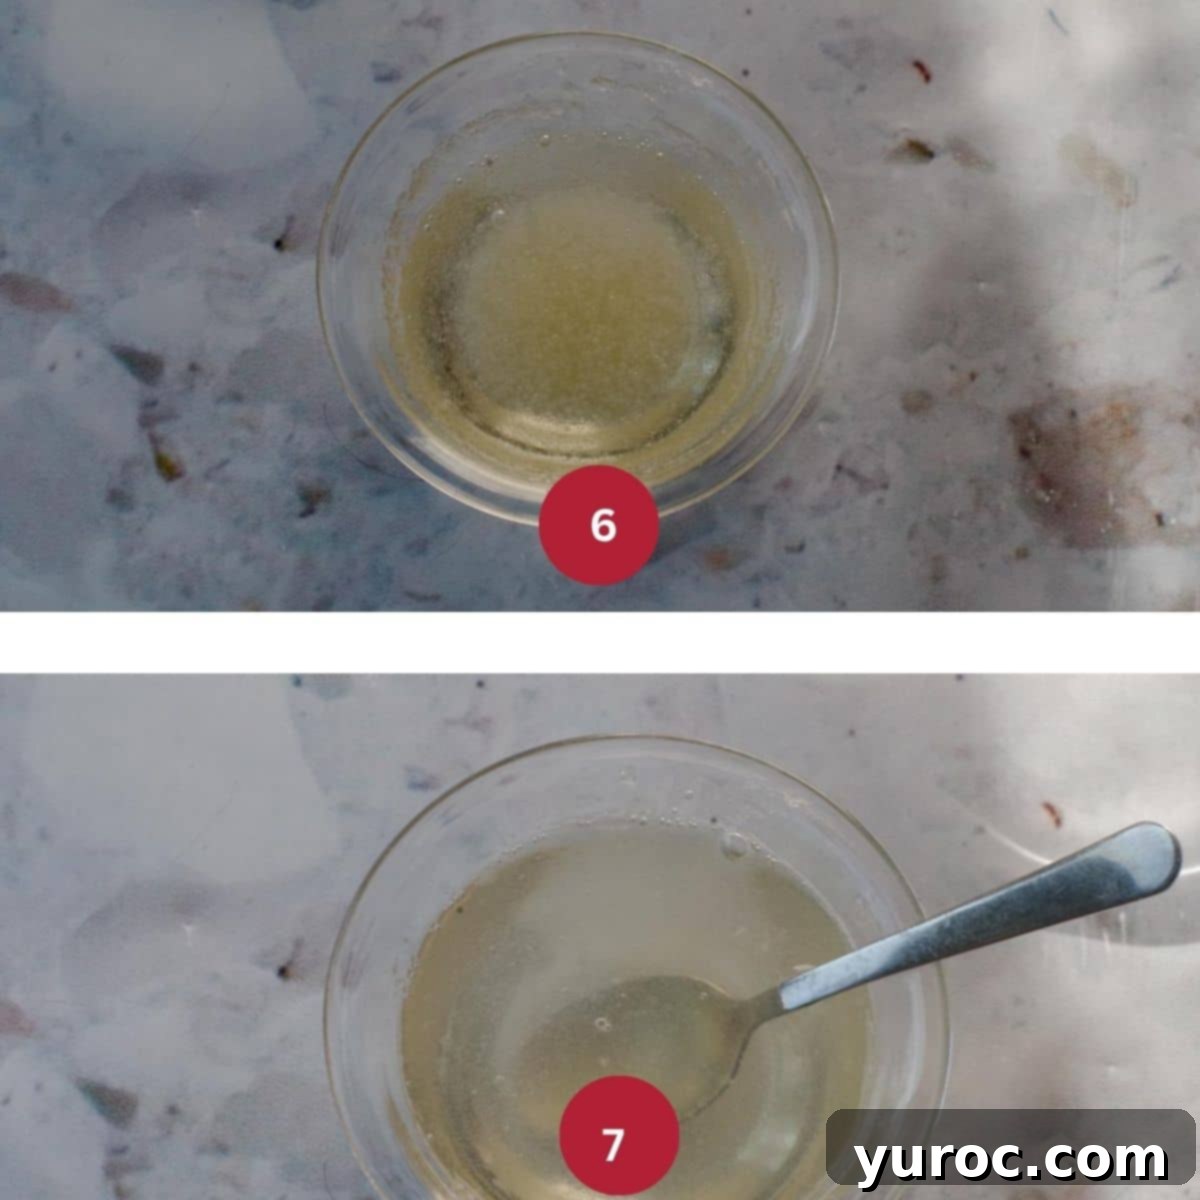
MAKE THE FILLING (STEP 3 – PART 1 – Gelatin Prep): In a small bowl, combine the gelatin crystals with ¼ cup of warm water (only half of the total water amount required for the gelatin). Allow the gelatin to “bloom” for 5 minutes; it will absorb the water and thicken into a gel-like consistency (Image 6). Next, heat the remaining ¼ cup of water in the microwave for 30 seconds on high. Pour this hot water into the bloomed gelatin mixture and stir well until the gelatin is completely dissolved and becomes a clear liquid again. It’s crucial that the gelatin is fully dissolved. Allow this dissolved gelatin mixture to cool slightly – it should be lukewarm, not hot to the touch – before adding it to the cream cheese mixture (Image 7).
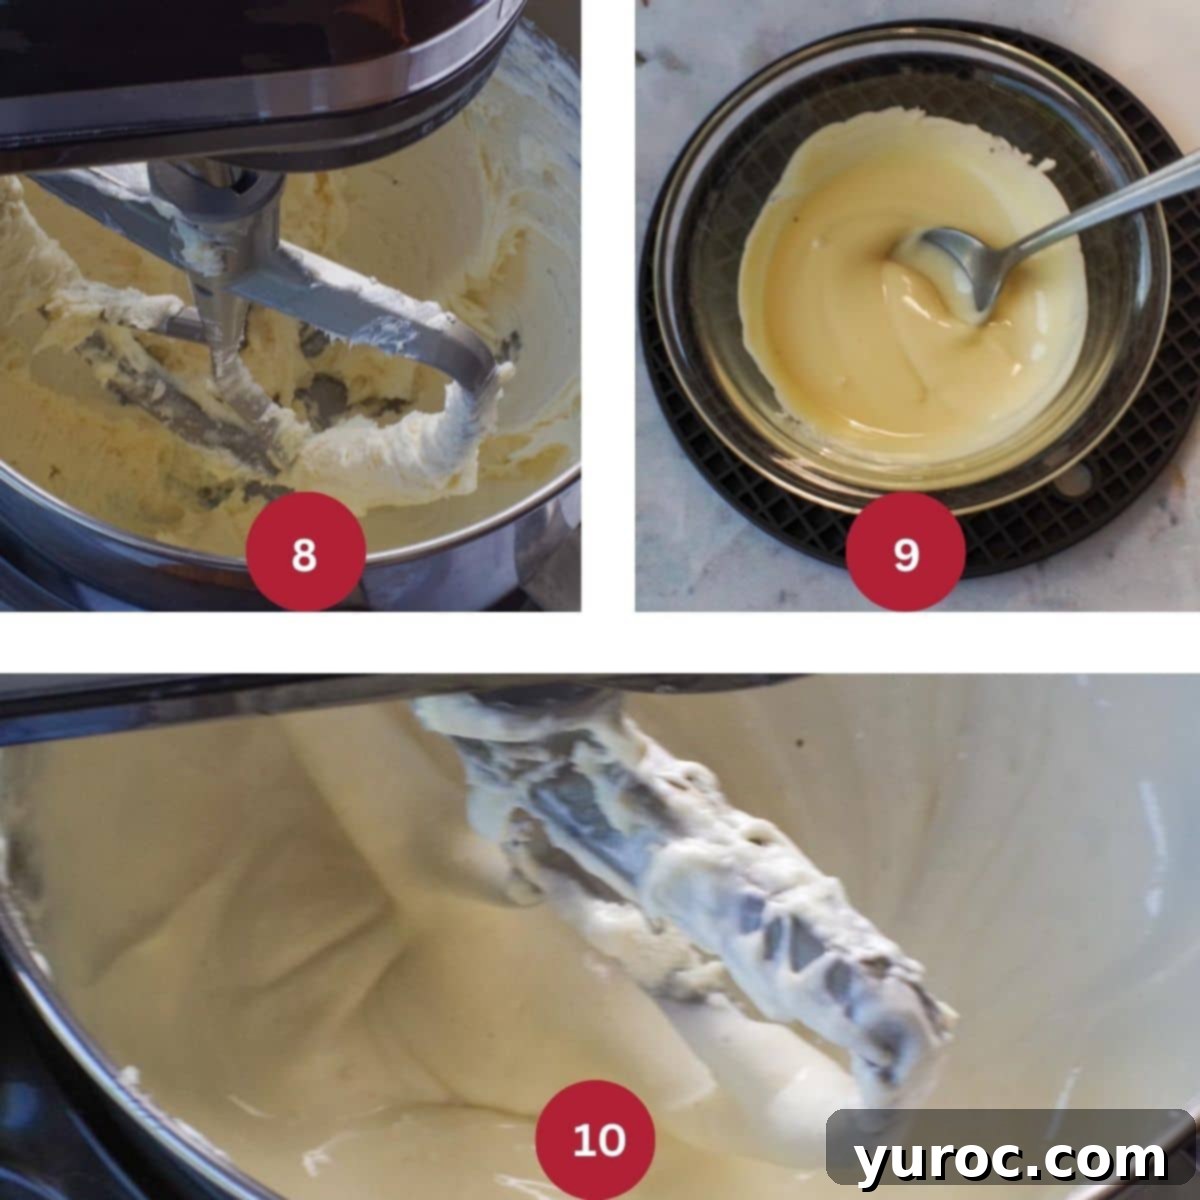
MAKE THE FILLING (STEP 3 – PART 2 – Cheesecake Base): In the large bowl of a stand mixer fitted with a paddle attachment (a hand mixer can also be used with a large bowl), add the room-temperature light cream cheese and 1 cup of white granulated sugar. Mix on low speed for about 30 seconds to break down the cream cheese, then increase to medium speed for another 1 minute until it’s smooth and creamy (Image 8). Separately, melt the white chocolate: use 50% power in the microwave for up to 2 minutes, stirring after 1 minute, and then at 30-second intervals. The residual heat will help melt any remaining solid pieces when you stir, so avoid overheating to prevent seizing. Alternatively, melt the chocolate using a double boiler (Image 9). Scrape down the sides of the mixer bowl. Add the light sour cream, liquid whipping cream, and non-fat Greek yogurt to the cream cheese mixture, then stir in the slightly cooled melted white chocolate. Mix on medium speed for 30 seconds, scrape the sides again, and then mix on medium-high speed for 2 minutes until the mixture is smooth, light, and fluffy. Finally, with the mixer running on low speed, slowly pour the slightly cooled dissolved gelatin mixture into the cream cheese mixture. Continue mixing at medium speed for about 1 minute, scraping the sides after 30 seconds. Be careful not to overmix, as this can incorporate too much air (Image 10).
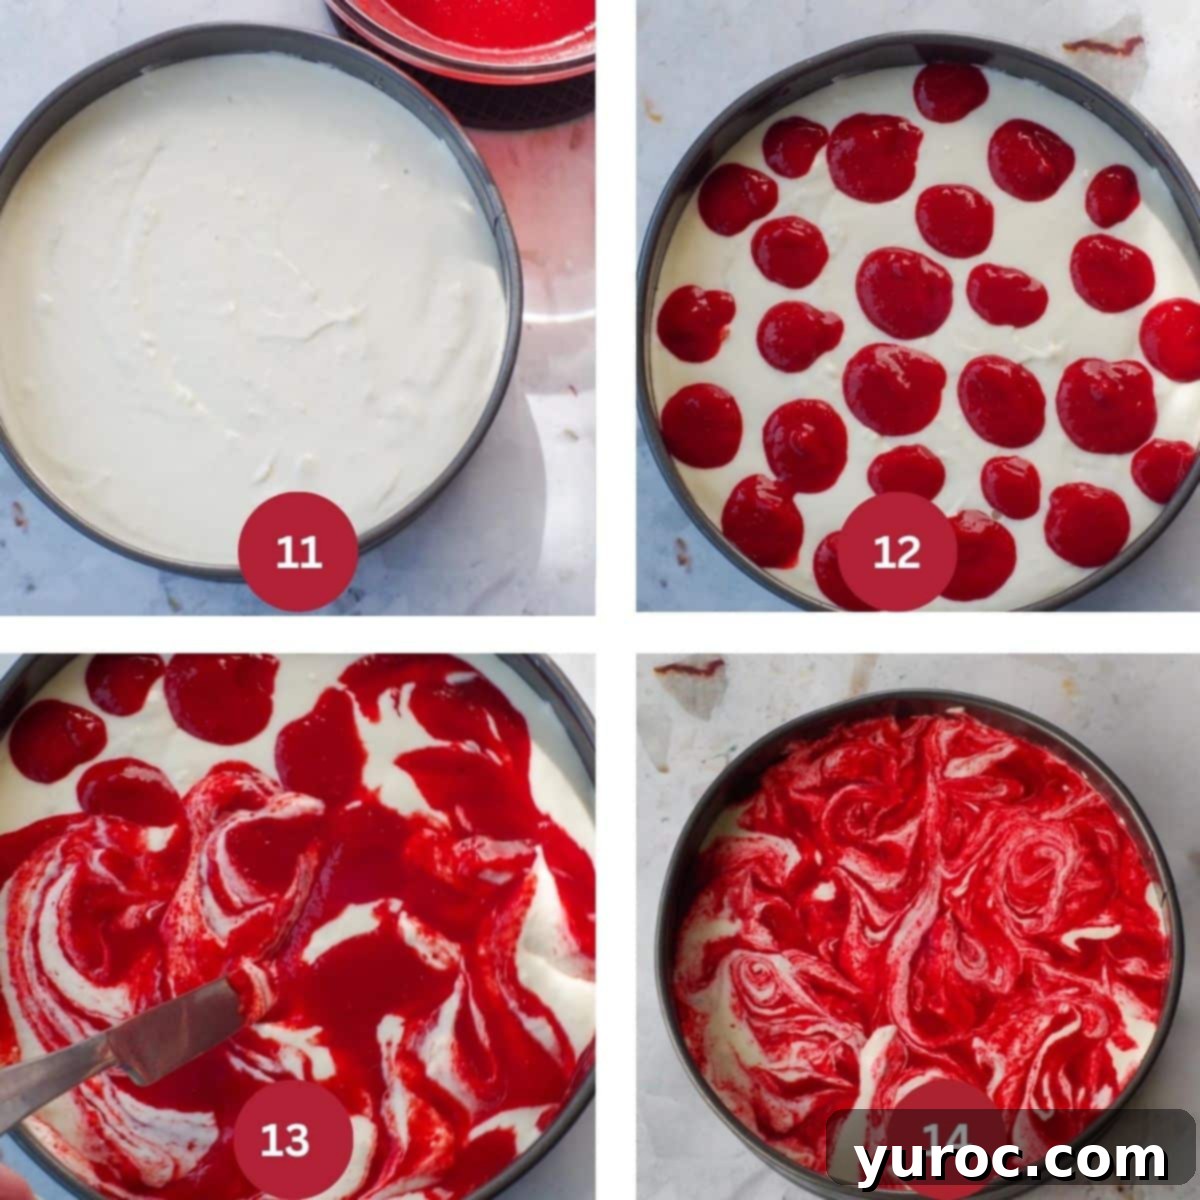
ASSEMBLY (STEP 4): Carefully pour the cheesecake batter over the chilled crust in the springform pan and gently level the top with a spatula (Image 11). Next, artfully drop several dollops of the strawberry and rhubarb mixture onto the white cheesecake surface (Image 12). Using a butter knife or a skewer, gently swirl the fruit mixture into the white cheesecake batter to create a beautiful marbled effect (you might not need to use all of the fruit mixture) (Image 13). Try to penetrate a little deeper with your swirls, but avoid over-mixing, as this will cause the colors to blend too much and lose the distinct swirl pattern (Image 14). Once swirled, gently tap the pan against the counter a few times to release any trapped air bubbles, ensuring a smooth finish. Cover the pan loosely with plastic wrap and refrigerate for a minimum of 3 hours, though ideally, leave it overnight for the best setting and flavor development.
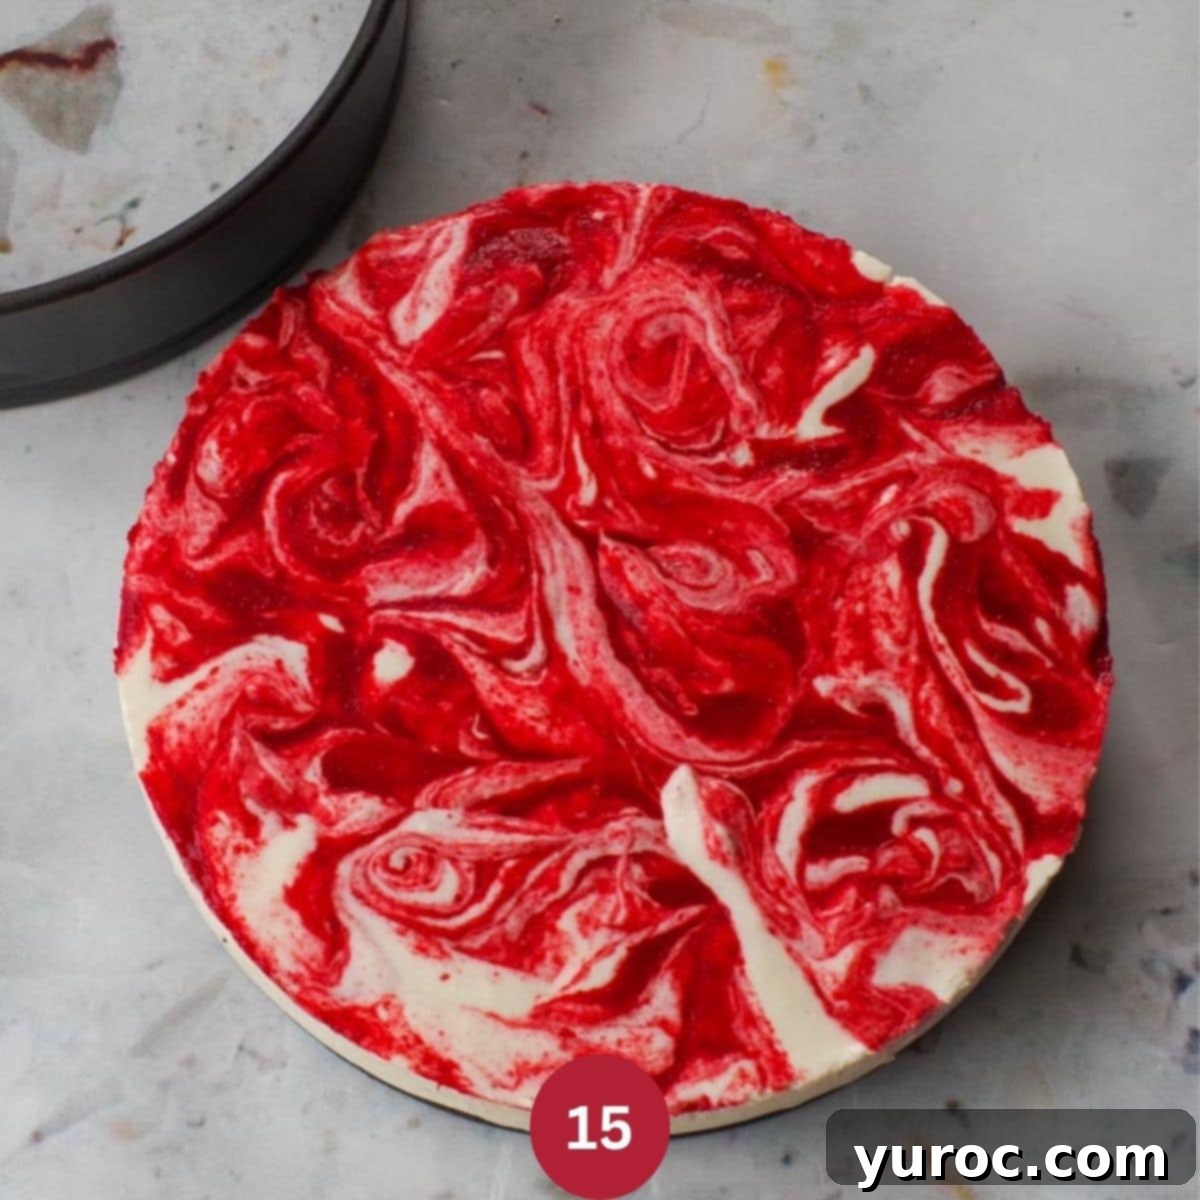
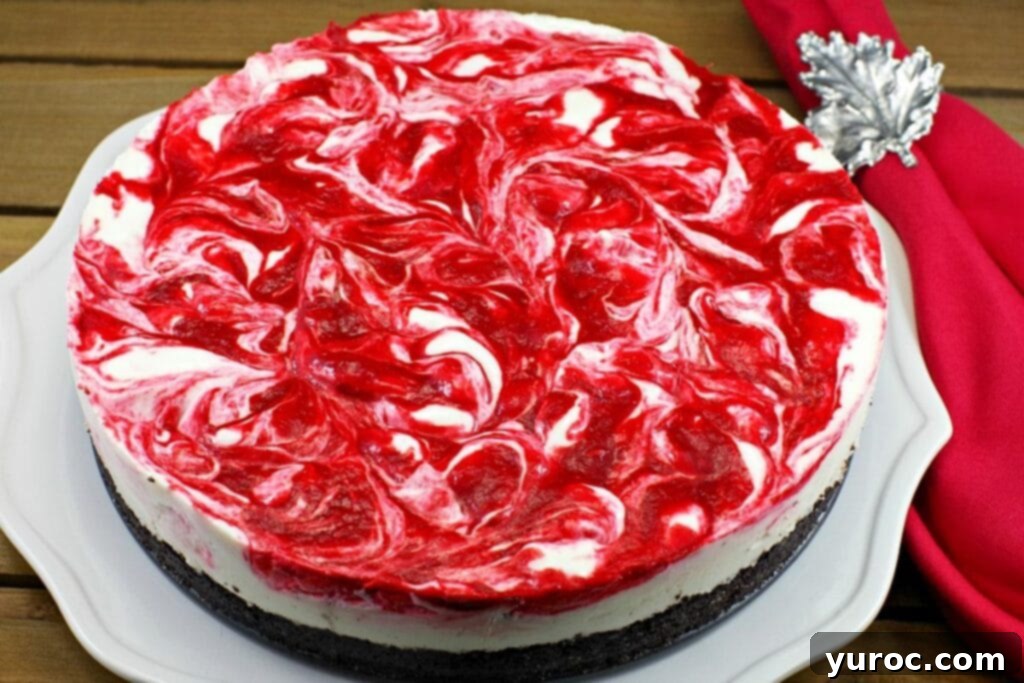
SERVE (STEP 5): Once chilled and firm, carefully unhinge the rim of the springform pan and remove it. If the edges of the cake are not perfectly smooth, you can gently neaten them with a warm knife (Image 15). Slice the cheesecake with a clean, sharp knife (dipping it in hot water between slices can help achieve cleaner cuts) and serve it cold. Garnish with fresh mint, extra berries, or a dollop of whipped cream for an even more impressive presentation!
💡 Expert Recipe Tips for Perfect No Bake Cheesecake
Achieving a flawless no-bake cheesecake is simple with these expert tips:
- Choose High-Quality White Chocolate: Always opt for white chocolate baking bars over white chocolate chips. Chips contain additives that hinder proper melting, often leading to a grainy or lumpy filling. Quality baking bars will melt smoothly, ensuring a silky cheesecake texture.
- Prevent Chocolate Seizing: White chocolate is sensitive to both moisture and excessive heat. Ensure all your utensils and bowls are completely dry. When melting in the microwave, use 50% power and stir frequently (every 30 seconds to 1 minute). Overheating or introducing water can cause the chocolate to “seize,” turning it into a stiff, unusable mess.
- Freshly Ground Fennel for Best Flavor: If you can’t find pre-ground fennel, it’s worth taking the extra step to grind whole fennel seeds yourself. Use a coffee grinder or a mortar and pestle to create a fine powder. This ensures the unique licorice-like flavor is evenly distributed and more potent than using whole seeds.
- Thoroughly Drain Fruit: Whether using fresh or frozen rhubarb and strawberries, draining excess liquid after cooking is critical. Too much moisture in the fruit swirl can prevent the surrounding cheesecake filling from setting properly, leading to a runny layer. Press out as much liquid as possible.
- Master the Swirl (Don’t Over-Mix!): The goal is a beautiful marbled effect, not a fully blended color. Drop the fruit mixture in dollops, then use a butter knife or skewer to gently create swirls. Avoid over-mixing or stirring vigorously, as this will cause the colors to blur and diminish the visual contrast.
- Cool Gelatin to Room Temperature: After dissolving the gelatin, allow it to cool slightly until it’s lukewarm or at room temperature. Adding hot gelatin directly to the cold cream cheese mixture can cause the dairy to curdle or create an uneven texture.
- Opt for Gel Paste Food Coloring: For vibrant, true-red color, especially for festive occasions like Canada Day, use a high-quality gel paste food coloring (like Americolor). These concentrated pastes deliver intense color with minimal product, avoiding the artificial taste sometimes associated with liquid grocery store dyes.
- Firm and Even Crust: A well-packed crust is the foundation of your cheesecake. Use a flat spatula, the bottom of a glass, or a measuring cup to firmly and evenly press the crumb mixture into the bottom of the springform pan. This ensures the crust holds together beautifully when sliced.
- Chill Overnight for Superior Slices: While the cheesecake may set sufficiently in 3 hours, chilling it overnight (8-12 hours) is highly recommended. This allows the gelatin and fats to fully firm up, resulting in a cleaner texture and much neater, more defined slices.
- Room Temperature Cream Cheese: Always start with cream cheese that has come to room temperature. Softened cream cheese blends much more smoothly with other ingredients, preventing lumps and creating a uniformly creamy filling.
- Tap the Pan to Release Air: After pouring the cheesecake batter into the pan and before chilling, gently tap the springform pan against your counter a few times. This helps release any trapped air bubbles, ensuring a smooth, even surface and preventing unsightly holes in your finished cheesecake.
👪 Serving Size & Adjustments
This delicious Strawberry Rhubarb Cheesecake (No Bake) recipe is designed to yield 16 generous servings. If you need to adjust the recipe for a smaller or larger crowd, you can easily do so by clicking on the serving number within the recipe card and selecting your desired quantity. The ingredient amounts will automatically adjust to match your selection. However, please note that for larger batches, you will need additional springform pans to accommodate the increased volume.
🔢 Weight Watchers Friendly & Nutritional Information
Despite its rich, decadent taste, this creamy no-bake cheesecake is remarkably Weight Watchers friendly! When made with light butter, fat-free sour cream, and fat-free cream cheese, each slice comes in at just 12 WW points. This is a significant saving compared to a typical piece of cheesecake with fruit topping, which can be around 22 WW points – truly a fantastic deal for such a satisfying dessert!
For an even more WW-friendlier option: You can further reduce the points by replacing the white granulated sugar with a sugar substitute. If using monk fruit sweetener, replace the sugar with half the amount (i.e., ½ cup of monk fruit for 1 cup of sugar). Always check the specific conversion rates for your chosen sugar substitute for optimal results.
🍽 Essential Equipment for This Recipe
To successfully make this no-bake cheesecake, you’ll need a few key pieces of kitchen equipment:
- Stand Mixer or Electric Hand Mixer: While a stand mixer is preferred for its power and hands-free operation, a good quality electric hand mixer will also work perfectly for blending the creamy filling ingredients.
- Food Processor or Immersion Blender: To achieve a smooth puree for the strawberry rhubarb swirl, you’ll need either a food processor or an immersion blender, which is incredibly convenient for this task.
- Springform Pan (8-inch or 9-inch): A springform pan is ideal for cheesecakes, allowing for easy removal and a beautiful presentation. If you don’t have one, you can use a deep pie dish or a square baking dish lined with parchment paper, ensuring the parchment extends over the edges for easier lifting. While the presentation may vary slightly, the taste will be equally delightful.
🌡️ Storage & Freezing Tips
Proper storage is key to enjoying your No Bake Strawberry Rhubarb Cheesecake for days to come:
Store any leftover cheesecake in an airtight container in the refrigerator for 3-4 days. This keeps it fresh, moist, and prevents it from absorbing odors from other foods in your fridge.
While you might be tempted to freeze leftovers, I generally do not recommend freezing this cheesecake if your intention is to thaw it later. The texture can become watery and runny upon thawing due to the gelatin and dairy content. HOWEVER, there’s a fantastic alternative: you can absolutely freeze individual slices and eat them frozen! I’ve personally tried this with leftovers, and it transforms into an AMAZING frozen dessert, reminiscent of ice cream cake. Just slice it, freeze it, and enjoy it directly from the freezer without defrosting.
❔ Recipe FAQs
Absolutely! The red food coloring is completely optional and is added purely for aesthetic purposes, giving the rhubarb swirl a more vibrant red color, especially for a Canada Day presentation. Omitting it will not affect the flavor or the texture of your cheesecake in any way. The natural pinkish hue from the rhubarb and strawberries will still be lovely.
A properly set no-bake cheesecake should feel firm to the touch when you gently press on the center. It should also hold its shape cleanly when you attempt to slice it. If it still feels wobbly or overly soft after 3 hours of refrigeration, don’t worry! Simply return it to the fridge for a few more hours, or ideally, allow it to chill overnight. Overnight chilling almost always guarantees the best, firmest results.
No, the ground fennel is not mandatory. It’s a unique addition that imparts a subtle, intriguing licorice-like undertone, which many find complements the tartness of rhubarb beautifully. However, if you’re not a fan of fennel or prefer a more traditional strawberry rhubarb flavor profile, you can certainly leave it out without altering the core integrity of the cheesecake.
There are several common reasons why a no-bake cheesecake might not set as firmly as desired. Understanding these can help you troubleshoot and prevent issues:
1. Gelatin Issues: The most common culprit. If the gelatin wasn’t fully dissolved or properly bloomed, it won’t be able to set the cheesecake. Ensure you let the gelatin bloom for 5 minutes in warm water, then thoroughly dissolve it by stirring in hot water until no granules remain. Crucially, let it cool to lukewarm (not hot!) before adding it to the cream cheese mixture to prevent curdling.
2. Overheated or Seized White Chocolate: If white chocolate is overheated or comes into contact with even a tiny bit of water during melting, it can seize, becoming grainy and stiff. This will prevent it from incorporating smoothly into the filling and contributing to the set. Always melt white chocolate gently at 50% power in the microwave or use a double boiler, ensuring all tools are completely dry.
3. Insufficient Chilling Time: While the recipe suggests a minimum of 3 hours, a no-bake cheesecake truly benefits from extended chilling. Overnight refrigeration (8-12 hours) allows the gelatin and fats to fully firm up, yielding the best texture and clean slices.
4. Excess Moisture from Fruit: If the rhubarb and strawberries weren’t thoroughly drained after cooking, the leftover liquid can dilute the cheesecake mixture and inhibit its ability to set properly. Press out as much moisture as possible after microwaving.
5. Incorrect Whipping Cream: This recipe calls for liquid 35%-36% whipping cream (heavy cream), not pre-whipped cream or a lower-fat cream. Substituting with a different type of cream or omitting it can significantly impact the structure and firmness of the cheesecake.
6. Cream Cheese Brand Variation: Different brands of cream cheese have varying consistencies and ingredients. Some off-brand or generic cream cheeses may not set as reliably in no-bake recipes as higher-quality brands like Philadelphia, which I recommend for its consistent performance.
What to do if it doesn’t set: If you’ve tried everything and your cheesecake just won’t firm up, don’t despair! You can salvage it by freezing it. Serve it as a delicious frozen cheesecake, similar to an ice cream cake. Just remember to eat it directly from the freezer; do not attempt to defrost it, as it will become runny.
This Strawberry Rhubarb Cheesecake is a fantastic way to utilize your summer rhubarb harvest, and it’s a dessert that the entire family is sure to adore. Whether you’re seeking a simple yet elegant treat or the perfect red and white dessert for your Canada Day celebrations, this no-bake wonder fits the bill perfectly.
For more festive red and white dessert ideas to brighten your Canada Day festivities, be sure to check out my Skinny Miami Vice Frozen Cheesecake and a comprehensive list of 21 Canada Day Desserts!
📋 Discover More Delightful Rhubarb Recipes!
If you’ve fallen in love with rhubarb, there are plenty more recipes to explore:
- Rhubarb Squares
- Healthy Rhubarb Bread
- Healthy Rhubarb Smoothie
- Healthy Rhubarb Muffins (Weight Watchers Friendly)
Did your family ❤️ this recipe? Did you know that commenting and ⭐ rating recipes is one of the best ways to support your favorite recipe creators? If you LOVED this recipe, please comment and rate it in the recipe card below or share photos on social media using the hashtag #foodmeanderings or tagging @foodmeanderings ! Your feedback means the world!

🍓Strawberry Rhubarb Cheesecake Recipe (No Bake)
Equipment
- springform pan
- immersion blender
- stand mixer
Ingredients
Base:
- 2 cups chocolate baking crumbs
- ⅔ cup unsalted butter , melted
- 1 -7 gram package of gelatin crystals (I use Knox brand*)
- ½ cup water , divided into 2
- 2 – 8 oz packages of light cream cheese , room temperature (softened)
- ½ teaspoon ground fennel
- 1 ½ cup frozen rhubarb (or fresh)
- 1 cup strawberries (fresh or fresh)
- 1 cup light sour cream
- 3 ounces melted white chocolate
- ¼ cup whipping cream
- 1 cup white granulated sugar
- ½ cup non fat Greek yogurt
- ½ – ¾ teaspoon super red gel paste food coloring (I use Americolor)
Instructions
- Spray the bottom of an 8-inch or 9 inch springform pan with non- stick cooking spray.
- In a medium bowl, combine chocolate crumbs and ⅔ cup melted butter and mix until all the crumbs are moistened and a thick, crumbly paste forms. Press mixture into the bottom of the springform pan. Level and press to the bottom of the pan using a rubber spatula and neatly taper at the edge. Cover the pan with plastic wrap and place in the fridge for 15 minutes.2 cups chocolate baking crumbs, ⅔ cup unsalted butter
- Cook frozen rhubarb and strawberries in microwave for 3 ½ minutes, drain excess liquid. Puree rhubarb/strawberries for approximately 1 minute in food processor.1 ½ cup frozen rhubarb (or fresh), 1 cup strawberries (fresh or fresh)
- Add ground fennel and red gel paste. ** if you are using fresh rhubarb and strawberries, use the same process½ teaspoon ground fennel, ½ – ¾ teaspoon super red gel paste food coloring
- Mix gelatin crystals and ¼ cup water in a small bowl and allow to bloom for 5 minutes. Heat ¼ cup water for 30 seconds in the microwave on high and pour into the gelatin bloom. Stir to dissolve, and allow to cool.1 -7 gram package of gelatin crystals, ½ cup water
- Place cream cheese, 1 cup white granulated sugar in the large bowl of a stand mixer fitted with a paddle attachment (you can use a hand mixer and a large bowl). Mix on low to break down the cream cheese for 30 seconds, and increase to medium speed for another 1 minute.1 cup white granulated sugar
- Melt the white chocolate on 50% power in the microwave for up to 2 minutes, taking it out to stir at 1 minute, then at 30 second intervals- the heat from the melted chocolate helps to melt the unmelted chocolate pieces when you stir it, so only cook just as long as it needs. Alternatively, you can use a double boiler.3 ounces melted white chocolate
- Scrape the sides of the bowl and add sour cream, whipping cream, Greek yogurt and stir in white chocolate. Mix on medium for 30 seconds, scrape the sides, and continue to mix on medium-high speed for about 2 minutes, until smooth and fluffy.1 cup light sour cream, ½ cup non fat Greek yogurt, ¼ cup whipping cream
- Starting on low, pour gelatin into the cream cheese mixture. Continue to mix at medium speed for a minute, scraping the sides of the bowl after 30 seconds.
- Pour cheesecake batter into the springform pan with crust and level with a spatula. Drop several dollops of rhubarb ands strawberry mixture onto the white cheesecake and swirl in with a butter knife. Repeat until all is gone. Try to cut into it to get it deeper and don’t over-mix or it will lose the swirled effect.
- Tap pan lightly against the counter to get rid of air bubbles. Cover with plastic wrap and refrigerate for at least 3 hours, preferably overnight.
- Unhinge rim of springform pan and remove. If necessary, smooth edges of cake with a knife. Serve.
Notes
- Use high-quality white chocolate baking bars. White chocolate chips don’t melt properly and can result in a grainy texture.
- Avoid moisture and overheating when melting chocolate: Do not get water near anything you use for melting chocolate and melt chocolate at 50% power in the microwave or it will seize. See you microwave manual for directions on using reduced power.
- Grind your own fennel for best flavor. If you can’t find ground fennel, crush fennel seeds using a coffee grinder or mortar and pestle to distribute the licorice flavor more evenly.
- Drain excess liquid from the fruit thoroughly. Whether using fresh or frozen rhubarb and strawberries, draining the liquid well after microwaving helps prevent a runny swirl layer, which will prevent the cheesecake from setting,
- Don’t over-swirl the fruit mixture. Gently swirl just enough to create a marbled effect-over-mixing will blur the design and dull the contrast.
- Let the gelatin cool to room temperature (not hot to the touch) before adding. Adding hot gelatin to the cheesecake batter can affect the texture and cause curdling.
- Use gel paste food coloring for vibrant color. It gives strong color with minimal product and avoids the unpleasant artificial taste of some liquid dyes.
- Press the crust firmly and evenly. Use a flat spatula or measuring cup to pack it down so it holds together well when sliced.
- Chill overnight for clean slices. Although 3 hours is enough to set, chilling overnight gives the best texture and slice quality.
- Bring cream cheese to room temperature. Softened cream cheese mixes more smoothly and prevents lumps in the batter.
- Tap the pan to release air bubbles. This prevents holes and uneven texture in the finished cheesecake.