Homemade No-Churn Butter Tart Ice Cream: Easy Canadian Dessert Recipe
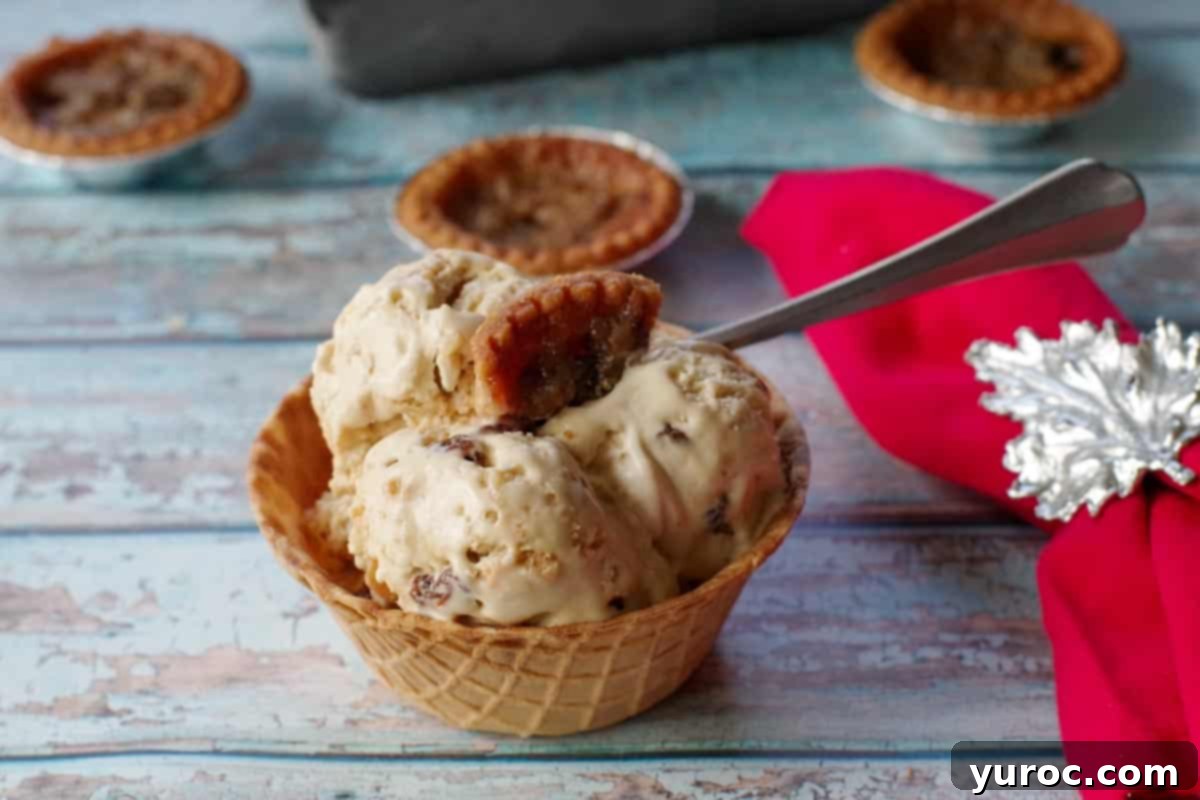
Prepare to be enchanted by a truly unique frozen treat: this incredible No-Churn Butter Tart Ice Cream! It flawlessly captures the rich, sweet, and distinctly Canadian flavor of classic butter tarts, featuring a luscious butter tart filling swirled into creamy ice cream, complemented by delightful pieces of mini tart shells. Every spoonful is like biting into a chilled butter tart, offering an unparalleled taste experience. The best part? This recipe is incredibly simple to make at home, requiring absolutely no ice cream maker! It’s perfect for anyone craving an authentic taste of Canada without the fuss.
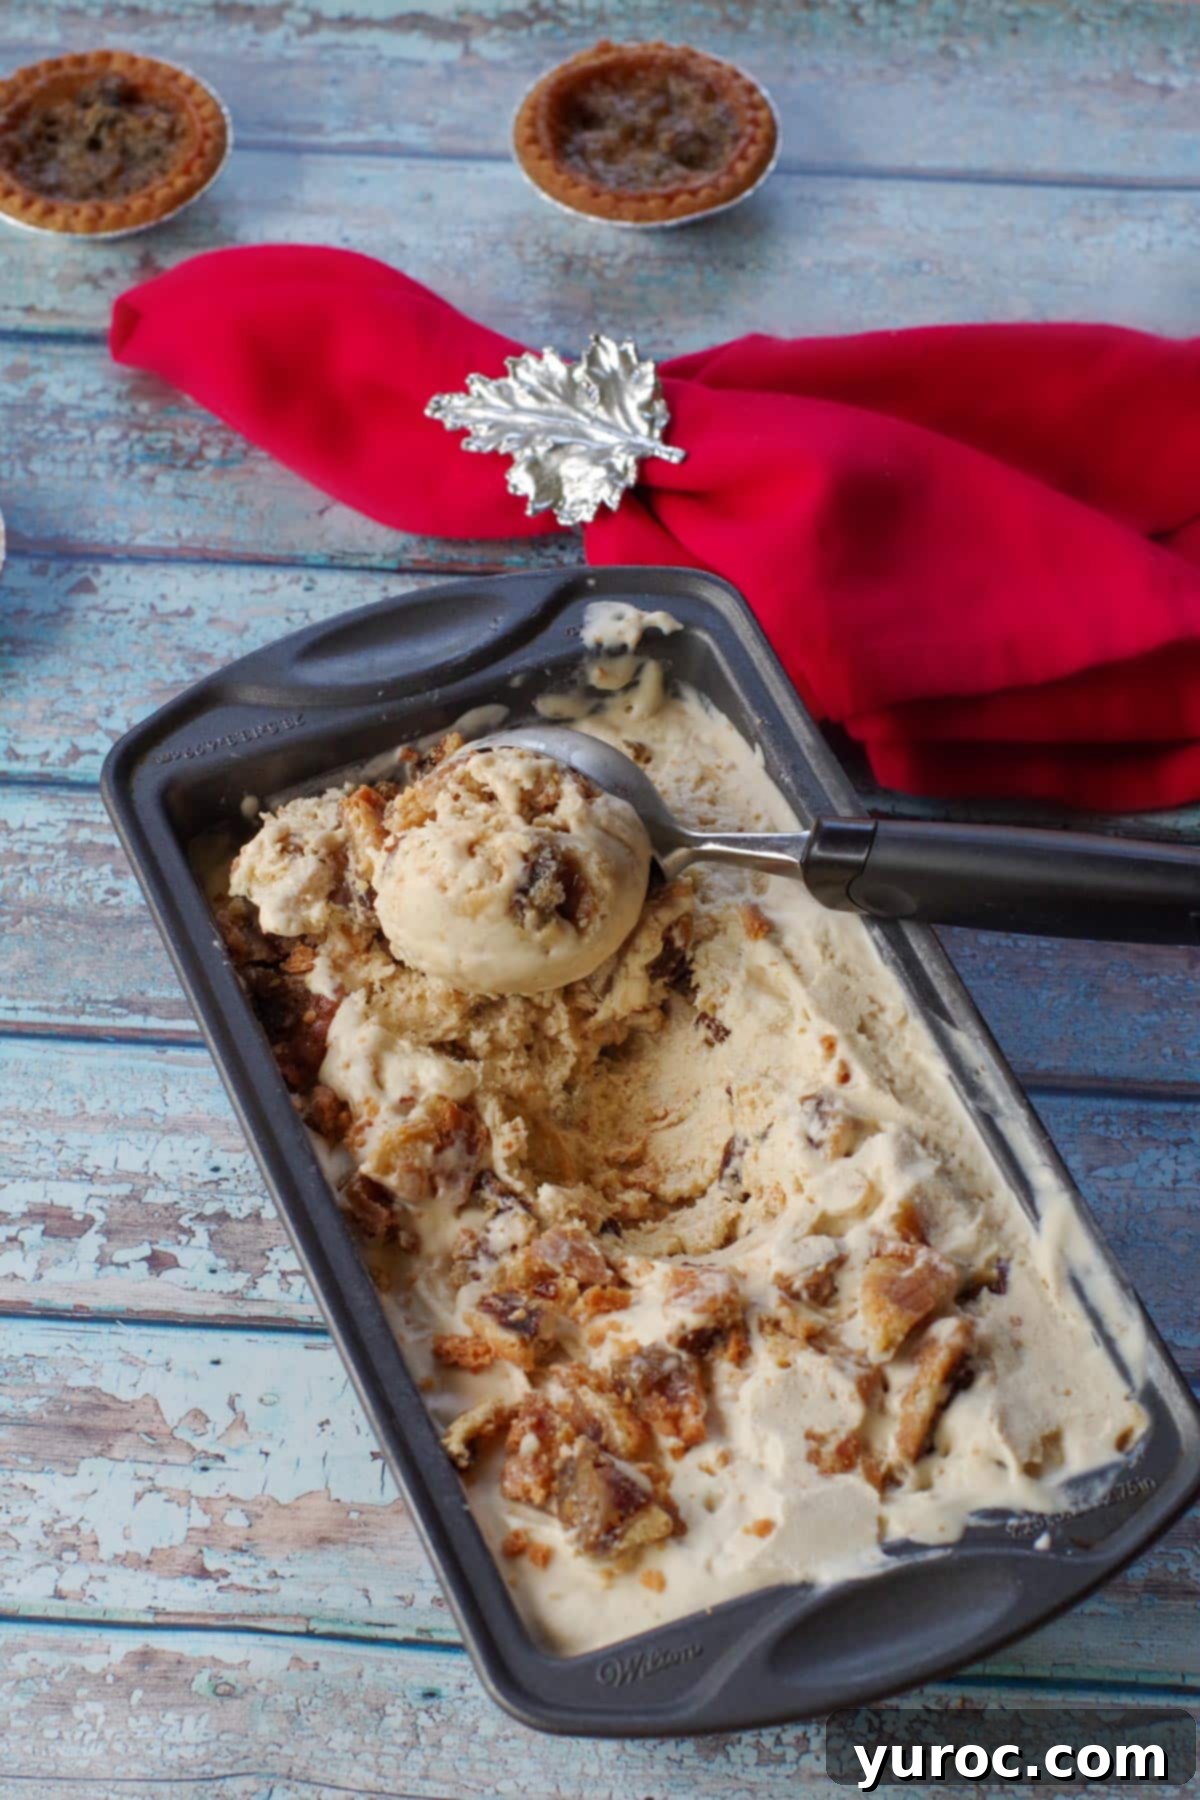
Butter tarts hold a special place in Canadian cuisine, enjoyed throughout the year. However, butter tart ice cream truly comes into its own during the warmer months, making it an ideal dessert for summer celebrations, especially Canada Day. This particular recipe was born out of a deep affection for butter tarts and leverages the exact same, tried-and-true filling used in our popular Butter Tart Thumbprint Cookies. It’s not just a sensational dessert on its own; it also offers a brilliant solution if you happen to have leftover butter tart filling, ensuring no deliciousness ever goes to waste!
My passion for butter tarts has inspired a delightful array of innovative recipes. In addition to these delicious cookies and now this must-try ice cream, I’ve also developed a show-stopping Butter Tart Bundt Cake and a creative recipe for Butter Tart Waffles. Each creation is a tribute to the iconic butter tart flavor profile, adapted into new and exciting forms. This dedication ensures that every recipe delivers that familiar, comforting taste that Canadians cherish, making this ice cream an authentic culinary journey.
🥘 Essential Ingredient Notes for the Best Butter Tart Ice Cream
Many butter tart ice cream recipes available today often fall short of delivering a truly authentic flavor. They might simply incorporate chopped butter tarts or rely on a generic caramel swirl, which, while pleasant, doesn’t quite capture the deep, buttery, and custardy essence of a true butter tart. This recipe distinguishes itself by utilizing a special, homemade butter tart filling. This unique filling, inspired by my Grandma’s treasured recipe, is the same one that makes our butter tart cookies so irresistible. This commitment to an authentic filling ensures that every spoonful of this no-churn ice cream bursts with genuine butter tart flavor, offering a perfectly balanced sweetness that appeals to all palates, whether you have a robust sweet tooth or prefer a more subtle dessert.
To embark on your journey to create this decadent homemade butter tart ice cream, gather the following key ingredients:
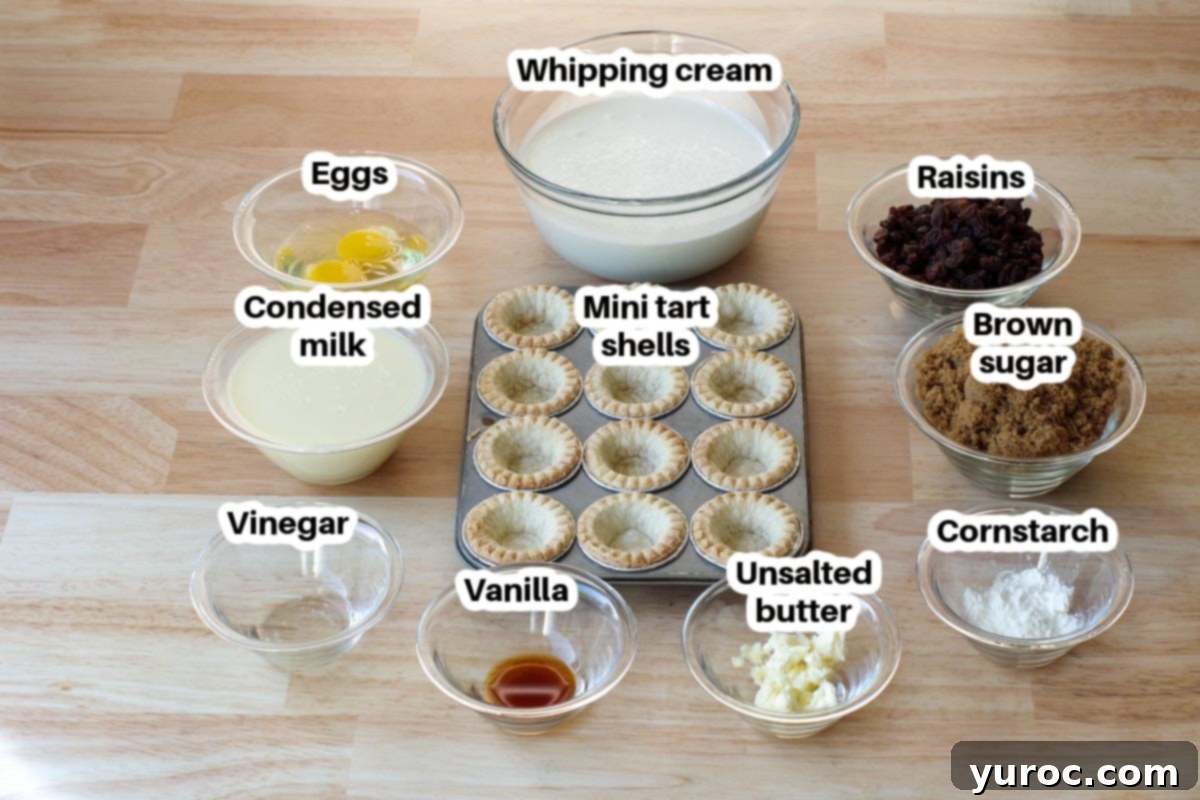
- Whipping Cream (also known as heavy cream): This is the star ingredient for any no-churn ice cream, providing the essential airy and creamy base. For optimal results and a stable, luxurious texture, it’s vital to use whipping cream with a high-fat content, typically 33-36% milk fat. Creams with lower fat percentages will not whip to the stiff peaks needed, leading to a denser and potentially icy ice cream.
- Unsalted Butter: I consistently recommend using unsalted butter for baking and dessert preparations. This allows you precise control over the overall saltiness of your recipe, as the salt content in salted butter can vary significantly between brands. However, if salted butter is your only option, it can be used; just be mindful of any potential adjustments to other salty elements.
- Sweetened Condensed Milk: This ingredient is a magic component in no-churn ice cream. It provides both the necessary sweetness and a wonderfully rich, creamy consistency without the need for an ice cream machine, making the process incredibly simple.
- Brown Sugar: It lends a deep, molasses-rich sweetness and a subtle caramel note to the butter tart filling, which is characteristic of traditional Canadian butter tarts.
- Eggs: Crucial for developing the classic custardy texture and richness of the homemade butter tart filling, contributing to its authentic taste.
- Vanilla Extract: An indispensable flavor enhancer, it beautifully complements and elevates all the sweet and buttery components within the filling and the ice cream base.
- Vinegar: A perhaps surprising but essential ingredient in many classic butter tart fillings. A small amount of vinegar adds a crucial tanginess that perfectly balances the sweetness, adding depth and complexity to the overall flavor profile.
- Cornstarch: This acts as a reliable thickening agent for the butter tart filling, ensuring it achieves that desirable gooey, slightly viscous consistency when cooked, which is then perfectly marbled into the ice cream.
- Mini Butter Tart Shells: These are instrumental in providing the signature flaky, buttery pastry texture that makes butter tarts so beloved. For convenience and consistent quality, I suggest using a well-known brand like Tenderflake. From personal experience, some generic or “no-name” brands can be overly salty or have an inferior texture, which might detract from your ice cream’s overall flavor. Of course, if you enjoy baking from scratch, homemade tart shells are also a wonderful option!
- Raisins: A traditional inclusion in many butter tart recipes, raisins offer delightful bursts of sweetness and a pleasant chewiness that contrast with the smooth ice cream.
*For a precise and comprehensive list of all ingredients and their quantities, please consult the full recipe card located at the end of this article.
📖 Creative Variations & Easy Substitutions
While this butter tart ice cream recipe is a masterpiece in its original form, it’s also incredibly adaptable to suit your personal tastes and preferences. Don’t hesitate to get creative with these delicious variations and simple substitutions:
- Raisins – If raisins aren’t your preferred mix-in, or if you simply wish to explore other textures and flavors, you have numerous fantastic alternatives. Consider adding chopped pecans or praline pecans for a delightful nutty crunch. If you opt for plain pecans, a quick toast in a dry pan or oven beforehand will significantly enhance their natural flavor and aroma. Chopped walnuts are another excellent choice, providing a slightly earthy note that beautifully complements the sweet filling. For a more indulgent twist, try folding in mini chocolate chips, toffee bits, or even a swirl of dulce de leche.
- Tart Shells – The mini tart shells contribute an authentic, flaky pastry element, but homemade pastry is always an option if you enjoy baking. For ultimate convenience, store-bought tart shells are perfectly acceptable. If you find yourself without tart shells, don’t despair! You can use leftover pie pastry (baked and crumbled), crushed Graham crackers, shortbread cookies, or even crumbled digestive biscuits. The goal is to incorporate a buttery, crunchy element that mimics the tart crust.
- Butter – My preference for unsalted butter in recipes is primarily for precise control over seasoning. However, if salted butter is what you have in your pantry, you can certainly use it for this recipe. Just be aware that it might introduce a slightly increased saltiness to the butter tart filling, so you might want to subtly adjust any other added salt if you typically do so.
- Ice Cream Sandwich – Elevate this delightful ice cream into a portable, fun treat! Simply spread a generous layer of the finished butter tart ice cream between two graham crackers or even two homemade shortbread cookies. Freeze these assembled sandwiches until solid for a perfect individual dessert that’s great for parties or a quick indulgence.
- Spiced Twist – For an added layer of warmth and complexity, consider stirring a pinch of ground cinnamon, nutmeg, or even a tiny dash of allspice into your butter tart filling. These spices beautifully enhance the caramel and buttery notes.
- Boozy Kick – A teaspoon of rum, brandy, or even a high-quality maple liqueur added to the cooled butter tart filling can introduce a sophisticated, boozy depth, reminiscent of some gourmet butter tart varieties. Add this sparingly after the filling has been removed from the heat and is cooling.
🔪 Step-by-Step Guide: Crafting Your Own No-Churn Butter Tart Ice Cream
Creating this remarkably rich and flavorful butter tart ice cream is a surprisingly simple and rewarding process. The key to its success lies in careful preparation of the butter tart filling and allowing it to cool completely before combining it with the whipped cream base. Follow these detailed steps to achieve a truly memorable homemade dessert:
Prep Ahead: Start by pre-baking your mini tart shells according to the package instructions. This typically involves baking them for about 10-12 minutes until they are beautifully golden and flaky. Once baked, transfer them to a wire rack to cool down completely. This cooling step is crucial to prevent them from softening and becoming soggy when later folded into the ice cream mixture.
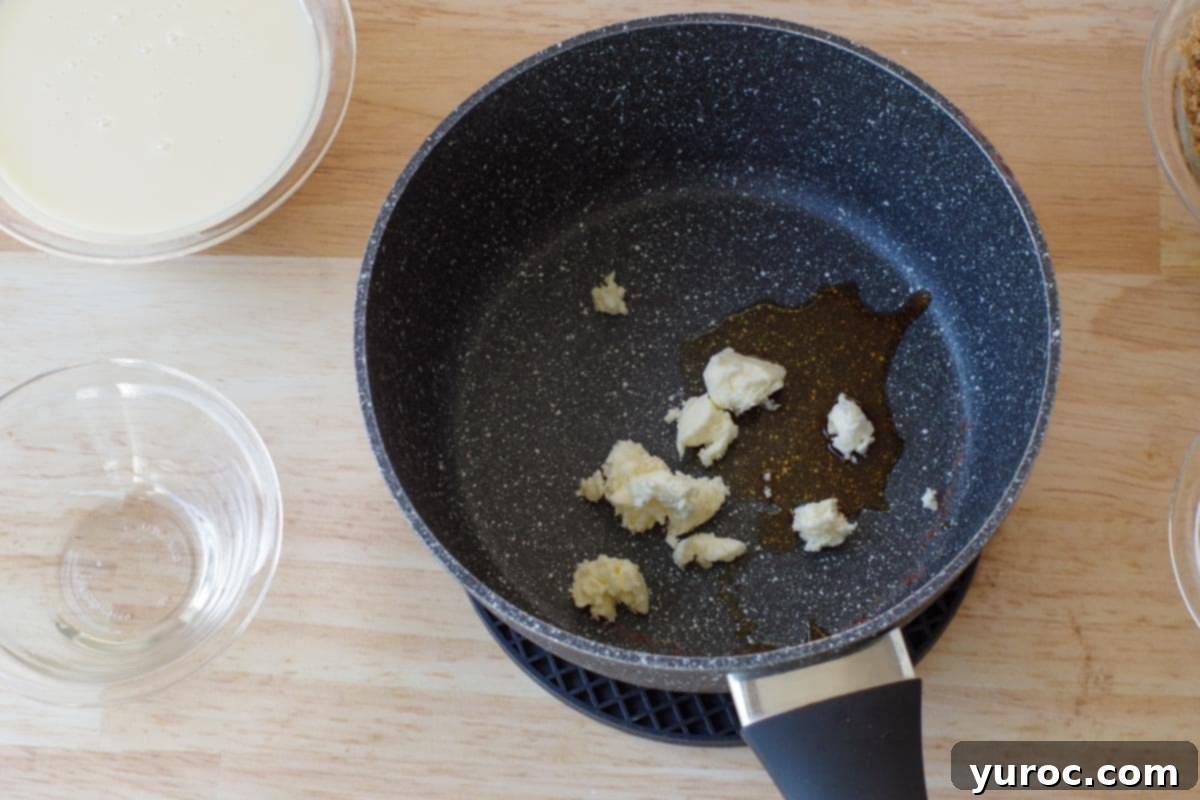
In a small saucepan placed over medium-low heat on your stovetop, add the vanilla extract and unsalted butter. Allow these ingredients to gently melt together, stirring occasionally, until the butter is fully liquefied and well integrated with the vanilla. This fragrant, buttery foundation is the starting point for your rich butter tart filling.
*Time-Saving Tip: If you are fortunate enough to have a batch of pre-made or leftover butter tart filling, you can conveniently bypass the next few steps and proceed directly to Step #6, saving valuable preparation time!
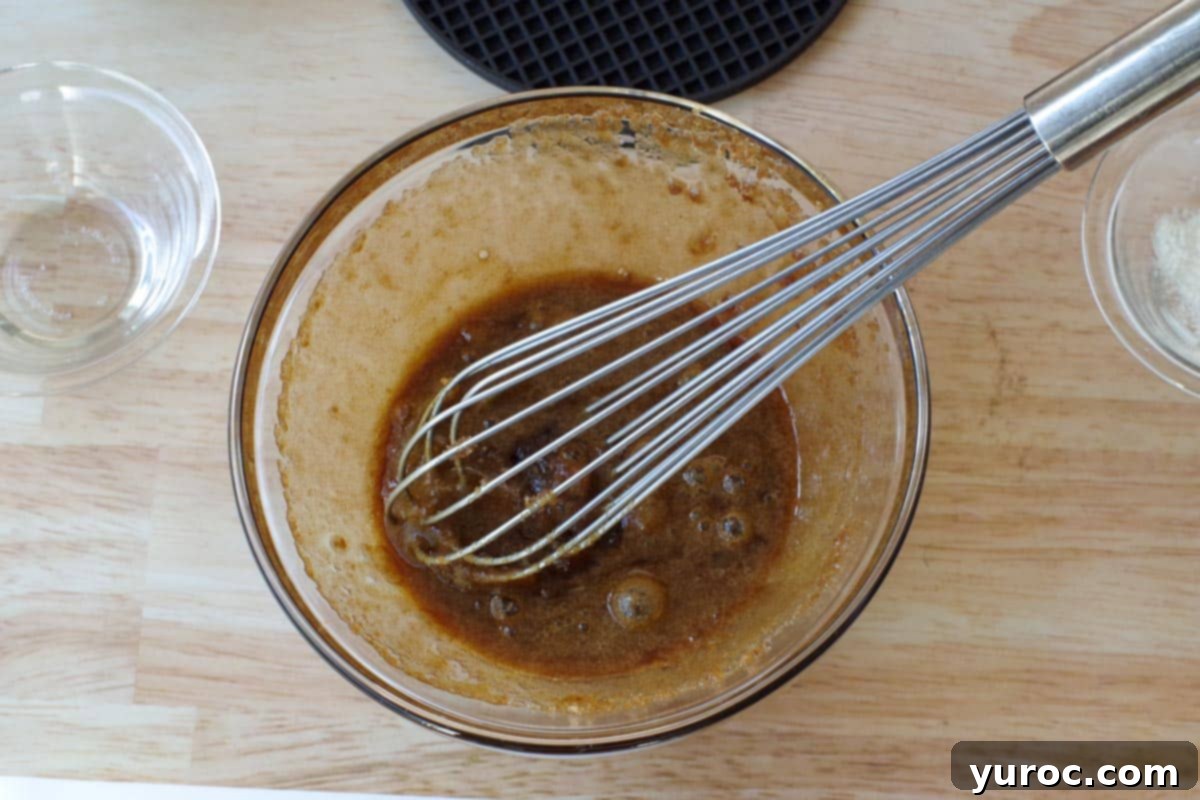
In a separate mixing bowl, combine the whole eggs and brown sugar. Whisk vigorously until the mixture is thoroughly blended and appears slightly lighter in color and somewhat frothy. This combination will form the custardy, sweet backbone of your butter tart filling, crucial for its signature taste and texture.
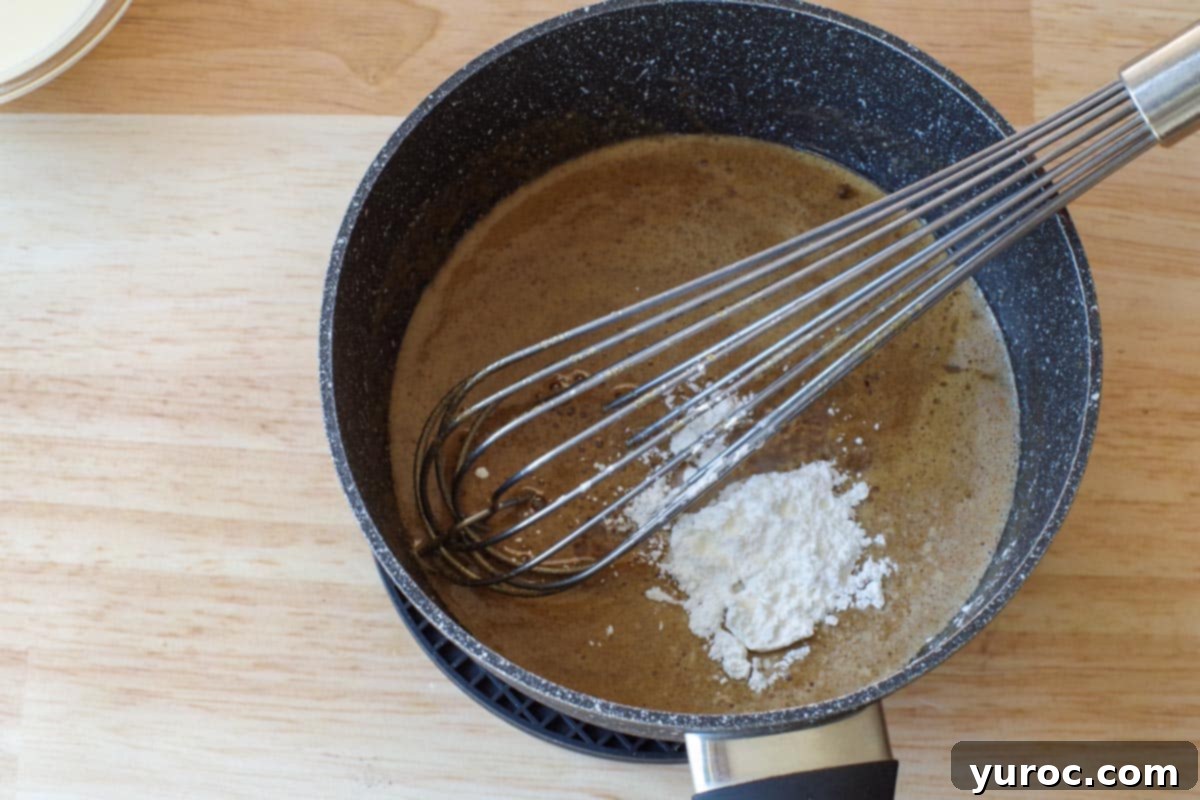
Carefully pour the egg and brown sugar mixture into the saucepan containing the warm butter and vanilla. Stir continuously as you bring the mixture to a gentle simmer over low heat. Once it begins to simmer, add the vinegar and cornstarch. The vinegar provides an essential tanginess that cuts through the sweetness, while the cornstarch is key to achieving the perfect thickened consistency for the filling.
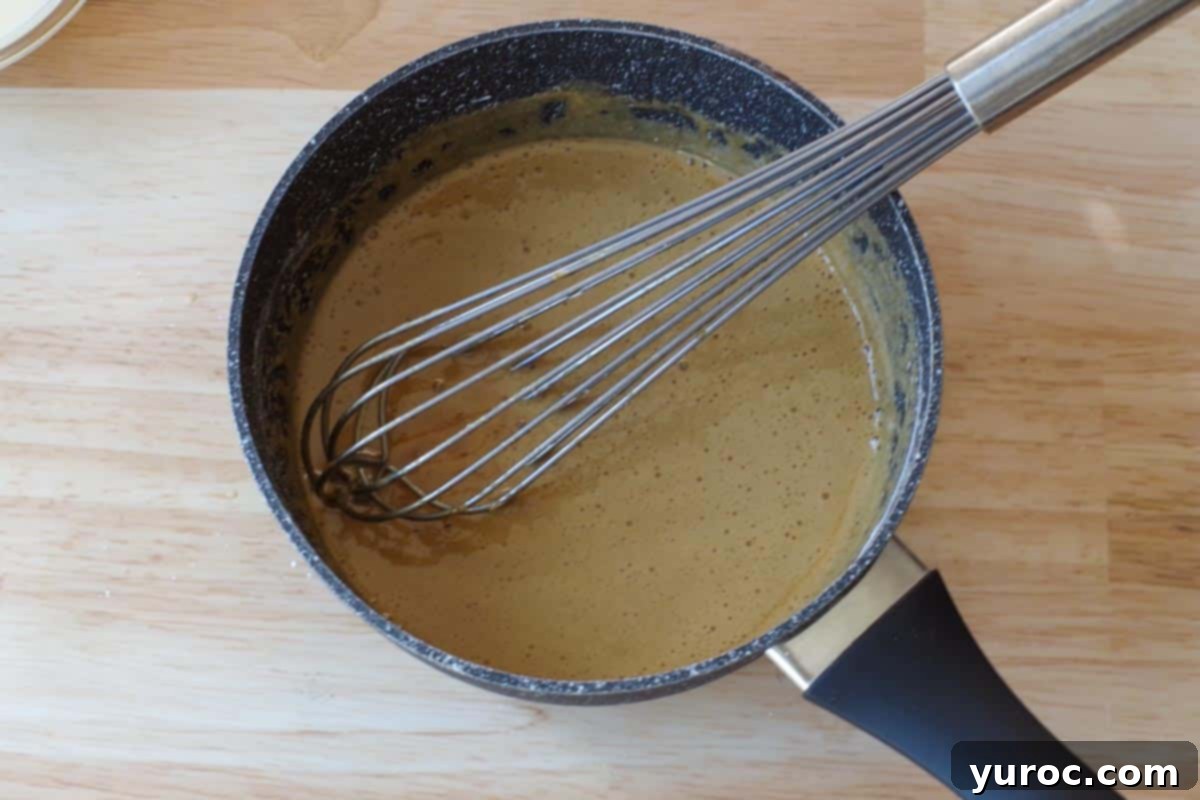
Continue whisking the filling diligently over low to medium heat for approximately 10 minutes. Consistent stirring is paramount here to prevent any scorching and to ensure even thickening. The mixture will gradually transform into a rich, gooey sauce, similar in consistency to a thick gravy or a luscious caramel. This perfectly cooked filling is what will infuse your ice cream with authentic butter tart flavor and texture.
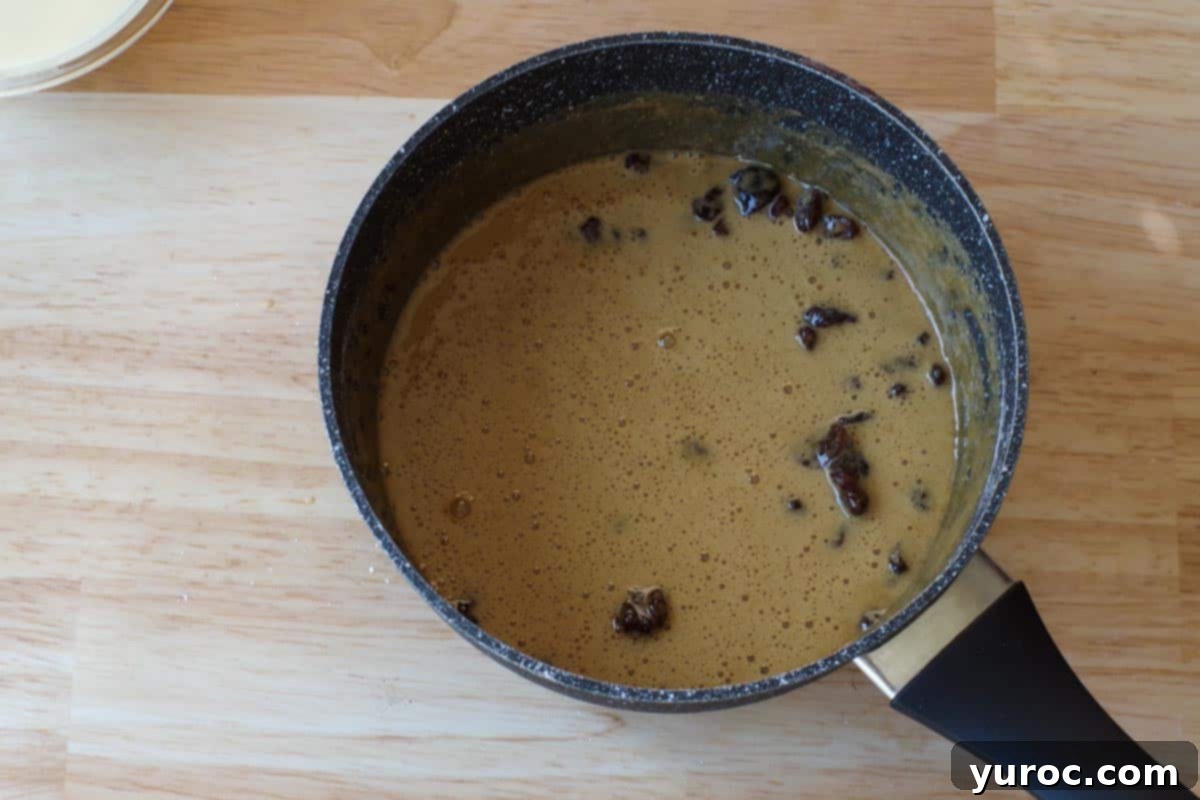
Once your butter tart filling has achieved its ideal gravy-like consistency, remove the saucepan from the heat. Immediately stir in the raisins (or your chosen mix-ins like nuts or chocolate chips). Now, transfer the entire filling to a separate bowl and set it aside to cool down completely to room temperature. This step is absolutely critical: introducing warm filling to the whipped cream will cause the cream to deflate, negatively impacting the final texture of your ice cream.
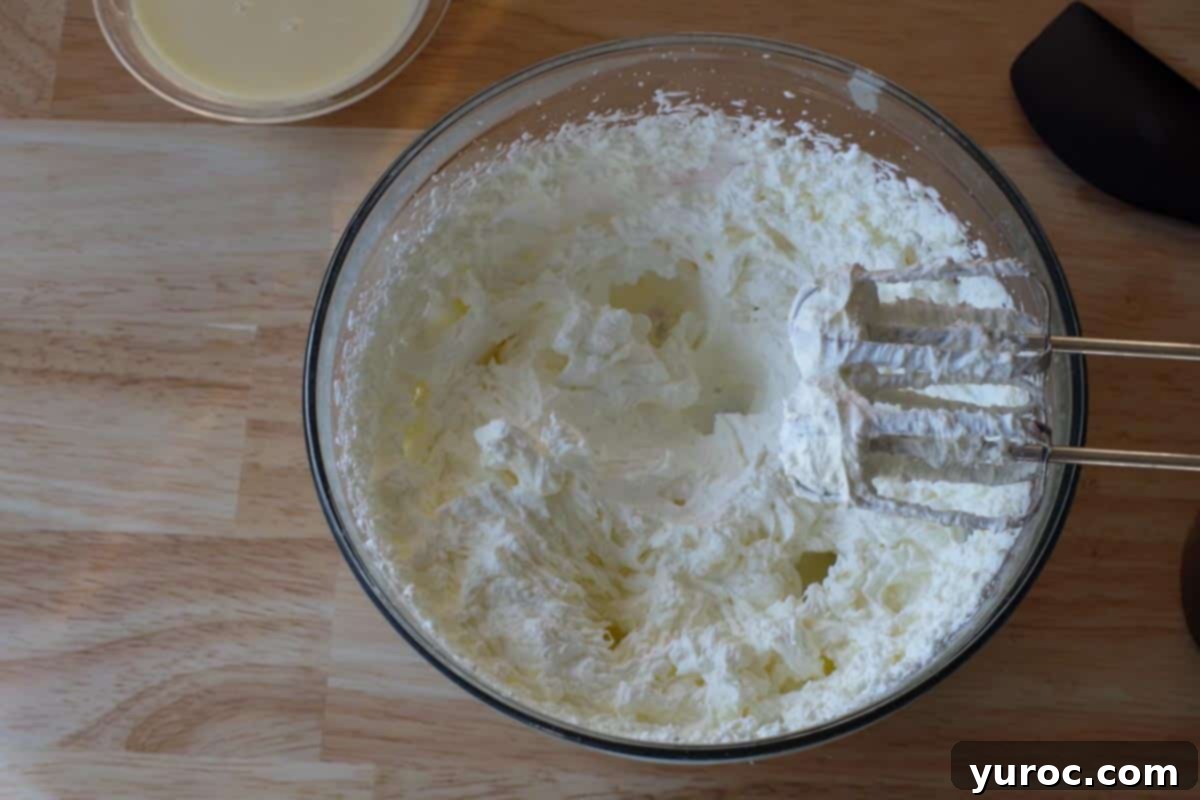
In a large mixing bowl (preferably one that has been chilled in the freezer for 10-15 minutes), beat the very cold whipping cream using an electric mixer on high speed until it forms stiff peaks. Stiff peaks are achieved when the cream holds its shape firmly and doesn’t droop when you lift the beaters. This airy, voluminous base is fundamental to achieving a light and creamy no-churn ice cream texture.
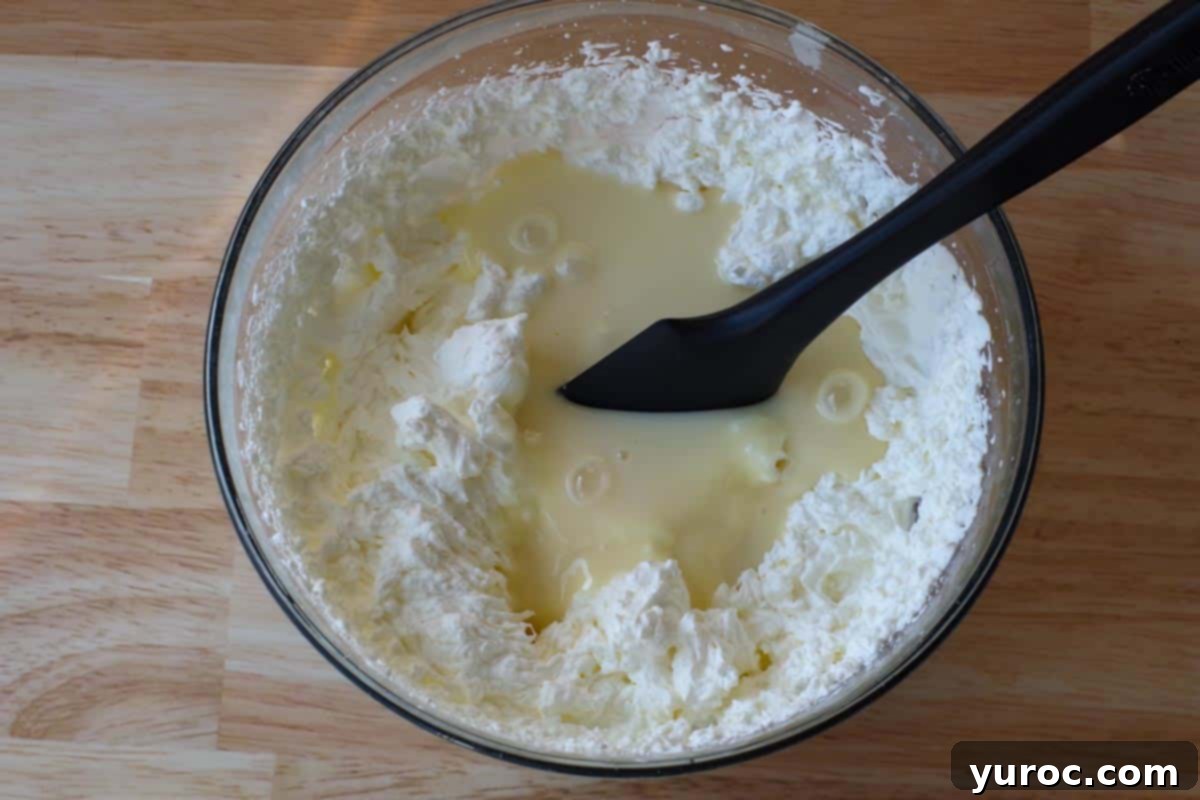
Once your whipping cream is stiff and airy, carefully pour the sweetened condensed milk into the bowl. Using a spatula, gently fold the condensed milk into the whipped cream. Employ a light touch to avoid deflating the whipped cream, preserving its volume. The condensed milk provides the essential sweetness and creamy body that replaces the need for an ice cream machine.
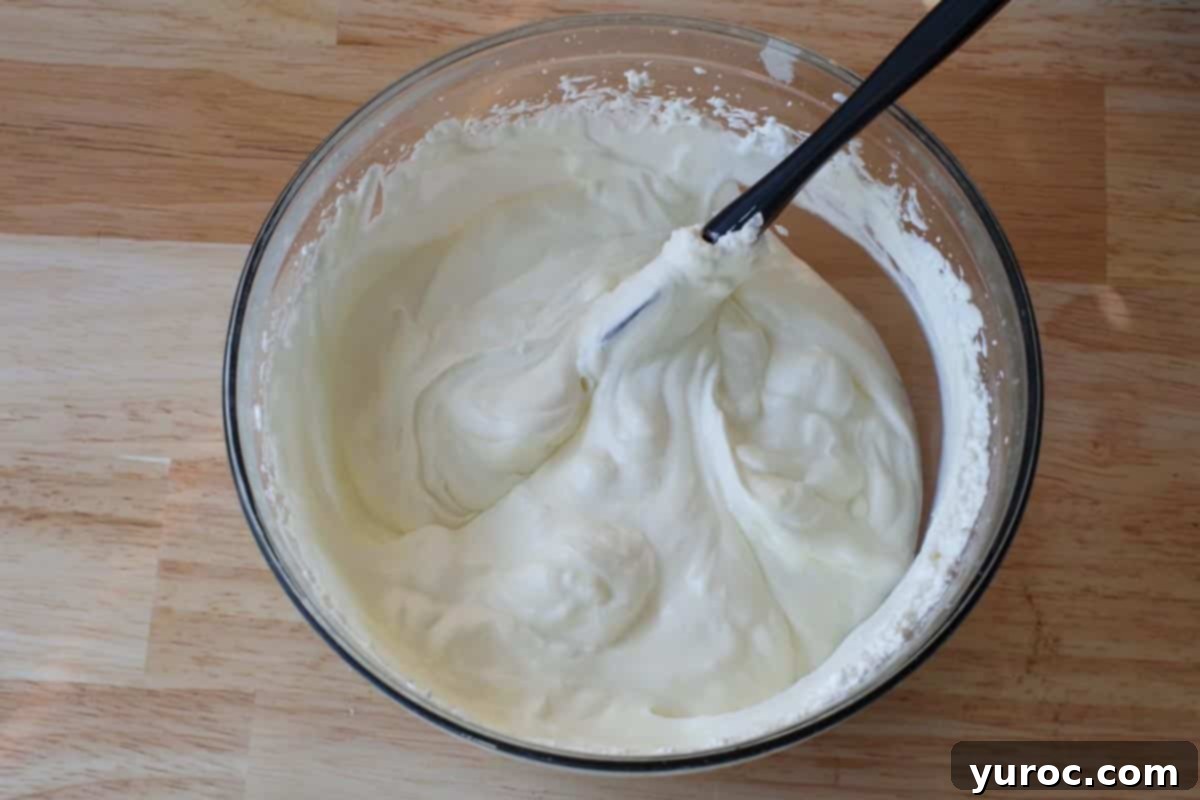
Continue to gently stir the whipped cream and condensed milk just until they are fully combined and you no longer see any distinct streaks of condensed milk. It’s crucial not to overmix at this stage, as excessive stirring can cause the whipped cream to lose its airiness, resulting in a denser and less desirable ice cream texture.
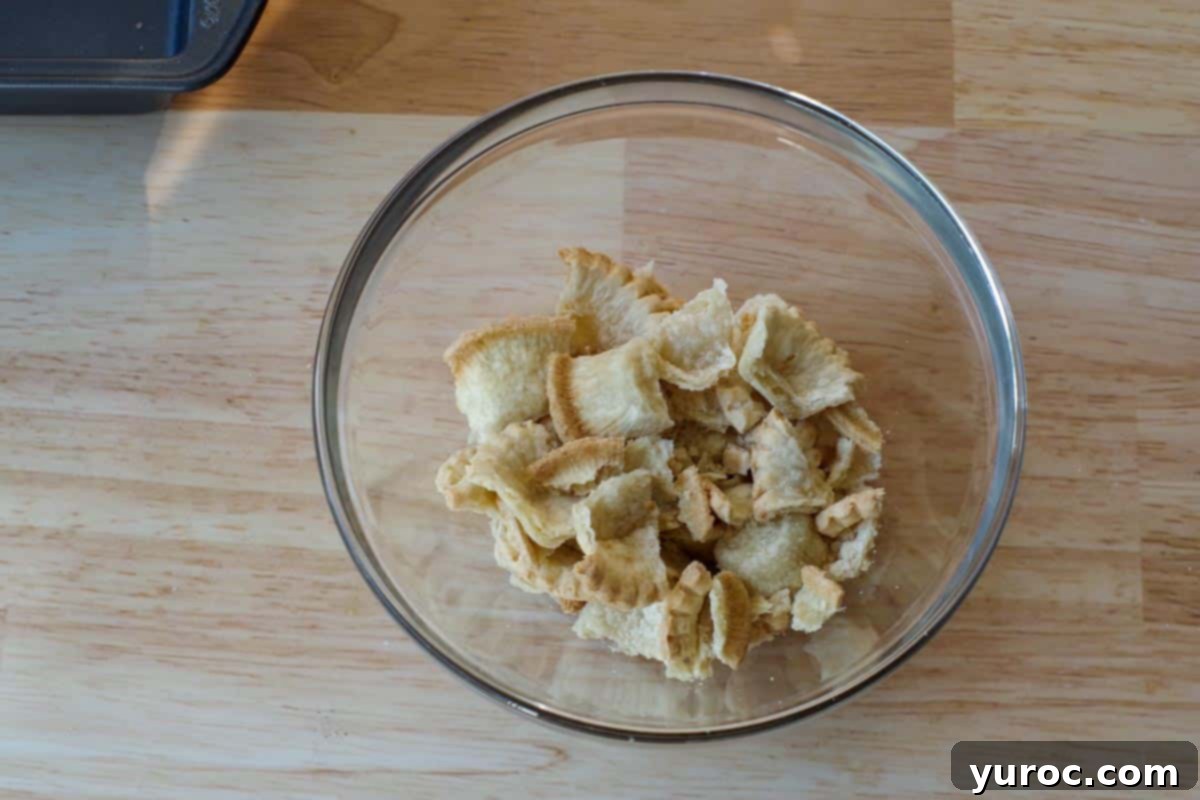
Take your completely cooled, baked mini tart shells and gently break them into small, uneven pieces. Aim for a mix of different sizes – some slightly larger chunks for crunch, and smaller crumbs for a softer textural element. Avoid crushing them into fine powder; you want distinct pastry pieces to provide that authentic butter tart experience within your ice cream.
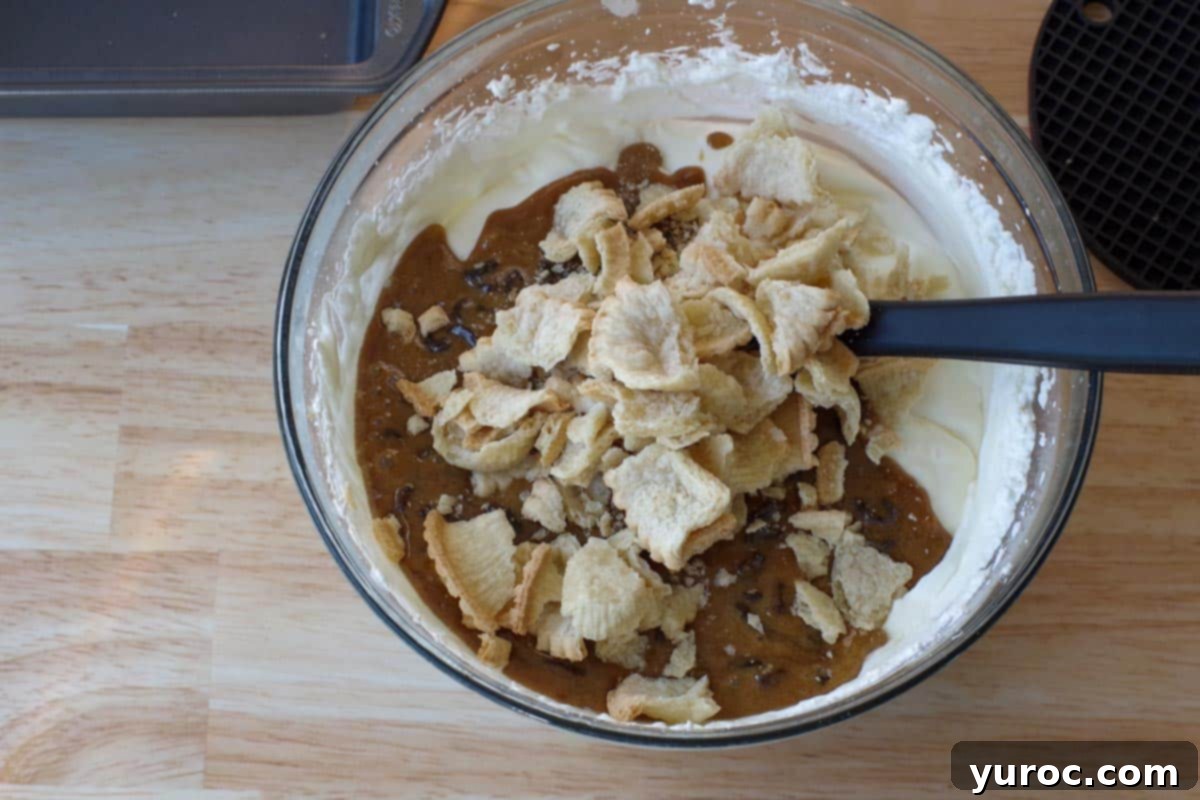
Now for the highly anticipated flavor infusion! Add the entirely cooled butter tart filling and the broken pastry pieces into your whipped cream and condensed milk mixture. Double-check that the filling is completely cool; even slight warmth can compromise the ice cream’s texture by melting the delicate whipped cream base.
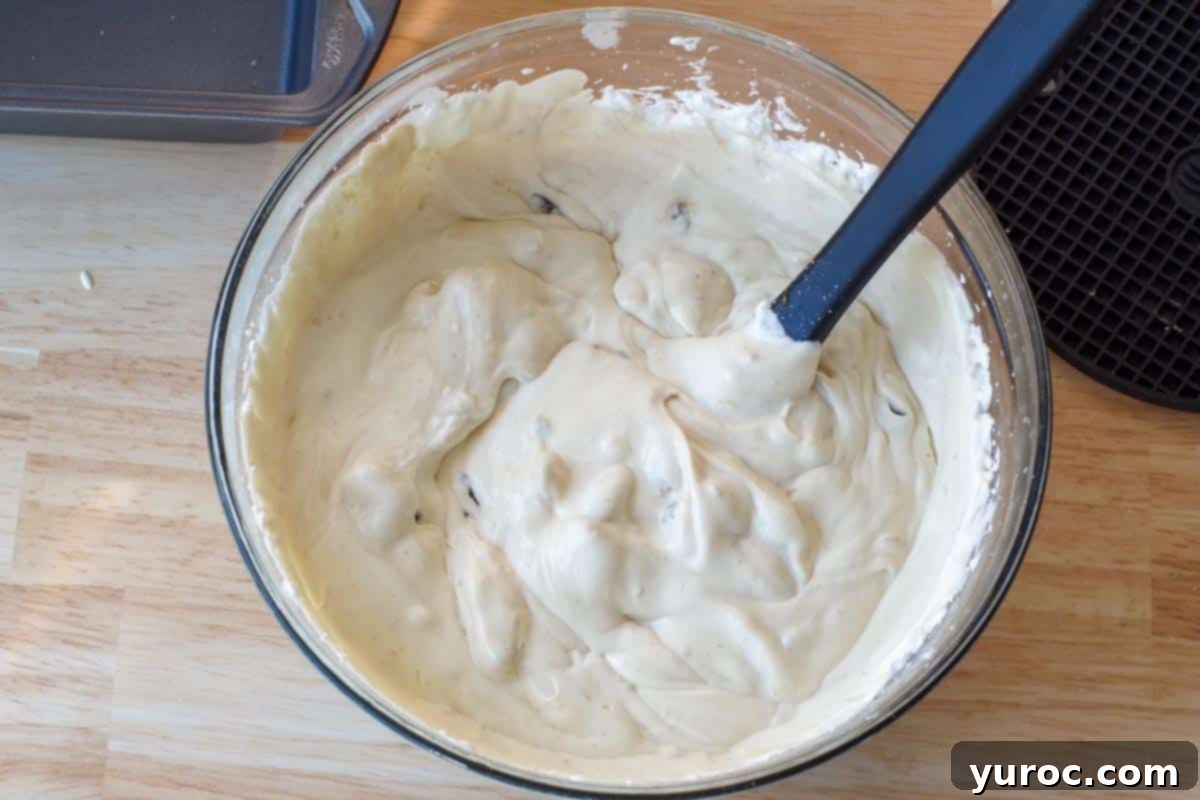
With a gentle hand, fold all the ingredients together: the creamy base, the rich butter tart filling, and the crunchy pastry pieces. Mix just until they are combined, aiming for beautiful swirls of the filling throughout the ice cream rather than a uniform color. As before, be careful not to overmix, as this can deflate the airy texture you’ve meticulously built.
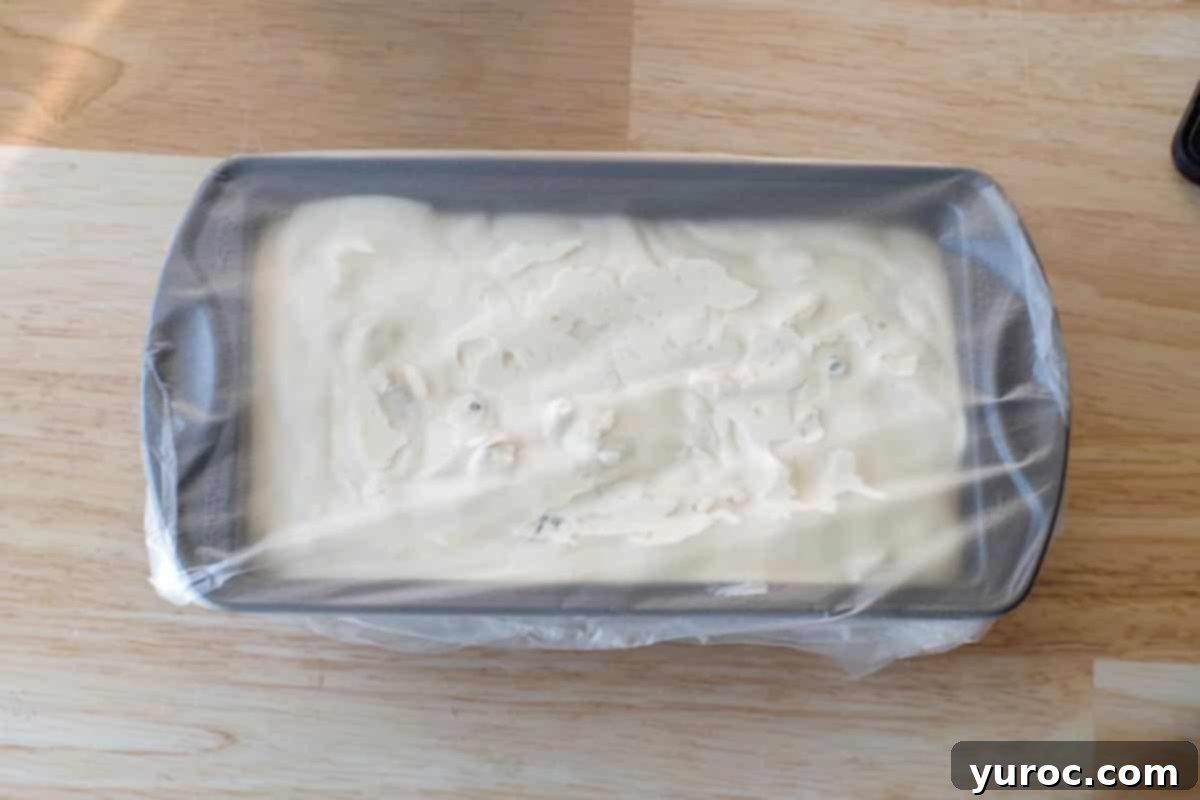
Pour the luscious butter tart ice cream mixture into a freezer-safe container of your choice. A standard 9×5-inch loaf pan is an excellent option, providing an ideal shape for scooping, but a square cake pan, or any other sealed container, will work equally well. Cover the container very tightly to prevent freezer burn and the formation of undesirable ice crystals on the surface. For superior protection and a truly airtight seal, I highly recommend using Glad Press n’ Seal (affiliate link) instead of traditional plastic wrap. Freeze the ice cream for at least 8 hours, or ideally overnight, until it is completely solid. Be aware that freezing time can vary depending on the temperature and how full your freezer is. A longer freeze generally results in a creamier texture and deeper flavor integration.
Optional Garnish for Extra Flair: For an irresistible visual and textural flourish, chop up 2-3 additional whole butter tarts and sprinkle them generously over the top of the ice cream. You can do this either before freezing (for a softer, slightly integrated topping) or after freezing (for a fresh, crunchy garnish). Alternatively, serve each scoop of ice cream alongside a small, elegant wedge of a whole butter tart – whether homemade or purchased, it makes a perfect accompaniment!
Hint: No-churn ice cream, due to its unique preparation method and higher fat content, tends to melt more quickly than traditionally churned ice cream. For the absolute best serving experience and to maintain its delightful creamy consistency, scoop it out immediately upon removing it from the freezer and promptly return the container to the freezer once you are done serving.
✅ Expert Recipe Tips for the Creamiest No-Churn Ice Cream
Achieving perfectly creamy, luscious no-churn ice cream, especially one as rich in flavor as our Butter Tart Ice Cream, is effortless with a few insider tricks. Incorporate these expert tips into your preparation to ensure your homemade dessert is nothing short of spectacular:
- Chill your mixing bowl and beaters before whipping the cream. This simple step is a true game-changer! Place your mixing bowl and the beaters (or whisk attachment) of your electric mixer in the freezer for about 10-15 minutes before you begin whipping the heavy cream. Cold equipment significantly aids in helping the cream whip up faster, achieve maximum volume, and hold those crucial stiff peaks more easily. This results in a much lighter, airier, and ultimately creamier ice cream base.
- Let the butter tart filling cool completely. Patience is a virtue, especially here. Adding even slightly warm filling to your delicate whipped cream base will cause it to instantly deflate. This leads to an ice cream that is not only less creamy but can also develop an icy, uneven, or even grainy texture. Ensure the filling is at a true room temperature, or even slightly chilled, before you gently fold it into the whipped cream mixture.
- Toast your nuts (if using) for enhanced flavor. If you opt to include pecans, walnuts, or other nuts in your ice cream, whether as a substitute for or in addition to raisins, take an extra moment to lightly toast them. Spread them evenly on a dry pan and toast on the stovetop over medium heat for a few minutes, stirring frequently, or bake them in the oven at 350°F (175°C) for 5-7 minutes. This quick step brings out their natural oils, deepening their flavor and adding a more complex, aromatic dimension to your ice cream.
- Don’t overmix the final ice cream base. When you reach the stage of folding the cooled butter tart filling and pastry pieces into the whipped cream and condensed milk mixture, mix just until everything is combined. Overmixing is the cardinal sin of no-churn ice cream, as it can quickly knock out the precious air that you’ve carefully incorporated into the whipped cream. The consequence is a denser, less creamy, and less appealing ice cream texture. Aim for “just barely combined” rather than a homogeneous blend.
- Use a metal loaf pan for faster and more even freezing. While any freezer-safe container will work for freezing, metal pans are superior. Metal conducts cold much more efficiently and rapidly than glass or plastic. Using a metal loaf pan will help your ice cream set faster and freeze more uniformly throughout, significantly reducing the chances of developing undesirable icy spots.
- Break tart shells into uneven chunks. For the most dynamic and enjoyable eating experience, aim for a variety of sizes when breaking your baked tart shells. A mix of larger, crunchy pieces and smaller, crumbly bits creates a fantastic textural contrast. Some bites will offer a satisfying, distinct buttery crunch, while others will provide a softer, more integrated pastry element, mimicking the delightful experience of biting into a freshly baked butter tart.
- Add a pinch of salt to balance sweetness. Butter tarts are famously sweet, and this ice cream embraces that characteristic. However, a tiny pinch of fine sea salt (approximately ¼ teaspoon) folded into the whipped cream base can work wonders. Salt is a remarkable flavor enhancer that helps to cut through the richness and elevate all the other flavors, preventing the ice cream from being overwhelmingly sweet and adding a subtle yet profound depth to the overall profile.
- Freeze overnight for the absolute best texture. While the recipe specifies a minimum freezing time of 8 hours, allowing your homemade butter tart ice cream to freeze for a full overnight period will yield the creamiest, most luxurious, and perfectly set result. This extended freezing time permits all the intricate flavors to meld beautifully and the ice cream to firm up impeccably, making it easier to scoop and infinitely more enjoyable to savor.
🥗 Perfect Pairings: Delectable Meals to Serve with Butter Tart Ice Cream
Butter Tart Ice Cream is an incredibly versatile dessert, effortlessly complementing a diverse range of meals and making it a superb conclusion to almost any gathering. Its rich, sweet, and subtly tangy profile, combined with the signature buttery pastry notes, positions it as an exceptional choice, particularly for festive occasions like a Canada Day BBQ. Imagine ending a flavorful outdoor feast with this uniquely Canadian and wonderfully refreshing treat!
Here are some fantastic meal ideas that would be wonderfully enhanced by serving our homemade Butter Tart Ice Cream as the grand finale:
- Slow Cooker Beef on a Bun: The robust, savory flavors of tender, slow-cooked beef served on a bun create a hearty and satisfying main course. The contrasting light, cold, and sweet ice cream provides a perfect palate cleanser and a refreshing end to the meal.
- Beer Can Chicken: (as showcased in the image below) This beloved BBQ staple, renowned for its incredibly juicy and flavorful chicken, is an outstanding partner for butter tart ice cream. The smoky, savory, and often slightly spicy notes of the chicken are beautifully balanced by the sweet, creamy indulgence of the dessert. It’s a quintessential summer pairing that truly delights!
- Greek Chicken Burgers: Featuring fresh, Mediterranean-inspired flavors often seasoned with bright lemon and aromatic herbs, Greek chicken burgers offer a lighter yet equally satisfying main course. The brightness and zest of the burgers elegantly pave the way for the rich and comforting sweetness of the butter tart ice cream.
- Grilled Salmon: For those seeking a slightly lighter or healthier option, grilled salmon presents a delicate yet rich flavor profile that harmonizes well without overpowering the dessert. Its healthy fats and mild taste make it a fulfilling meal that leaves just the right amount of room for a sweet, creamy conclusion.
- Pulled Pork Sandwiches: Much like the beef on a bun, the tangy and savory nature of classic pulled pork sandwiches creates a delightful counterpoint to the sweet ice cream. The warm, succulent savory flavors followed by the cool, sweet dessert is a combination that is consistently a crowd-pleaser.
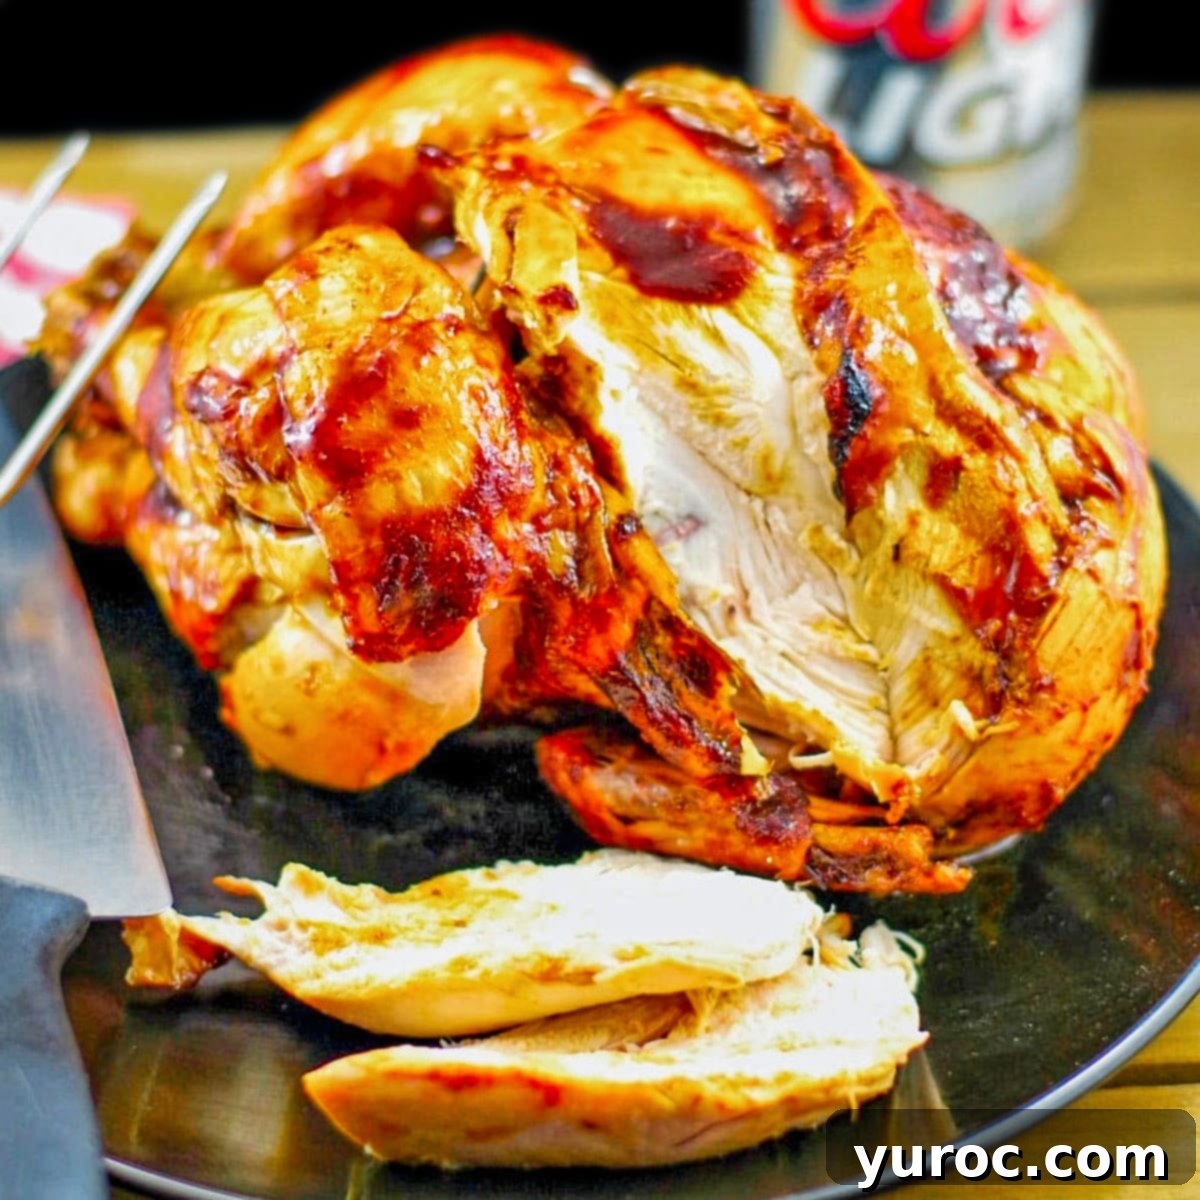
Regardless of your main course selection, this homemade Butter Tart Ice Cream is guaranteed to be a universally loved dessert that will leave a lasting impression on all your guests, sparking conversations long after the meal has concluded.
🍽 Essential Equipment for Your Homemade Butter Tart Ice Cream
One of the most appealing aspects of this no-churn butter tart ice cream recipe is its simplicity and minimal equipment requirements. You won’t need any specialized or expensive gadgets like a traditional ice cream machine. In fact, you likely already possess most, if not all, of these common kitchen tools:
- Small Pot: Essential for melting the butter and vanilla, and then simmering the ingredients for the rich butter tart filling. A small saucepan is perfect for this task.
- Whisk: A fundamental tool for several steps, including combining the egg and sugar mixture smoothly and continuously stirring the filling as it thickens to prevent lumps and ensure a perfectly smooth consistency.
- Mixing Bowls: You will need at least two mixing bowls. One will be for preparing the egg and brown sugar mixture, and a large bowl (ideally one that has been chilled in the freezer) is crucial for whipping the heavy cream to stiff peaks.
- Electric Mixer: While whipping cream by hand is possible, an electric mixer—whether a stand mixer with a whisk attachment or a hand mixer—will make the process significantly faster, easier, and more reliable, guaranteeing you achieve the necessary stiff peaks for a light and airy no-churn ice cream. Here’s an excellent hand mixer option (affiliate link).
- Freezer-Safe Container: To freeze your delightful, finished ice cream mixture. A 9×5-inch loaf pan (affiliate link) is frequently recommended due to its convenient shape for scooping and efficient freezing properties. However, any square cake pan, airtight plastic food storage container, or even a deep glass dish will function perfectly, provided it can be covered securely to prevent air exposure.
- Spatula: An invaluable tool for gently folding delicate ingredients together, ensuring you don’t deflate the meticulously whipped cream, which is vital for the ice cream’s airy texture.
Equipped with these basic and readily available kitchen tools, you are perfectly set to create a deliciously creamy homemade butter tart ice cream that tastes every bit as good as, if not better than, a gourmet parlor offering!
🌡️ Storage Tips for Maximum Freshness and Flavor
Proper storage is paramount to preserving the delightful creamy texture and rich flavor of your homemade Butter Tart Ice Cream. Following these guidelines will ensure your frozen treat remains delicious for as long as possible:
Always store any leftover ice cream in an airtight container placed in the coldest section of your freezer. To rigorously prevent freezer burn and maintain its delicate, smooth texture over an extended period, I highly recommend transferring the ice cream to a dedicated sealed plastic container if you anticipate storing it for more than just a few days. While a loaf pan is excellent for initial freezing and presentation, an airtight plastic container offers superior protection against air exposure, which is the primary culprit behind ice crystals and a gritty texture.
If you find yourself with a bit of excess ice cream that doesn’t quite fit into your main container, or perhaps you’ve deliberately made extra, don’t let it go to waste! I often opt to freeze these smaller portions in individual containers, such as coffee mugs or small ramekins. Just ensure that these smaller containers are also covered tightly with a layer of plastic wrap or, ideally, Glad Press n’ Seal before placing them in the freezer. This homemade butter tart ice cream can be stored effectively in the freezer for up to 2-3 weeks, though its peak freshness, optimal texture, and most vibrant flavor are typically best enjoyed within the first week of freezing.
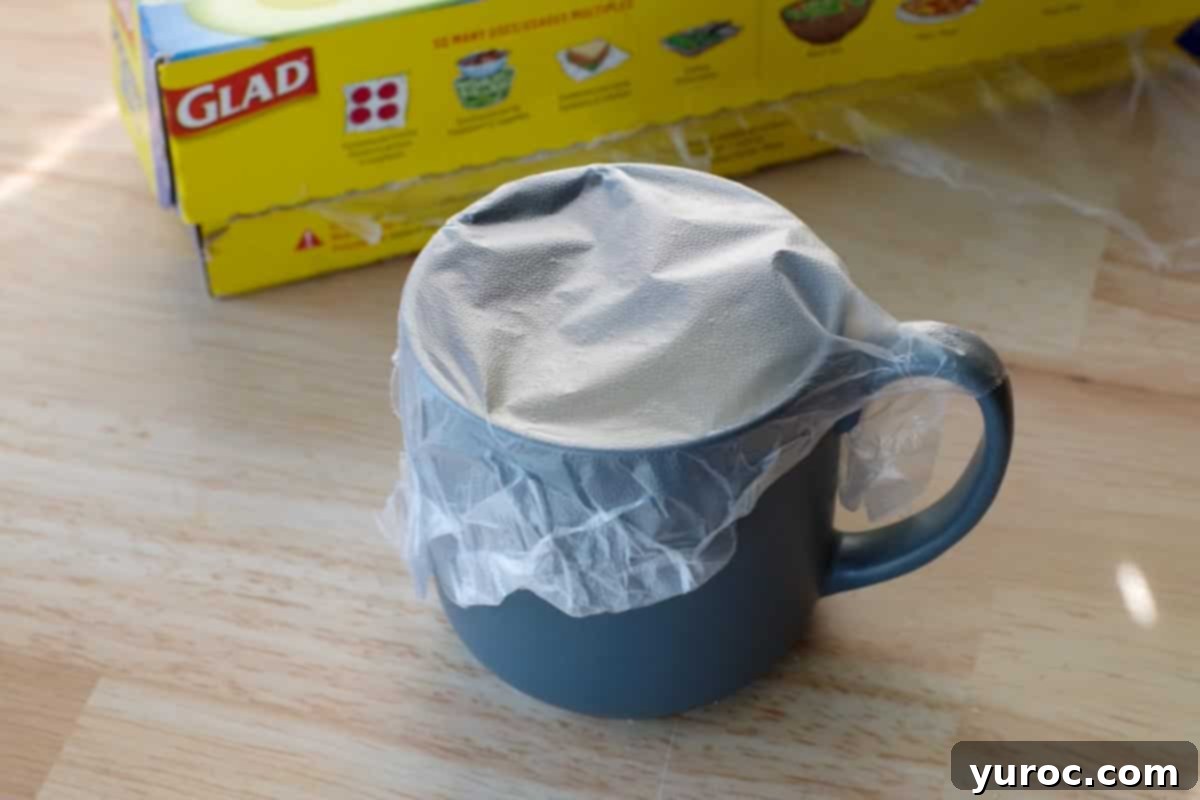
Remember, the tighter the seal on your container and the colder your freezer maintains its temperature, the better your homemade ice cream will preserve its delightful quality and resist the common issues of freezer burn and ice crystallization over time!
👪 Serving Size & How to Easily Adjust the Recipe
This delightful recipe for homemade Butter Tart Ice Cream is designed to yield approximately 10 generous servings, making it an excellent choice for family gatherings, potlucks, or when entertaining a group of friends. The wonderful flexibility of modern online recipe cards means you can effortlessly tailor the yield to your specific needs!
Should you need to prepare a smaller batch for a cozy night in, or a much larger quantity for a grand celebration, adjusting the recipe is incredibly simple. Just locate the serving number prominently displayed on the recipe card below and click on it. You will then be presented with options to select your desired number of servings (e.g., to half, double, or even triple the original recipe). Upon selection, the ingredient quantities will automatically adjust themselves to precisely match your chosen serving size, eliminating the need for tedious manual calculations and making scaling the recipe remarkably convenient. Always give the adjusted measurements a quick review to ensure everything looks correct before you begin preparing.
💡 Top Tip: Don’t Waste a Drop of Leftover Sweetened Condensed Milk!
Clever Ways to Use Up Excess Condensed Milk
Many recipes, including this scrumptious ice cream, often call for a standard 14-ounce can of sweetened condensed milk. It’s quite common to find yourself with a small amount leftover if your recipe only requires a portion. There’s no need to let that precious, sweet, and creamy liquid go to waste! Sweetened condensed milk freezes exceptionally well in an airtight container for convenient future use, or you can effortlessly incorporate it into a variety of other delightful dishes. It’s a fantastic ingredient that adds incredible richness, sweetness, and a velvety texture to both sweet and savory recipes.
Consider these fantastic recipes from our culinary collection to make the most of your leftover condensed milk:
- Healthy Butter Chicken: A surprising but wonderful addition, contributing a subtle sweetness and creamy depth to this savory Indian-inspired dish.
- Creamy Lemon Chicken Pasta: It works magic by enhancing the creaminess of the pasta sauce and beautifully balancing the tanginess of the lemon.
- Stovetop Rice Pudding (Cranberry Gingerbread): An ideal ingredient for achieving that signature rich, sweet, and comforting texture in a classic homemade rice pudding.
Having a creative plan for your leftovers is not only efficient but also a great way to reduce food waste and explore new culinary horizons!
❔ Frequently Asked Questions About Butter Tart Ice Cream
While the baked mini tart shells are highly recommended for providing the most authentic butter tart experience with their distinctive buttery, flaky texture, you absolutely have excellent options for substitution. You can creatively use any kind of flaky pastry you might have leftover, such as baked and crumbled pie crust scraps. For a slightly different but equally delightful flavor and texture profile, consider using crushed Graham cracker pieces, crumbled shortbread cookies, or even crushed digestive biscuits. The crucial element is to select something with a buttery quality to beautifully echo the classic butter tart flavor. Just ensure whatever alternative you choose is baked or prepared to be crispy before it’s incorporated into the ice cream base.
No need to worry if a loaf pan isn’t available! Any freezer-safe container with a tightly fitting lid will work perfectly for freezing your homemade no-churn ice cream. This could include various options such as a square or rectangular baking pan, a large glass food storage container, a sturdy plastic container, or even a metal cake tin. The most critical factor is ensuring that the container can be covered very securely to prevent any air exposure, which is what leads to freezer burn and the unwelcome formation of ice crystals on your delicious ice cream. The specific shape of the container will primarily affect the ease of scooping, not the taste or quality of the ice cream itself.
Unfortunately, no, using light cream (or half-and-half) is not recommended for this no-churn ice cream recipe. Light cream has a significantly lower fat content compared to whipping cream or heavy cream, which typically contains 33-36% milk fat. This lower fat content means that light cream simply will not whip up to the necessary stiff peaks required to create the light, airy, and creamy texture that is characteristic of successful no-churn ice cream. The stiff peaks of whipped cream are essential for incorporating air and preventing the ice cream from becoming overly dense or icy without the churning process. Using light cream would unfortunately result in a thin, watery, and very icy ice cream that completely lacks the desired richness and luxurious mouthfeel.
Absolutely! Chopping up full-sized butter tarts (whether they are store-bought or homemade) and gently folding them directly into the ice cream base before freezing is an excellent and highly recommended way to further intensify the authentic butter tart flavor and introduce even more delightful texture. This method will provide you with larger, softer, and chewier chunks of actual butter tart distributed throughout your creamy ice cream. Just be aware that incorporating whole butter tarts will likely increase the overall sweetness and richness of the ice cream, so you may wish to adjust your serving sizes or prepare for an extra indulgent treat. It’s a fantastic option for true butter tart enthusiasts who crave that extra layer of authenticity!
Butter Tarts are undeniably a beloved Canadian favorite, and this homemade No-Churn Butter Tart Ice Cream offers a wonderfully refreshing and utterly delicious way to savor their classic, comforting taste. It’s truly a perfect dessert for your Canada Day celebrations, summer gatherings, or any time you desire a sweet, authentic treat, and it’s guaranteed to be a hit with the entire family!
For even more delightful desserts to celebrate Canada Day or simply to enjoy throughout the year, be sure to explore our carefully curated selection of 21 Canada Day Desserts for abundant inspiration!
🍨 Explore More Easy No-Churn Ice Cream Recipes!
- Saskatoon Berry Ice Cream (No-Churn)
- No-Churn Ice Cream Cupcake Recipe
- Potato Ice Cream – Cookies N’ Creamers No-Churn Ice Cream
- Pumpkin Pie Ice Cream (No-Churn)
Did your family ❤️ this irresistible recipe? Did you know that commenting and ⭐ rating recipes is one of the best ways to support your favorite recipe creators? If you LOVED this recipe, please take a moment to comment and rate it in the recipe card below, or share your delicious photos on social media using the hashtag #foodmeanderings or by tagging @foodmeanderings! Your feedback means the world to us and helps other home cooks discover these amazing dishes.

📋 Butter Tart Ice Cream Recipe (No-Churn)
Equipment
- electric mixer
- loaf pan
Ingredients
- 14 oz sweetened condensed milk
- 3 cups whipping cream (aka heavy cream, 33-36% fat)
- 2 ½ teaspoon unsalted butter
- 1 teaspoon vanilla extract
- 1 ½ cups brown sugar
- 2 whole eggs
- 2 teaspoon vinegar
- 2 teaspoon cornstarch
- 1 cup raisins
- 12 mini tarts shells (baked)
Instructions
- Prep: Bake mini tart shells according to package directions (typically 10-12 minutes) until golden and crispy. Set aside to cool completely.12 mini tarts shells (baked)
- In a small saucepan on the stovetop, add the vanilla extract and unsalted butter. Melt these ingredients together over medium-low heat.*Note: If you are using leftover, pre-made butter tart filling, you can skip directly to Step #6.2 ½ teaspoon unsalted butter, 1 teaspoon vanilla extract
- In a separate medium bowl, whisk together the eggs and brown sugar until well combined.2 whole eggs, 1 ½ cups brown sugar
- Pour the egg and brown sugar mixture into the warm butter and vanilla mixture in the saucepan. Bring to a gentle simmer over low heat, then add the vinegar and cornstarch, stirring continuously.2 teaspoon vinegar, 2 teaspoon cornstarch
- Continue whisking constantly over medium-low heat for about 10 minutes, or until the mixture thickens to the consistency of a rich gravy. This ensures a perfectly gooey filling.
- Remove the butter tart filling from the heat and stir in the raisins (or your preferred add-ins). Set the filling aside in a separate bowl to cool completely to room temperature. This is crucial for the ice cream’s texture.1 cup raisins
- In a large, chilled mixing bowl, beat the cold whipping cream using an electric mixer until stiff peaks form. The cream should hold its shape firmly when the beaters are lifted.3 cups whipping cream
- Gently fold the sweetened condensed milk into the whipped cream using a spatula. Be careful not to deflate the cream.14 oz can of sweetened condensed milk
- Continue stirring only until the condensed milk is fully combined with the whipped cream and no streaks remain. Avoid overmixing.
- Break the cooled mini tart shells into small, uneven pieces. A mix of sizes will provide the best texture.
- Add the broken tart pieces and the completely cooled butter tart filling mixture into the whipped cream base.
- Gently fold all ingredients together until they are just combined, creating lovely swirls of the filling throughout the ice cream base.
- Pour the ice cream mixture into your chosen freezer-safe container (a 9×5 loaf pan works well). Cover the container tightly with plastic wrap or Glad Press n’ Seal to prevent ice crystals. Freeze for at least 8 hours, or preferably overnight, until solid. Freezing time may vary based on your freezer’s efficiency.
Garnish (optional)
- For an extra touch, chop up 2-3 additional whole butter tarts and sprinkle them over the top of the ice cream (either before or after freezing). Alternatively, serve each portion with a small wedge of a whole butter tart on the side.
Notes
-
- Chill your mixing bowl and beaters before whipping the cream. For best results, place your mixing bowl and beaters in the freezer for 10-15 minutes before whipping. Cold equipment helps the cream whip faster and hold stiff peaks more easily.
-
- Let the butter tart filling cool completely. Adding warm filling to the whipped cream base can deflate the mixture and lead to icy or uneven texture. Make sure it’s fully cooled to room temperature before folding it in.
-
- Toast your nuts (if using) for enhanced flavor. If you’re using pecans or walnuts instead of raisins, lightly toast them in a dry pan or oven to bring out their natural oils and deepen the flavor.
-
- Don’t overmix the final ice cream base. When folding everything together, mix just until combined. Overmixing can knock the air out of the whipped cream and make the ice cream denser and less creamy.
-
- Use a metal loaf pan for faster freezing. Metal conducts cold more efficiently than glass or plastic, so your ice cream will set faster and more evenly in a metal pan.
-
- Break tart shells into uneven chunks. A mix of large and small pieces creates better texture contrast – some bites will be soft and custardy, while others will have a buttery crunch.
-
- Add a pinch of salt to balance sweetness. If you’re using very sweet tart shells or extra raisins, a small pinch of sea salt folded into the base can help balance the overall flavor.
-
- Freeze overnight for best texture. While 8 hours is the minimum, a full overnight freeze will give the creamiest result and help the flavors meld more deeply.