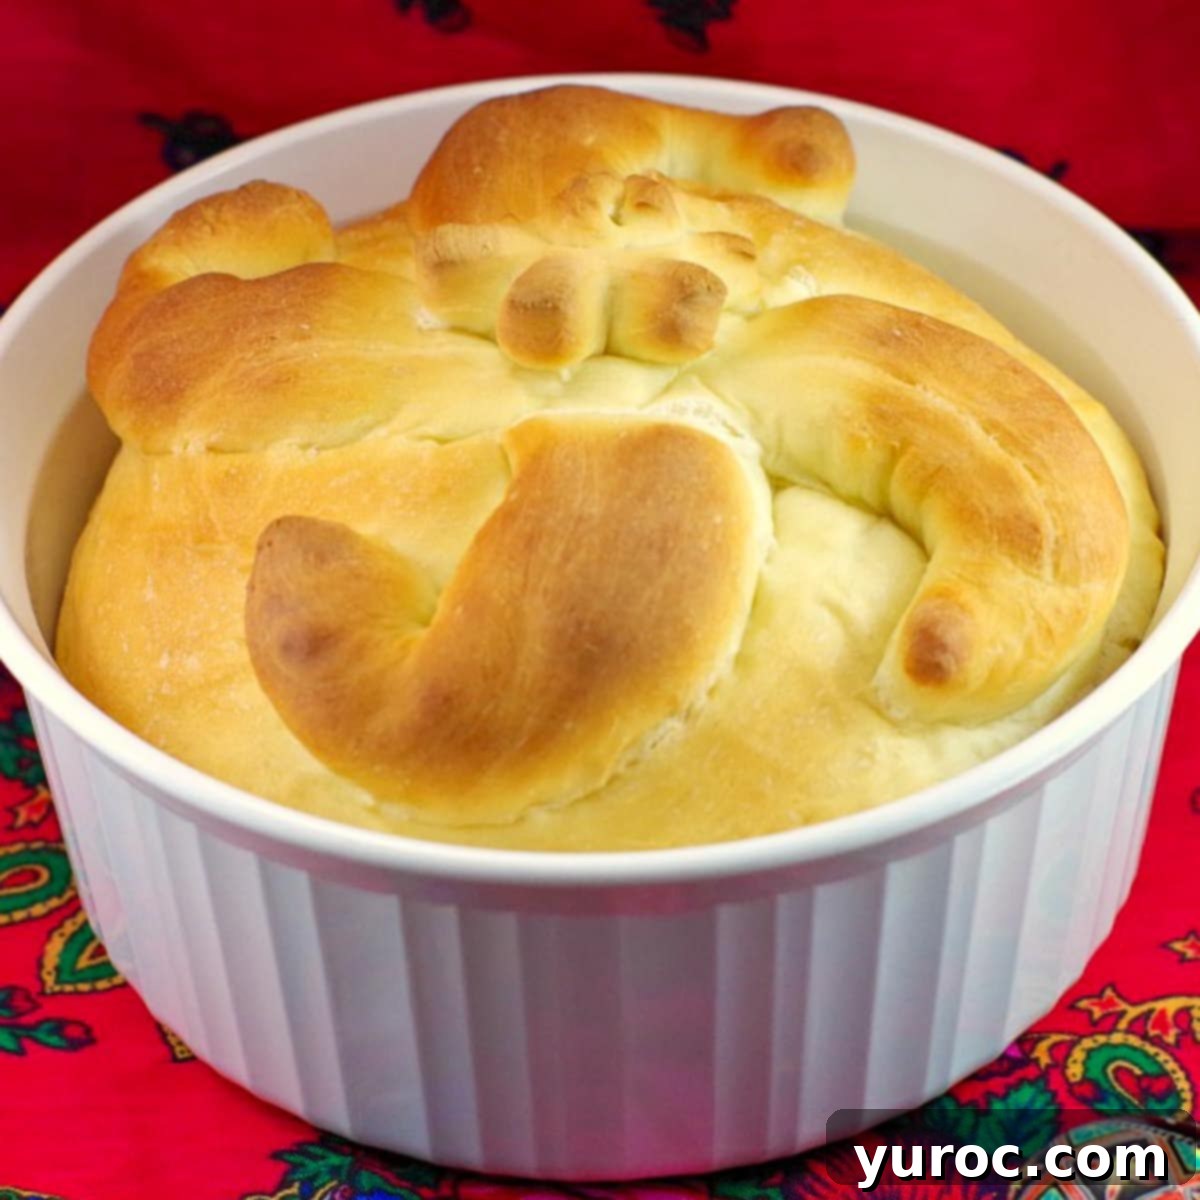
Easy Bread Machine Paska Recipe: Traditional Ukrainian Easter Bread Made Simple
This effortless Paska bread recipe, expertly crafted in your bread machine, brings the beloved tradition of Ukrainian Easter bread right to your kitchen. Historically, preparing Paska was a labor-intensive process, involving extensive kneading and rising. However, with the convenience of a modern bread maker, you can now enjoy this symbolic, slightly sweet bread with significantly less effort, yet still achieve that authentic, rich flavor and tender texture. The bread machine handles all the challenging dough work – kneading, mixing, and the initial rise – leaving you to focus on the beautiful final shaping and decoration before a short baking period. This innovative approach allows you to preserve the traditional essence and cultural significance of Paska while embracing the ease of contemporary baking methods. It’s the perfect way to share a piece of Ukrainian heritage without the all-day commitment.
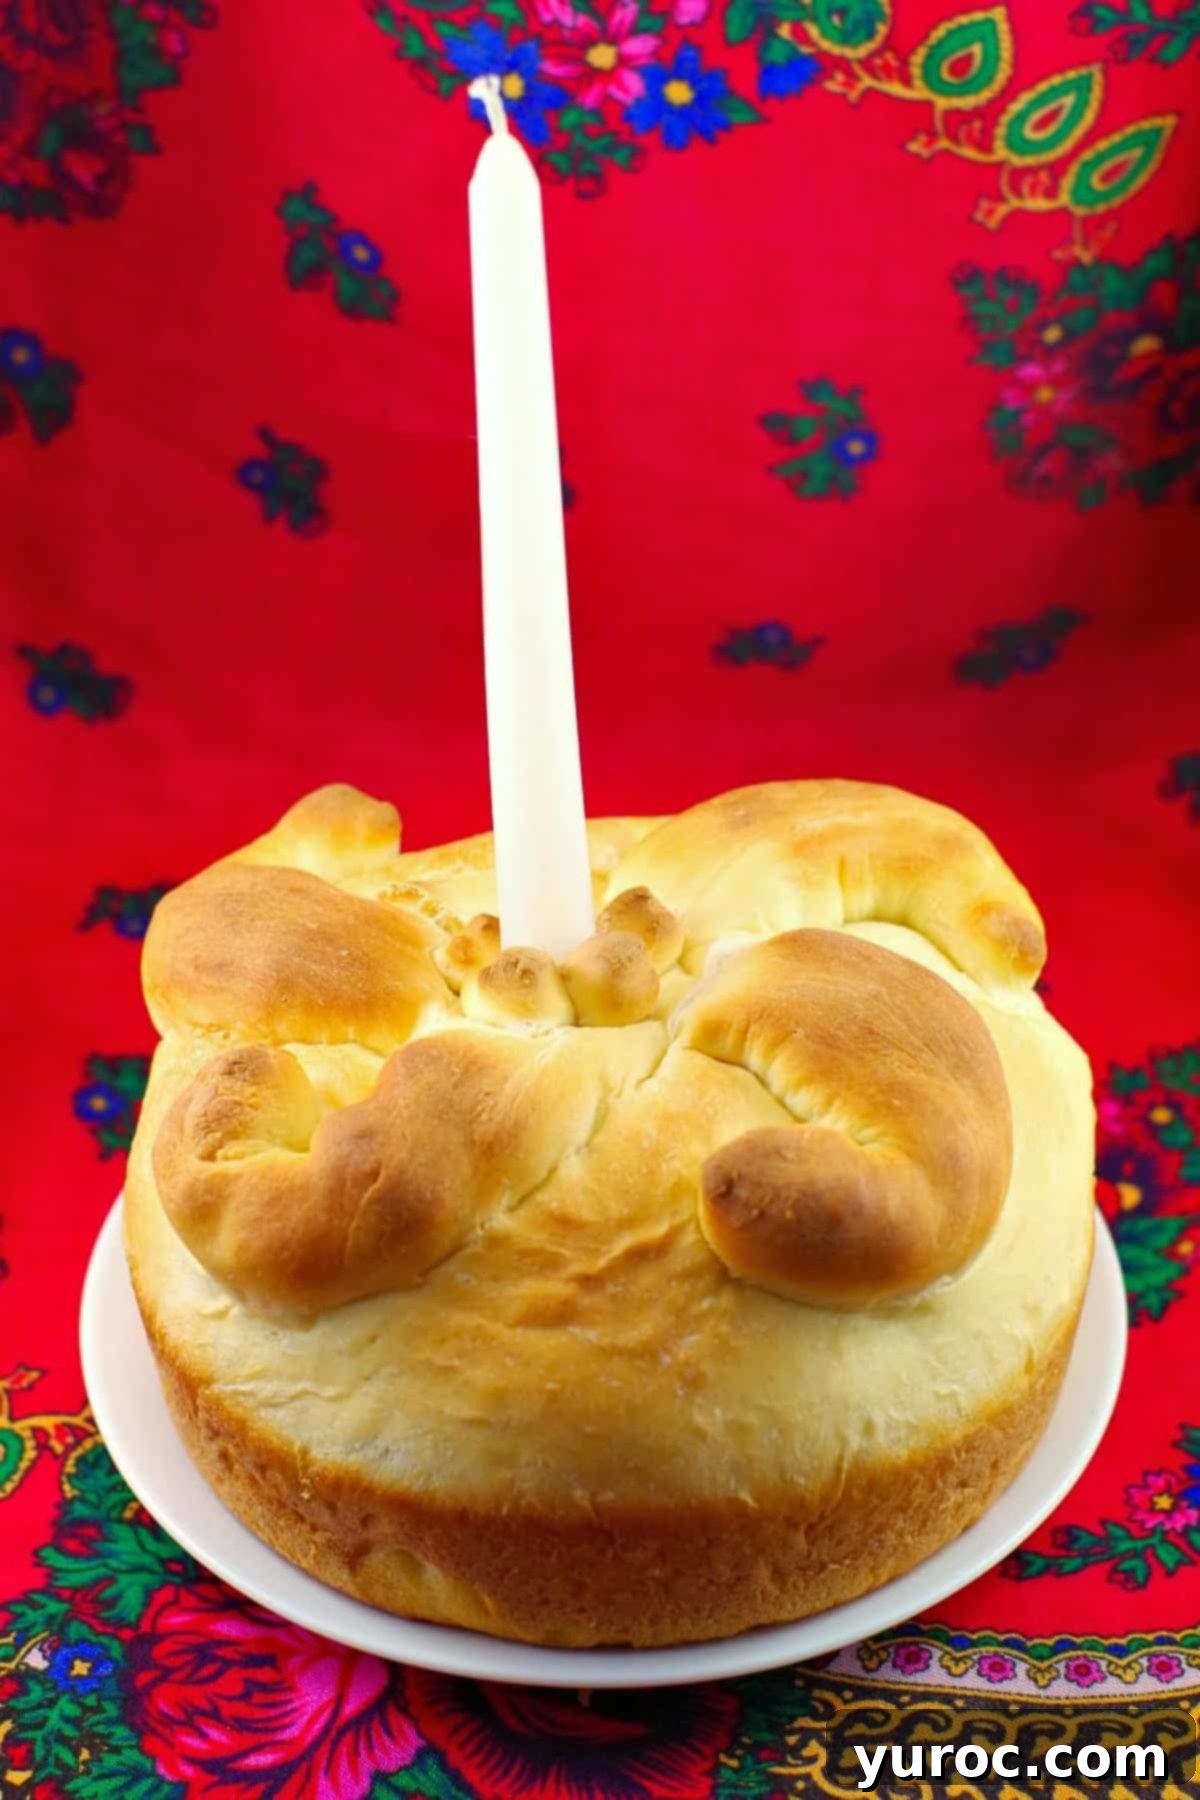
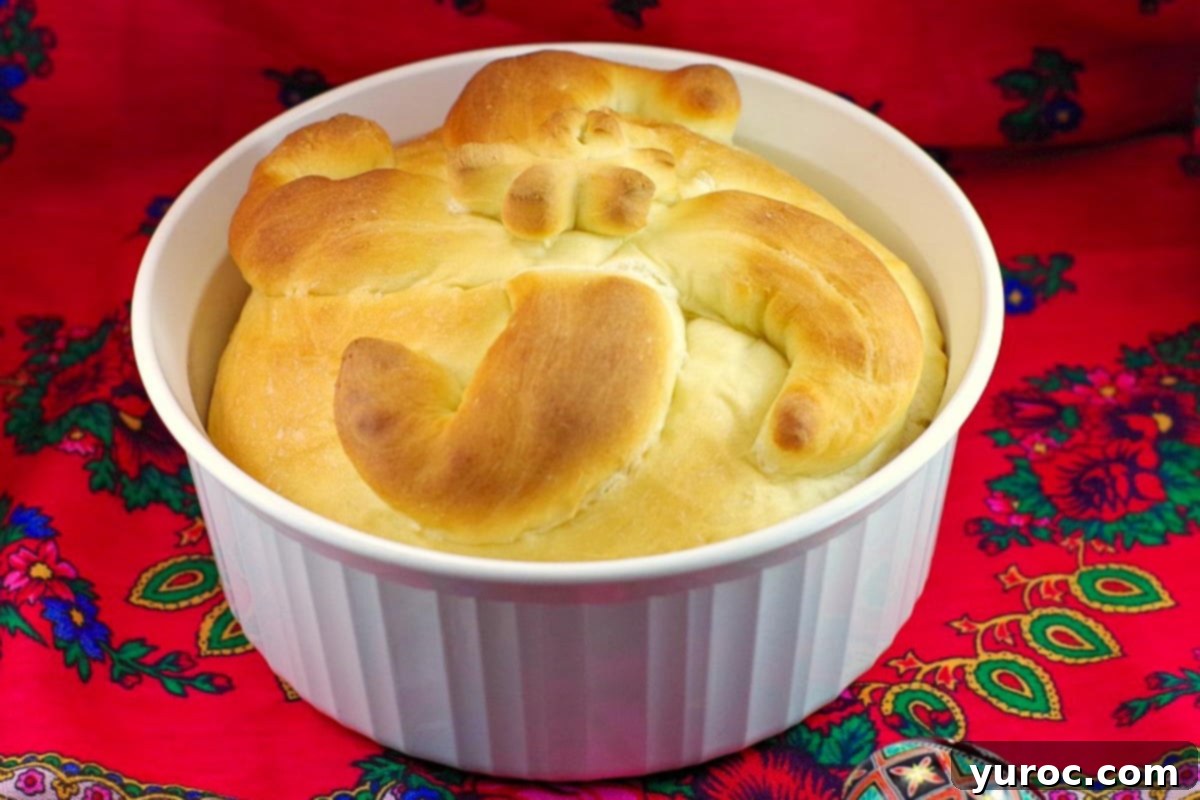
This delightful Bread Machine Easter Bread is a cherished staple, gracing tables throughout the Easter season. Its mild sweetness and airy texture make it incredibly versatile, serving as an ideal accompaniment for your festive Easter dinner, or as a star attraction in a vibrant Easter brunch spread. Beyond its delicious taste, Paska is also a canvas for culinary artistry. Imagine it beautifully adorned with intricate Ukrainian Easter Bread Doves, transforming your loaf into a truly magnificent centerpiece that captures the spirit of the holiday.
🍒Heartfelt Reader Review
“I made your bread for the first time. Like you, I long for my grandmother and her baking. I pray I make her proud by trying and keep her memory alive. She was my best friend and miss her terribly. The smell radiating from my oven melts my soul. Thank you dear friend.“ ⭐⭐⭐⭐⭐
I still vividly recall that serene summer day when my world shifted. The phone rang, and it was my Mom, her voice tinged with a solemnity that compelled me to come home immediately. She withheld the details, perhaps trying to shield me, but a chill ran down my spine even as I sat with a friend, engrossed in “The Shining.” A premonition hung heavy in the air, a silent knowing of the news she was about to impart. I clung to the fleeting normalcy, postponing the inevitable by finishing the movie, for to hear the words would be to make it undeniably real.
My Baba, my cherished grandmother, was a woman who embodied comfort and love. She never fretted over her size, or if she did, she kept those thoughts to herself. From my innocent perspective as a grandchild, she was absolutely perfect: round, wonderfully pudgy, and always ready with the warmest, most enveloping hugs. Beyond her comforting presence, Baba was an extraordinary baker, her kitchen a sanctuary of tantalizing aromas and delicious creations.
Each Easter, without fail, my Baba would meticulously prepare her signature Ukrainian Easter Bread (this very Paska bread recipe). It was a yearly ritual, a culinary masterpiece that I devoured with unbridled joy and zero concern, a luxury afforded by my youth, long before the self-consciousness of middle age crept in.
🍞Effortless Paska with Your Bread Machine
For many years, Ukrainian Paska bread was the only homemade bread I dared to attempt, and each time, it felt like an immense undertaking. The traditional method, involving hours of kneading, punching down, and multiple long waits for the dough to rise, was utterly exhausting. It was undeniably a labor of love, but truthfully, much of that manual effort felt redundant and time-consuming.
That all changed the moment I discovered the magic of making traditional Paska bread using a bread machine. The difference was revolutionary! I can confidently say that I have no intention of ever returning to making it by hand. Why dedicate countless hours to strenuous labor when a bread maker can accomplish the bulk of the work – the mixing, kneading, and initial proving – flawlessly on your behalf? It’s a game-changer that makes this beloved Easter tradition accessible to everyone, even those with busy schedules.
I often wonder if my Baba, given the opportunity, would have embraced this modern convenience too. I’m certain she would have appreciated the extra time it afforded for other preparations or simply enjoying her family. This same time-saving technique now extends to my other Ukrainian Easter favorite: Babka! If you adore the simplicity of preparing Easter breads in your bread machine, you must also try my fantastic Bread Machine Babka recipe for another delightful holiday treat.
🥘Key Ingredient Notes for Perfect Paska
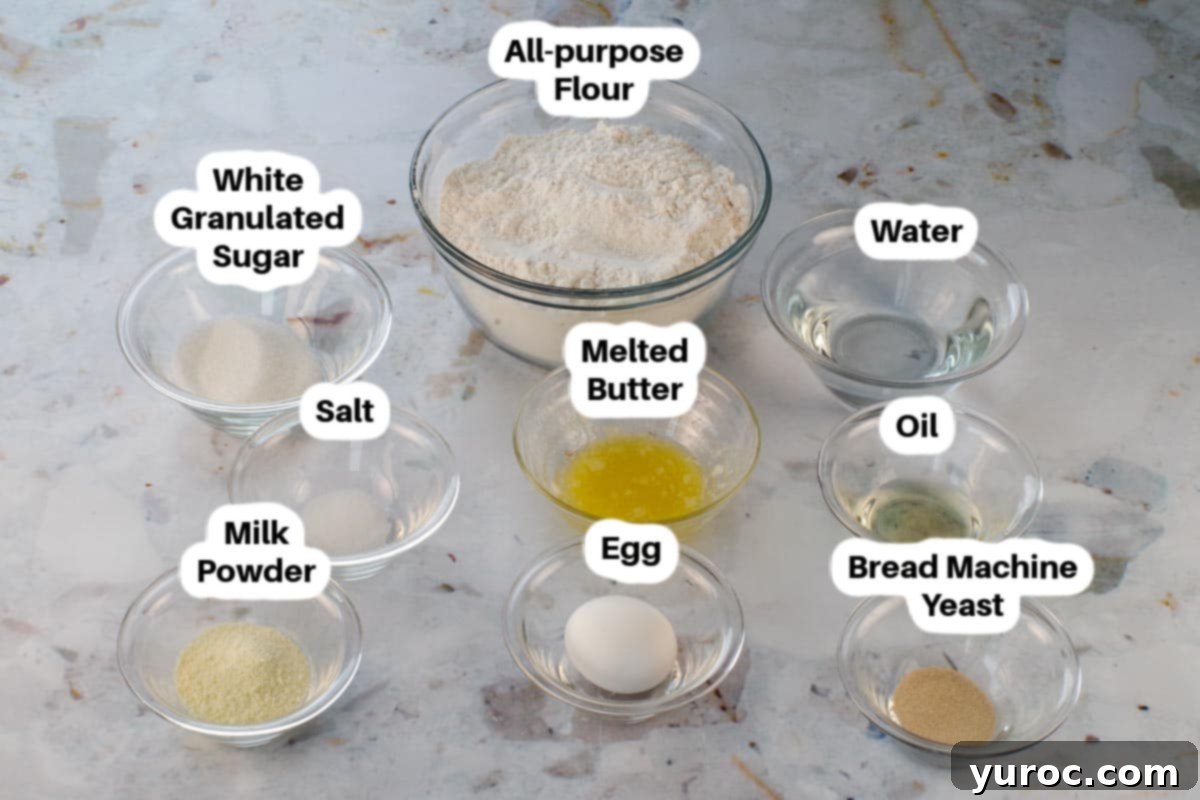
Crafting the perfect Paska starts with understanding your ingredients. Here are a few important notes to ensure your bread turns out beautifully:
- Milk Powder: I prefer to use skim milk powder in this recipe. It adds richness and softness to the dough without adding extra fat, contributing to a wonderfully tender crumb.
- Oil: Canola oil is my go-to choice for this Paska. Its neutral flavor ensures that the delicate, traditional taste of the bread shines through, and it helps keep the bread moist and extends its freshness.
- Butter: Always opt for unsalted butter. This allows you complete control over the salt content in your baking, which is crucial for achieving the perfect flavor balance. Remember to measure the butter *after* you’ve melted it, as the volume changes.
- Bread Machine Yeast: This is a critical component. Ensure you are using a type of yeast specifically formulated for bread machines. This yeast is designed to be highly active and compatible with the machine’s dough cycle, ensuring a reliable and excellent rise.
- Egg Wash (not pictured in all ingredient photos): While optional, an egg wash is highly recommended. It’s a simple mixture that, when brushed onto the dough before baking, will give your Paska a gorgeous, glossy, golden-brown finish that looks as inviting as it tastes.
🔪Step-by-Step: Making Paska in Your Bread Machine
Creating this traditional Ukrainian Easter bread is surprisingly straightforward when you let your bread machine do the heavy lifting. Follow these detailed steps for a perfect Paska every time:
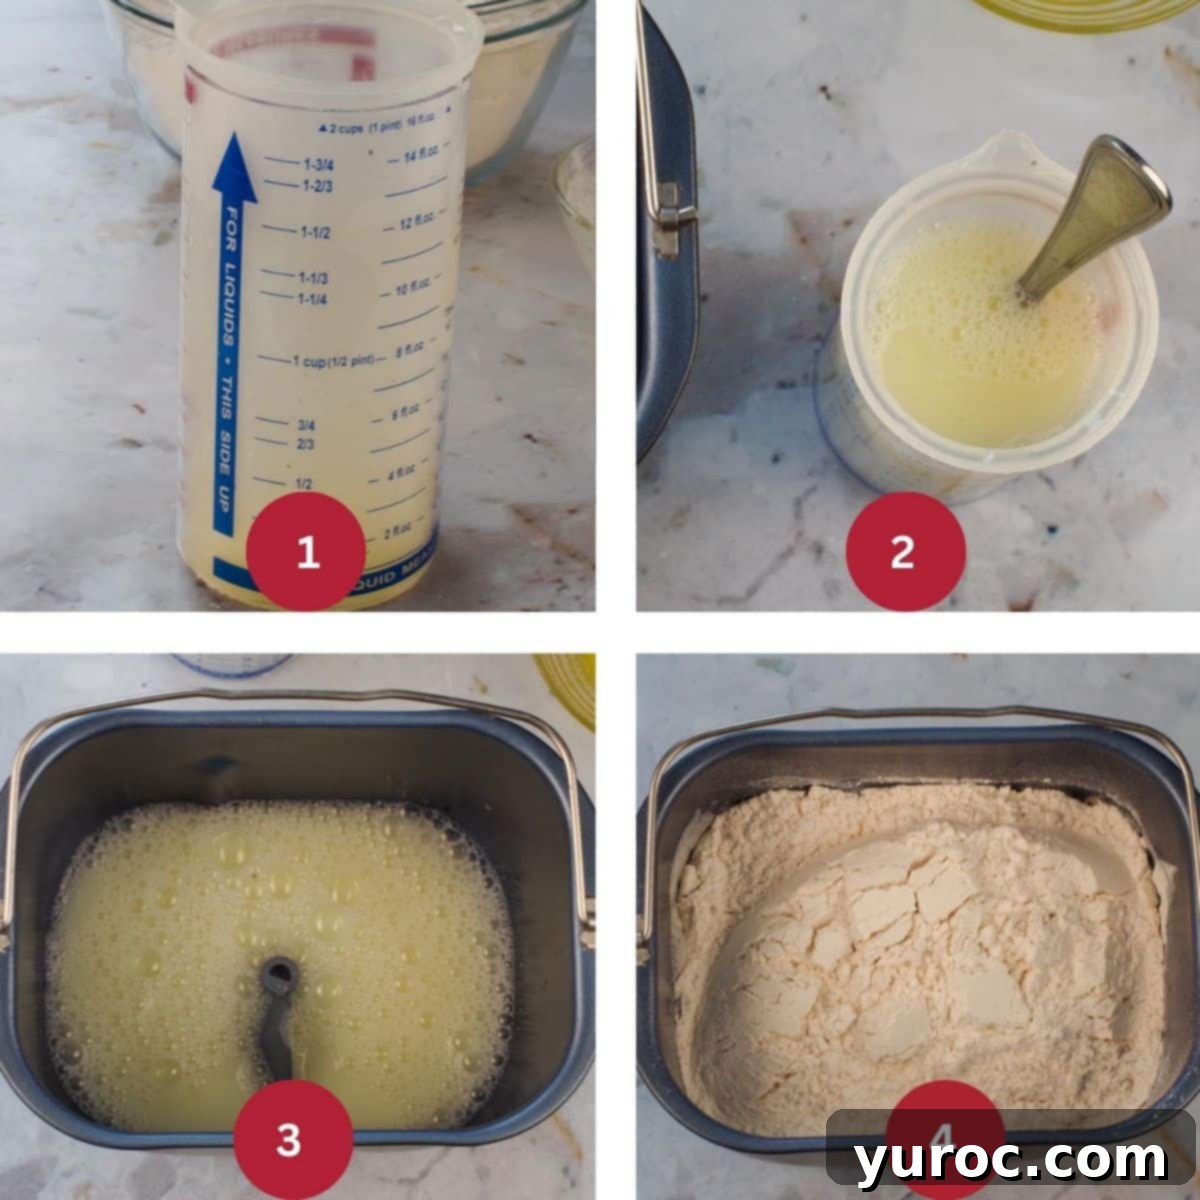
Step 1: Prepare and Mix the Dough Ingredients. Begin by breaking a single egg into a 2-cup liquid measuring cup. Then, add enough lukewarm water to reach the 1 ½ cup mark in total (IMAGE 1). Whisk this egg and water mixture thoroughly with a fork until well combined (IMAGE 2), then carefully pour it into the bread machine pan (IMAGE 3). Next, add the remaining wet and dry ingredients in the order recommended by your bread machine manufacturer, typically milk powder, sugar, melted butter, oil, salt, and finally, the flour (IMAGE 4).
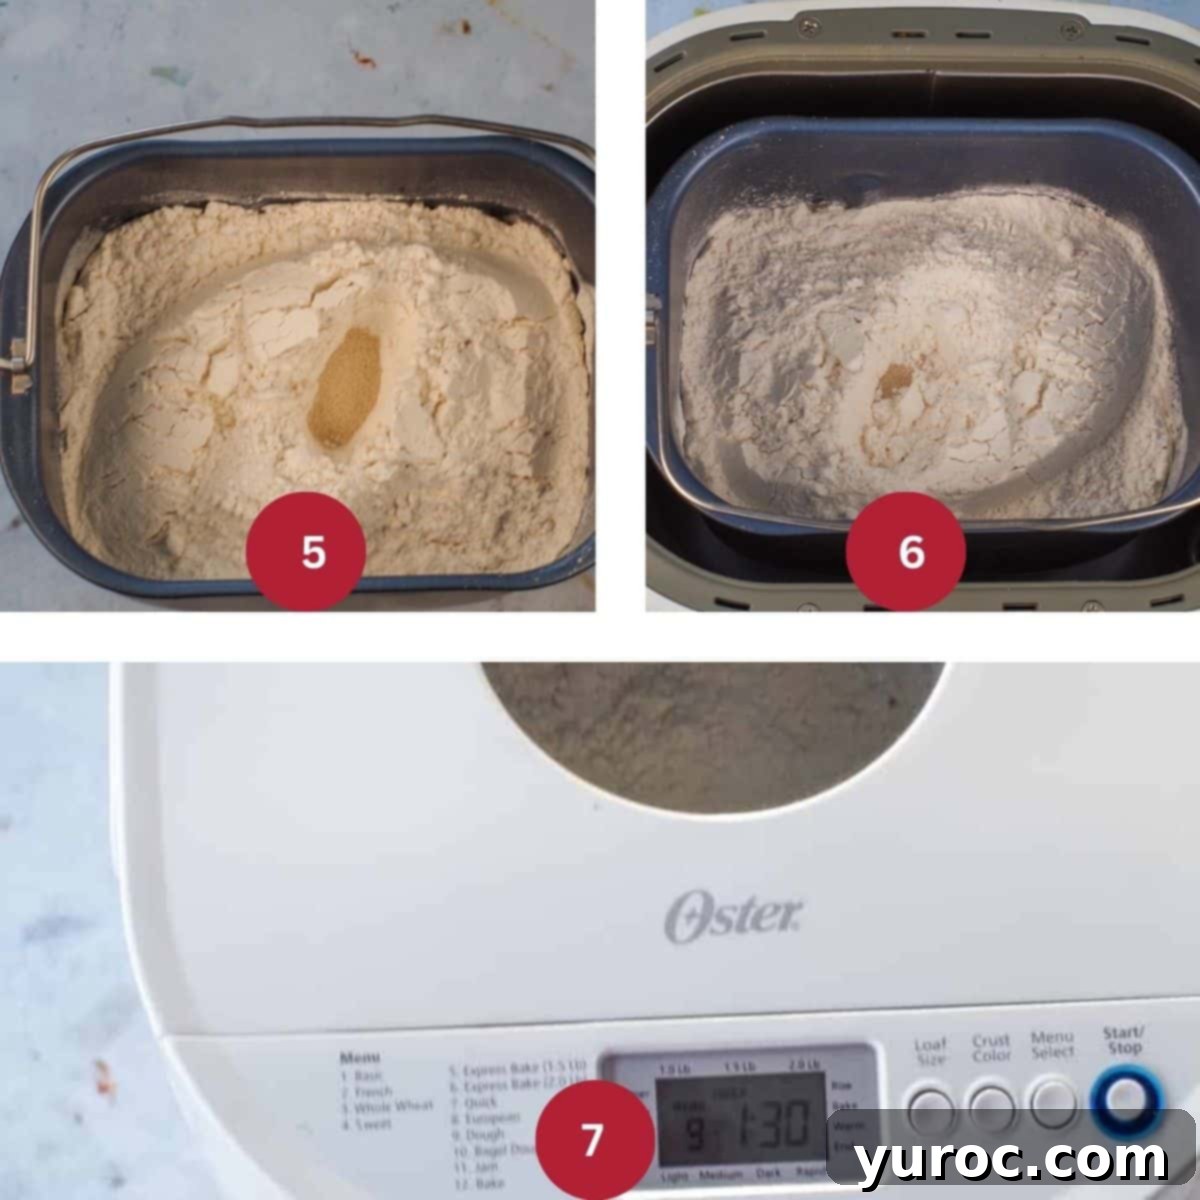
Step 2: Let the Bread Machine Work Its Magic. Create a small indentation or “well” in the center of the flour, making sure it doesn’t touch the liquid ingredients below. Carefully add the bread machine yeast into this dry well (IMAGE 5). This separation is crucial, as premature contact between yeast and liquid can activate the yeast too soon, potentially hindering the dough’s optimal rise. Securely place the bread pan back into your bread maker (IMAGE 6). Select the “Dough” cycle on your machine and press start (IMAGE 7). The machine will now mix, knead, and perform the first rise, perfectly preparing your dough.
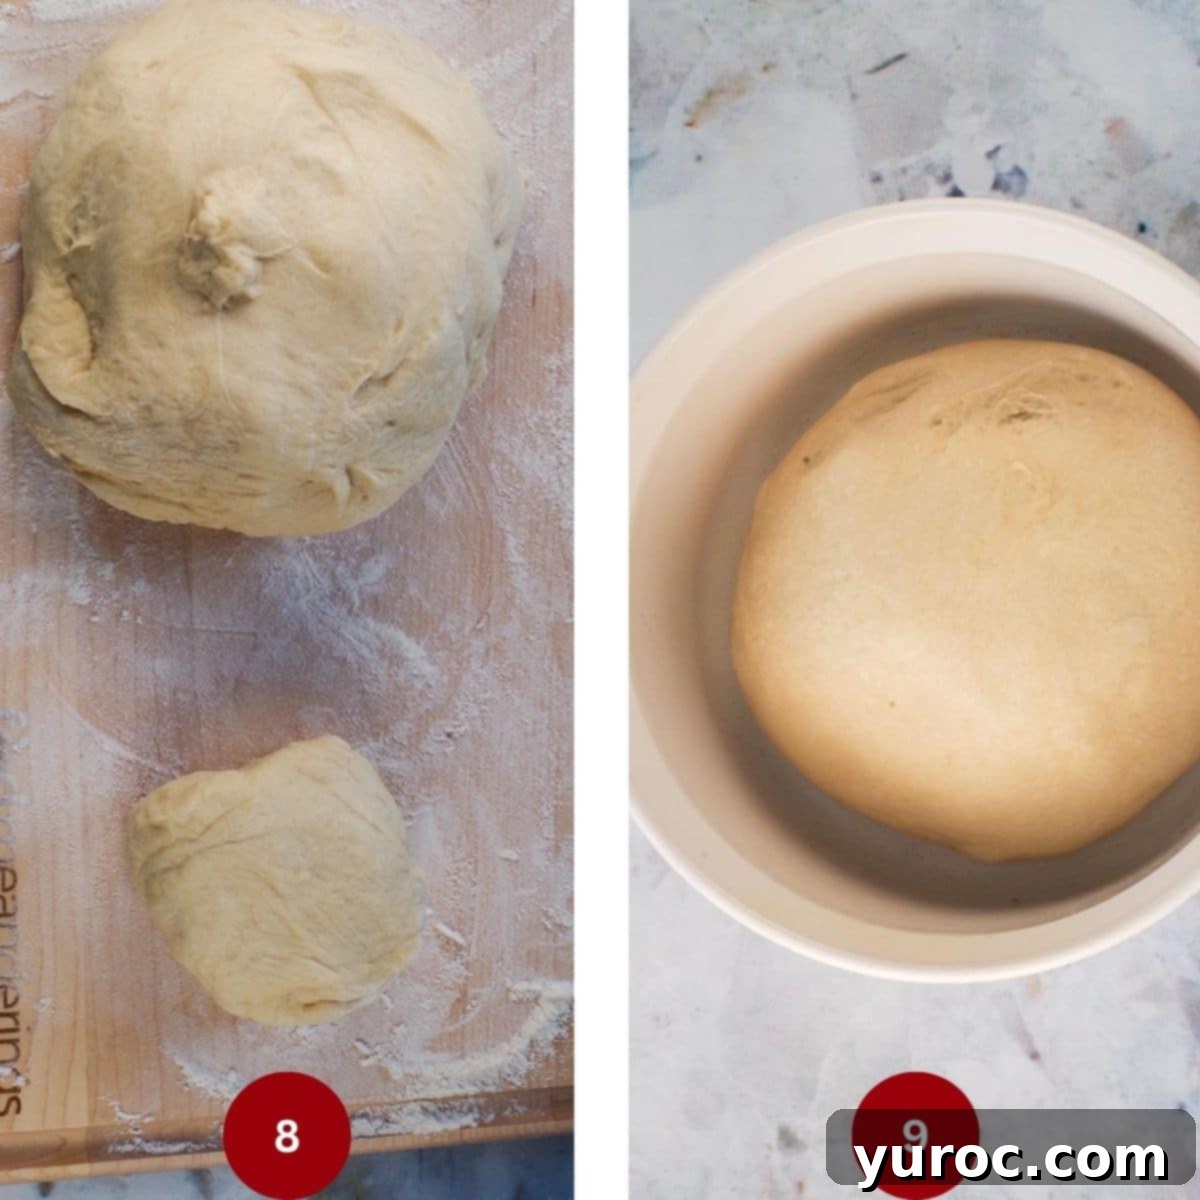
Step 3: Shape Your Paska Loaf. Once the dough cycle is complete, carefully remove the beautifully risen dough from the bread machine. On a lightly floured surface, gently deflate the dough. Set aside a portion of the dough to be used later for making decorative elements (IMAGE 8). The exact amount will vary depending on the complexity of your chosen decorations; typically, about one-sixth of the dough is sufficient. Take the remaining dough and gently shape it into a smooth, round loaf. Place this round loaf into a greased, shallow, round baking pan (grease with vegetable shortening or non-stick cooking spray). Depending on the size of your pan and the desired thickness of your Paska, you might need to use more than one pan (IMAGE 9).
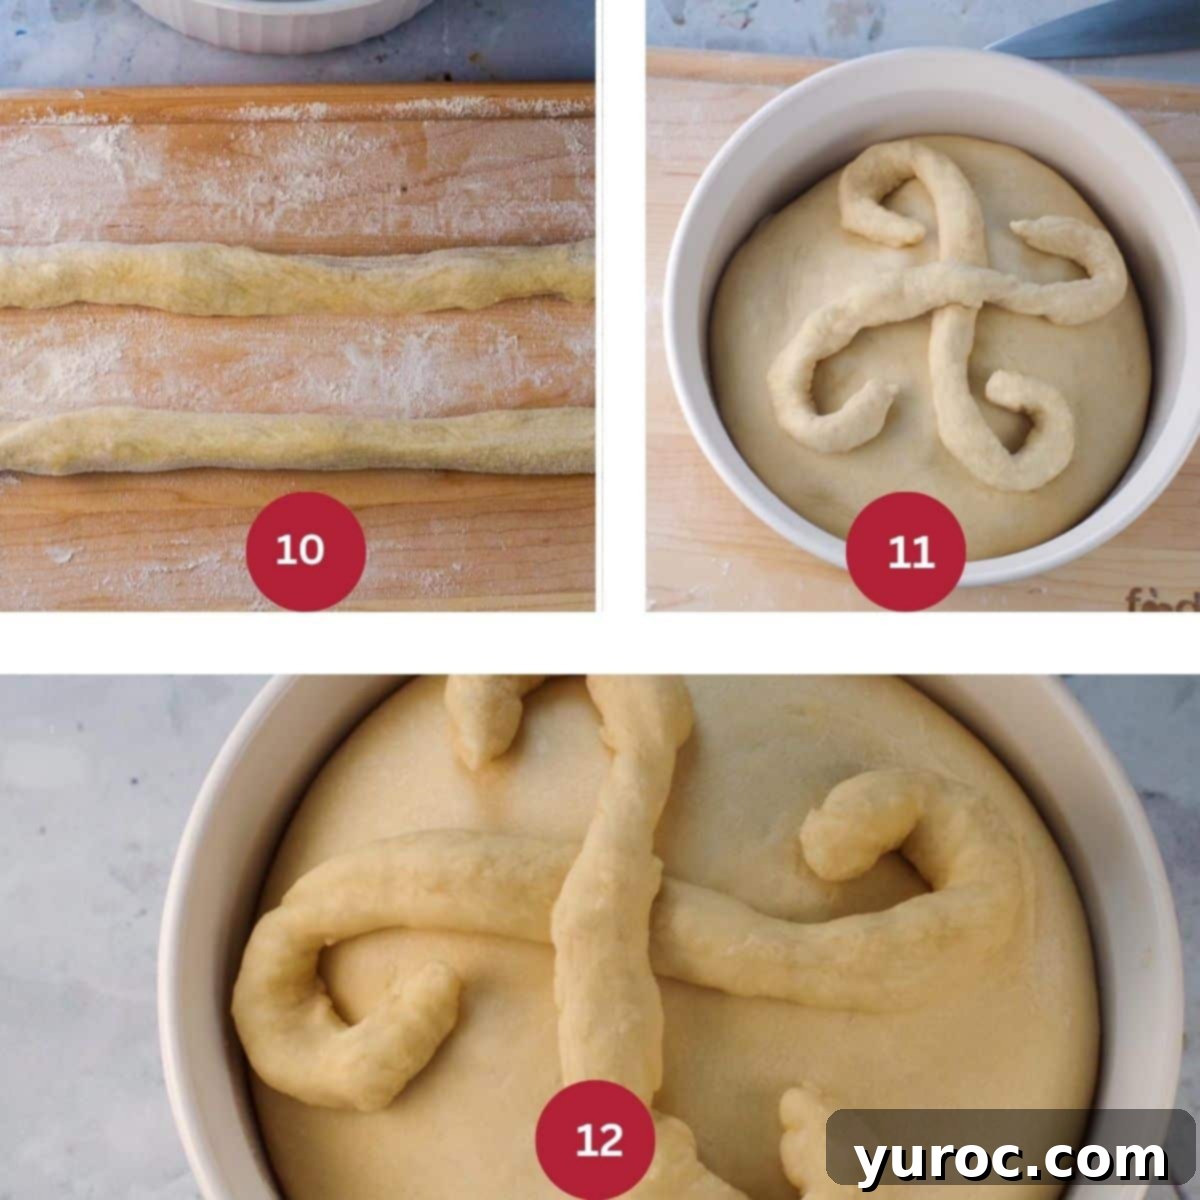
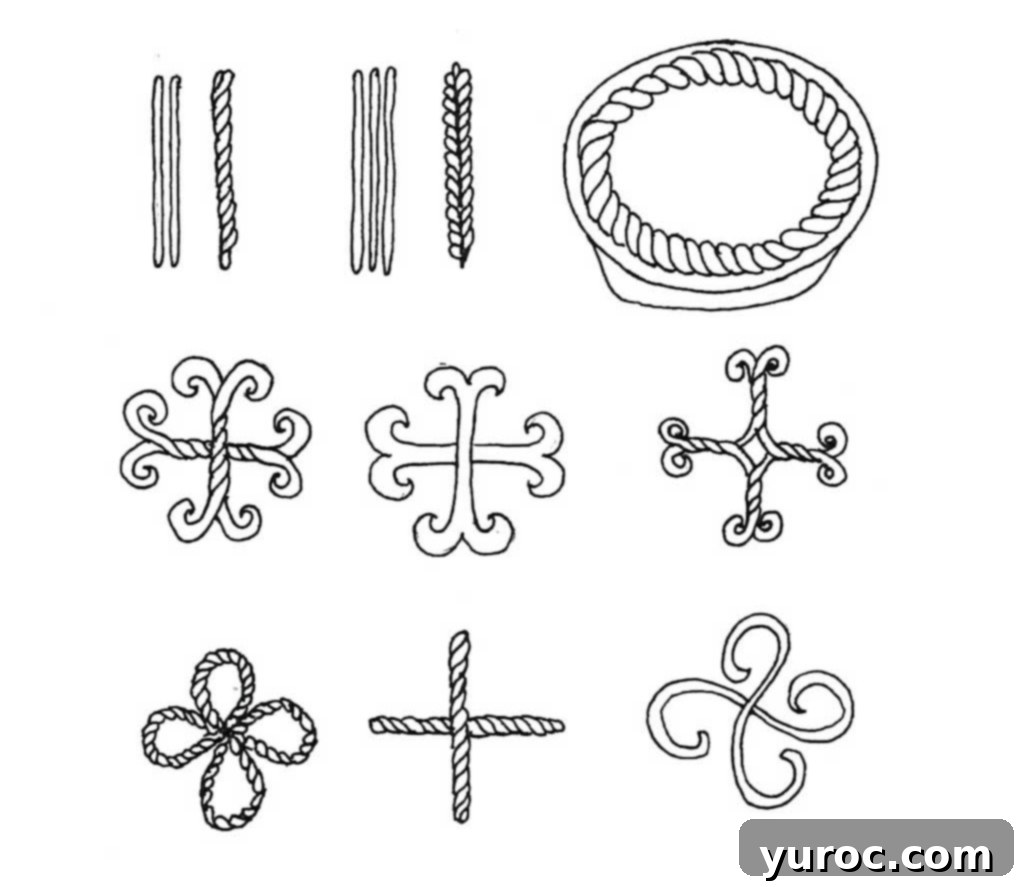
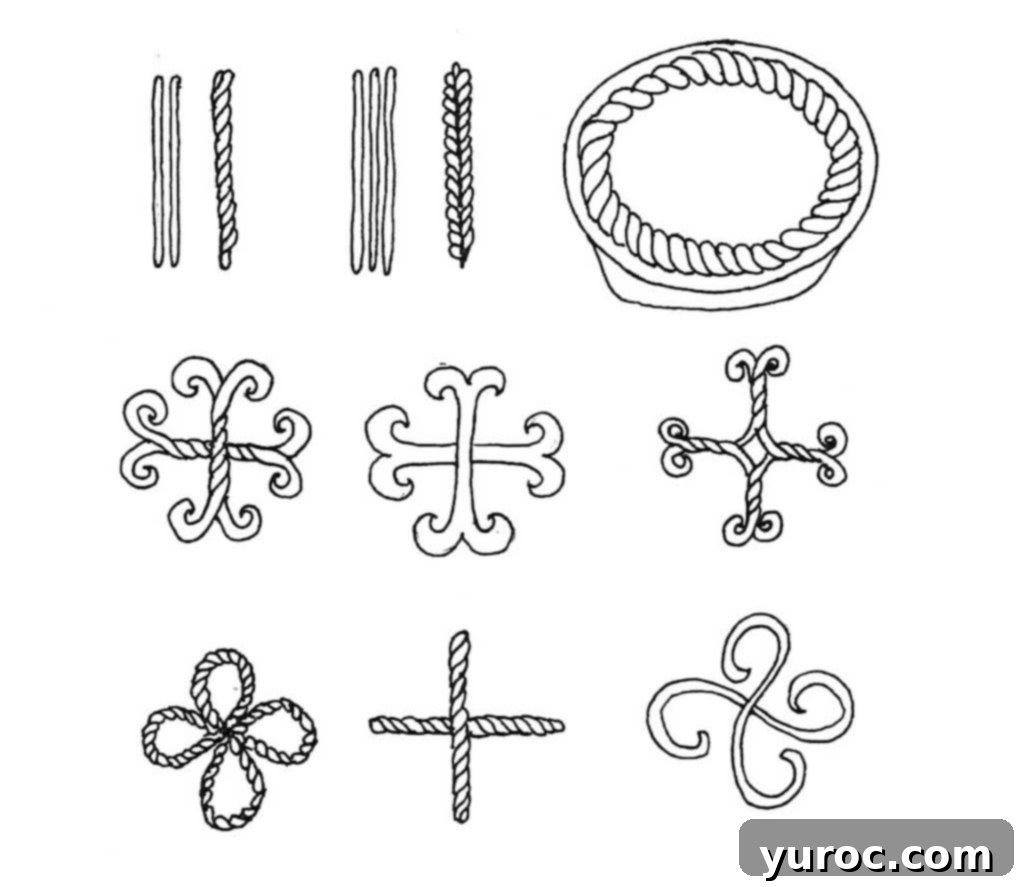
Step 4: Decorate and Allow for Final Rise. Now comes the creative part! Use the reserved dough to create traditional Paska decorations. A common central ornament is a cross, symbolizing faith. Roll strips of dough approximately ¼ to ½ inch in diameter to form various designs (IMAGE 10). For a simple yet elegant look, you can follow the design shown in the bottom right of the image collage. Carefully arrange your chosen decorations onto the shaped Paska loaf (IMAGE 11). Once decorated, place your loaf or loaves in a warm, draft-free spot and allow them to rise for 45 minutes to 1 hour, or until noticeably puffed up. Remember to factor in the time spent on decorations as part of this final proofing period. During this rise, keep a close eye on your dough ornaments. If any begin to distort or rise excessively, gently reshape them by carefully inserting a wooden toothpick or cake tester along the sides that have risen too much (IMAGE 12). Don’t worry if they rise a bit imperfectly, as mine did in the main photos – it often adds to the rustic charm! Of course, if you prefer, you can skip the decorations entirely and still have a delicious Paska.
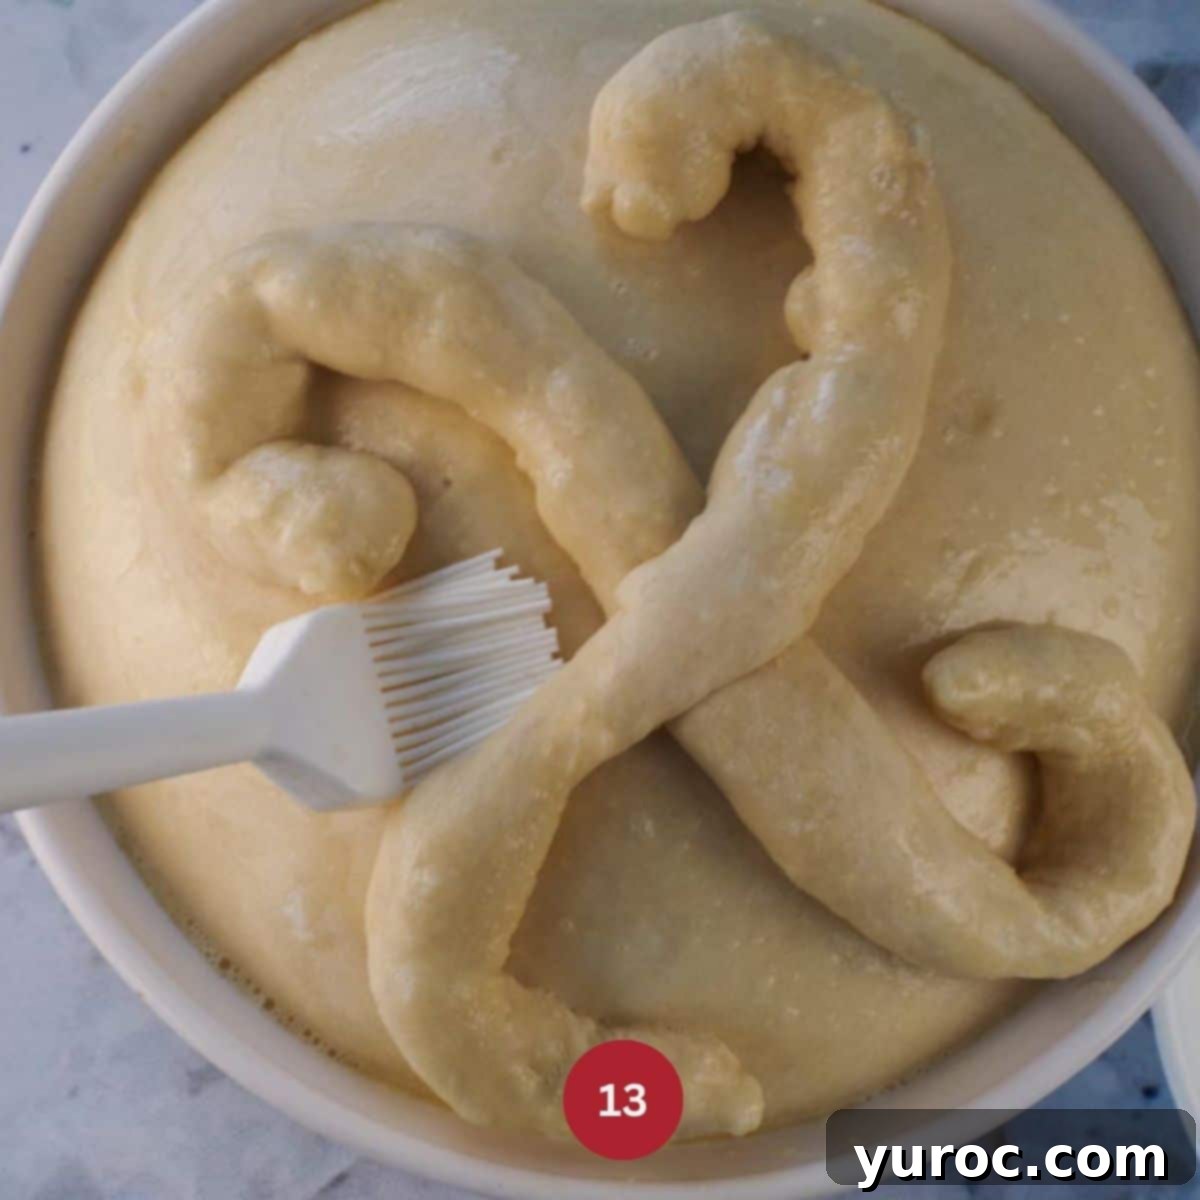
Step 5: Bake to Golden Perfection. Preheat your oven to 350°F (175°C). Just before placing the Paska in the oven, brush the top generously with an egg wash. This wash is typically made by beating one egg with 1 tablespoon of water (IMAGE 13). While I sometimes forget this step in my excitement, as in some of the main photos, it’s not strictly essential for taste, but it truly enhances the visual appeal by creating a beautiful, shiny, golden crust. Bake for 25-35 minutes, or until the bread is deeply golden brown. To confirm doneness, you can use an instant-read thermometer; the internal temperature should reach 190°F (87°C). Alternatively, a classic test is to tap the bottom of the pan – if it sounds hollow, your Paska is ready. If you notice the decorative elements browning too quickly during baking, loosely tent the loaf with aluminum foil or parchment paper to prevent burning. Once baked, let the Paska cool in its pan for about ten minutes before carefully transferring it to a wire rack to cool completely. This gradual cooling prevents the bottom from becoming soggy and helps maintain the bread’s structure.
Master Your Paska: Expert Recipe Tips
Achieving a perfect Paska, even with a bread machine, benefits from a few expert insights. Keep these tips in mind for consistently delicious results:
- Always Use Fresh Yeast: The vitality of your yeast is paramount. Ensure your bread machine yeast is fresh and well within its expiration date. Old or inactive yeast will lead to a poor or non-existent rise, impacting the bread’s texture significantly.
- Optimal Liquid Temperature is Key: When adding water (or the egg-water mixture) to your dough, it should be lukewarm, ideally around 100°F (38°C). Water that is too hot will kill the yeast, while water that is too cold will inhibit or drastically slow down its activation and the rising process.
- Accurate Egg Measurement Tip: For precise liquid measurement, first crack your egg into a measuring cup. Then, add enough water to reach the total liquid amount specified in the recipe. This ensures your dough has the exact hydration it needs.
- Prevent Premature Yeast Activation: When adding ingredients to the bread machine pan, create a small indentation in the flour and add the yeast there, ensuring it does not directly contact any liquid. This prevents the yeast from activating too early before the machine begins its mixing cycle, which is vital for a controlled and proper rise.
- The Secret to a Shiny Crust: Egg Wash: Don’t skip the egg wash! A simple mixture of one beaten egg with one tablespoon of water, brushed over the Paska before baking, will give it that signature glossy, golden-brown crust that is both beautiful and appetizing.
- Protect Your Decorations During Baking: If your beautiful dough decorations start to brown too quickly in the oven, gently tent the loaf with a piece of aluminum foil or parchment paper. This will shield the delicate ornaments and prevent them from burning while the rest of the bread finishes baking.
- Confirm Doneness for Best Texture: A perfectly baked Paska should have a rich golden-brown crust and sound hollow when gently tapped on the bottom. For ultimate accuracy, an instant-read thermometer inserted into the center of the loaf should register approximately 190°F (88°C).
- Proper Cooling is Essential for Texture: Once out of the oven, allow the Paska to cool in its baking pan for about 10 minutes. This helps the bread set. Then, carefully transfer it to a wire cooling rack to cool completely. Cooling on a rack prevents condensation, ensuring the crust remains crisp and the bread doesn’t become soggy.
- Smart Storage for Freshness: Store your freshly baked Paska at room temperature in an airtight container for up to 4 days. Refrigeration can actually dry out bread more quickly. For longer storage, freezing is the best method. Wrap it tightly and place it in a freezer-safe bag, where it will keep well for at least 3 months.
What to Serve with Paska: Enhancing Your Easter Table
Paska is a versatile bread, equally delightful on its own or paired with various accompaniments. Traditionally, it’s often enjoyed simply with a smear of sweet butter, a drizzle of golden honey, or a dollop of your favorite fruit jam. Beyond breakfast or dessert, its subtle sweetness also makes it a wonderful companion to savory dishes, beautifully complementing an Easter ham, various cheeses, or as a key component of an elaborate Easter brunch spread. Its soft texture and inviting aroma make it a comforting presence at any meal.
For those eager to explore more culinary treasures from Ukrainian heritage, be sure to delve into these comprehensive Ukrainian Easter Recipes. They offer a rich collection of dishes to complete your festive celebration!

👪Yield & Serving Suggestions
This delightful Easter Paska bread recipe is specifically designed for a 1-pound capacity bread maker. When prepared as directed, it yields a generous loaf, providing approximately 10 servings or slices, making it perfect for family gatherings or sharing with loved ones during the holiday season.
🌡️Storage Instructions for Paska
- This traditional Easter bread retains its freshness beautifully when stored at room temperature. Simply place it in a well-sealed, airtight container, and it will remain delicious for up to 4 days. I’ve found that refrigerating Paska tends to dry it out faster, so it’s generally best avoided for everyday storage.
- Freezing: Paska made in the bread machine freezes exceptionally well, making it a fantastic option for longer preservation or preparing ahead of time. To freeze, first wrap the cooled bread tightly in plastic wrap (I often use Glad Press n’ Seal for a secure seal). Then, place the wrapped loaf into a heavy-duty Ziploc freezer bag. Stored this way, your Paska will maintain its quality in the freezer for at least 3 months, ready to be thawed and enjoyed whenever a craving strikes.
❔Recipe FAQs for Paska Bread
Paska and Babka are both cherished Ukrainian Easter breads, but they have distinct characteristics. Paska is traditionally baked in a large, round baking dish, often resembling a casserole, and is elaborately decorated on top with religious symbols like crosses, braids, and floral designs, representing aspects of Orthodox and Eastern Catholic faith. It’s a subtly sweet bread, perfect for pairing with savory meals or as a light breakfast. Babka, on the other hand, is typically baked in tall, cylindrical molds, often coffee cans, giving it a distinctive height. It’s generally sweeter and has a more delicate crumb than Paska, frequently incorporating raisins or other dried fruits into the dough for added flavor and texture. Both are delicious, but serve slightly different roles and aesthetics during Easter celebrations.
If your dough ornaments sink or lose their defined shape during the rising process, it’s often due to them being either too heavy or too wet. To remedy this, try rolling the decorative dough pieces slightly thinner and allowing them to air-dry for a short period before carefully placing them onto the main loaf. If the dough for decorations seems overly sticky, you can knead in a tiny amount of flour, about 1 teaspoon at a time, until it’s more workable, but be careful not to add too much, as this can make the dough dry and difficult to shape. During the final rise, if you notice any ornaments beginning to distort, you can gently adjust their shape using a wooden toothpick to carefully push them back into place.
Absolutely! This recipe is wonderfully adaptable for creating individual-sized Paskas. Simply divide the dough into smaller, even portions after the bread machine cycle is complete. You can then bake these mini loaves in muffin tins, small round ramekins, or mini casserole dishes. When making smaller versions, remember to significantly adjust your baking time. Start checking for doneness much earlier, typically around 15-20 minutes, as smaller loaves will bake much faster than a large one. They make charming personal servings or gifts!
Yes, you certainly can! While the bread machine simplifies the process, you can still make this Paska bread by hand or with a stand mixer equipped with a dough hook. Instead of bread machine yeast, you would use traditional active dry or instant yeast. For manual preparation, mix the ingredients, then knead the dough thoroughly until it’s smooth and elastic. Allow it to rise in a warm place until it has doubled in size. Gently punch down the dough to release the air, and let it rise a second time. After the second rise, you can proceed with shaping, decorating, and baking exactly as directed in the recipe for the bread machine version.
Several factors can contribute to a Paska that doesn’t rise as expected. First, always ensure your yeast is fresh and active; expired yeast is often the culprit for flat bread. Second, the temperature of your liquid ingredients is crucial: water that’s too hot will kill the yeast, while water that’s too cold won’t activate it sufficiently. Aim for lukewarm water (around 100°F/38°C). Finally, a cold kitchen environment can significantly slow down the rising process. If your kitchen is chilly, try placing the dough in a warmer, draft-free spot, such as a slightly warmed (but turned off) oven, near a sunny window, or covered with a damp towel.
That year, Baba never made it to our annual Mother’s Day Brunch. Instead, she endured what felt like an endless eternity in a hospital bed, trapped in a coma. She was only 66; I was a mere 12 years old. The phone call I received that beautiful, sunny summer day didn’t just deliver news; it fundamentally reshaped my entire being, leaving an indelible mark that would influence the trajectory of my life.
Losing someone you love so profoundly leaves a wound unlike any other. You frantically try to pack the void, then spend the remainder of your days attempting to fill that scarred, hollow space with anything that might offer even a fleeting glimmer of pleasure. But as a child, I lacked the wisdom to navigate such immense grief. So, I floundered, adrift in a sea of unspoken sorrow and confusion.
If only I had known that that particular Easter would be my last opportunity to savor her exquisite Ukrainian Easter bread, I would have eaten with even greater abandon. I would have consciously lingered over every single bite, allowing its flavor to imprint on my memory forever. But more importantly, I would have held her, my dear Baba, in an embrace so much tighter and longer, trying to absorb every last bit of her warmth and love.
I later learned that she had suffered a stroke, and her health had been silently deteriorating for quite some time leading up to it. She lived with uncontrolled Type 2 diabetes, likely never engaged in a day of exercise in her life, and indulged freely in the wonderfully “naughty” and delicious things she so expertly created. Even now, armed with knowledge of my family history, the importance of exercise, and healthy eating, and grappling with my own concerns about weight, it requires immense willpower to practice moderation and resist the temptation to overindulge in my own delectable baking.
That hollow, scarred space within me still aches and echoes at unexpected moments. However, I have slowly, deliberately, learned to fill it with some truly pleasurable things. One of the most significant is the annual ritual of making this very Easter bread recipe and sharing it with my children. It has woven itself into the fabric of our family traditions, a beautiful continuity of love and remembrance.
And each and every time those flaky, tender Paska morsels meet my taste buds, a profound sense of comfort washes over me. It feels like a long, tight, comforting Baba hug, wrapping me in her enduring love. For that precious moment in time, I set aside all worries about weight, allowing myself to wholeheartedly indulge in too much Ukrainian Easter bread, savoring every last, bittersweet bite.
So, if you are searching for a straightforward and deeply meaningful way to prepare Paska bread, I wholeheartedly encourage you to try my family’s beloved Ukrainian Paska recipe! This exquisite bread is not only delicious but also serves as a wonderful, festive accompaniment to any Easter meal, bringing warmth and tradition to your table.
And for those planning a truly special Easter morning celebration, be sure to explore my comprehensive Easter Brunch Menu for a wealth of delightful ideas and recipes!
🍽 More Essential Ukrainian Recipes
- Ukrainian Breakfast Hash
- Ukrainian Daughter’s Crock Pot Casserole
- Ukrainian Cabbage Rolls (with ground beef and rice)
- Pierogi Breakfast Casserole (with frozen pierogies)
Did your family ❤️ this recipe? Did you know that commenting and ⭐ rating recipes is one of the best ways to support your favorite recipe creators? If you LOVED this recipe, please take a moment to comment and rate it in the recipe card below, or share your delicious photos on social media using the hashtag #foodmeanderings or by tagging @foodmeanderings! Your feedback means the world!

📋 Paska Bread Recipe (Bread Machine)
Print Recipe
Pin
Save RecipeSave Recipe
Rate
Add to Shopping ListGo to Shopping List
Ingredients
- 1 egg
- 1 cup water, approximately *warm – NOT hot
- 2 tablespoon milk powder *I use skim milk powder
- 3 ½ tablespoon white granulated sugar
- 1 tablespoon oil *I use canola
- 2 tablespoon unsalted butter melted, measure AFTER melting
- 1 teaspoon salt
- 4 cups all-purpose flour
- 1 teaspoon breadmaker/breadmachine yeast regular
Egg wash (optional)
- 1 tablespoon water
Instructions
-
In a 2-cup measuring cup, break the egg and add enough lukewarm water to reach the 1 ½ cup mark. Beat well with a fork until thoroughly combined. Pour this liquid mixture into your bread machine’s loaf pan.1 egg, 1 cup water, approximately
-
Add the milk powder, granulated sugar, melted butter, oil, salt, and all-purpose flour to the bread machine pan, following your machine’s recommended order (typically dry ingredients on top of wet).2 tablespoon milk powder, 3 ½ tablespoon white granulated sugar, 1 tablespoon oil, 2 tablespoon unsalted butter, 1 teaspoon salt, 4 cups all-purpose flour
-
Create a small well or crater in the center of the flour, making sure it doesn’t come into contact with the liquid ingredients. Add the bread machine yeast into this dry well. This prevents premature activation of the yeast before the machine begins its cycle, which is essential for a proper rise.1 teaspoon breadmaker/breadmachine yeast
-
Carefully place the bread pan into the bread maker. Select the “Dough” cycle on your bread machine and press start. This cycle will mix, knead, and allow the dough to complete its first rise.
Once the dough cycle finishes, remove the dough from the machine and gently transfer it to a lightly floured surface. Set aside about one-sixth of the dough to be used for making decorative elements. (The exact amount may vary based on your chosen decorations).
-
Shape the larger portion of the dough into a smooth, round loaf. Place this loaf into a round, shallow baking pan that has been greased with vegetable shortening or non-stick cooking spray. You may need more than one pan depending on the size of your chosen dishes.
-
Using the reserved dough, create your desired decorations. A common central ornament for Paska is a cross. Roll strips of dough approximately ¼ to ½ inch in diameter to form various traditional designs. For more ideas, refer to the decoration suggestions in the NOTES section below the recipe card. Carefully place the decorations onto your shaped Paska loaf.
-
Place the decorated loaf (or loaves) in a warm, draft-free area and allow the dough to rise for an additional 45 minutes to 1 hour, or until visibly puffed and light.
-
During the final rise, keep a careful eye on your dough ornaments. If any begin to distort or rise out of shape, gently correct them by inserting a wooden toothpick or cake tester along the sides that have risen excessively, guiding them back into form.
-
Just before baking, brush the top of the Paska generously with an egg wash (one beaten egg diluted with 1 tablespoon of water). This step is optional but highly recommended for a beautiful, shiny, golden-brown crust. (Note: I sometimes forget this step, as seen in some main photos, but it truly enhances the final appearance!)1 egg, 1 tablespoon water
-
Preheat your oven to 350°F (175°C). Bake the Paska for 25-35 minutes, or until the crust is a beautiful golden brown. Check the bread around 15-20 minutes into baking; if the decorative elements are browning too quickly, loosely tent the loaf with aluminum foil or parchment paper to prevent burning.
-
Once baked, allow the Paska to cool in its pan for approximately ten minutes. This helps the bread firm up before transferring. Gently remove the loaf from the pan and place it on a wire cooling rack to cool completely.
Notes
Expert Tips:
-
- Use Fresh Yeast – Ensure your bread machine yeast is fresh and not expired, as old yeast may not rise properly, resulting in a dense loaf.
-
- Proper Liquid Temperature – When adding water to the dough, it should be lukewarm (around 100°F/38°C). Water that is too hot will kill the yeast, while water that is too cold can significantly slow down the rising process.
-
- Egg Measurement Tip – For accuracy, break the egg into a measuring cup first, then add water to reach the total required amount of liquid. This ensures precise hydration for your dough.
-
- Avoid Direct Yeast Contact with Liquid – Dig a small hole in the flour and add the yeast there. This prevents the yeast from activating prematurely before the bread machine starts its mixing cycle, ensuring a controlled rise.
-
- Egg Wash for Shine – Brushing the bread with an egg wash (1 egg beaten with 1 tablespoon of water) before baking gives it a beautiful golden, shiny crust.
-
- Covering Decorations While Baking – If the decorative elements on your Paska start browning too quickly, cover them loosely with aluminum foil or parchment paper to prevent them from burning while the rest of the bread bakes.
-
- Check for Doneness – The bread should have a golden brown crust and sound hollow when tapped on the bottom. For precision, check the internal temperature with an instant-read thermometer; it should be around 190°F (88°C).
-
- Cooling for Best Texture – Allow the bread to cool in the pan for about 10 minutes before transferring it to a wire rack. This prevents the bottom from becoming soggy and helps maintain the bread’s structure.
-
- Best Way to Store – Store Paska at room temperature in an airtight container for up to 4 days. Refrigeration can dry bread out. For longer storage, freezing is the best option, keeping it fresh for at least 3 months.
Storage:
-
- This traditional Easter bread can be stored, at room temperature, in a sealed container, for up to 4 days. *I find that putting it in the fridge dries it out faster
-
- Freezing: This Bread Machine Paska freezes really well. The best way to prep it for freezing is to wrap it tightly in plastic wrap (I use Glad Press n’ seal wrap) and then place it in a Ziplock freezer bag. It will last for at least 3 months in your freezer.
Decorating Ideas:
Nutrition
Did you make this recipe? Please leave a star rating and review below!
