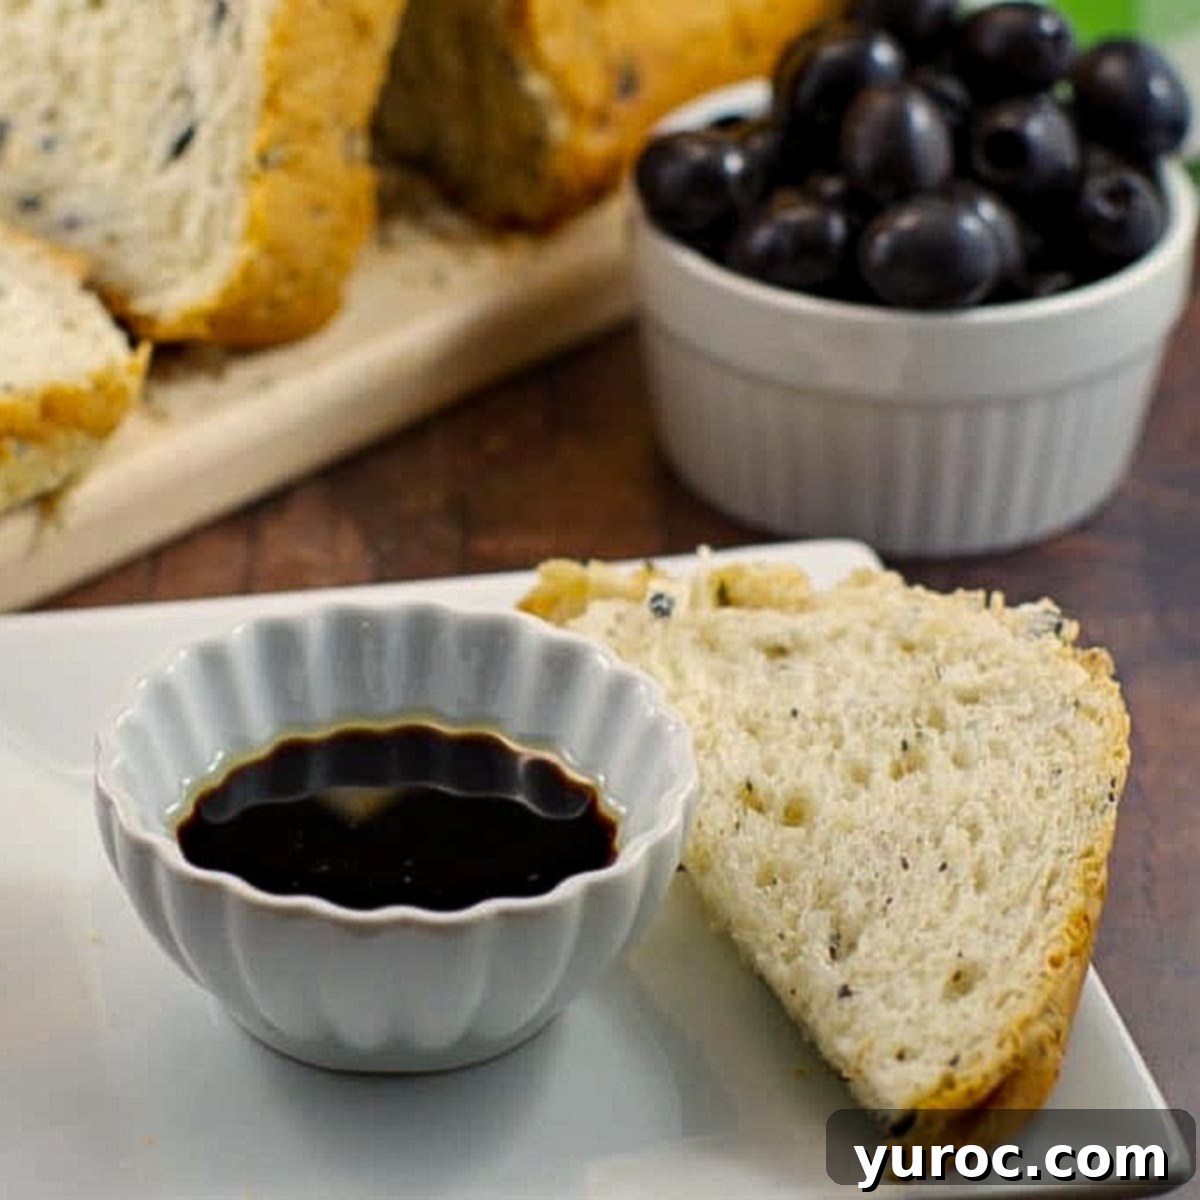
Delicious & Easy Bread Machine Onion and Olive Bread: Artisan-Quality Loaves at Home
For many years, my trusty bread machine has been my secret weapon for whipping up delightful homemade loaves, allowing me to bypass the traditional hand-kneading process entirely. While I admire those who consider hand-baking a therapeutic rite of passage, my bread machine offers an effortless and equally rewarding path to freshly baked deliciousness. This invaluable appliance entered my life early in my adulting journey, and I quickly became enamored with its magic. This particular Onion and Olive Bread Machine recipe stands out, proving unequivocally that you don’t need to be a seasoned artisan baker or commit hours to kneading dough to enjoy a truly exceptional, bakery-quality loaf. With minimal effort, you can create a savory, aromatic bread that rivals anything you’d find at a gourmet bakery.
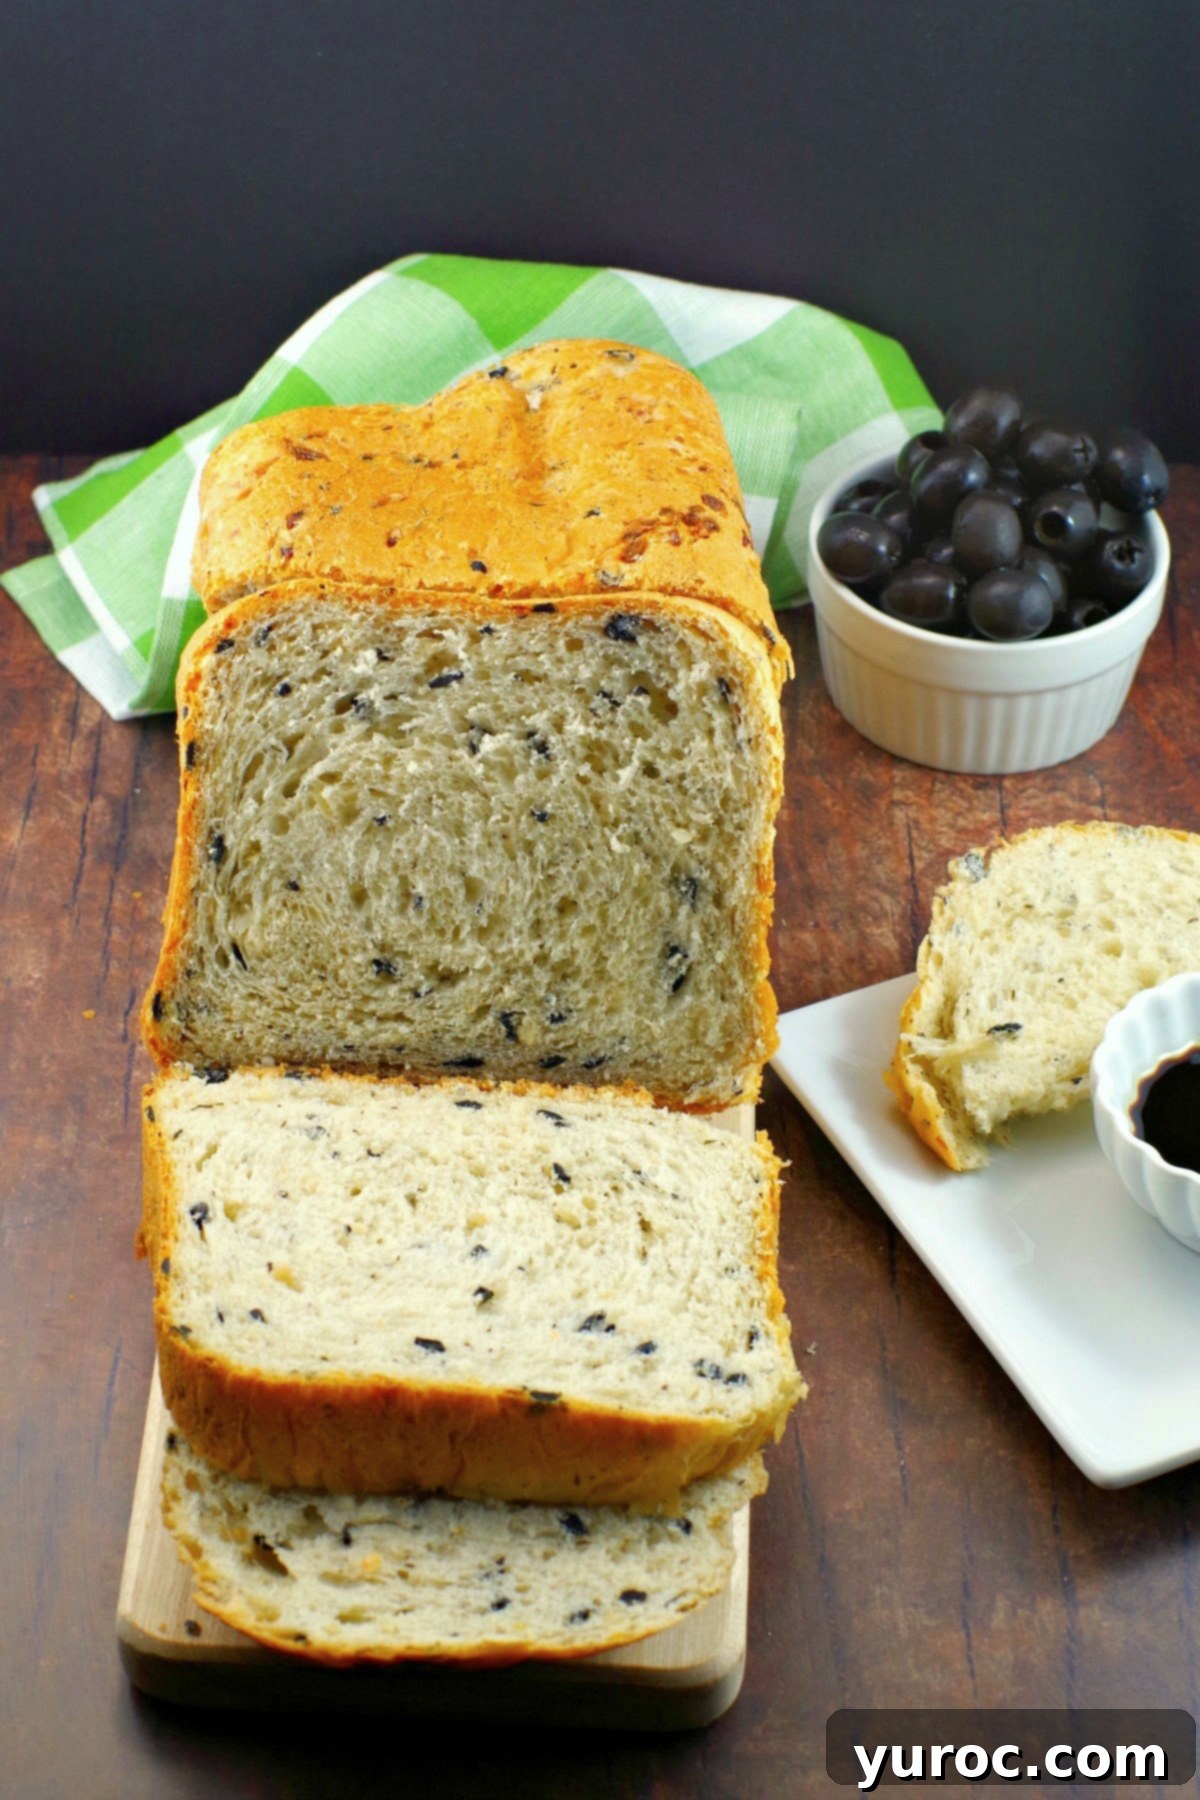
The enthusiastic reception from my family for this bread machine bread has been phenomenal; truly, my bread maker has never worked so hard! The appeal of this Bread Machine Olive Bread isn’t just its incredible savory flavor, but also its remarkable ease of preparation. This recipe consistently delivers artisan bread quality straight from your kitchen, without the labor-intensive process of traditional baking or the premium cost of store-bought gourmet loaves. If you’re looking to enjoy a genuinely delicious, homemade loaf without the hassle of making it by hand or the expense of buying it, then you’ve come to the right place. READ ON to discover how to create this culinary delight. This flavorful bread also serves as a perfect companion to heartwarming dishes, beautifully complementing soups such as my beloved Ham and Macaroni Soup.
🍒Reader Review
“”I made this today and I used the liquids in bottom and flour yeast on top and it turned out absolutely amazing !!The size and density of the bread and flavours were perfect .I gave half the loaf to my neighbour and she loved it too .I will definitely be making this again !” ⭐⭐⭐⭐⭐
While I have ventured into making Ukrainian Easter bread by hand in the past, let me be absolutely clear – it was *purely out of necessity* and occurred *before* I discovered the game-changing convenience of preparing Ukrainian Easter Bread directly in my bread machine. Over time, I developed wrist issues that made the repetitive motions of kneading quite painful. I’ll spare you the mundane details – you’re welcome! – but this physical limitation made my bread machine even more essential. It transformed what was once a strenuous and time-consuming task into a simple, automated process, allowing me to continue enjoying homemade breads without any discomfort. This experience only solidified my appreciation for the innovative design and practicality of modern bread makers.
If you share my enthusiasm for streamlined and efficient baking, you’ll find that bread machine recipes open up a world of possibilities. For another delightful and easy bread maker creation, I highly recommend trying my Bread Maker Cinnamon Raisin Bread. It’s another fantastic recipe that consistently delivers delicious results with minimal effort, making your bread machine an indispensable kitchen companion.
🥘Ingredient Notes & Expert Tips for Perfect Onion and Olive Bread
Creating a mouthwatering loaf of Bread Machine Onion and Olive Bread is surprisingly simple when you grasp the purpose of each ingredient. For this distinctly savory bread recipe, you don’t necessarily need specialty bread flour; high-quality all-purpose flour works exceptionally well. In Canada and the U.S., our standard all-purpose flours generally boast a higher protein content (around 11.7%) compared to some European counterparts, making them perfectly suitable for many bread recipes, including this one. Here’s a closer look at the simple yet essential components for your bread machine:
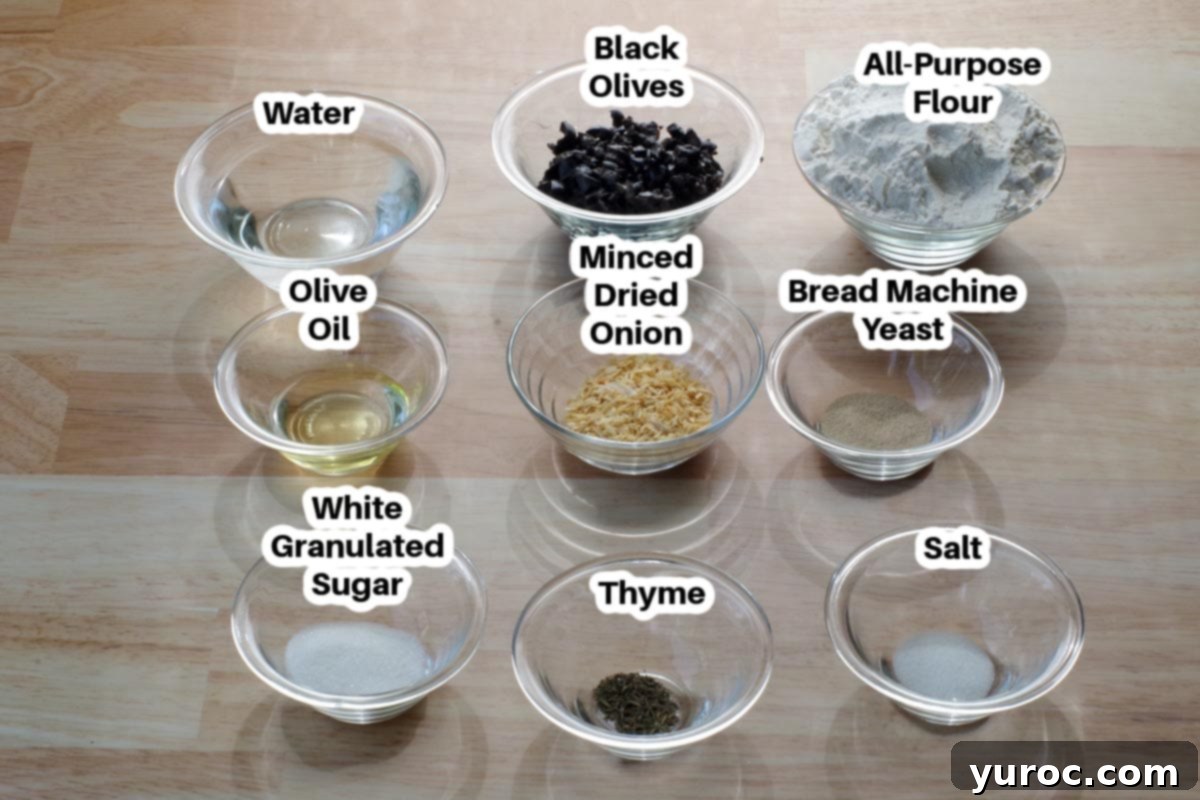
- Warm Water: The temperature of your water is critical for awakening the yeast. It should feel comfortably warm to the touch, similar to a baby’s bath – ideally between 105-115°F (40-46°C). Water that’s too hot will kill the yeast, while water that’s too cold will prevent it from activating effectively, both leading to a poor rise.
- All-purpose Flour: As previously mentioned, a good quality all-purpose flour is entirely sufficient for this recipe. Its protein structure provides the necessary gluten development for a soft yet structured loaf. While bread flour (which has even higher protein) can create a chewier texture, it’s not a strict requirement here, making the recipe more accessible for most home bakers.
- Dry Minced Onion: This is a cornerstone ingredient for the savory depth of this bread. It is imperative to use *dry minced onion* and avoid substituting with fresh. Fresh onions contain too much moisture, which can critically disrupt the delicate liquid-to-dry ingredient ratio in a bread machine recipe, often resulting in a dense, heavy, or improperly risen loaf. Dried minced onion rehydrates slowly within the dough, imparting its distinct, savory flavor without adverse effects.
- Bread Maker Yeast: The type of yeast you use is paramount for success. Bread machine yeast (also known as instant yeast or rapid-rise yeast) is specially designed to be fast-acting and more tolerant of the various temperature fluctuations and robust mixing cycles within a bread maker. It activates much more quickly and reliably than traditional active dry yeast, ensuring a consistent and vigorous rise. Always opt for bread maker yeast for optimal results in your appliance.
- Canned, Sliced Black Olives: These add a wonderful briny and subtly savory element to the bread. Ensure they are well-drained and chopped into smaller pieces to ensure even distribution throughout the dough. While other olive varieties like Kalamata or green olives could be experimented with for different flavor profiles, black olives offer a classic, mild taste that beautifully complements the onion and thyme.
- Olive Oil: Beyond simply adding a rich flavor, olive oil contributes significantly to the bread’s tender crumb and helps to keep the loaf fresh for longer. It also reinforces the Mediterranean flavor profile, making this bread perfect for dipping.
- Granulated Sugar & Salt: A small amount of sugar acts as food for the yeast, jump-starting its activation and contributing to the golden-brown crust. Salt, on the other hand, is crucial for both flavor enhancement and regulating yeast activity. It slows down the yeast’s fermentation, ensuring a controlled rise and preventing the bread from tasting bland.
- Dried Thyme: This aromatic herb infuses the bread with an earthy, slightly peppery nuance that perfectly enhances the savory blend of onion and olives. Feel free to adjust the quantity to suit your taste preferences, or even consider substituting with other complementary dried herbs like oregano or a touch of rosemary.
Essential Tips for Consistent Bread Machine Success
Achieving a consistently perfect loaf of this delicious Onion and Olive Bread from your bread machine is easily accomplished by adhering to a few fundamental principles. Bread machines are celebrated for their convenience, but they perform best with meticulous attention to detail and consistency. Here are the key tips to ensure every loaf you bake turns out beautifully:
- Always Use Fresh Yeast: Yeast is a living ingredient, and its viability directly dictates your bread’s rise. Before baking, always double-check the expiration date on your bread machine yeast. Expired or inactive yeast is the most common reason for a dense, flat loaf. For optimal potency, store your yeast in an airtight container in a cool, dark place, such as the refrigerator or freezer.
- Measure All Ingredients Precisely: This cannot be overstated: precise measurement is the single most critical factor in bread machine baking. Unlike traditional hand-kneading, where you can adjust flour or liquid by feel, bread machines operate on exact ratios. Use accurate measuring cups and spoons, leveling off dry ingredients like flour with a straight edge. Even slight inaccuracies can significantly impact the dough’s consistency, texture, and rise.
- Follow the Exact Ingredient Order: Every bread machine manufacturer provides a specific sequence for adding ingredients, and it’s essential to follow it. Typically, liquids are added first, followed by dry ingredients (flour, sugar, salt, dried onion, thyme), and finally, the yeast is carefully placed on top, often in a small well or “crater.” This layered approach prevents the yeast from making premature contact with liquids or salt, which could hinder its activation before the mixing cycle begins.
- Cool Completely Before Slicing: Once your aromatic Bread Machine Onion and Olive Bread is baked, resist the tempting urge to slice into it immediately. Transfer the hot loaf onto a wire rack and allow it to cool completely. This cooling period is vital for the internal structure to set properly. Slicing too early can result in a gummy texture and make the bread difficult to cut cleanly.
- Use a Serrated Bread Knife: Once fully cooled, use a sharp serrated knife, commonly known as a bread knife, for slicing. Its jagged edge effortlessly cuts through the crust and the soft interior without compressing or tearing the delicate crumb, ensuring perfect slices every time.
- Choose the Lightest Crust Setting: If your bread machine offers various crust color options (light, medium, dark), always select the “Light” setting for this recipe. A lighter crust will be softer and easier to cut, which is particularly desirable for a savory, moist loaf like this one. This setting also helps prevent the crust from becoming overly thick or excessively hard, which can sometimes occur with darker settings.
- Avoid Frequent Peeking: While it’s natural to be curious, try to avoid opening the bread machine lid frequently during the rising and baking cycles. Each time the lid is opened, heat escapes, and the carefully controlled environment is disrupted. This temperature fluctuation can negatively impact the dough’s rise and the final texture of your bread.
- Know Your Bread Machine: Take the time to read and understand your specific bread machine’s instruction manual. Familiarize yourself with its particular cycle times, ingredient capacities, and any unique instructions, especially for adding mix-ins like olives at the designated signal.
🔪How to Make Delicious Bread Machine Olive Bread Step-by-Step
Making this incredible Bread Machine Onion and Olive Bread is a delightfully straightforward process, but paying close attention to the ingredient order and your bread machine’s settings is paramount for a perfect result. Always prioritize consulting your specific bread machine manufacturer’s operating instructions, as models and functionalities can vary. The following detailed steps will guide you through creating a perfectly baked, savory loaf:
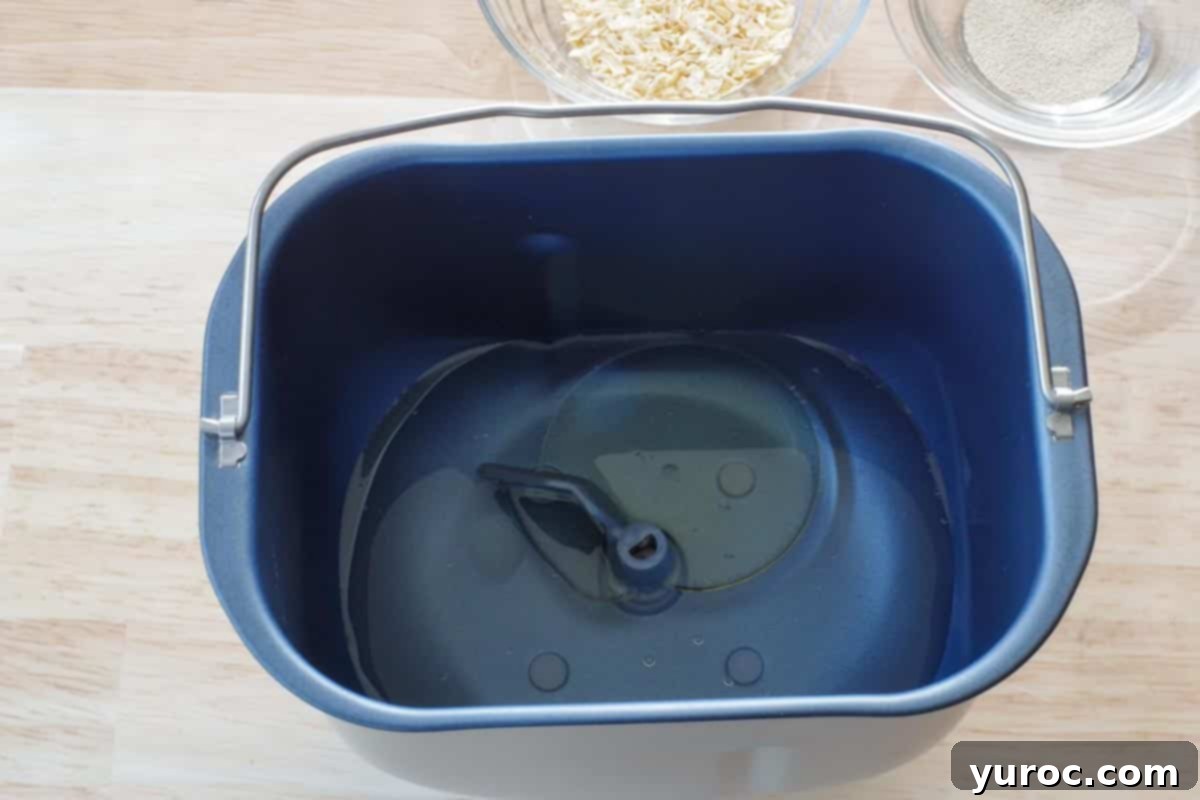
- Step 1: Add Wet Ingredients First. Begin by carefully adding the specified amount of warm water and olive oil into your bread machine pan. This order is absolutely critical for initiating proper yeast activation and ensuring the dough develops correctly. Confirm that your water is at the ideal temperature (105-115°F or 40-46°C) to provide an optimal environment for the yeast to thrive, but not so hot that it kills the yeast.
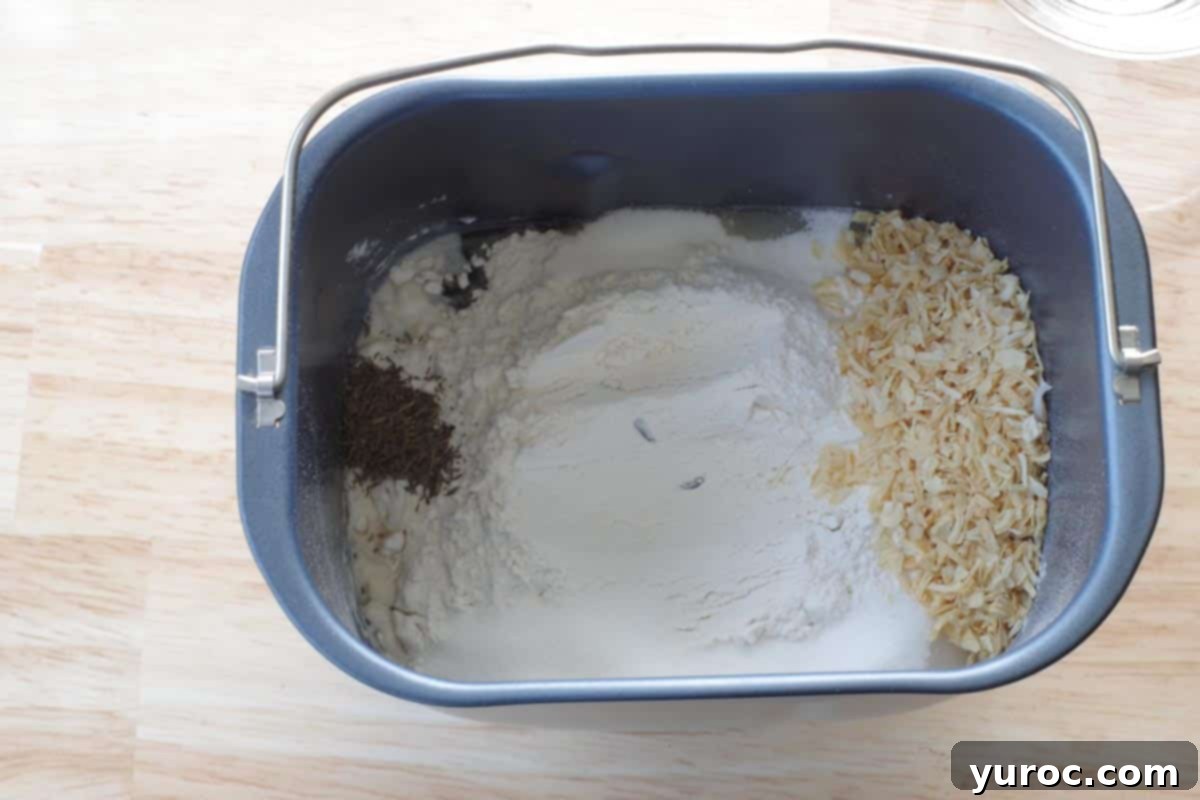
- Step 2: Layer Dry Ingredients (Excluding Yeast). Next, with precision, layer in all the dry ingredients. This includes the all-purpose flour, white granulated sugar, salt, dried thyme, and finally, the dry minced onion. When adding the salt, sprinkle it specifically around one outer edge of the mixture, consciously keeping it away from where the yeast will later be placed. Similarly, pour the sugar around the opposite outer edge. This strategic separation is vital to prevent direct contact between salt and yeast, which can inhibit yeast activity.
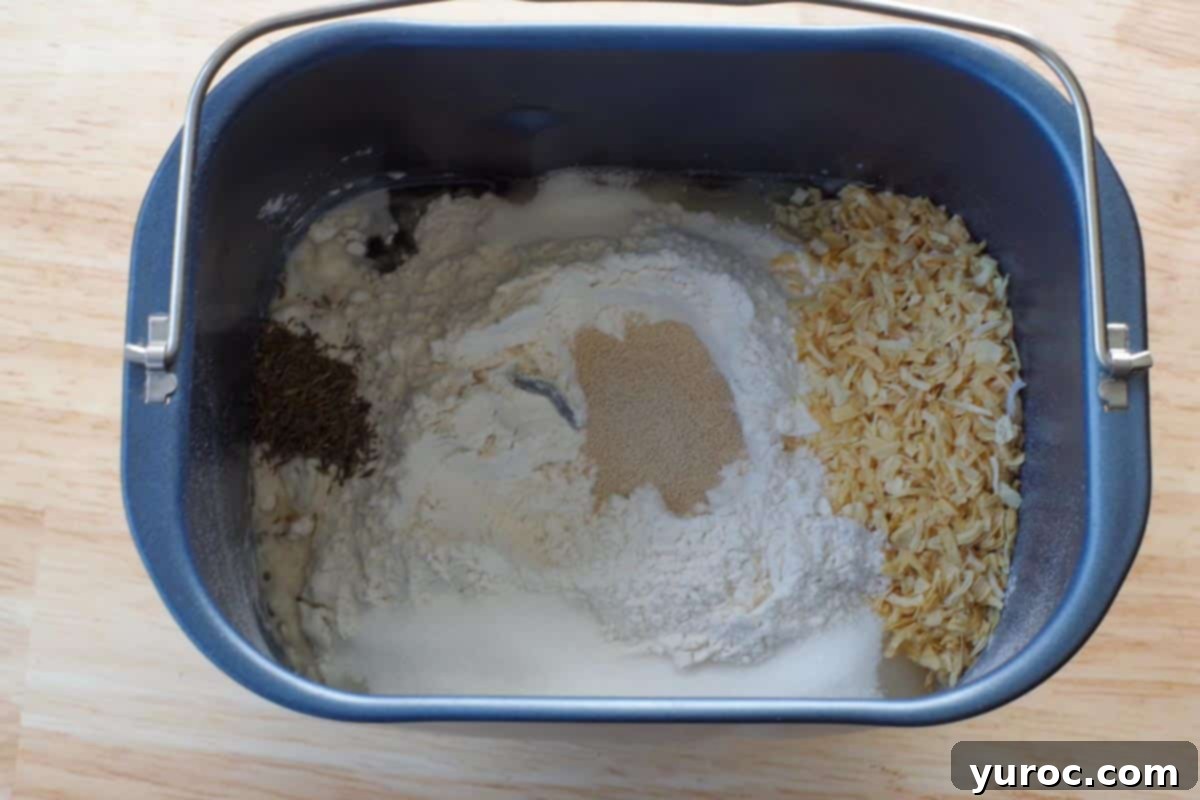
- Step 3: Add Yeast Safely. The bread maker yeast should always be the last ingredient to enter the pan. Create a small crater or well directly in the middle of the flour layer, ensuring it is well-isolated from the salt, sugar, and especially the liquid below. Carefully pour your bread maker yeast into this protected crater. This method is critical to ensure the yeast does not prematurely come into contact with the liquid, salt, or sugar, allowing it to activate optimally once the mixing cycle commences.
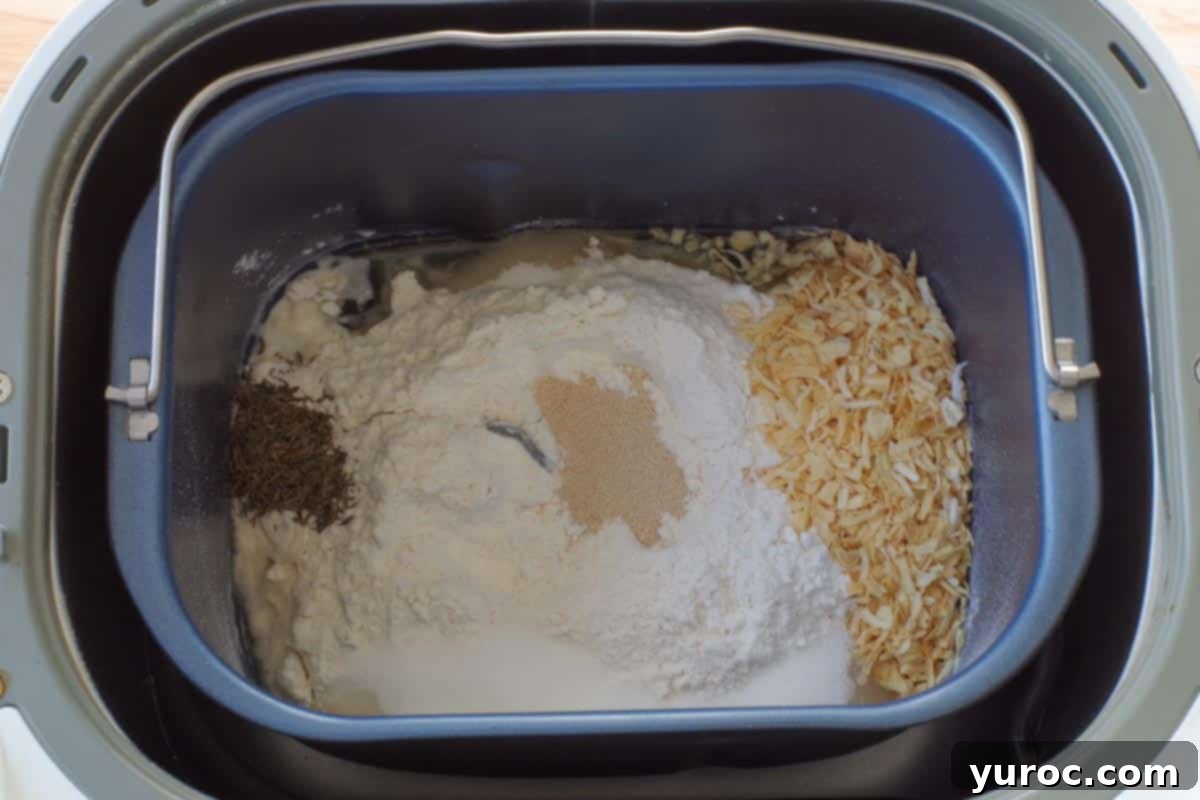
- Step 4: Secure the Bread Pan. With all ingredients carefully added, gently place the bread pan into its designated compartment within the bread machine. Ensure it is securely locked into place according to your specific machine’s instructions. This prevents any movement during the kneading and baking cycles.
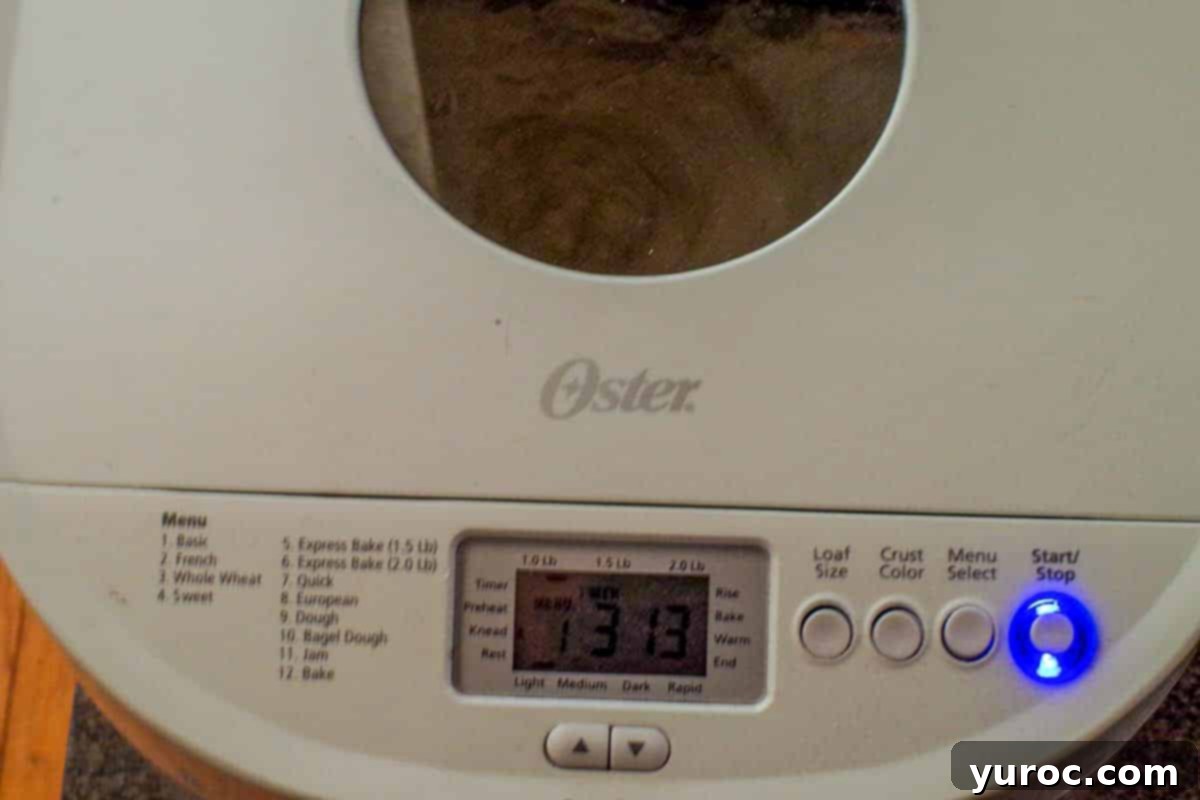
- Step 5: Select Settings and Start. Close the lid of your bread machine. Choose the most appropriate setting for a standard loaf; this is typically labeled “Normal Mode” or “Basic Mode,” which is the setting commonly used for a regular white bread. If your machine offers a loaf size selection, set it to “1 lb.” For the crust color, select “Light” – this will yield a softer crust that is easier to slice and beautifully complements the savory internal flavors. Finally, press START to initiate the baking cycle.
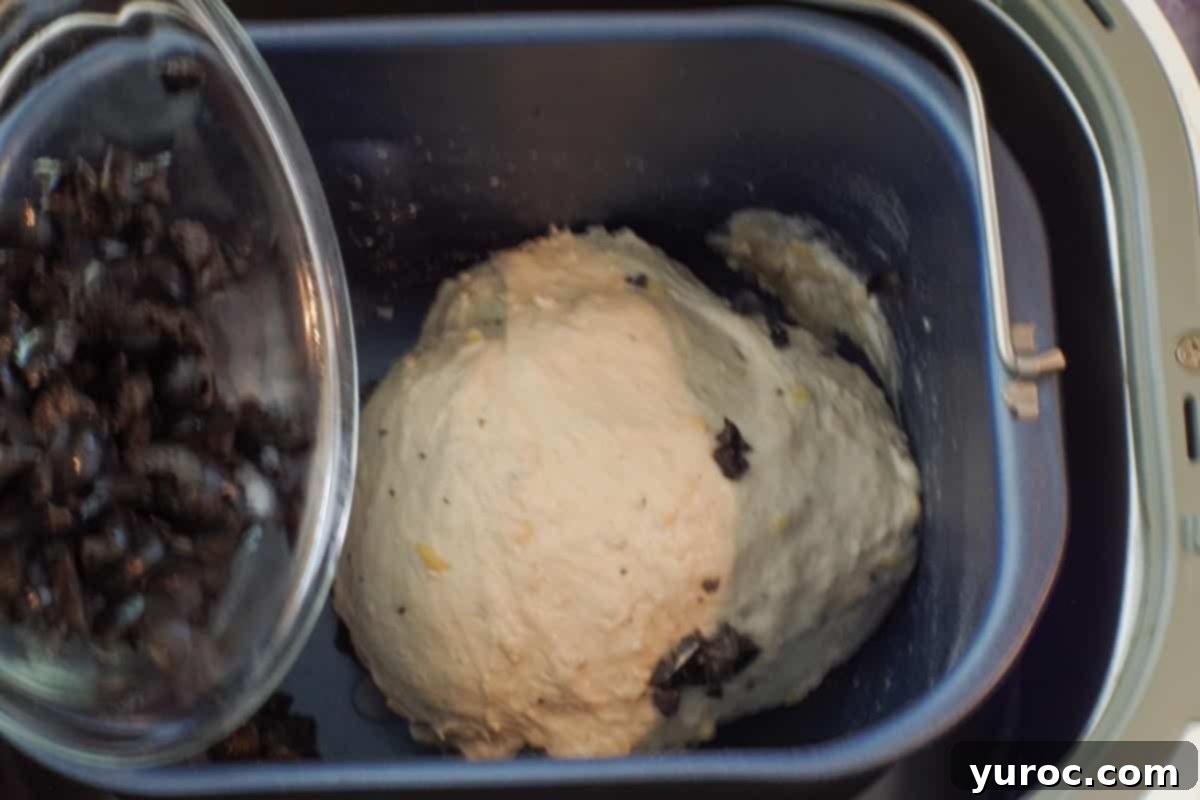
- Step 6: Add Olives at Signal & Cool. During the dough’s kneading cycle, your bread machine will emit an audible signal (often referred to as the “fruit signal” or “mix-in signal”). This typically occurs approximately 10-15 minutes into the kneading process. At this precise moment, add your chopped black olives to the dough. Once the bread machine successfully completes its full cycle and your bread is baked, carefully remove the hot loaf pan from the machine using oven mitts (it will be extremely hot!). Immediately transfer the freshly baked loaf onto a wire rack to cool completely. This crucial cooling process allows the internal structure of the bread to set and prevents a soggy bottom or gummy texture.
Helpful Hint: When removing the hot loaf pan from the bread machine, always use oven mitts, as both the pan and its handle will be intensely hot. Similarly, the kneading paddle, which may remain embedded in the bottom of your freshly baked bread, will also be very hot. If it becomes stuck, it’s best to wait until the bread has cooled significantly before attempting to gently remove it. This prevents potential burns and avoids damaging the delicate structure of your beautiful loaf.
Top Tip: Elevate Your Dipping Experience with Quality Balsamic Vinegar & Olive Oil
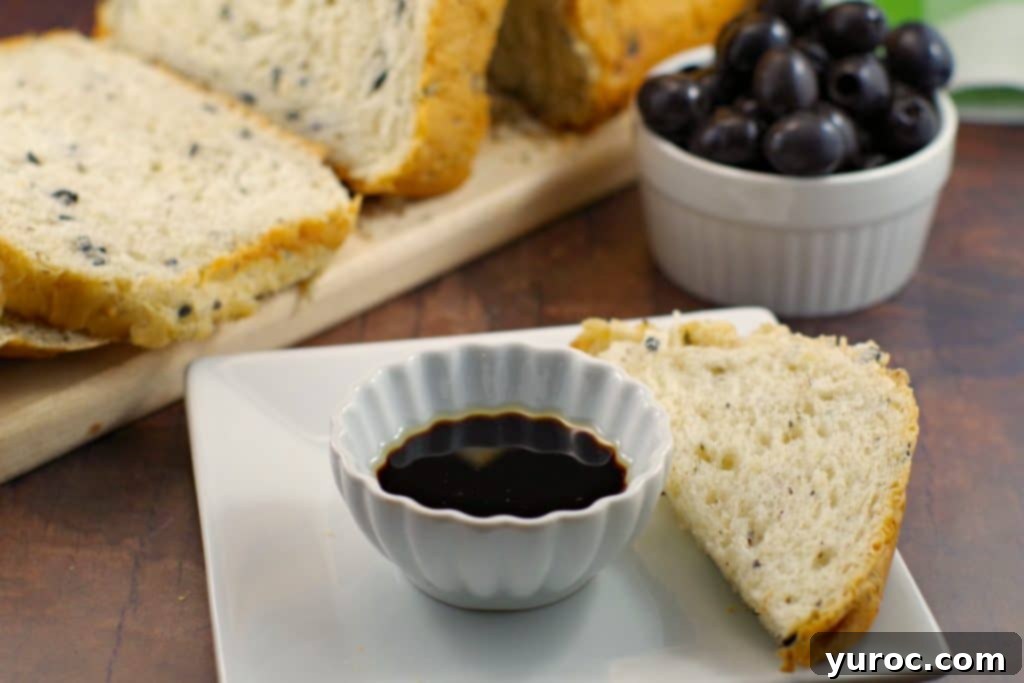
There is truly nothing quite like tearing into a slice of fresh, warm bread and dipping it into a harmonious blend of high-quality olive oil and aged balsamic vinegar! For the ultimate culinary experience with your homemade Bread Machine Onion and Olive Bread, the selection of your balsamic vinegar and olive oil is incredibly important. If you’ve ever unfortunately encountered a low-quality balsamic, you’ll undoubtedly understand the unpleasant bitterness and harsh notes that can completely detract from the experience. Investing in good quality oils and vinegars genuinely transforms a simple dipping moment into a gourmet delight.
My personal favorite balsamic vinegar discovery, one that continually impresses me, is Kirkland Signature Balsamic Vinegar of Modena (affiliate link)! I initially stumbled upon it quite by chance during a routine shopping trip at Costco and was genuinely astonished by its exceptional smoothness, rich depth, and perfectly balanced flavor profile. Later, while conducting research for an article on balsamic vinegars, I discovered a professional taste test review focusing on “economical” balsamic vinegars, where Kirkland’s offering impressively secured the FIRST PLACE position!
Several expert judges lauded its intriguing aroma, noting subtle hints of wood, its excellent viscosity, and a remarkably balanced sweet-to-sour ratio. One panelist specifically highlighted its “brighter palate,” while another detected delicate cherry notes on the nose. The overwhelming consensus among many judges pointed to its wonderfully pleasing and lingering finish. In summary, it was universally praised for possessing “an excellent sweet-to-sour balance and pleasing finish, especially considering its accessible price point.” I wholeheartedly concur with these assessments! You can read more about this specific balsamic vinegar taste test HERE. Therefore, if you’re not inclined to spend upwards of $75 or more on a bottle of premium, 12-year-aged traditional balsamic vinegar, this Kirkland option presents an outstanding combination of value and quality that will undoubtedly impress your palate. Furthermore, a single bottle tends to last a very long time, making it a highly economical and smart addition to your pantry.
To perfectly complement your chosen balsamic, select a high-quality extra virgin olive oil. Look for oils that are cold-pressed and exhibit distinct characteristics such as a fruity aroma, a peppery finish, or a slightly bitter note; these attributes are indicators of freshness and a high polyphenol content. A robust olive oil will beautifully stand up to the tangy and complex flavors of the balsamic, collectively creating an unforgettable dipping experience for your freshly baked Homemade Bread Machine Onion and Olive Bread. Enjoy this simple yet sophisticated culinary pleasure!
👪 Serving Size & Critical Considerations for Bread Machine Recipes
This specific Onion and Olive Bread Machine recipe is meticulously formulated to produce a perfectly sized 1 lb. loaf. This weight is generally considered the optimal size for most standard home bread machines, ensuring that the dough rises correctly and bakes evenly throughout the cycle. It is critically important to resist the common temptation to double a bread machine recipe, even if you believe your machine has the capacity. Using a larger quantity of ingredients than explicitly recommended will almost certainly lead to the dough rising excessively within the confined space of the bread pan. When the pan is not sufficiently large enough to accommodate the increased volume of dough, there’s a significant risk of the dough overflowing, collapsing during the crucial rise or baking stages, or failing to bake thoroughly, which will ultimately result in a very dense, heavy, and disappointing loaf rather than the light and airy texture you desire.
For consistently excellent, high-quality results, always adhere strictly to the recipe’s specified quantities when using your bread machine. If you find yourself needing more than a single loaf for an event or larger gathering, it is always the safer and more reliable approach to make two separate 1 lb. loaves (or more, depending on your needs) rather than attempting to force a larger, combined batch into one pan. This small but vital precaution guarantees that each and every loaf of your delicious Homemade Bread Machine Olive Bread will be a resounding success, boasting the ideal texture and flavor.
🥗 Perfect Pairings for Your Savory Onion and Olive Bread
This versatile and flavorful Bread Machine Bread with Onion and Olive is an exceptional accompaniment to a wide array of meals, particularly hearty and comforting soups. The savory notes of the dried onion and black olives, combined with the rustic texture of the bread, make it a delightful and enhancing addition to almost any comfort food spread. For an truly unforgettable meal experience, I highly recommend pairing it with my Award-winning Creamy Carrot Soup – it’s an absolute match made in dinner heaven! The bread is perfect for generously dipping and soaking up every last, flavorful drop of the soup, creating a truly satisfying bite.
Beyond the rich and creamy carrot soup, this artisan-style bread also pairs beautifully with other robust and flavorful soups. I particularly enjoy serving it alongside my light and delicious Healthy Pumpkin Soup, where its robust flavor and texture stand up wonderfully to the soup’s inherent sweetness. It’s also a fantastic complement to a savory Beef Borscht (made easily with canned beets), providing a perfect textural contrast to the tender vegetables. For a lighter yet equally satisfying option, it harmonizes wonderfully with this Easy Healthy Minestrone Soup. Furthermore, don’t limit this bread to just dipping; consider using it for creating gourmet open-faced sandwiches, serving it as a rustic side with a vibrant charcuterie board, or simply enjoying it with a smear of butter or a drizzle of olive oil for a delightful, stand-alone snack.
🌡️Storing Your Homemade Onion and Olive Bread
This incredibly delicious Olive Bread Machine recipe is such a hit in my home that it often vanishes almost immediately after it’s baked, meaning long-term storage is rarely a concern! However, if you find yourself with a beautiful leftover loaf or prefer to bake ahead for future enjoyment, proper storage techniques are absolutely essential to preserve its freshness, flavor, and wonderful texture. Follow these simple yet effective guidelines to keep your homemade bread in peak condition:
- Always Cool Completely: This is the golden rule for storing any type of bread. Before wrapping or storing your loaf, it is paramount to allow it to cool down entirely on a wire rack. Wrapping warm bread will trap residual steam, which inevitably leads to a soggy crust and a gummy, unappetizing interior. Patience here is key!
- Short-Term Storage (Room Temperature): For enjoyment within one to two days, once the loaf is completely cooled, store it in an airtight container, a large plastic bread bag, or wrapped tightly in several layers of plastic wrap. Keeping it airtight at room temperature helps to prevent it from drying out too quickly and maintains its soft crumb.
- Refrigeration (When Necessary): While refrigeration can sometimes accelerate the staling process of certain breads, if you are making this bread ahead for a specific event or if you reside in a particularly humid climate, storing it in the fridge can be beneficial. Once cooled, place it inside an airtight plastic bag or wrap it thoroughly in plastic wrap to minimize moisture loss. Stored this way, it will keep well for approximately three to four days.
- Freezing for Long-Term Storage: This savory bread freezes exceptionally well, making it perfect for meal prep or enjoying a freshly baked taste anytime! To freeze, ensure the loaf is completely cool. First, wrap it very tightly in several layers of plastic wrap, ensuring no air pockets. Then, place the wrapped loaf inside a large, heavy-duty freezer-safe plastic bag (such as a Ziploc freezer bag) or wrap it again in aluminum foil. This double-layer protection is crucial for preventing freezer burn. Properly frozen, it can be stored for up to three months without significant loss of quality.
- Thawing and Reheating: When you’re ready to savor your frozen bread, simply remove it from the freezer and allow it to thaw gradually at room temperature for several hours. For a truly warm, “just baked” experience, you can lightly toast individual slices, or for a whole loaf, warm it in a moderate oven (around 350°F / 175°C) for 10-15 minutes, or until it is heated through and the crust is crisp again.
❔Frequently Asked Questions about Bread Machine Olive and Onion Bread
For optimal results in a bread machine, liquid ingredients (such as water, milk, or oil) should generally be added to the bread pan first. These are then followed by the dry ingredients, including flour, sugar, and salt. The yeast should always be added last, typically placed in a small well or crater created in the center of the dry ingredients. This layering ensures the yeast does not come into premature contact with the liquid or salt, which can inhibit its activity, until the machine’s mixing cycle properly combines everything. Following this specific sequence is crucial for successful yeast activation and proper dough development.
For this particular bread machine recipe, it is strongly recommended to stick with dried minced onion. Fresh onions contain a significant amount of moisture which can critically disrupt the delicate liquid balance required for bread machine recipes. This disruption often leads to a dense, gummy loaf, or prevents the bread from rising properly. Dried minced onion rehydrates slowly and evenly during the baking process, infusing flavor without introducing excess moisture that could compromise the dough’s consistency and final texture.
If your bread machine loaf isn’t rising as expected, several common factors could be at play. First, always verify the freshness of your yeast; expired or old yeast will not activate effectively. Second, ensure your water temperature is within the ideal range (105-115°F or 40-46°C) – water that is too hot will kill the yeast, while water that is too cold won’t activate it sufficiently. Third, precise measurements are incredibly important for bread machines; too much flour or insufficient liquid can result in a stiff dough that struggles to rise. Lastly, double-check that the yeast did not come into direct contact with salt or liquid before the mixing cycle began, as both can significantly inhibit yeast activity.
While this recipe specifically calls for black olives due to their mild, classic flavor that complements the onion and thyme beautifully, you can certainly experiment with other varieties to suit your preference. For instance, Kalamata olives would impart a more intense, briny, and slightly fruity flavor profile, while green olives could introduce a tangier note. Regardless of the type you choose, ensure they are pitted, chopped to a similar size for even distribution throughout the dough, and most importantly, drained exceptionally well and patted dry if they were packed in brine, to prevent introducing any excess liquid into your bread dough.
🍞More Delicious Bread Machine Recipes to Try!
- Bread Maker Cinnamon Raisin Bread
- Bread Machine Pizza Dough Recipe
- Gruyère Apple Pie Bread Machine Cinnamon Rolls
- Italian Bread Machine Breadsticks
Your Feedback Matters! Comments & Reviews
Engaging with recipes by leaving comments and star ratings is one of the most impactful and cherished ways to support your favorite recipe creators! If you’ve loved the experience of making and tasting this delightful Onion and Olive Bread Machine recipe, please take a moment to share your thoughts and results. You can easily leave a comment and rate it using the convenient star rating system found in the recipe card below. Alternatively, capture your beautiful homemade bread creations and share them on social media platforms. Don’t forget to use the hashtag #foodmeanderings or tag @foodmeanderings so we can see and celebrate your amazing baking achievements!
Ultimately, if you are searching for an incredibly effortless yet supremely satisfying way to create a savory, artisan-quality loaf, this bread machine olive bread, with its delightful and aromatic notes of onion and thyme, is truly unparalleled. It brings the profound joy of homemade baking to your table with remarkable ease, consistency, and a flavor that will surely impress!

📋 Onion and Olive Bread Machine Recipe
Print Recipe
Pin
Save RecipeSave Recipe
Rate
Add to Shopping ListGo to Shopping List
Equipment
-
bread machine
-
cutting board
-
serrated knife
Ingredients
- 8 oz warm water
- 2 tablespoon olive oil
- 2 cups all-purpose flour
- 1 ½ tablespoon white granulated sugar
- 1 teaspoon salt
- ¾ teaspoon dried thyme
- ¼ cup dried minced onion
- 200 ml can of sliced black olives chopped, ensure well-drained
- 2 teaspoon bread maker yeast
Instructions
-
(This recipe yields a 1 lb loaf)
Prepare the Pan: First, add all the wet ingredients (warm water and olive oil) to your bread machine pan. This initial step is vital, so ensure you follow this order precisely.
-
Layer Dry Ingredients: Next, carefully layer in the dry ingredients: all-purpose flour, white granulated sugar, salt, dried thyme, and dried minced onion. When adding salt, sprinkle it around one outer edge of the mixture, well away from where the yeast will go. Similarly, pour the sugar around the other outer edge, opposite the salt. This separation prevents direct contact with the yeast too early.
-
Add Yeast Safely: The yeast should always be added last. Create a small crater or well in the middle of the flour layer. Carefully pour the bread maker yeast into this crater. It is absolutely critical that the yeast does not come into contact with the liquid or salt until the mixing cycle begins.
-
Place in Machine: Securely place the bread pan into its slot within your bread machine and close the lid.
-
Set Program: Select the most appropriate setting for a standard loaf on your bread machine. This is typically “Normal Mode” or “Basic Mode” (the same setting commonly used for a regular loaf of white bread). If your machine offers size selection, choose “1 lb.” For crust color, opting for “Light” will result in a softer crust that’s easier to cut. Press START to begin the baking cycle.
-
Add Olives: Listen for the “fruit signal” or “mix-in signal” from your bread machine, which usually sounds about 10-15 minutes into the kneading cycle. At this point, add the chopped black olives to the dough.
-
Cool & Serve: Once the bread machine finishes its cycle, carefully remove the hot loaf pan (using oven mitts) and immediately transfer the baked loaf to a wire rack to cool completely. This cooling step is essential for the bread’s texture.
-
Important Note: It is paramount that you consult and follow your bread machine manufacturer’s specific operating instructions when attempting to bake any bread, as models and settings can vary.
Notes
- Ensure your bread machine yeast is fresh and not expired for the best rise. Old yeast will lead to a dense loaf.
- Measure all ingredients with absolute precision. Bread machines are very finicky when it comes to *exact measurements* and even small variations can impact the final result.
- Always follow the directions exactly for adding ingredients, particularly ensuring yeast does not touch liquid or salt until the machine’s mixing cycle begins.
- Use a sharp serrated knife (bread knife) when cutting the bread, but only after it has cooled completely on a wire rack. This is crucial for achieving an ideal texture and clean slices.
- Select the lightest crust color setting, if your bread machine offers the option. This makes the crust easier to cut and chew.
Storing Your Loaf:
This savory olive bread recipe tends to be devoured quickly! If you do need to store it, always allow the loaf to cool completely on a wire rack first. Then, store it in an airtight plastic wrap, a large plastic bag, or a ziplock freezer bag in the fridge for a few days. For longer storage, it freezes beautifully for up to 3 months. When freezing, double-wrap it in plastic wrap and then foil or a freezer bag to protect against freezer burn.
Preventing a Stuck Paddle: When removing the loaf pan from the bread machine, use oven mitts as it will be hot! If the kneading paddle gets stuck in the bottom of the bread, wait until the loaf cools down significantly before gently removing it (also with oven mitts or a small utensil) to avoid burning yourself or damaging the bread.
Nutrition
