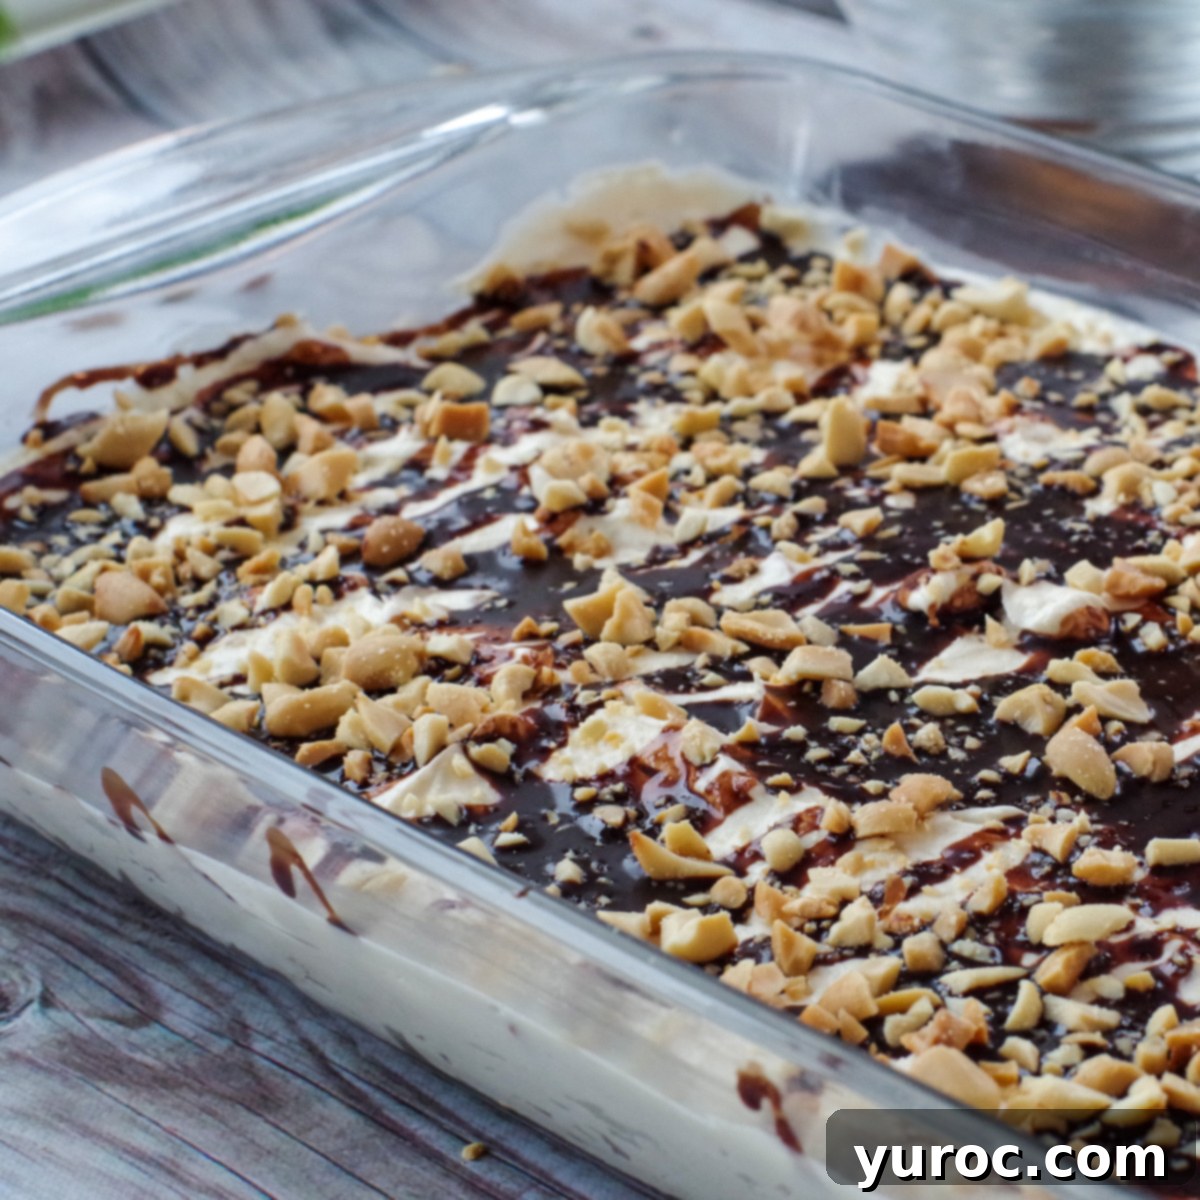
Ultimate No-Bake Drumstick Dessert: Your Go-To Easy Summer Recipe
If the mere thought of a classic Drumstick ice cream cone makes your mouth water, then get ready to fall in love with this incredible No-Bake Drumstick Dessert! Imagine all the beloved flavors and textures of that iconic treat – the crunchy chocolate shell, the creamy vanilla ice cream, and the irresistible salty peanuts – but in a simple, effortless dessert that requires absolutely no oven time. This recipe is a true game-changer, especially when the summer heat makes the idea of baking feel like an impossible task. Prepare to enjoy the nostalgic taste of your favorite ice cream cone, transformed into a convenient and utterly delicious make-ahead treat.
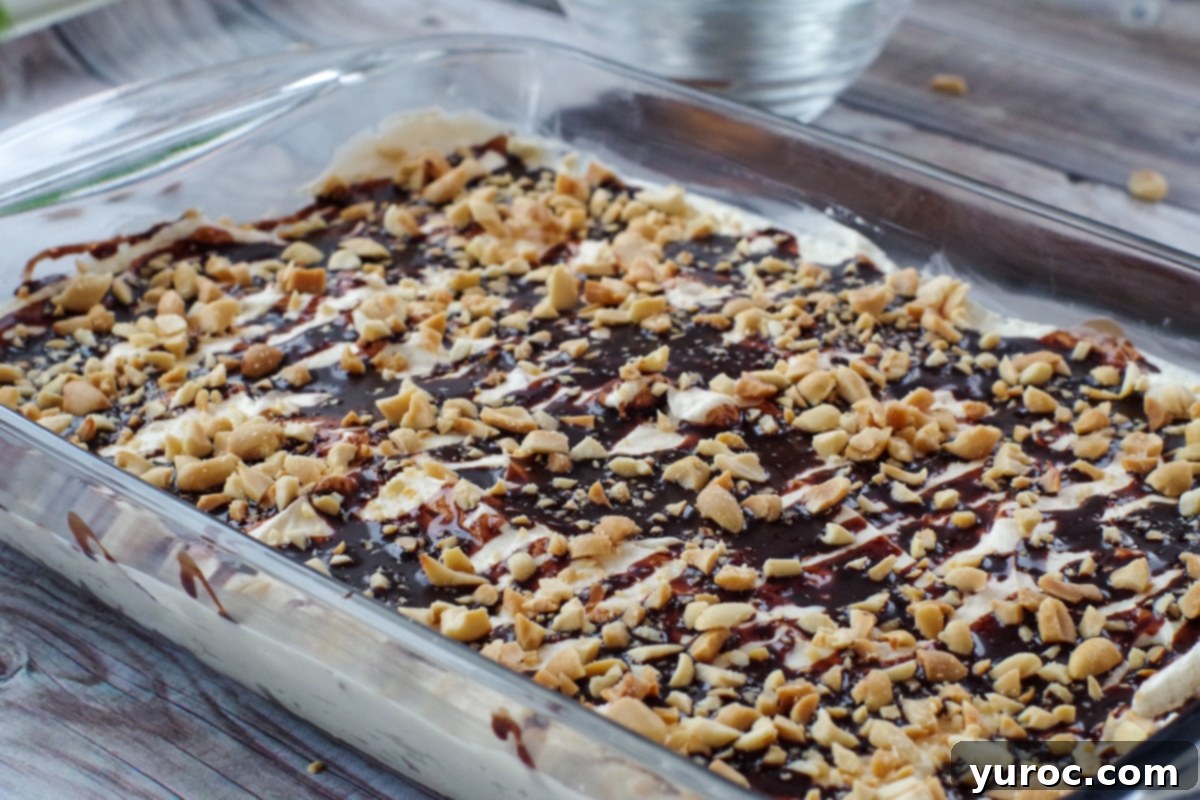
There’s nothing quite like a cool, refreshing dessert on a hot day, and this no-bake wonder delivers exactly that. Forget slaving over a hot stove; this Drumstick Dessert comes together quickly, with only about 20 minutes of active prep time. It’s the ultimate solution for a last-minute craving, an impromptu gathering, or simply when you need a delightful treat without any fuss. Best of all, it captures the authentic taste of a Drumstick ice cream cone so perfectly, you’ll swear it came right from the freezer section. Made with simple, readily available ingredients from any grocery store, this recipe is not only easy but also incredibly satisfying. And here’s the clincher: unlike its ice cream counterpart, this dessert does NOT need to be frozen. It’s designed to be enjoyed chilled, right from your refrigerator, making it perfect for potlucks, BBQs, and all your summer entertaining needs. Its rich, layered flavors and delightful textures make it an instant crowd-pleaser that will have everyone asking for the recipe.
Why You’ll Adore This Easy No-Bake Drumstick Dessert
This isn’t just another dessert; it’s an experience that combines convenience with irresistible flavor. Here’s why this No-Bake Drumstick Dessert will quickly become a cherished recipe in your collection:
- Effortlessly Easy: No complex techniques, fancy equipment, or culinary degrees required. If you can mix, spread, and chill, you can make this show-stopping dessert with absolute confidence.
- Bake-Free Bliss: Keep your kitchen cool and comfortable, even on the hottest days! This dessert is perfect for summer when turning on the oven is the last thing you want to do.
- Quick to Prepare: With a hands-on time of just about 20 minutes, you can whip this up in a flash. This makes it ideal for busy schedules, spontaneous dessert needs, or when unexpected guests arrive.
- Authentic Drumstick Flavor: Every bite delivers that unmistakable combination of crunchy waffle cone, rich chocolate, creamy peanut butter, and savory peanuts – a true taste of the classic ice cream cone you grew up loving. It’s pure nostalgia in a pan!
- A Guaranteed Crowd-Pleaser: This recipe yields a generous 16 servings, making it an excellent choice for family reunions, picnics, potlucks, or any large gathering where a satisfying and impressive dessert is a must.
- Simple, Accessible Ingredients: You’ll find everything you need at your local supermarket, often ingredients you already have in your pantry, making it economical and convenient.
- Make-Ahead Marvel: Prepare this dessert a day or even two in advance and store it in the refrigerator. This frees up your time on the day of your event, allows the flavors to fully meld, and often makes it taste even better!
- No Freezing Required: Unlike actual ice cream Drumsticks, this dessert is designed to be enjoyed chilled, straight from the fridge, offering a delightful creamy texture without the need for a freezer. This means easier transport and serving at any gathering.
This dessert truly embodies convenience and indulgence, providing all the deliciousness with none of the hassle. It’s a dessert that not only satisfies your sweet tooth but also brings a touch of nostalgic joy and effortless elegance to any table.
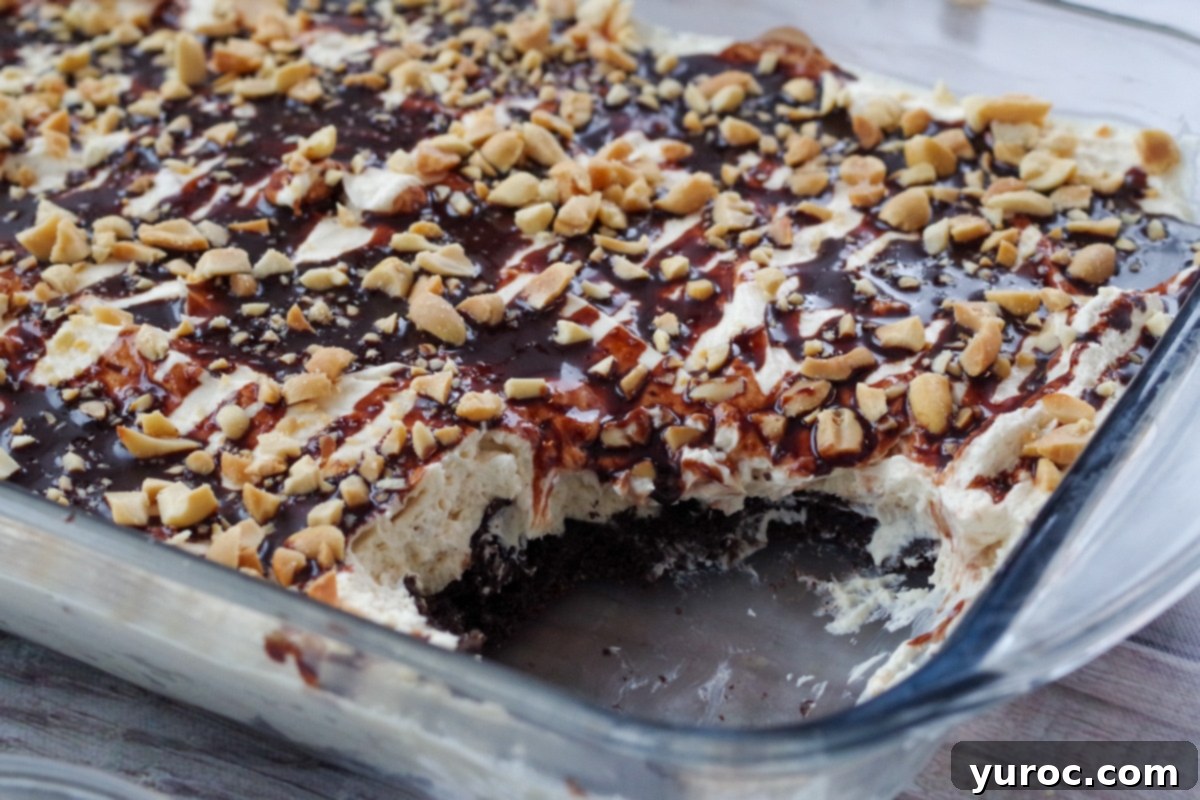
Essential Ingredients for Your Perfect Drumstick Dessert
Creating this delightful no-bake treat relies on a few key ingredients, each playing a vital role in replicating that iconic Drumstick flavor profile and satisfying texture. Here’s a closer look at what you’ll need and why each component is essential for achieving the best results:
- Oreo Cookie Baking Crumbs: These form the foundational crust, providing a rich, chocolatey base that perfectly complements the creamy filling. Using pre-crushed crumbs saves a significant amount of time and effort. If you can’t find them, you can easily crush whole Oreo cookies (cream filling included for extra richness!) in a food processor or by hand.
- Melted Unsalted Butter: Essential for binding the crust ingredients together. The butter helps to create a firm, cohesive base that holds its shape beautifully once chilled. Using unsalted butter allows you to control the overall saltiness of the dessert.
- Small Waffle Ice Cream Bowls: This is a secret weapon ingredient that elevates the crust and truly delivers that authentic “cone” flavor and texture. Breaking them up and combining them with the Oreo crumbs adds a unique, slightly crisp, and distinctive waffle-cone taste that makes the base extraordinary. Don’t skip these for the ultimate Drumstick experience!
- Chunky Peanut Butter: Featured in both the crust and the luscious creamy filling, chunky peanut butter provides the classic nutty flavor and delightful textural contrast. The small pieces of peanuts within the butter add an extra layer of crunch. If you prefer a completely smooth dessert, you can certainly substitute with smooth peanut butter, but the chunky variety is highly recommended for authenticity.
- Softened Cream Cheese: The backbone of our wonderfully rich and tangy filling. Ensure your cream cheese is softened to room temperature before beating. This is crucial for achieving a perfectly smooth, lump-free consistency that blends seamlessly with the other ingredients.
- Powdered Sugar (Icing Sugar): This finely milled sugar sweetens the cream cheese and peanut butter filling, dissolving easily to create a silky smooth and luxurious texture without any grittiness.
- Vanilla Extract: A crucial flavor enhancer, vanilla brightens and balances the richness of the peanut butter and cream cheese, adding a warm, aromatic, and comforting note that ties all the sweet flavors together.
- Heavy Whipping Cream: When properly whipped, this creates the airy, light, and decadent topping for our dessert. It expands significantly in volume, giving the dessert its fluffy, cloud-like crown. Make sure it’s very cold for best whipping results.
- White Granulated Sugar: Added to the heavy whipping cream before beating, this sugar subtly sweetens the topping, ensuring it complements the rich filling below without being overly sweet, providing a balanced flavor profile.
- Chopped Unsalted Peanuts: The iconic Drumstick topping! These provide a satisfying salty crunch and visual appeal to the finished dessert. Using unsalted peanuts allows you to perfectly control the overall saltiness and balance of flavors.
- Chocolate Sundae Syrup: The final, unmistakable touch that pulls the whole Drumstick experience together. A generous drizzle of chocolate syrup mimics the characteristic hard chocolate shell, adding a sweet, rich chocolatey layer that creates the classic look and taste.
Gathering and preparing these quality ingredients is the enjoyable first step towards creating a dessert that will truly impress and delight everyone who tries it. Each component contributes significantly to the overall authentic Drumstick experience, promising a symphony of flavors and textures.
Perfect for a Crowd: Generous Servings for Every Occasion
This No-Bake Drumstick Dessert is truly designed for sharing and is exceptionally well-suited for larger gatherings! The recipe yields a substantial 16 servings, making it an excellent choice when you need to feed a crowd without having to make multiple desserts. While individual servings might not appear enormous, remember that this is a wonderfully rich, indulgent, and incredibly satisfying dessert. The harmonious combination of the dense, crunchy base, the decadent peanut butter cream cheese filling, and the light, airy whipped topping ensures that a smaller portion goes a long way. Each bite is packed with complex flavor and delightful texture, ensuring that everyone feels completely satisfied without needing a huge slice. It’s the perfect sweet ending for family dinners, holiday gatherings, backyard barbecues, summer picnics, or any event where you want to offer a memorable treat that’s both impressive and surprisingly easy to prepare. Its ability to serve many and its universal appeal make it a reliable favorite.
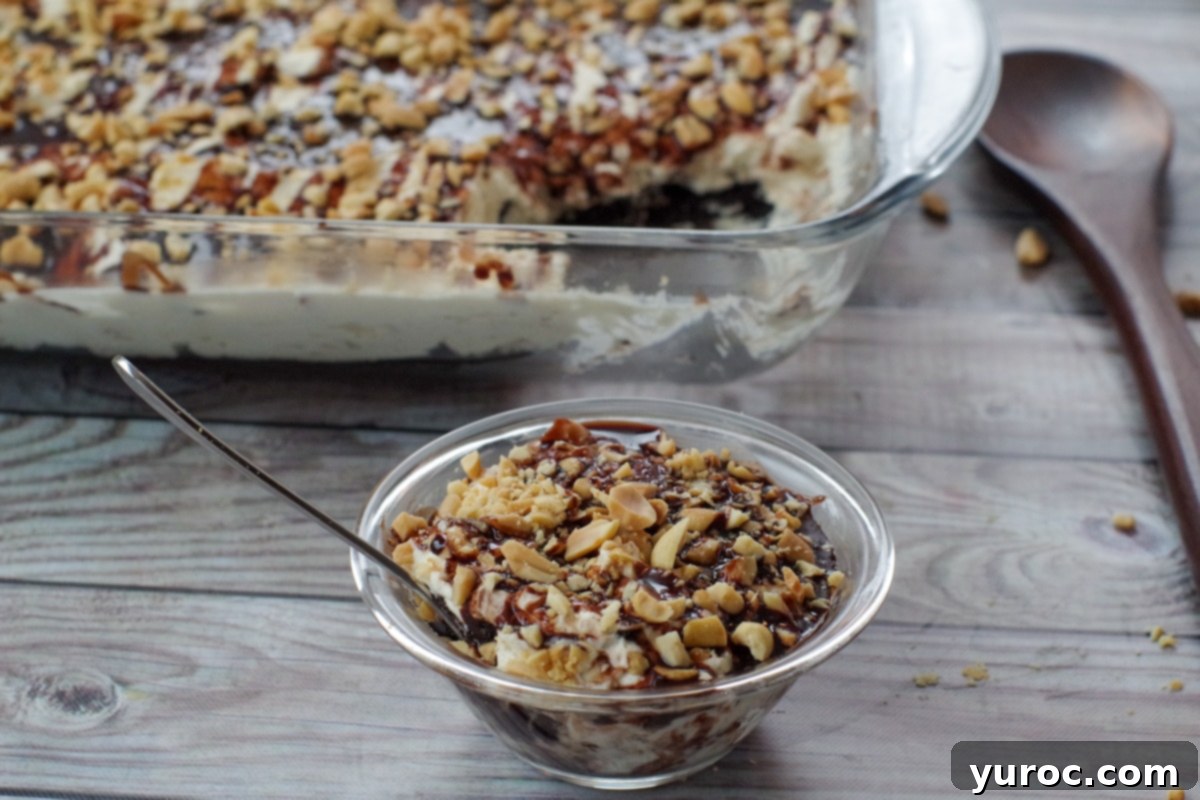
Expert Tip: Mastering the Chocolate Drizzle
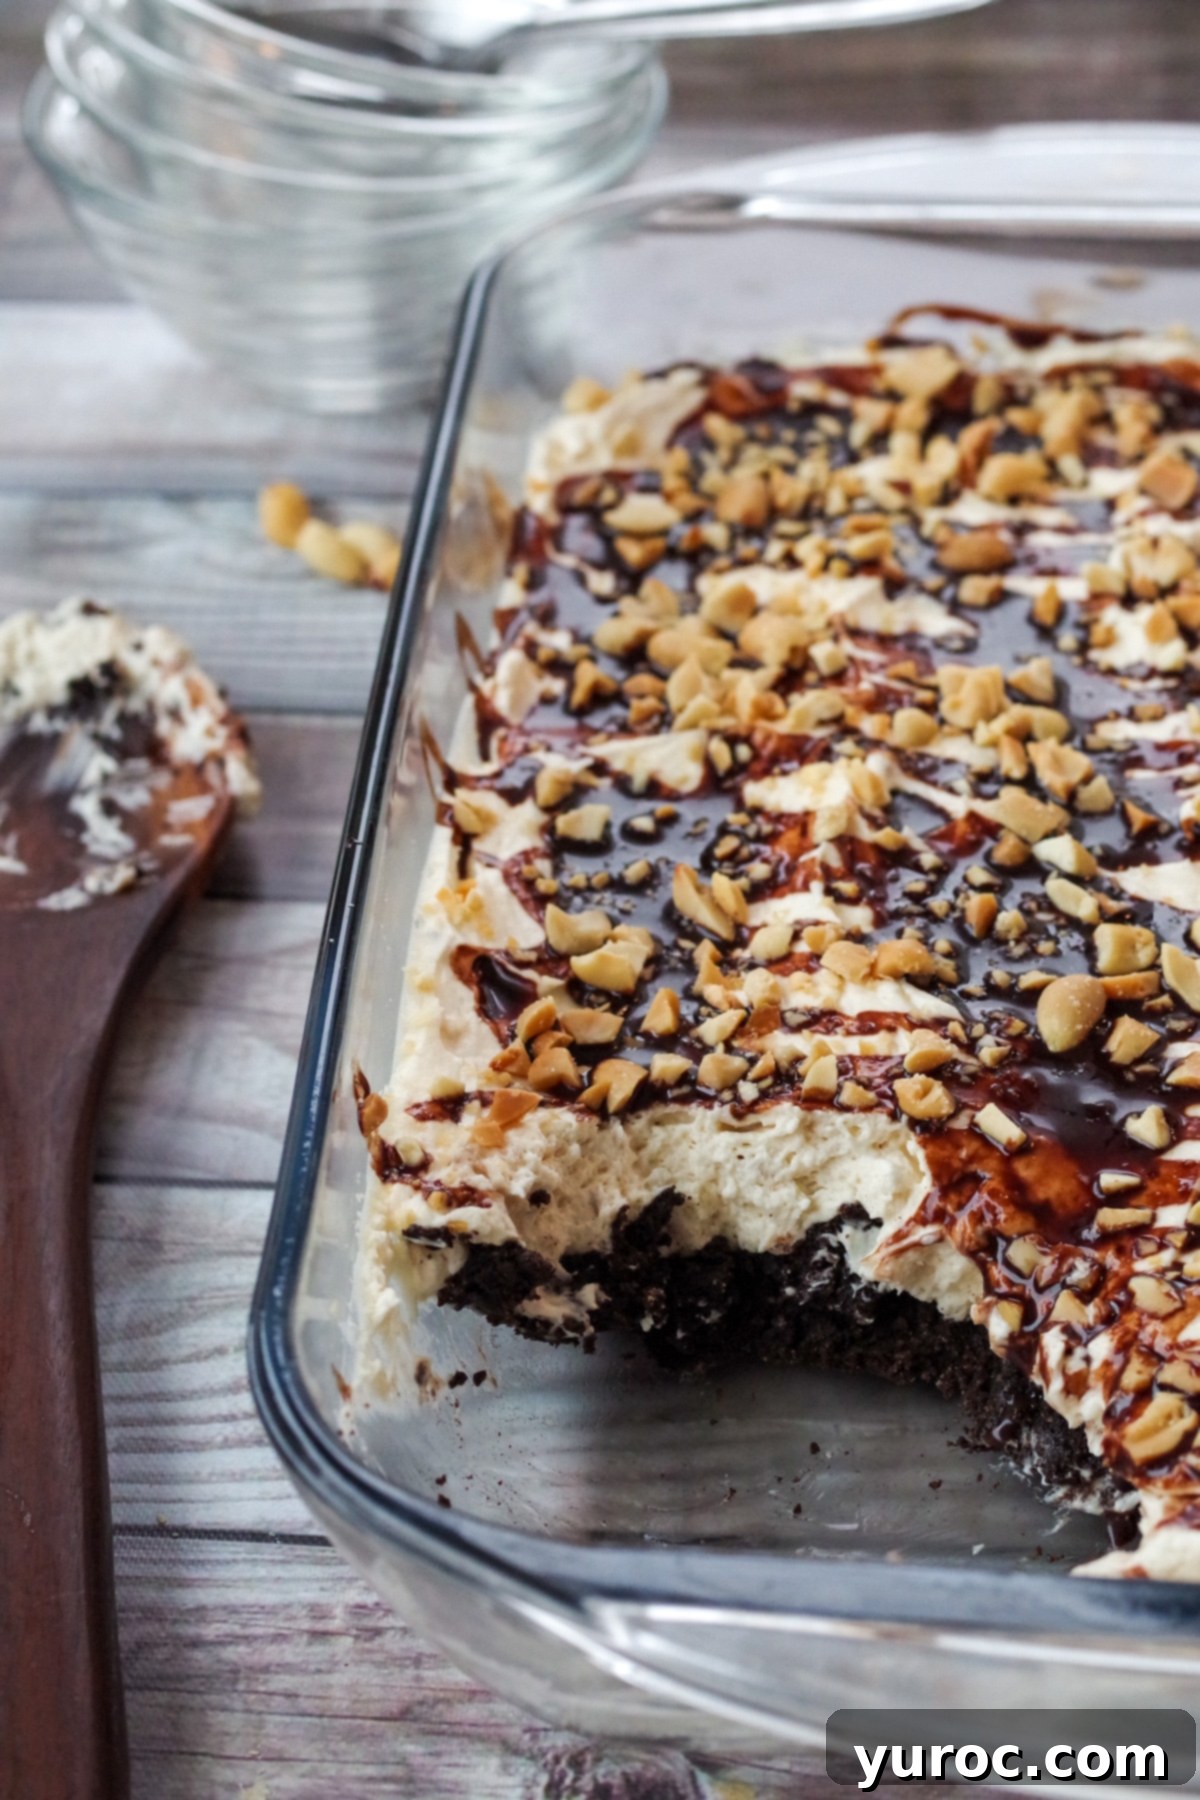
The chocolate drizzle is a signature and visually appealing element of the Drumstick experience, and getting it just right is easier than you might think! While some recipes or videos might suggest using a fork for drizzling, I often find that simply using the chocolate sundae syrup bottle itself offers excellent control and a less messy approach. The key to a beautiful drizzle is to apply the chocolate syrup with a quick, steady, back-and-forth motion across the entire surface of the dessert. This creates those appealing thin lines and ensures an even distribution of chocolatey goodness over every single piece.
TIP: For a perfect, eye-catching drizzle, don’t overthink it! Hold the bottle a few inches above the whipped cream layer and move your hand steadily from one side of the pan to the other, then repeat this motion perpendicular to your first pass to create a crosshatch pattern. This quick, almost artistic motion will yield beautiful, professional-looking results that enhance both the flavor and presentation of your dessert. You can even practice on a plate first if you’re a bit nervous about the technique.
Video – how to drizzle chocolate *The referenced video uses a fork for drizzling, but you can achieve the same dynamic motion directly with your chocolate sundae syrup bottle, which can often be simpler and more effective.
Storage and Make-Ahead Tips for Your No-Bake Drumstick Dessert
One of the many fantastic advantages of this No-Bake Drumstick Dessert is its excellent make-ahead potential and incredibly simple storage requirements. You can easily prepare this entire dessert a day or even two in advance of when you plan to serve it. In fact, many people find that the flavors have a chance to fully meld and intensify after a night in the refrigerator, often making it even more delicious on the second day.
To store, simply cover the pan tightly with plastic wrap or aluminum foil to prevent any refrigerator odors from permeating the dessert and to keep the delicate whipped cream topping fresh and fluffy. Then, store it safely in the refrigerator until ready to serve. Once made, any delicious leftovers (if you’re lucky enough to have them!) can be stored in the refrigerator for up to 4 days. Always ensure the dessert is well-covered to maintain its freshness and prevent it from drying out or absorbing other fridge smells. A crucial tip for ensuring both optimal freshness and food safety is to always check the expiry dates on your cream cheese and whipping cream before you begin, as these dairy products are key components. Proper storage ensures you can enjoy this delightful treat for days, making it perfect for efficient party planning or just having a sweet indulgence ready for a spontaneous weeknight treat.
Frequently Asked Questions (FAQ) About This No-Bake Delight
To help you create the most perfect No-Bake Drumstick Dessert, here are answers to some common questions you might have:
- Can I use smooth peanut butter instead of chunky? Yes, absolutely! While chunky peanut butter adds a delightful texture that closely mimics the nuts in a traditional Drumstick ice cream cone, smooth peanut butter will work just as well for a creamier, more uniform consistency. The choice is yours based on your textural preference.
- Do I really need the waffle ice cream bowls in the crust? The waffle ice cream bowls are a unique addition that really helps to infuse that authentic “cone” flavor and crispy texture into the crust, distinguishing it from a plain chocolate cookie crust. While you could technically omit them, they contribute significantly to the overall Drumstick experience. If you can’t find them, consider adding a touch more Oreo crumbs and maybe a pinch of ground cinnamon or a drop of butter extract for a similar warm, bready note.
- Can this dessert be frozen? While the dessert itself does not *need* to be frozen and is truly meant to be served chilled from the refrigerator, you could technically freeze it for an ice cream cake-like consistency. However, be aware that the texture of the whipped cream and cream cheese filling might change slightly upon thawing, potentially becoming a bit softer or slightly watery. For the absolute best texture and flavor, we highly recommend serving it chilled and unfrozen.
- What if I don’t have a food processor for the crust? No problem at all! You can easily prepare the crust without a food processor. Simply place the Oreo cookies and broken waffle bowls in a large zip-top bag, seal it, and crush them with a rolling pin or the bottom of a heavy pan until fine crumbs form. Then, transfer the crumbs to a bowl and mix them thoroughly with the melted butter and peanut butter by hand.
- Can I lighten up this recipe to reduce calories or fat? You could try using reduced-fat cream cheese, but we generally don’t recommend significantly altering the heavy whipping cream or sugar content too much, as these are crucial for achieving the desired rich texture, stability, and balanced flavor of this indulgent treat. This dessert is meant to be a special indulgence!
- How do I ensure my whipping cream whips properly to stiff peaks? For the best results when whipping cream, make sure both your heavy whipping cream and your mixing bowl (and beaters!) are very cold. You can even chill your mixing bowl and beaters in the freezer for 10-15 minutes before you start whipping. This cold environment helps the fat molecules in the cream to stabilize more effectively, leading to a much fluffier and more stable whipped cream.
- Can I make this dessert nut-free? To make this dessert nut-free, you would need to substitute the peanut butter with a nut-free spread like sunbutter (sunflower seed butter). Ensure all other ingredients, especially the Oreo crumbs and any other toppings, are also certified nut-free to avoid cross-contamination for those with severe allergies.
So, if you’re seeking an easy, quick, incredibly flavorful, and truly satisfying dessert that evokes cherished memories, look no further! This No-Bake Drumstick Dessert is the ultimate treat that captures the essence of summer fun in every delightful spoonful. It’s destined to become a perennial family favorite for all your warm-weather gatherings and beyond.
And while you’re exploring delightful no-bake options, be sure to give my Skor Bar Dessert, my No Bake Cream Puff Dessert, and my EASY Buster Bar Ice Cream Cake Recipe a try! They’re all fantastic additions to your no-bake repertoire, promising more delicious, hassle-free enjoyment.
More Irresistible No-Bake Desserts to Satisfy Your Sweet Cravings
If you’ve fallen in love with the ease and deliciousness of this no-bake Drumstick creation, you’ll be thrilled to discover even more fantastic recipes that require no oven time. These desserts are perfect for any season, simplifying your kitchen adventures while delivering maximum flavor and minimal fuss. Explore these other tempting options from our collection of no-bake favorites:
- 15 No Bake Potluck Desserts
- No Bake Cream Puff Dessert
- Death by Chocolate Trifle (with Kahlua)
- Baileys No Bake Cheesecake
Did your family ❤️ this recipe? Did you know that commenting and ⭐ rating recipes is one of the best ways to support your favorite recipe creators? If you LOVED this recipe, please comment and rate it in the recipe card below or share photos on social media using the hashtag #foodmeanderings or tagging @foodmeanderings ! Your feedback and support mean the world and help other home cooks discover delicious new recipes!

📋 No-Bake Drumstick Dessert Recipe
Print Recipe
Pin
Save RecipeSave Recipe
Rate
Add to Shopping ListGo to Shopping List
Ingredients
Crust Base
- 3 small waffle ice cream bowls broken into pieces
- 4 tablespoon unsalted butter melted
- 4 tablespoon chunky peanut butter * can substitute smooth
- 2 cups chocolate Oreo crumbs
Creamy Filling
- 1 cup cream cheese (softened)
- ½ cup icing sugar
- ½ cup chunky peanut butter (smooth or chunky)
- 2 teaspoon vanilla extract
Topping & Garnish
- 2 ½ cups heavy whipping cream (*will almost double in volume when whipped to make about 4 cups)
- 2 tablespoon white granulated sugar
- ½ cup chopped peanuts (unsalted)
- ¼ cup chocolate sundae syrup (approximately, for drizzling)
Instructions
-
1. Prepare the Crunchy Crust Base: In a food processor, combine the 4 tablespoons of melted unsalted butter, the broken waffle ice cream bowls, 2 cups of chocolate Oreo baking crumbs, and 4 tablespoons of chunky peanut butter. Pulse the mixture until it is well combined and has a wet sand-like consistency that clings together when pressed. If you don’t have a food processor, you can crush the waffle bowls and Oreos in a large zip-top bag with a rolling pin, then mix thoroughly with the melted butter and peanut butter in a bowl.
-
2. Form and Chill the Base: Transfer the prepared crust mixture to a 9×13 inch baking pan. Using the back of a spoon, a flat-bottomed glass, or your clean hands, press the base firmly and evenly into the bottom of the pan. It’s important to compact it well. Place the pan in the refrigerator to chill while you prepare the next layers.
-
3. Make the Creamy Peanut Butter Filling: In a large mixing bowl, using an electric mixer, beat together the 1 cup of softened cream cheese, ½ cup of icing sugar, ½ cup of chunky peanut butter, and 2 teaspoons of vanilla extract. Beat until the mixture is completely smooth, creamy, and free of any lumps of cream cheese. Scrape down the sides of the bowl as needed to ensure everything is well incorporated.
-
4. Prepare the Whipped Topping: In a separate, very cold large mixing bowl (preferably metal, chilled in the freezer for 10-15 minutes prior), add the 2 ½ cups of heavy whipping cream. Beat on medium-high speed until soft peaks begin to form. Gradually add the 2 tablespoons of white granulated sugar, then continue to beat until stiff peaks are achieved. Be careful not to over-whip, or it may become grainy.
-
5. Assemble the Layers: Gently fold about half of the prepared whipped cream into the cream cheese and peanut butter mixture until just combined. This lightens the filling. Spread this creamy peanut butter layer evenly over the chilled crust in the 9×13 inch pan. Then, carefully spread the remaining whipped cream over the peanut butter layer, creating a smooth, inviting top.
-
6. Add the Signature Drumstick Toppings: Drizzle the top of the whipped cream layer generously with chocolate sundae syrup. Use a quick, back-and-forth motion with the bottle to create an appealing, even pattern. Immediately after drizzling, sprinkle the ½ cup of chopped unsalted peanuts evenly over the chocolate drizzle.
-
7. Chill Thoroughly and Serve: Place the finished Drumstick Dessert back into the refrigerator for at least 2-4 hours. This chilling time is crucial for the layers to set completely, firm up, and for all the incredible flavors to meld beautifully. Once thoroughly chilled, slice into generous squares and serve this delightful no-bake treat to your eager guests!
Notes
🎥 Chocolate Drizzle Technique Refinement:
When you are adding the chocolate sundae syrup, hold the bottle a few inches above the dessert and drizzle it back and forth in a quick, steady motion. This creates an even, appealing pattern that mimics the classic Drumstick shell. For a more intricate look, try drizzling in one direction, then rotating the pan and drizzling perpendicularly.
Video – how to drizzle chocolate *The referenced video uses a fork, but you can achieve the same dynamic back-and-forth motion directly and easily with your chocolate sundae syrup bottle. It’s often simpler and less messy than using a fork for larger surfaces!
