Decadent Black Forest Yule Log Cake: Your Ultimate Christmas Showstopper Recipe
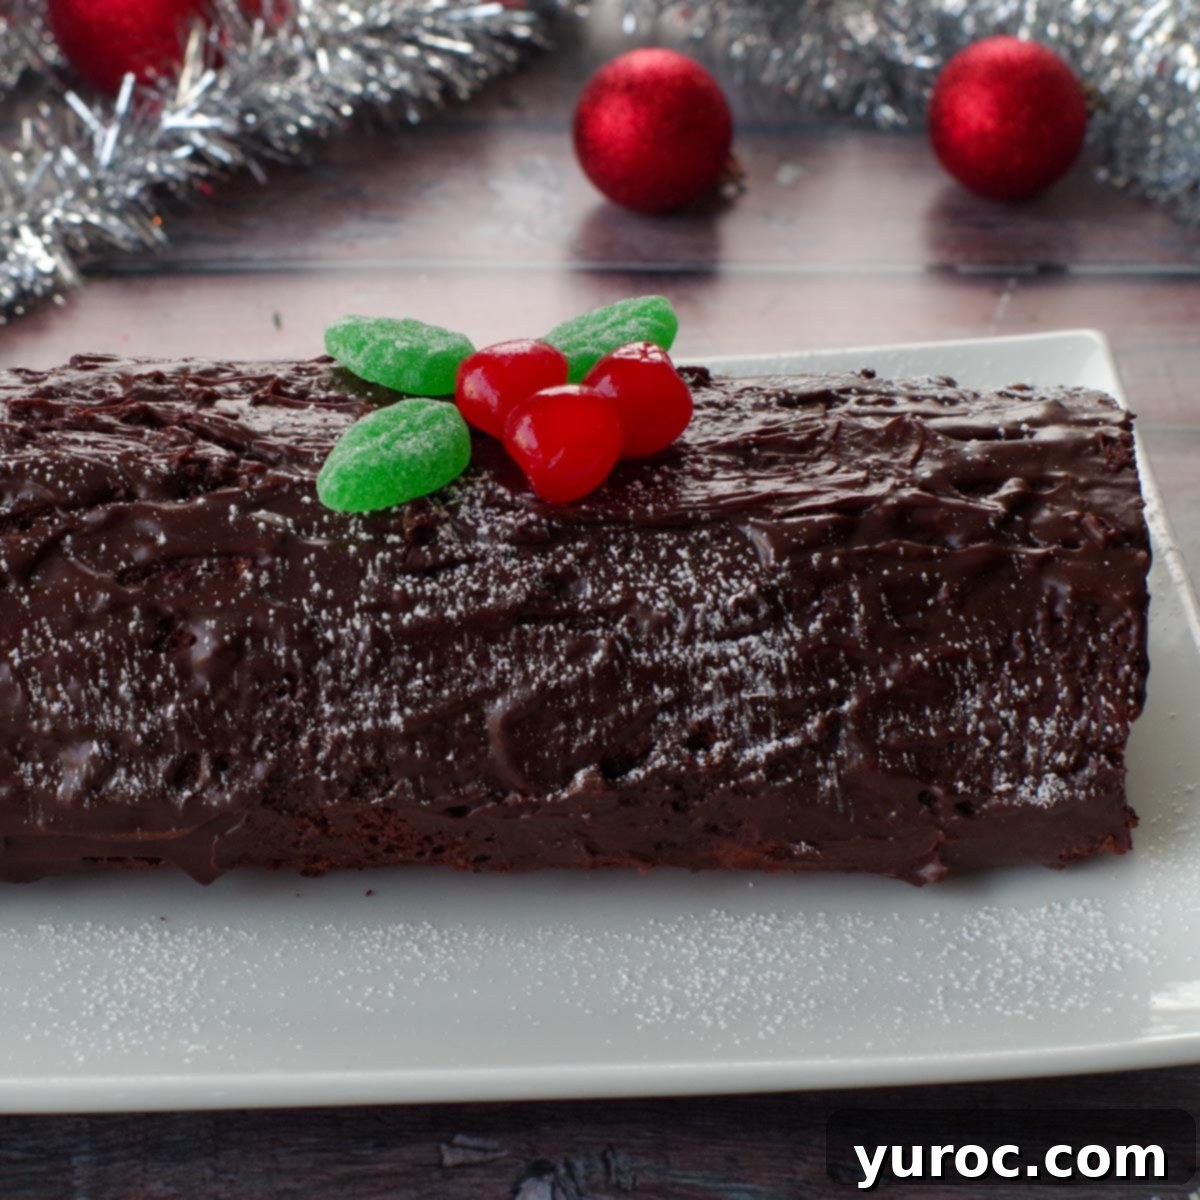
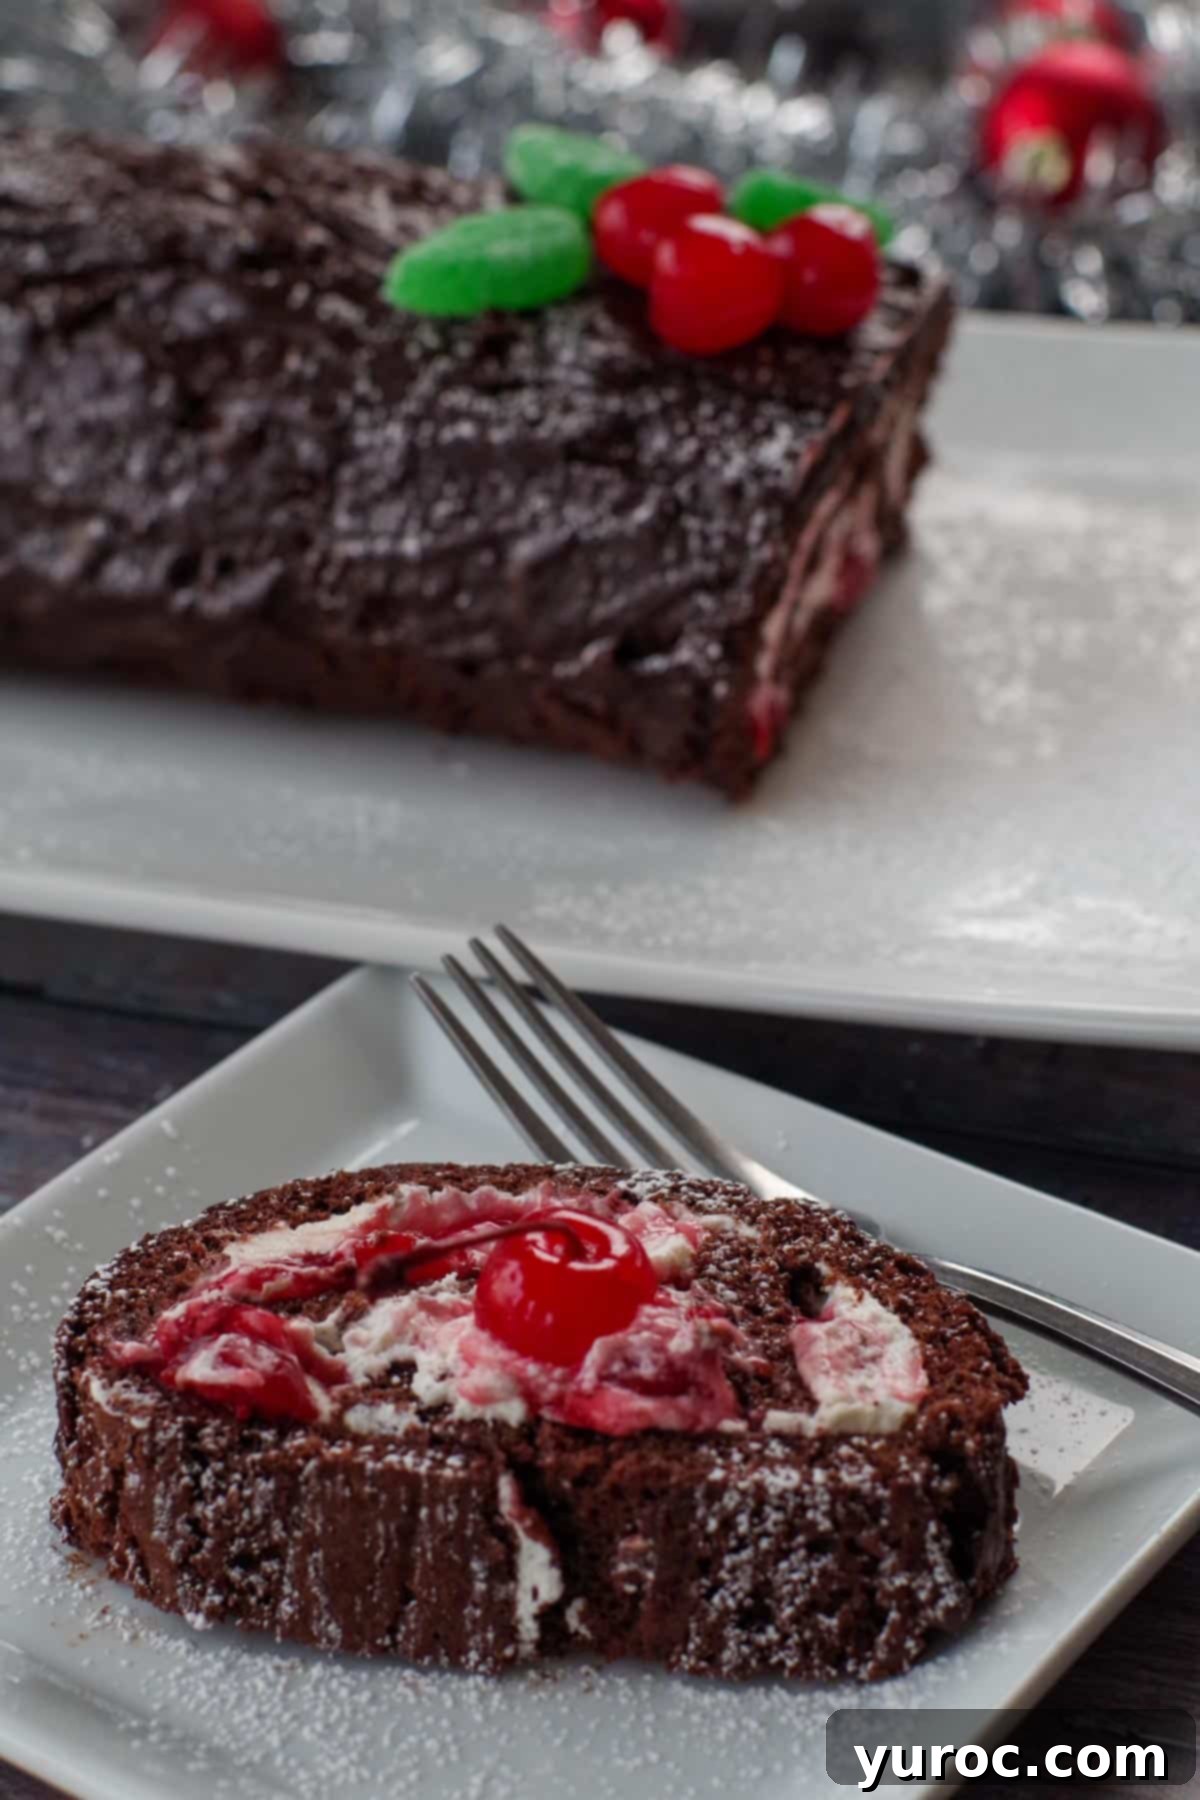
Transform your holiday table into a festive wonderland with this utterly delicious Black Forest Yule Log Cake. A true Christmas centerpiece, this impressive dessert combines the rich, beloved flavors of classic Black Forest cake with the charming, rustic appeal of a traditional Bûche de Noël. Imagine a moist, tender chocolate Swiss roll, generously filled with a creamy whipped topping and vibrant canned cherries, all enrobed in a luscious, smooth chocolate ganache. This recipe simplifies the art of creating a showstopping holiday cake, ensuring a delightful experience for both the baker and everyone who gets to enjoy a slice.
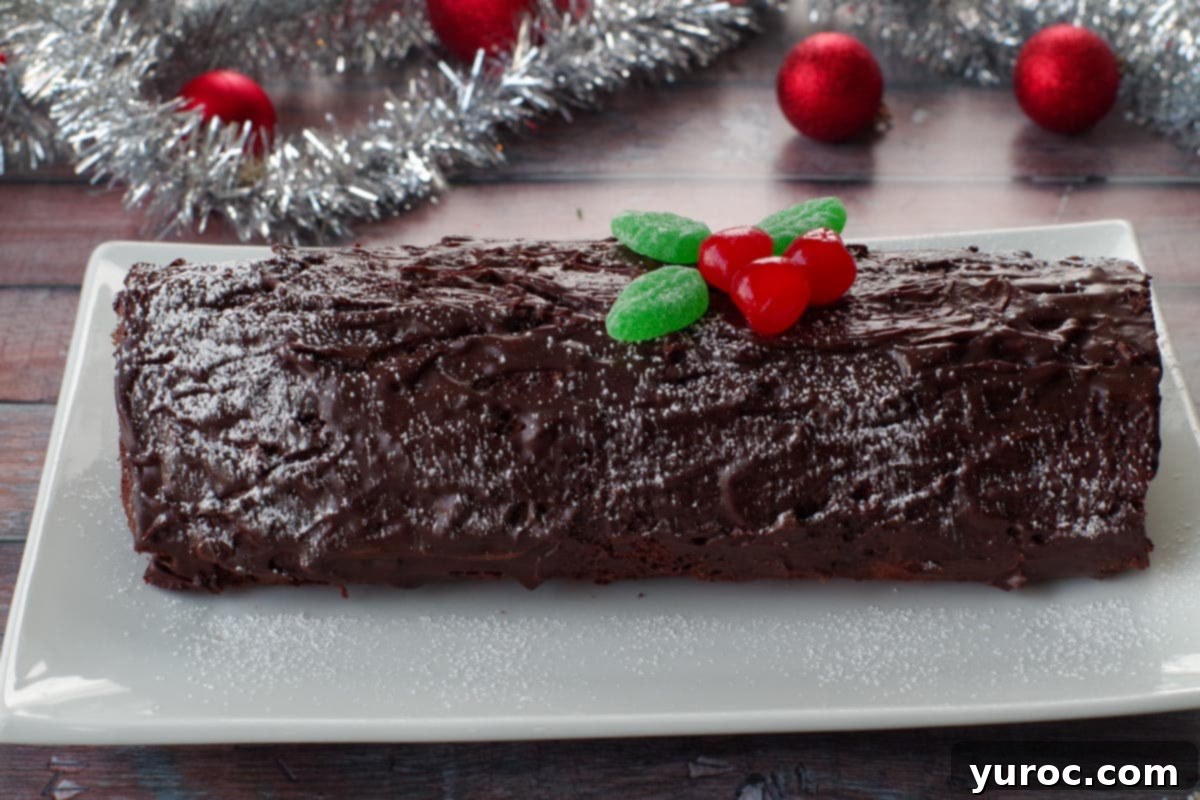
Inspired by our popular black forest trifle recipe, this Black Forest Log Cake is particularly cherished during the Christmas season. It’s a perfect companion to any festive meal, beautifully complementing rich main courses like a classic turkey dinner or a succulent holiday ham. Its deep chocolate and cherry notes provide a sophisticated yet comforting end to your holiday feast, making it an unforgettable part of your Christmas dessert spread.
Mastering Your Black Forest Yule Log: Essential Baking Tips
- Roll the Cake While Warm for Flawless Results: The key to achieving a beautifully rolled Swiss roll, and by extension, your Yule log, is to roll the chocolate sponge cake while it is still warm. This is crucial because a warm cake is more pliable and less prone to cracking. If you wait too long and the cake cools completely before rolling, it will likely crack as you attempt to shape it. However, don’t fret if minor cracks appear; they can actually enhance the authentic “log-like” appearance and will be beautifully concealed by the rich chocolate ganache.
- Handle Your Sponge Batter with Utmost Care: When preparing the delicate sponge batter, particular attention must be paid to the mixing process, especially when incorporating the dry ingredients into the egg mixture. This step requires a gentle folding technique, which is vastly different from stirring or beating. To fold correctly, pass your spatula through the center of the mixture, sweep it across the side of the bowl, and then gently fold the bottom portion over the top. Visualize it as carefully carving through the mixture and tenderly lifting the ingredients. This delicate motion ensures that all ingredients are combined without deflating the air bubbles you painstakingly incorporated into the egg mixture, which are vital for a light, airy sponge cake.
This delightful Swiss roll recipe has a special history in our home, originating from a cooking class my son attended in middle school. He developed a tradition of baking it every year, but this holiday season, I envisioned a festive twist. My deep affection for classic black forest cake inspired me to transform his beloved Swiss roll into this stunning Black Forest Yule Log. The result is a fusion of cherished flavors and a celebratory presentation perfect for Christmas.
Premium Ingredients for an Exceptional Black Forest Yule Log
To craft this exquisite Black Forest Yule Log Cake, you’ll need a selection of quality ingredients that contribute to its rich flavor and perfect texture. Each component plays a vital role in achieving the classic taste and elegant finish of this festive dessert.
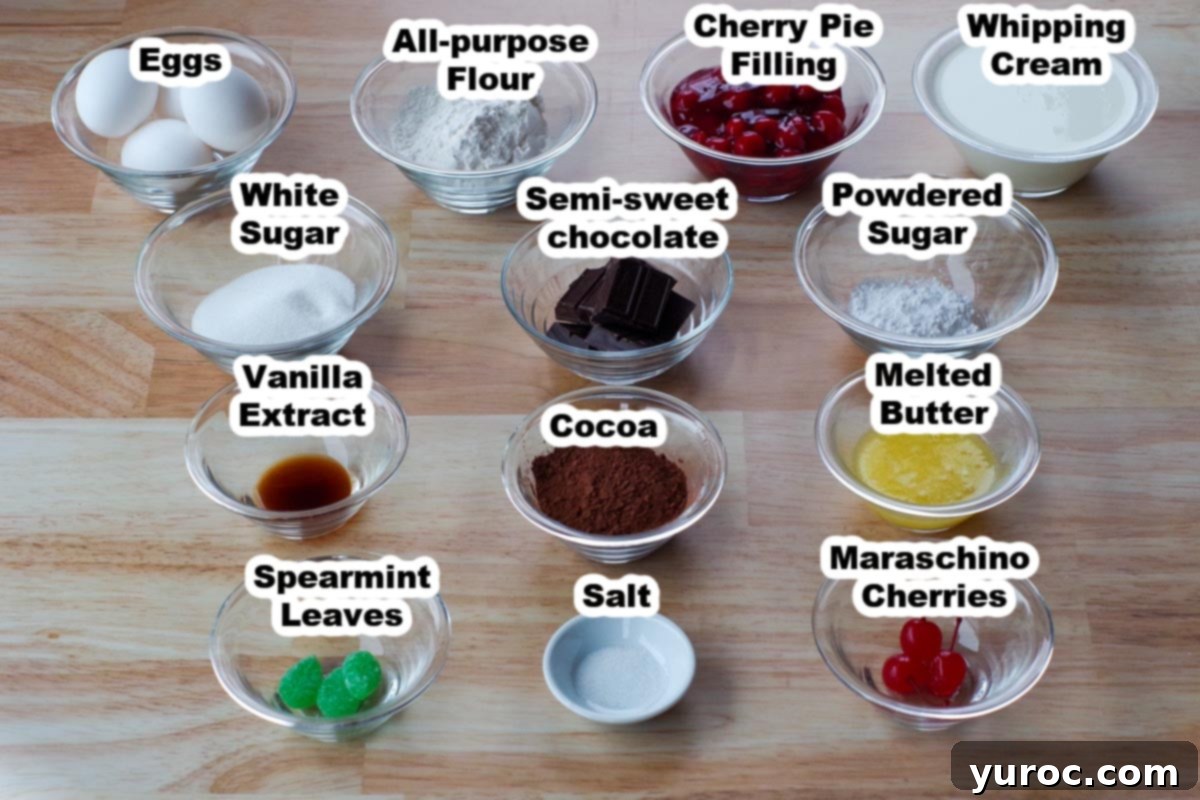
- Melted Butter: Butter is essential for adding a luxurious richness, delicate tenderness, and crucial structural integrity to the cake. We recommend using unsalted butter as it gives you precise control over the overall salt content in your baking, allowing the flavors to truly shine without being overwhelmed.
- All-Purpose Flour: In North America, all-purpose flour typically contains a moderate protein level, making it robust enough to provide the necessary structure for the cake. This ensures the rolled sponge maintains its shape and ‘memory’ after being rolled, preventing it from collapsing once filled.
- Unsweetened Cocoa Powder: This ingredient is key to imparting a deep, authentic chocolate flavor to your cake without adding any extra sweetness or unnecessary weight to the delicate sponge. Using unsweetened cocoa allows the other flavors to balance beautifully.
- Heavy Cream (Whipping Cream – 33-36%): The high fat content of heavy cream is crucial for whipping up into a light, airy, and stable whipped cream filling. This provides the ideal creamy texture and rich mouthfeel that defines the classic Black Forest flavor profile.
- Canned Cherry Pie Filling: This convenient and economical ingredient is a cornerstone of the “black forest” flavor. When combined with the whipped cream and chocolate, the sweet-tart cherries create the signature taste that makes this Yule log so irresistible.
*Refer to the comprehensive recipe card below for a complete list of ingredients and their exact quantities.
Creative Variations & Smart Substitutions for Your Yule Log
While the classic Black Forest Yule Log is a masterpiece in itself, don’t hesitate to experiment with these variations and substitutions to tailor the recipe to your taste or what you have on hand:
- Butter Alternatives: If you only have salted butter available, simply omit the ¼ teaspoon of added salt from the cake recipe to balance the flavors. This minor adjustment ensures your cake isn’t overly salty.
- Garnish Get-Togethers: Feel free to get creative with your Yule log garnishes! Beyond the traditional maraschino cherries and spearmint gummy leaves, consider using fresh cranberries for a festive tartness, or even regular fresh cherries for a more natural look. Edible glitter, chocolate shavings, or small meringue mushrooms can also add a magical, woodland touch to your holiday dessert.
- Filling Freedom: For those who prefer a richer, more stable filling, you can substitute the whipped cream with your favorite buttercream frosting. A chocolate buttercream or even a cream cheese frosting would offer a delightful, decadent alternative, providing a different texture and flavor experience within the chocolate sponge and cherries.
Crafting Your Black Forest Yule Log Cake: A Step-by-Step Guide
Creating a chocolate sponge cake for a Swiss roll can sometimes seem daunting, primarily due to the concern of cracking. However, for this charming Black Forest Yule Log, any minor cracks are actually a non-issue! In fact, they can perfectly enhance the rustic, “log-like” appearance we’re aiming for. Plus, the entire log is generously enveloped in a luxurious chocolate ganache, which artfully conceals any imperfections or ‘blemishes’, ensuring a beautiful finish every time.
Preparation Phase: Begin by preheating your oven to a precise 425 degrees F (218 degrees C). This high temperature is crucial for setting the sponge cake quickly and achieving its light texture.
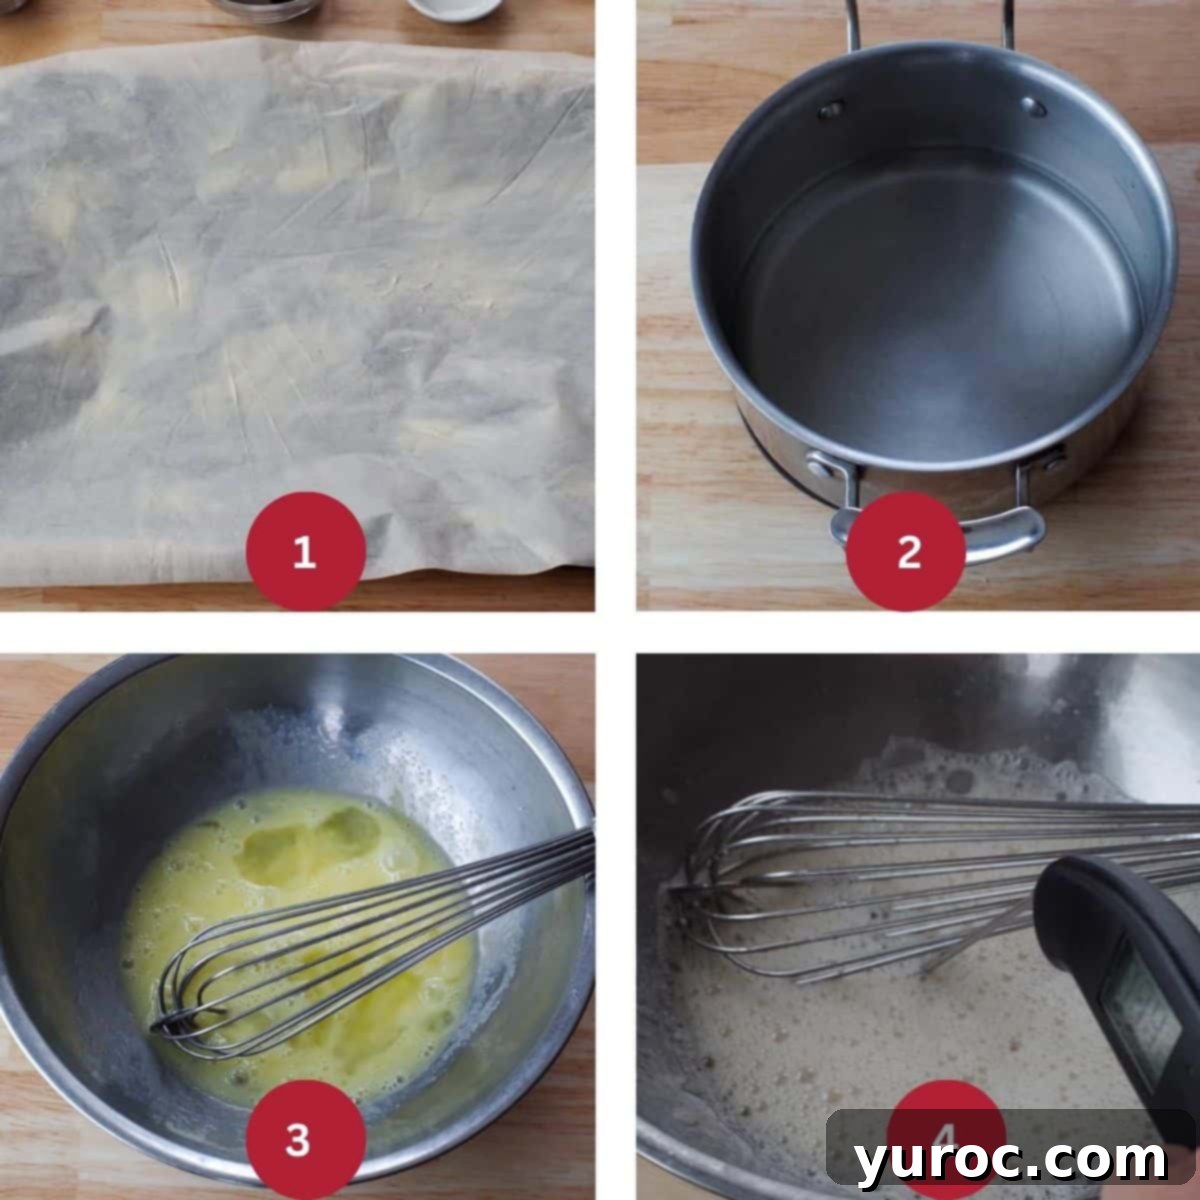
CRAFTING THE CAKE (STEP 1): First, lay a large sheet of parchment paper onto a 17×12 inch sheet pan (often called a jelly roll pan). Ensure the parchment paper extends at least an inch or two beyond the edges of the pan, as this extra overhang will make it much easier to lift the baked cake later. Thoroughly grease this parchment paper with butter. It’s often more convenient to remove the parchment from the pan, grease it on a flat surface like your counter or table, and then return it to the pan (Image 1). Next, bring about an inch of water to a gentle simmer in a medium saucepan over medium heat, creating a double boiler setup (Image 2). In a separate heatproof bowl, whisk together your eggs and sugar until just combined (Image 3). Carefully place this bowl over the simmering water, ensuring that the bottom of the bowl does not make direct contact with the water at any point (Image 4). This indirect heat is essential for gently warming the egg mixture without cooking it.
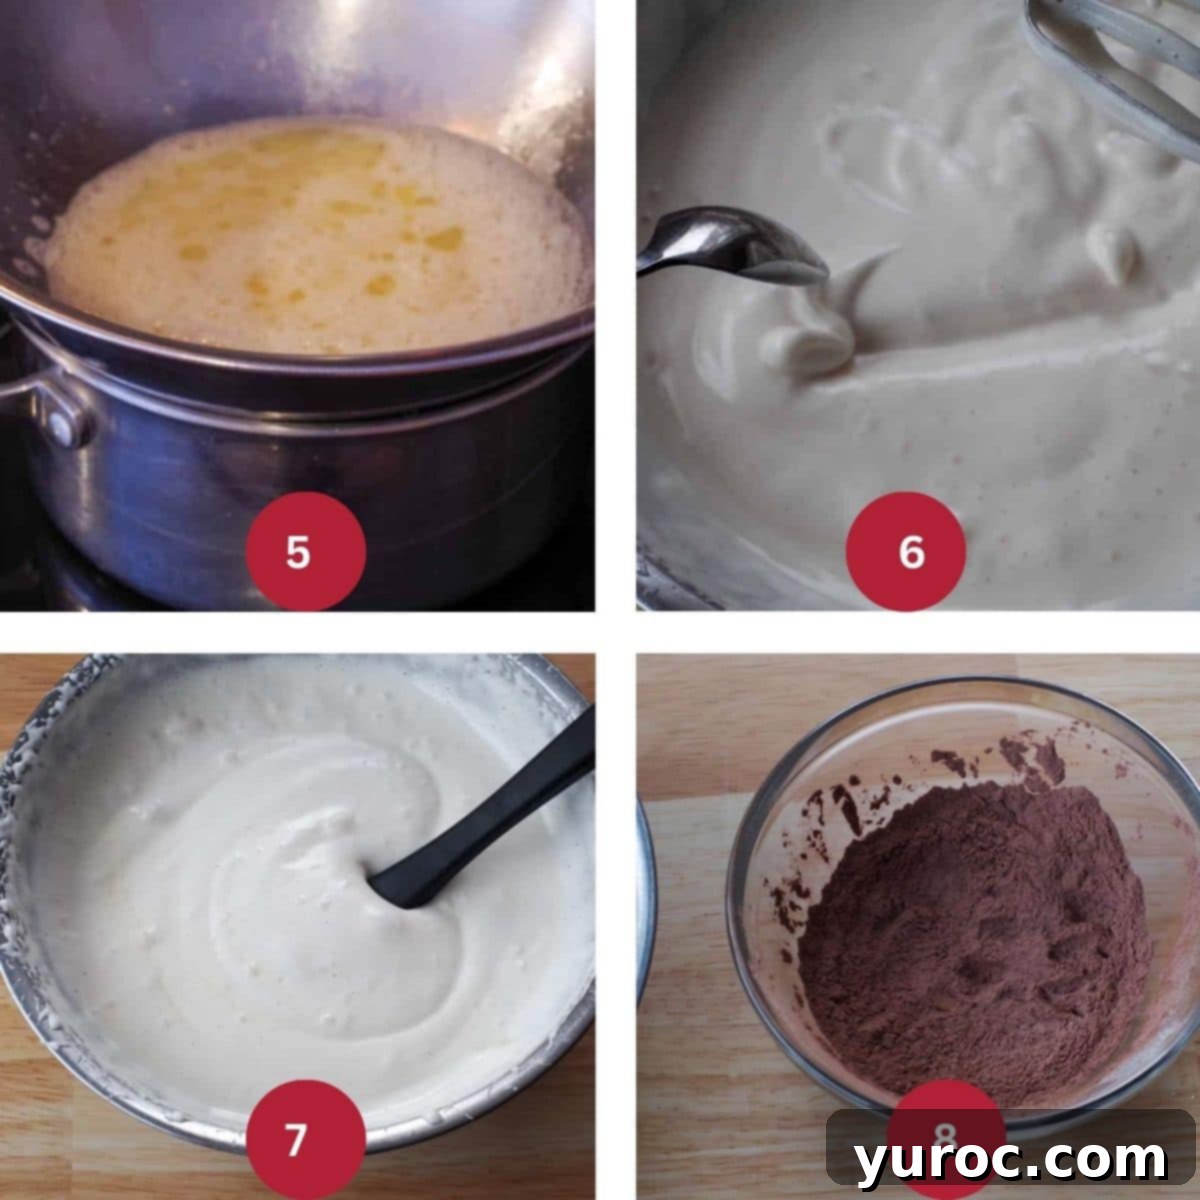
CRAFTING THE CAKE (STEP 1 CONTINUED): Continue to whisk the egg and sugar mixture constantly, either by hand or with an electric mixer, until the eggs become thick, light yellow, and warm to the touch. The ideal temperature is around 120 degrees F (48 degrees C), feeling much like warm tap water. An instant-read thermometer is your best friend for precise temperature control here (Image 5). Once the desired temperature is reached, remove the bowl from the heat. Switch to an electric mixer (or continue with a stand mixer) and beat the mixture on high speed until it’s very thick and airy, reaching what bakers call the “ribbon stage.” This means that when you lift the beaters and drizzle some of the mixture back into the bowl, the trails should hold their shape on the surface for a good 5-10 seconds before disappearing (Image 6). Gently fold in the melted butter with a spoon or spatula – resist the urge to beat it in with the mixer, as this can deflate the precious air (Image 7). In a separate small bowl, thoroughly whisk together the cocoa powder, all-purpose flour, and salt. This ensures these dry ingredients are evenly distributed before adding them to the wet mixture (Image 8).
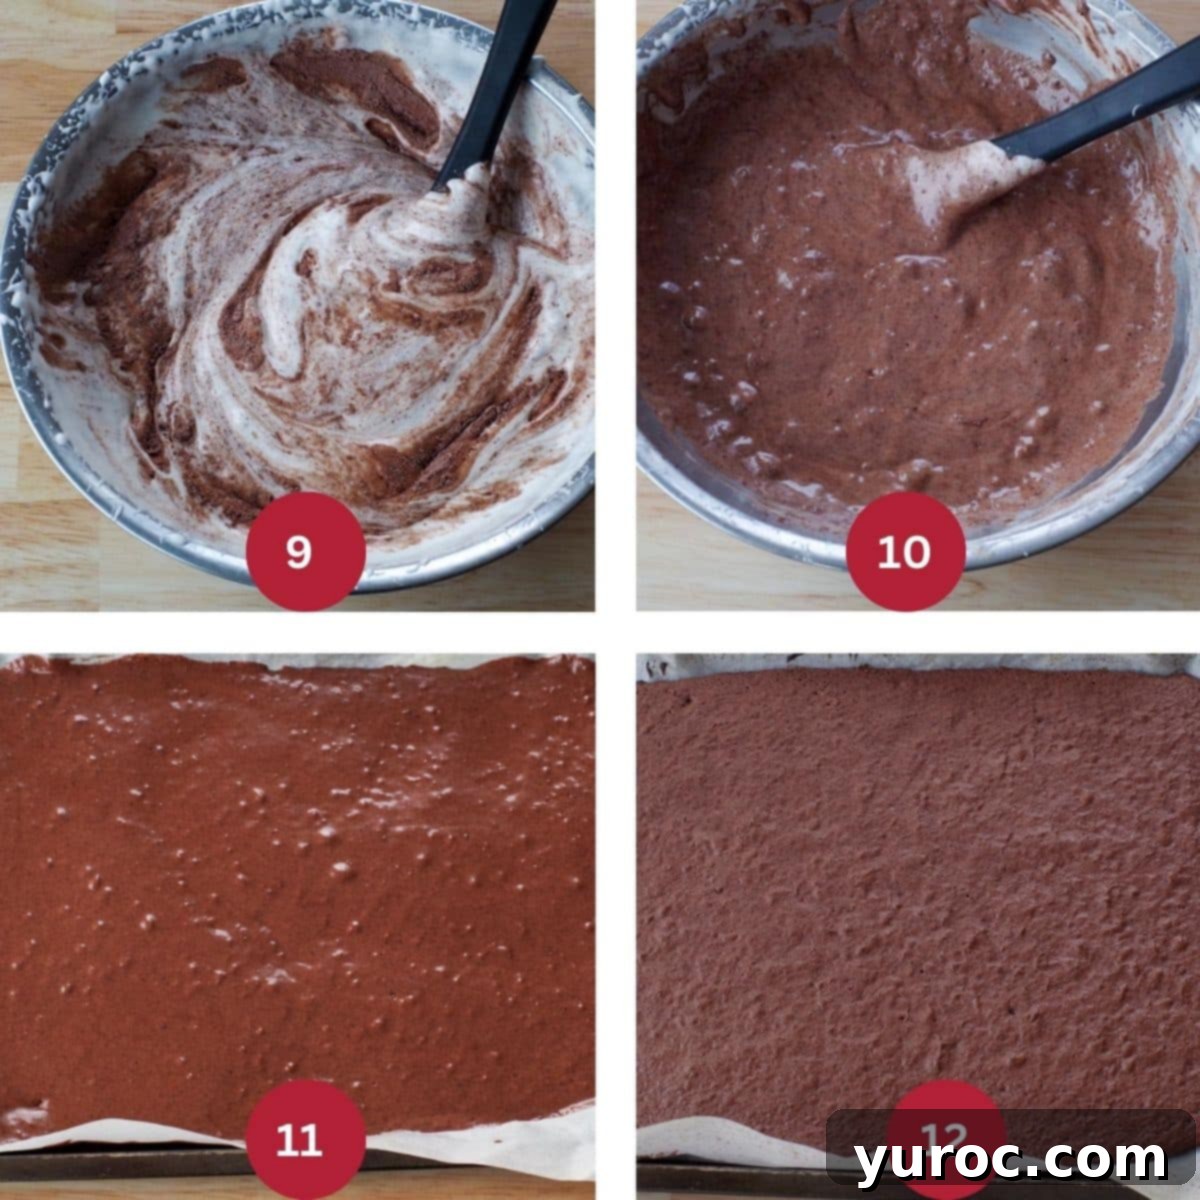
CRAFTING THE CAKE (STEP 1 CONTINUED FURTHER): Carefully add the sifted dry ingredients into the airy egg mixture. Using a spatula, gently fold these ingredients together. This is a delicate process that requires patience; only mix until the ingredients are just combined. Over-mixing will cause the batter to lose its volume and deflate, resulting in a dense cake (Image 9 & 10). Once combined, spread the light and airy batter evenly onto the buttered parchment paper on your prepared sheet pan. Be sure to leave approximately a one-inch border from the edges of the parchment (Image 11). Bake the cake in the preheated oven for about 8 minutes. The cake is perfectly baked when it feels springy to the touch and a cake tester or toothpick inserted into the center comes out completely clean (Image 12).
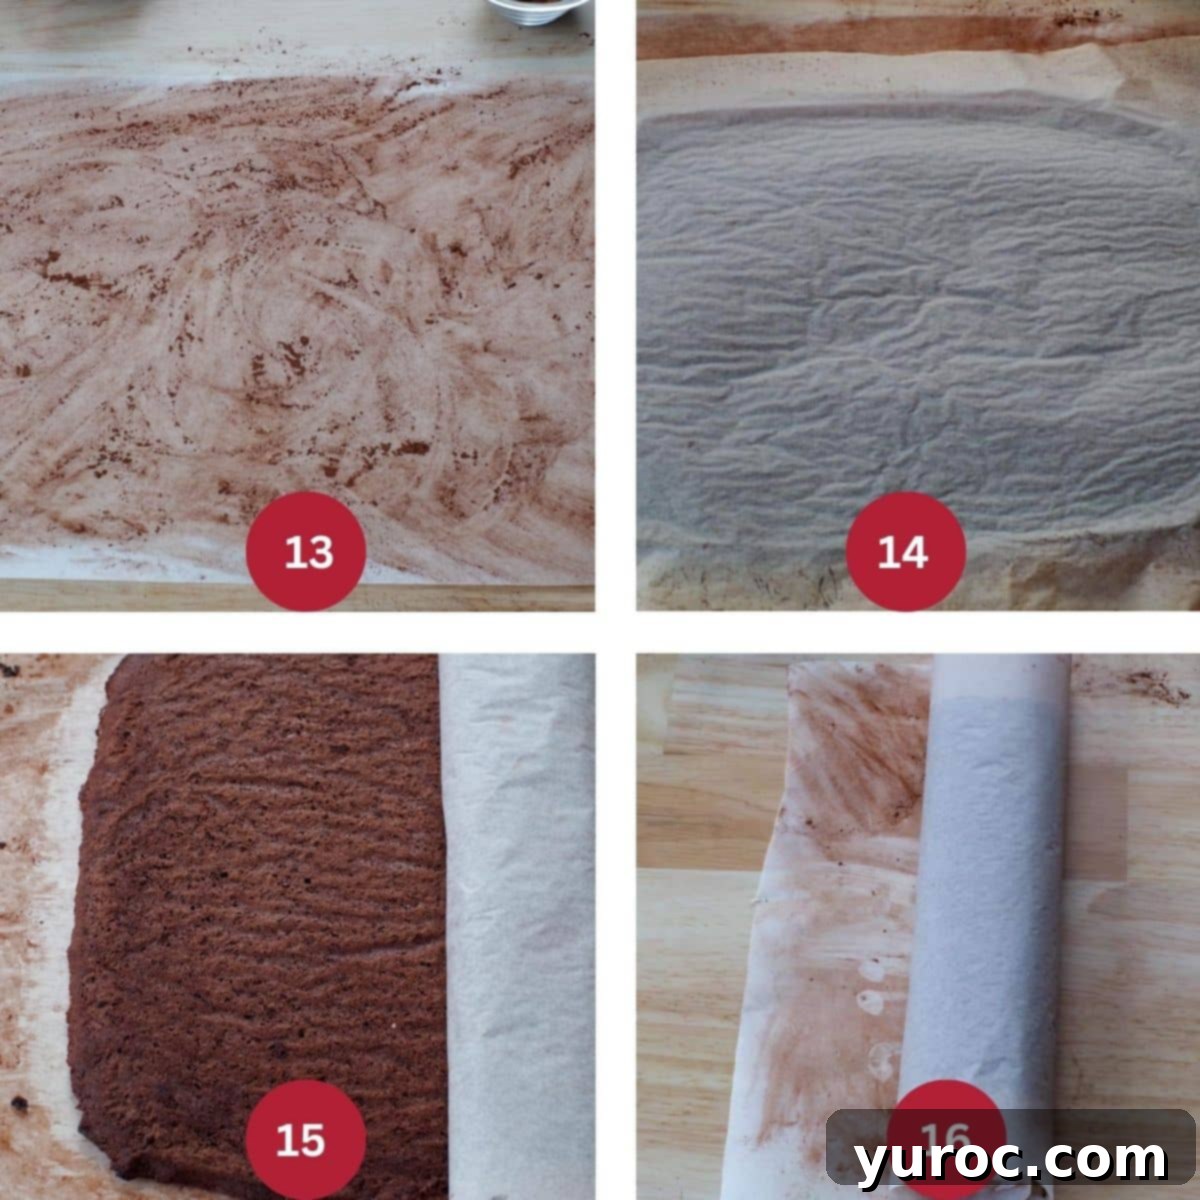
ROLLING THE CAKE (STEP 2): While your chocolate sponge cake is still warm from the oven, prepare a fresh piece of parchment paper by lightly sprinkling it with a thin layer of cocoa powder. This dusting will prevent the warm cake from sticking (Image 13). Carefully invert the warm cake onto this new piece of cocoa-dusted parchment. Once flipped, gently peel away and remove the parchment paper that the cake was baked on (Image 14). Now, immediately and gently roll the cake up with the new parchment paper, forming it into a tight log. This initial warm roll is like creating “muscle memory” for the cake, making it much easier to roll again later after it has cooled. Remember, don’t be concerned if you notice a few small cracks – these will only enhance its natural “log” appearance and will be entirely covered by the chocolate ganache (Image 15). Allow the cake to cool completely in this rolled-up position. This helps it set its shape and prevents it from unraveling (Image 16).
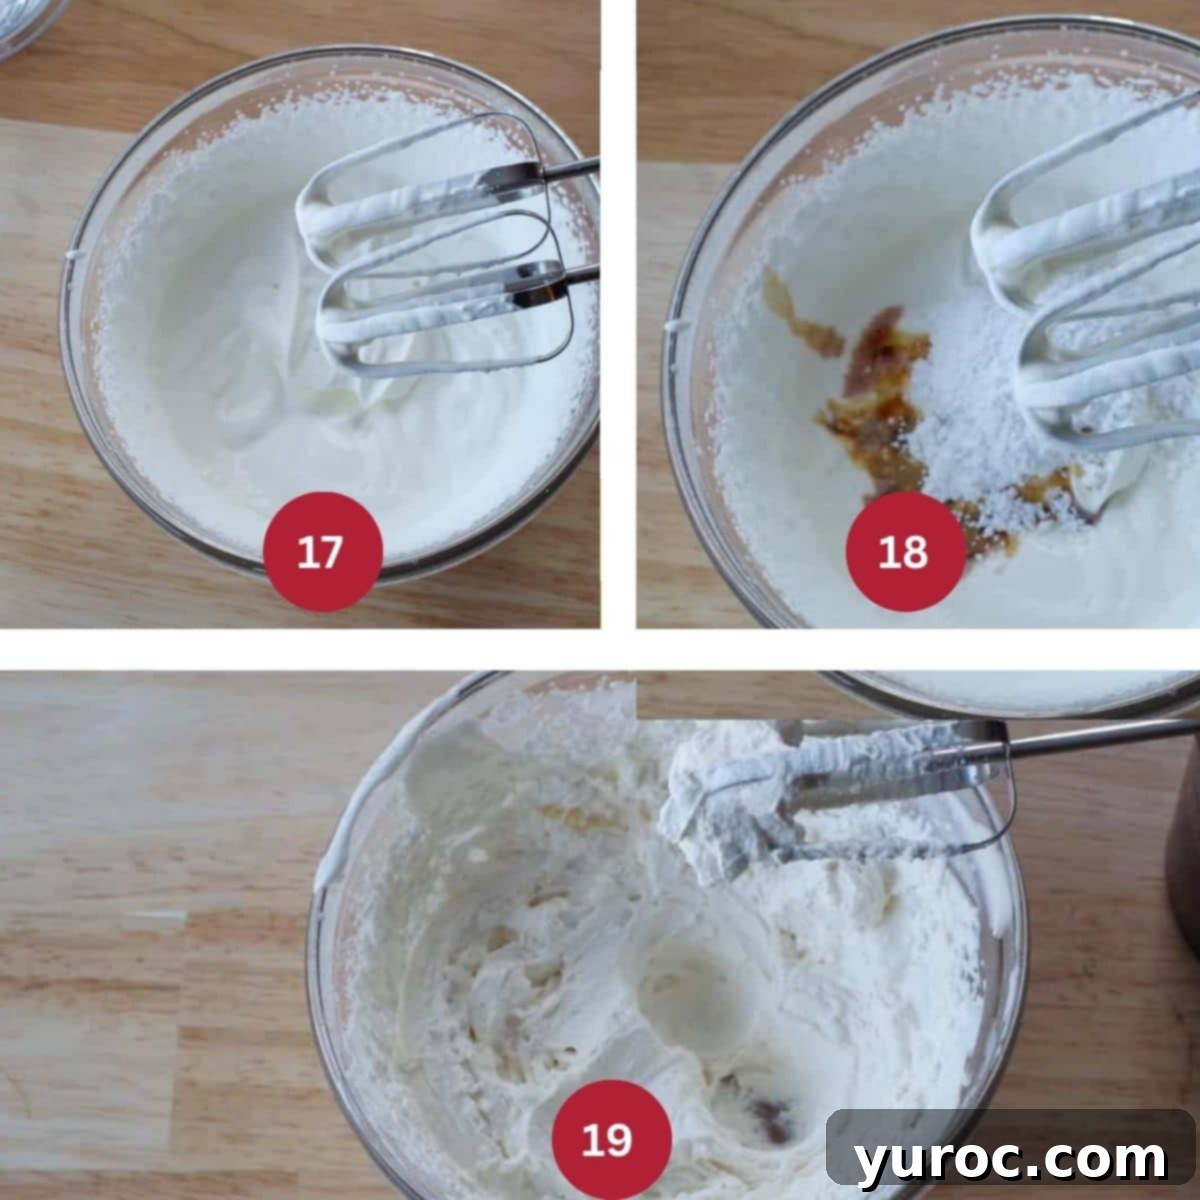
PREPARING THE WHIPPED CREAM (STEP 3): In a large, chilled mixing bowl, pour the heavy cream. Begin whipping the cream on a medium speed, gradually increasing to high speed, until soft peaks begin to form. These peaks should hold their shape gently but still be somewhat droopy (Image 17). At this stage, add the vanilla extract and powdered sugar. Continue whipping until stiff peaks form (Image 18). Stiff peaks will hold their shape firmly and stand upright when the whisk is lifted (Image 19). Be careful not to over-whip, or you’ll end up with butter!
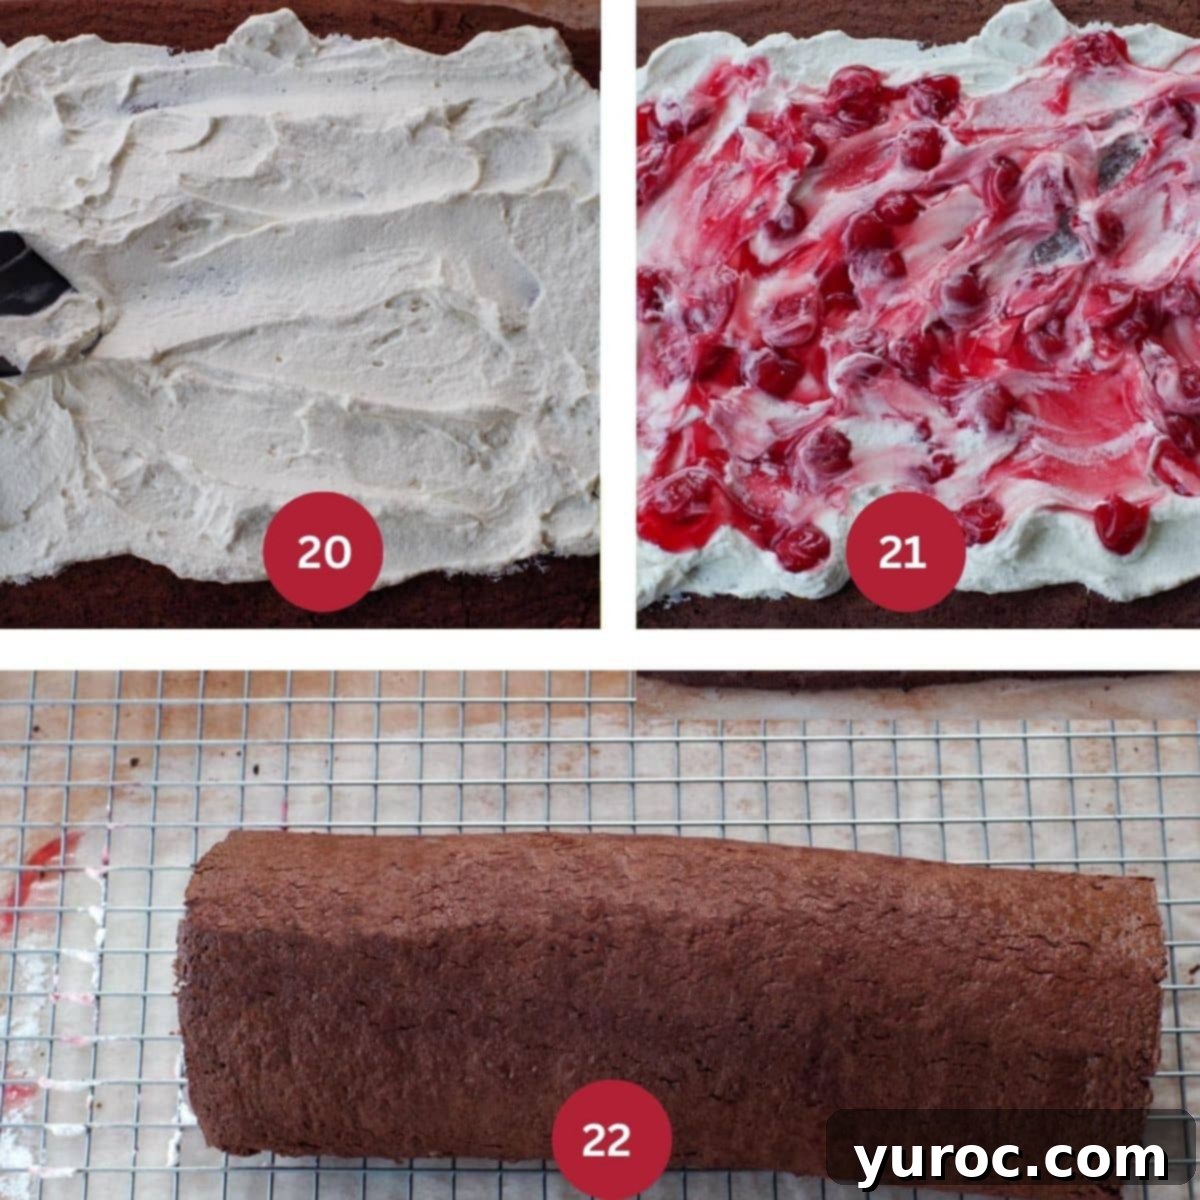
ASSEMBLING THE CAKE (STEP 4): Once the chocolate sponge cake has cooled completely, carefully unroll it from the parchment paper. Take your prepared whipped cream and evenly spread it all over the surface of the unrolled cake, making sure to leave approximately a one-inch border around all the edges. This border prevents the filling from squeezing out when you roll the cake (Image 20). Next, gently spoon and spread the canned cherry pie filling over the whipped cream layer, ensuring even distribution for that signature Black Forest flavor (Image 21). Now, delicately roll the cake back up into a log shape, but this time without the parchment paper. Place the assembled cake log onto a wire rack, positioning a sheet of parchment or wax paper underneath. This paper will catch any excess ganache when you pour it, making cleanup much easier (Image 22).
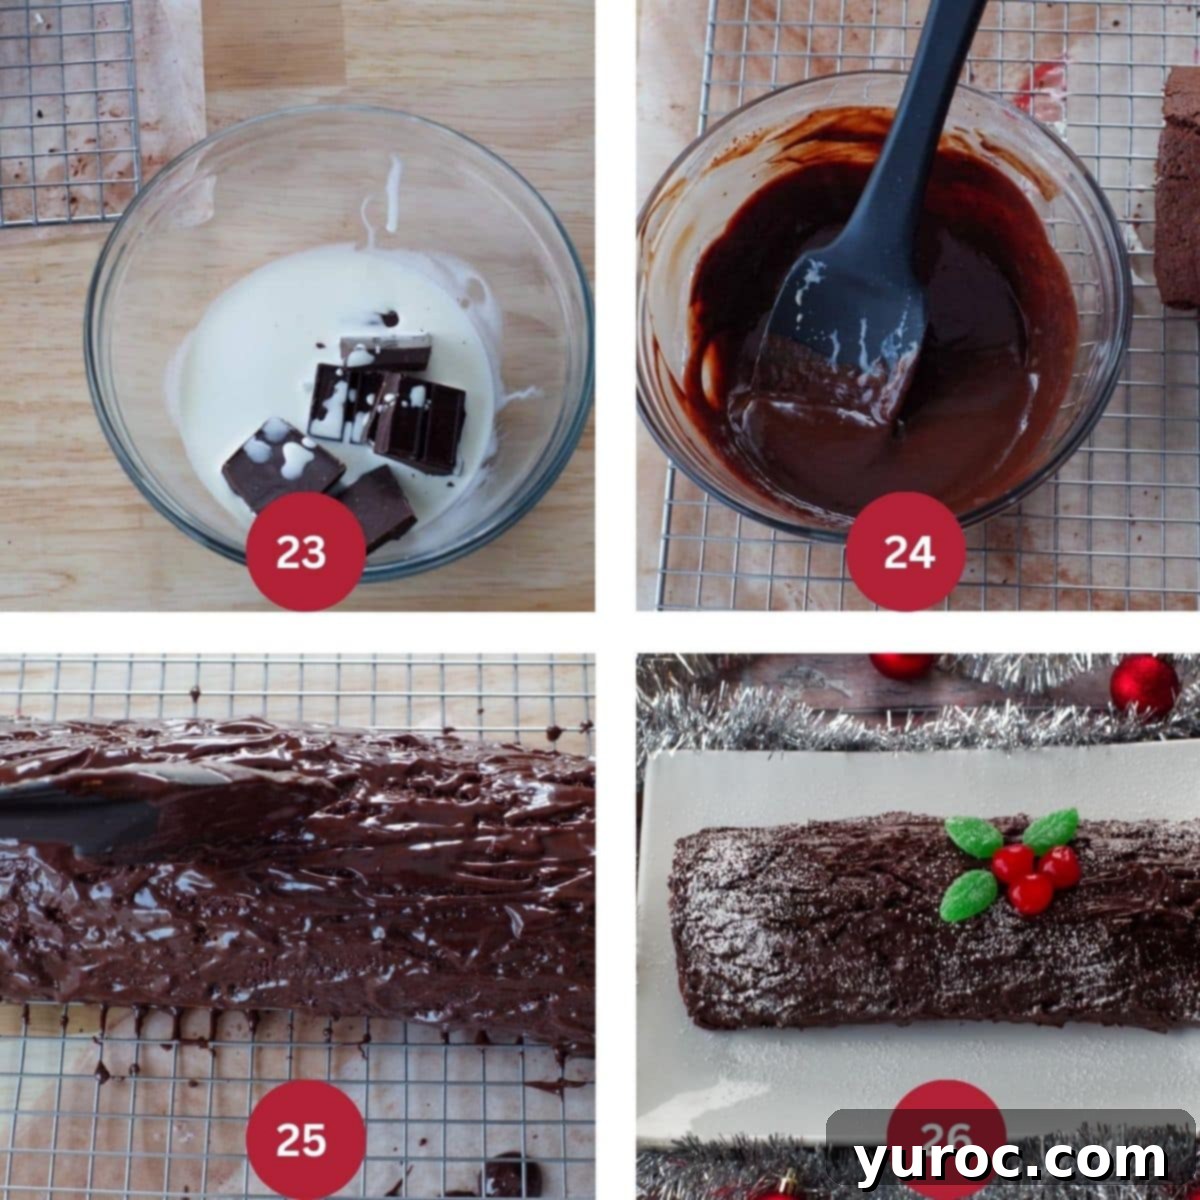
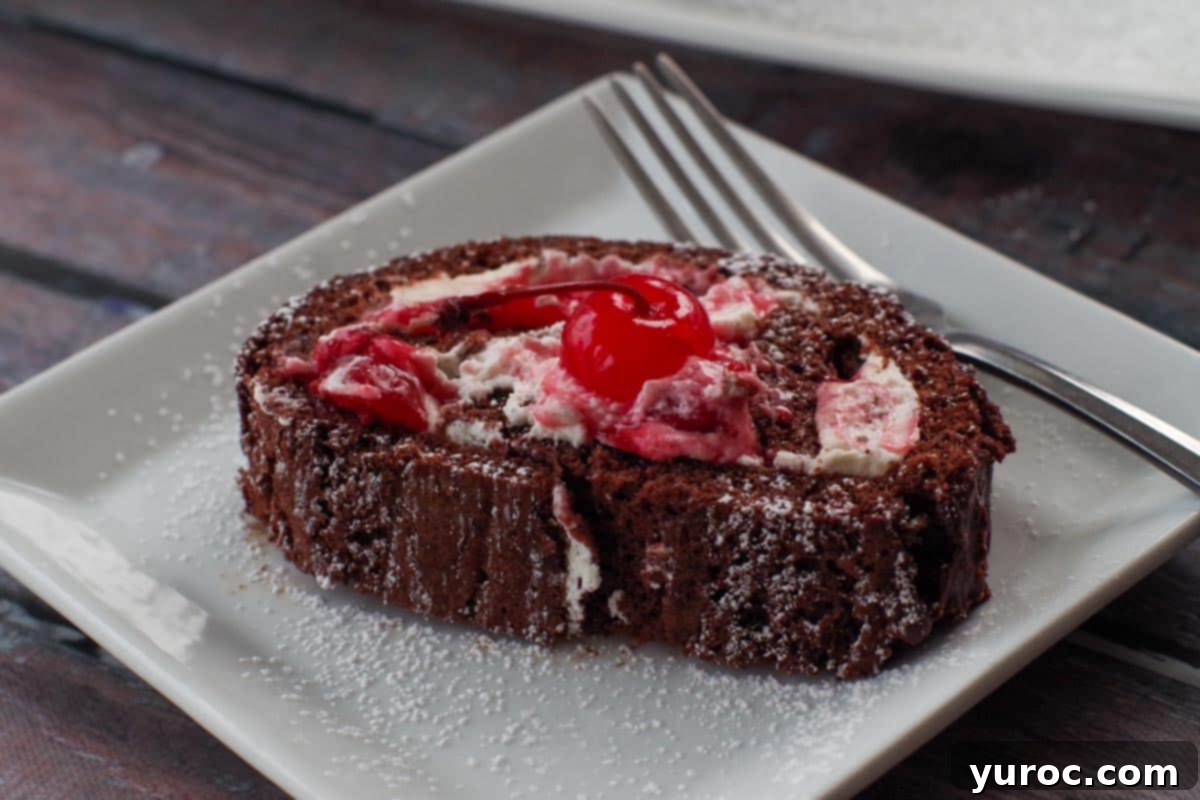
PREPARING THE GANACHE (STEP 5): To create the rich chocolate ganache, combine the heavy cream and semi-sweet baker’s chocolate in a heatproof bowl. Microwave this mixture in short 30-second intervals at half power (50%), stirring thoroughly after each interval until the chocolate is fully melted and smoothly combined with the cream. Alternatively, you can achieve the same result using a double boiler setup (Image 23). It’s crucial not to overcook the ganache; the residual heat from the cream will continue to melt the chocolate as you stir. If, after stirring, the ganache still appears too thick for pouring, you can add a tablespoon of milk to achieve a pourable consistency (I found this wasn’t necessary for my ganache) (Image 24). Once your ganache is smooth and pourable, pour it generously over the entire cake, using a spatula to spread and ensure full coverage. While the ganache is still soft, use the tines of a fork, a butter knife, or a spatula to etch lines into the chocolate, mimicking the textured appearance of tree bark (Image 25). For the ganache to firm up properly, refrigerate the finished Yule log for at least one hour before serving. Before presenting this stunning holiday dessert on a cake or serving platter, adorn it with festive garnishes: arrange spearmint gummy leaves and bright maraschino cherries on top, then lightly dust the entire cake with powdered sugar to create a beautiful, snowy effect (Image 26).
Delectable Pairings: What to Serve Alongside Your Black Forest Yule Log Cake
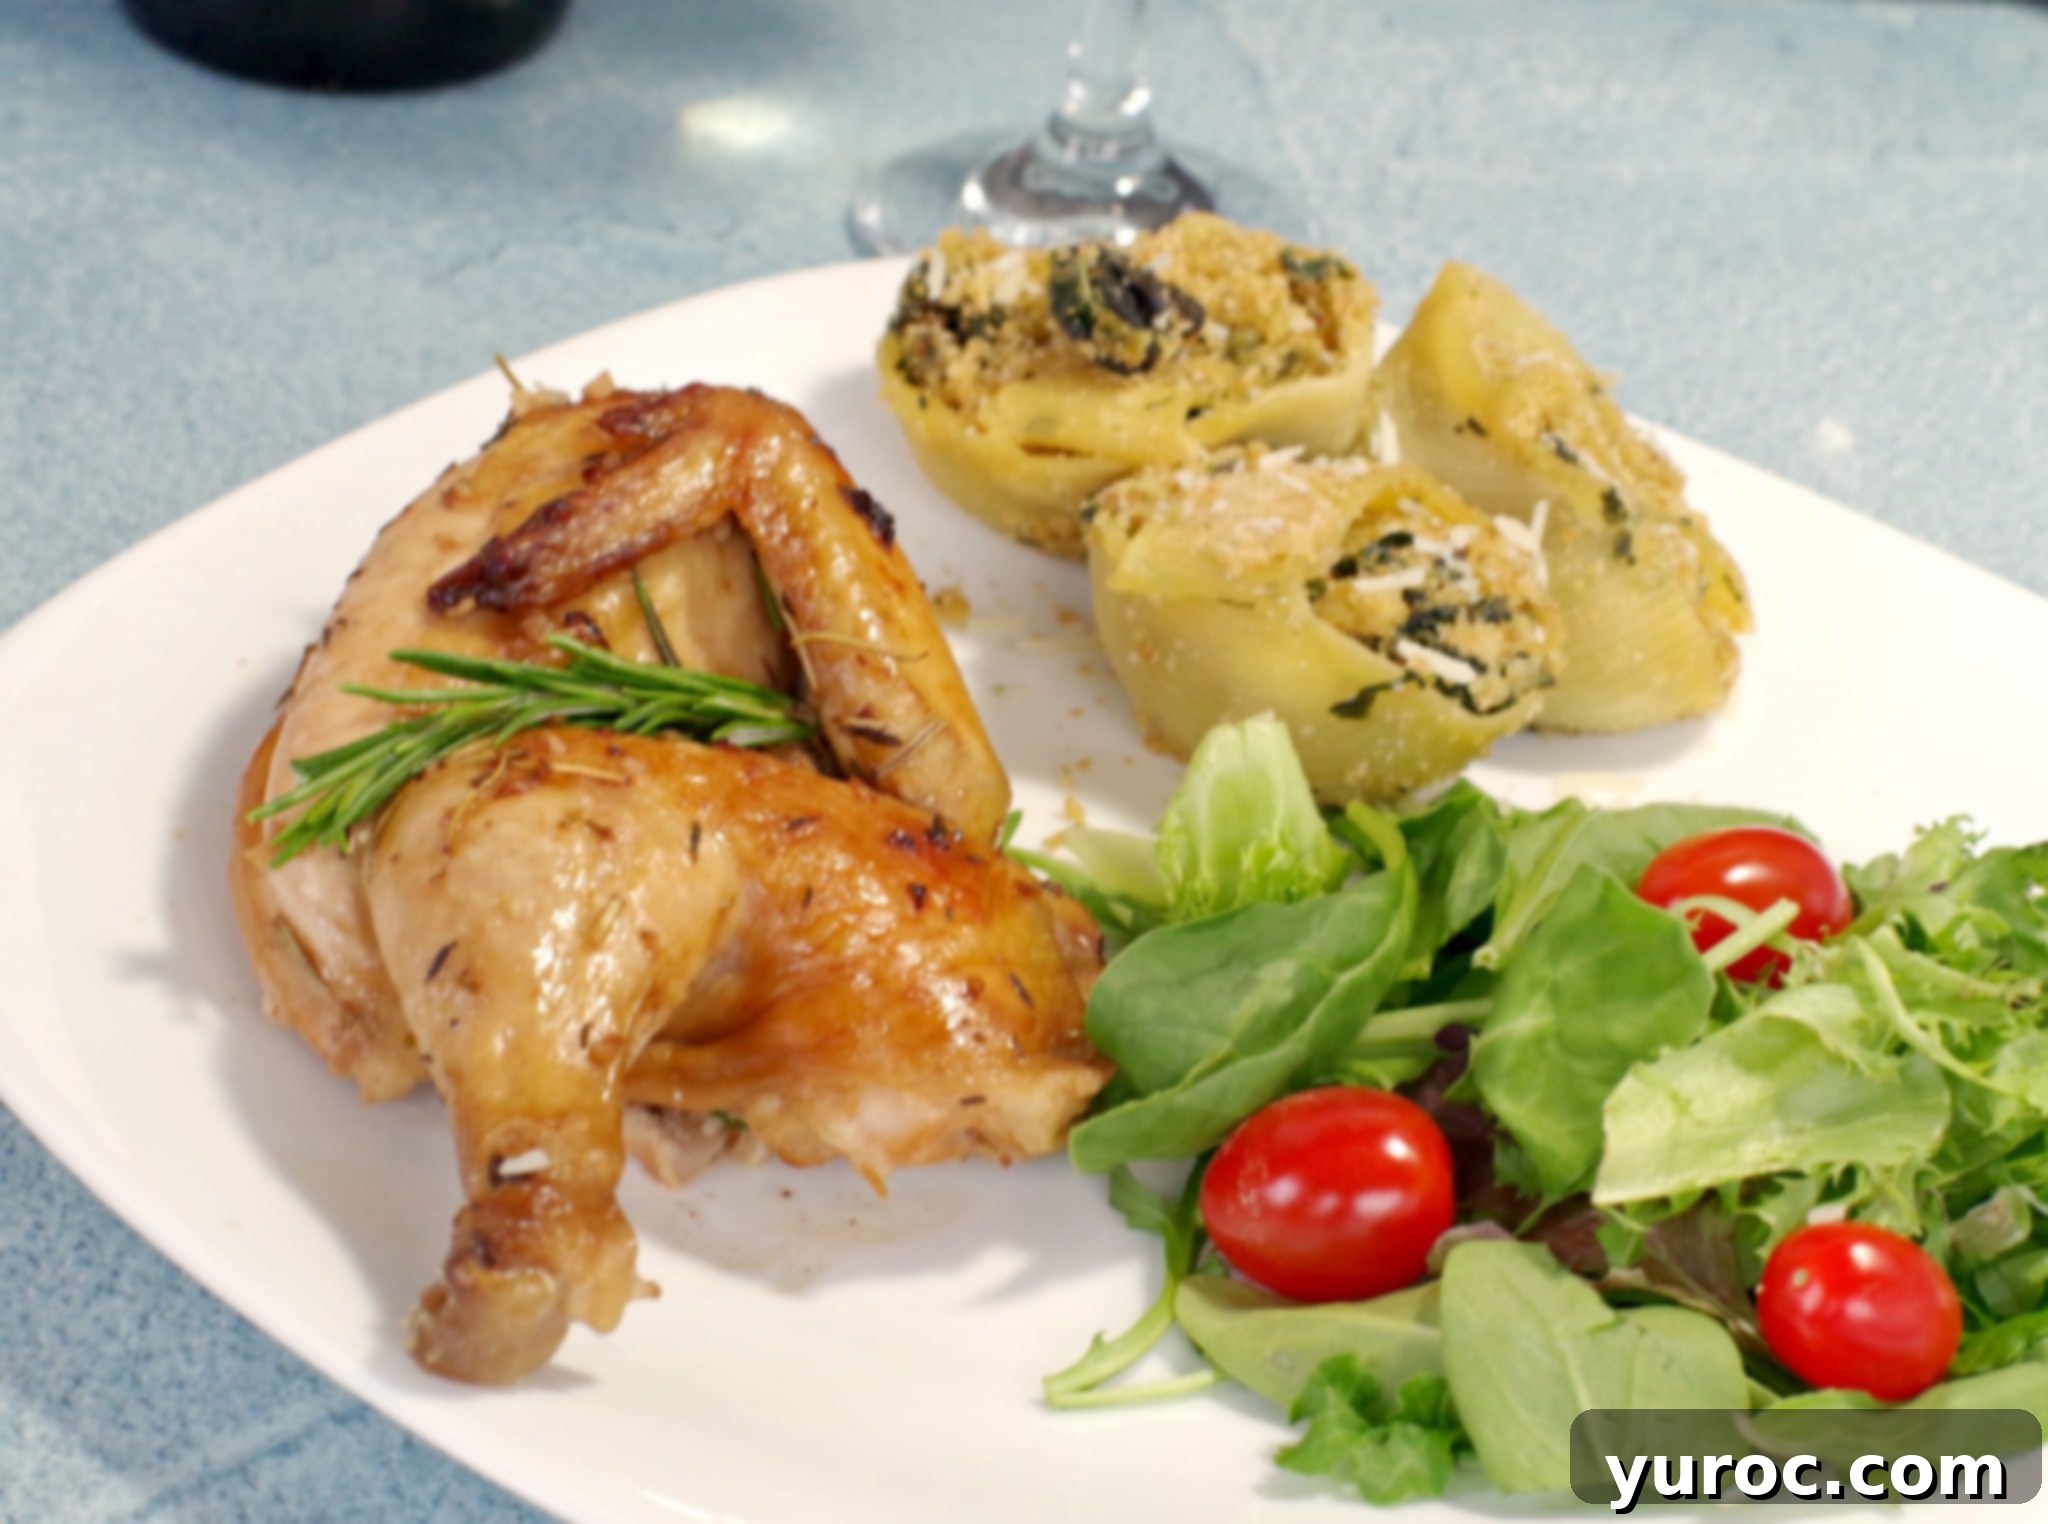
This magnificent Black Forest Yule Log Cake makes a grand statement on its own, but it truly shines when paired with the right main course, creating a harmonious holiday menu. For a fuss-free yet elegant main dish, consider serving it after a tender Crockpot Turkey Breast with Quinoa Cranberry Dressing. The succulent turkey and flavorful dressing offer a lovely contrast to the richness of the chocolate and cherries. Hearty Italian-inspired dishes also complement this cake beautifully; think savory Baked Beef Cannelloni or a comforting Make-Ahead Lasagna. If you’re seeking a more refined poultry option, this Easy Cornish Hens with Rosemary Wine Sauce recipe (pictured) provides an exquisite balance of flavors that will perfectly lead into your delightful dessert.
Baking Brilliance: An Essential Expert Tip
For absolute precision in this and many other baking endeavors, an instant-read thermometer (affiliate link) is an indispensable tool. It ensures your egg mixture reaches the perfect temperature of 120 degrees F (48 degrees C), a critical factor for achieving a light and airy sponge cake. This accuracy helps prevent overcooking the eggs while guaranteeing they are warm enough to whip to the correct volume and consistency.
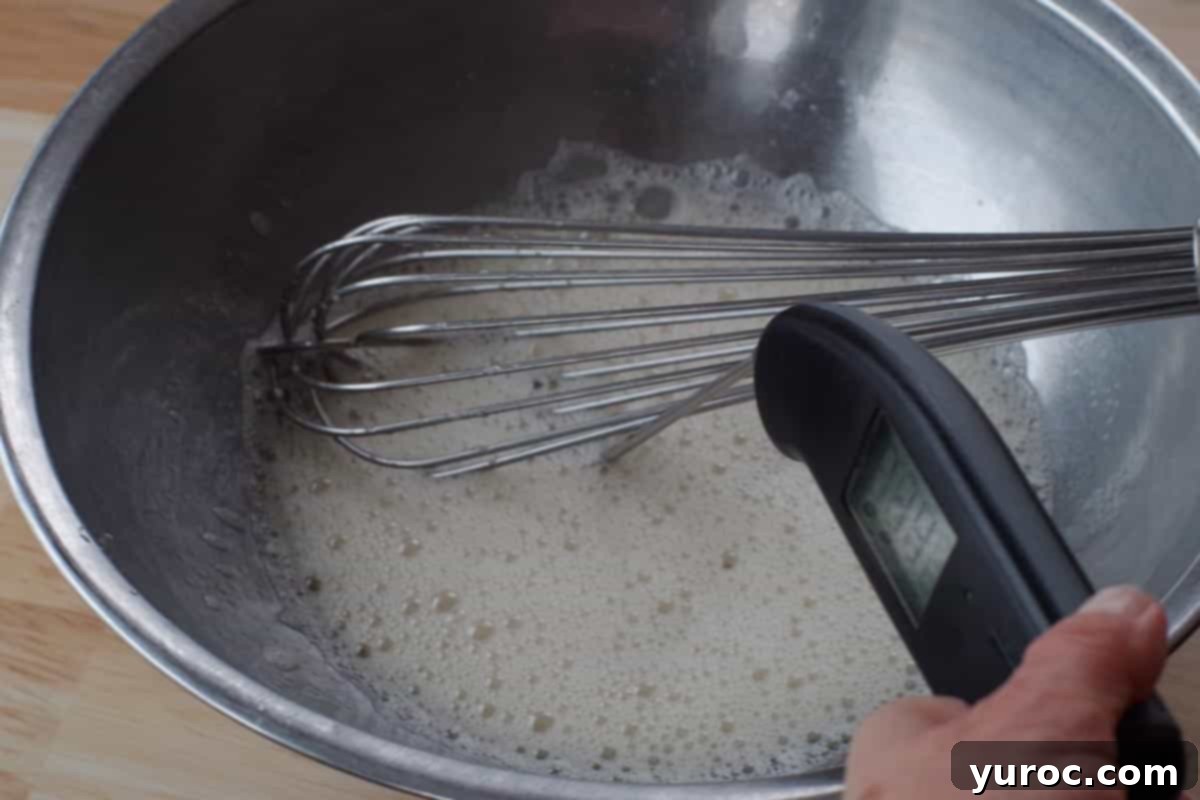
Investing in a good instant-read thermometer is a smart move for any home cook or baker. This versatile gadget is not just for specific cake recipes; it’s a valuable asset for nearly every food-related task! It allows you to confidently assess the doneness of food without needing to cut into it, preserving juices and presentation. It’s particularly ideal for:
- Perfectly baking breads, freeform loaves, and soft rolls.
- Ensuring meats like pork, chicken, salmon, and beef are cooked safely and precisely to your desired doneness.
- Achieving optimal results with grilled and roasted foods.
- Monitoring temperatures for items cooked in an air fryer.
- Guaranteeing baked desserts, like custards and cakes, are set just right.
Optimal Storage for Your Black Forest Yule Log Cake
Proper storage is essential to keep your Black Forest Yule Log Cake fresh and delicious for as long as possible, ensuring you can enjoy every last crumb of this festive treat.
Refrigeration Instructions: Any leftover slices or the remainder of your Yule log should be stored promptly in the refrigerator. Place the cake in an airtight container to prevent it from drying out or absorbing other odors from your fridge. When stored correctly, it will remain delightful for up to 3 days.
Freezing for Future Enjoyment: You have the option to prepare the cake sponge in advance and freeze it. To do this, bake the sponge and roll it up in parchment paper as instructed, but without adding the filling. Store the rolled cake (still in its parchment) in a sealed, freezer-safe container or tightly wrapped in plastic wrap. Before you plan to fill and decorate, ensure the cake is completely defrosted at room temperature before attempting to unroll it. This prevents cracking and ensures pliability.
Please note that it is generally not recommended to freeze the fully assembled cake with the whipped cream filling. Whipped cream does not freeze well; upon defrosting, it tends to become watery and lose its desirable fluffy texture, negatively impacting the overall quality of the dessert.
Make-Ahead Tips: For effortless holiday entertaining, this Black Forest Yule Log Cake can be fully assembled and stored in the refrigerator 1-2 days before your event. This allows the flavors to meld beautifully. However, for the best visual appeal, add any delicate holly decorations or fresh garnishes just before you are ready to serve.
Serving Size Considerations for Your Holiday Gathering
This exquisite Black Forest Bûche de Noël recipe is designed to yield approximately 8 generous servings, making it a perfect dessert for a moderate-sized holiday gathering. Should you need to adjust the recipe to accommodate more or fewer guests, you can easily do so by clicking on the serving number within the recipe card and selecting your desired quantity. The ingredient amounts will automatically update to reflect your new serving size. However, please be aware that if you opt to significantly increase the batch, you will likely require additional jelly roll pans to bake multiple cakes simultaneously.
Frequently Asked Questions About This Yule Log Recipe
Functionally, a Yule log, also known by its French name Bûche de Noël, is essentially a Swiss roll that has been elaborately decorated to resemble a traditional Christmas log. The fundamental cake structure and rolling technique are the same; the primary difference lies in the festive, bark-like exterior and woodland-inspired garnishes that transform it into a holiday showpiece.
For optimal freshness and convenience, the entire Black Forest Yule Log Cake can be fully assembled and prepared up to 1-2 days in advance of when you plan to serve it. This allows the flavors to meld beautifully and gives you one less task on the day of your holiday celebration.
So, if you’re searching for an elegant, delightful, and subtly unique Yule log recipe this holiday season, look no further! This Black Forest Yule Log offers a fantastic twist on a Christmas classic that is sure to impress your guests and satisfy every sweet tooth.
And for those who adore the rich flavors of this Black Forest Yule Log Cake, you’ll undoubtedly fall in love with my No-Bake Black Forest Tiramisu – another decadent creation that brings together chocolate and cherry perfection. If you’re in the mood for something incredibly easy yet equally festive, don’t miss out on my delightful No-Bake Eggnog Trifle!
More Festive Christmas Desserts to Explore
- Cranberry Christmas Bread Pudding
- Baileys No Bake Cheesecake
- Mini Eggnog Trifle
- Gingerbread Fruit Christmas Wreath
Did your family ❤️ this recipe? We love hearing from you! Did you know that commenting and ⭐ rating recipes is one of the best ways to support your favorite recipe creators? If you LOVED this Black Forest Yule Log Cake recipe, please take a moment to comment and rate it in the recipe card below. You can also share photos of your beautiful creation on social media using the hashtag #foodmeanderings or by tagging @foodmeanderings! Your feedback helps other bakers discover and enjoy these recipes too!

📋 Black Forest Yule Log Cake Recipe
Equipment
- electric mixer
- cooling rack
- jelly roll pans
- trivets
- spatula
- whisk
- instant read thermometer
Ingredients
Cake:
- 4 large eggs
- ½ cup white granulated sugar
- 4 tbsp unsalted butter, melted
- ⅓ cup all-purpose flour
- ¼ cup unsweetened cocoa powder
- ¼ tsp salt
Filling
- 1 cup heavy cream (whipping cream)
- ¼ cup powdered sugar
- 1 tsp vanilla extract
- 1 cup canned cherry pie filling
Chocolate Ganache Frosting
- 3 oz semi-sweet baker’s chocolate
- ½ cup heavy cream (whipping cream)
Garnish
- 3 Maraschino cherries
- 3 spearmint gummy leaves
- powdered sugar (for sprinkling)
Instructions
Cake Preparation
- Preheat oven to 425°F (218°C). Place a large sheet of parchment paper on a 17×12 inch sheet pan, ensuring it overhangs the edges slightly. Thoroughly grease the parchment paper with butter.
- In a medium saucepan, bring about an inch of water to a gentle simmer to create a double boiler setup.
- In a heatproof bowl, whisk together the eggs and granulated sugar. Place this bowl over the simmering water, making sure the bottom of the bowl does not touch the water.4 large eggs
- Continuously whisk the egg mixture until it becomes thick, pale yellow, and warm to the touch (approximately 120 degrees F / 48 degrees C), resembling warm tap water. An instant-read thermometer is recommended for accuracy.
- Remove the egg bowl from the heat. Using an electric mixer, beat the mixture on high speed until it is very thick, airy, and reaches the “ribbon stage.” This means a drizzle of the mixture should hold its shape on the surface for 5-10 seconds before dissolving.
- Gently fold in the melted butter with a spoon or spatula. Do NOT use the electric mixer for this step, as it can deflate the batter.4 tablespoon unsalted butter, melted
- In a separate small bowl, whisk together the unsweetened cocoa powder, all-purpose flour, and salt until thoroughly combined.⅓ cup all-purpose flour, ¼ cup unsweetened cocoa powder, ¼ teaspoon salt
- Add the dry cocoa mixture to the egg mixture. Using a spatula, gently fold the dry ingredients into the eggs until just combined. Patience is key here; do not overmix, or the batter will deflate.
- Spread the batter evenly onto the buttered parchment paper on the prepared sheet pan, leaving approximately a one-inch border from the edges.
- Bake for 8 minutes, or until the cake feels springy to the touch and a cake tester or toothpick inserted into the center comes out clean.
- While the cake is still warm, prepare a new piece of parchment paper by lightly sprinkling it with cocoa powder.
- Carefully invert the warm cake onto the cocoa-dusted parchment. Gently peel off and discard the parchment paper the cake was baked on.
- Immediately and gently roll the cake up in the parchment into a log shape. This “muscle memory” step helps the cake roll more easily later. Don’t worry if it cracks; it will look more log-like and be covered by ganache.
- Allow the cake to cool completely in this rolled-up position.
Filling and Assembly
- In a large, chilled mixing bowl, whip the heavy cream on medium speed, gradually increasing to high speed, until soft peaks form.1 cup heavy cream (whipping cream)
- Add vanilla extract and powdered sugar to the whipped cream.¼ cup powdered sugar, 1 teaspoon vanilla extract
- Continue whipping until stiff peaks form. Be careful not to over-whip.
- Gently unroll the cooled cake. Spread the prepared whipped cream evenly over the entire surface, leaving a one-inch border around all edges to prevent squeezing out.
- Evenly spread the canned cherry pie filling on top of the whipped cream layer.1 cup canned cherry pie filling
- Carefully roll the cake back up into a log, this time without the parchment paper. Place the assembled Yule log onto a wire rack, with parchment or wax paper underneath to catch any ganache drips.
Chocolate Ganache Frosting
- In a heatproof bowl, combine the heavy cream and semi-sweet baker’s chocolate. Microwave in 30-second intervals at half power (50%), stirring thoroughly after each interval, until the chocolate is melted and smoothly combined with the cream. Alternatively, use a double boiler.½ cup heavy cream (whipping cream), 3 oz semi-sweet baker’s chocolate
- Ensure the chocolate is fully melted and incorporated. If needed, add a tablespoon of milk to achieve a pourable consistency for the ganache (this step was not necessary in my experience).
- Pour the ganache over the cake, spreading with a spatula to cover it completely. Use a fork, butter knife, or spatula to etch lines into the ganache, creating a tree bark effect.
Garnish and Serve
- Refrigerate the Yule log for at least one hour to allow the ganache to firm up. Before serving, garnish with maraschino cherries and spearmint gummy leaves, then lightly sprinkle with powdered sugar for a festive, snowy finish.3 Maraschino cherries, 3 spearmint gummy leaves, powdered sugar (for sprinkling)
Notes
- The trick is to roll the cake up while it’s still warm. If you don’t roll it soon enough, it will crack. But as I said, if it cracks, that’s perfectly fine for this cake (it will look more log-like)!
- Be very careful and gentle when you are making the sponge batter, especially when you are folding the dry ingredients into the egg mixture. Folding is a very delicate technique- it’s not like stirring: Pass your spatula through the middle of the mixture, across the side, and fold over the top. Think about it as if you are carving your spatula through the mixture and gently folding the bottom over the top. By doing this, you are incorporating all the ingredients together while trapping air into bubbles in the batter.
