Indulgent Birthday Cake Batter Crepes with Ice Cream: The Ultimate Celebration Breakfast
I distinctly remember the first time my daughter casually mentioned having ice cream for breakfast. She had just returned from a friend’s sleepover birthday party, and when I inquired about their morning meal, her nonchalant reply of “ice cream cake” left me slightly amused and perhaps a little horrified. This unexpected revelation, however, sparked an idea that would soon become a cherished family tradition.
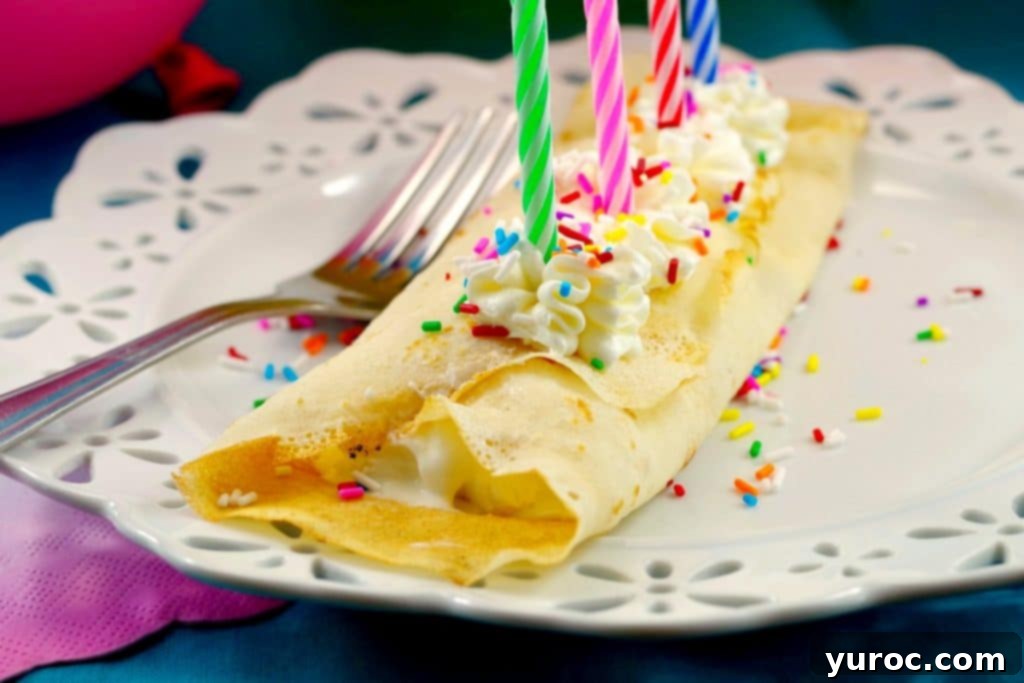
Years later, on the morning after her 11th birthday sleepover, I decided to embrace the spirit of celebration wholeheartedly. I let her indulge in these magnificent Birthday Cake Batter Crepes for her special birthday breakfast. And yes, I even packed them full of creamy ice cream because, well, it was her birthday, and some moments are just meant for pure, unadulterated joy!

My decision felt even more justified when I learned that the mother who allowed the ice cream cake breakfast was a dietitian! These delightful Birthday Crepes genuinely taste like a slice of birthday cake, generously filled with your favorite ice cream, lavishly topped with fluffy whipped frosting, and adorned with a cheerful cascade of rainbow sprinkles. They are truly the perfect celebratory breakfast, whether it’s for a kids’ birthday party sleepover, an unforgettable birthday morning for anyone ready to truly PARTY, or even as an extraordinary dessert. If you’re searching for unique and exciting birthday breakfast ideas, look no further – this recipe is the ultimate crowd-pleaser. My daughter now eagerly requests these festive crepes every single year, making them a cornerstone of our family’s birthday traditions!
Sometimes, you just need to start your day with a scoop of ice cream, especially when it’s your birthday! It’s a simple pleasure that transforms an ordinary morning into a memorable celebration, setting a joyful tone for the entire day. These crepes encapsulate that feeling perfectly.
🥘 Essential Ingredient Notes for Perfect Birthday Crepes
The combination of cake and ice cream is an absolute match made in heaven, a truth universally acknowledged by anyone with a sweet tooth. That’s precisely why I crafted these crepes to be cake batter-flavored, tucked creamy ice cream inside, smothered them with an abundance of festive sprinkles, and even opted for rich whipped buttercream icing instead of conventional whipped cream. My philosophy? If you’re going to celebrate, you might as well go all out and make it an experience!
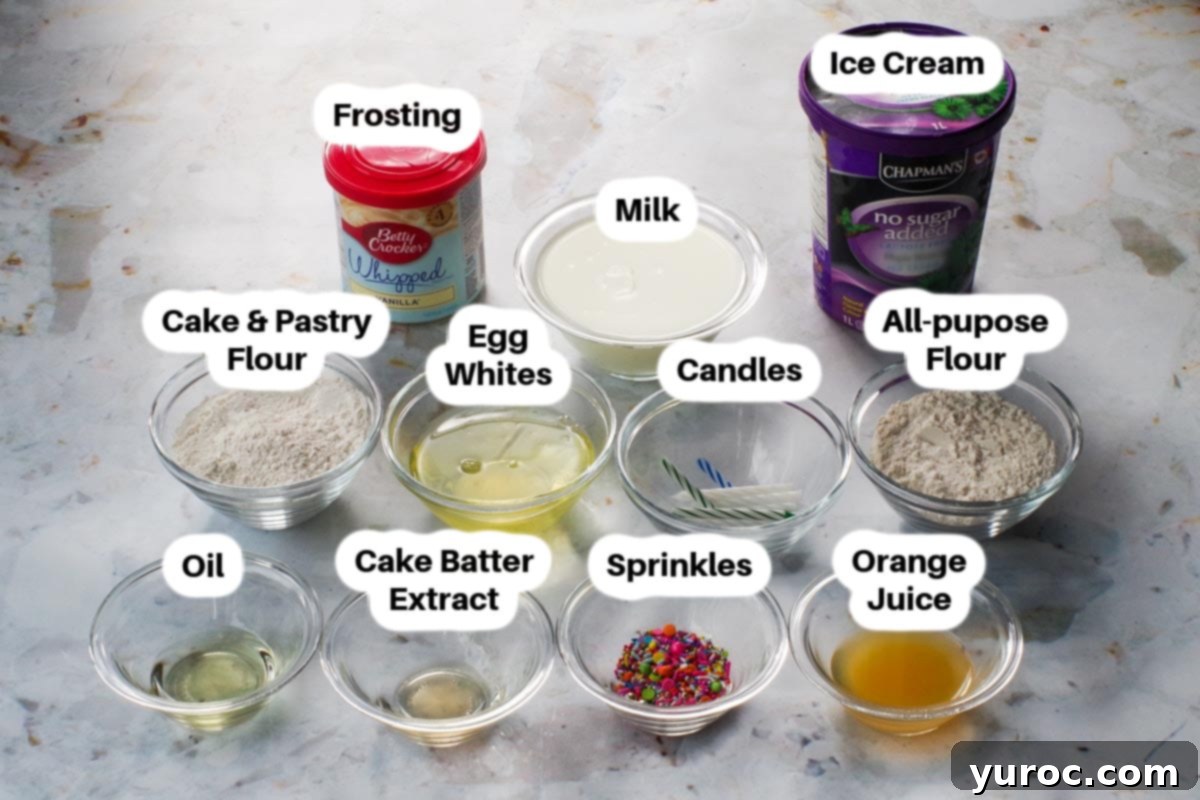
- Pastry flour: I utilize a specific ratio of pastry flour in this recipe because it’s a low-protein flour. Its unique composition is designed to yield pastries that are exceptionally lighter and more delicate than those prepared solely with all-purpose flour, creating the ideal melt-in-your-mouth crepe texture.
- All-Purpose Flour: Combined with pastry flour, all-purpose flour provides just enough structure and chewiness to the crepes, preventing them from being too fragile while maintaining their tender quality.
- Egg Whites: Using egg whites contributes to a lighter, airier crepe batter, resulting in delicate crepes. While you can substitute with whole eggs, egg whites truly enhance the “light as air” quality.
- Milk: I typically use 1% milk, or whatever variety I have readily available in my fridge. For my daughter, who is lactose sensitive, I consistently use lactose-free milk to ensure everyone can enjoy these delicious treats without discomfort.
- Orange juice: You’ll only need a small quantity of orange juice for this recipe, but its subtle acidity brightens the flavors and helps to create a more tender crepe. I usually have fresh oranges on hand, so I prefer to use freshly squeezed juice (about ½ an orange is plenty).
- Cake batter extract/flavor (affiliate link): This is the secret ingredient that gives these crepes their distinctive birthday cake taste. I swear by LorAnn’s concentrated cake batter extract, often found in craft or cake decorating stores. If using a concentrated version, one small bottle (about 1 tsp) is usually sufficient. For standard, non-concentrated extracts, you’ll need 2-3 teaspoons to achieve that rich, authentic cake batter flavor. *Note: The provided link is for a non-concentrated version, as my usual brand is harder to find online.*
- Vegetable Oil: A small amount of neutral oil in the batter ensures the crepes are flexible and prevents them from sticking, contributing to their smooth texture.
- Ice cream: While ice cream might not be the most traditional crepe filling, it truly is the BEST and most exciting choice for these cake batter crepes, especially for a birthday celebration. To achieve the best possible result, I recommend using high-quality vanilla ice cream made with natural ingredients. Chapman’s ice cream happens to be a personal favorite (and this post is not sponsored by them!), but if you can’t find it (it’s a Canadian brand), opt for any premium vanilla ice cream that offers a rich, creamy texture and superior flavor.
- Buttercream frosting: For ultimate convenience, I often use store-bought frosting, such as Betty Crocker Whipped Vanilla Frosting, which provides a wonderfully light and creamy topping. However, feel free to use any flavor of store-bought frosting you prefer or, for a truly homemade touch, whip up your own favorite buttercream.
- Sprinkles: What’s a birthday without sprinkles? You can use any type or color of sprinkles you like to add a burst of color and fun. I typically gravitate towards classic rainbow sprinkles for that quintessential festive look, but jimmies, nonpareils, or even edible glitter would be fantastic.
*See recipe card below for a full list of ingredients and precise quantities.
📖 Creative Variations for Your Birthday Crepes
These birthday cake batter crepes are incredibly versatile, allowing for endless customization to suit different tastes and dietary needs. Get creative and make them uniquely yours!
- Ice cream: The possibilities are truly boundless when it comes to ice cream flavors! While classic vanilla is always a hit, consider options like strawberry, chocolate, birthday cake flavored ice cream, or even a delightful cookie dough. For those with dietary restrictions, using lactose-free or a non-dairy ice cream alternative (such as almond or coconut-based) works wonderfully.
- Frosting: Beyond the convenient store-bought options like Duncan Hines or Betty Crocker whipped icing, you can elevate these crepes with homemade frosting. Explore recipes for a light Whipped Cream Buttercream Frosting, a rich Chocolate Frosting (without butter), or an EASY Stabilized Whipped Cream Icing (with piping gel) for a more professional finish.
- Dairy-free or Lactose-free: Making these crepes suitable for various dietary needs is simple. Replace regular milk with lactose-free milk, soy milk, or almond milk. Swap conventional ice cream for a lactose-free or non-dairy ice cream brand. You can also easily find or prepare dairy-free frostings. *A helpful note: I’ve observed that lactose-free ice cream tends to melt a bit faster, so assemble these quickly!*
- Extra Toppings: Elevate the fun with additional toppings! Consider fresh berries (strawberries, raspberries, blueberries), sliced bananas, chocolate shavings, mini chocolate chips, a drizzle of caramel or chocolate sauce, or even a dollop of fruit compote for a touch of freshness.
- Different Extracts: While cake batter extract is key for the birthday flavor, you can experiment with other extracts in the crepe batter for different themes. Almond extract for a more marzipan-like flavor, or even a hint of lemon or vanilla bean paste can add intriguing nuances.
As far as breakfast crepes go, an ice cream filling is an absolute dream come true—especially when celebrating a summer birthday breakfast! It’s an unexpected twist that brings smiles and a burst of celebratory flavor.
🎥 Watch: How to Make Crepes
If you’re new to making crepes or simply want a visual guide to perfect your technique, I highly recommend watching this helpful video! It covers all the essential steps to ensure your crepes turn out light, delicate, and perfectly cooked: WATCH THIS VIDEO!
🔪 Step-by-Step: How to Make Birthday Cake Crepes with Ice Cream
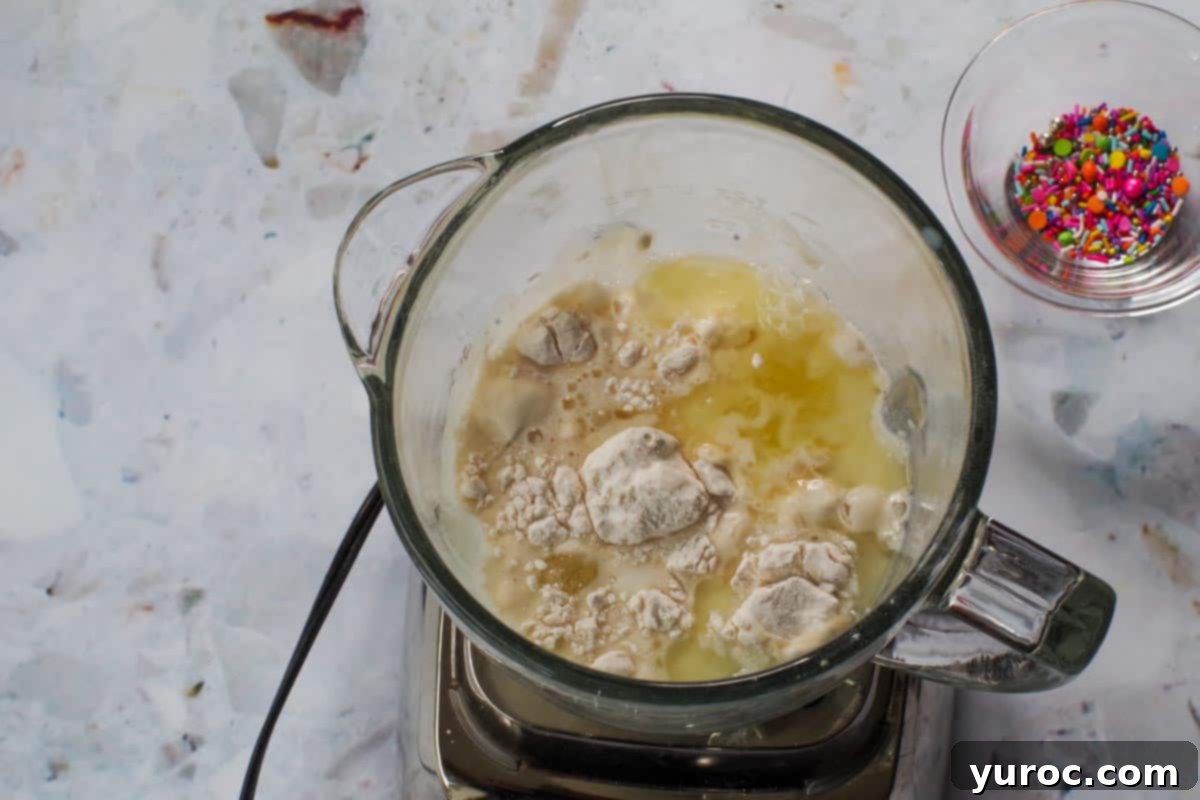
- Step 1: To begin, combine your dry ingredients (pastry flour, all-purpose flour) with the wet ingredients (egg whites, milk, orange juice, cake batter extract, and vegetable oil) in either a high-speed blender or a food processor. This method ensures a super smooth and lump-free batter.
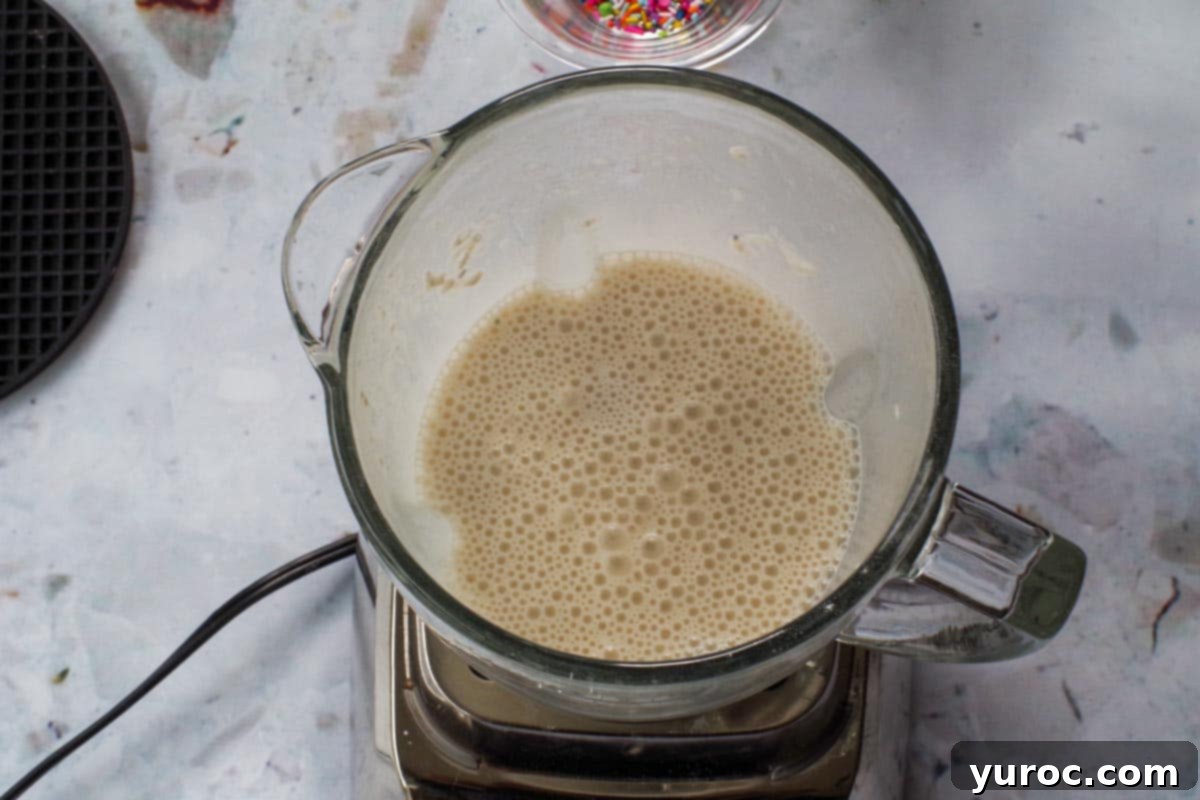
- Step 2: Blend the mixture thoroughly until it is completely smooth and uniform, with no visible lumps. Once blended, allow the crepe batter to rest for 5-10 minutes. This resting period is crucial as it allows the flour to fully hydrate, resulting in more tender and flexible crepes.
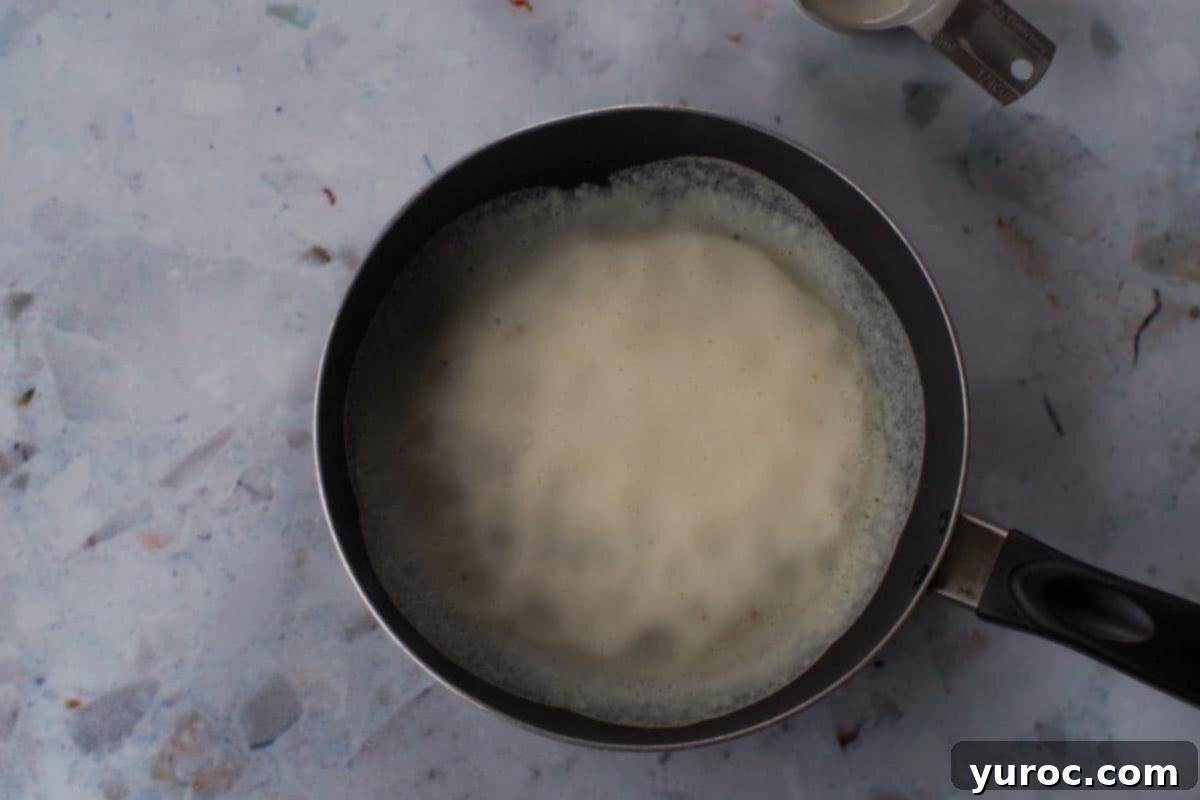
- Step 3: Lightly spray an 8-inch nonstick skillet with cooking spray and heat it over medium-high heat until it’s nice and hot. Remove the skillet from the heat for a moment, then pour ¼ cup of batter into the center. Immediately tilt the skillet in all directions to evenly coat the bottom with a thin layer of batter. Cook until the edges begin to brown and the batter sets in the center (this usually takes about 30 seconds to 1 minute). *If you’ve never made a crepe before, please WATCH THIS VIDEO! The key to perfectly cooked crepes is a hot pan and quick, even spreading of the batter.*
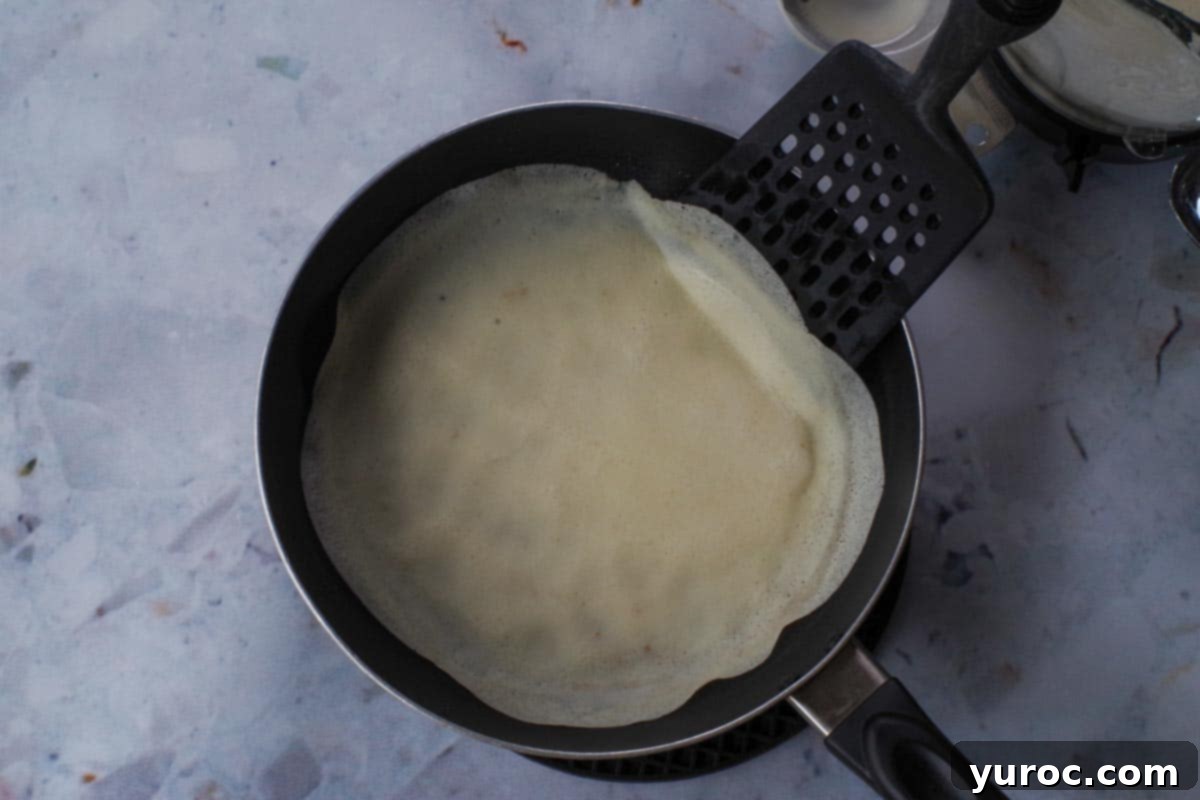
- Step 4: Once the first side is cooked, use a thin, flexible spatula to carefully lift the edges of the crepe, ensuring it’s not sticking to the pan.
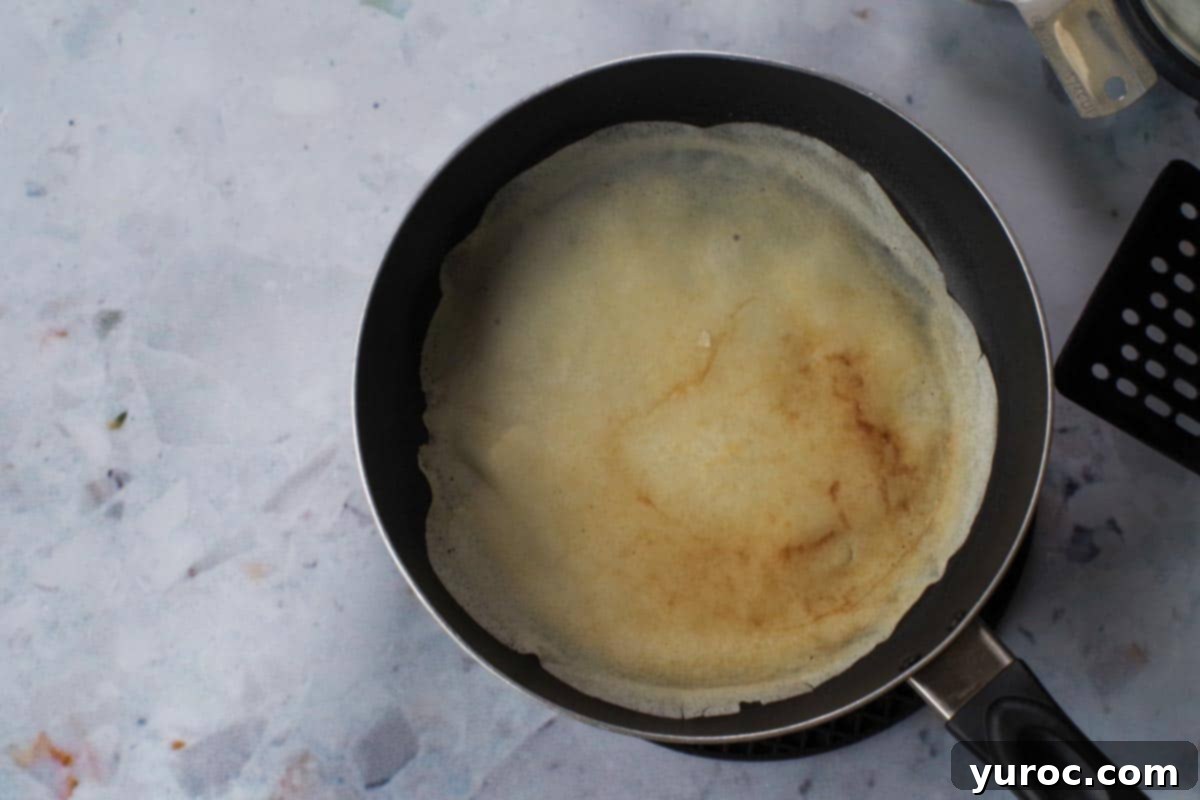
- Step 5: Gently flip the crepe with the spatula. Cook for another 30 seconds to 1 minute, or until the second side is lightly browned and cooked through. Remove the finished crepe to a plate to cool. Continue this process with the remaining batter, making about 10 crepes in total. Stack each cooked crepe between sheets of parchment or wax paper to prevent sticking.
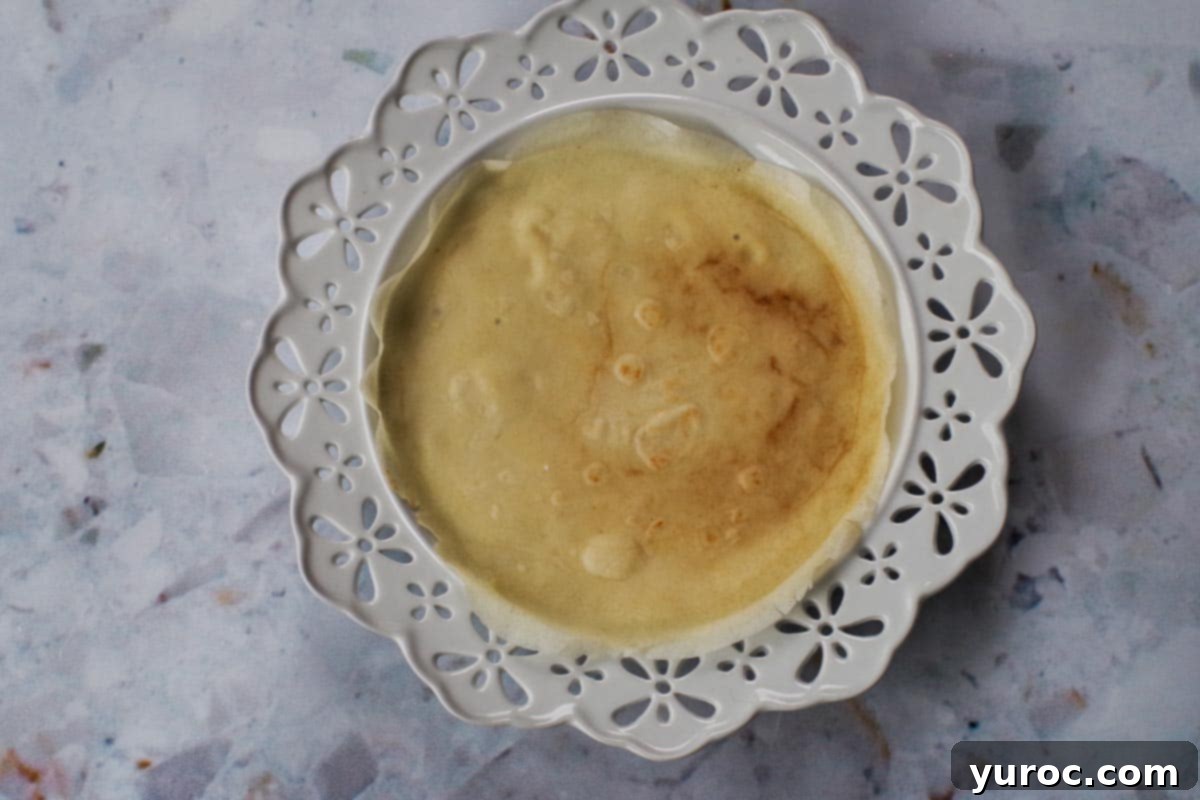
- Step 6: For assembly, lay a cooled crepe flat on a serving plate. Prepare your frosting by fitting a pastry bag with a 1M star tip (or your favorite decorative tip) and filling the bag with your chosen buttercream or whipped frosting.
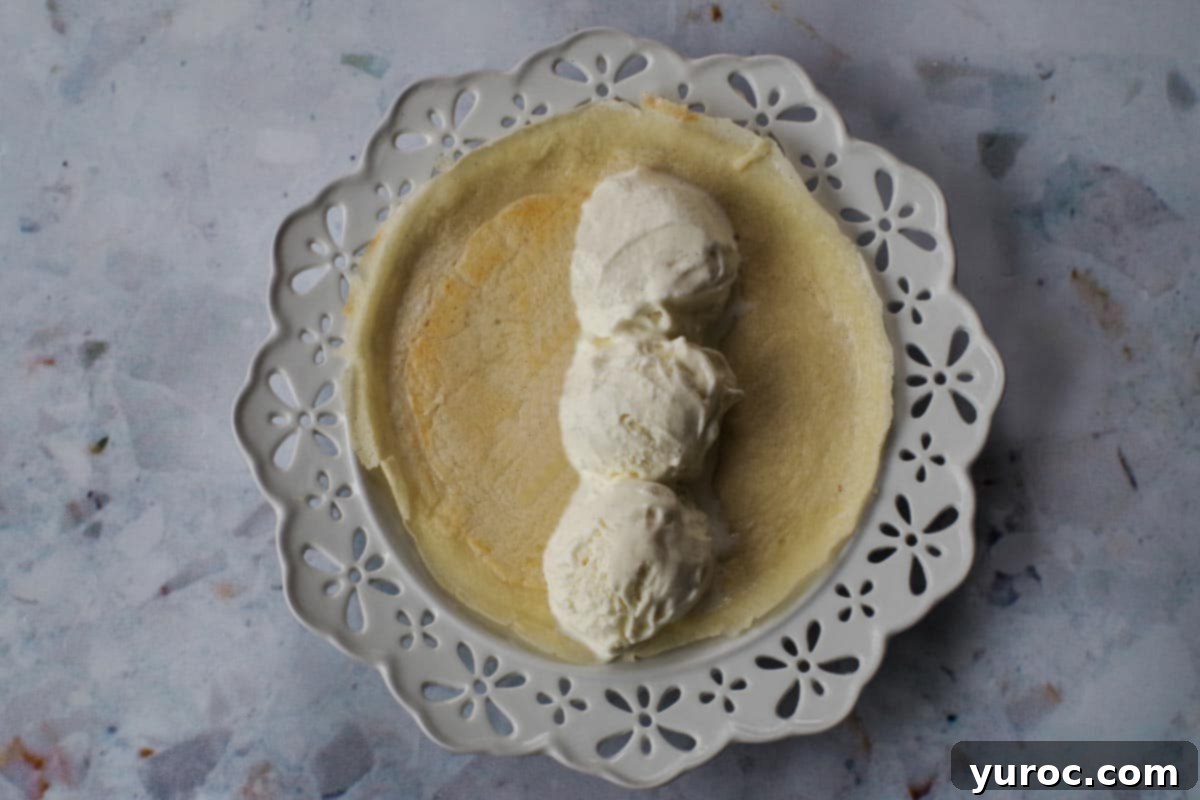
- Step 7: Carefully place three generous scoops of your favorite ice cream into the middle of the crepe. Work swiftly to minimize melting.
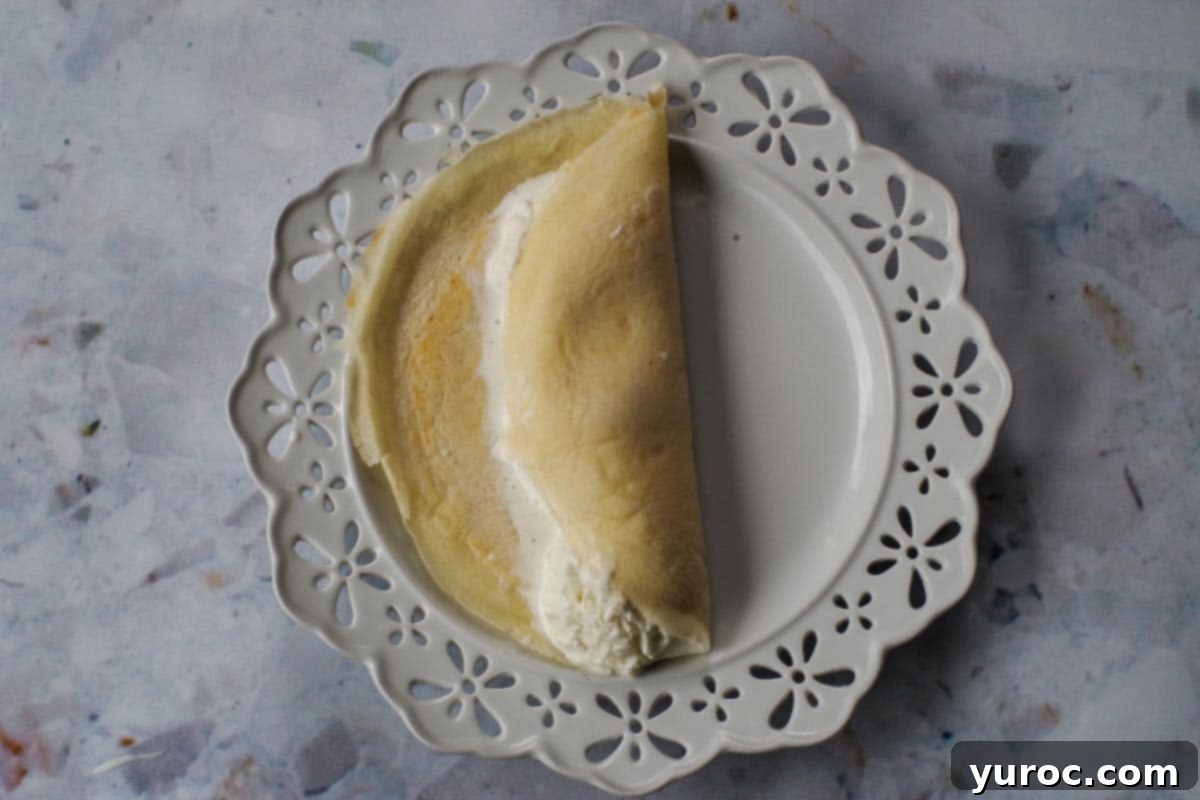
- Step 8: Gently fold one side of the crepe lengthwise towards the middle, covering the ice cream. This creates a neat pocket for your filling. If you’re unsure about the best way to fold a crepe, or want to explore different folding techniques, CLICK HERE to see a guide with various crepe folding options.
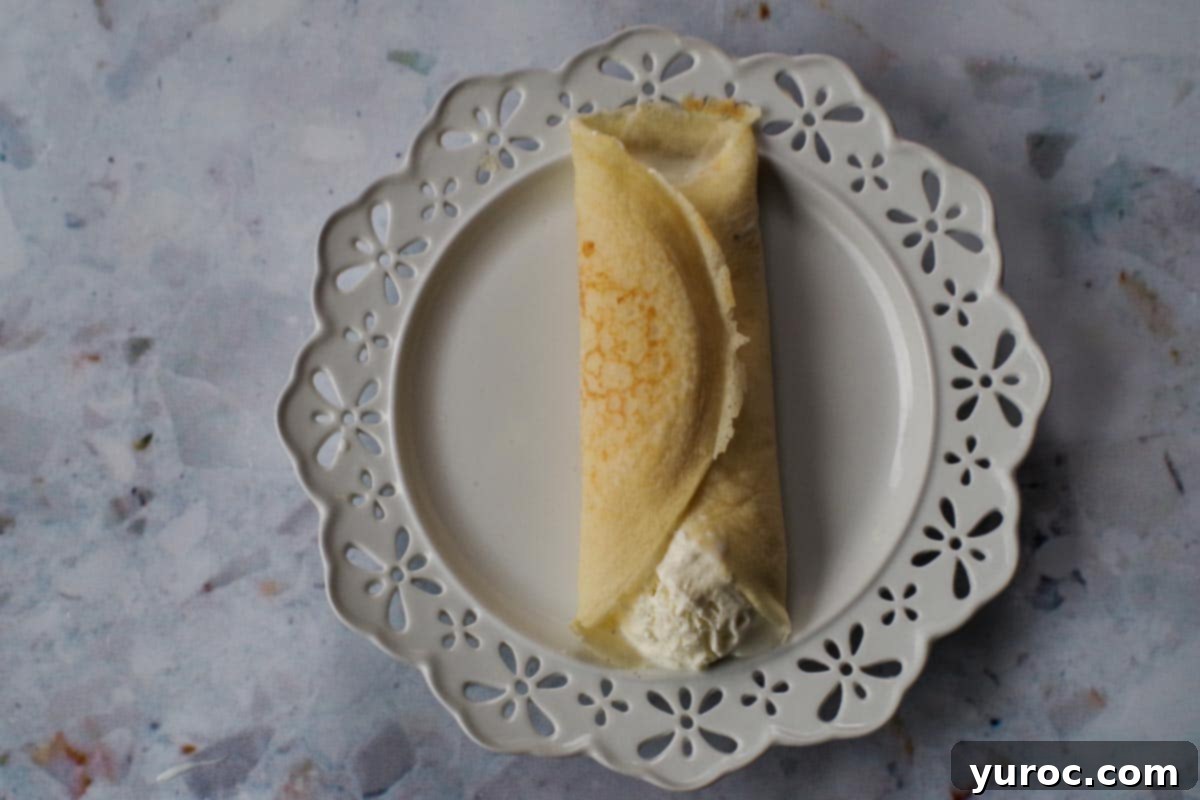
- Step 9: Now, fold over the other side of the crepe lengthwise towards the middle, completely encasing the ice cream filling. You’ll have a beautifully wrapped, delicious package.
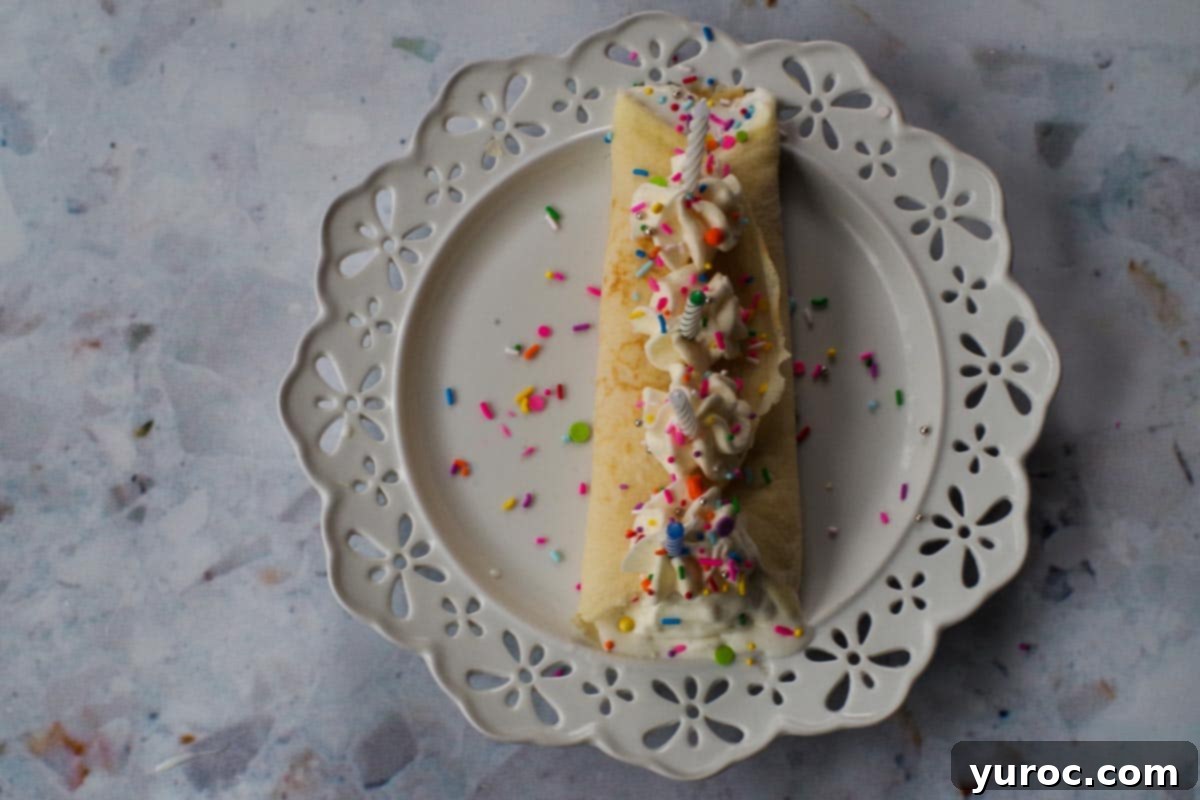
- Step 10: The final, festive touch! Pipe your chosen buttercream or whipped cream decoratively on top of the folded crepe. Generously add rainbow sprinkles for that classic birthday look, and then, for the ultimate birthday presentation, carefully insert a few birthday candles. Serve immediately and watch the smiles erupt!
Expert Tips for Flawless Birthday Cake Crepes
Achieving perfect crepes and assembling them beautifully is easier with a few insider tricks. Here are my top expert tips to ensure your Birthday Cake Crepes are a resounding success:
- Optimal Texture with Combined Flours: Don’t skip the blend of pastry flour and all-purpose flour. This combination is key! Pastry flour imparts a delicate, tender texture, while all-purpose flour provides just enough gluten structure to make the crepes pliable and strong enough to hold your generous ice cream filling without tearing.
- Thorough Pan Preheat is Crucial: A properly hot, non-stick skillet is your best friend when making crepes. Preheating it thoroughly is essential for preventing the crepes from sticking and ensuring they develop those beautiful golden, slightly crispy edges that are so characteristic of a well-made crepe.
- Allow Batter to Rest: Patience is a virtue, especially with crepe batter. Letting the batter rest for at least 5-10 minutes (or even up to 30 minutes) allows the flour to fully hydrate and any air bubbles to dissipate. This results in an incredibly smooth, lump-free batter that yields more pliable, delicate, and evenly cooked crepes.
- Consistent Crepe Size with Measured Batter: For uniform crepes that cook evenly and are easy to fold, use a ¼ cup measuring cup for each crepe. This ensures consistency in size and thickness across your entire batch.
- Invest in High-Quality Ice Cream: Since the ice cream is a star component of this indulgent dish, its quality truly matters. Opt for a premium brand or one known for using real, natural ingredients (like Chapman’s, if available, or a similar high-quality alternative). Superior ice cream will deliver a richer flavor and creamier texture, elevating the entire experience.
- Keep Components Chilled Before Assembly: To combat premature melting, ensure your cooked crepes are completely cooled before assembly. Likewise, keep your ice cream in the freezer until the very last moment. Working quickly and with chilled ingredients will minimize melting and keep your crepes looking pristine.
- Pipe Frosting Just Before Serving: Whipped frosting is at its best when slightly chilled, making it easier to pipe and hold its decorative shape. For the most appealing presentation, pipe the frosting onto the crepes just before you plan to serve them. This prevents it from melting into the warm crepe or losing its structure.
- Customize with Fun Toppings: Unleash your inner party planner! Beyond rainbow sprinkles, consider adding mini chocolate chips, colorful candies, edible glitter, or even small sparkler candles for an extra festive touch. The more personalized, the better!
- Create an Interactive Crepe Bar: For a fun party activity or a delightful family meal, set up a “Build Your Own Crepe” bar. Offer a variety of ice cream flavors, different types of frosting (chocolate, strawberry, vanilla), and an assortment of toppings. This allows everyone to customize their birthday crepe exactly how they like it, making it an engaging and memorable experience.
I only wish I had this fantastic breakfast for my birthday when I was a kid! The true story behind the initial “ice cream for breakfast” revelation is inconsequential now, as I was simply looking for a delightful excuse to create this special treat. And since I tend to live a little vicariously through my children’s joyous moments, ice cream for breakfast it definitely is!

🍽 Essential Equipment for Crepe Making
While you can certainly make delicious crepes with any standard non-stick frying pan, specific equipment can enhance your experience and results. For crepes that match the size and delicate appearance you see in the photos, I highly recommend using an 8-inch non-stick frying pan (affiliate link), as this is precisely what I used. Additionally, you will need a reliable blender (affiliate link) or a food processor (affiliate link) to achieve that perfectly smooth, lump-free batter. *I personally prefer using a blender, as the crepe batter is quite thin and blends exceptionally well.*
For the festive finishing touches, you’ll also require a pastry bag and a 1M frosting tip to pipe the beautiful buttercream or whipped cream onto your crepes, adding that professional bakery-style flourish.
🌡️ Storage and Make-Ahead Tips
These Birthday Cake Batter Crepes are excellent for making ahead, saving you time on the big day. Here’s how to store each component effectively:
- Cooked Crepes: The crepes themselves can be stored in the refrigerator for up to 3 days. To keep them fresh and prevent sticking, stack them with parchment paper or wax paper in between each crepe and place them in a sealed, airtight container.
- Ice Cream: Always store the ice cream separately in its original container in the freezer until you are ready to assemble the crepes.
- Frosting: If using store-bought frosting, store opened containers in the refrigerator (separately from the crepes and ice cream). Homemade buttercream can also be stored in an airtight container in the fridge for several days and may require a quick whip before piping.
- Freezing Crepes: These crepes freeze exceptionally well, making them ideal for long-term storage. You can freeze them for up to 3 months. To freeze, lay the cooled crepes flat in a sealed container or a Ziplock freezer bag, again with parchment paper placed between each crepe to prevent them from sticking together. Thaw in the refrigerator before use.
👪 Serving Size and Adjustments
This recipe is designed to yield approximately 10 delightful crepes, making it perfect for a small celebration or a generous family breakfast. You have the flexibility to easily adjust the recipe to suit your needs. If you’re hosting a larger gathering or simply want extra, you can double or even triple the recipe. Conversely, for a smaller treat, you can cut the recipe in half. Simply click on the serving size option within the recipe card below and select your desired number of servings; the ingredient quantities will automatically adjust accordingly.
❔ Frequently Asked Questions About Birthday Crepes
For these specific Birthday Cake Crepes, it is essential that the crepes are completely cooled before you add the ice cream filling. This prevents the ice cream from melting too quickly and making a mess. If you are preparing them in advance, let the crepes cool to room temperature, then store them. Assemble them just before serving or allow guests to build their own for an interactive experience. If you were using a warm filling (like fruit compote or a warm chocolate sauce), then warming the crepes slightly would be appropriate, but not with ice cream.
If you find yourself unable to locate cake batter extract, an excellent substitute to consider is “Princess Cake and Cookie Emulsion,” which provides a similar delightful flavor profile. Alternatively, you can create a decent substitute by combining vanilla extract with a tiny drop of almond extract. However, please be aware that while these alternatives will still be delicious, the authentic “cake-like” flavor won’t be quite as intense or pronounced as with the dedicated cake batter extract.
The key to preventing premature ice cream melting is to work quickly and ensure all your components are as cold as possible. Have your cooled crepes ready, your frosting slightly chilled, and your ice cream scooped just before you plan to assemble. For larger batches or if you anticipate slower assembly, a fantastic trick is to pre-scoop your ice cream onto a parchment-covered small sheet pan and pop it back into the freezer for 10-15 minutes. This firms up the scoops, giving you more time during assembly. You can also briefly freeze each assembled crepe for a few minutes to help it hold its shape before adding final garnishes.
Absolutely! Making the crepes in advance is highly recommended to streamline your serving day. You can prepare the crepes up to 3 days prior to your event. Store them stacked with layers of parchment or wax paper in between each crepe, inside an airtight container in the refrigerator. This allows for quick and easy assembly when you’re ready to serve, making your birthday breakfast preparation much more relaxed and enjoyable.
So, whether you’re looking for truly unique birthday breakfast ideas, hoping to throw an unforgettable P-A-R-T-Y on your special day, or simply want to make your kids’ birthday breakfast dreams come true, these Birthday Cake & Ice Cream Crepes are the answer! They are absolutely ideal for a lively kids’ sleepover birthday party, but they are equally perfect for any kind of birthday breakfast celebration, bringing joy and a touch of magic to the morning.
And for even more fabulous birthday party food fun, be sure to try my incredibly easy No Bake Birthday Cake Cheesecake (with Oreo Crust), a delightful treat that always impresses!
📋 More Festive Birthday Breakfast & Brunch Ideas
If you loved these Birthday Cake Crepes, you’ll be thrilled to discover more exciting and delicious ideas to make any birthday morning extra special. Explore these other fantastic recipes that are perfect for celebrating:
- Belgian Chocolate Waffles
- Sheet Pan Sugar Cookie Pancakes
- French Toast Pigs in a Blanket
- Sheet Pan Chocolate Chip Pancakes
Did your family ❤️ this recipe? Did you know that commenting and ⭐rating recipes is one of the best ways to support your favorite recipe creators? If you LOVED this recipe, please comment and rate it in the recipe card below or share photos on social media using the hashtag #foodmeanderings or tagging @foodmeanderings !


📋 Birthday Cake Crepes (with Ice Cream) Recipe
Print Recipe
Pin
Save RecipeSave Recipe
Rate
Add to Shopping ListGo to Shopping List
Equipment
-
blender
-
pastry bag
-
1 M tip
Ingredients
Crepes:
- ½ cup cake and pastry flour
- ½ cup all purpose flour
- 4 egg whites can substitute 2 whole eggs
- 1-¼ cups low-fat milk
- 2 tablespoon orange juice
- 1 teaspoon cake batter extract/flavouring
- 1 tablespoon vegetable oil
Filling:
- 5 cups vanilla ice cream *approximately, depending on how big your scoops are * I use Chapman’s ice cream
Garnish
- 2.5 cups whipped buttercream icing (pictured) or whipped cream * I used Betty Crocker whipped vanilla buttercream
- rainbow spinkles
- birthday candles
Instructions
Crepes (see video “how to cook a crepe” in NOTES)
-
To prepare the crepe batter, combine both pastry flour and all-purpose flour, egg whites, milk, orange juice, cake batter extract, and vegetable oil in a blender or food processor. Blend until the mixture is completely smooth and free of any lumps. Once blended, allow the crepe batter to rest for 5-10 minutes; this critical step helps the flour hydrate for perfect crepes.½ cup cake and pastry flour, ½ cup all purpose flour, 4 egg whites, 1-¼ cups low-fat milk, 2 tablespoon orange juice, 1 teaspoon cake batter extract/flavouring, 1 tablespoon vegetable oil
-
Lightly spray an 8-inch nonstick skillet with cooking spray. Heat the skillet over medium-high heat until it is hot. Remove the skillet from the heat momentarily and pour ¼ cup of the prepared batter into the skillet. Immediately tilt the skillet in all directions to evenly cover the entire bottom surface with a thin layer of batter (refer to the video in the NOTES section for a visual guide).
-
Cook the crepe until its edges begin to brown and the batter has set in the center (this typically takes about 30 seconds to 1 minute). Using a thin spatula, carefully lift the edges of the crepe and then flip it over. Cook the second side for another 30 seconds to 1 minute, or until it is lightly browned and cooked through.
-
Transfer the cooked crepe to a plate to cool completely. Repeat this process with the remaining batter, aiming to make approximately 10 crepes. As you cook them, stack each finished crepe between sheets of parchment or wax paper to prevent them from sticking together.
Assembly
-
Lay a cooled crepe flat on a serving plate. Prepare your chosen icing by fitting a pastry bag with a 1M tip (or desired decorative tip) and filling it with frosting.
-
Place three generous scoops of your favorite vanilla ice cream into the middle of the crepe.5 cups vanilla ice cream
-
Carefully fold over one side of the crepe lengthwise towards the middle, covering the ice cream filling.
-
Then, fold over the other side of the crepe lengthwise towards the middle, completely encasing the ice cream.
-
For the final festive touches, pipe buttercream or whipped cream on top of the folded crepe, generously add rainbow sprinkles, and then insert birthday candles for a truly special presentation. Serve immediately to enjoy!2.5 cups whipped buttercream icing (pictured) or whipped cream, birthday candles, rainbow spinkles
Notes
*The ultimate trick for cooking perfect, delicate crepes is to use a hot pan. Once you pour in the ¼ cup of batter, immediately remove the pan from the heat and turn it (much like you would for an omelette) while moving the liquid batter until it spreads thinly and evenly over the entire surface of the pan. This technique ensures a perfectly round and uniformly thin crepe.
🎥 VIDEO GUIDE
If you are new to crepe making or would like a visual demonstration of the cooking technique, I highly recommend watching this instructional video: WATCH THIS VIDEO!
🌡️STORAGE & MAKE-AHEAD
- For convenience, the cooked crepes can be prepared ahead of time. Store them in the refrigerator for up to 3 days in a sealed airtight container, with parchment paper between each crepe to prevent sticking.
- Always store the ice cream separately in the freezer until you are ready for assembly. Similarly, store opened containers of frosting (or homemade frosting) in the fridge, also in a separate, airtight container.
- These crepes are also freezer-friendly! They can be frozen for up to 3 months. To freeze, simply lay the cooled crepes flat in a sealed container or a Ziplock freezer bag, ensuring there’s parchment paper between each one. Thaw in the refrigerator before using.
Expert Tips for Success- Use both flours for optimal texture. Combining pastry flour with all-purpose flour gives the crepes a tender texture while still providing enough structure to hold the filling without tearing.
- Always preheat your pan thoroughly. A hot, non-stick skillet is absolutely essential for preventing crepes from sticking and for achieving those desirable golden, delicate edges.
- Let the batter rest before cooking. Allowing the batter to sit for 5-10 minutes (or even longer) helps the flour fully hydrate and reduces air bubbles, resulting in smoother, more pliable, and less prone-to-tear crepes.
- Measure the batter for consistent crepes. Using a ¼ cup measuring cup for each crepe ensures they are all uniformly sized, which aids in even cooking and makes folding during assembly much easier.
- Go for high-quality ice cream. Since the ice cream is the undeniable star of this filling, choosing a premium brand or one known for real, quality ingredients (like Chapman’s or a similar high-end option) will significantly enhance the flavor and overall enjoyment.
- Keep components cold before assembly. Ensure your cooked crepes are completely cooled and your ice cream remains frozen until the last minute before you assemble. This crucial step minimizes melting and mess, leading to a much better presentation.
- Pipe frosting just before serving. Whipped frosting is easiest to pipe and holds its shape best when it’s slightly chilled. For the most appealing presentation, pipe the frosting onto the crepes just before you plan to serve them, preventing it from melting and losing its decorative touch.
- Customize with fun toppings. Don’t be shy with the decorations! Add extra sprinkles, mini candies, chocolate drizzles, or even small sparkler candles for an extra festive and personalized birthday breakfast or dessert experience.
- Make it interactive. Consider setting up a “Build Your Own Crepe” bar! Let kids (or adults) customize their crepes by offering a selection of different ice cream flavors, various toppings, and a choice of frostings. This makes the meal a fun, engaging, and memorable party activity.
