Melted Witch Halloween Bark: An Easy & Epic Halloween Dessert Recipe
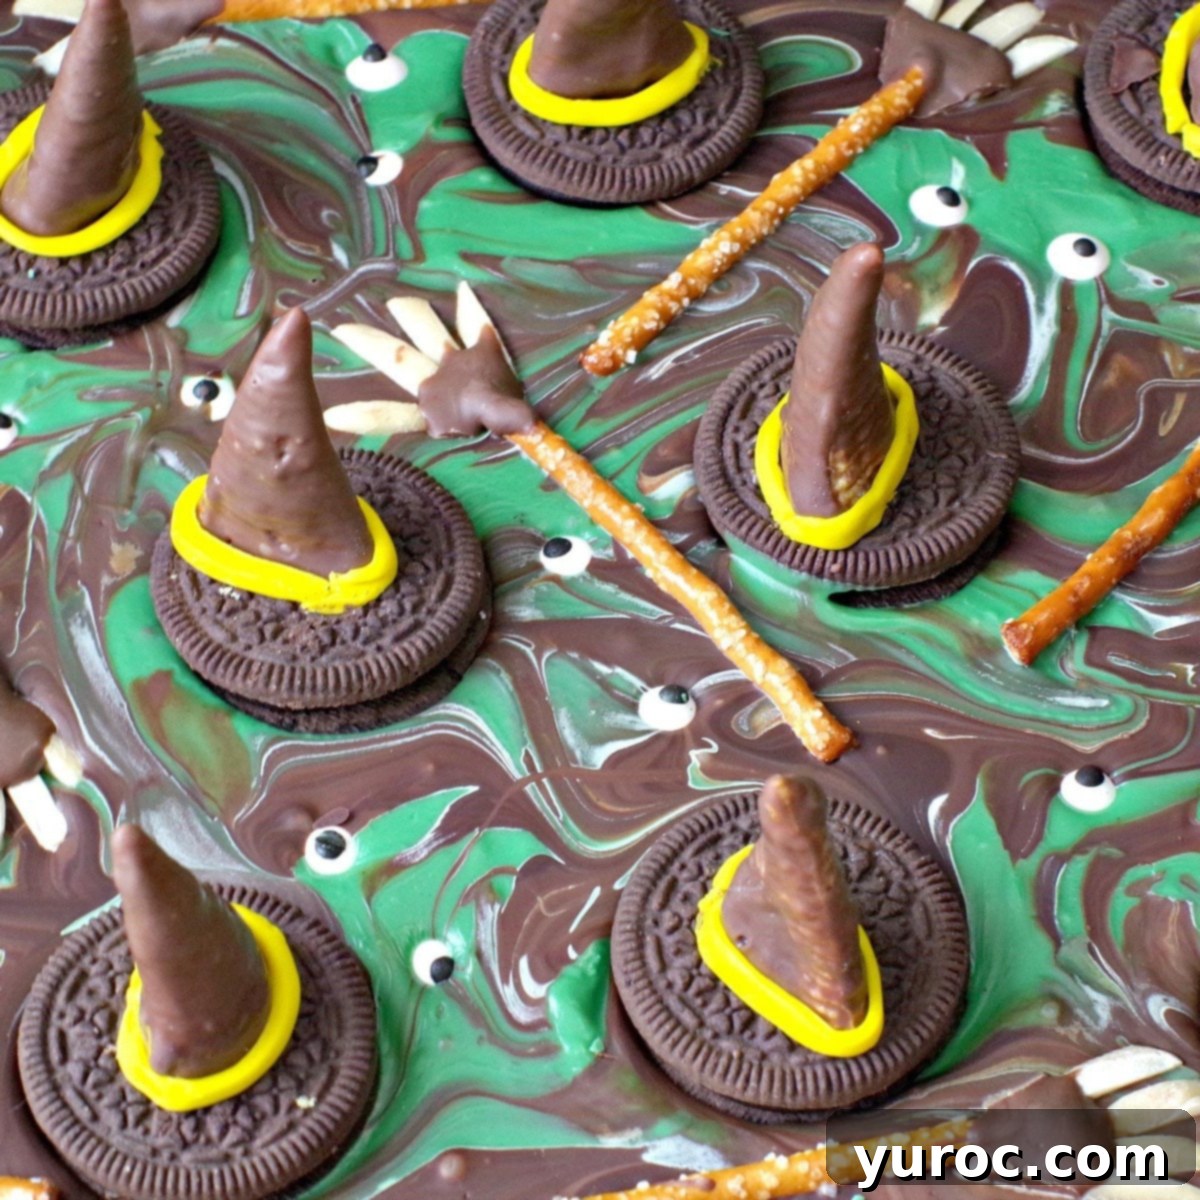
Remember that iconic scene from a classic movie where evil finally met its gooey end? Watching that witch melt away into a puddle was incredibly satisfying, wasn’t it? That unforgettable moment sparked the inspiration for this delightfully spooky and utterly delicious Melted Witch Halloween Bark Recipe! It’s the perfect sweet and savory treat to whip up for the Halloween season, guaranteed to be a hit at any Halloween party, and so easy to make that everyone, from kids to adults, will absolutely love it. Get ready to create an epic, edible spectacle that’s as fun to make as it is to devour!
In the enchanting world of movies, triumphing over evil often appears deceptively simple. As I grew up, I quickly realized that real life isn’t quite as straightforward as splashing water in the general direction of wickedness and watching it magically dissipate. However, over time, I’ve come to believe that perhaps the universe has its own subtle, profound ways of dealing with negativity – methods we may not fully grasp or easily explain. This thought often brings a whimsical sense of hope, much like the magic of Halloween.
[feast_advanced_jump_to]
If you’re searching for even more fantastic Halloween food ideas, don’t miss out on these incredible Halloween Potluck Foods!
🧙♀️ Ingredient Notes for Your Spooky Bark
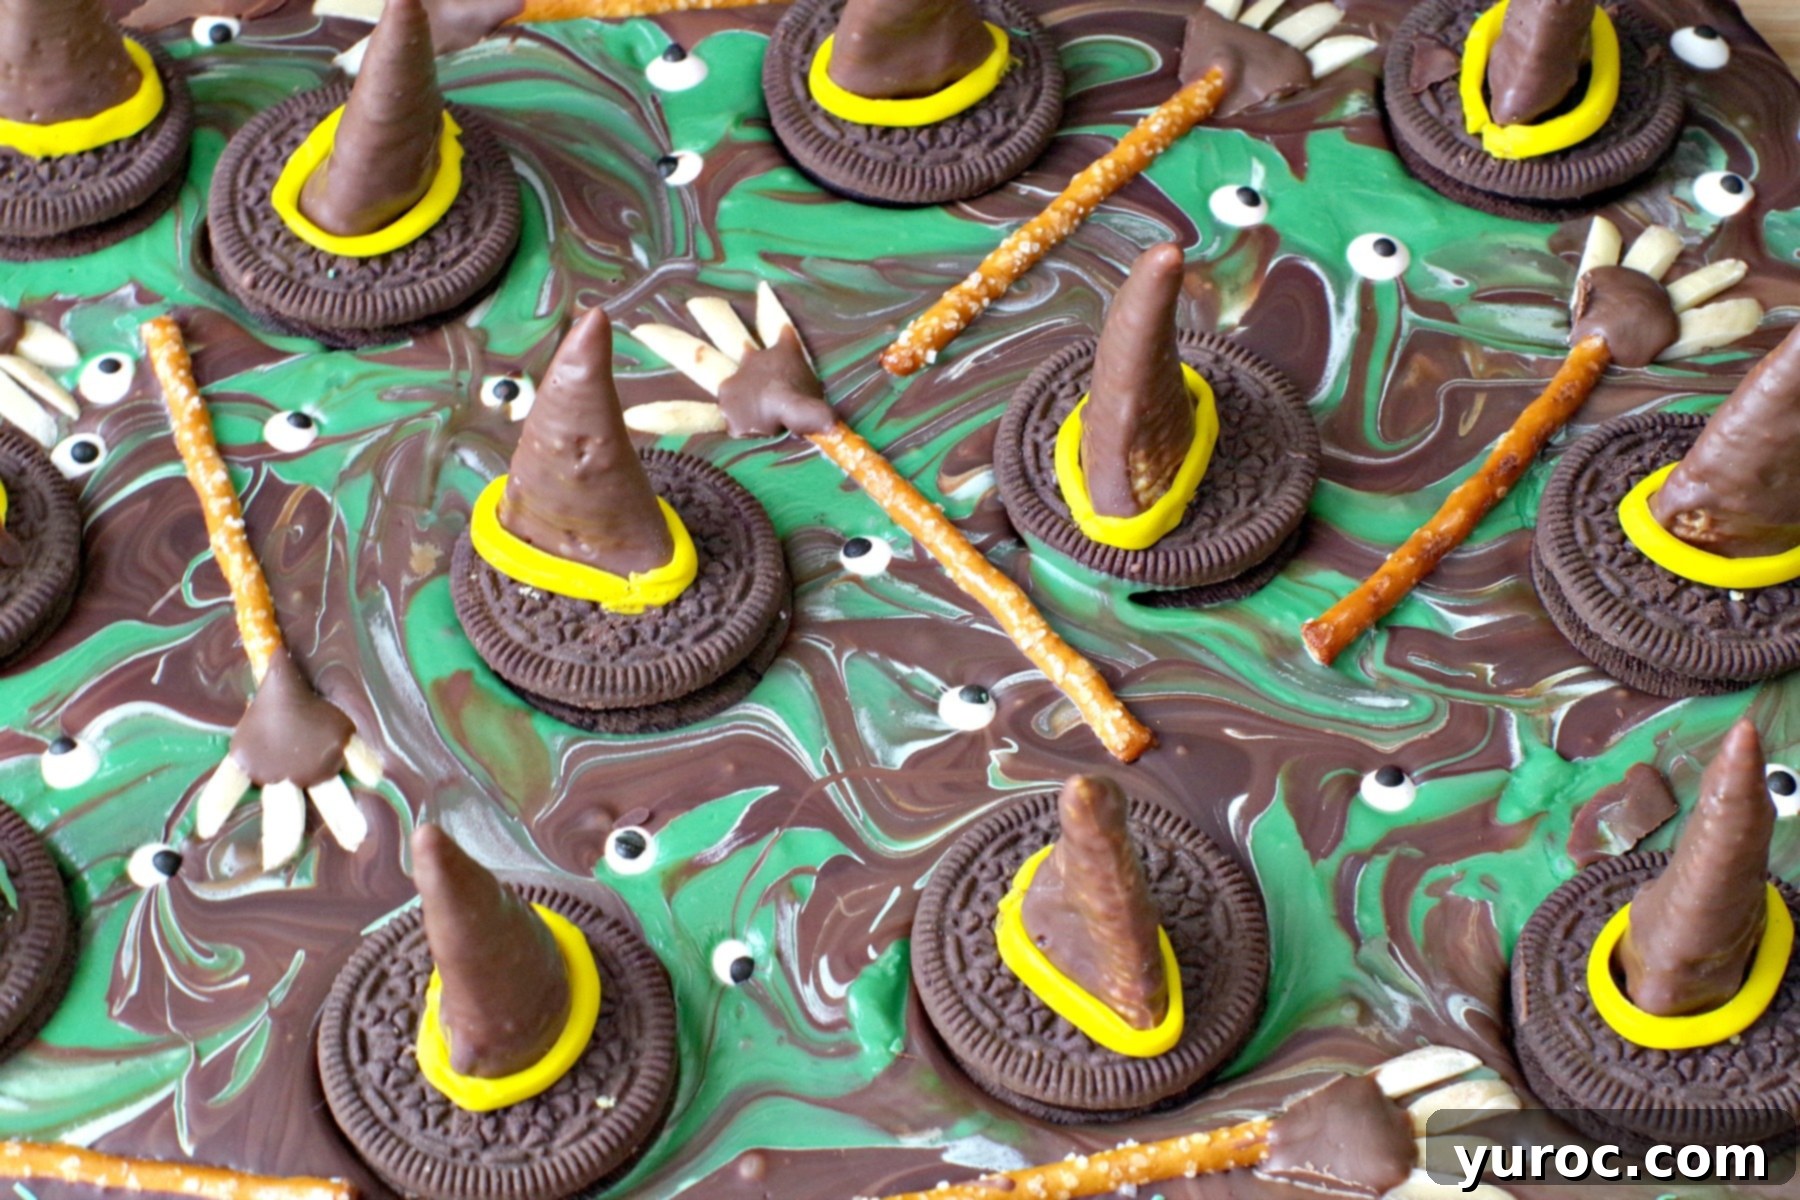
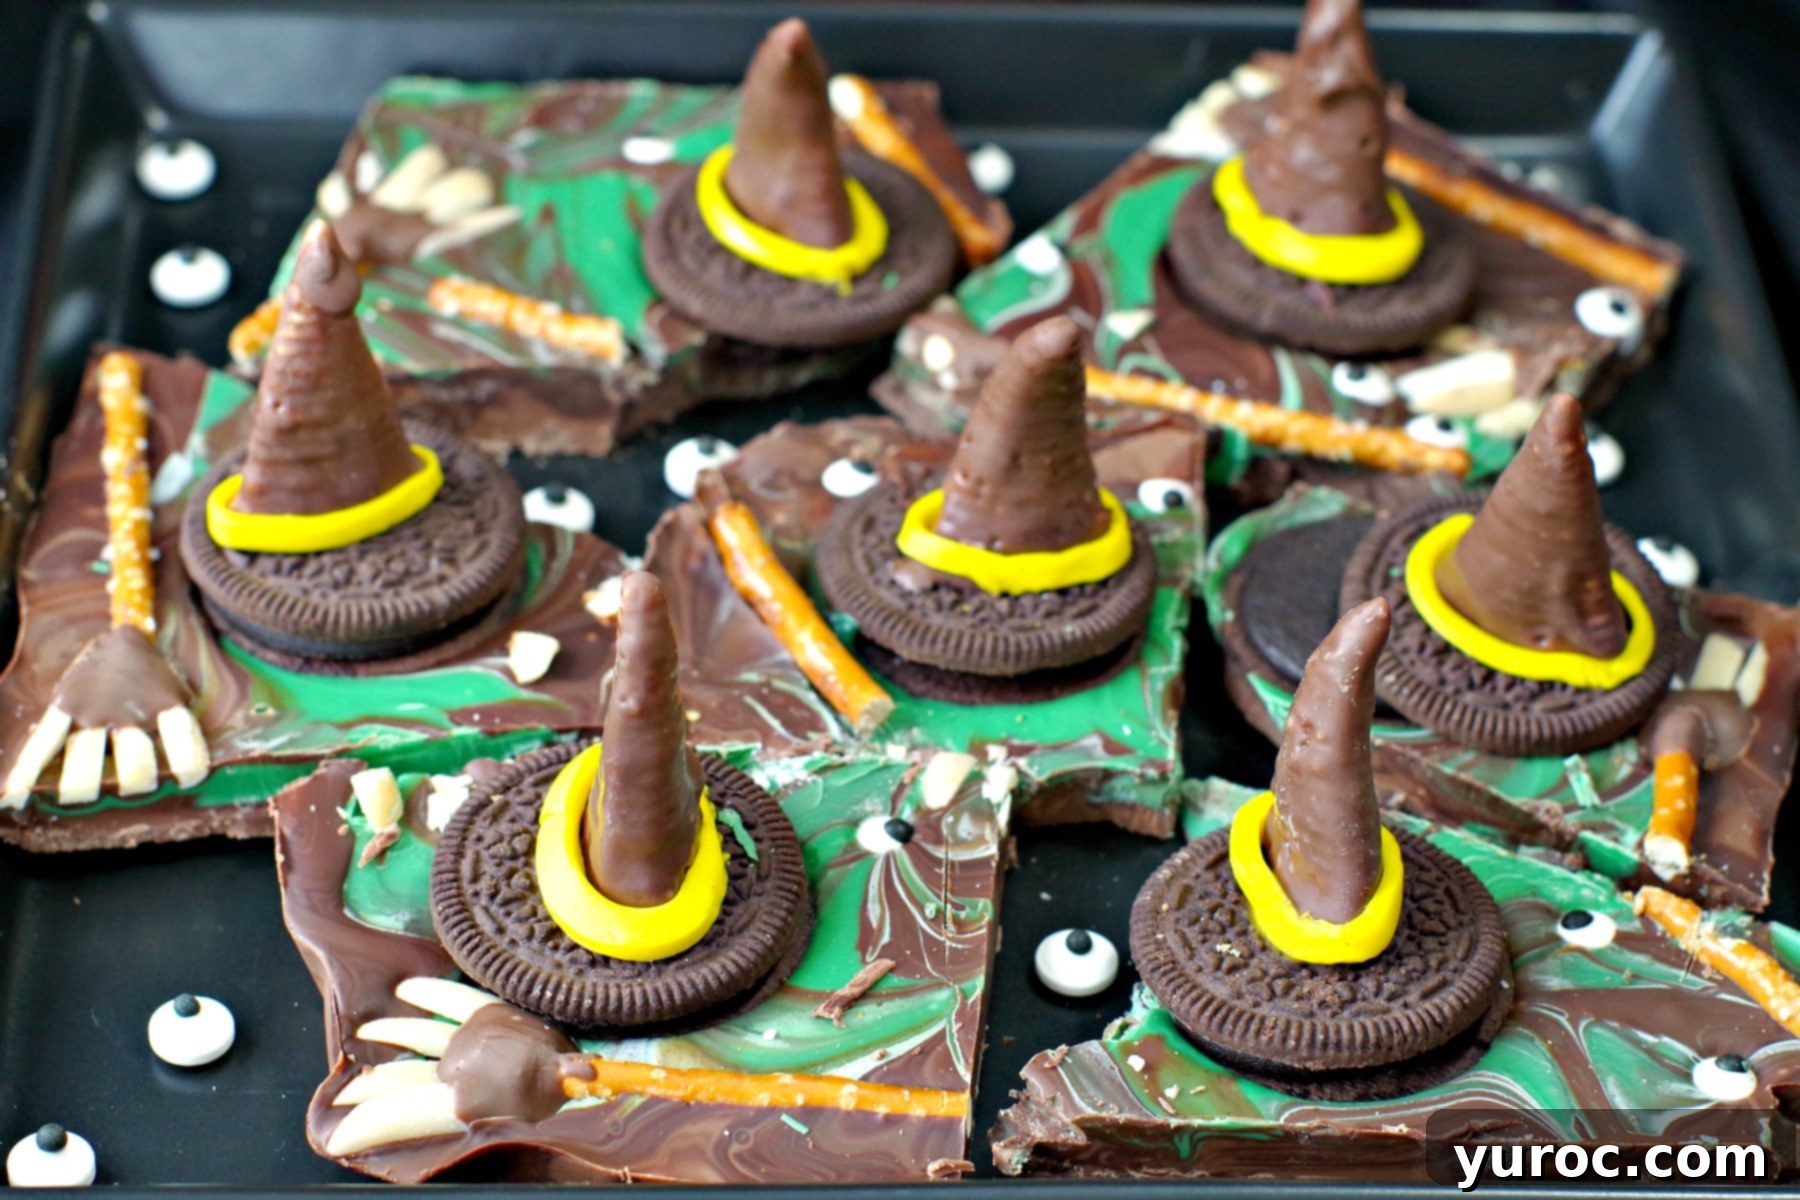
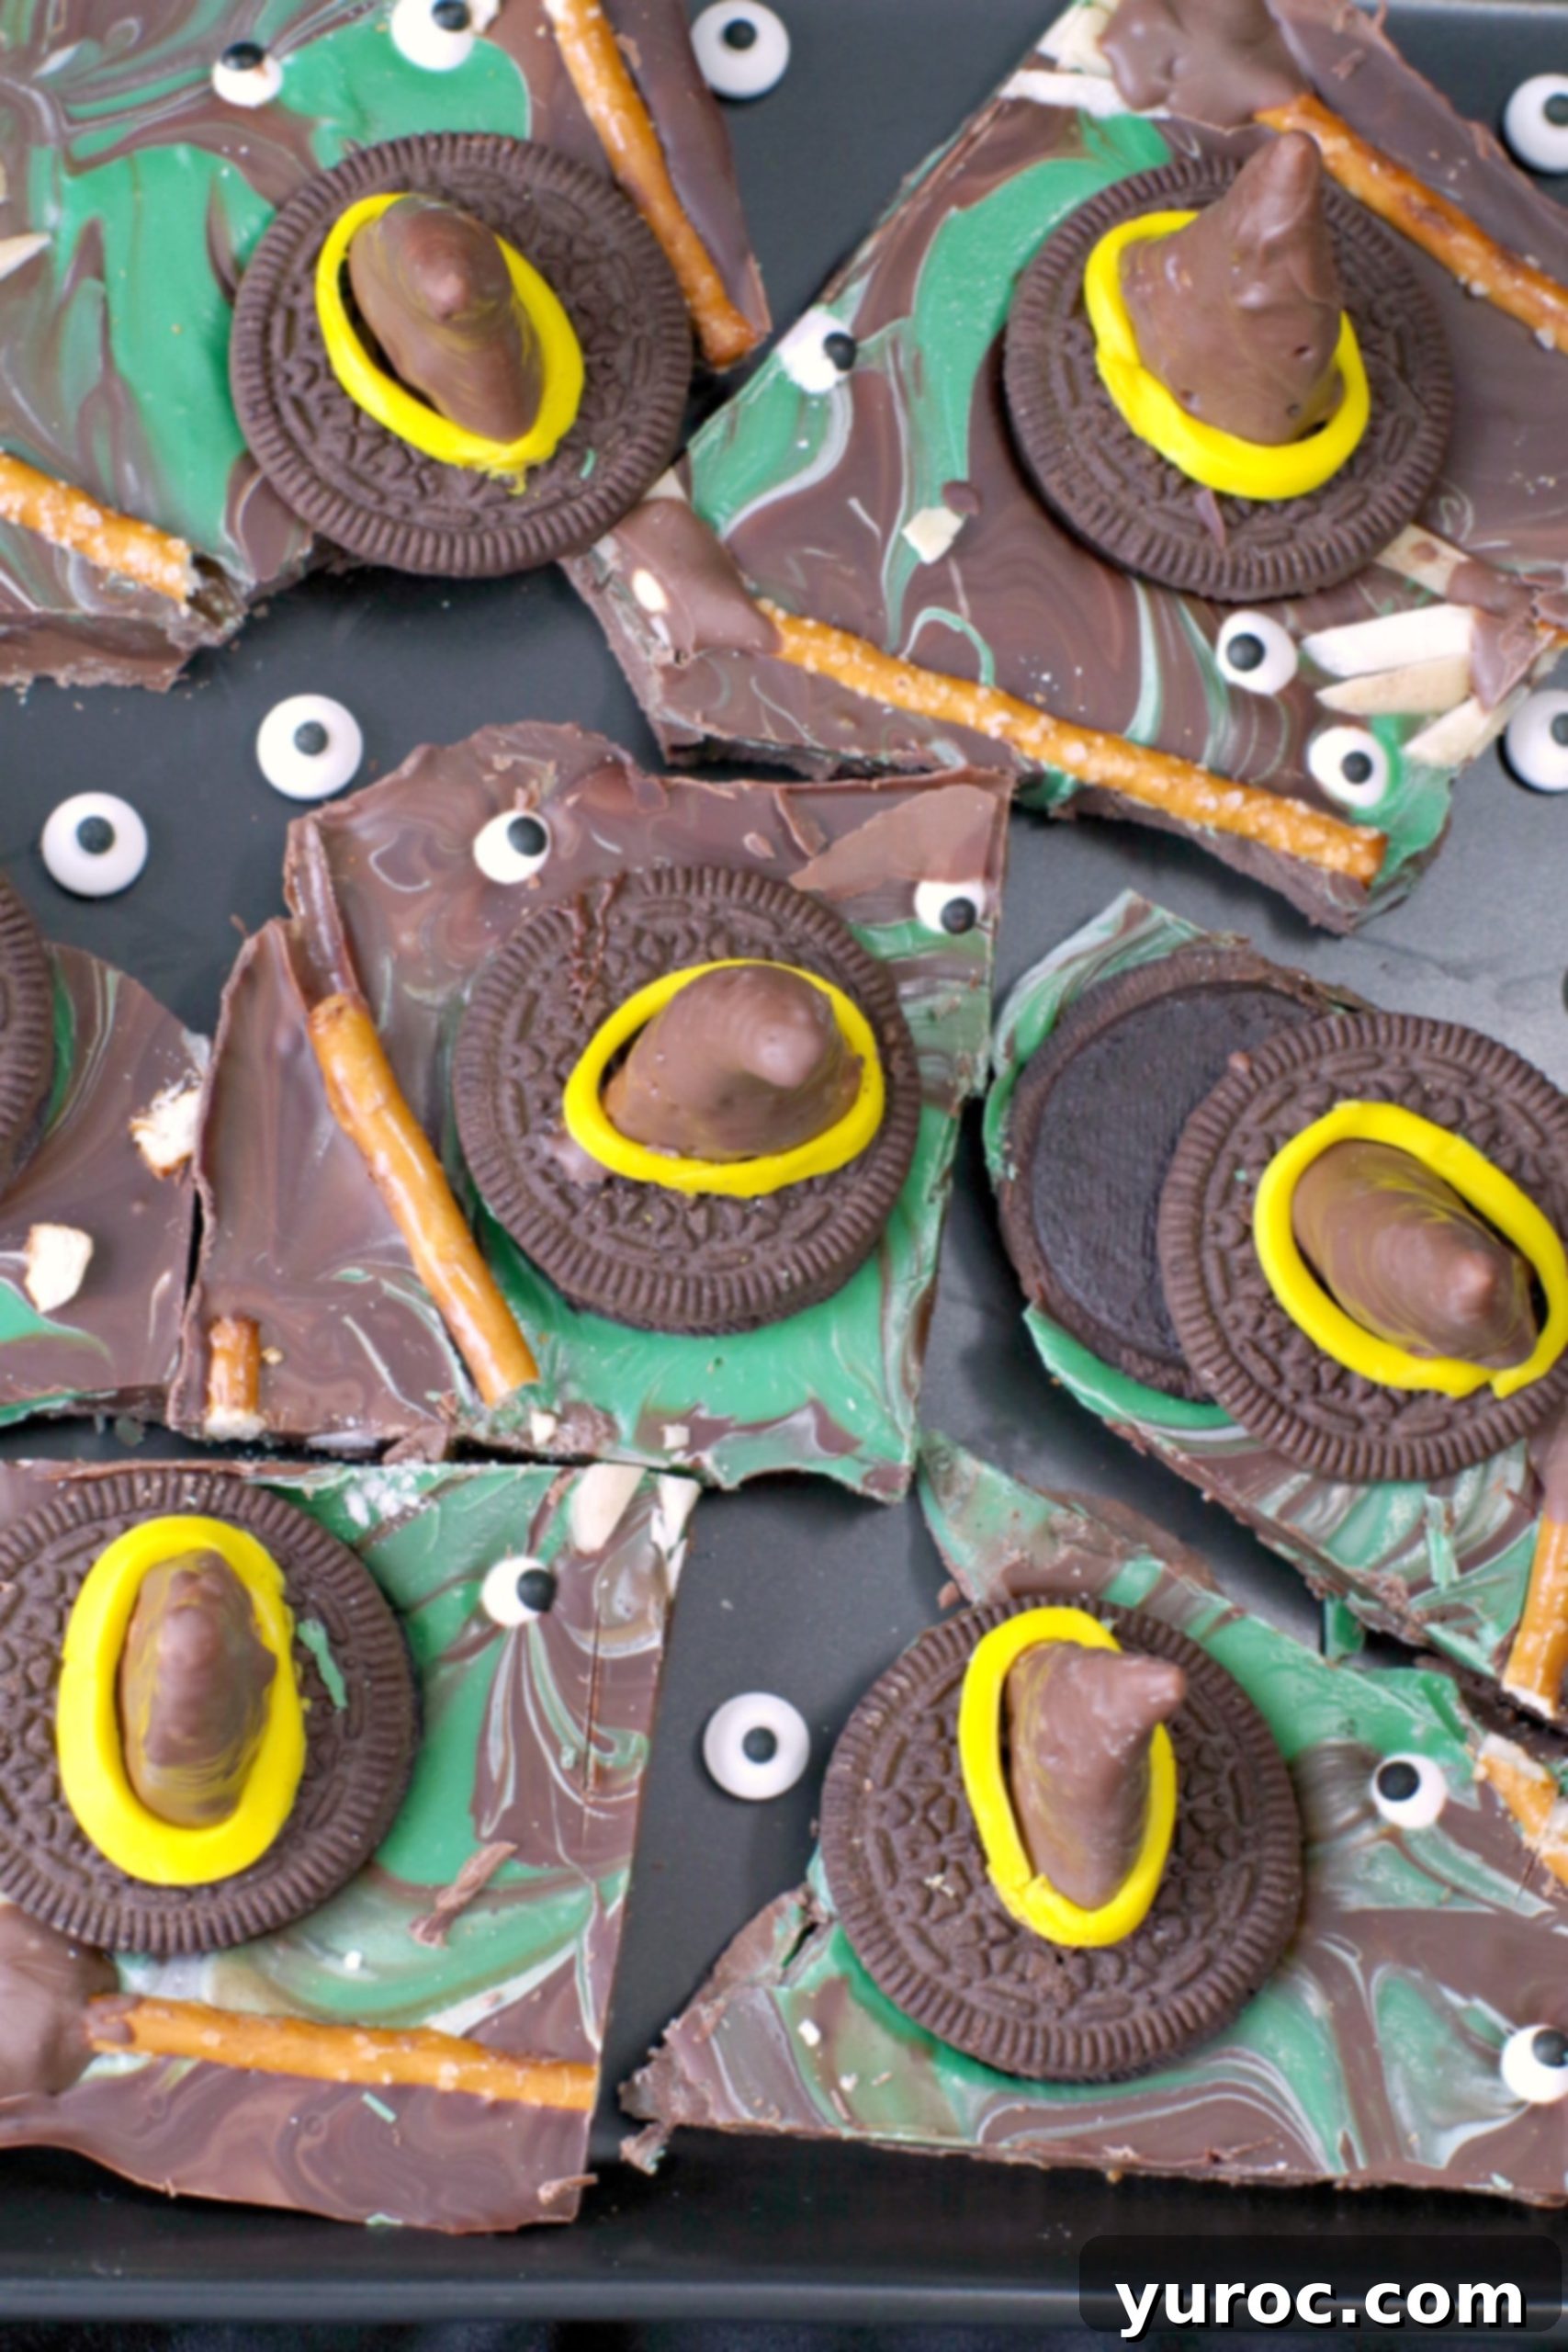
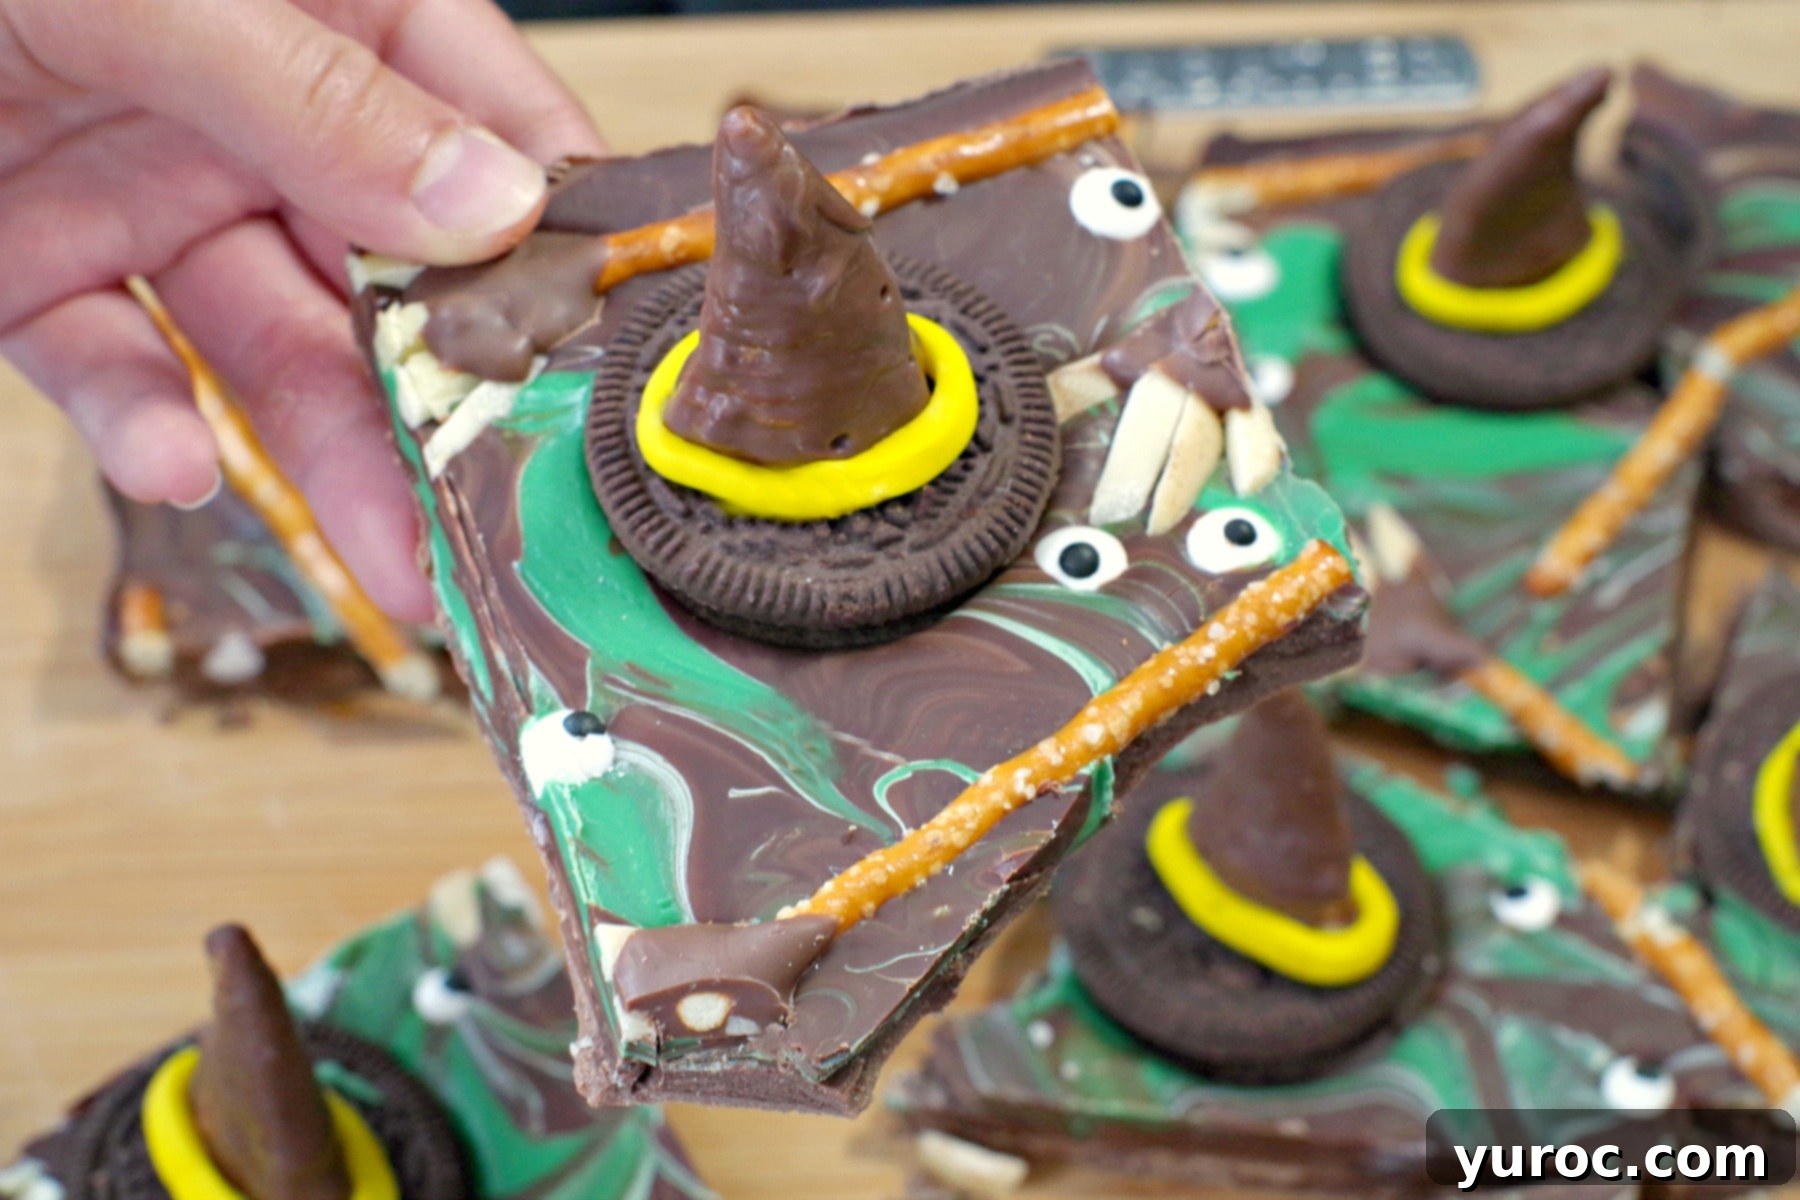
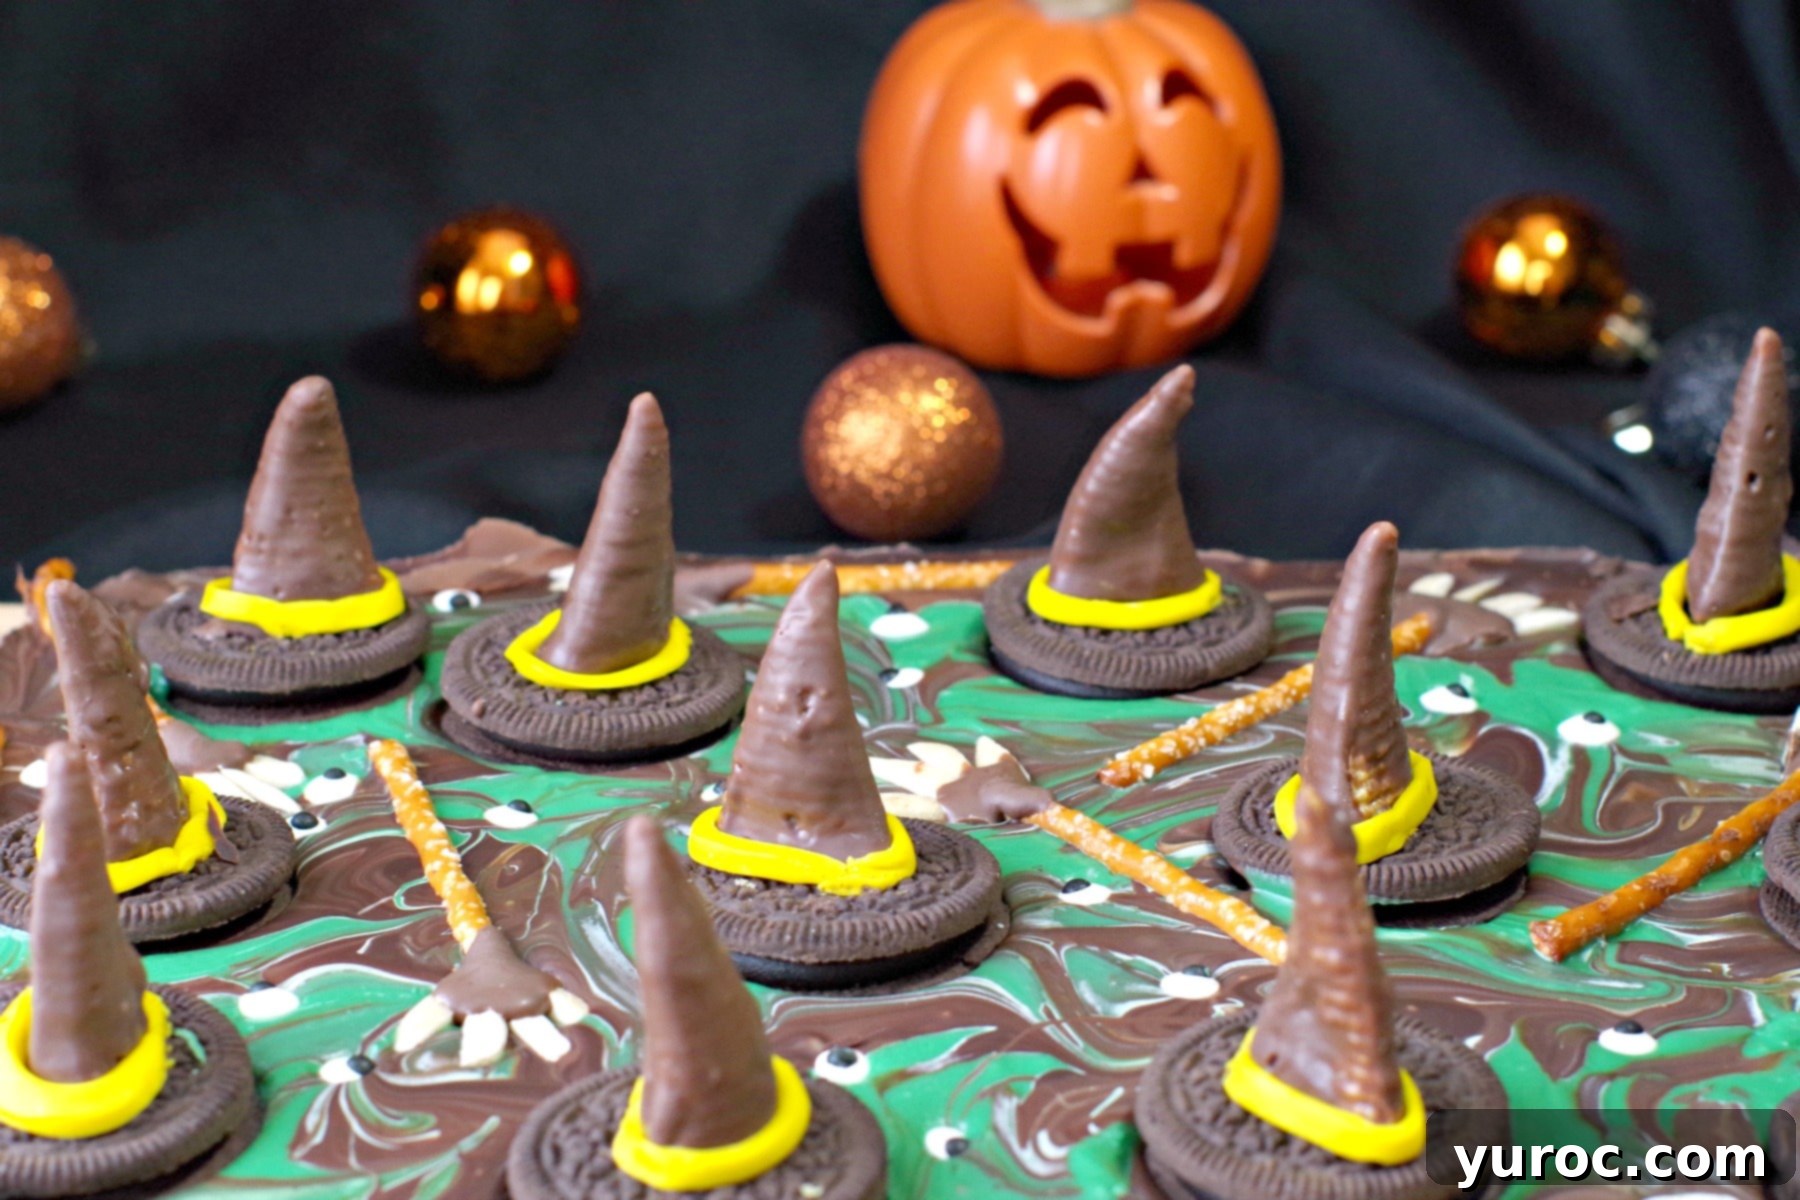
This Melted Witch Halloween Bark offers a delightful sweet and savory contrast, meticulously crafted from a combination of rich dark chocolate swirled into creamy milk chocolate. It features vibrant green candy melts to create those iconic “witch puddles,” whimsical chocolate-covered bugle cookie witch hats, playful candy eyeballs, and charming chocolate-almond pretzel witch brooms. This isn’t just a dessert; it’s a creative and really easy-to-make chocolate bark that promises a fun, delicious, and utterly festive Halloween treat for all!
- Chocolate Candy Melts: These are a dream to work with, designed to melt smoothly and hold their shape beautifully at room temperature. This means no worries about your gorgeous witch bark losing its magic if it sits out during your Halloween festivities! Choose high-quality melts for the best flavor and texture.
- Chocolate Cookies: For the base of your witch hats, classic Oreo cookies or Girl Guide cookies (any variety you prefer) work perfectly. The sturdy cookie provides a great foundation for the Bugle “hat.”
- Bugles: These conical corn snacks are ideal for creating the iconic pointy witch hat shape. Unfortunately, Bugles have been discontinued in Canada. If you’re in a region where they’re unavailable, don’t despair! Look for alternatives like “Tongari Corn,” a very similar Japanese snack often found in Asian supermarkets (such as A-Mart or T & T market). You can also experiment with other small, conical-shaped crackers or even shape modeling chocolate for a custom fit.
- Fondant (Yellow): A small amount of yellow fondant is used to create the iconic brim of the witch hats. You can easily find small boxes of pre-colored yellow fondant at most local craft stores (like Michael’s in Canada) or order it conveniently online from Amazon.
- Melting Chocolate (Milk Chocolate & Dark Chocolate): For the bark itself, a generous quantity of good quality melting chocolate is essential. I often purchase mine in bulk from stores like Bulk Barn, which is a more economical option, especially when you plan to make multiple batches or other chocolate treats. This versatile chocolate is also fantastic for my Christmas Chocolate Bark Recipe. You’ll need both milk chocolate for the base and a semi-sweet dark chocolate for swirling to achieve that perfect marbled effect.
- Candy Eyeballs: These add a wonderfully whimsical and slightly eerie touch to your melted witches. They are widely available during the Halloween season at most grocery stores, craft stores, or online via Amazon.
- Pretzel Sticks & Almond Slivers: These simple ingredients are transformed into charming witch brooms, adding a salty crunch that perfectly balances the sweetness of the chocolate.
The Wizard of Oz remains a timeless classic and truly one of my all-time favorite films. If you’ve somehow never experienced this magical movie, it’s an absolute must-watch! Beyond its powerful life lessons, the sheer gratification I felt watching evil literally melt into a puddle was an unparalleled experience in my short eight years on this earth. And honestly, nothing has quite matched it since! You can relive or discover the iconic melting witch scene from “The Wizard of Oz” by simply clicking the blue button below.
Watch the Melting Witch Scene HERE!
My adoration for this melted witch theme runs so deep that I even created another themed treat: this delightful and non-alcoholic Melting Witch Halloween Punch! It’s another fantastic way to bring a little bit of Oz magic to your spooky celebrations.
🔪 Easy Step-by-Step Instructions
Creating this Chocolate Bark is not only a fun and rewarding process but also incredibly easy, making it a perfect activity for kids to help with! The best part? It’s the delicious, edible embodiment of evil melting away – a truly satisfying Halloween project. This method is also far simpler than attempting to make individual melting witch puddles, allowing you to create a large, impressive treat with minimal fuss.
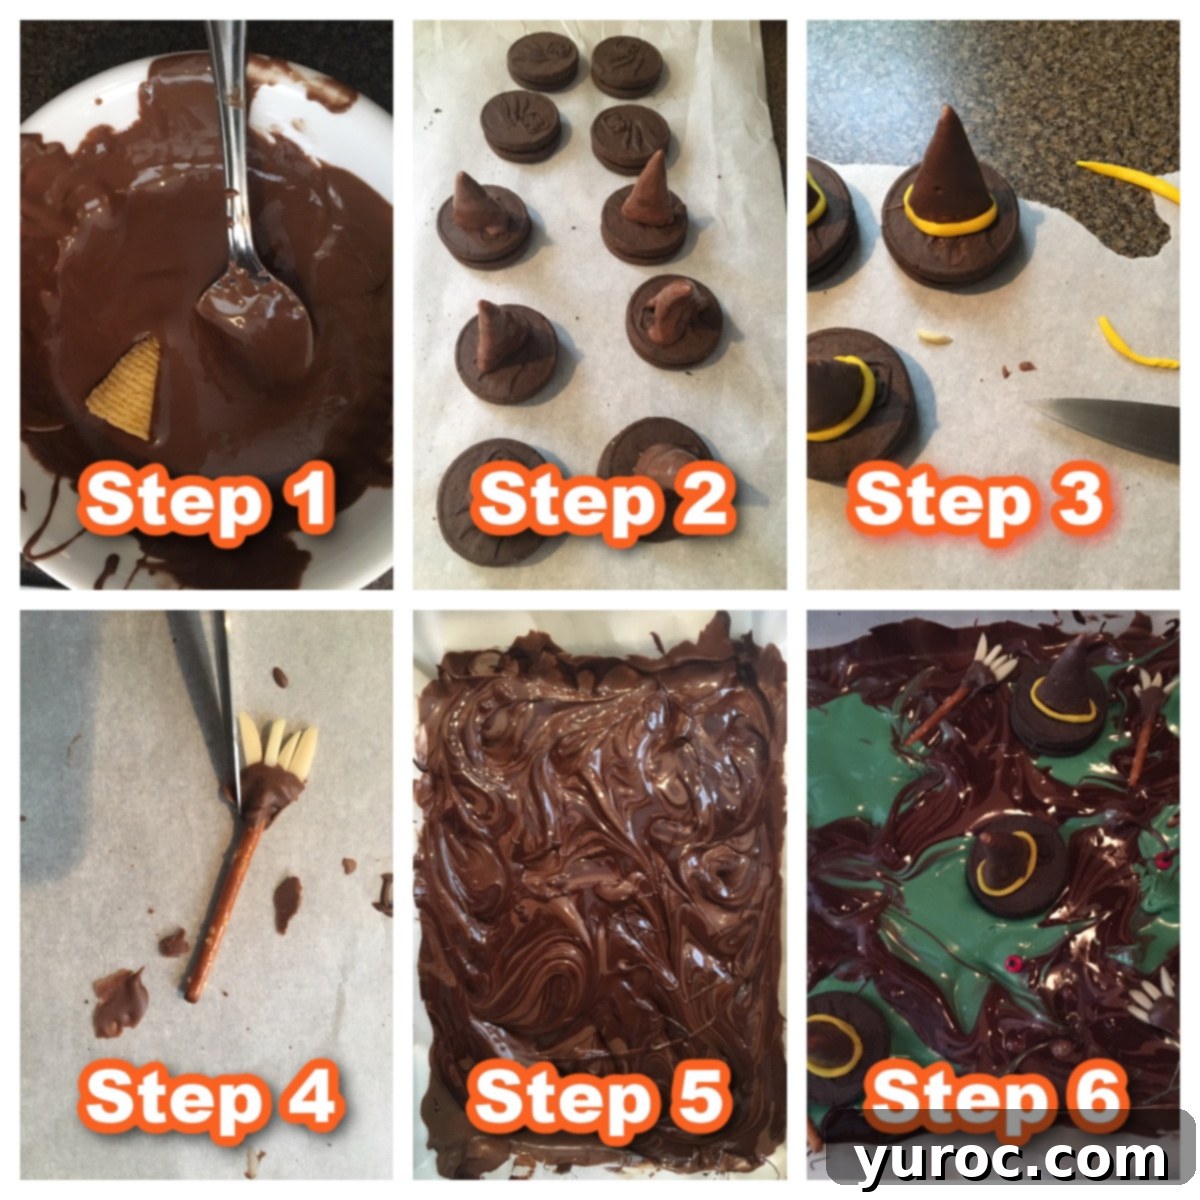
- Prepare the Witch Hats: Begin by melting your milk chocolate candy melts. Do this in a microwave-safe bowl on half power (50%) in short 30-second intervals. After each interval, remove the bowl and stir the chocolate thoroughly to ensure even melting and prevent burning. Continue until smooth. Dip each Bugle snack into the melted milk chocolate, covering it completely, then gently shake off any excess chocolate.
- Assemble the Hats: Immediately place the chocolate-dipped Bugles onto your chosen chocolate cookies, allowing the chocolate to act as an adhesive. Let them sit until the chocolate hardens completely, securing the Bugle to the cookie.
- Add Fondant Hat Brims: Once the chocolate on the hats is firm, take a small piece of yellow fondant and roll it into a thin “snake.” Carefully fit this fondant snake around the rim of each cookie hat, trimming any excess to create a neat, defined brim.
- Craft the Witch Brooms: Reheat any remaining milk chocolate candy melts if they have started to firm up. Dip one end of each pretzel stick into the melted milk chocolate, then lay it on a piece of parchment paper. While the chocolate is still wet, carefully add four almond slivers to the chocolate-dipped end of each pretzel to create the broom bristles. Spoon a tiny bit more melted chocolate over the base of the almond slivers to secure them. Allow these to harden fully. Once set, use a sharp paring knife to carefully trim the edges of the brooms, giving them a tidy, broom-like appearance.
- Create the Chocolate Bark Base: Line a large cookie sheet with parchment paper, ensuring it covers the entire surface for easy removal. Melt your main melting chocolate (milk chocolate or milk chocolate chips) in a medium microwave-safe bowl. Use 50% power in 30-second intervals, stirring well after each, until it’s perfectly smooth and melted. Alternatively, you can use the double boiler method for a gentler melt. Pour this melted milk chocolate evenly onto your prepared parchment-lined pan, spreading it to your desired thickness.
- Swirl in Dark Chocolate & Green Puddles: Next, melt the semi-sweet dark chocolate in the microwave using the same 50% power, 30-second interval method. Drop spoonfuls of this melted dark chocolate onto the spread milk chocolate. Use a knife to gently swirl the two chocolates together, creating a beautiful marbled effect. Melt the green candy melts in the microwave just like the other chocolates. Drop spoonfuls of the green candy melts onto the bark base to create distinct “puddles.” Using a knife, gently swirl only the edges of these green puddles to give them a melted, organic look.
- Decorate and Set: Evenly place your prepared cookie witch hats across the bark. You can certainly make extra hats and brooms if you wish to add more. Distribute your chocolate almond pretzel brooms throughout the bark. Finally, scatter the candy eyeballs evenly to bring your melted witches to life.
- Remove Air Bubbles & Harden: Firmly bang the bottom of the cookie sheet down on your counter 3-4 times. This crucial step helps to release any trapped air bubbles, resulting in a smoother, more solid bark.
- Chill and Serve: Set the finished bark aside in a cool place, or in the refrigerator, and allow it to harden completely for 1-2 hours. Once firm, break or cut the bark into desired pieces and serve your fantastic Melted Witch Halloween Bark!
🍽 Essential Equipment
To create this magical Halloween candy bark, you’ll need one or more baking sheets. If you plan on doubling this delightful recipe, ensure you have several large baking sheets available to accommodate the increased volume. Additionally, a sharp knife, such as a paring knife, will be essential for precise trimming of the witch brooms and for cutting the hardened bark into perfect, spooky pieces. Parchment paper is also highly recommended for lining your baking sheets, as it ensures easy removal and a mess-free process.
👪 Serving Size & Adjustments
This recipe for Melted Witch Bark typically yields approximately 18 generously sized pieces, perfect for sharing at a gathering. However, you have complete flexibility to break it into smaller, bite-sized pieces if you prefer. For convenience, you can easily adjust the recipe by clicking on the serving number in the recipe card and selecting your desired quantity – whether you want to half, double, or even triple the recipe. The ingredient quantities will automatically adjust, though you will need to ensure you have additional baking sheets if you’re making a larger batch.
🌡️ Storing Your Spooky Treat
How to Store Halloween Bark for Freshness
Once your Melted Witch Halloween Bark has completely set and been broken into pieces, it can be stored at room temperature for up to two weeks. For optimal freshness and to prevent melting, it’s best to keep it in an airtight container in a cool, dry place, such as your pantry, ideally at a temperature below 70ºF (21ºC). Personally, I often prefer to store it in the freezer, especially if I anticipate keeping it for longer than a few days. In the freezer, this delightful bark will remain fresh for up to two months, though in my experience, it rarely lasts that long before being enjoyed!
💡 Top Tips for Perfect Chocolate Bark
Crafting chocolate bark is wonderfully straightforward and makes for an incredibly easy Halloween treat because it requires no baking – you don’t even need to turn on your stove! Your microwave is your best friend here. Always remember to melt your chocolates and candy melts on half power (50%) and keep a very close eye on them. Overcooking chocolate can cause it to “seize,” transforming it into a crumbly, hard, and unusable mess.
And just like the Wicked Witch of the West, water is the arch-nemesis of chocolate and candy melts! Should they come into contact with even a drop of water, they will seize instantly. To ensure success, always double-check that all your bowls and utensils are perfectly dry before you begin the melting process. A little caution goes a long way in creating smooth, luscious bark!
A Little Bit of Karma
I genuinely strive not to harbor ill will towards anyone, understanding that such thoughts can create their own negative karma. Instead, I simply wish for others to receive exactly what they deserve, leaving the ultimate judgment to the universe itself. I find comfort in knowing that the intricate workings of karma will, more often than not, deliver justice in its own time.
In my humble experience, karma, much like a splash of water on a wicked witch, has a remarkable way of melting away the undesirable and subtly ridding the world of its various forms of “evil,” even if it’s just one small, satisfying moment at a time. And in the spirit of Halloween, enjoying a piece of this Melted Witch Halloween Bark can be its own sweet, karmic reward!
So, if you’re on the hunt for a truly fun, uniquely themed treat that’s absolutely perfect for the spooky season, you are going to adore this Melted Witch Halloween Bark! There’s something undeniably gratifying about sinking your teeth into a piece of a “melted witch” – almost as satisfying as watching one melt on screen. So, dig in, embrace the spirit of Halloween, and savor every delicious bite of this memorable Melted Witch Halloween Bark!
Comments & Reviews
Did you know that commenting and⭐rating recipes is one of the best ways to support your favorite recipe creators? If you loved this recipe, please comment and rate it in the recipe card or share photos on social media using the hashtag #foodmeanderings or tagging @foodmeanderings !

📋 Melted Witch Halloween Bark Recipe
Print Recipe
Pin
Save RecipeSave Recipe
Rate
Add to Shopping ListGo to Shopping List
Equipment
-
baking sheet
-
paring knife
Ingredients
Witch hats:
- ½ 340 g package of milk chocolate candy melts
- 12 chocolate cookies * I use girl guide, but you can use oreos or any kind
- 12 bugles
- fondant, yellow
Witch Brooms:
- 4 oz semi sweet dark chocolate
- 2 lbs milk chocolate (melting chocolate) * you can also use milk chocolate chips
- 48 almond slivers * approximately
- 12 pretzel sticks
Chocolate Bark:
- ½ 340 g package of green candy melts
- 18 white candy eyeballs or small red candy eyeballs approximately
Instructions
Witch Hats:
-
Melt the milk chocolate candy melts on ½ power in 30 second intervals. Keep checking, removing and stirring.
-
Dip each bugle in the melted chocolate candy melts and gently shake off excess.
-
Immediately place bugles onto cookies and allow to harden.
-
Once hardened, make a snake out of fondant and fit around the rim of each cookie hat, trimming to fit.
Witch Brooms:
-
Reheat the remaining milk chocolate candy melts if necessary. Dip one end of each pretzel stick into milk chocolate and lay on parchment paper. Add 4 almond slivers to each pretzel. Then spoon a little melted chocolate over the top of the almond sliver and let harden.
-
Once hardened, trim the edges of the brooms with a paring knife.
Chocolate Bark:
-
Line baking sheet with parchment paper. Melt melting chocolate (or milk chocolate chips) at 50% (½ power) in microwave safe bowl in 30 second intervals, stirring between, until melted. Pour onto prepare pan (lined with parchment paper).
-
Melt semi sweet chocolate in microwave the same as above. Drop by spoonfuls onto melted milk chocolate then swirl with knife to get desired effect.
-
Melt green candy melts in microwave same as chocolate, then drop by spoonfuls (to make puddles) Take a knife and only swirl at some of the edges to get the desired effect.
-
Place cookie witch hats evenly (you can make more and add more if you like). Then place the brooms evenly throughout (you can also make additional brooms). Add the eyeball candies evenly throughout.
-
Bang bottom of cookie sheet down on counter 3-4 times to remove air bubbles.
-
Set aside and allow to harden for 1-2 hours. Cut and serve
Notes
Nutrition
🎃 More Spooky & Sweet Halloween Recipes!
- Boo Batter Ice Cream (no churn)
- No Bake Boston Cream Halloween Pie
- Witches Brew Halloween Trifle (with jello worms): A Halloween Potluck Dessert
- Salted Toffee Halloween Caramel Apples
