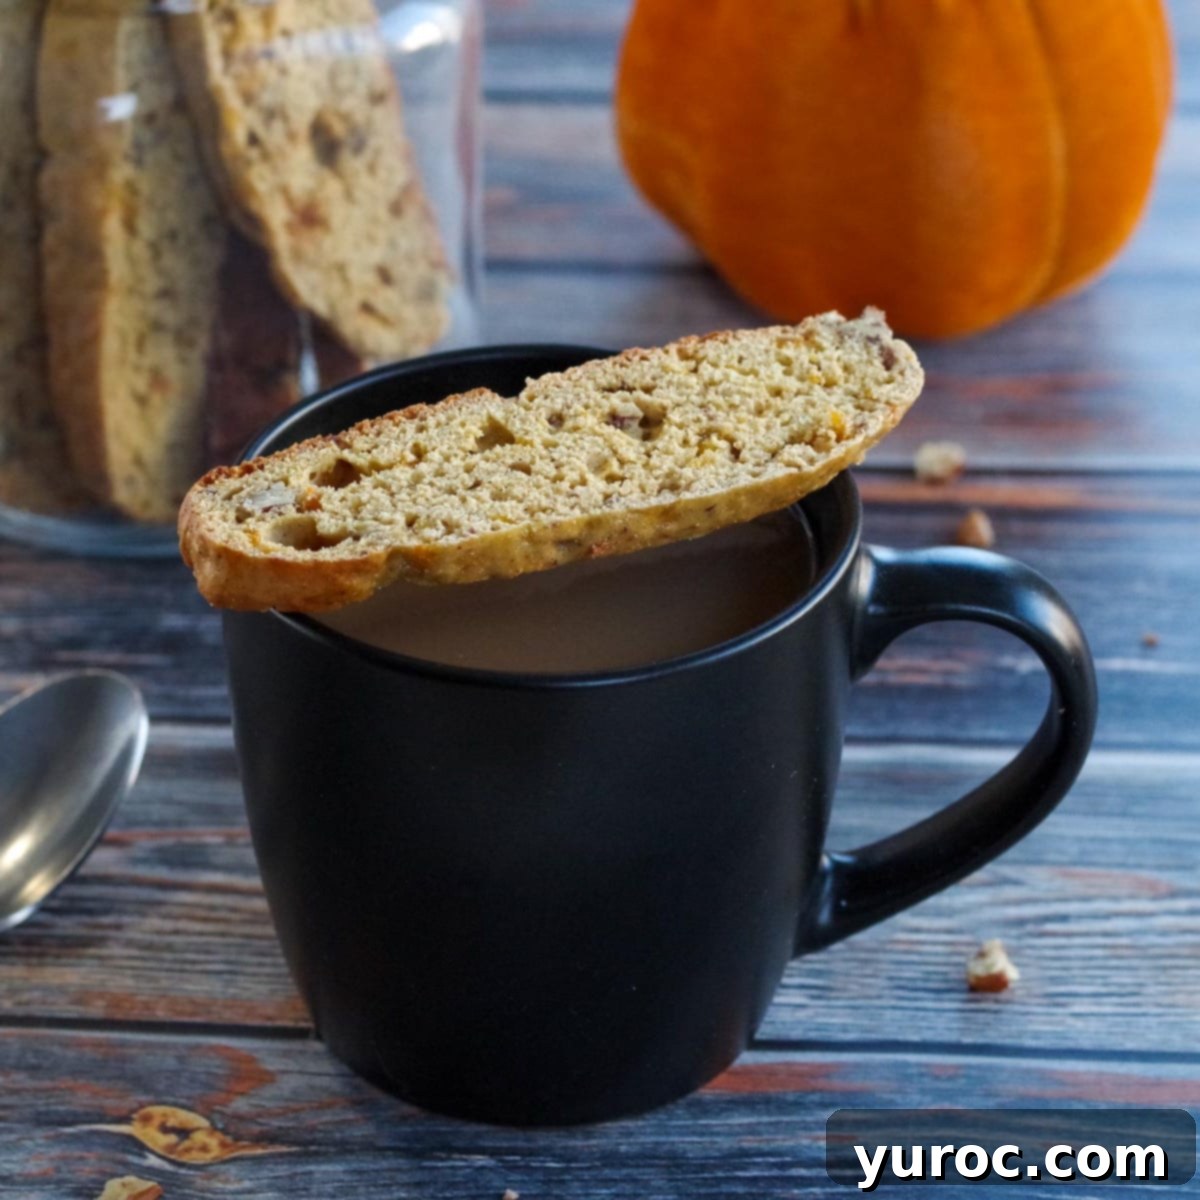
Healthy Pumpkin Biscotti Recipe: Easy, WW Friendly & Perfect for Fall
Embrace the cozy flavors of autumn with this incredible **Healthy Pumpkin Biscotti recipe**. Designed to be both easy to make and wonderfully delicious, this recipe is also **WW friendly**, making it an ideal treat for those mindful of their wellness goals. You’ll only need a modest ½ cup of pumpkin puree, making it a clever way to use up any leftovers from other seasonal recipes. Beyond being a delightful homemade indulgence, these biscotti are perfect for bringing along to a fall-themed work gathering or a weekend breakfast potluck, offering a wholesome and flavorful option for everyone to enjoy.
As late September arrives, the air fills with anticipation for pumpkin spice season, and what better way to celebrate than with these aromatic, twice-baked cookies? While these biscotti are certainly enjoyable any time of year, their rich pumpkin and warm spice profile truly shines during the crisp autumn months. This recipe draws inspiration from other beloved treats, like my classic Cranberry Pistachio Biscotti, and the delicious combination of pumpkin and dried apricot featured in my Healthy Apricot Bran Pumpkin Muffins. Crafting a pumpkin spice biscotti, complete with the satisfying crunch and delightful chew of dried fruit and nuts, was an absolute must-do.
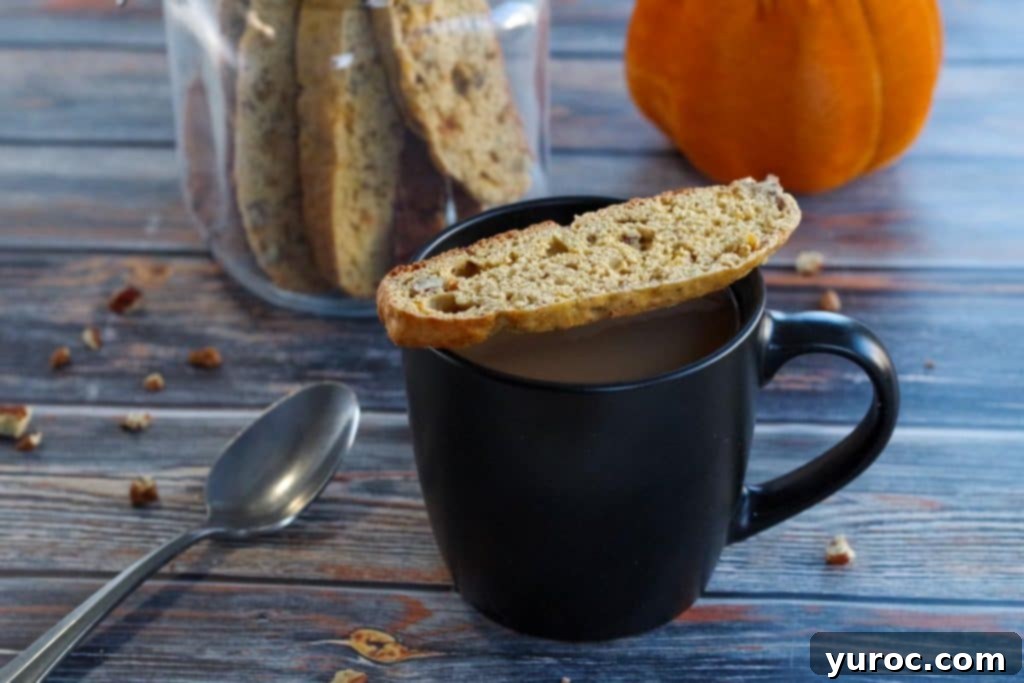
Why Choose Healthy Pumpkin Biscotti?
Biscotti are naturally a great choice for a snack or dessert due to their sturdy, crunchy texture, which makes them less prone to over-indulgence compared to softer cookies. This particular recipe takes that inherent advantage further by focusing on health-conscious ingredients. By substituting some traditional fats with nutrient-dense pumpkin puree and opting for low-fat cream cheese, we create a lighter version that doesn’t compromise on flavor or texture. This makes them perfectly suitable for a Weight Watchers lifestyle, allowing you to enjoy a festive fall treat without guilt. They pair wonderfully with coffee, tea, or even a glass of milk, providing a satisfying and wholesome bite any time of day.
The combination of classic Italian baking tradition with the beloved flavors of autumn makes this recipe truly special. It’s an opportunity to embrace seasonal ingredients in a form that’s both comforting and health-conscious. Whether you’re a seasoned baker or new to biscotti, you’ll find this recipe straightforward and incredibly rewarding.
[feast_advanced_jump_to]
If your love for healthy pumpkin recipes extends beyond biscotti, you’re in for a treat with my Healthy Pumpkin Cheesecake! It’s crafted to deliver all the rich, creamy goodness of a classic cheesecake with significantly fewer calories and less fat, proving that healthy can indeed taste amazing.
Essential Ingredients for Your Delicious Pumpkin Biscotti
While traditional biscotti are inherently less “fattening” than many other cookies due to their twice-baked nature, this recipe has been specifically lightened to be a truly **WW friendly biscotti**. We achieve this by thoughtfully incorporating pumpkin puree to replace some of the fat, contributing to both a healthier profile and a delightful texture. Here’s a closer look at the key components for these healthy pumpkin spice biscotti:
- Unsalted Butter: Using unsalted butter is a baker’s secret to controlling the exact salt content in your recipe. Ensure your butter is softened to room temperature for optimal creaming, which is crucial for the dough’s consistency.
- Pumpkin Purée: The star ingredient that gives these biscotti their signature flavor and moistness. You can use your own homemade pumpkin purée for the freshest taste, or opt for a good quality canned version. The most important tip here is to double-check that you are using pure pumpkin purée and absolutely NOT pumpkin pie filling, which is pre-sweetened and spiced, and will alter the recipe’s balance.
- Low-Fat Cream Cheese: To keep this recipe light and compatible with Weight Watchers, we use low-fat cream cheese. This ingredient adds a subtle tang, a hint of richness, and contributes to the overall tender crumb of the biscotti without adding excessive fat. For the best texture and flavor, a high-quality brand like Philadelphia is recommended.
- Brown Sugar: This provides a deeper, caramel-like sweetness compared to white sugar, enhancing the autumnal notes of the pumpkin and spices. It also contributes to a slightly more moist texture.
- Eggs: Essential binders that add structure, richness, and moisture to the dough. Like the butter and cream cheese, ensure your eggs are at room temperature for seamless incorporation into the batter.
- All-Purpose Flour: The primary dry ingredient providing structure. Accurate measurement is key; spoon the flour into your measuring cup and level it off with a straight edge to prevent adding too much, which can result in dry, dense biscotti.
- Baking Powder and Baking Soda: These leavening agents work in harmony to give the biscotti a gentle lift, preventing them from becoming too flat or overly dense.
- Salt: A small amount of salt is vital to balance the sweetness and intensify the flavors of the pumpkin and spices.
- Vanilla Extract: Pure vanilla extract adds a layer of warm, aromatic sweetness that beautifully complements the pumpkin and spice blend.
- Pumpkin Pie Spice: This pre-mixed spice blend is a fantastic time-saver, delivering that perfect combination of fall spices without needing to measure them individually. It typically contains cinnamon, ginger, nutmeg, allspice, and cloves.
- Ground Cinnamon: An additional touch of cinnamon further deepens the warm, inviting spice profile of these pumpkin biscotti.
- Dried Apricots: When finely chopped, dried apricots contribute a lovely chewiness and a sweet-tart flavor that harmonizes wonderfully with pumpkin.
- Chopped Pecans: These nuts offer a delightful crunch and a rich, buttery flavor that complements the other ingredients. Ensure they are finely chopped for even distribution.
*A comprehensive list of all ingredients and their exact quantities can be found in the detailed recipe card below.
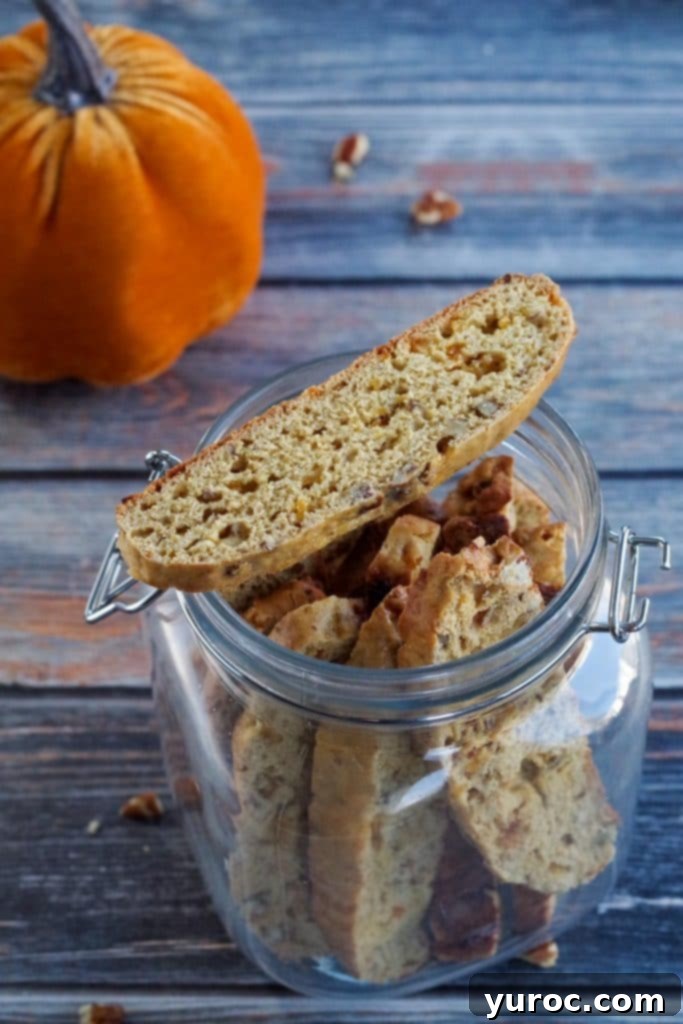
Customizing Your Healthy Pumpkin Biscotti: Creative Substitutions & Variations
One of the joys of home baking is the freedom to customize. This healthy pumpkin biscotti recipe is wonderfully versatile, allowing you to adapt it to your preferences or what you have on hand. Feel free to experiment and make it your own!
- **Butter Alternatives**: If you opt to use salted butter instead of unsalted, remember to simply omit the ¼ teaspoon of salt called for in the recipe to maintain a balanced flavor profile.
- **Nut Choices**: While pecans provide a delicious buttery crunch, you can easily substitute them. Blanched almonds are a classic choice for biscotti, offering a subtle flavor and crisp texture. Walnuts, on the other hand, will contribute a more pronounced, earthy taste that complements pumpkin spice beautifully. For a unique twist, consider using chopped hazelnuts.
- **Dried Fruit Varieties**: The dried apricots offer a fantastic chewy texture and a sweet-tart element. However, other dried fruits can be equally delightful. Raisins, dried cranberries (especially festive during the holidays), or even chopped dried cherries are excellent alternatives that will add different layers of flavor and color. Ensure any dried fruit is finely chopped to distribute evenly throughout the dough.
- **Pumpkin Pie Spice Blend (Homemade)**: If you don’t have a pre-mixed pumpkin pie spice, it’s simple to create your own! For every 1 teaspoon required in the recipe, you can substitute with a blend of **¾ teaspoon ground cinnamon + ¼ teaspoon of a combination of ground ginger, ground allspice, ground cloves, or ground nutmeg**. Adjust the ratios to suit your personal preference for spice intensity.
- **Pumpkin Purée Consistency**: Whether you prefer to use homemade pumpkin purée or a canned variety, the most critical point is to ensure it’s pure pumpkin purée. As reiterated, **do not use pumpkin pie filling**, as it contains added sugars and spices that will disrupt the intended flavor and moisture balance of the biscotti.
- **Adding Chocolate**: For an extra touch of indulgence, consider folding in ½ cup of miniature chocolate chips (dark, milk, or white chocolate would all be delicious) along with the dried fruit and nuts. The chocolate will melt slightly during the first bake and create pockets of gooey goodness.
- **Flavor Enhancements**: A hint of orange zest or a pinch of cardamom can be added to the dough for an additional layer of aromatic complexity, enhancing the existing spice profile.
- **Glaze and Drizzle Options**: Once your biscotti are completely cooled, you can elevate their presentation and taste with a simple glaze. A powdered sugar glaze (powdered sugar mixed with a touch of milk or lemon/orange juice) adds sweetness and a smooth finish. Alternatively, dipping one end in melted dark chocolate and allowing it to set creates a bakery-quality look and a decadent flavor contrast.
Crafting Your Own Pumpkin Biscotti: A Step-by-Step Guide
Baking biscotti is an incredibly rewarding process, yielding wonderfully crisp and flavorful cookies that are perfect for dipping. While the recipe does require a bit of patience due to essential chilling time, two distinct baking stages, and crucial cooling intervals, the delightful results are absolutely worth the investment of time. Precision and patience are your best allies here!
- **Prepare Your Add-ins:** Start by taking your dried apricots and pecans and finely chopping them. This can be done efficiently using a food processor, or if you prefer, a sharp knife and cutting board. Once chopped to a small, consistent size, set them aside.
- **Cream the Wet Ingredients:** In a large mixing bowl, using an electric mixer (either a hand mixer or a stand mixer fitted with the paddle attachment) on medium to high speed, beat the softened unsalted butter for about 30 seconds until it’s light and fluffy. Next, add the softened low-fat cream cheese, brown sugar, baking powder, baking soda, ground cinnamon, pumpkin pie spice, and salt. Continue to beat these ingredients until they are thoroughly combined and the mixture appears smooth and creamy.
- **Incorporate Pumpkin and Eggs:** Now, add the pumpkin purée to the mixture, beating until it is fully incorporated and no streaks of pumpkin remain. Then, beat in the two room temperature eggs one at a time, followed by the vanilla extract, mixing until everything is uniform and smooth. Using room temperature eggs prevents the mixture from separating or curdling.
- **Gradually Add Flour & Fold in Extras:** With your mixer set to a low speed, gradually add the all-purpose flour, mixing only until it’s mostly incorporated. Once the dough becomes too stiff for the electric mixer, switch to a large, sturdy spoon or a rubber spatula. Gently stir in any remaining flour until just combined, being careful not to overmix the dough, as excessive mixing can lead to tough biscotti. Finally, gently fold in the finely chopped pecans and dried apricots until they are evenly distributed throughout the dough.
- **Chill the Dough (Crucial Step):** Cover the bowl containing your prepared biscotti dough tightly with plastic wrap. Transfer it to the refrigerator and chill for a minimum of 2 hours, or until the dough is firm and easy to handle. This chilling process is vital; it prevents the dough from spreading excessively during the first bake and makes shaping the logs much simpler and cleaner.
- **First Bake – Shaping the Logs:** Once your dough is adequately chilled, preheat your oven to 350 degrees F (175 degrees C). Prepare a large cookie sheet (a jelly roll pan is often ideal due to its wider surface) by lightly greasing it with non-stick cooking spray or lining it with parchment paper. Divide the firm dough in half. On the prepared baking sheet, gently shape each half of the dough into a log approximately 12 inches long, about 4 inches wide, and between ½ to ¾ inch high. Ensure there is about 2 inches of space between the two logs to allow for any slight spreading during baking.
- **Egg Wash Application:** In a small separate bowl, whisk together the remaining 1 large egg with 1 tablespoon of water to create an egg wash. Lightly and evenly brush this egg mixture over the top and sides of both dough logs. This wash will contribute to a beautiful golden-brown color and a slightly crisp crust.
- **Initial Baking:** Place the baking sheet with the dough logs into the preheated oven. Bake for 25-30 minutes, or until the logs are lightly golden brown on the outside and firm to the touch. They should appear slightly puffed.
- **Cooling Before Slicing (Absolutely Critical):** Remove the cookie sheet from the oven. It is absolutely crucial to allow the baked logs to cool completely on the cookie sheet for at least 1 hour, or until they are fully firm. Attempting to slice warm logs will inevitably lead to crumbling, as they need to set properly before being cut.
- **Second Bake – Slicing and Crisping:** Once the logs are completely cool and firm, preheat your oven to a slightly lower temperature of 325 degrees F (160 degrees C). Carefully transfer the cooled logs to a sturdy cutting board. Using a very sharp serrated bread knife, cut each log diagonally into ½-inch thick slices. Use a gentle, confident sawing motion with minimal downward pressure to achieve clean, non-crumbling slices.
- **Final Baking for Crispness:** Arrange the sliced biscotti, cut sides down, back onto the prepared cookie sheet. Bake them in the preheated oven for 5-10 minutes, or until the bottoms are lightly golden brown. Then, carefully turn each slice over and bake for another 5-10 minutes, or until both sides are dry, crisp, and beautifully golden. This second bake is what gives biscotti their characteristic dry, crunchy texture.
- **Final Cooling and Storage:** Once fully baked, transfer the biscotti to a wire cooling rack and allow them to cool completely to room temperature. They will continue to crisp up as they cool. Once thoroughly cooled, they are ready to be served or stored in an airtight container as outlined in the “Storage” section of the notes. Enjoy your perfectly homemade, healthy pumpkin biscotti!
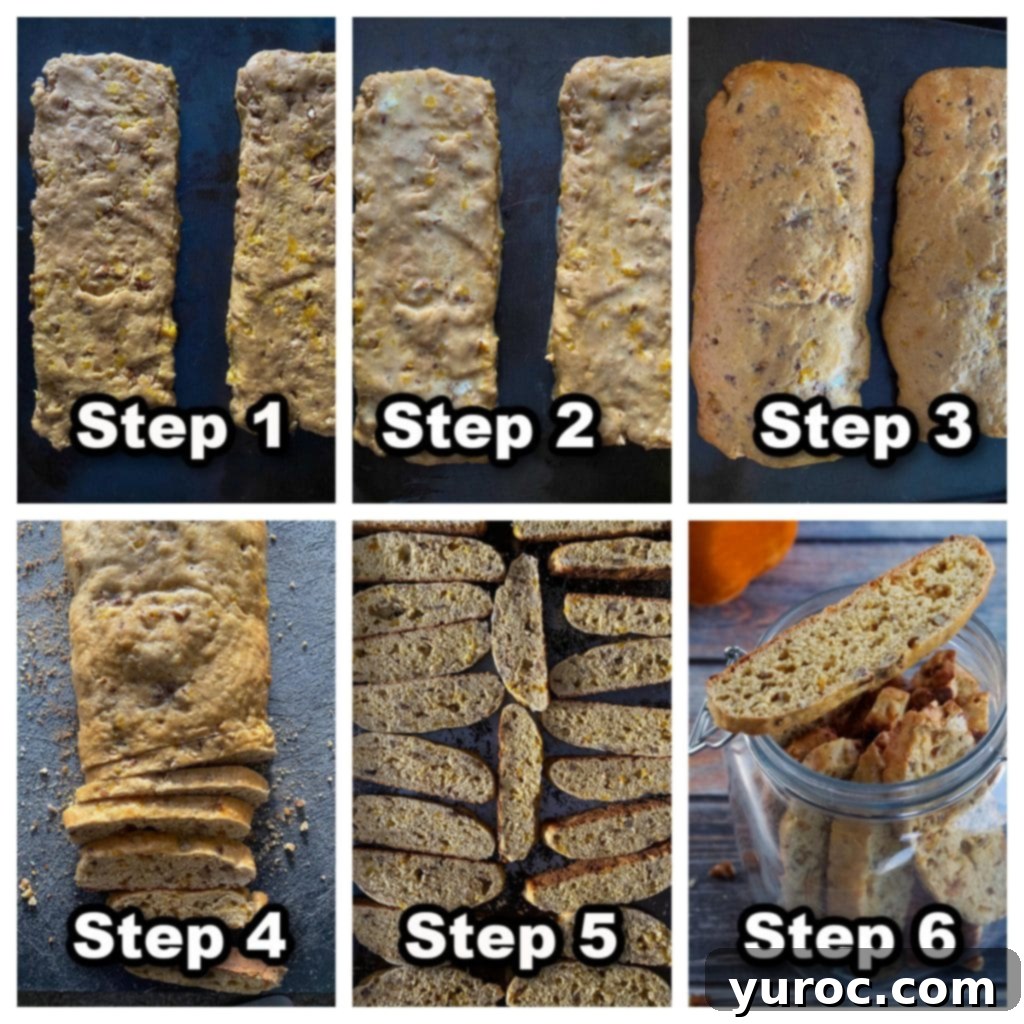
*For the most precise instructions and ingredient measurements, always refer to the complete recipe card found below this section.
A Critical Hint: The key to perfectly structured biscotti that don’t crumble during slicing is ensuring they are COMPLETELY cooled between the first and second baking stages. This patience is truly the secret ingredient for success!
Expert Tips for Perfect Pumpkin Biscotti Every Time
To ensure your homemade healthy pumpkin biscotti achieve that ideal crispness, flavor, and visual appeal, keep these expert baking tips in mind. They’ll help you navigate common challenges and master the art of biscotti making:
- Always Use Room Temperature Ingredients: This is a golden rule in baking, especially for doughs. Make sure your butter, cream cheese, and eggs are all at room temperature before you begin mixing. This allows them to cream together much more smoothly and effectively, creating a well-emulsified, lump-free dough that bakes evenly and consistently. Cold ingredients can lead to a lumpy batter and an uneven bake.
- Do Not Skip the Dough Chilling Step: The 2-hour chilling period for the dough is non-negotiable. Chilling is vital because it firms up the dough, making it significantly easier to handle and shape into neat, uniform logs without them becoming sticky or losing their form. Furthermore, cold dough is less prone to spreading excessively in the oven during the first bake, which helps maintain the desired shape and thickness of your biscotti.
- Master the Confident Cut for Slicing: When it’s time to slice the cooled logs, use a very sharp serrated bread knife. The key is to make clean, decisive diagonal slices using a gentle, almost “sawing” motion with minimal downward pressure, rather than forcing the knife through. Excessive pressure or a dull knife can cause the partially baked logs to crumble, resulting in uneven or broken biscotti.
- Adjust Second Baking Times Based on Slice Thickness: The duration of the second bake directly correlates with the thickness of your biscotti slices. Thinner slices will dry out and crisp up faster, potentially requiring only 5 minutes per side. Conversely, thicker slices might need an additional minute or two per side to become thoroughly dry and crisp all the way through. It’s crucial to watch them closely during this stage to prevent over-baking, which can result in overly hard or even burnt biscotti.
- Bake on Parchment Paper for Even Browning & Easy Release: For consistent baking results and effortless cleanup, always line your baking sheets with parchment paper. This provides a non-stick surface, ensuring your biscotti don’t stick, and also helps to promote more even browning by moderating direct heat contact with the pan.
- Allow Complete Cooling Before Dipping or Storing: Biscotti continue to dry and crisp up significantly as they cool to room temperature on a wire rack. It is absolutely crucial to let them cool completely before considering any dipping in chocolate or transferring them to an airtight container. Storing warm biscotti will trap moisture, leading to condensation inside the container, which will soften your perfectly crisp cookies.
- Customize and Elevate the Flavor: Personalize your biscotti for an extra special touch! A light sprinkle of turbinado sugar on top of the logs before the first bake adds a lovely sparkle and a bit of extra crunch. For a more gourmet finish, once the biscotti are fully cooled, dip one end into melted dark, milk, or white chocolate, or drizzle them with a simple citrus glaze made with powdered sugar and orange zest for added brightness.
- Perfect for Thoughtful Gifting: Homemade biscotti make excellent gifts that are always appreciated. Once your pumpkin biscotti are completely cooled and dried, package them beautifully in clear cellophane bags tied with festive ribbons, or arrange them neatly in decorative tins or glass jars. They hold up remarkably well, making them a delicious and thoughtful edible present, especially cherished during the holiday season or as a thank-you gesture.
- Avoid Overmixing the Dough: When you are incorporating the flour into the wet ingredients, mix only until the flour is just combined. Overmixing the dough can overdevelop the gluten in the flour, which will result in tough, dense biscotti instead of the desired tender-crisp texture. Mix until no dry streaks of flour remain, then stop.
Recommended Equipment for Baking Perfect Biscotti
Having the right tools can make all the difference in ensuring a smooth and successful baking experience. For this homemade healthy pumpkin spice biscotti, you’ll need a few essential kitchen items:
- **Electric Mixer:** An indispensable tool for creaming butter and cream cheese, and for thoroughly mixing the dough. Both a hand mixer and a stand mixer will work perfectly to ensure a smooth, well-aerated batter.
- **Large Sheet Pan (or Jelly Roll Pan):** You’ll need at least one large baking sheet to accommodate the dough logs during the initial bake and the individual biscotti slices during the second baking stage. A jelly roll pan is often preferred for its slightly raised edges, which can help shape and contain the dough.
- **Food Processor:** While entirely optional, a food processor can significantly speed up the process of finely chopping the dried apricots and nuts, ensuring they are evenly sized for consistent distribution in the dough. If you don’t have one, a sharp chef’s knife and a cutting board will suffice.
- **Sharp Serrated Bread Knife:** This is a crucial item for achieving clean, uniform slices during the second stage of biscotti preparation. A good bread knife allows you to slice through the semi-firm logs with minimal effort and prevents crumbling.
- **Wire Cooling Rack:** Essential for allowing the biscotti to cool completely and develop their signature crisp texture. Proper air circulation around the cookies is key to preventing them from becoming soft.
- **Measuring Cups and Spoons:** Accurate measurement is the foundation of successful baking. Ensure you have a reliable set for both dry and liquid ingredients.
- **Large Mixing Bowls:** You’ll need at least one spacious mixing bowl to comfortably combine all the dough ingredients.
Yield, Serving Suggestions, and Adjusting Your Recipe
This healthy pumpkin biscotti recipe is designed to be quite generous, typically yielding a substantial batch of between 38 and 48 individual pieces. The exact number will vary slightly depending on how thinly or thickly you choose to slice the logs during the second baking stage. Keep in mind that thicker slices may require an additional minute or two of baking time per side to ensure they become perfectly crisp all the way through.
Despite the considerable yield, these flavorful and wholesome cookies are so delightful, you might find that they disappear faster than expected, prompting you to bake a second batch! For your convenience, the recipe is easily adjustable. Simply click on the serving number in the recipe card, and you’ll have the option to half, double, or even triple the recipe, with all ingredient amounts automatically adjusting accordingly. This feature is incredibly useful whether you’re baking for a small family treat, preparing for a large holiday gathering, or making them for gifting.
These versatile pumpkin biscotti are wonderfully suited for a variety of occasions:
- Enjoy them as a sophisticated accompaniment to your morning coffee, espresso, or tea.
- Serve them as a lighter, yet utterly satisfying, dessert after any meal.
- They make an impressive and much-appreciated contribution to potlucks, brunches, and festive holiday parties.
- Package them beautifully for thoughtful homemade gifts for friends, family, and colleagues.
- Keep them on hand for a wholesome and satisfying snack at any time of day, perfect for satisfying sweet cravings the healthy way.
Weight Watchers Friendly Pumpkin Biscotti: Guilt-Free Indulgence
For those following the Weight Watchers (WW) program, this pumpkin biscotti recipe is a game-changer. It has been carefully developed to offer all the rich, comforting flavors of fall with a significantly reduced point value. Each delectable piece of this healthy pumpkin biscotti comes in at a mere **2 WW points**, making it an outstanding choice for a satisfying treat that aligns perfectly with your wellness goals. You can indulge in the deliciousness of homemade biscotti, flavored with the essence of autumn, without compromising your daily point allowance. This recipe proves that you don’t have to sacrifice flavor for healthy eating!
Storing Your Homemade Pumpkin Biscotti for Optimal Freshness
One of the many benefits of biscotti is their excellent shelf life, especially when stored correctly. This makes them a perfect make-ahead treat or a thoughtful gift. Proper storage is key to preserving their signature crisp texture and delightful flavor:
- **Room Temperature Storage:** Once your homemade pumpkin biscotti have completely cooled to room temperature, store them in an airtight container. A large sealed glass jar or a sturdy cookie tin works wonderfully for this purpose. When stored in an airtight environment, these biscotti will maintain their fresh, crisp quality and delicious taste for up to 7 days. Ensure they are fully cooled before sealing them to prevent any condensation from forming, which could lead to softness.
- **Freezing for Extended Freshness:** For longer-term storage, these biscotti freeze beautifully, allowing you to enjoy them for up to 3 months. Simply place the completely cooled biscotti in a freezer-safe airtight container or a heavy-duty freezer bag. If stacking layers, you might want to separate them with a piece of parchment paper to prevent sticking. I often prepare a large batch and immediately transfer them to the freezer once cooled, taking out a few pieces whenever a craving strikes.
- **Thawing and Reheating Instructions:** When you’re ready to enjoy a frozen biscotti, simply remove it from the freezer and allow it to thaw at room temperature for a few minutes. For those times you’re in a hurry or prefer a slightly warm biscotti, a quick 10-second zap in the microwave will do the trick, or you can crisp them gently in a toaster oven.
Frequently Asked Questions About Baking Pumpkin Biscotti
After the second bake, your biscotti should feel noticeably dry and wonderfully crisp to the touch, but they shouldn’t be rock hard. Remember that they will continue to firm up and achieve their ultimate crispness as they cool completely on a wire rack. To avoid over-baking, which can result in an unpleasantly tough or burnt texture, look for a light golden-brown color on both sides as your primary visual indicator.
The most common culprit for crumbling biscotti is impatience – specifically, attempting to slice the baked logs before they have had ample time to cool completely after their first bake. The logs need to be thoroughly cooled and fully firm to prevent breakage. Additionally, using a dull knife or applying too much downward pressure instead of a gentle sawing motion with a sharp serrated knife can also cause the biscotti to crumble. Patience during the cooling phase is truly the key to beautifully intact slices!
Chilling the dough is a critical step that serves multiple important purposes. First and foremost, it allows the fats within the dough to firm up, making the dough much easier to handle and shape into neat, consistent logs without it being overly sticky or soft. Secondly, cold dough spreads significantly less when introduced to a hot oven. This helps the biscotti maintain their desired shape and prevents them from spreading too much during the initial bake, ensuring a well-formed final product. This step directly impacts both the texture and the aesthetic appeal of your biscotti.
Yes, absolutely! This is a fantastic way to spread out your baking process and is particularly helpful when preparing for events or holidays. You can prepare the biscotti dough up to two days in advance. After you’ve mixed in the nuts and dried fruit, cover the bowl tightly with plastic wrap and store it in the refrigerator. When you’re ready to bake, remove the dough from the fridge about 15-20 minutes before you plan to shape it, allowing it to soften just slightly, which will make it easier to work with. Then, proceed with shaping and baking as directed in the recipe.
Didn’t find the answer you’re looking for?
Ask AI to answer based on this specific recipe
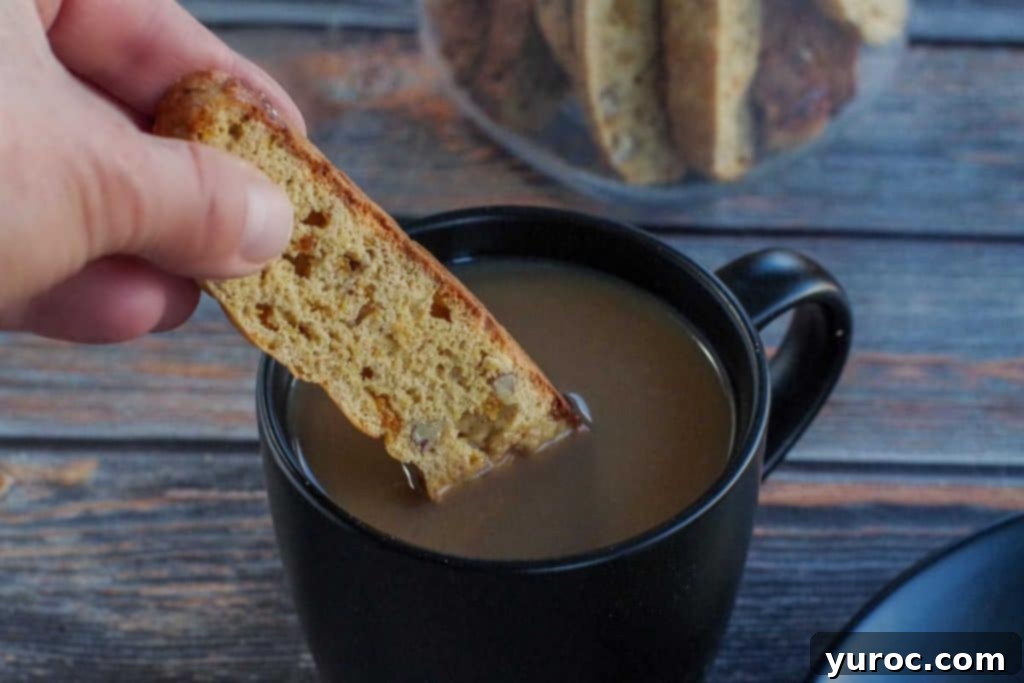
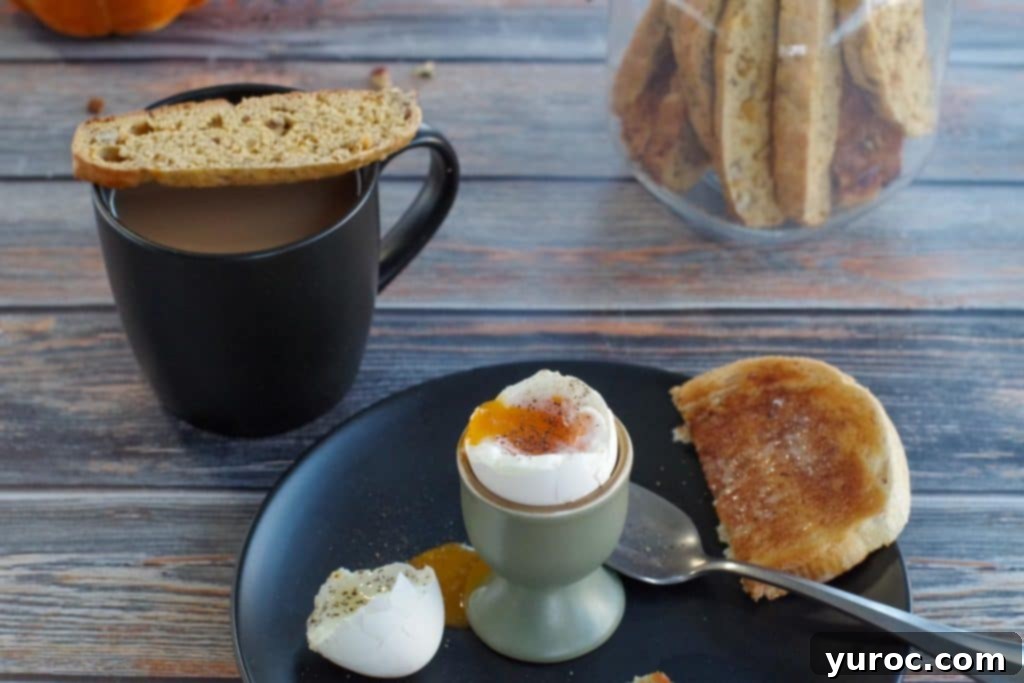
This healthy pumpkin biscotti truly excels as a “breakfast dessert” or a delightful coffee-break companion. Imagine dunking a crisp, perfectly spiced biscotti into a hot cup of coffee, tea, or even a glass of cold milk – it’s a small moment of pure bliss. They are also incredibly suitable for contributing to a breakfast or brunch potluck, where their unique flavor and wholesome appeal are sure to make them a standout. Don’t forget to stash a few in your bag for a wholesome and delicious treat during your next work coffee break!
If your culinary quest includes healthy biscotti recipes, specific **WW pumpkin recipes**, or simply wholesome **healthy pumpkin recipes** that are completely free from artificial sweeteners, then this pumpkin biscotti is precisely what you’ve been searching for! It delivers on all fronts, providing authentic fall flavor with a health-conscious twist.
For more delectable and **WW friendly biscotti** options that perfectly balance flavor with wellness, be sure to explore my Chocolate Marble Biscotti and my Chocolate Zucchini Biscotti. Each offers a unique flavor profile while adhering to healthy eating guidelines!
Discover More Delicious & Healthy Pumpkin Recipes
The versatility of pumpkin extends far beyond just sweet baked goods. If you’ve been captivated by the comforting and nutritious qualities of pumpkin in this biscotti recipe, you’ll be thrilled to explore other ways to incorporate this wonderful seasonal ingredient into your meals. From savory dishes to more delightful desserts, here are some fantastic pumpkin recipes to inspire your cooking:
- Healthy Pumpkin Soup (without cream)
- Pumpkin Pie Sheet Pan Pancakes
- Coconut Pumpkin Chicken
- Crustless Pumpkin Pie (Weight Watchers)
Did your family ❤️ this recipe? Did you know that commenting and ⭐ rating recipes is one of the best ways to support your favorite recipe creators? If you LOVED this recipe, please take a moment to comment and rate it in the recipe card below, or share your delicious photos on social media using the hashtag #foodmeanderings and tagging @foodmeanderings! Your feedback means the world!

📋 Healthy Pumpkin Biscotti Recipe
Print Recipe
Pin
Save RecipeSave Recipe
Rate
Add to Shopping ListGo to Shopping List
Equipment
-
bread knife
-
cutting board
-
food processor
-
sheet pan
-
electric mixer
Ingredients
- 2 tablespoon unsalted butter, softened
- ½ cup pure pumpkin puree (not pie filling)
- 2 tablespoon low-fat cream cheese, softened
- 1 cup brown sugar, packed
- 1 teaspoon baking powder
- ½ teaspoon baking soda
- ¼ teaspoon salt (omit if using salted butter)
- 2 large eggs, at room temperature
- 1 teaspoon vanilla extract
- 2 ⅔ cups all-purpose flour
- 1 ½ teaspoon pumpkin pie spice
- ½ teaspoon ground cinnamon
- ½ cup dried apricots, finely chopped
- ¾ cup chopped pecans
- For Egg Wash:
- 1 large egg
- 1 tablespoon water
Instructions
-
**Heads up:** This recipe requires a minimum of 2 hours of chilling time for the dough before the first bake! Please plan accordingly to ensure the best results.
-
**Step 1: Prepare Add-ins.** Begin by finely chopping your dried apricots and pecans. You can achieve this quickly and efficiently using a food processor, or by hand with a sharp chef’s knife. Set these chopped ingredients aside in separate bowls for later incorporation into the dough.
-
**Step 2: Cream Wet Ingredients.** In a large mixing bowl, using an electric mixer (either hand-held or a stand mixer with the paddle attachment) on medium to high speed, beat the softened unsalted butter for approximately 30 seconds until it becomes light and fluffy. Then, add the softened low-fat cream cheese, brown sugar, baking powder, baking soda, ground cinnamon, pumpkin pie spice, and salt. Continue to beat the mixture until all these ingredients are thoroughly combined and the texture is smooth and creamy.
-
**Step 3: Incorporate Pumpkin and Eggs.** Next, beat in the pure pumpkin purée until it is completely incorporated into the mixture, ensuring there are no streaks of pumpkin remaining. Follow this by adding the 2 room temperature large eggs, one at a time, beating well after each addition. Finally, beat in the vanilla extract until the entire mixture is uniform and smooth.
-
**Step 4: Add Flour & Fold in Extras.** With your mixer set to a low speed, gradually add the all-purpose flour, mixing only until as much of it as the mixer can comfortably handle is incorporated. Once the dough becomes too thick for the electric mixer to handle efficiently, switch to a large, sturdy spoon or a rubber spatula. Gently stir in any remaining flour until it is just combined and no dry streaks of flour are visible. Be careful not to overmix the dough. Lastly, gently fold in the finely chopped pecans and dried apricots until they are evenly distributed throughout the dough.
-
**Step 5: Chill the Dough.** Cover the bowl containing your biscotti dough tightly with plastic wrap. Transfer the covered bowl to the refrigerator and chill the dough for a minimum of 2 hours, or until it becomes firm enough to handle easily without excessive stickiness. This chilling period is crucial for the dough’s texture and for preventing too much spread during baking.
-
**Step 6: First Bake – Shape Logs.** Once your dough is adequately chilled, preheat your oven to 350 degrees F (175 degrees C). Prepare a large cookie sheet (a jelly roll pan, known for its wider surface, works very well here) by lightly greasing it with non-stick cooking spray or lining it with parchment paper for easy removal. Divide the firm dough in half. On the prepared baking sheet, gently shape each half of the dough into a log that is approximately 12 inches long, about 4 inches wide, and between ½ to ¾ inch high. Ensure that the two logs are placed about 2 inches apart on the baking sheet to allow for any slight expansion during baking.
-
**Step 7: Apply Egg Wash.** In a small, separate bowl, whisk together the remaining 1 large egg and 1 tablespoon of water to create a simple egg wash. Lightly and evenly brush this egg mixture over the tops and sides of both dough logs on the baking sheet. This wash will help achieve a beautiful golden-brown color and a slightly crisp exterior.
-
**Step 8: Initial Baking.** Place the baking sheet with the dough logs into the preheated oven. Bake for 25-30 minutes, or until the logs are lightly golden brown on the outside and feel firm to the touch when gently pressed. They should appear slightly puffed and cooked through.
-
**Step 9: Cool Completely Before Slicing.** Remove the cookie sheet from the oven. This next step is absolutely critical: allow the baked logs to cool completely on the cookie sheet for at least 1 hour, or until they are firm throughout. Attempting to slice warm logs will almost certainly result in them crumbling, as they need to set properly before being cut. Patience here is key!
-
**Step 10: Second Bake – Slice & Arrange.** Once the logs are entirely cool and firm, preheat your oven to a slightly lower temperature of 325 degrees F (160 degrees C). Carefully transfer the cooled logs to a sturdy cutting board. Using a very sharp serrated bread knife, cut each log diagonally into uniform ½-inch thick slices. Use a gentle, confident sawing motion with minimal downward pressure to achieve clean, non-crumbling slices.
-
**Step 11: Final Baking for Crispness.** Arrange the sliced biscotti, with their cut sides facing down, back onto the prepared cookie sheet. Bake them in the preheated oven for 5-10 minutes, or until the bottoms are lightly browned. Then, carefully flip each slice over and bake for another 5-10 minutes, or until both sides are thoroughly dry, crisp, and beautifully golden. This second bake is essential for achieving the biscotti’s characteristic dry and crunchy texture.
-
**Step 12: Cool & Store.** Once fully baked, transfer the finished biscotti to a wire cooling rack and allow them to cool completely to room temperature. They will continue to crisp up as they cool. Once thoroughly cooled, they are ready to be served immediately or stored in a sealed container according to the “Storage” tips provided in the notes section. Enjoy your perfectly homemade, healthy pumpkin biscotti!
Notes
- Use Room Temperature Ingredients – It’s vital to ensure your butter, cream cheese, and eggs are at room temperature before you start mixing. This allows them to cream together seamlessly, resulting in a more uniform and lump-free dough, which is key for an even bake and superior texture.
- Don’t Skip the Chilling Step – The 2-hour chilling period for the dough is absolutely essential, not optional. Chilling firms up the dough significantly, making it much easier to handle and shape into logs without stickiness. Crucially, it also prevents the biscotti logs from spreading too much in the oven during the initial bake, ensuring they maintain their classic shape.
- Cut with Confidence – When it’s time to slice your cooled biscotti logs, use a very sharp serrated bread knife. Make clean, decisive diagonal slices in a single, smooth motion. Avoid a back-and-forth “sawing” action with heavy pressure, as this can easily cause the partially baked logs to crumble and break apart, leading to uneven pieces.
- Adjust Baking Times for Thickness – The duration of the second bake needs to be flexible based on how thickly you’ve sliced your biscotti. Thinner slices will crisp up faster, potentially needing only 5 minutes per side. Conversely, thicker slices might require an extra minute or two per side to become thoroughly dry and crisp throughout. Monitor them closely to prevent over-baking, which can result in overly hard or even burnt biscotti.
- Bake on Parchment Paper for Even Browning – For the best results, always line your baking sheet with parchment paper. This serves two important functions: it prevents the biscotti from sticking to the pan, making removal easy, and it also promotes more even heat distribution, contributing to a uniformly golden-brown bake.
- Let Them Cool Completely Before Dipping or Storing – Biscotti continue to dry out and crisp up as they cool on a wire rack. It is absolutely crucial to allow them to cool completely to room temperature before dipping them in any glaze or chocolate, or transferring them to an airtight storage container. Storing them while still warm will create condensation inside the container, leading to soft and chewy biscotti instead of the desired crisp texture.
- Customize the Flavor – Feel free to personalize your biscotti! A light sprinkle of turbinado sugar on top of the logs before the first bake adds a delightful, sparkling crunch. For a more indulgent finish, once completely cooled, consider dipping one end of each biscotti into melted dark chocolate, white chocolate, or even a spiced glaze made with powdered sugar and a hint of orange zest or maple extract.
- Perfect for Gifting – Homemade biscotti make exceptional and much-appreciated gifts. Once your pumpkin biscotti are fully cooled and thoroughly dried, package them beautifully in clear cellophane bags tied with festive ribbons, or arrange them elegantly in decorative tins or glass jars. They maintain their freshness and appealing texture remarkably well, making them a thoughtful and delicious present, especially cherished during the holiday season or for any special occasion.
- Don’t Overmix the Dough – When incorporating the flour, mix only until the ingredients are just combined and no dry streaks of flour remain. Overmixing develops the gluten in the flour too much, which can result in tough, dense biscotti instead of the desired tender-crisp texture. Mix gently and stop as soon as the flour is incorporated.
**Storage Guidelines:**
To maintain the optimal crispness and fresh flavor of your homemade pumpkin biscotti, store them in an airtight container (a large sealed jar works perfectly for this) at room temperature for up to 7 days. For longer preservation, these biscotti freeze exceptionally well for up to 3 months. I highly recommend placing them directly into a freezer-safe airtight container or bag once they are completely cooled. This method keeps them wonderfully fresh until you’re ready to use them. They defrost very quickly at room temperature, but if you’re in a hurry or prefer them warm, a quick 10-second blast in the microwave will do the trick!
