Irresistibly Creamy & Lighter No-Bake Baileys Cheesecake: The Ultimate Easy Dessert
Indulge in pure bliss with this incredibly easy-to-make Baileys No-Bake Cheesecake. This creamy, rich, and utterly delicious dessert is a dream come true for anyone seeking a luxurious treat without the fuss of baking. What makes it even better? This Baileys Irish Cream Cheesecake is crafted to be a lighter option and is even Weight Watchers (WW) friendly, yet it’s so decadently flavorful that no one will ever suspect it’s a “light” version! It’s also remarkably versatile and can easily be adapted into a non-alcoholic delight, perfect for all ages and occasions.
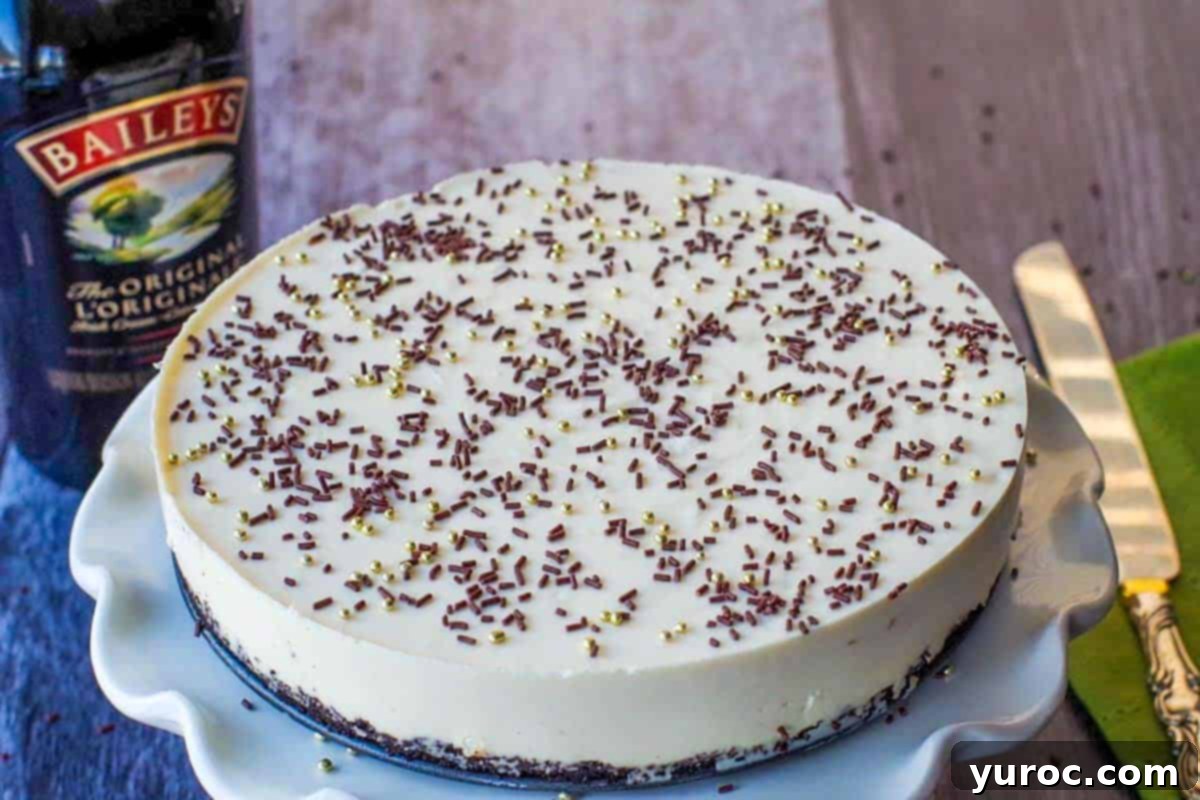
This delightful no-bake cheesecake featuring the beloved Irish cream liqueur is a popular choice, especially around festive times like St. Patrick’s Day and during the holiday season. However, its irresistible charm makes it a fantastic dessert for any special occasion, a celebratory gathering, or simply as a wonderful treat for the Baileys Irish Cream enthusiast in your life. The convenience of a no-bake recipe means less time in the kitchen and more time enjoying delicious moments with loved ones. This particular recipe draws inspiration from the fantastic simplicity of my Birthday Cake Cheesecake (No Bake), proving that effortless desserts can still be incredibly impressive.
If you’re a connoisseur of holiday cheesecakes, you must also try my festive Eggnog Cheesecake Bars! And for those who simply can’t get enough of Baileys Irish Cream, I highly recommend exploring my other delightful creations: the charming Shamrock Irish Cream Dessert Shots for a bite-sized treat, and the indulgent Baileys French Toast Casserole, perfect for a special breakfast or brunch. These recipes truly showcase the versatility and rich flavor of Baileys, making it a star ingredient in both desserts and comfort foods.
🥘 Essential Ingredient Notes for a Lighter Baileys Cheesecake
To achieve the desired “lighter” profile for this Baileys no-bake cheesecake without compromising on taste or texture, I’ve carefully selected a combination of ingredients that deliver a rich, creamy consistency and a wonderfully tangy flavor. Instead of traditional heavy whipping cream, which can add significant calories and fat, this recipe utilizes reduced-fat cream cheese, non-fat Greek yogurt, and low-fat sour cream. The result is a cheesecake filling that is slightly tangy, incredibly rich, delightfully fluffy, and boasts a luxurious creamy texture, all while carrying that unmistakable hint of Baileys Irish Cream. This intelligent ingredient swap helps make this dessert more accessible for those monitoring their intake, like those on a Weight Watchers plan. (*See WW points below for a detailed breakdown.)
For this exquisite white chocolate and Baileys cheesecake, you’ll need the following key ingredients:
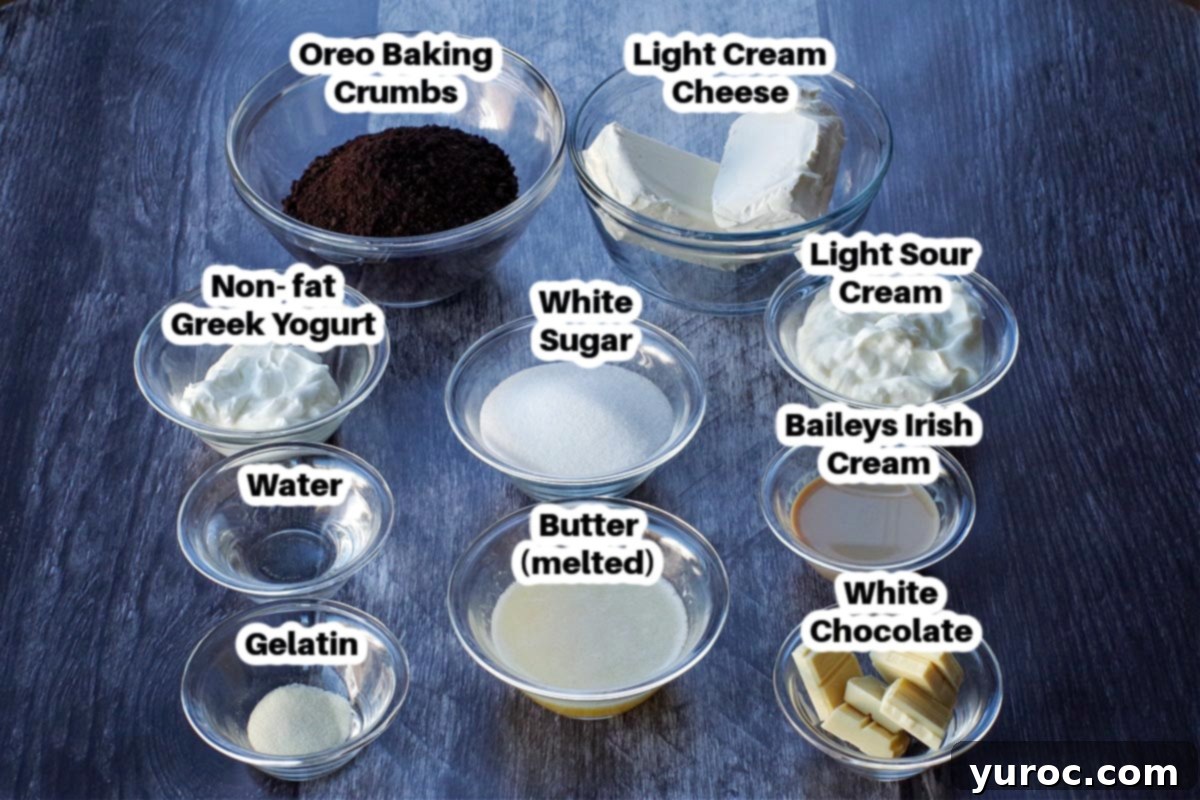
- Oreo Baking Crumbs: While Oreo baking crumbs are ideal for their rich chocolate flavor and fine texture, they can sometimes be a little challenging to find in certain regions. Don’t worry if you can’t locate them! You can easily substitute them with any readily available chocolate baking crumb, or even crush your own chocolate cookies (like regular Oreos, with or without the cream filling removed) to create a delicious crust. Graham cracker crumbs or digestive biscuit crumbs can also work, but the chocolate crumbs truly complement the Baileys flavor.
- Unsalted Butter (Melted): I always recommend using unsalted butter in baking recipes. This allows you complete control over the salt content in your dessert. It’s crucial for this recipe to measure the butter *after* it has been melted. The melted butter binds the crumbs together, forming a sturdy and flavorful base for your cheesecake.
- White Chocolate Squares/Baking Bar: This is a very important distinction! It’s essential to use high-quality white chocolate in the form of squares or a baking bar. Do NOT use white chocolate chips, as they contain stabilizers that prevent them from melting smoothly and completely. A baking bar will melt down into a silky, uniform consistency, which is vital for the smooth texture of the cheesecake filling. The white chocolate adds a delicate sweetness and a subtle depth of flavor that perfectly harmonizes with the Baileys.
- Garnish: The garnish is where you can truly let your creativity shine! While the recipe suggests gold sugar pearls, sparkling gold sugar, or edible glitter for a luxurious touch, the possibilities are endless. These decorative items can be found at specialized hobby and cake decorating stores (like Michael’s in Canada) or easily purchased online through platforms like Amazon. Always, *always* double-check to ensure that any decorative elements you choose are explicitly labeled as edible. A crucial note: most traditional gold and silver Dragees are designed purely for decoration and are NOT safe for consumption, so be vigilant when selecting your embellishments.
📖 Versatile Variations & Smart Substitutions
This Baileys No-Bake Cheesecake recipe is wonderfully adaptable, allowing you to tailor it to your dietary needs, personal preferences, or what you simply have on hand. Don’t hesitate to experiment with these thoughtful variations and substitutions to make this dessert truly your own:
- Butter: If you only have salted butter available, you can certainly use it, but be aware that it might slightly reduce the overall sweetness of the crust. For those aiming to further lower the calorie count or WW points, opting for a light butter alternative is an excellent choice.
- Cream Cheese: The recipe calls for light cream cheese to keep it on the healthier side, but you have full flexibility here. You can use full-fat cream cheese for a richer, more indulgent texture, or go even lighter with non-fat cream cheese if you’re meticulously counting calories or points. Each option will yield a slightly different consistency and flavor profile, so choose what best suits your taste.
- Sugar: For a sugar-reduced or sugar-free version, feel free to use a sugar substitute. Natural alternatives like Monk Fruit sweetener work wonderfully. If using a concentrated sweetener like Monk Fruit, remember to adjust the quantity; you’ll typically need to use only about half the amount of sugar specified in the recipe. Always check the conversion ratio on your specific sweetener product.
- Kid-Friendly/Non-Alcoholic: To make this a delightful treat for everyone, including children or those who prefer to avoid alcohol, Baileys Coffee Creamer (affiliate link) is an absolutely perfect non-alcoholic substitute. It captures the essence of Baileys’ flavor without the alcohol content. There are several brands and flavors of Irish cream coffee creamer available at most local grocery stores, so you have options!
- Irish Cream: If you’re an avid home cook or simply prefer a customized flavor, you could certainly use homemade Irish cream instead of store-bought Baileys. This allows for control over the sweetness and blend of flavors.
- Garnish: The garnish is your canvas for creativity! Beyond the suggested chocolate and gold sprinkles, consider a delicate dusting of cocoa powder for a sophisticated touch, a generous swirl of light whipped cream for extra creaminess, a shower of fine chocolate shavings, or even additional crushed Oreo baking crumbs for a textural contrast. Each option adds a unique visual appeal and complementary flavor.
🔪 How to Craft Your Perfect No-Bake Baileys Cheesecake
**A quick heads-up before you begin: This recipe requires a significant refrigeration time of 6-8 hours, or preferably overnight! Plan accordingly to allow ample time for your cheesecake to set perfectly.
If the thought of wrestling with finicky water baths for baked cheesecakes sends shivers down your spine, then this no-bake version is about to become your new best friend! It delivers all the creamy, decadent flavor you crave with none of the baking hassle. Let’s get started on this simple yet impressive dessert:
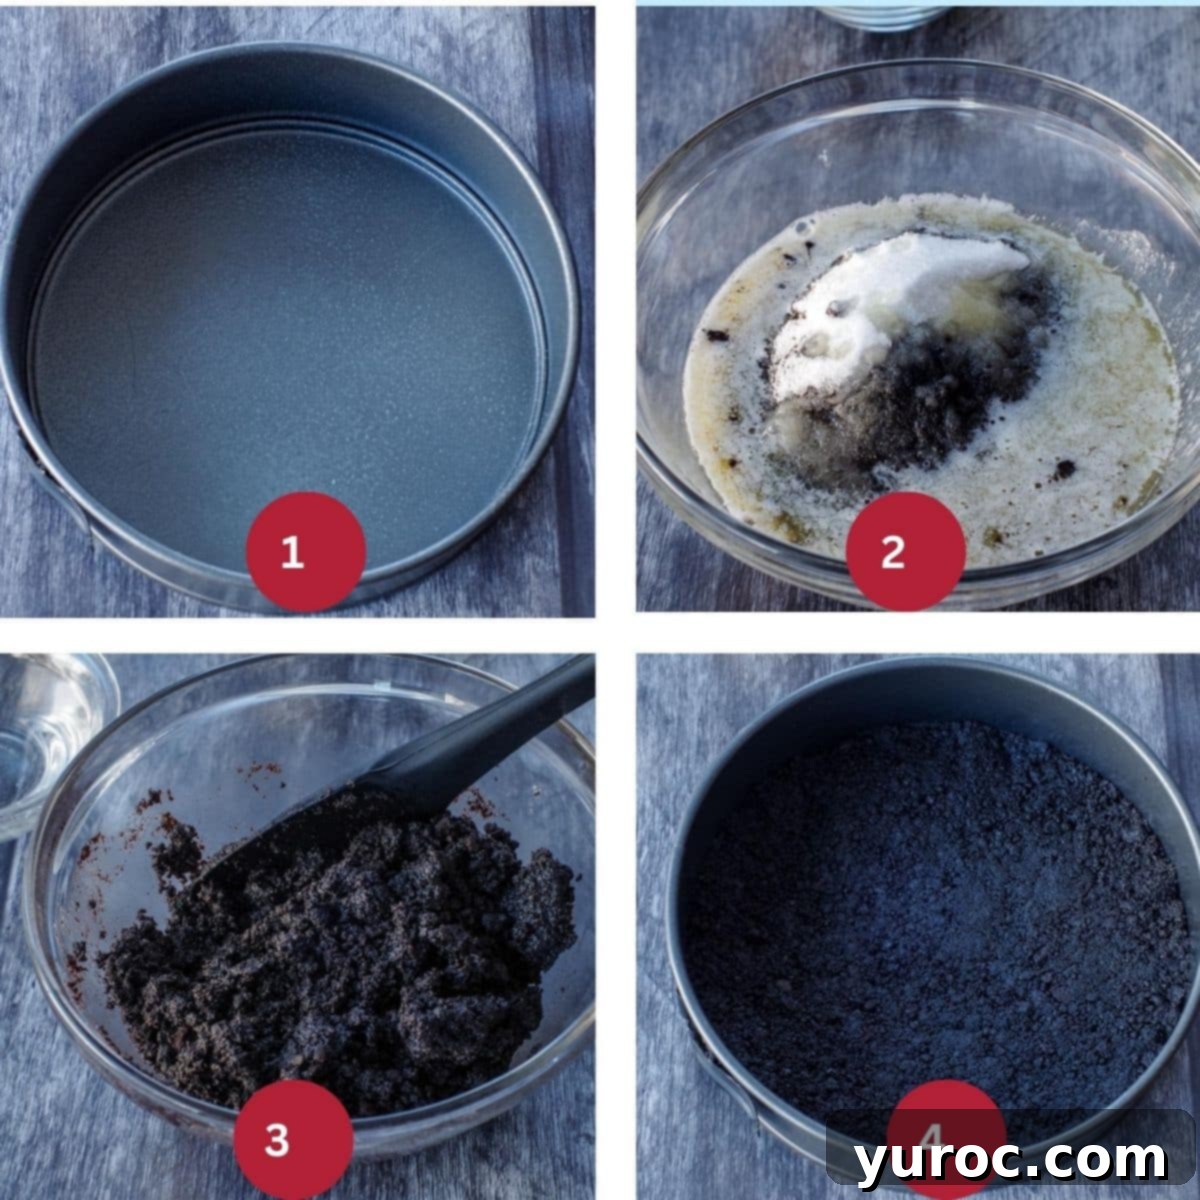
MAKE THE OREO CRUST (STEP 1): Begin by lightly spraying an 8 or 9-inch springform pan with non-stick cooking spray, ensuring full coverage to prevent sticking (Image 1). In a medium-sized mixing bowl, combine the chocolate baking crumbs (or crushed Oreos), your measured melted butter, and 3 tablespoons of white granulated sugar (Image 2). Mix these ingredients thoroughly until all the crumbs are evenly moistened and a thick, crumbly, yet cohesive paste forms. This ensures a firm and flavorful crust (Image 3). Press this crumb mixture firmly and evenly into the bottom of the prepared springform pan. Use the back of a spoon or a silicone spatula to create a smooth, compact base. Once pressed, cover the pan tightly with plastic wrap and place it in the fridge for at least 15 minutes. This brief chilling period helps the butter solidify and the crust to firm up, providing a stable foundation for your filling (Image 4).
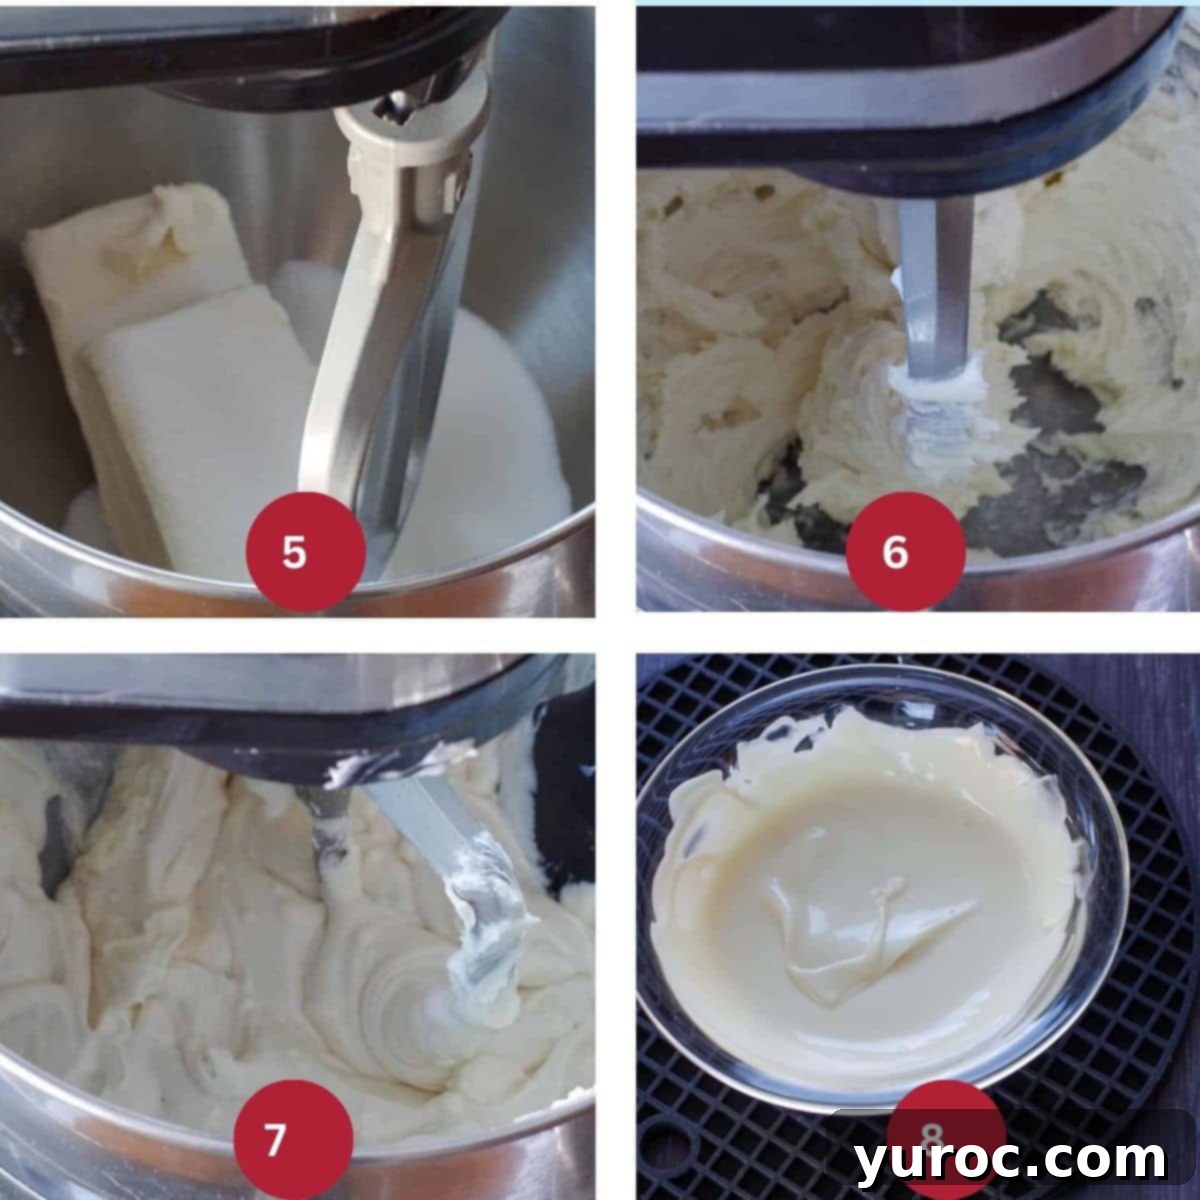
MAKE THE FILLING (Step 2 – Part 1): For the filling, place your room temperature cream cheese along with the remaining 1 cup of white granulated sugar into the large bowl of a stand mixer. Ensure your cream cheese is at room temperature; this is crucial for a smooth, lump-free batter. If you don’t have a stand mixer, a hand electric mixer and a large mixing bowl will work just as well (Image 5). Mix on low speed for about 30 seconds to break down the cream cheese, then increase to medium speed for an additional minute. This initial mixing helps to aerate the cream cheese. Next, scrape down the sides of the bowl to ensure all ingredients are incorporated. Add the sour cream, Baileys Irish cream, and Greek yogurt, then mix for another 30 seconds or until the mixture appears smooth and well combined (Image 6 & 7). Now, it’s time for the white chocolate. Melt the white chocolate in the microwave at half (½ ) power for 1 minute. After this, check the chocolate, give it a good stir, and return it to the microwave for 30-second intervals. It is vital to stir thoroughly after each interval, as the residual heat from the chocolate continues the melting process, preventing it from overheating and seizing (Image 8).
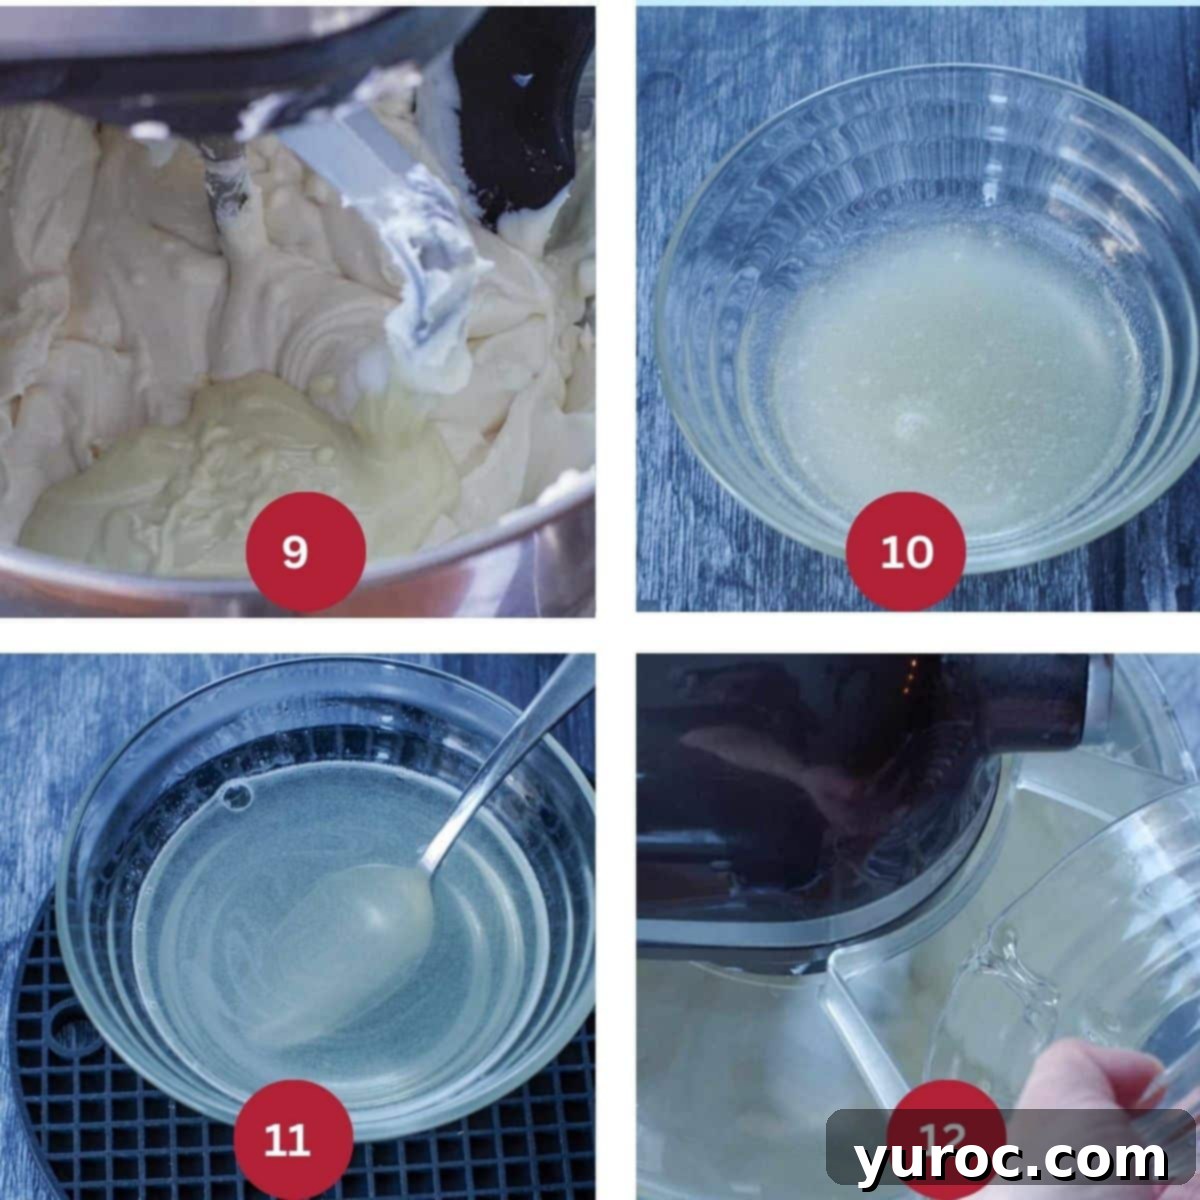
MAKE THE FILLING (Step 2 – Part 2): Once the white chocolate is perfectly melted and smooth, gently add it into the cream cheese mixture. Mix on medium speed for 30 seconds, then scrape down the sides of the bowl to ensure everything is evenly incorporated. Increase the speed to medium-high and mix for a full 2 minutes, until the filling is wonderfully smooth and fluffy (Image 9). In a separate small bowl, combine the unflavored gelatin crystals with ¼ cup of cold water. Allow this mixture to sit undisturbed for about 5 minutes; this process, known as “blooming,” allows the gelatin to absorb the water and soften. You can find excellent visual guides on how to bloom gelatin online, but remember to NOT drain it as some videos might suggest, as we need all the liquid (Image 10). After blooming, heat the other ¼ cup of water in the microwave on high for 30 seconds until hot. Pour this hot water into the bloomed gelatin mixture and stir continuously until the gelatin crystals are completely dissolved and the mixture is clear. Allow this dissolved gelatin to cool slightly before proceeding (Image 11). With your stand mixer running on low speed, slowly pour the cooled gelatin mixture into the cream cheese filling. Continue to mix at medium speed for about a minute, making sure to scrape the sides of the bowl after 30 seconds to ensure the gelatin is fully and evenly distributed throughout the cheesecake batter. This step is crucial for the cheesecake to set properly (Image 12).
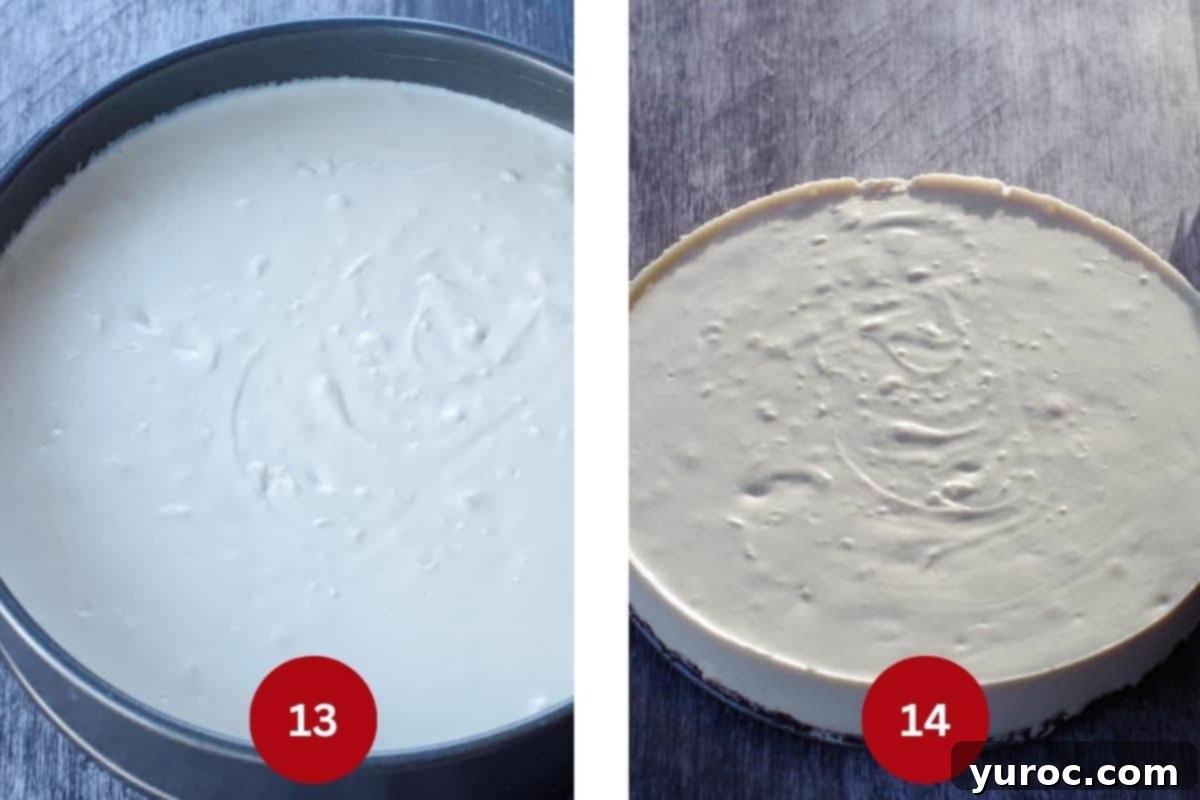
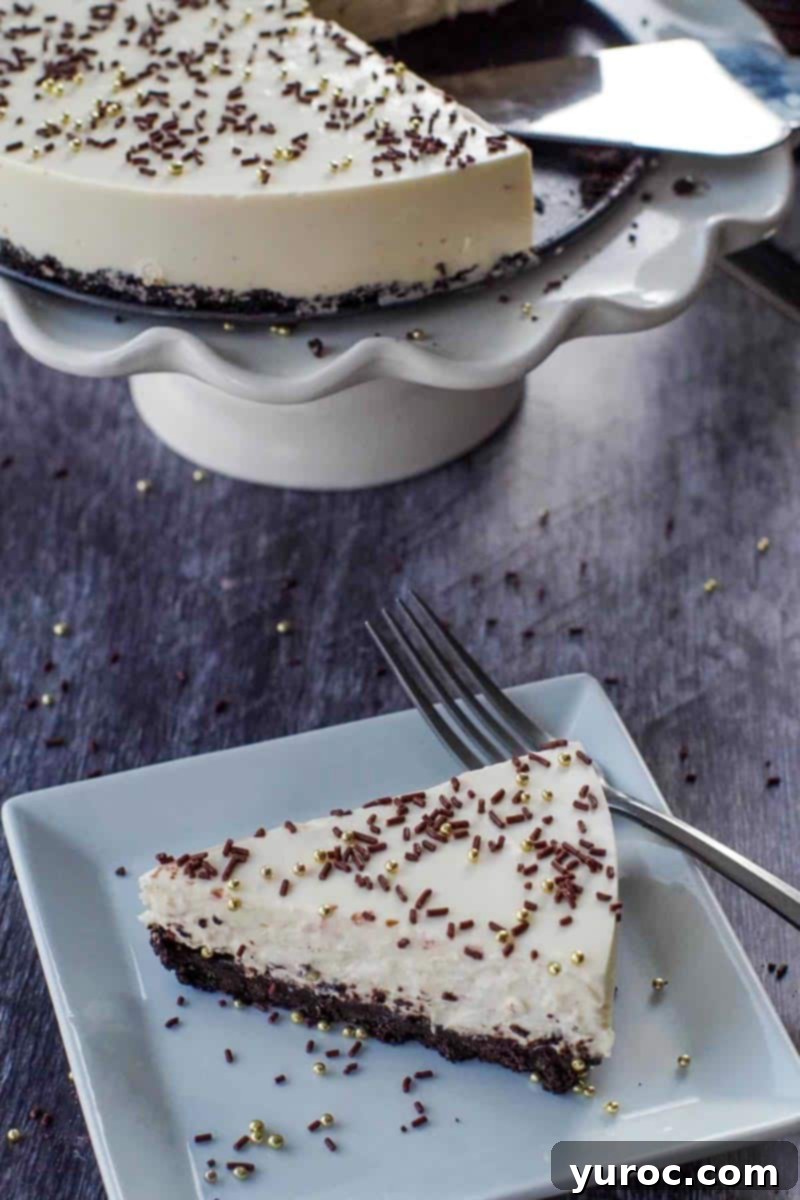
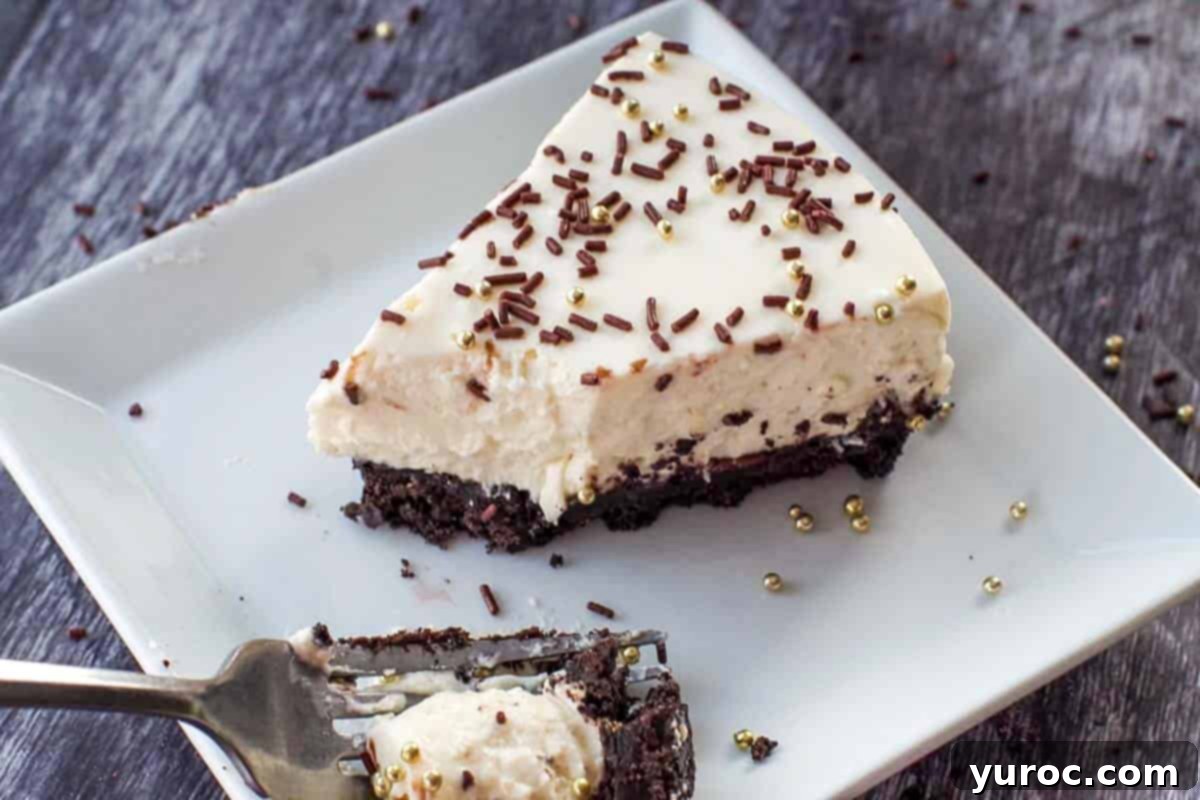
ASSEMBLE AND CHILL THE CAKE (Step 3 ): Carefully pour the prepared cheesecake batter into the springform pan, directly over the chilled chocolate crust. Use a spatula to gently level the top surface, ensuring a smooth and even finish (Image 13). Helpful Hint: Before refrigerating, gently tap the pan lightly against your kitchen counter a few times. This simple action helps release any trapped air bubbles from the batter, ensuring a denser, smoother cheesecake. Once leveled and de-bubbled, cover the springform pan tightly with plastic wrap. Place the cheesecake in the refrigerator for a minimum of 6 hours. For the best, firmest set and easiest slicing, it’s highly recommended to refrigerate it overnight, ideally for 8 or more hours. *Resist the urge to add your garnish at this stage; it should be done just before serving. When your cheesecake is perfectly chilled and firm, unhinge the rim of the springform tin and carefully remove it. If you notice any slightly uneven edges, a warm, clean knife can be used to gently smooth them, though I rarely find this necessary with this recipe (Image 14). Finally, carefully transfer your beautiful Baileys cheesecake to a serving plate and lavishly garnish it with chocolate and gold sprinkles, or any other festive sprinkles or toppings you desire. For the cleanest, most professional-looking slices when serving, run a sharp knife under hot water, then wipe it completely dry. Slice the cheesecake, and wipe the knife clean again between each cut. This hot knife technique ensures smooth, neat slices every time, showcasing the stunning layers of your creation.
Expert Tips for No-Fail No-Bake Baileys Cheesecake
Achieving a perfect no-bake cheesecake is all about attention to a few key details. Follow these expert tips to ensure your Baileys cheesecake turns out flawlessly creamy and beautifully set every time:
- Ensure Your Cream Cheese is at Room Temperature: This is arguably the most critical tip for any cheesecake, baked or no-bake. Cream cheese that is at room temperature blends much more smoothly with other ingredients, creating a velvety, lump-free cheesecake batter. Cold cream cheese will result in a lumpy, inconsistent texture, no matter how long you mix it. Plan ahead and take your cream cheese out of the fridge at least an hour before you start.
- Use Good Quality Ingredients (Especially Cream Cheese): The quality of your ingredients significantly impacts the final taste and texture of your dessert. I’ve found that brand-name light cream cheeses tend to be less watery and offer a superior texture and flavor compared to generic alternatives, contributing to a richer and more stable cheesecake.
- Follow Gelatin Blooming Instructions Carefully: Gelatin is the magic ingredient that gives this no-bake cheesecake its structure. It’s imperative to accurately follow the instructions for blooming and dissolving the gelatin. Improperly bloomed or dissolved gelatin will prevent your cheesecake from setting correctly, leading to a runny or overly soft dessert. The blooming process allows the gelatin granules to absorb liquid, making them easier to dissolve when heated.
- Always Use a Springform Pan: Springform pans are indispensable for cheesecakes. Their unique design, with a removable side, allows you to effortlessly release the delicate cheesecake without having to invert it. This is particularly important for no-bake cheesecakes, which have a more custard-like, delicate texture compared to traditional cakes.
- Spray Your Pan Thoroughly: To guarantee a clean release of your cheesecake from the pan, generously spray the springform pan with a non-stick cooking spray, especially the sides. This creates a barrier that prevents the cheesecake from sticking, ensuring beautiful, intact edges when you remove the ring. Skipping this step can lead to a messy removal and a damaged cheesecake.
- Do NOT Skimp on Chilling Time: Patience is a virtue when it comes to no-bake cheesecakes! The recommended 6-8 hours (or overnight) in the refrigerator is essential for the gelatin to fully set and for the cheesecake to firm up properly. If you attempt to remove or slice your cheesecake before it’s adequately chilled, it won’t hold its shape and will likely be soft and difficult to cut cleanly.
- Clean Knife for Perfect Slices: For presentation-worthy slices, warm a sharp knife under hot water, wipe it dry, and then slice. Clean the knife between each cut to prevent crumbs from contaminating subsequent slices.
🥗 Delightful Pairings: Meals to Serve with Your Baileys No-Bake Cheesecake
This exquisite Baileys No-Bake Cheesecake is versatile enough to complement a wide array of main courses, making it the perfect grand finale to any meal. Whether you’re planning a casual Sunday dinner or a sophisticated special occasion, here are some ideas for meals that will pair beautifully with your creamy creation:
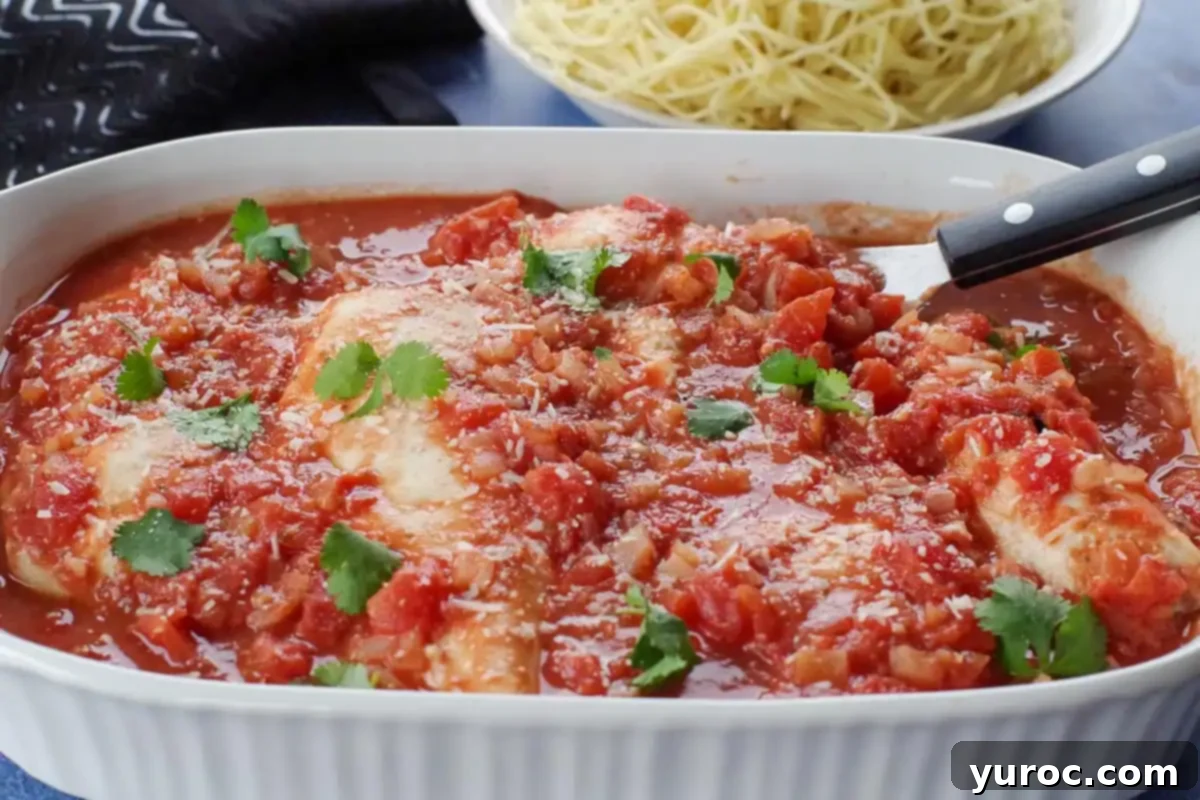
For a comforting and hearty Sunday dinner, consider serving this cheesecake after my savory Ground Turkey Shepherd’s Pie, which offers a robust contrast to the sweet dessert. Another excellent option is my flavorful Baked Chicken Cacciatore (as shown below), its rich tomato-based sauce and tender chicken providing a wonderfully satisfying main course before the decadent cheesecake.
Planning an elevated, special occasion dinner? Then I highly recommend pairing this elegant dessert with my Easy Cornish Hens with Rosemary Wine Sauce. The refined flavors of the Cornish hens, with their delicate meat and aromatic sauce, create a sophisticated balance with the creamy sweetness of the Baileys cheesecake, making for an unforgettable meal experience.
And, of course, if you are making this particular cheesecake to celebrate St. Patrick’s Day, the quintessential Irish-American Reuben Soup is an absolutely perfect pairing! Its hearty, tangy, and savory profile provides a delightful counterpoint to the sweet, boozy notes of the Irish Cream cheesecake, creating a truly festive and thematic meal.
🌡️ Storage Solutions for Your Baileys Cheesecake
Proper storage is key to enjoying your Baileys No-Bake Cheesecake for days to come, or even saving it for a future treat. To maintain its freshness and creamy texture, any leftover cheesecake should be stored in an airtight container. When refrigerated, it will happily last for up to 4-5 days, making it an excellent make-ahead dessert option.
For longer storage, this cheesecake freezes exceptionally well. Wrap individual slices or the entire remaining cake tightly in plastic wrap, then place it in a freezer-safe, airtight container. It can be frozen for an impressive 3-4 months without significant loss of quality. When you’re ready to enjoy it, simply transfer it to the refrigerator to thaw overnight before serving.
A crucial tip for advanced preparation: If you are making this cheesecake well in advance to refrigerate or planning to freeze it, I strongly recommend that you hold off on garnishing it with sprinkles, chocolate shavings, or any other decorative elements. Add your desired garnish only just prior to serving, once the cheesecake is fully defrosted and ready to be enjoyed. This prevents the garnish from bleeding, melting, or becoming soggy during storage, ensuring your dessert looks as fresh and appealing as possible.
👪 Customizing Your Serving Size
This delightfully decadent Baileys No-Bake Cheesecake recipe is designed to yield 16 generous servings, making it perfect for larger gatherings or for having plenty of leftovers to enjoy throughout the week. However, you absolutely have the flexibility to customize the serving size to better suit your needs. If you prefer larger, more indulgent slices, you can easily cut the cake into 12 pieces instead of 16.
For those planning an even larger event or wanting to ensure they have enough for multiple occasions, you can readily double or even triple the recipe. Many recipe cards, including the one below, offer a convenient feature: simply click on the serving number (e.g., “16 servings”) and select your desired number of servings. The ingredient quantities will automatically adjust, saving you the hassle of manual calculations. Just remember that if you plan to significantly increase the recipe, you will likely need additional springform pans to accommodate the increased volume of cheesecake batter.
🔢 Savvy Weight Watchers (WW) Points Information
One of the fantastic benefits of this Baileys No-Bake Cheesecake recipe is its significantly reduced Weight Watchers (WW) points compared to a traditional, full-fat cheesecake. A typical slice of classic cheesecake can easily tally up to 21 WW points or even more, which can be a considerable indulgence for those monitoring their intake.
However, by intelligently incorporating low-fat and light ingredients as specified in this recipe, a delicious slice (when cut into 1/16th of the cake) comes in at a much more manageable 13 WW points. But the good news doesn’t stop there! You can further reduce the points per slice, bringing it down to an impressive 10 WW points, by making a few additional swaps:
- Utilize light butter for the crust.
- Opt for non-fat sour cream in the filling.
- Choose non-fat cream cheese for the creamiest base.
For those looking to shave off even more points, consider using a sugar substitute, such as monk fruit, in both the crust and the filling. Monk fruit is a natural sweetener that is calorie-free. If you choose this option, remember that most monk fruit sweeteners are much sweeter than regular sugar, so you should typically use only about half the amount. For instance, you would use approximately 1.5 tablespoons in the crust and about ⅓ cup in the filling. Always consult the specific product’s conversion chart for precise measurements. This thoughtful approach allows you to enjoy a luxurious dessert while staying well within your dietary goals.
❔ Recipe Frequently Asked Questions (FAQs)
There are a couple of primary reasons why a no-bake cheesecake might not firm up properly, leading to a runny or too-soft consistency. The most common culprit is insufficient refrigeration time. This cheesecake needs at least 6-8 hours to set, but ideally, chilling it overnight (8+ hours) yields the best results. The second major reason relates to the gelatin: either you did not allow your gelatin to bloom properly (it didn’t absorb enough water), or you added it to the cheesecake mixture before it had cooled sufficiently after being dissolved. Hot gelatin can hinder the setting process.
Absolutely! The garnish is a wonderful opportunity to personalize your cheesecake and add your unique touch. Beyond the suggested chocolate and gold sprinkles, you have a wealth of options. Consider a delicate dusting of cocoa powder for a sophisticated look, a generous dollop or swirl of light whipped cream for extra richness, elegant chocolate shavings, or even a simple yet classic dusting of powdered sugar. Fresh berries, like raspberries or strawberries, also make a beautiful and fresh accompaniment.
Yes, definitely! While Oreo crumbs provide a fantastic chocolatey base that perfectly complements the Baileys, you are by no means limited to them. You can readily substitute Oreo crumbs with classic graham cracker crumbs for a more traditional cheesecake flavor, or use digestive biscuit crumbs for a slightly different texture and taste. Any cookie crumb of your choice, such as shortbread or Biscoff, would also work beautifully, allowing you to tailor the crust to your preference.
If you prefer not to use gelatin, or if you’re looking for a vegetarian or vegan alternative, you can substitute it with agar-agar. Agar-agar is a plant-based gelling agent derived from seaweed. However, it’s important to note that the texture of the cheesecake may vary slightly when using agar-agar, often resulting in a firmer, more jelly-like set compared to the creamy smoothness achieved with gelatin. Always follow the specific instructions for agar-agar as ratios can differ from gelatin.
Whether you’re planning a festive dessert for St. Patrick’s Day or seeking an impressive yet effortless treat for Christmas, you’ll absolutely adore this easy Irish Cream Cheesecake. It stands out as one of those perfect desserts that truly allows you to indulge in rich flavors while still staying on track with your lighter eating goals!
And if your palate is craving more fantastic light cheesecake recipes, be sure to give my Skinny Pumpkin Cheesecake a try for another delightful, guilt-free indulgence!
Discover More Irresistible No-Bake Cheesecakes
- Miami Vice Frozen Cheesecake Recipe
- Birthday Cake Cheesecake (No Bake)
- Strawberry Rhubarb Cheesecake (No Bake)
- No Bake Saskatoon Berry Cheesecake (in a jar)
Did your family ❤️ this recipe? Did you know that commenting and ⭐ rating recipes is one of the best ways to support your favorite recipe creators? If you LOVED this recipe, please comment and rate it in the recipe card below or share photos on social media using the hashtag #foodmeanderings or tagging @foodmeanderings!

📋Baileys No Bake Cheesecake recipe
Equipment
- springform pan
- stand mixer
Ingredients
**HEADS UP: There is a 6-8 hour refrigeration time with this recipe!
Cheesecake Base:
- 2 cups Chocolate baking crumbs
- ⅔ cup unsalted butter melted * measure the MELTED butter
- 3 tablespoon white granulated sugar
Cheesecake filling
- 1 -7 gram package of unflavored gelatin crystals
- ½ cup water (divided into 2)
- 2 – 8 oz packages of light cream cheese room temperature softened
- 1 cup light sour cream
- 3 ounces white chocolate squares **do NOT use white chocolate chips
- ¼ cup baileys irish cream
- ¾ cup white granulated sugar
- ½ cup non- fat Greek yogurt
Garnish (optional)
- chocolate sprinkles
- gold sprinkles
Instructions
Cheesecake Base:
- Spray an 8 or 9 inch springform pan with non- stick cooking spray.
- Combine chocolate baking crumbs with melted butter and 3 tablespoons of white granulated sugar in a medium bowl.
- Mix until all the crumbs are moistened and a thick, crumbly paste forms.
- Press crumb mixture into the greased springform pan. Level and press to the bottom of the pan using a silicone spatula and neatly taper at the edge.
- Cover the pan with plastic wrap and place in the fridge for 15 minutes.
Cheesecake Filling
- Place softened cream cheese, 1 cup white granulated sugar in the large bowl of a stand mixer fitted with a paddle attachment (alternatively, you can use a hand electric mixer and a large mixing bowl).
- Mix on low to break down the cream cheese for 30 seconds, and increase to medium speed for another1 minute.
- Scrape the sides of the bowl and add sour cream, Baileys Irish cream and Greek yogurt and mix for 30 seconds or until smooth.
- Melt the white chocolate in the microwave on ½ power for 1 minute, then check, stir and put back in to microwave for 30 second intervals until melted. *Ensure that you stir at each 30 second interval, as the stirring helps to melt it further.
- Then stir the melted white chocolate into the cream cheese mix. Mix on medium for 30 seconds, scrape the sides, and on medium-high speed for 2 minutes, until smooth and fluffy.
- Mix gelatin crystals and ¼ cup water in a small bowl and allow to bloom for 5 minutes.
- Heat the other ¼ cup water for 30 seconds in the microwave on high and pour into the gelatin bloom. Stir to dissolve, and allow to cool.
- Starting on low, pour gelatin into the cream cheese mixture. Continue to mix at medium speed for a minute, scraping the sides of the bowl after 30 seconds.
- Pour cheesecake batter into the springform pan with crust and level with a spatula.Tap pan lightly against the counter to get rid of air bubbles. Cover with plastic wrap and refrigerate for at least 6 hours, preferably overnight (8+ hours) *Do NOT add garnish yet.
- Unhinge rim of springform pan and remove. If necessary, smooth edges of cake with a knife (I didn’t need to do this)
Garnish (optional)
- Add extra chocolate and gold sprinkles to the top of the cake, as desired. *Do not do this until just before serving (or the sprinkles will melt and run)