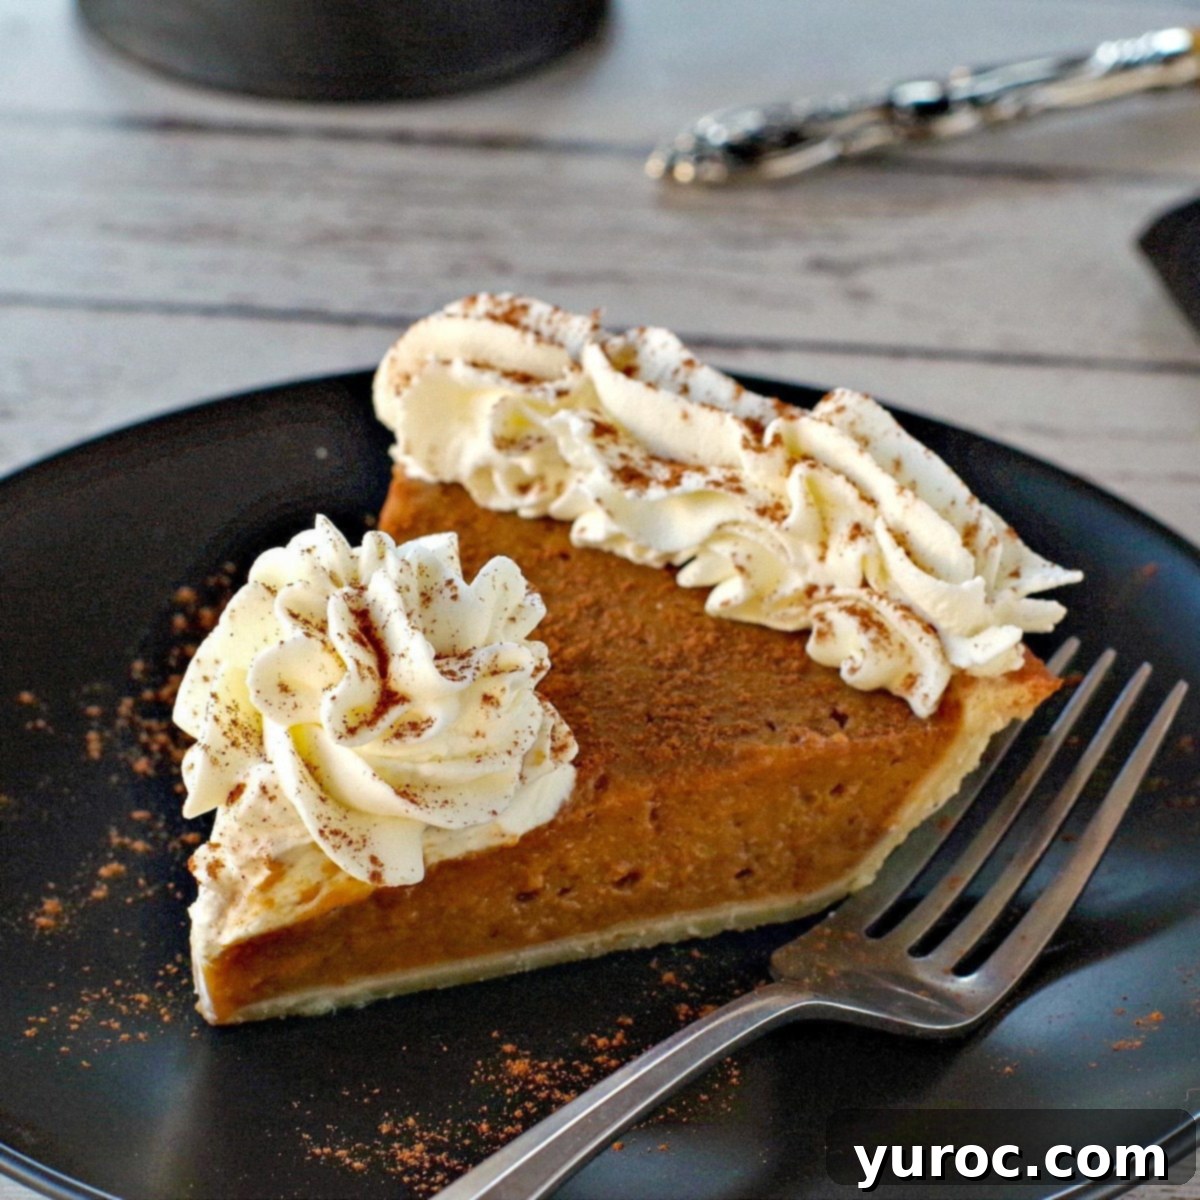
The Ultimate Easy Pumpkin Pie Recipe: Silky Smooth Perfection with Canned Pumpkin
There are some recipes that become instant classics, woven into the fabric of family traditions. For me, this Prize Pumpkin Pie made with canned pumpkin is precisely one of those. It’s a timeless dessert I’ve savored and baked for as long as I can remember, and it was even among the first solid foods I introduced to my own children. This iconic pie graced our holiday tables for Easter, Thanksgiving, and Christmas throughout my childhood, creating cherished memories and a deep anticipation for its arrival. To this day, it remains one of my absolute favorite treats to prepare and enjoy, symbolizing comfort and celebration.
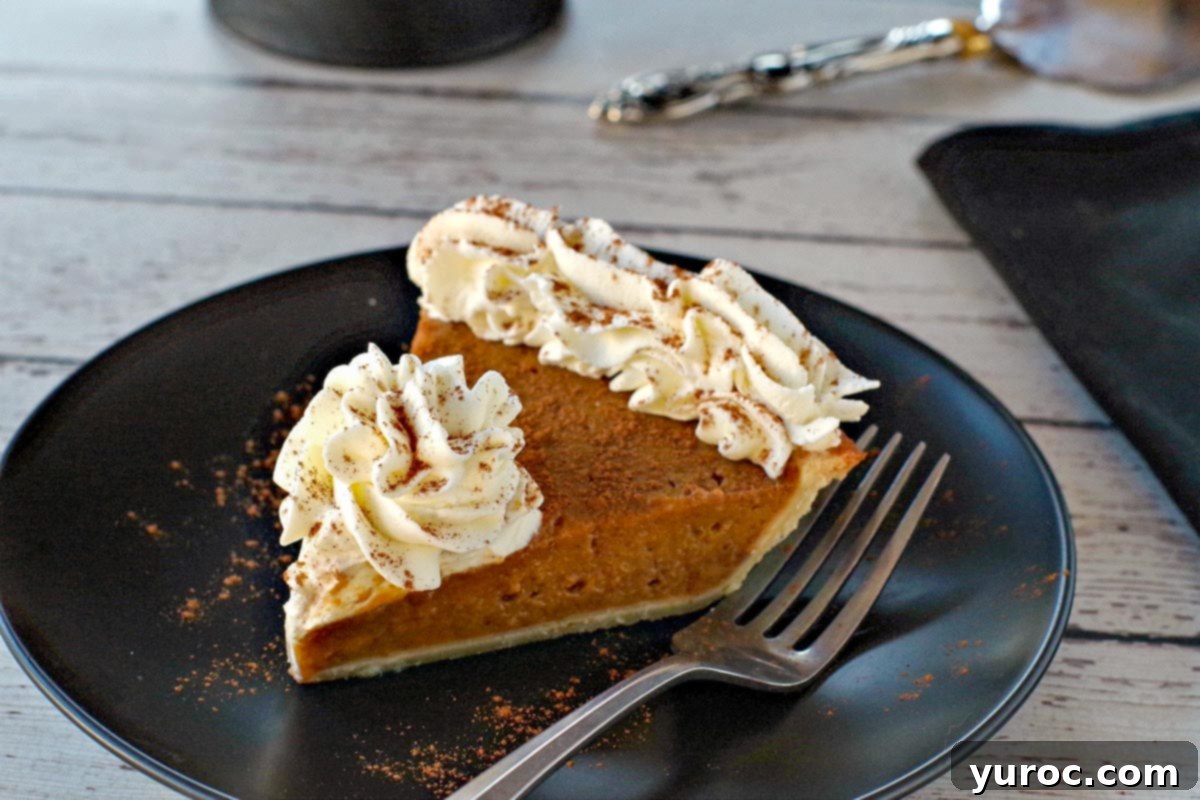
What truly sets this recipe apart is its undeniably superior pumpkin pie filling. The original version, a treasure found in my very first cookbook, “A Guide to Good Cooking” (affectionately known as The Five Roses cookbook), has been a staple in my kitchen for decades. First published over a century ago, this culinary gem still holds countless “go-to” recipes, with this easy pumpkin pie standing out as a true star. While it’s exceptionally popular during the festive holiday season, making it a perfect dessert for Thanksgiving and Christmas dinners, its comforting flavors are delightful at any time of the year. In fact, this beloved recipe even inspired the creation of my Pumpkin Pie Ice Cream, a testament to its incredible taste and versatility.
Baking, for me, has always been an enchanting experience. I wasn’t always a skilled cook; my culinary journey has certainly evolved over time. Yet, even as a novice, the allure of baking held a powerful sway. This particular easy pumpkin pie using canned pumpkin was one of my earliest and most triumphant baking endeavors. There’s a certain magic in the transformation that occurs within the oven – a mysterious, metamorphic process that turns simple ingredients into something extraordinary. This pumpkin pie recipe embodies that magic perfectly. Within the warm embrace of the oven, pure pumpkin, flour, and a blend of aromatic spices undergo a miraculous change, culminating in a silky, gloriously delicious dessert that delights the senses and brings warmth to any gathering.
If you find yourself craving more delightful pie creations, be sure to explore some of my other popular recipes. Indulge in the rich, classic flavors of my Old Fashioned Chocolate Pie, experience the fruity perfection of my Award-winning Apple Pie Recipe, or try the unique sweetness of Sweet Potato Pie with Marshmallows. For something with a sophisticated twist, my Maple Bourbon Pecan Pie is a must-try, and don’t forget the regional charm of my Saskatoon Berry Pie Filling and Sauce. Each offers a unique flavor profile but shares the same homemade love as this pumpkin pie.
🥘 Ingredient Notes for Your Perfect Pumpkin Pie
Crafting the perfect pumpkin pie starts with understanding each ingredient’s role and selecting the right components. Here’s a detailed look at what you’ll need for this prize-winning recipe, ensuring a silky, flavorful result:
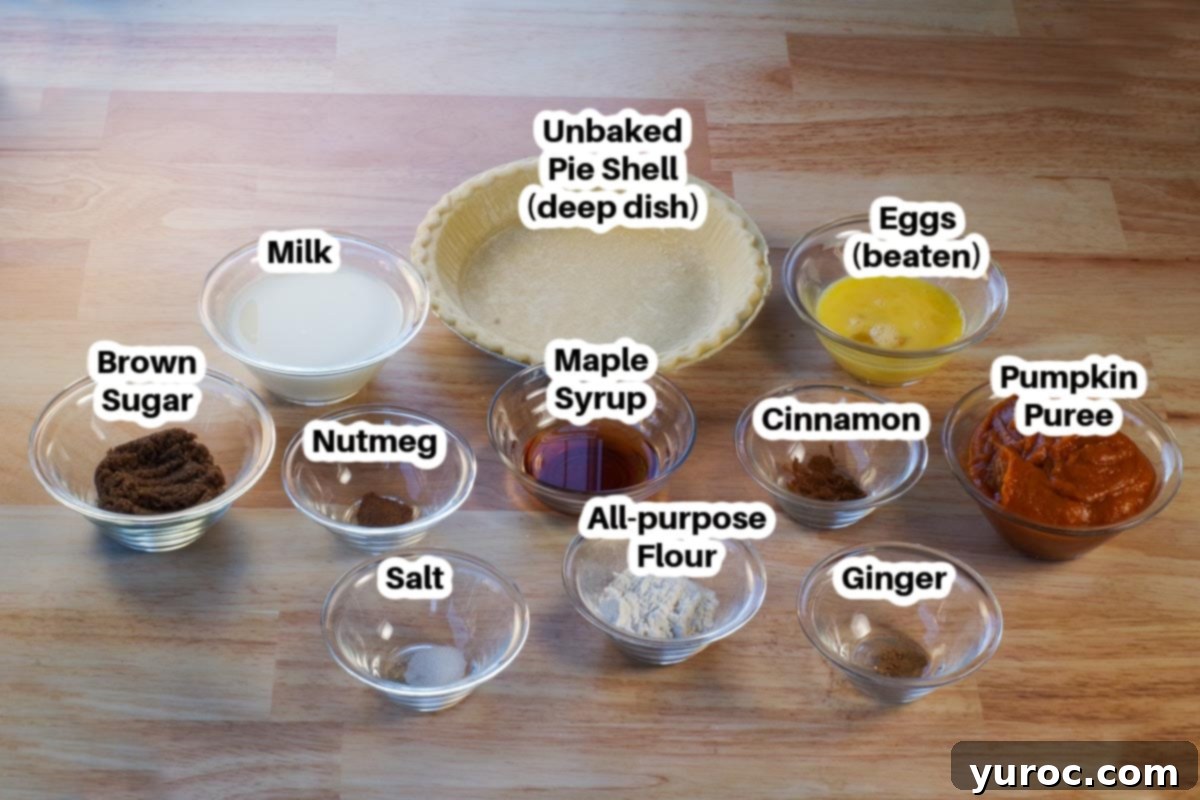
- Canned Pumpkin Purée: This is the undeniable star of our recipe. It’s absolutely crucial to use pure canned pumpkin purée, not pumpkin pie filling. Pie filling contains pre-mixed sweeteners and spices, which would make your homemade pie excessively sweet and disrupt the carefully balanced flavor profile we’re aiming for. The color of pure pumpkin purée can vary slightly between brands due to natural pumpkin variations, but rest assured, this won’t impact the final taste or texture. If you happen to accidentally pick up pumpkin pie filling, don’t despair! Check our FAQ section further down for a helpful workaround.
- All-Purpose Flour: A modest amount of all-purpose flour plays a vital role in binding the filling. It works in conjunction with the eggs and liquid ingredients to ensure a smooth, cohesive, and properly set custardy texture, preventing the pie from becoming watery.
- Salt: A small but mighty pinch of salt is essential. It doesn’t make the pie taste salty; instead, it expertly balances the sweetness from the brown sugar and maple syrup, enhancing and intensifying all the other flavors, allowing the pumpkin and spices to truly shine.
- Ground Ginger, Nutmeg, and Cinnamon: This aromatic trio forms the classic, quintessential flavor profile of pumpkin pie. Cinnamon provides a warm, comforting base, nutmeg adds a sweet, earthy, and slightly pungent note, while ginger contributes a subtle, peppery warmth and zing that prevents the pie from tasting flat. Together, they create that irresistible, nostalgic taste everyone adores.
- Brown Sugar: Opting for brown sugar over white granulated sugar is key to this prize recipe. Brown sugar introduces a deeper, richer sweetness with delightful caramel and molasses undertones. It also adds a subtle amount of moisture, contributing to the pie’s tender texture and complex flavor.
- Maple Syrup: Pure maple syrup elevates the pumpkin filling with its distinct, nuanced sweetness and rich, complex flavor. It imparts a subtle hint of maple that complements the pumpkin and spices beautifully, adding an extra layer of gourmet taste. I personally prefer using no-sugar-added maple syrup to better control the overall sweetness, but regular maple syrup works perfectly fine and adds an even more pronounced maple note.
- Milk: Milk is crucial for adding richness and moisture to the baked goods, contributing significantly to the pie’s luxurious, silky smooth texture. Scalding the milk, as instructed in this recipe, is a traditional technique that helps prevent curdling and also enhances the milk’s ability to act as a flavor carrier, distributing the spice notes more evenly throughout the filling. I typically use 1% milk because it’s what I always have on hand, but feel free to use 2% or whole milk for an even richer, creamier result.
- Eggs: Eggs are the primary structural component and binder in our pumpkin pie filling. They are responsible for setting the custard, giving it that perfect firm yet creamy consistency. Ensuring your eggs are well-beaten before mixing them with other ingredients helps create a uniformly smooth filling.
- Unbaked Pie Shell: This recipe utilizes an unbaked pie shell, which significantly simplifies the process by eliminating the need for blind baking. The initial high oven temperature is specifically designed to create a crisp, flaky crust underneath the moist filling, preventing it from becoming soggy. You can use either a homemade or good quality store-bought crust.
*Refer to the complete recipe card below for precise quantities and detailed instructions to make this the best pumpkin pie ever.
🎥 How to Scald Milk (Video Guide)
One step that truly makes a difference in the final texture and flavor of this prize pumpkin pie is scalding your milk. While not strictly mandatory for safety reasons anymore (thanks to modern pasteurization), scalding milk still offers significant culinary benefits. It enhances the flavor profile of the pie, allowing the spices to meld more harmoniously, and contributes to a smoother, more stable custard-like texture. If you’re new to this traditional technique or simply need a visual refresher, I highly recommend taking a moment to watch this helpful video guide: How to scald milk. Trust me, investing a few extra minutes in this simple step is truly worth it for the superior results you’ll achieve in your easy pumpkin pie!
📖 Variations & Substitutions for Your Pumpkin Pie
This easy pumpkin pie recipe is wonderfully adaptable, allowing you to customize it to your personal preferences, dietary needs, or simply what you have readily available in your pantry. Don’t hesitate to experiment with these popular variations and substitutions:
- Pie Crust: The foundation of any great pie! While an unbaked pie shell is called for in the recipe, you have several excellent options. For a truly from-scratch experience, consider using my proven NO FAIL homemade pie crust recipe, known for its flakiness and rich butter flavor. Alternatively, for ultimate convenience, simply pick up a good quality store-bought crust from your local grocery store. For a different texture and flavor profile, you could also opt for a delicious graham cracker crust, either homemade or pre-made.
- Pumpkin Puree: Flexibility is key here. You can use either canned pumpkin puree for its incredible convenience and consistent texture, or if you’re feeling adventurous and have fresh pumpkins, freshly made pumpkin puree. Canned pumpkin is a fantastic shortcut that doesn’t compromise on the robust pumpkin flavor or the silky texture of this recipe, making it ideal for busy bakers or anyone seeking an easy pumpkin pie.
- Maple Syrup: This ingredient adds a lovely depth. You can use regular maple syrup for a richer, sweeter flavor profile, or opt for no-sugar-added maple syrup if you’re conscious about reducing the overall sugar content in your dessert. Both options will provide that distinctive maple note that beautifully complements the pumpkin and spice blend.
- Milk: The recipe works wonderfully with various types of milk. You can use 1%, 2%, or whole milk. Generally, the higher the fat content in the milk, the richer and creamier your pie filling will be, adding to the luxurious mouthfeel of the easy pumpkin pie.
- Dairy-Free Option: To easily convert this recipe into a delicious dairy-free pumpkin pie, simply substitute the regular milk with a dairy-free alternative. Excellent choices include unsweetened soy milk, almond milk, or oat milk. Just ensure your chosen dairy-free milk is unsweetened to maintain the intended flavor balance of the filling.
- Mini Pumpkin Pies or Tarts: This recipe is incredibly versatile and scales down perfectly for individual servings. To create charming mini pumpkin pies or tarts, simply pour the prepared filling into tart shells. The baking time will be significantly reduced – typically to about half (or until the filling is set and passes the doneness test). These mini pies are fantastic for portion control, dessert buffets, or when you want to serve individual treats.
- Spices: For ultimate convenience and if you don’t have individual spices on hand, you can substitute the ground ginger, nutmeg, and cinnamon with a pre-mixed pumpkin spice blend. Use an equivalent total amount or adjust to your taste, keeping in mind that commercial blends can vary in their intensity and specific spice ratios.
- Sugar: While brown sugar is highly recommended for its deep, rich flavor and moistening properties that contribute significantly to the “prize” quality of this pie, you could substitute white granulated sugar if absolutely necessary. However, for the most authentic and best easy pumpkin pie experience, sticking with brown sugar will yield a superior depth of flavor and a more complex sweetness.
With holidays like Easter, Thanksgiving, and Christmas often dictating our dessert choices, I frequently contemplate trying new recipes to shake things up. Yet, I consistently find myself returning to this timeless classic. It’s genuinely challenging to find a dessert that rivals the unparalleled simplicity and sheer deliciousness of my homemade canned pumpkin filling. I’ve certainly experimented with other holiday desserts in the past, only to find them lacking the profound satisfaction, comforting nostalgia, and ease of preparation that this pumpkin pie consistently delivers. So, I always return to this tried and true recipe – it’s seriously the best pumpkin pie! Using quality canned pumpkin in your pie filling not only makes the process significantly easier but also ensures a consistent and vibrant flavor, proving that a truly homemade pumpkin pie filling can be both simple and exquisitely delicious.
🔪 How to Make Your Perfect Pumpkin Pie Filling (with Canned Pumpkin)
Despite its rich flavor and impressive presentation, this is hands-down one of the easiest pumpkin pies you’ll ever bake. The beauty of this recipe lies in its straightforward approach: simply combine all the ingredients in a single bowl (excluding the optional whipped cream, of course), then pour the smooth pumpkin pie mixture into an unbaked pie shell. There’s no need for the extra step of blind baking the crust, which greatly simplifies the process and makes this a truly “easy peasy” recipe from start to finish.
PREP: Begin by preheating your oven to a precise 425 degrees F (230 degrees C). This initial high temperature is crucial for achieving a perfectly crisp and flaky crust, ensuring your easy pumpkin pie has the best foundation.
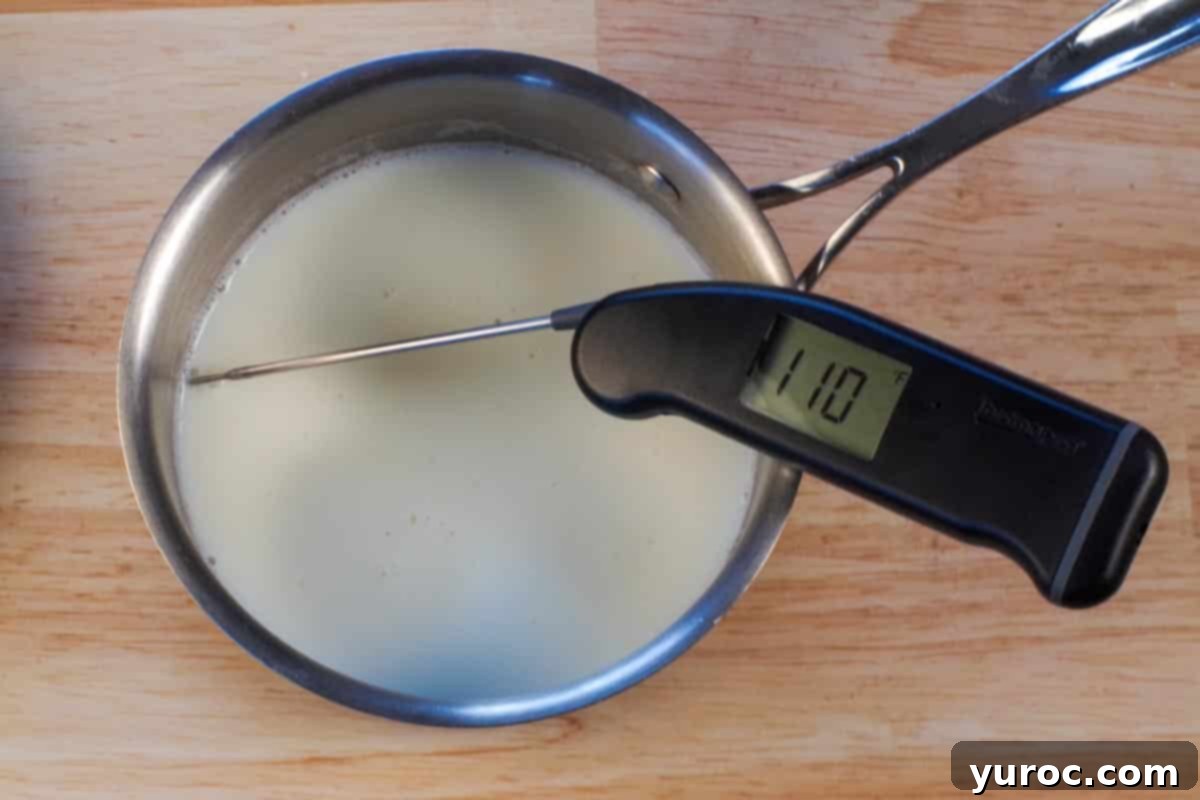
- Step 1: Carefully scald the milk. This process involves gently heating the milk in a saucepan over medium heat until small bubbles just begin to form around the edges of the pan, but it should not come to a rolling boil. Once scalded, remove it from the heat and allow it to cool down to 110 degrees F (43 degrees C). For a visual guide and more detailed instructions, please refer to the “How to Scald Milk” video provided above in the post content. This step is key for a smooth, rich filling.
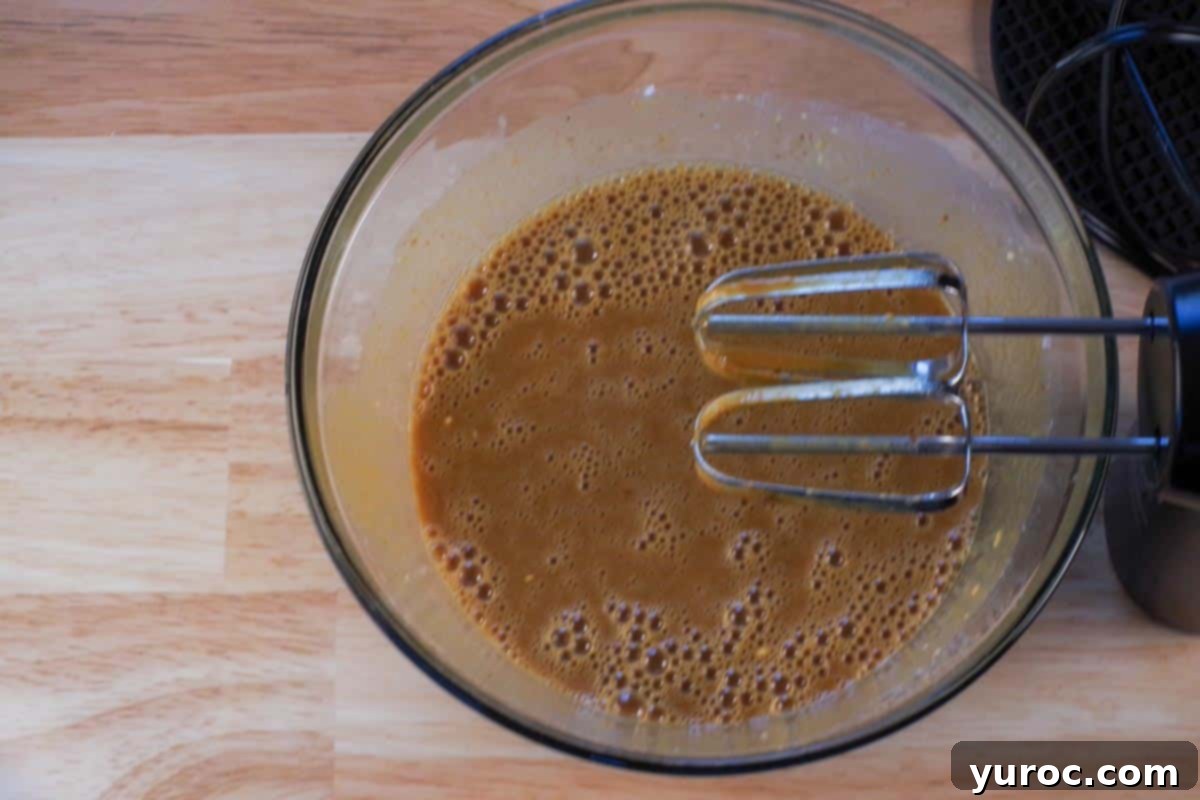
- Step 2: In a generously sized mixing bowl, combine all the pumpkin pie filling ingredients: the pure canned pumpkin purée, flour, salt, ground ginger, nutmeg, cinnamon, brown sugar, maple syrup, the scalded and cooled milk, and the well-beaten eggs. Use an electric mixer on medium speed to thoroughly blend everything together until the mixture is completely smooth, lump-free, and uniformly combined. This ensures that signature silky texture in your easy pumpkin pie filling. Remember, the whipped cream is a garnish to be added later!
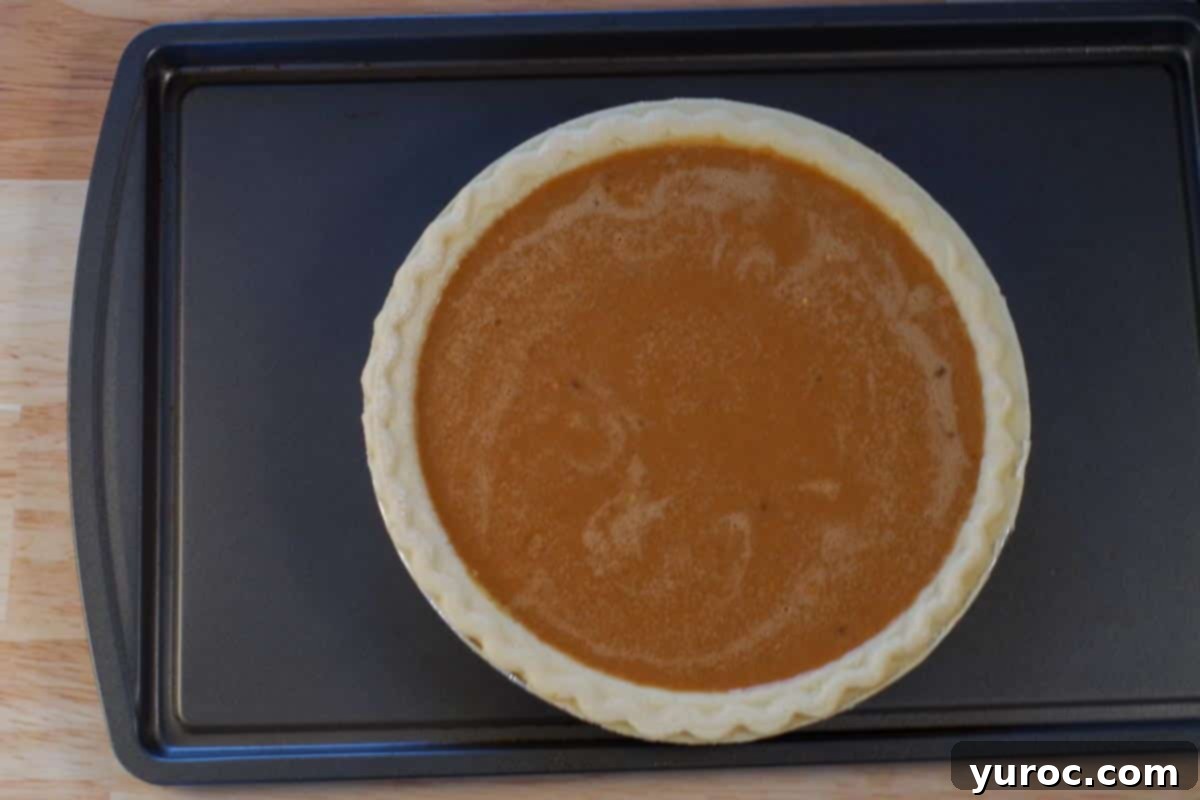
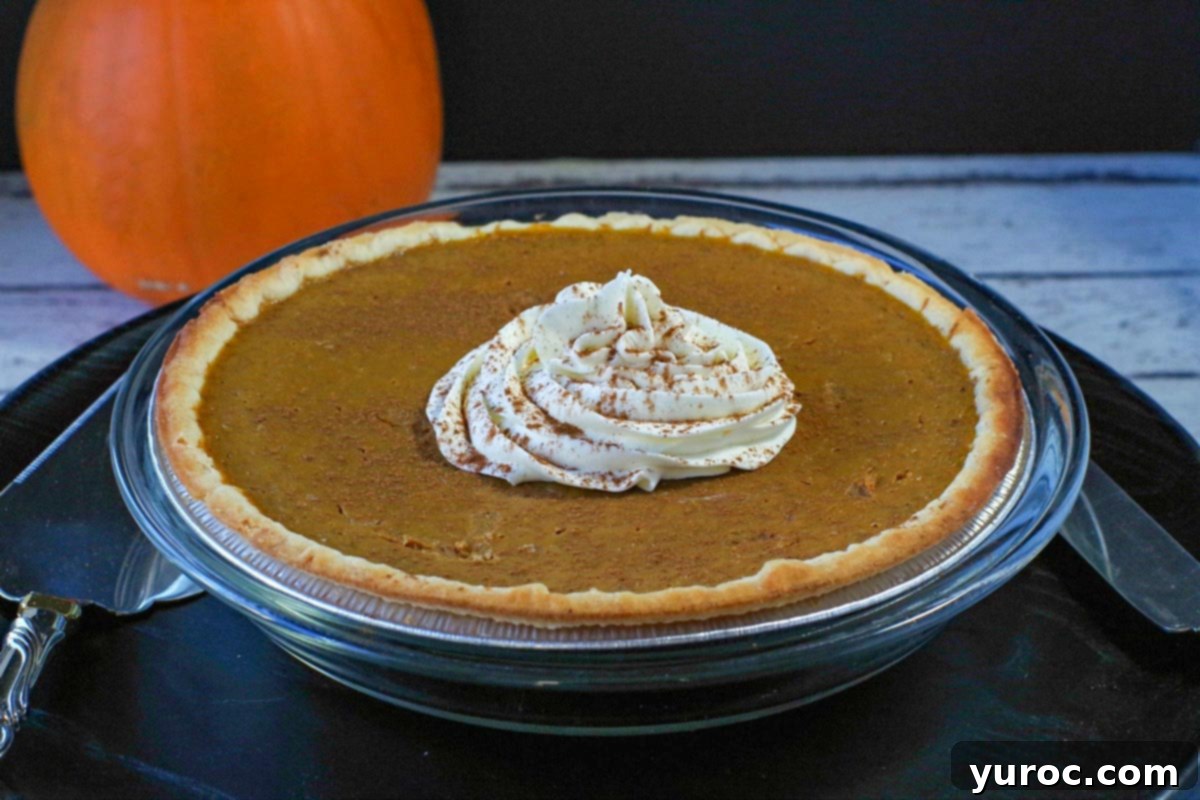
- Step 3: Carefully pour the prepared pumpkin pie filling into your unbaked pie shell, filling it up to the base of the crust. It’s normal to have a small amount of filling left over; you can use this for a few mini tarts or discard it if preferred. Place the pie into your preheated 425 degrees F (230 degrees C) oven and bake for an initial 10 minutes. This high heat jump-starts the crust, making it beautifully flaky. After 10 minutes, reduce the oven temperature to 325 degrees F (160 degrees C) and continue baking for another 30 to 40 minutes, or until the filling appears firm with only a slight jiggle in the center. *For the very best results and to ensure perfect doneness every time, refer to Top Tip #1 below. Once baked, allow the easy pumpkin pie to cool completely on a wire rack before serving. For an extra touch of indulgence, serve with a dollop of homemade whipped cream!
PRO TIP: To make transferring your filled pie into and out of the oven much easier and to prevent any unfortunate spills (especially if you’re using a store-bought, more delicate pie shell), I highly recommend placing your unbaked pie shell on a sturdy baking sheet *before* pouring in the luscious pumpkin filling. Once the pie is full, it becomes quite difficult to move without potentially buckling the crust or spilling the filling. After it’s baked and completely cooled, you can easily transfer the finished pie into a more decorative pie dish for an elegant presentation at your holiday table.
Top Tip #1: Achieving Pumpkin Pie Perfection
How to Tell When Your Pumpkin Pie is Perfectly Done
Knowing exactly when your easy pumpkin pie is finished baking is crucial for achieving that ideal creamy yet perfectly set texture. A commonly used method is to insert a knife into the center, and if it comes out clean, the pie is often considered done. However, for the absolute BEST and most accurate way to ensure perfect doneness every single time, without overbaking or leaving it undercooked, I strongly advocate for using an instant-read thermometer. Bake your pie until the internal temperature in the center reaches precisely 175 degrees F (79 degrees C). This temperature indicates that the eggs have fully set, and the custard filling has achieved its ideal consistency. I personally rely on this instant-read thermometer (affiliate link) – it’s an indispensable and versatile tool for everything food-related in my kitchen, from roasts to breads to this perfect pumpkin pie!
Top Tip #2: The Ultimate Whipped Cream Topping
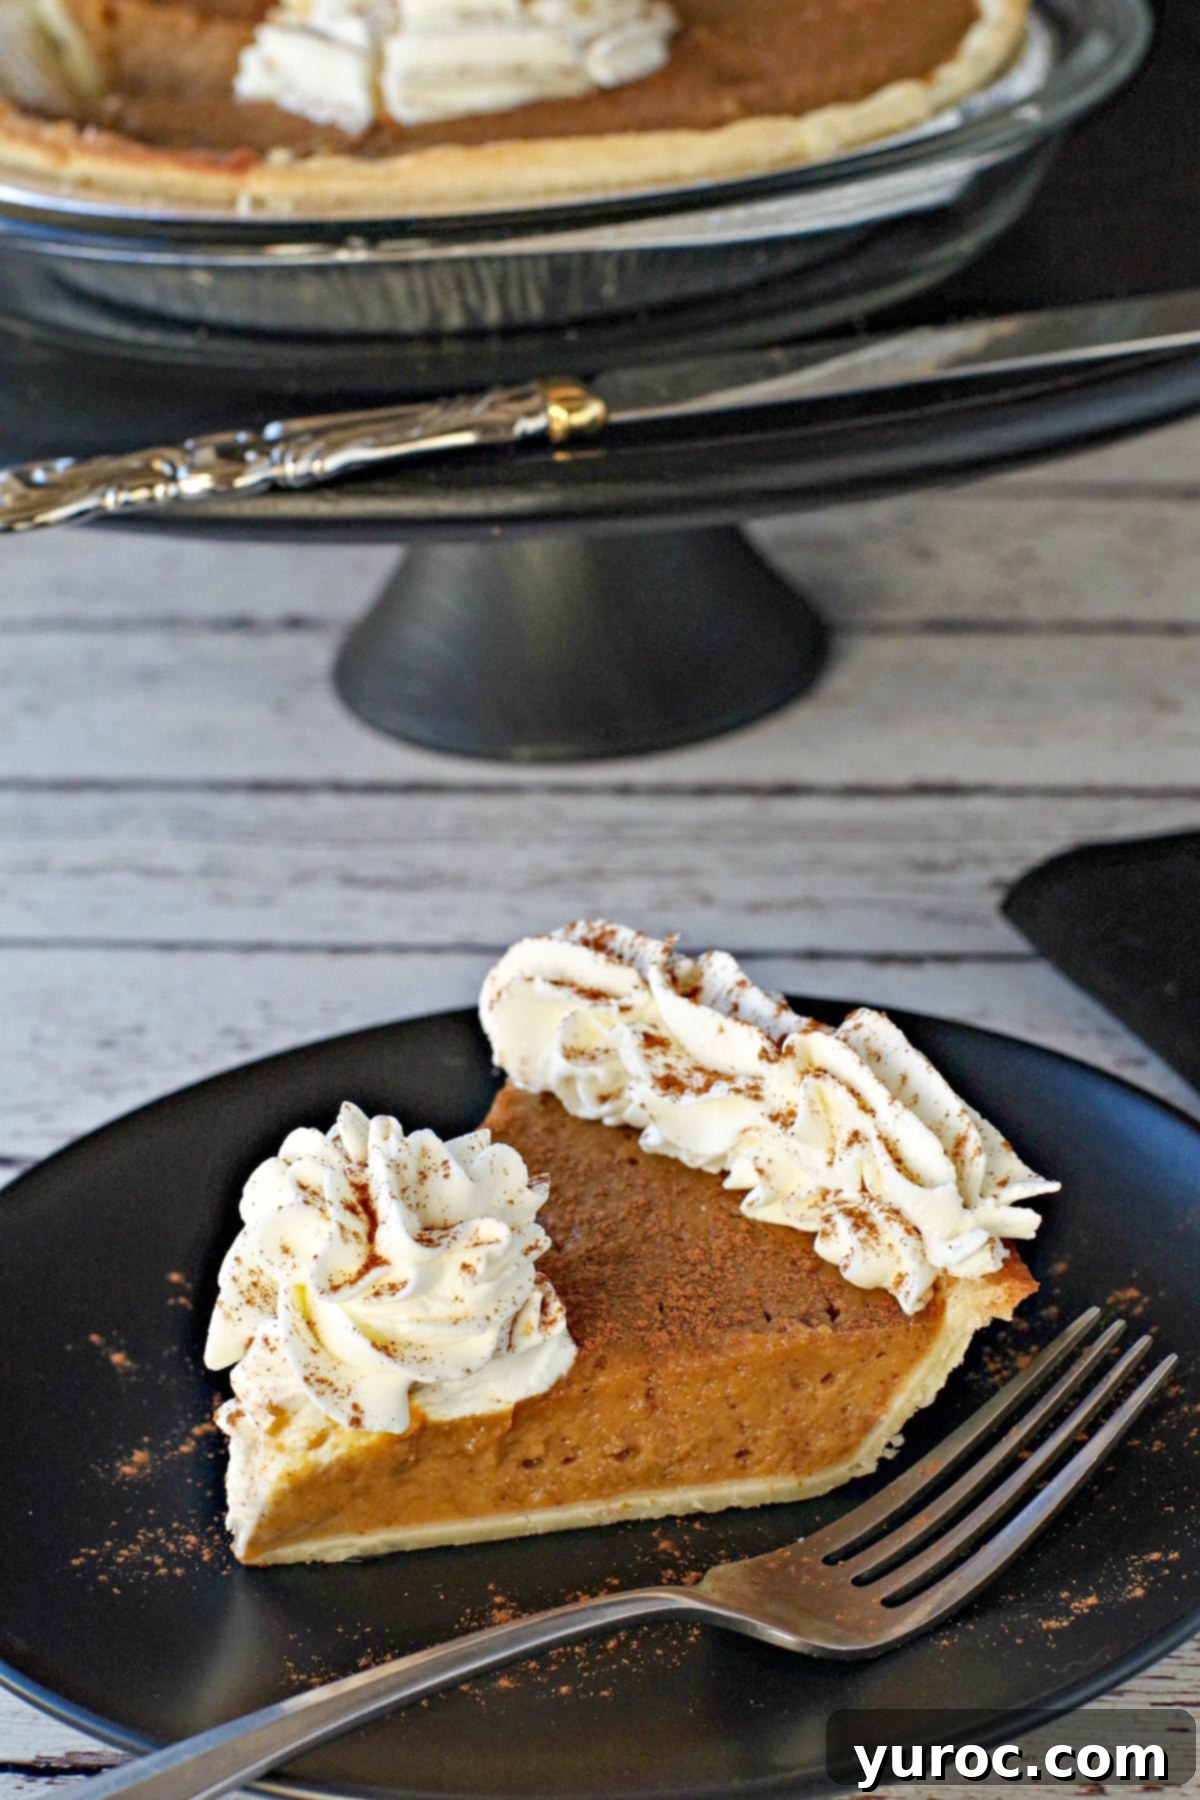
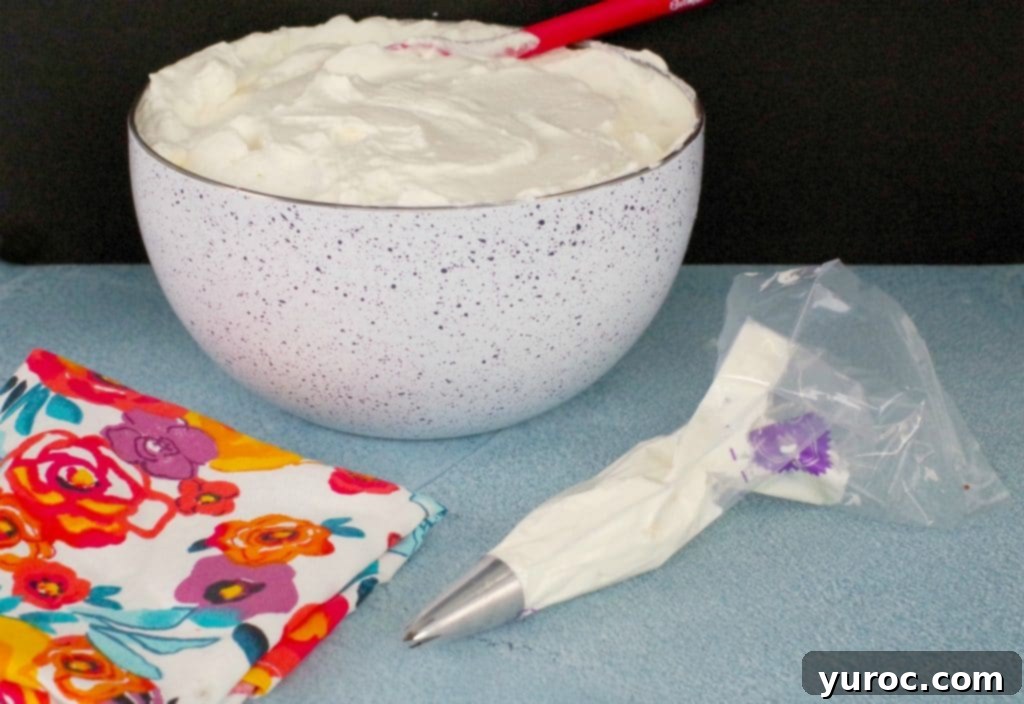
No prize pumpkin pie is truly complete without a generous, cloud-like dollop of whipped cream! For an impressive and hassle-free topping that holds its elegant shape beautifully, you are definitely going to want to try my EASY Stabilized Whipped Cream Icing. What makes this recipe so special? It’s stabilized with piping gel, which means it’s incredibly easy to make, pipes beautifully with professional-looking swirls, and most importantly, holds its elegant shape for a significantly longer time than traditional whipped cream. This makes it absolutely ideal for preparing in advance for your holiday gatherings, saving you precious last-minute time. If you prefer a less sweet topping or a different texture, you can easily substitute white granulated sugar for the powdered sugar in the recipe, though powdered sugar generally yields a smoother, melt-in-your-mouth texture. This stabilized whipped cream will undoubtedly take your easy pumpkin pie to an even higher level of deliciousness and presentation!
🌡️ Storage Guidelines for Freshness
To ensure your delicious easy pumpkin pie remains fresh and flavorful for as long as possible, proper storage is paramount. Once your pie has completely cooled to room temperature, it must be refrigerated. Store it in a sealed, airtight container in the fridge for up to 3 days. If you only plan to store it overnight for a quick dessert the next day, a simple covering with plastic wrap or aluminum foil will suffice to keep it fresh and prevent it from absorbing other refrigerator odors. For longer-term enjoyment, this pumpkin pie freezes exceptionally well. To freeze, wrap individual slices or the whole pie tightly first in plastic wrap, then again in heavy-duty aluminum foil, and finally place it in an airtight freezer-safe container or bag. It can be stored in the freezer for up to 3 months without compromising flavor or texture. When you’re ready to indulge, simply thaw the frozen pie in the refrigerator overnight and serve chilled or at room temperature, garnished with fresh whipped cream if desired.
👪 Yield and Adjusting Serving Size
This prize-winning easy pumpkin pie recipe yields approximately 8 generous servings, making it the perfect dessert for a family dinner, a small gathering, or a holiday feast. Each slice offers a satisfying portion of creamy, spiced pumpkin goodness. However, if you’re hosting a larger crowd, planning for leftovers (which are always a treat!), or simply want more pie (who could blame you?), you can easily scale the recipe. Simply locate the serving number within the recipe card below and click on it to select your desired number of servings. The ingredient quantities will automatically adjust to accommodate your needs, taking the guesswork out of scaling. Just remember that if you’re significantly increasing the yield, you’ll require additional pie pans to bake all your glorious pumpkin pies!
❔ Frequently Asked Questions About Making Pumpkin Pie
Yes, you absolutely can still use pumpkin pie mix or pre-made pie filling if that’s what you have on hand, though it will require some adjustments. Pumpkin pie mix already contains sweeteners, spices, and often other ingredients. Therefore, it’s crucial to adjust this recipe accordingly to avoid an overly sweet or unbalanced flavor. If you’re using pumpkin pie mix, you will need to omit the brown sugar, maple syrup, salt, and individual spices from this specific recipe. These components are already present in the commercial mix. To enhance the flavor and compensate for any subtle differences, I recommend adding a ¼ teaspoon of maple extract to your pumpkin pie mix, which will mimic the rich notes from the maple syrup in our original recipe. Otherwise, simply follow the remaining directions as written, particularly regarding the milk and eggs, to complete your easy pumpkin pie.
Technically, no, you don’t *need* to scald milk for food safety reasons with modern pasteurized milk. In the early days of cooking, before widespread pasteurization, it was a common practice for sanitation. However, when a contemporary recipe calls for scalded milk, it’s typically for its significant culinary benefits. Scalding the milk helps it become an excellent carrier of flavors, allowing the aromatic spices and other ingredients to meld more deeply and evenly into the pie filling, resulting in a more nuanced and richer taste. It also helps to create a smoother, more stable custard that is less likely to curdle during baking, and can even contribute to a slightly reduced baking time by pre-warming the liquid ingredients. For the very best texture and flavor in this prize pumpkin pie, I highly recommend taking the extra step to scald your milk – the difference is truly noticeable!
The initial blast of high heat (425 degrees F / 230 degrees C) serves a critical dual purpose in achieving the perfect easy pumpkin pie, especially a beautifully flaky crust. This high temperature rapidly heats the fat in the pie dough, causing it to quickly melt and produce steam. This rapid steam production is what creates those desirable flaky layers in your crust, helping it crisp up quickly and preventing it from becoming soggy when exposed to the moist filling. After approximately 10 minutes, the oven temperature is then reduced to 325 degrees F (160 degrees C). This lower, more gentle temperature allows the delicate pie filling to bake slowly and thoroughly without the risk of the crust burning or the top of the pie becoming overcooked. This two-stage baking process is a tried-and-true method that ensures both a wonderfully cooked, golden-brown crust and a perfectly set, creamy, and flavorful filling.
So, if you’ve been searching for the ultimate easy pumpkin pie recipe – one that consistently delivers on exceptional flavor, luxurious texture, and brings a comforting sense of homemade warmth to any occasion – look no further. This Prize Pumpkin Pie, made with the convenience of canned pumpkin, is guaranteed to impress. Give it a try, and watch it quickly become a cherished culinary tradition in your own home for years to come!
🦃 More Delicious Pumpkin Desserts to Explore
If you love pumpkin as much as we do, you’ll be thrilled to discover these other fantastic pumpkin-inspired dessert recipes from my kitchen. They’re perfect for extending the fall feeling, celebrating the holidays, or simply enjoying the comforting taste of pumpkin anytime you crave it!
- Light Pumpkin Cheesecake (with Oreo Crust)
- Crustless Pumpkin Pie (Weight Watchers)
- Healthy Pumpkin Biscotti Recipe
- Apricot Bran Pumpkin Muffins
Did your family ❤️ this recipe? Did you know that commenting and ⭐ rating recipes is one of the best ways to support your favorite recipe creators? If you LOVED this recipe, please comment and rate it in the recipe card below or share photos of your delicious creation on social media using the hashtag #foodmeanderings or tagging @foodmeanderings! Your feedback means the world to us!

📋Prize Pumpkin Pie (with Canned Pumpkin) Recipe
Print Recipe
Pin
Save RecipeSave Recipe
Rate
Add to Shopping ListGo to Shopping List
Ingredients
- 2 tablespoons all-purpose flour
- ¼ teaspoon salt
- ⅛ teaspoon ground ginger
- ¼ teaspoon ground nutmeg
- ½ teaspoon ground cinnamon
- ⅓ cup brown sugar
- ¼ cup maple syrup *I used no sugar added maple syrup
- 1 cup scalded milk *See video in post for “how to scald milk”
- 2 large eggs , well beaten
- 1 ½ cups pumpkin puree (canned or fresh, NOT pie filling)
- 1 10-inch unbaked pie shell
Optional Garnish (adding whipped cream will increase the calories and fat per serving size)
- Whipped cream
- Cinnamon sprinkles
Instructions
-
Preheat your oven to 425 degrees F (230 degrees C).
-
Scald the milk by gently heating it until small bubbles form around the edges (do not boil). Remove from heat and cool to 110 degrees F (43 degrees C). Refer to the video in the post content for detailed instructions.
-
In a large mixing bowl, combine all ingredients for the filling (except whipped cream) and mix thoroughly with an electric mixer until completely smooth and well-combined.
-
Carefully pour the prepared pumpkin pie filling into the unbaked pie shell, filling it up to the base of the crust. Bake for 10 minutes at the initial temperature of 425 degrees F (230 degrees C).
-
Reduce the oven temperature to 325 degrees F (160 degrees C). Continue to bake for another 35 to 45 minutes, or until the filling appears firm with a slight jiggle in the center and an instant-read thermometer registers 175 degrees F (79 degrees C). *See Top Tip #1 for details on checking for perfect doneness.
-
Allow the pie to cool completely on a wire rack before serving. For optimal texture and flavor, I recommend refrigerating the pie for at least an hour to ensure it’s fully set and chilled. If desired, serve with a generous dollop of whipped cream and a sprinkle of cinnamon.
Notes
Nutrition
