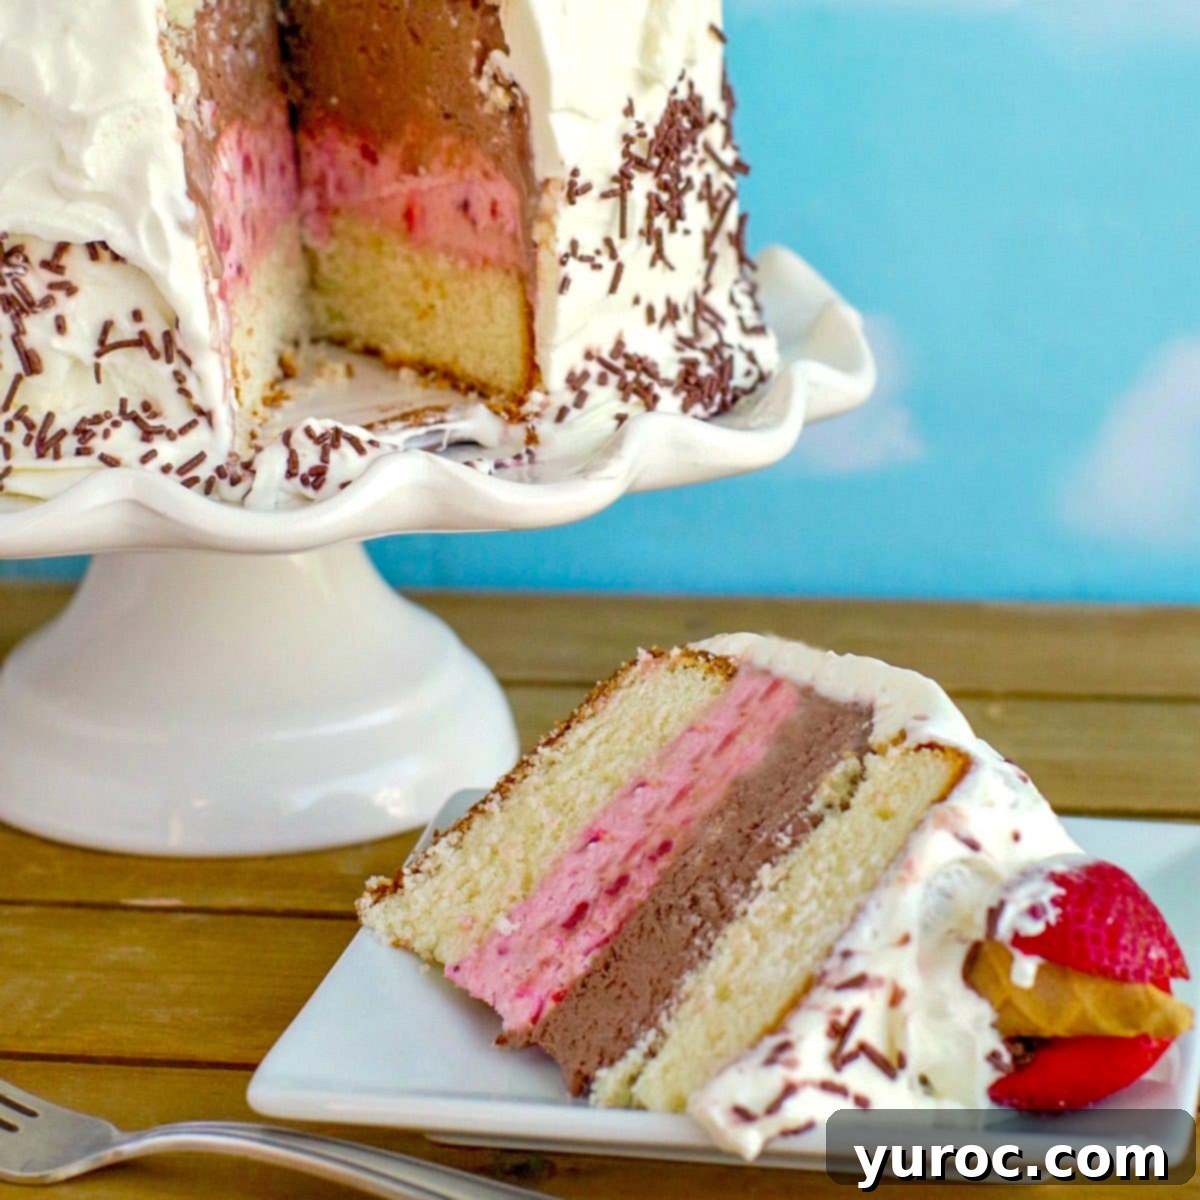
The Ultimate Homemade Neapolitan Ice Cream Cake: A Step-by-Step Guide to Perfect Layers
For many years, my children’s birthdays were synonymous with a flurry of baking activity. I would meticulously craft three homemade cakes for each child, ensuring one for their actual birthday, another for the party, and a third for daycare celebrations. Looking back, it was a truly ambitious undertaking, bordering on the insane! Yet, at the time, my passion for cake decorating fueled this tradition. Little did I realize, I was inadvertently creating an expectation that was utterly unsustainable in the long run.
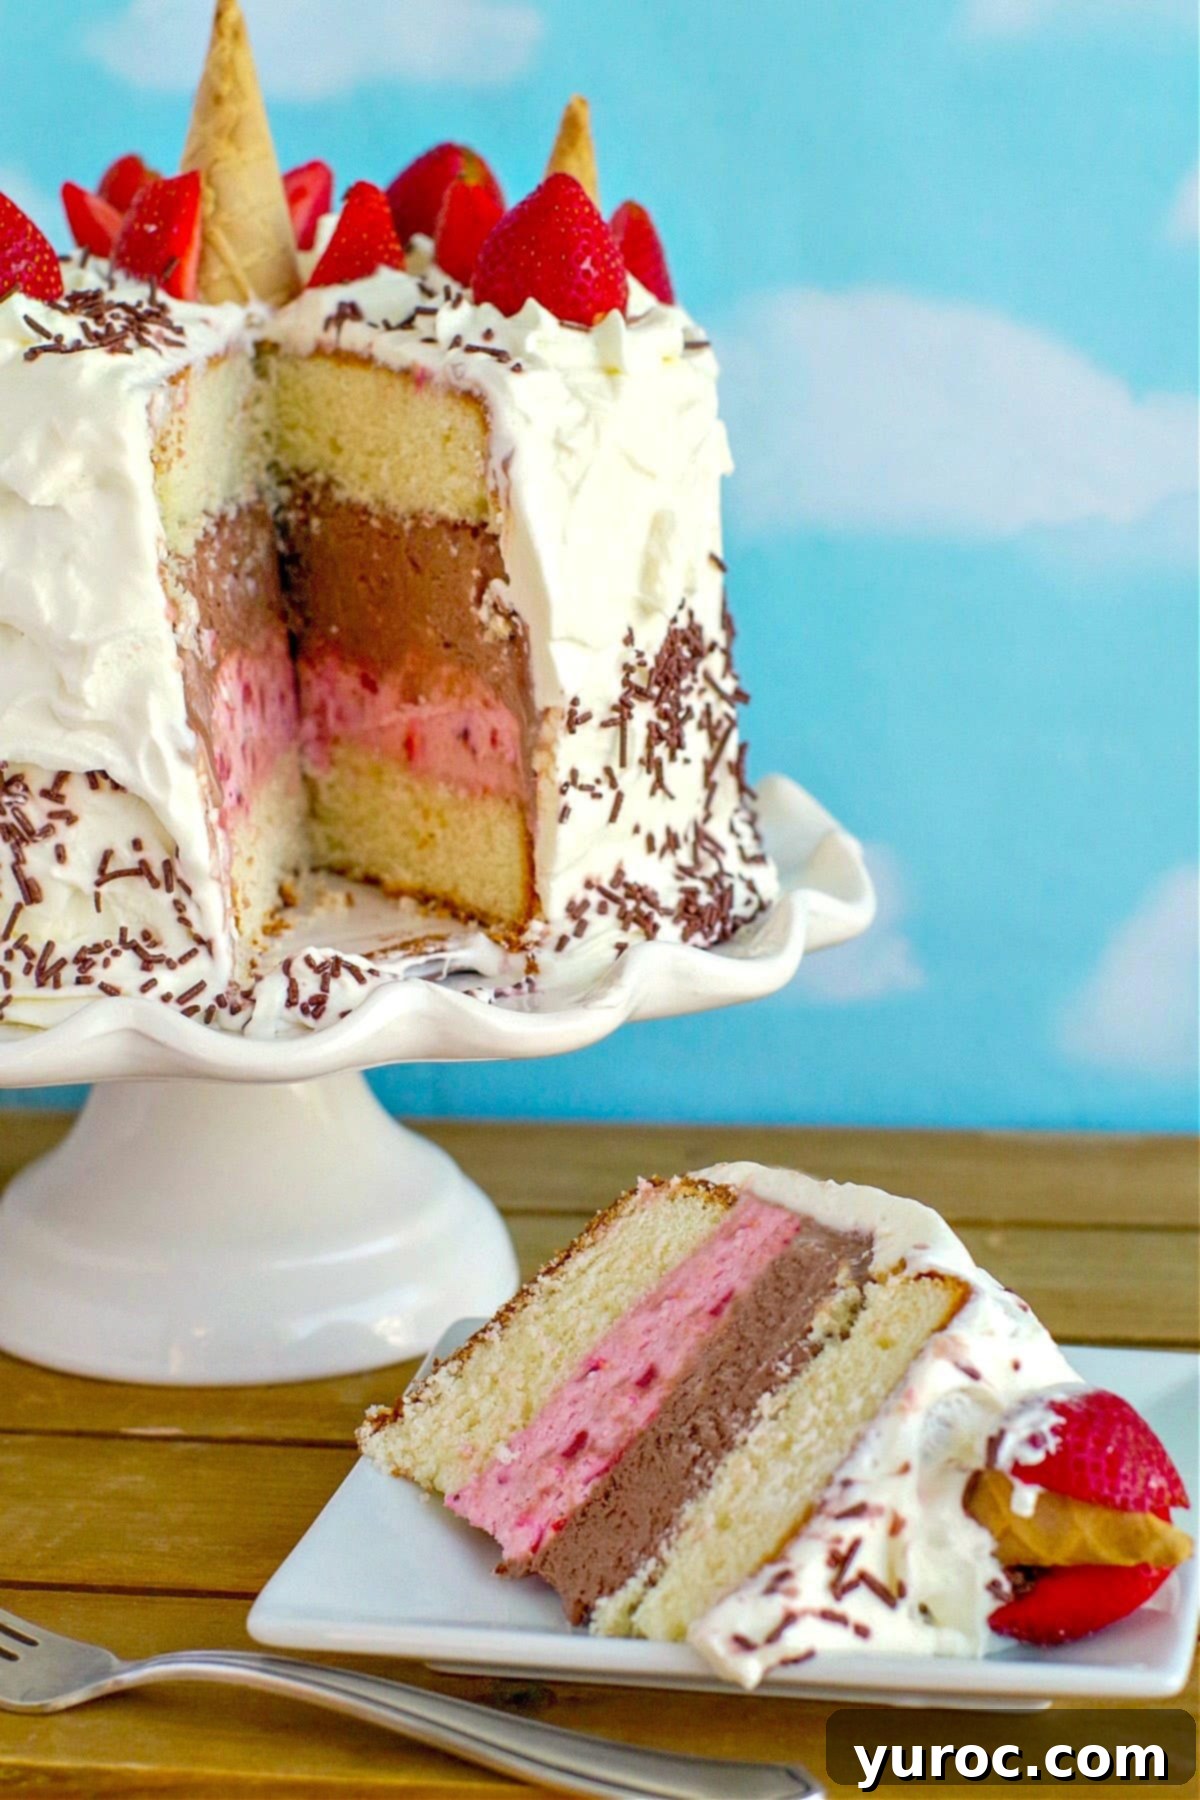
As my children grew older and transitioned out of daycare, a new birthday trend emerged: the demand for Dairy Queen ice cream cakes. To my surprise and relief, this shift marked a welcome reprieve from my exhausting baking marathon. Ice cream cakes have undeniably captured the hearts of kids today, becoming the go-to choice for birthday celebrations. So, when my daughter expressed her desire for a homemade Neapolitan Ice Cream Cake for her birthday this year, I was simply thrilled that I only had one magnificent cake to create.
[feast_advanced_jump_to]
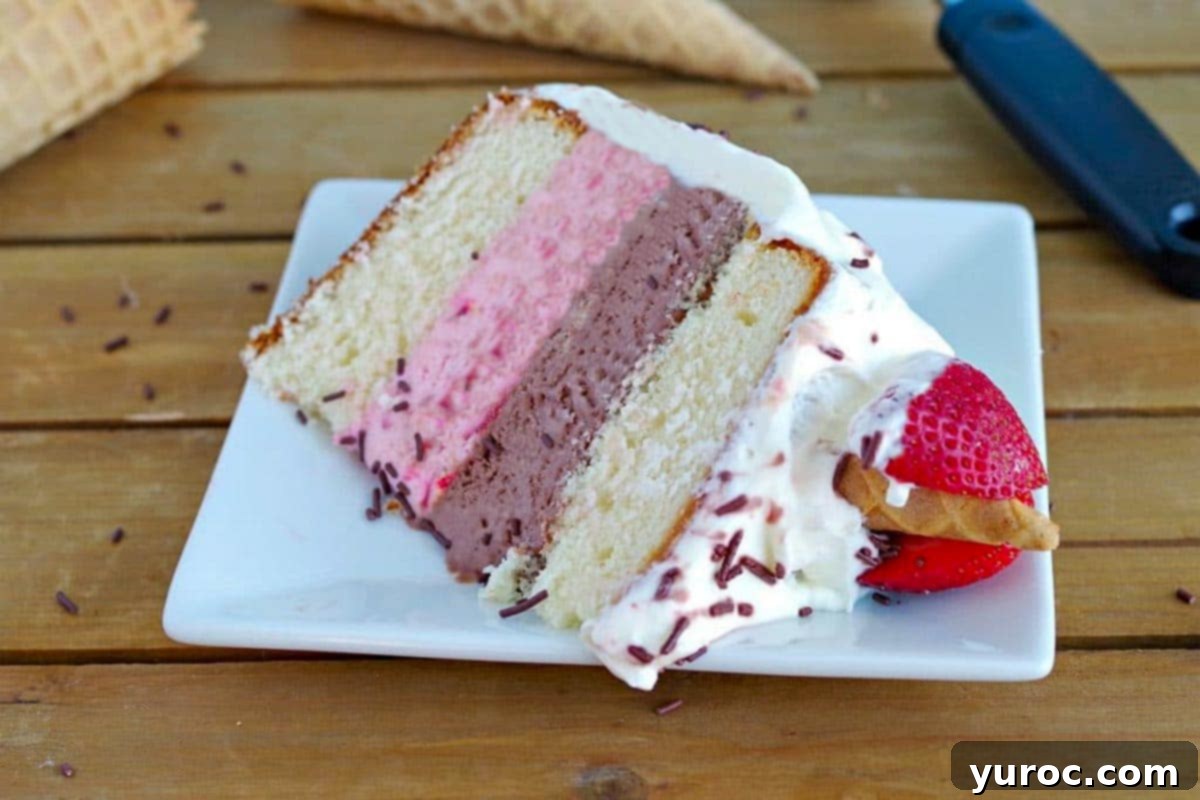
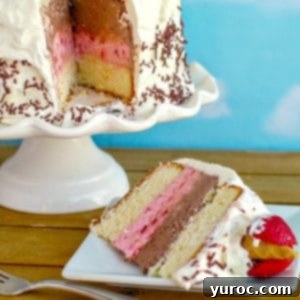
My vision for this Neapolitan masterpiece, however, wasn’t to make it *entirely* out of ice cream. After all, if it’s called a cake, it should surely have a proper cake layer! My daughter specifically requested a vanilla cake base, so I turned to my absolute favorite vanilla cake recipe (from the Mermaid Bakery). This recipe consistently delivers a light, airy, and moist vanilla cake, though any high-quality white or vanilla cake recipe would work beautifully. To complement this, I developed incredibly easy and utterly delicious no-churn chocolate and strawberry ice creams, perfecting the classic Neapolitan flavors. The entire creation was then crowned with a light, yet wonderfully stable, whipped cream frosting. The result was nothing short of divine – a truly joyful culinary adventure from start to finish!
Creating a homemade Neapolitan Ice Cream Cake is a fantastic project that combines the best of both worlds: fluffy cake and creamy ice cream. It offers a nostalgic flavor profile that appeals to all ages, making it an ideal choice for birthdays, summer gatherings, or any occasion that calls for a show-stopping dessert. While the idea of layering cake and ice cream might sound complex, this recipe breaks down the process into manageable, enjoyable steps, ensuring even ambitious home bakers can achieve spectacular results.
Why Choose Homemade Neapolitan Ice Cream Cake?
Beyond the undeniable deliciousness, opting for a homemade Neapolitan Ice Cream Cake offers several distinct advantages. Firstly, you have complete control over the quality of ingredients, ensuring fresh, flavorful components. Secondly, the ability to customize each layer means you can adjust sweetness, texture, and even add personal touches to the flavors. The no-churn ice cream method simplifies the process significantly, removing the need for an ice cream maker while still yielding incredibly smooth and creamy results. This approach allows you to achieve bakery-quality taste and presentation right in your own kitchen, creating a truly memorable dessert that tastes far superior to anything store-bought.
The Perfect Flavor Balance: Vanilla, Chocolate, and Strawberry
The beauty of Neapolitan lies in its iconic trio of flavors. The vanilla cake provides a neutral, sweet foundation that acts as a perfect canvas. Our homemade no-churn chocolate ice cream offers a rich, deep cocoa flavor that is both comforting and indulgent. Complementing this is the vibrant, fruity burst of the strawberry ice cream, made with both freeze-dried and fresh strawberries for an intense, authentic taste. Finally, the stabilized whipped cream frosting ties all these elements together with a light, airy finish that doesn’t overpower the distinct flavors of the cake and ice cream. Each bite delivers a harmonious blend of textures and tastes, making this cake an absolute crowd-pleaser.
🥘 Essential Ingredients for Your Neapolitan Ice Cream Cake
To embark on this delightful baking adventure and create your magnificent Neapolitan Ice Cream Cake, you’ll need a carefully selected list of ingredients. These components are divided into three main sections: the creamy no-churn ice cream layers, the fluffy vanilla cake base, and the luscious stabilized whipped cream frosting. Using high-quality ingredients is key to achieving the best flavor and texture in your final product.
- For the Vanilla Cake:
- Unsalted butter: Crucial for rich flavor and tender crumb.
- White granulated sugar: Provides sweetness and helps with cake structure.
- White vinegar: Reacts with baking powder for a lighter texture; also creates buttermilk effect with milk.
- Milk: Adds moisture and richness.
- Vanilla extract: Essential for that classic vanilla flavor.
- All-purpose flour: The structural foundation of the cake.
- Baking powder: The primary leavening agent for a fluffy cake.
- Salt: Balances sweetness and enhances other flavors.
- For the No-Churn Chocolate & Strawberry Ice Cream Layers:
- Heavy whipping cream (liquid): The base for airy, no-churn ice cream.
- Sweetened condensed milk: Provides sweetness and creaminess without ice crystals.
- Pink food coloring (optional): To enhance the vibrant pink of the strawberry ice cream.
- Freeze-dried strawberries: For intense, concentrated strawberry flavor. Crucial for the no-churn method.
- Fresh strawberries: Finely chopped for bursts of natural fruitiness.
- Cocoa powder: For a deep, rich chocolate ice cream flavor.
- Vanilla extract: Enhances both strawberry and chocolate flavors.
- Pinch of salt: Balances the sweetness in the ice cream.
- For the Stabilized Whipped Cream Frosting:
- Heavy whipping cream: The foundation of the light and airy frosting.
- Piping gel: The secret ingredient for a perfectly stabilized whipped cream that holds its shape, even on an ice cream cake.
- Powdered sugar (icing sugar): Sweetens the frosting and helps with stability.
- Clear vanilla extract: To maintain the pure white color of the frosting, preventing any yellowish tint from regular vanilla.
- For Garnishes:
- Ice cream cones: Broken tips add a fun, thematic touch.
- Chocolate sprinkles: For texture and visual appeal.
- Fresh strawberries: Sliced or whole for a beautiful, fresh topping.
*A detailed list of quantities can be found in the comprehensive recipe card below.
📖 Creative Variations & Smart Substitutions
While this recipe is designed to deliver the ultimate homemade Neapolitan Ice Cream Cake experience, there are always ways to adjust it to fit your schedule, preferences, or available ingredients. Here are some thoughtful variations and substitutions:
- Cake Base:
- Time-Saving Shortcut: If you’re pressed for time or prefer not to bake from scratch, a high-quality box cake mix can be a perfectly acceptable substitute for the homemade vanilla cake. Choose a mix that yields a light, fluffy texture for the best results. Simply follow the package instructions for baking two round cake layers.
- Flavor Experimentation: While vanilla is traditional for Neapolitan, you could experiment with other cake flavors like a light lemon or almond cake for a unique twist, though it would deviate from the classic profile.
- Ice Cream Layers:
- Store-Bought Convenience: The homemade no-churn ice cream is incredibly rewarding and simple, but if you’re really short on time, you can certainly substitute good quality store-bought chocolate and strawberry ice cream. Opt for premium brands with natural flavors for the best taste. Ensure they are softened slightly before layering for easy spreading, then refreeze immediately.
- Other Flavors: While it wouldn’t be “Neapolitan,” this cake structure is adaptable. Imagine a mint chocolate chip and cookies ‘n’ cream combination!
- Frosting for Ice Cream Cake:
- Stabilized Whipped Cream is Key: For an ice cream cake, a Stabilized Whipped Cream Icing is highly recommended. Regular whipped cream will deflate and melt too quickly, especially with the temperature fluctuations of an ice cream cake. The stabilization helps it hold its shape and withstand freezing and thawing better.
- Whipped Cream Buttercream: Another excellent option is a Whipped Cream Buttercream Frosting (with no butter). This offers a slightly richer, yet still light, texture compared to pure stabilized whipped cream, and also provides excellent stability. These two types of frostings are genuinely the best choices for ice cream cakes due to their ability to maintain structure and appearance in frozen conditions.
However, it must be said that for the truly unparalleled flavor and texture, aiming to make every component homemade is ideal. The synergy of a scratch-baked cake with luscious homemade no-churn ice cream and a perfectly stabilized frosting elevates this dessert to true cake and ice cream perfection!
🔪 Step-by-Step Instructions: Crafting Your Neapolitan Ice Cream Cake
Let’s be upfront: this cake requires a bit of time and patience, but I promise you, the end result is absolutely worth every minute of effort! My kids devoured this cake with unparalleled enthusiasm, even requesting leftovers for breakfast the next day (a true testament to its deliciousness!). To make the process manageable and enjoyable, I highly recommend tackling this recipe in stages. This approach ensures each component is perfect and allows ample freezing time, which is crucial for structural integrity.
My preferred method involves making the no-churn ice cream layers one day, baking the vanilla cake layers the next, and then assembling the entire cake the day before the party. This schedule ensures the cake has sufficient time to freeze solid overnight, making it much easier to handle, frost, and serve. Proper staging reduces stress and maximizes the enjoyment of the baking process.
Crafting the No-Churn Ice Cream Layers
- Whip the Cream: In a large mixing bowl, preferably from a stand mixer equipped with a whisk attachment, beat the heavy whipping cream until stiff peaks form. This is the foundation of your airy ice cream.
- Prepare Strawberry Powder: Place the freeze-dried strawberries into a food processor and blend until they transform into a fine powder. This powder provides a concentrated burst of strawberry flavor and color without adding excess moisture, which is key for no-churn ice cream. Set this aside.
- Mix Strawberry Base: In a separate bowl, combine one 14 oz can of sweetened condensed milk with 1 teaspoon of vanilla extract, the freshly powdered freeze-dried strawberries, a dash of salt, and the finely chopped fresh strawberries. Mix these ingredients thoroughly until they are well incorporated.
- Mix Chocolate Base: In another medium mixing bowl, combine the second 14 oz can of sweetened condensed milk, 1 teaspoon of vanilla extract, and ½ cup of cocoa powder. Whisk vigorously until the chocolate is fully dissolved and the mixture is smooth.
- Fold in Whipped Cream: Gently fold half of the stiff-peaked whipped cream into the strawberry mixture and the other half into the chocolate mixture and mix until incorporated. The goal is to incorporate the whipped cream without deflating it, maintaining the airy texture.
- Freeze Ice Cream Layers: Carefully transfer each distinct ice cream flavor (strawberry and chocolate) into separate 8 or 9-inch round cake pans. Ensure you use the same size pans for these layers as you will for your baked cake. Smooth the tops evenly and freeze for at least 8 hours, or ideally, overnight, until completely solid.
Baking the Vanilla Cake Layers (Homemade or Store-Bought)
- Prepare Pans and Preheat Oven: Preheat your oven to 350°F (175°C) and position the oven rack in the center. Liberally grease two 8 or 9-inch round cake pans (matching the size of your ice cream layers). I highly recommend using a quality cake release spray, such as Wilton Cake Release, to prevent any sticking and ensure your cakes slide out perfectly.
- Cream Butter and Sugar: In a large mixing bowl, cream together the softened unsalted butter and white granulated sugar until the mixture is light, fluffy, and pale in color, typically about 3 minutes.
- Add Eggs: Incorporate the large eggs one at a time, beating well after each addition to ensure they are fully emulsified into the butter mixture.
- Prepare Wet and Dry Ingredients: In a small bowl or measuring cup, mix the clear vanilla extract into the milk. In a separate, larger bowl, whisk together the all-purpose flour, baking powder, and salt.
- Combine Wet and Dry: Gradually add the dry flour mixture to the creamed butter/sugar/egg mixture in two parts, alternating with the milk mixture. Begin and end with the flour. Beat well after each addition until just combined, being careful not to overmix, which can lead to a tough cake.
- Bake Cake Layers: Divide the cake batter evenly between the two prepared cake pans. Note that you may have a bit of extra batter, which is perfect for a few cupcakes! Ensure your pans are filled no more than two-thirds full to prevent spillage. Bake for 20 to 25 minutes, or until a cake tester inserted into the center comes out clean.
- Cool: Allow the cake layers to cool in their pans for about 10 minutes before inverting them onto a wire rack to cool completely. It’s crucial that the cake layers are entirely cool before assembly to prevent melting the ice cream.
Whipping Up the Stabilized Whipped Cream Frosting
- Initial Whip: In a large, chilled mixing bowl, combine the heavy whipping cream and powdered sugar. Using an electric mixer (handheld or stand mixer), beat on medium-high speed until soft peaks begin to form.
- Add Stabilizers: Add the piping gel and clear vanilla extract. Continue to whip the mixture on high speed until stiff peaks form. The piping gel is what gives this frosting its incredible stability, allowing it to hold its shape beautifully and resist melting, even when applied to a frozen cake. (For a visual guide, refer to the video on whipping cream to stiff peaks in the “Notes” section below.)
Assembling Your Neapolitan Ice Cream Cake
- First Cake Layer: Place your first cooled vanilla cake layer onto a cardboard cake circle or directly onto your chosen serving plate/cake stand.
- Ice Cream Layers: Carefully remove the frozen chocolate ice cream layer from its pan and place it directly on top of the first cake layer. Repeat this process with the strawberry ice cream layer, placing it on top of the chocolate. Work quickly!
- Final Cake Layer: Add the second vanilla cake layer on top of the strawberry ice cream.
- Quick Freeze: Immediately return the assembled cake to the freezer for a few minutes. Ice cream melts fast, and this quick freeze will help solidify the layers before frosting.
- Frosting: Remove the cake from the freezer. Using an offset spatula or a butter knife, quickly spread the stabilized whipped cream frosting evenly over the top and sides of the cake.
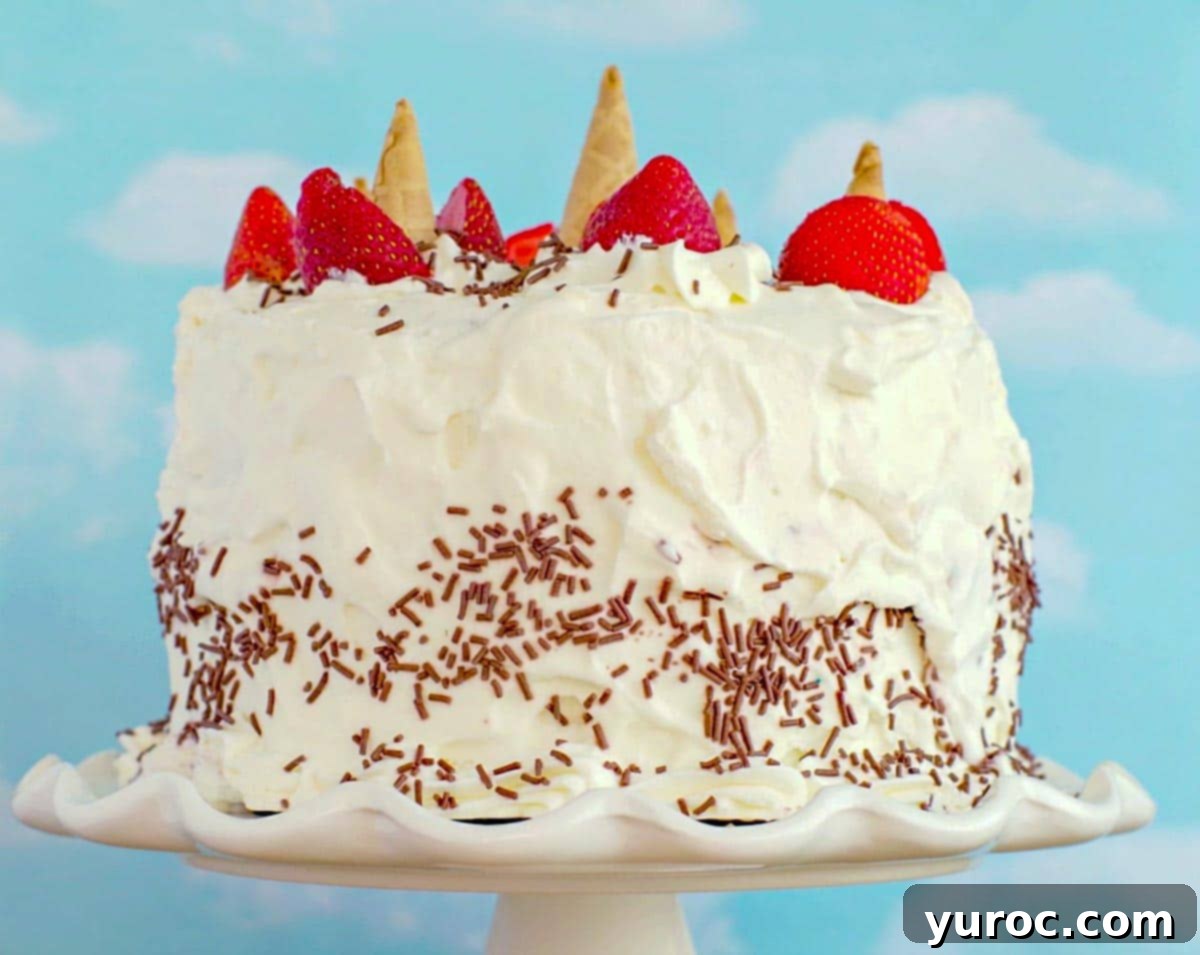
- Garnish and Decorate: Add your desired garnishes. I used broken tips of ice cream cones, additional piped swirls of whipped cream, fresh strawberry slices, and a generous sprinkle of chocolate sprinkles. Get creative with your decorations!
- Serve or Re-freeze: Serve the cake immediately for the best texture, or return it to the freezer until just prior to serving. Ensuring it is thoroughly frozen before serving is key to maintaining its structure.
💭 Expert Tips for Neapolitan Ice Cream Cake Success
Achieving a picture-perfect and delicious Neapolitan Ice Cream Cake is easy with these insider tips:
- Freeze-Dried vs. Dried Strawberries: This is a critical distinction! Freeze-dried strawberries are NOT the same as dried strawberries. Freeze-drying is a process that removes almost all water content, resulting in a crispy, intensely flavored, and easily pulverizable product. Dried strawberries, on the other hand, retain more moisture, are chewier, and will not blend into a fine powder suitable for the no-churn ice cream base. Using dried strawberries will lead to a watery, icy, and less flavorful ice cream.
- Finely Dice Fresh Strawberries: When adding fresh strawberries to your ice cream mixture, ensure they are very finely diced. Larger pieces will become rock-hard and difficult to bite into once the ice cream is frozen solid. Smaller pieces integrate better and provide a pleasant texture contrast.
- Clear Vanilla Extract for Frosting: To maintain the pristine white appearance of your stabilized whipped cream frosting, I highly recommend using clear vanilla extract. Regular vanilla extract, due to its amber color, can impart a slight yellowish tint, detracting from the classic Neapolitan aesthetic.
- Grease Your Pans Effectively: For foolproof cake removal, always use a reliable method for greasing your cake pans. Wilton Cake Release is a fantastic product that greases and flours pans in one step, ensuring your cake layers don’t stick. Alternatively, you can butter and flour the pans, or line the bottoms with parchment paper.
- Chill Your Whipping Bowl and Utensils: For the best results when whipping cream, place your mixing bowl and whisk attachment (or beater blades) in the freezer for 10-15 minutes before you start. Cold equipment helps the cream whip up faster and achieve stiffer peaks, which is essential for both the no-churn ice cream and the stabilized frosting.
- Work Quickly During Assembly: Ice cream melts rapidly once out of the freezer. Have all your components ready and organized before you begin assembly. Work swiftly to layer the cake and ice cream, then return the cake to the freezer immediately after each major step to keep everything firm.
- Sharp Knife for Serving: For clean slices, use a very sharp knife. Warm the knife under hot water, wipe it dry, and then slice through the cake. Repeat this process for each slice to prevent sticking and tearing.
🎥 Video Resource: Perfect Whipped Cream Every Time
Achieving stiff peaks for your whipping cream is crucial for both the no-churn ice cream and the stabilized frosting. If you’re new to whipping cream or want a refresher, this video offers excellent visual guidance:
How to whip whipping cream to stiff peaks
👪 Serving Your Neapolitan Ice Cream Cake
This impressive Neapolitan Ice Cream Cake is designed to generously serve 12 individuals with substantial slices. Due to its ice cream layers, this cake is quite susceptible to melting once it’s removed from the freezer. To ensure a beautiful presentation and enjoyable experience, make sure the cake is frozen completely solid before you begin decorating. Once decorated, return it to the freezer until just minutes before you plan to serve it. This allows the frosting to firm up and the ice cream to remain at its ideal consistency. Work quickly when slicing and serving to prevent excessive melting, and encourage guests to enjoy their slices promptly!
🍽 Essential Equipment for Your Kitchen
To prepare this stunning Neapolitan Ice Cream Cake with ease, having the right kitchen tools is invaluable:
- Stand Mixer or Hand Mixer: Absolutely essential for whipping the heavy cream to stiff peaks for both the ice cream and the frosting. A stand mixer offers hands-free convenience, but a powerful hand mixer will also do the trick.
- Food Processor: Crucial for pulverizing the freeze-dried strawberries into a fine powder, which is key for an intensely flavored and smooth strawberry ice cream layer.
- Round Cake Pans (4 total): You’ll need two 8 or 9-inch round cake pans for baking your vanilla cake layers. Additionally, two more pans of the same size are needed for freezing your chocolate and strawberry no-churn ice cream layers. Using consistent pan sizes ensures all layers fit together perfectly for a uniform and attractive cake.
- Large Mixing Bowls: Several large bowls will be needed for mixing the ice cream bases, cake batter, and whipping the frosting.
- Spatulas and Whisks: For stirring, folding, and spreading.
- Offset Spatula: Ideal for smoothly applying the whipped cream frosting.
- Wire Cooling Rack: For cooling your baked cake layers completely.
- Cardboard Cake Circle (optional but recommended): Provides a stable base for assembling and transferring the cake, especially helpful when decorating.
🌡️Storing Your Neapolitan Ice Cream Cake for Freshness
Proper storage is paramount for an ice cream cake to maintain its quality and structural integrity. This cake must always be stored in the freezer. After you’ve completed the decoration (excluding any fragile garnishes that might freeze poorly or get crushed), I strongly recommend placing the cake in a sealed cake container or tightly wrapping it in several layers of plastic wrap followed by aluminum foil. Allow it to freeze overnight until it is incredibly solid. The more solidly frozen it is before serving, the better it will hold up against melting once it hits the table. It can be stored this way for up to 2-3 weeks, though it’s always best when enjoyed within the first week for optimal texture and flavor. When you’re ready to serve, simply pull it out, add any delicate garnishes, and enjoy!
If you’re now inspired to explore more delightful homemade ice cream cake recipes, be sure to check out my equally delicious Easy Red Velvet Ice Cream Cake (pictured below) and my fun DQ Copycat Cookie Dough Ice Cream Cake! Both are fantastic options for any occasion.
Ice cream cakes are truly versatile and wonderful desserts that can be enjoyed at any time of the year. However, they truly shine as the quintessential summer birthday cake, offering a refreshing and celebratory treat. So, whether you’re planning a warm-weather celebration or simply searching for impressive birthday cake ideas, this Homemade Neapolitan Ice Cream Cake is the perfect recipe to add a touch of joy and deliciousness to your special moments!
⭐ Rate and Share Your Experience!
Did you make this incredible Neapolitan Ice Cream Cake? We’d absolutely love to hear about it! Please take a moment to RATE THE RECIPE below and share your thoughts. Your feedback helps other bakers and is greatly appreciated.
For more delicious recipes and exclusive content, please SUBSCRIBE to my newsletter and receive a FREE E-cookbook! Also, be sure to FOLLOW ME on FACEBOOK, TWITTER, INSTAGRAM, and PINTEREST for daily inspiration and tasty updates!

📋Neapolitan Ice Cream Cake
Print Recipe
Pin
Save RecipeSave Recipe
Rate
Add to Shopping ListGo to Shopping List
Equipment
-
Stand or Hand Mixer
-
Food Processor
-
4 – 8 or 9 inch round cake pans
Ingredients
Chocolate & Strawberry Ice cream layers
- 2 cans sweetened condensed milk 14 oz each
- 1 drop pink food coloring
- 4 cups whipping cream (liquid)
- 1 ½ cup freeze-dried strawberries
- 1 ½ cups fresh strawberries, chopped finely
- 2 teaspoons vanilla extract
- pinch salt
- ½ cup cocoa
Vanilla Cake layer
- Wilton Cake Release for greasing pans
- 1 cup unsalted butter
- 2 cups white granulated sugar
- 4 large eggs
- 1 tablespoon white vinegar
- 1 cup milk *add vinegar to measuring cup first, then top with milk
- 1 teaspoon vanilla extract
- 2 ¾ cups all-purpose flour
- 2 ¼ teaspoons baking powder
- ¾ teaspoon salt
Stabilized Whipped Cream Frosting
- 3 cups heavy whipping cream
- 1 ½ teaspoons clear vanilla extract
- 6 tablespoons piping gel
- 6 tablespoons powdered sugar/icing sugar
Garnish/Decorations (Optional)
- Ice cream cones (broken for decorative tips)
- Chocolate sprinkles
- Fresh strawberries (sliced or whole)
- Additional stabilized whipped cream frosting (for piping)
Instructions
No Churn Ice Cream
-
In the bowl of a stand mixer fitted with the whisk attachment, beat the whipping cream to stiff peaks.
-
Add the freeze-dried strawberries to the bowl of a food processor. Process until the strawberries are a fine powder. Set aside.
-
In a separate bowl, add one 14 oz can of condensed milk, 1 teaspoon vanilla, the powdered freeze dried strawberries from the food processor, a dash of salt and the fresh finely chopped strawberries. Mix together until incorporated.
-
In another medium mixing bowl, add the other 14 oz can of condensed milk, 1 teaspoon vanilla and ½ cup of cocoa. Whisk thoroughly.
-
Fold half the whipped cream into the strawberry mixture and the other half into the chocolate mixture and mix until incorporated.
-
Transfer each ice cream flavor into a separate 8 or 9 inch round cake pan (you can use either size, just make sure you use the same size for baking the cake. Freeze 8 hours or overnight.
Vanilla Cake layer (can substitute with store bought cake mix if desired)
-
Preheat oven to 350 degrees, put oven rack into center of oven. Grease 2 round 8 or 9 inch cake pans (be sure to use the same size pan as you used for ice cream) *I recommend using Wilton Cake Release so your cakes won’t stick to the pan
-
Cream butter and sugar together until fluffy, about 3 minutes. Add eggs one at a time, beating well after each egg.
-
Mix the clear vanilla into the milk. Mix the flour, baking powder and salt together in a separate bowl.
-
Add flour to butter/sugar/eggs in two parts, alternating with the milk mixture, beating well after each addition.
-
Divide batter into 2 prepared pans (there will be extra, so you can use it for cupcakes). Bake 20 to 25 minutes, or until a cake tester inserted into the center of cake comes out clean.
* Do NOT fill your pans more than ⅔ full to prevent them from spilling over. -
Let cool in pans 10 minutes, then remove from pans and cool completely on wire rack.
Stabilized Whipped Cream Frosting
-
Combine whipping cream and powdered sugar in large bowl. Beat with electric mixer
until soft peaks form. -
Add piping gel and vanilla, then continue to whip until
stiff peaks form (see video on how to beat whipped cream to stiff peaks in NOTES)
Assembly
-
Add first cake layer to cardboard cake circle (if you are using one) or whatever you are putting the cake on.
-
Add chocolate ice cream layer, then strawberry ice cream layer
-
Add final cake layer.
-
Return to freezer for a few minutes, as this melts fast!
-
Frost with whipped cream frosting and a butter knife
-
Add garnishes as shown in photos, or as you desire. * I used the tips of broken ice cream cones, additional piped whipped cream and strawberries, as well as chocolate sprinkles.

-
Serve or immediately return to freezer until ready to serve.
Notes
🎥 Video Resource:
How to whip whipping cream to stiff peaks
Nutrition
🎂 Explore More Irresistible Birthday Cakes!
If you’re looking for more show-stopping dessert ideas or simply love baking for special occasions, here are some other fantastic birthday cake recipes from my kitchen:
- Root Beer Float Cake: A whimsical and nostalgic cake that captures the beloved flavors of a classic root beer float.
- Lemon Poppy Seed Torte with Raspberry Curd Filling & White Chocolate Whipped Cream Frosting: An elegant and sophisticated torte bursting with bright lemon, delicate poppy seed, and tangy raspberry.
- Chocolate (Genoise) Italian Sponge Cake with Berries: A light, airy chocolate sponge cake paired beautifully with fresh, vibrant berries for a truly delightful treat.
- White Chocolate Pistachio Cake with Pistachio Pudding Filling: A luxurious cake featuring the delightful combination of white chocolate and rich pistachio flavors.
- Red Velvet Ice Cream Cake Recipe: Another fantastic ice cream cake option, combining the classic red velvet flavor with creamy frozen layers.
- Easy Black Forest Cake: A simplified yet utterly decadent version of the beloved German classic, featuring chocolate, cherries, and whipped cream.
