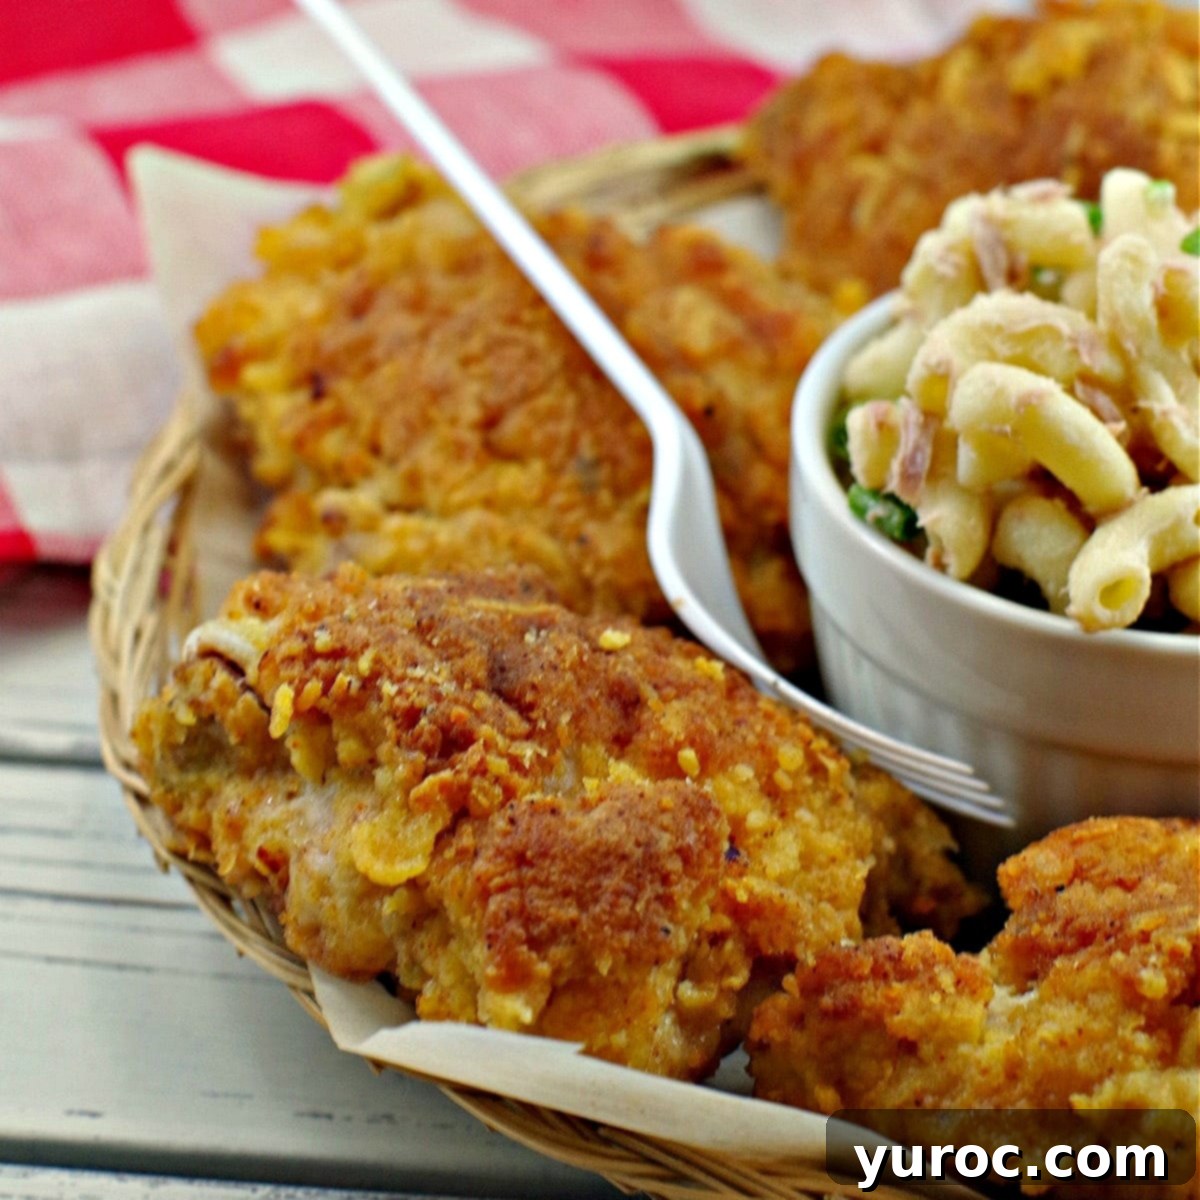
The Ultimate Shortcut to Crispy, Juicy Pan-Fried Chicken Thighs (No Buttermilk Needed!)
For far too long, achieving the ideal pan-fried chicken felt like an insurmountable culinary challenge. The dilemma was always the same: how to get that coveted golden-brown, irresistibly crispy coating without overcooking or undercooking the chicken’s interior. My attempts often resulted in a beautifully browned exterior that hid a still-pink center, or a fully cooked interior with a less-than-perfect crust. This common kitchen conundrum often leaves home cooks frustrated, and I was no exception. As a devoted fan of breaded pan-fried chicken, I simply couldn’t imagine a life without it. So, many years ago, I decided it was time to innovate and find a foolproof method that guaranteed perfection every single time.
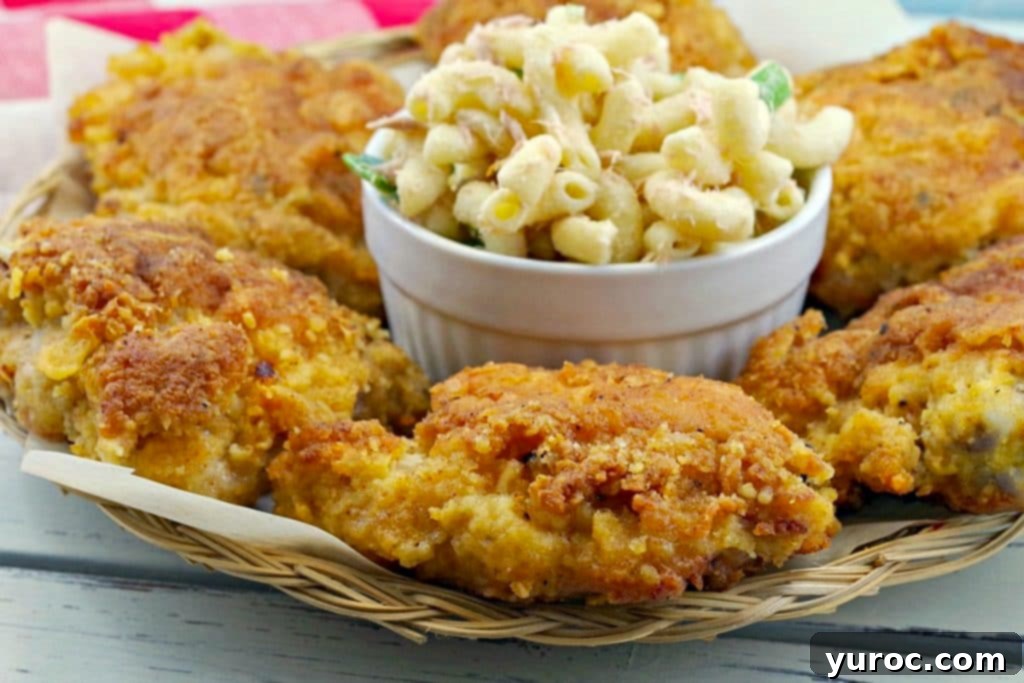
Here’s a full confession that might surprise some seasoned cooks: my secret weapon for consistently perfect Shortcut Fried Chicken has been the microwave. While a skillet delivers that glorious, golden-brown crispy skin on the outside, the microwave takes over to gently and thoroughly cook the inside. This unconventional approach tackles the biggest hurdle in pan-frying – ensuring the chicken is cooked through without burning the crust – with remarkable efficiency. Call it impatience, call it practical laziness, but this method yields incredibly moist, fully cooked chicken with a perfectly crisp exterior. If you adore crispy fried chicken but shy away from the extensive effort and uncertainty, this ingenious recipe is about to become your new favorite. This crispy fried chicken recipe isn’t just a summer staple; it’s a versatile dish perfect for any season. Whether you’re planning a casual picnic, a backyard cookout, or a comforting Sunday dinner, these pan-fried chicken thighs are an absolute winner.
While the idea of using a microwave for fried chicken might sound like culinary heresy to some, I assure you, it simplifies the cooking process dramatically, and the results are indistinguishable from traditionally prepared chicken. This method has been my little secret for years, a hack that consistently delivers deliciousness without the usual stress. But now, it’s time to share this good secret! My goal is for everyone to know that even if you’ve struggled with achieving uniformly cooked, crispy pan-fried chicken, you absolutely can make awesome chicken thighs that are just as tender, juicy, and flavorful as if they had spent their entire cooking time in the skillet.
🥘 Essential Ingredients for Perfect Pan-Fried Chicken
This recipe for stovetop fried chicken isn’t just a casual creation; it’s the culmination of years of rigorous testing and refinement. My quest for the best fried chicken led me down many paths, experimenting with advice from various culinary experts. Some suggested a coating of butter and egg for optimal breading adhesion, while others swore by an egg and milk mixture. While both yielded tasty results and generally worked, they often left the chicken feeling a bit too heavy and fatty for my preference, especially the butter-based versions. Determined to find a lighter, yet equally effective, solution, I decided on a whim to try fat-free liquid egg replacement. The outcome was nothing short of astonishing – it worked like an absolute charm!
Just because I enjoy fried chicken doesn’t mean I disregard calorie consciousness! The beauty of using liquid egg replacement isn’t just about reducing fat; it’s also about enhancing flavor. These liquid eggs, particularly the cheese & chive or garden vegetable varieties I favor (like Burnbrae Farms Egg Creations), infuse the chicken with an incredible depth of savory taste, making them a total flavor enhancer. They provide the perfect sticky base for the breading, ensuring every piece is evenly coated and destined for crisp perfection.
This simple fried chicken recipe cleverly skips the buttermilk soak without compromising on moisture or flavor. In addition to the versatile liquid egg replacement, you’ll need these common, straightforward ingredients to create your irresistibly crispy coating:
- Chicken Thighs: Bone-in, skin-on thighs are ideal for flavor and juiciness, but boneless can also be used.
- Vegetable Cooking Oil: Essential for pan-frying and achieving that golden crust.
- Fine Bread Crumbs: The backbone of our crispy coating. Fine crumbs adhere better and create a more uniform crust.
- All-Purpose Flour: Helps create a sturdy breading and contributes to the golden color.
- Salt: A fundamental seasoning to bring out the chicken’s natural flavors.
- Parmesan Cheese: The secret ingredient! Adds incredible umami, saltiness, and helps crisp the breading.
- Garlic Powder: For aromatic depth and savory notes.
- Black Pepper: A classic seasoning that complements the other spices.
- Cajun Seasoning: Adds a delightful kick and complex spice profile. Adjust to your heat preference.
📖 Versatile Substitutions & Creative Variations
One of the best aspects of this easy pan-fried chicken recipe is its flexibility. Feel free to adapt it to your preferences or whatever ingredients you have on hand:
- Chicken Cuts: While bone-in, skin-on chicken thighs are recommended for their succulence and flavor, this recipe works beautifully with other chicken pieces. You can easily use boneless chicken breasts (adjust cooking time), chicken quarters, or even chicken drumsticks. For larger pieces, ensure thorough cooking with the microwave step.
- Spice Level: To introduce more heat, simply increase the amount of Cajun seasoning in your breading mixture. Alternatively, a pinch of cayenne pepper or chili powder can add a fiery kick to your crispy coating.
- Egg Replacement: If you don’t have flavored liquid egg replacement, you can use plain fat-free liquid egg product or even regular whisked eggs. While it won’t impart the unique cheese & chive or garden vegetable flavor, it will still provide an excellent binder for your breading. For those who prefer a more traditional, rich flavor, a milk and egg wash is also an option, though it will slightly increase the fat content.
- Cooking Oil: I typically opt for vegetable oil due to its neutral flavor and high smoke point. However, you can substitute it with any cooking oil suitable for frying, such as canola oil, grapeseed oil, or a light olive oil. Just be mindful of the oil’s smoke point to prevent burning.
- Breading Enhancements: For an extra layer of crispness, consider using panko breadcrumbs instead of or in combination with fine breadcrumbs. You can also experiment with different herbs and spices like dried thyme, paprika, onion powder, or a dash of smoked paprika for a deeper flavor profile.
- Gluten-Free Option: To make this recipe gluten-friendly, simply swap the all-purpose flour for a gluten-free all-purpose flour blend. Ensure your breadcrumbs are also gluten-free.
👪 Serving Size
This fantastic recipe for fried chicken thighs (without buttermilk) is designed to yield 8 satisfying servings. The beauty of the digital recipe card (often linked below) is its adjustability: you can easily half, double, or even triple the recipe by clicking on the blue servings number. The ingredient quantities will automatically adjust, taking the guesswork out of scaling. Whether you’re cooking for a small family dinner or a larger gathering, this recipe can effortlessly accommodate your needs, ensuring everyone gets to enjoy a piece of perfectly crispy, juicy chicken.
🔪 Step-by-Step Instructions for Shortcut Crispy Chicken
Follow these simple steps to master this easy pan-fried chicken recipe and achieve that perfect crispy exterior with a thoroughly cooked, juicy interior:
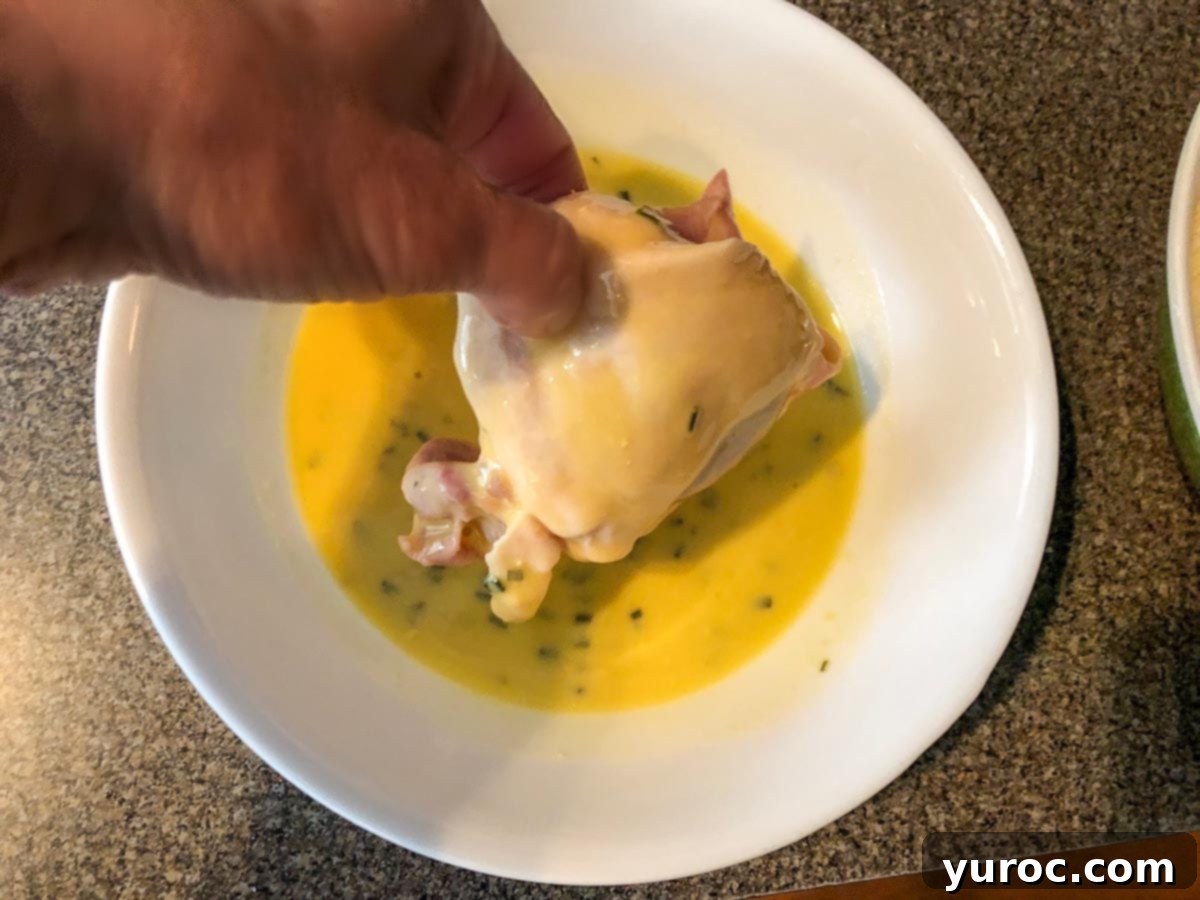
1. Prepare the Chicken and Oil: Begin by heating the vegetable oil in a large, heavy-bottomed skillet over medium-high heat. While the oil is heating, pat your chicken thighs dry with paper towels to help the coating stick better. For the coating, thoroughly dip each piece of chicken into the liquid egg replacement, ensuring every surface is completely covered. This initial moist layer is crucial for the breading to adhere.
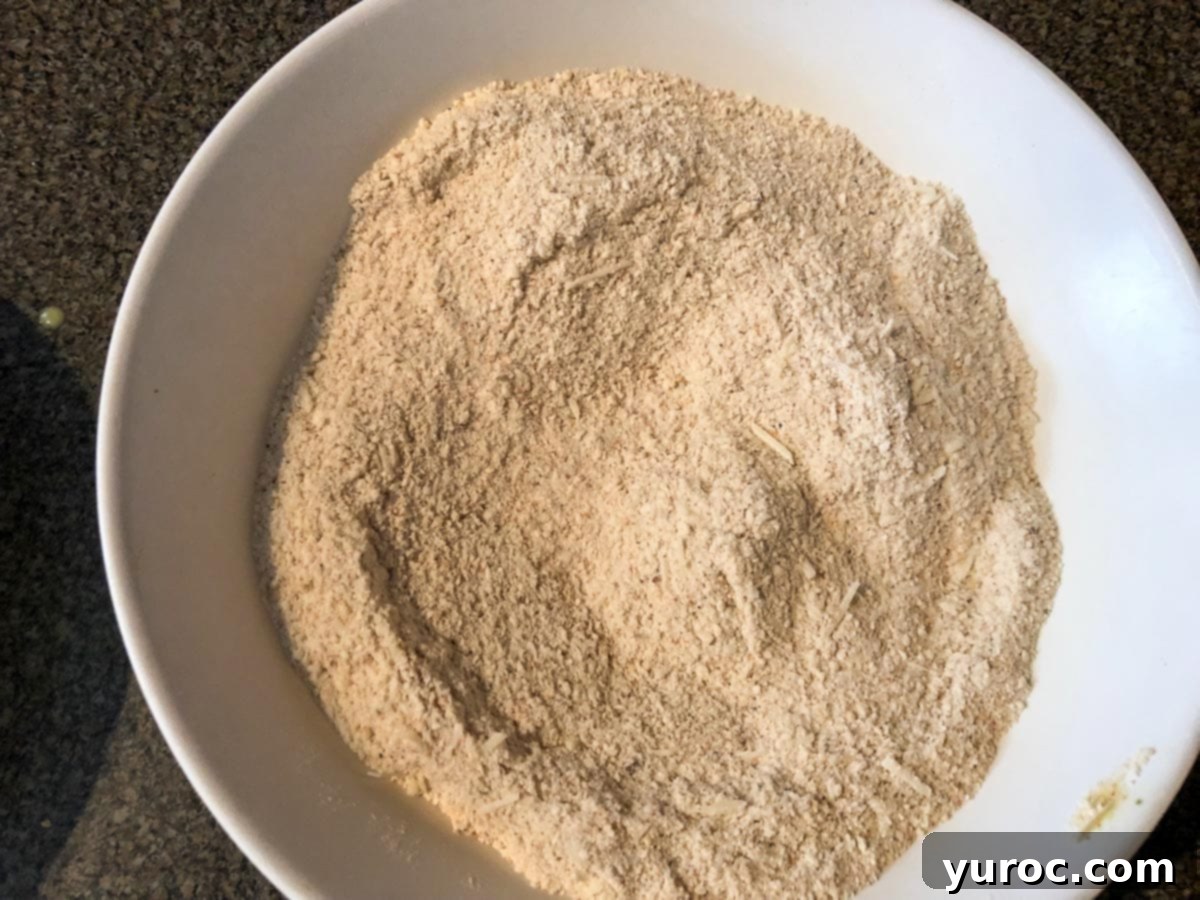
2. Create the Breading Mixture: In a separate, wide, shallow bowl, combine all the dry ingredients for the breading: parmesan cheese, fine bread crumbs, all-purpose flour, salt, Cajun seasoning, and garlic powder. Whisk them together thoroughly until well combined. The parmesan cheese is key here, adding a savory depth and extra crispness to the final crust.
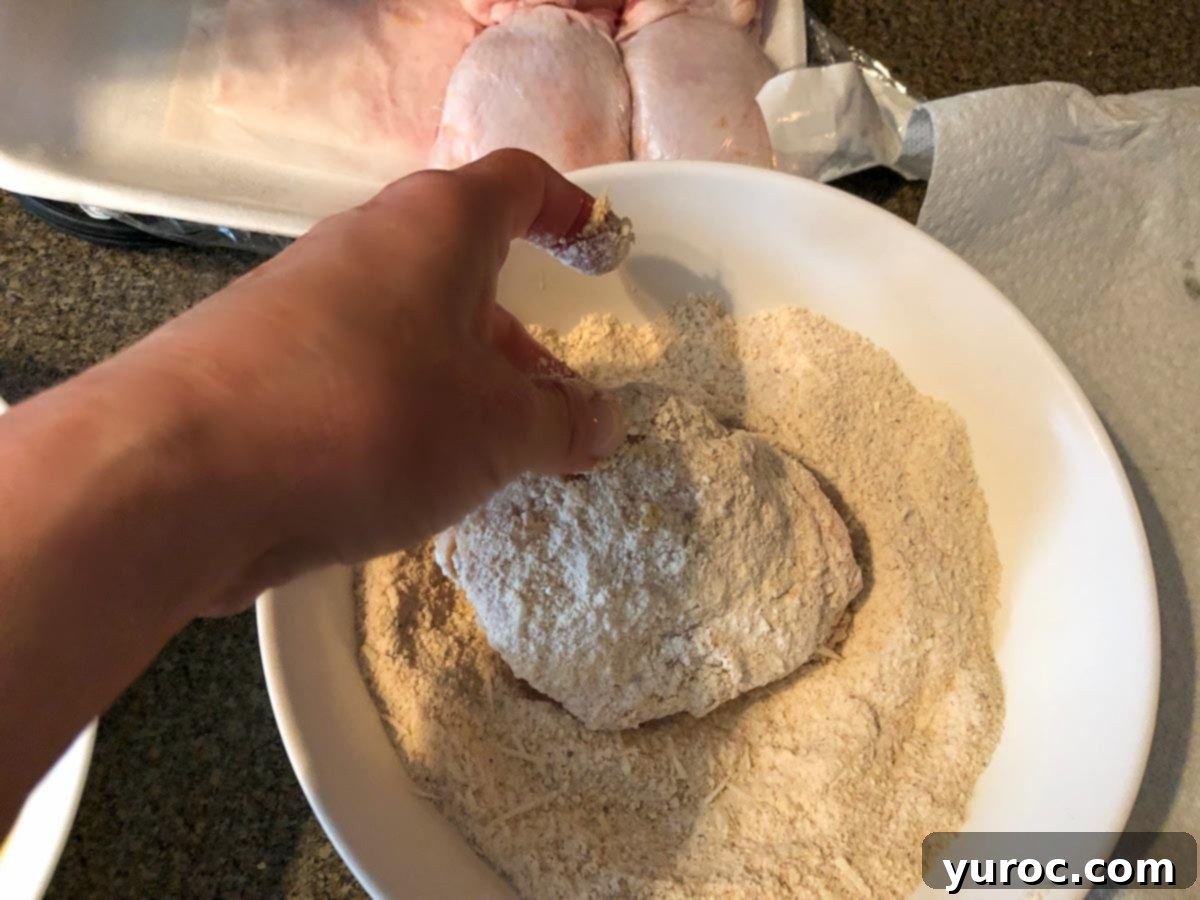
3. Coat the Chicken: Once the chicken is coated in the egg mixture, transfer it directly into the dry breading mixture. Press the breading onto the raw chicken firmly, turning it multiple times to ensure a thick, even coating. A well-coated piece of chicken is essential for achieving that sought-after crispy crust. Make sure there are no bare spots.
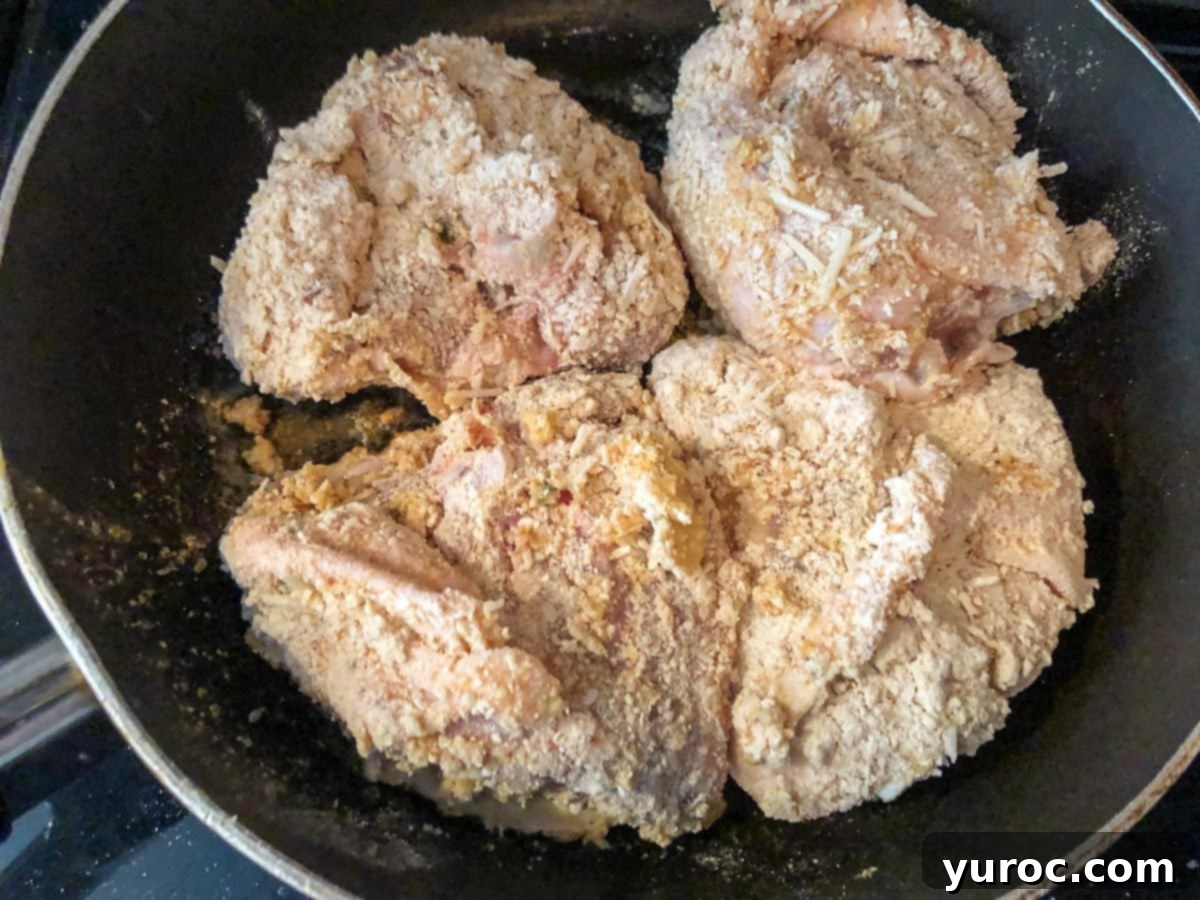
4. Pan-Fry for Crispness: Carefully transfer each breaded chicken piece to the hot frying pan. Cook the chicken, skin side down (if applicable), uncovered, for approximately 5-7 minutes on medium-high heat. The goal here is to develop a deep golden-brown, crispy crust on the first side. Don’t overcrowd the pan; cook in batches if necessary to maintain consistent oil temperature and allow for even browning.
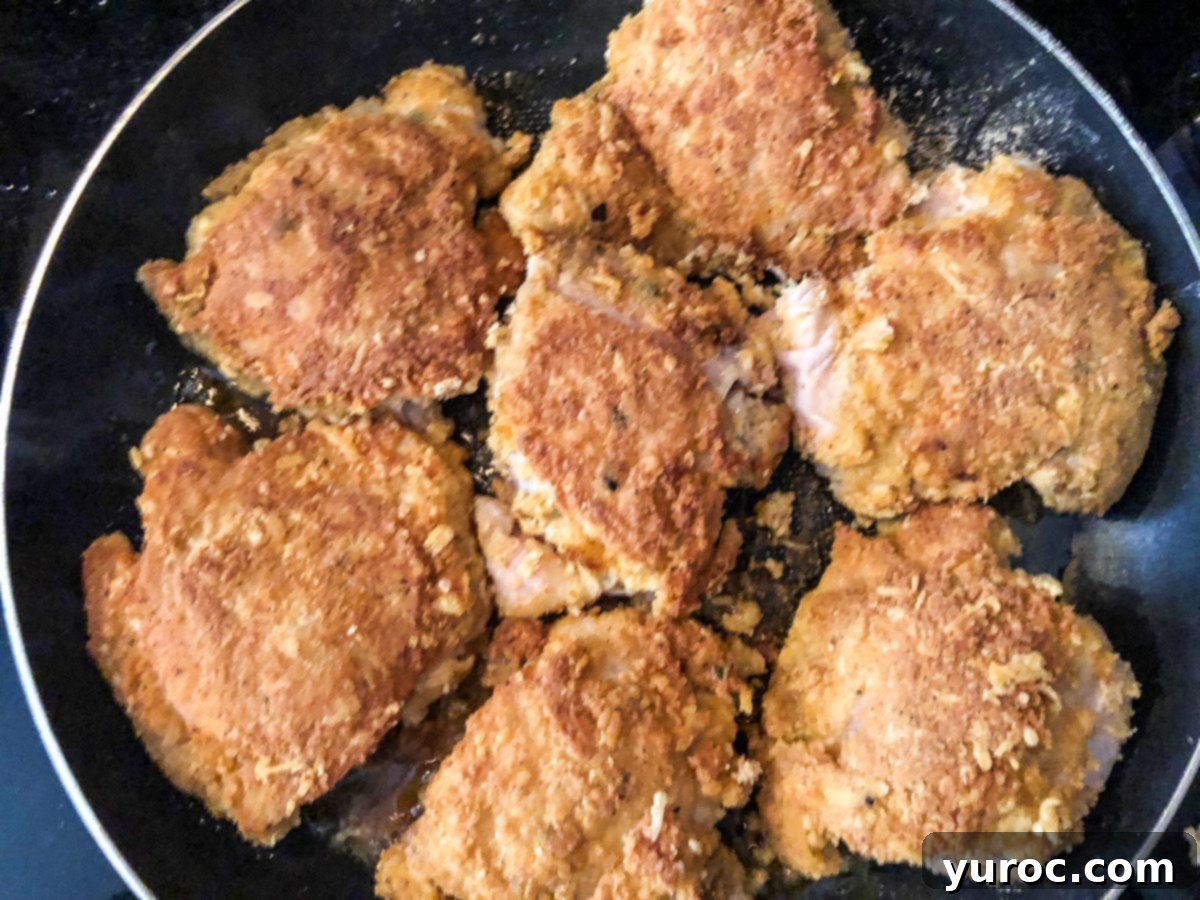
5. Flip and Brown the Second Side: Gently turn each piece of chicken with tongs and cook on the other side for a similar duration, about 5-7 minutes on medium-high heat, until it also achieves a beautiful golden-brown and crispy finish. The objective of this pan-frying stage is solely to create the perfect crust; the chicken might not be fully cooked through yet, which is where our shortcut comes in.
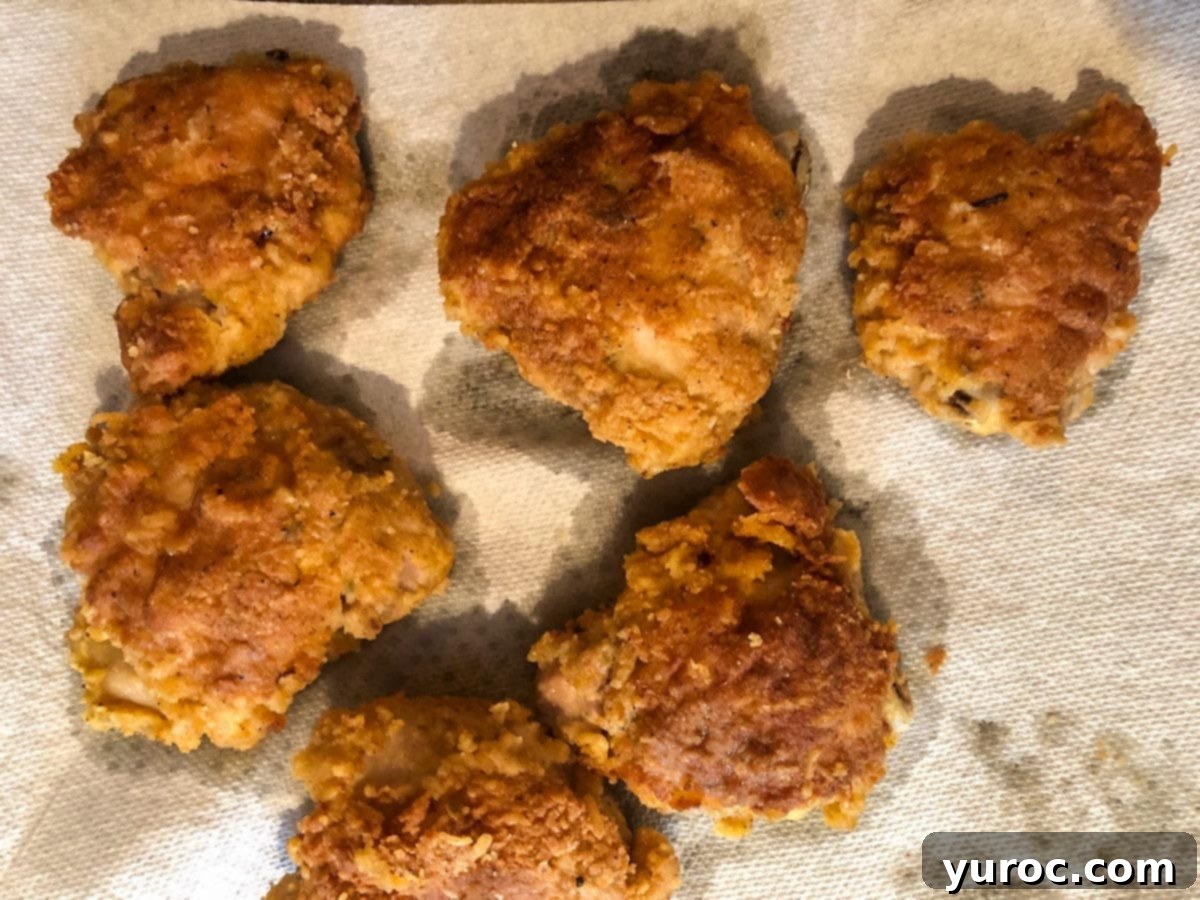
6. The Microwave Shortcut: Once both sides are golden and crispy, remove the chicken from the skillet. Immediately transfer it to a microwave-safe plate and microwave for 5-7 minutes, or until the chicken is no longer pink in the center. For me, 7 minutes is often the magic number for thighs. The internal temperature of the thickest part of the chicken should reach 165°F (74°C) as measured with an instant-read thermometer. This microwave step ensures the chicken is cooked safely and thoroughly without drying it out or burning the delicious crust. After cooking, drain off any excess oil and juices, then place the chicken on paper towels to absorb any remaining grease, patting it dry for ultimate crispness. Serve your perfectly cooked, crispy chicken hot or allow it to cool for a delicious cold meal.
🍽 Essential Equipment for Your Kitchen
You won’t need an arsenal of specialized gadgets for this delicious fried chicken recipe, which is another reason it’s so appealing. The primary tool is a good skillet. I personally favor a large non-stick skillet, which makes for easy cooking and cleanup, but a heavy-duty cast iron skillet works wonderfully for heat retention and developing an even crust. An electric skillet is another excellent option, offering precise temperature control. For those who prefer alternative cooking methods, this recipe can also be adapted for a deep fryer or an air fryer, though the exact timing for the microwave finish might need slight adjustments. Regardless of your main cooking vessel, a reliable instant-read meat thermometer is an invaluable tool, ensuring your chicken is cooked to the safe internal temperature of 165°F (74°C) every time. Additionally, having a couple of shallow bowls for your egg wash and breading mixture, along with a pair of tongs, will make the coating process much smoother.
💭 Top Tip: The Secret to Irresistible Fried Chicken Breading
Through countless trials and delicious errors, I’ve discovered that the true magic behind truly crunchy, incredibly flavorful fried chicken breading lies in a meticulously balanced ratio of ingredients. The secret blend that takes this recipe from good to outstanding is a harmonious combination of flour, fine bread crumbs, salt, a selection of savory spices, and a generous touch of parmesan cheese. Yes, you read that right – parmesan cheese! It’s the unexpected hero that elevates the entire flavor profile, adding a deep umami richness and an extra layer of savory crispness that will have everyone wondering what your secret ingredient is. This specific blend creates a coating that is not only robust enough to cling to the chicken but also delivers an explosion of flavor and an unparalleled crunch with every bite. The fine breadcrumbs ensure a uniform texture, while the parmesan, garlic powder, and Cajun seasoning contribute a complex, irresistible taste that perfectly complements the juicy chicken.
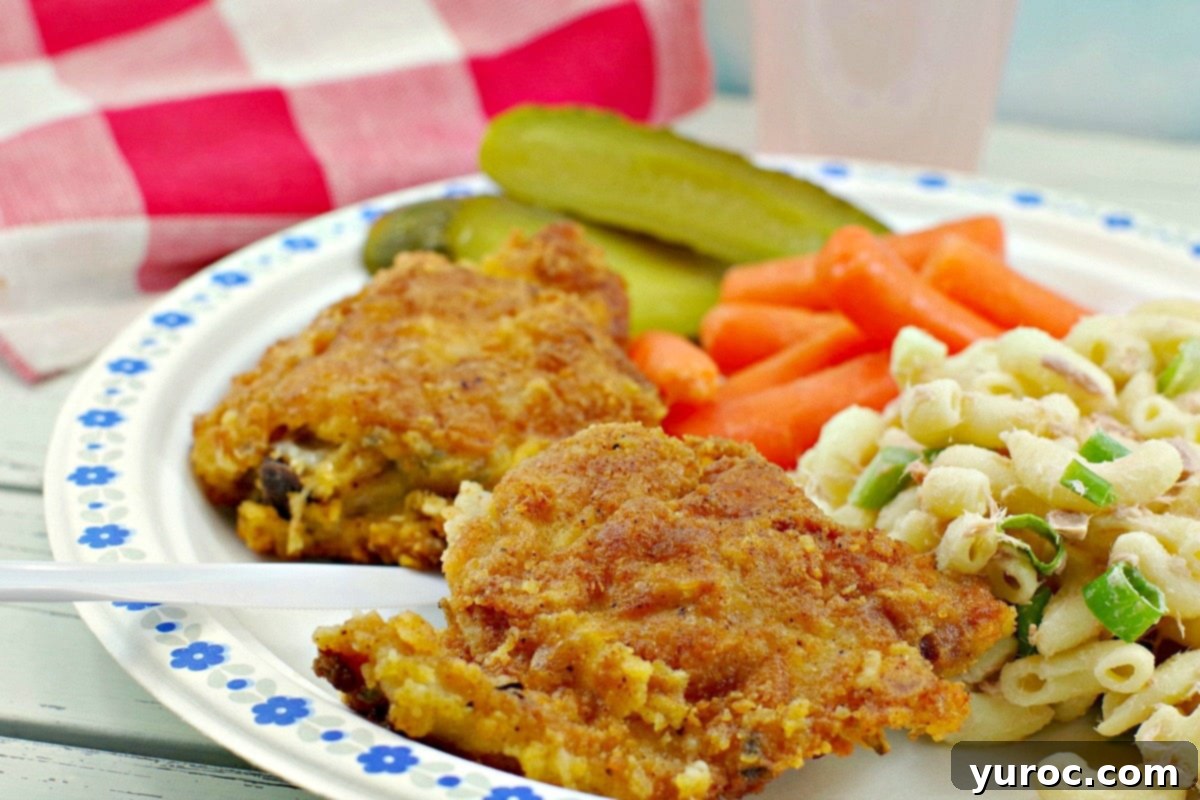
These pan-fried chicken thighs aren’t just for dinner; they truly shine as an excellent picnic chicken or a fantastic addition to your lunchbox. The non-greasy nature of this chicken, thanks to our shortcut method and the post-frying draining, makes it incredibly portable and easy to enjoy without a mess. Whether eaten hot or cold, the breading retains its crispness and the chicken stays wonderfully moist. Eating lunch in your vehicle between meetings might not be a traditional “picnic,” but for busy individuals like myself, portability is a non-negotiable lunchbox requirement. This chicken perfectly fits the bill. It’s also a superb choice for kids’ school lunches, offering a delicious and wholesome alternative to typical sandwiches. My kids absolutely love having these flavorful leftovers in their lunchboxes, making meal prep a breeze and ensuring they have a satisfying meal on the go.
🌡️ Storage & Reheating Tips
Proper storage is key to enjoying your crispy fried chicken for days to come. Store any leftover fried chicken in an airtight container in the refrigerator for up to 4 days. This helps maintain its freshness and prevents it from drying out. For longer storage, this fried chicken can be frozen for up to 3 months. To freeze, arrange cooked chicken pieces in a single layer on a baking sheet and freeze until solid. Then transfer them to a freezer-safe bag or airtight container, separated by parchment paper to prevent sticking. When you’re ready to enjoy it again, you can eat it cold straight from the fridge or reheat it. For quick reheating, a microwave works well for about 1-2 minutes, though it might soften the crispness slightly. For a crispier reheat, preheat your oven to 375°F (190°C) and bake for 10-15 minutes, or use an air fryer at 350°F (175°C) for 5-8 minutes, until heated through and the breading has regained its crunch.
🥗 Complementary Side Dishes
No fried chicken meal is complete without delicious side dishes! This versatile chicken pairs wonderfully with a variety of accompaniments, offering a balance of flavors and textures. Here are some of my favorite suggestions:
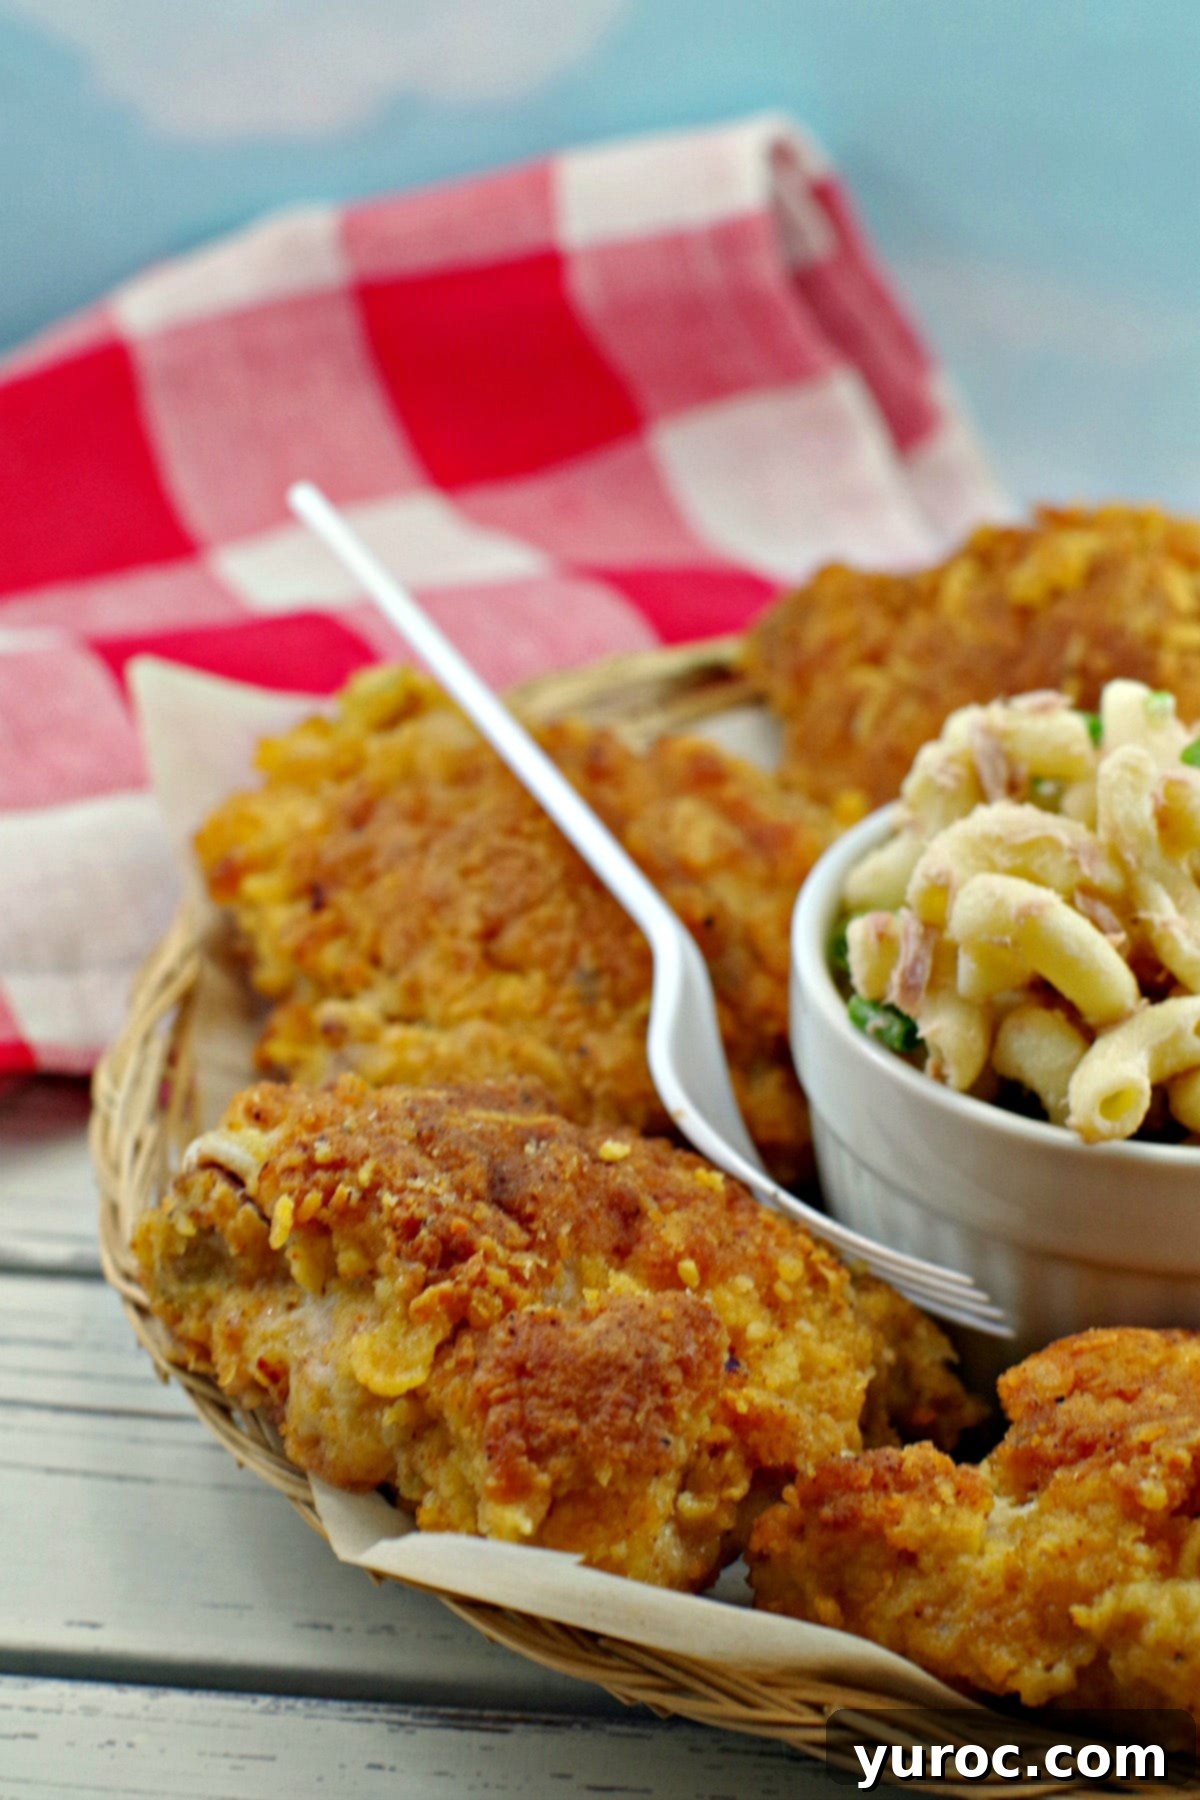
- Creamy Tuna Macaroni Salad: (as shown below) A classic pairing that offers a cool, tangy contrast to the warm, crispy chicken.
- Fresh Green Salad: A simple, vibrant green salad with your favorite dressing, like my Spinach salad with Honey Lime Cilantro Dressing, provides a refreshing counterpoint.
- Easy Greek Pasta Salad: For a Mediterranean twist, this zesty pasta salad adds color and flavor.
- Hearty Easy Bean Salad: A healthy and fulfilling option that adds fiber and texture to your meal.
- Healthy Classic Potato Salad: A comforting and traditional side that always hits the spot.
- Garlic Sautéed Green Beans: Fresh and tender, these offer a light, crisp vegetable component.
- Creamy Mashed Potatoes: A comforting and classic choice, perfect for soaking up any chicken juices.
- Buttery Corn on the Cob: A sweet and juicy addition, especially delightful during summer months.
- Fluffy Biscuits or Cornbread: Ideal for a more Southern-style meal, perfect with a drizzle of honey.
- Homemade Coleslaw: The tangy crunch of coleslaw provides a fantastic textural contrast to the crispy chicken.
🦺 Important Food Safety Guidelines
Ensuring food safety is paramount when cooking any poultry. Please follow these guidelines to keep your kitchen and your meal safe:
- Internal Temperature: Always cook chicken to an internal temperature of 165°F (74°C). Use an instant-read thermometer inserted into the thickest part of the meat, avoiding bones, to verify doneness.
- Prevent Cross-Contamination: Never use the same utensils, cutting boards, or platters on cooked food that have previously touched raw meat. Always wash hands, surfaces, and equipment thoroughly after handling raw chicken.
- Hand Hygiene: Wash your hands thoroughly with soap and warm water for at least 20 seconds after handling raw chicken or any raw ingredients.
- Temperature Danger Zone: Do not leave food sitting out at room temperature for extended periods (no more than two hours). Bacteria multiply rapidly between 40°F (4°C) and 140°F (60°C).
- Never Leave Cooking Unattended: Stay in the kitchen when food is on the stovetop, especially when frying with hot oil, to prevent fires and ensure proper cooking.
- Choose High Smoke Point Oils: Use cooking oils with high smoke points (e.g., canola oil, peanut oil, almond oil, avocado oil, and high oleic sunflower and safflower oil) to avoid burning the oil and forming harmful compounds. Olive oil can be used, but select a light or refined variety for frying.
- Ensure Good Ventilation: Always have good ventilation when using a gas stove or when frying to disperse cooking fumes and heat.
For more comprehensive guidelines, please refer to USDA.gov.
So, whether you’ve always struggled with getting both the inside and outside of your pan-fried chicken cooked to perfection, or you simply desire a faster, more reliable method, this easy fried chicken recipe is your answer. It’s a game-changer for busy home cooks who refuse to compromise on flavor or crispness. And for those who prefer the traditional, continuous skillet method without the microwave shortcut, rest assured that this breading is still the absolute best fried chicken coating ever, delivering an incredible taste and crunch regardless of your chosen cooking duration. Give this incredible recipe a try and rediscover the joy of perfectly pan-fried chicken!


📋 Shortcut Fried Chicken (without buttermilk) Recipe
Print Recipe
Pin
Save Recipe
Save Recipe
Rate
dinner, lunch
American
8
pieces
318
kcal
Terri Gilson
15 minutes
20 minutes
35 minutes
Prevent your screen from going dark
Add to Shopping List
Go to Shopping List
Equipment
-
large skillet
Ingredients
-
8
chicken thighs -
3
tablespoon
vegetable cooking oil
Coating
-
½
cup
Liquid egg replacement
*I use Burnbrae Farms Cheese & Chive or Garden Vegetable
Breading
-
¾
cup
fine bread crumbs -
½
cup
all purpose flour -
1
tablespoon
salt -
¼
cup
parmesan cheese -
1
tablespoon
garlic powder -
½
teaspoon
pepper -
½
tablespoon
cajun seasoning
Metric
Instructions
-
1. Heat oil in a large skillet over medium-high heat.
Coating
-
2. Thoroughly coat chicken in liquid egg replacement, turning to cover completely.
Breading & Cooking
-
3. In a separate shallow bowl, mix parmesan cheese, bread crumbs, flour, salt, Cajun seasoning, and garlic powder.
-
4. Thoroughly coat each chicken piece in the dry breading mixture, pressing firmly to adhere.
-
5. Immediately transfer chicken to the hot frying pan. Cook, skin side down (if applicable), uncovered for approximately 5-7 minutes on medium-high heat, until one side is golden brown and crispy.
-
6. Turn gently and cook on the other side for the same time (about 5-7 minutes) or until golden brown on the outside.
-
7. Remove from skillet. Transfer to a microwave-safe plate and microwave for 5-7 minutes until the internal temperature reaches 165°F (74°C) and the chicken is no longer pink. *7 minutes is often the magic number for me!
-
8. Briefly cut into a thicker part of one piece to ensure it’s fully cooked (if not using a thermometer). Then, drain off any excess oil and juices and place on paper towels to absorb any remaining oil, patting the chicken dry.
-
9. Serve hot or cold for a delicious meal!
Notes
*See post contents for important recipe information and tips, including food safety and serving suggestions.
Nutrition
Serving:
1
g
|
Calories:
318
kcal
(16%)
|
Carbohydrates:
11
g
(4%)
|
Protein:
21
g
(42%)
|
Fat:
21
g
(32%)
|
Saturated Fat:
7
g
(44%)
|
Cholesterol:
114
mg
(38%)
|
Sodium:
1073
mg
(47%)
|
Potassium:
271
mg
(8%)
|
Fiber:
1
g
(4%)
|
Sugar:
1
g
(1%)
|
Vitamin A:
315
IU
(6%)
|
Vitamin C:
1.3
mg
(2%)
|
Calcium:
44
mg
(4%)
|
Iron:
1.6
mg
(9%)
Did you make this recipe?
Please leave a star rating and review below!
