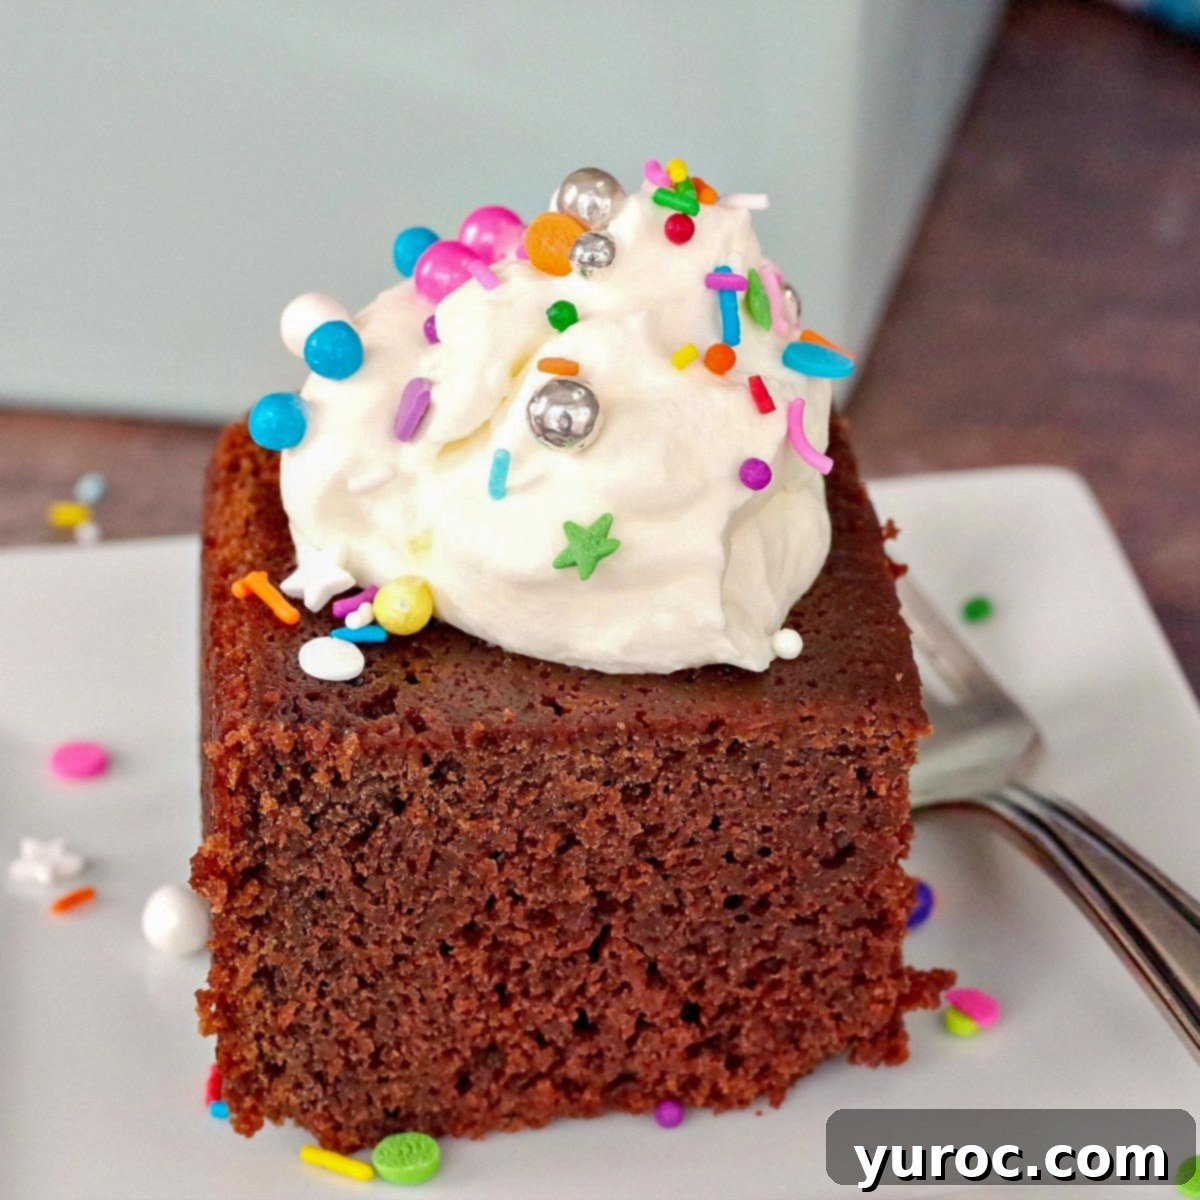
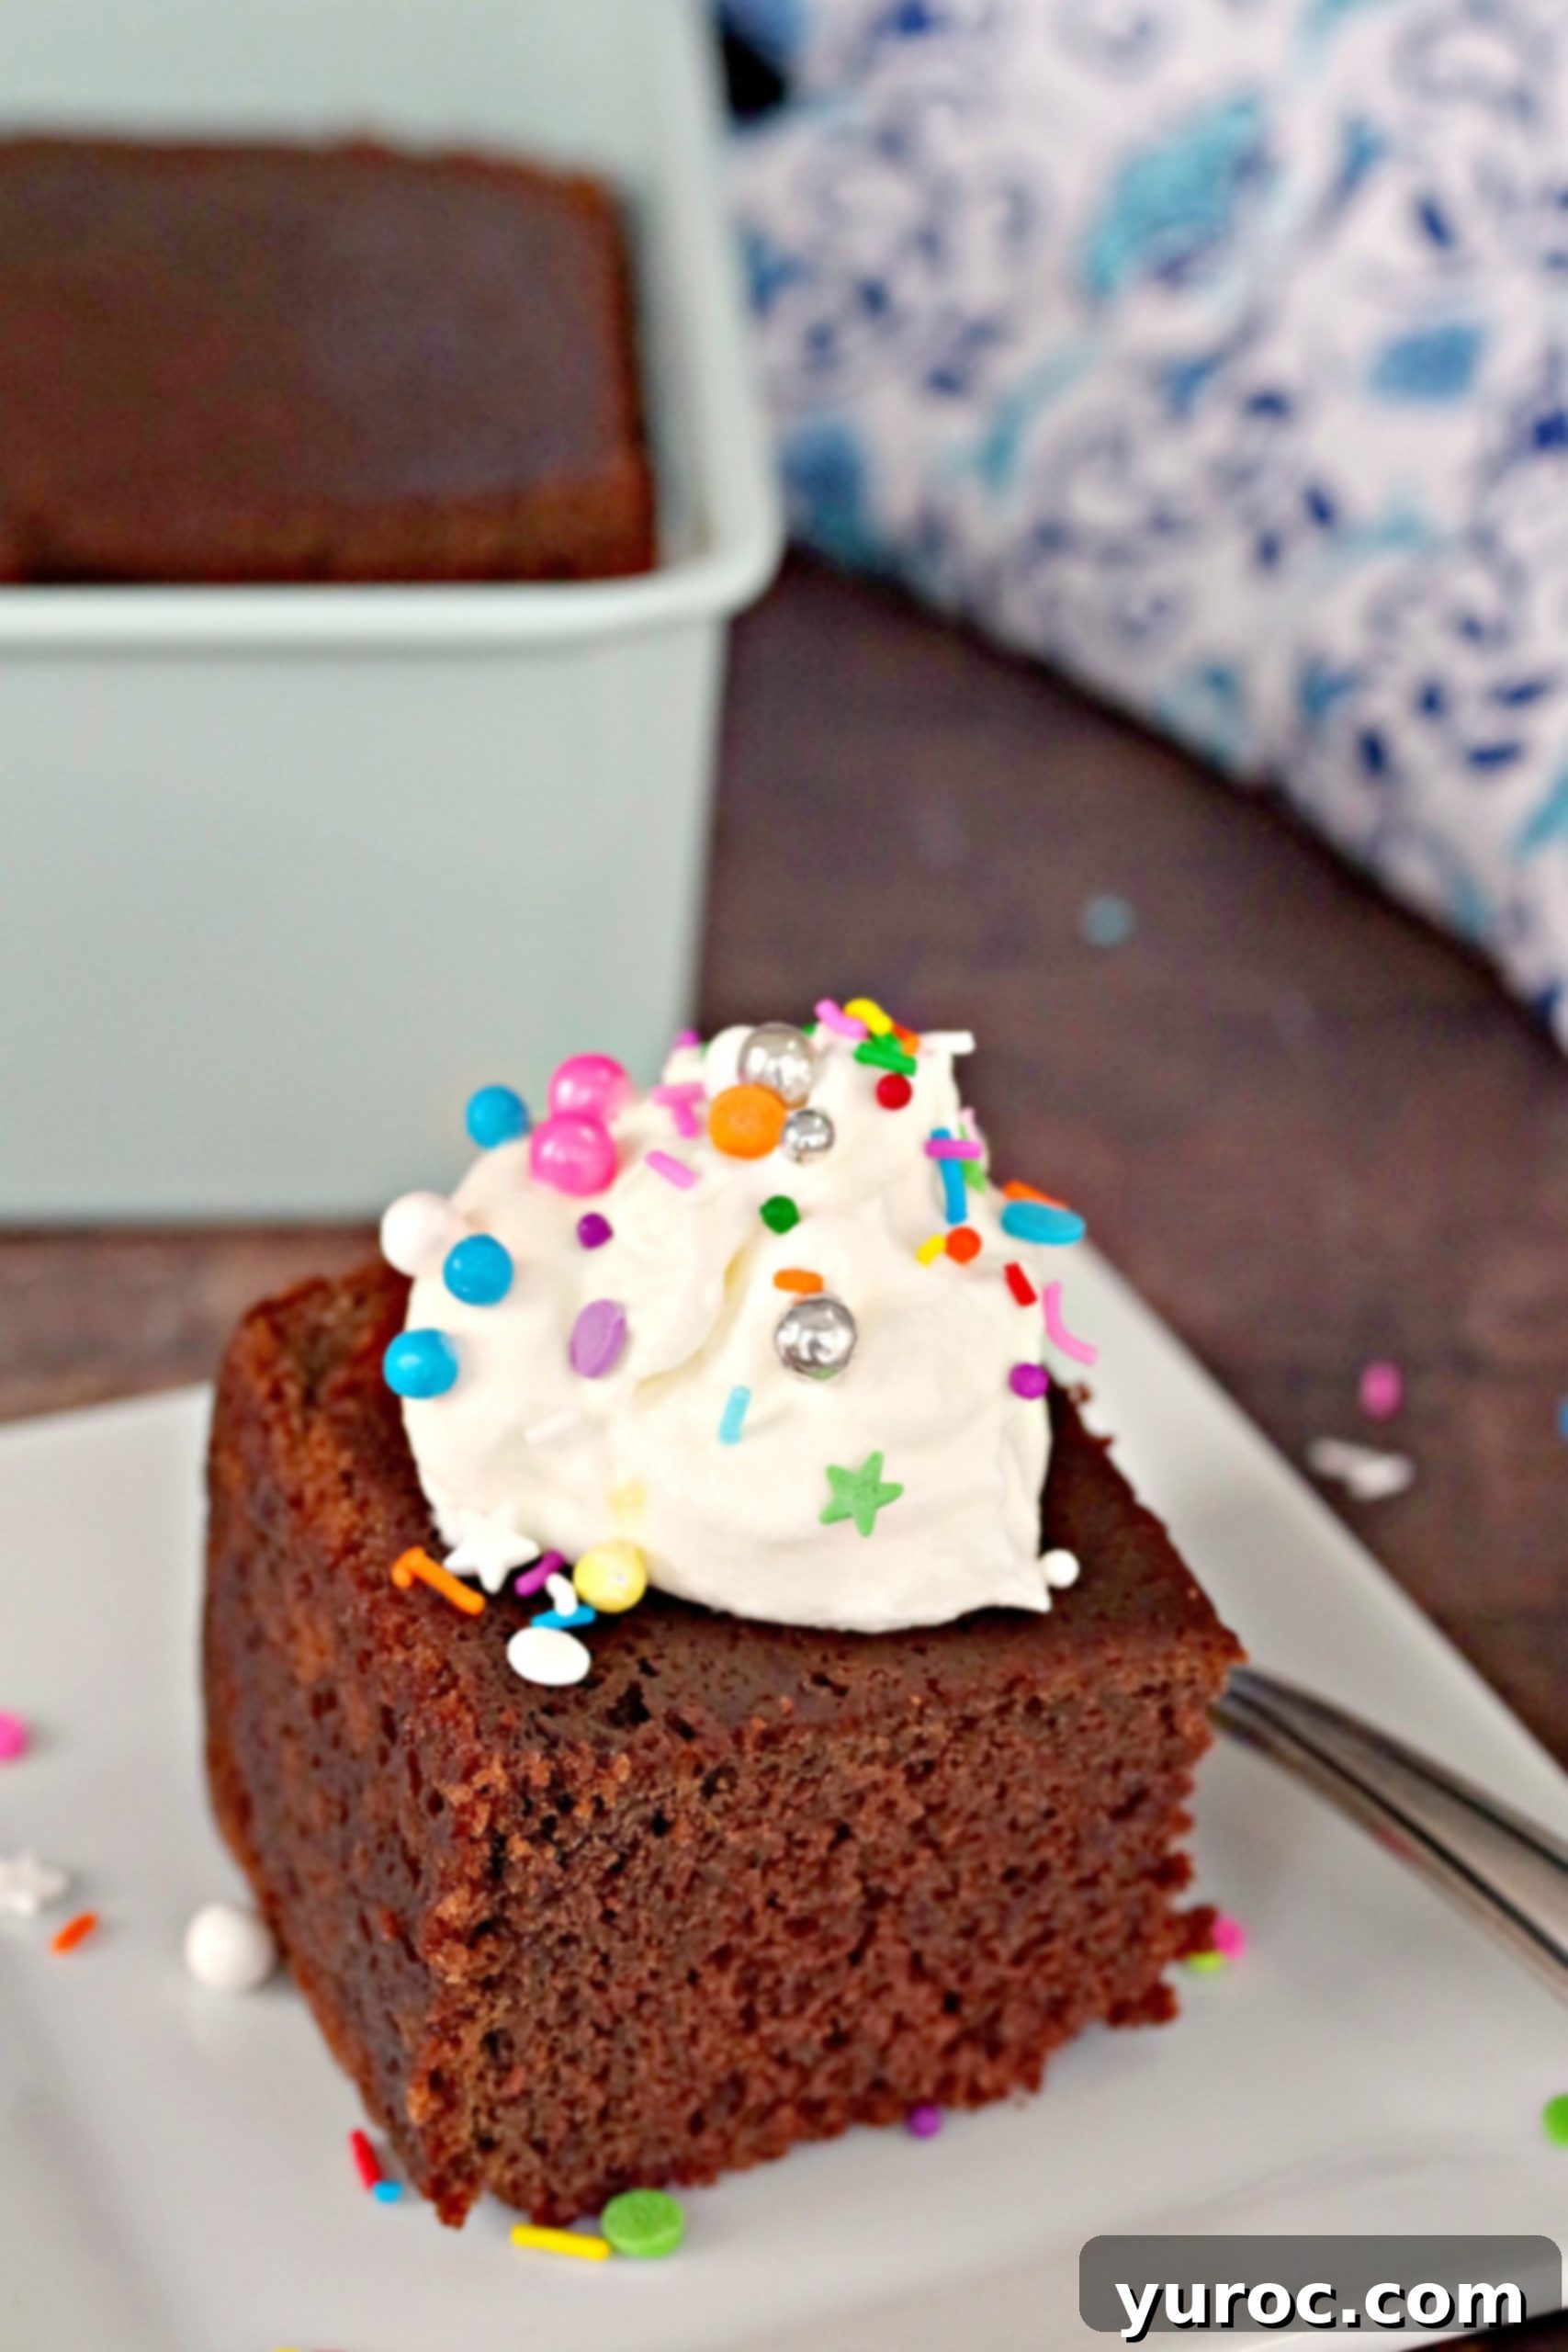
The Ultimate Old-Fashioned Sour Cream Chocolate Cake: A Classic Recipe for Unforgettable Moistness and Rich Flavor
This Old-Fashioned Sour Cream Chocolate Cake is more than just a dessert; it’s a timeless classic that brings joy to any occasion. Renowned for its incredibly tender crumb, exceptional moistness, and profound chocolate flavor, this recipe has been my trusted favorite for countless years. It’s a surprisingly easy-to-make homemade chocolate cake that delivers a luxurious experience without the complexity often associated with gourmet baking. Whether you’re planning a grand celebration, a casual birthday gathering, preparing the base for an exquisite Black Forest Cake, or simply baking a batch of delightful cupcakes, this versatile chocolate cake recipe is your perfect canvas. It pairs beautifully with virtually any frosting, allowing for endless customization to suit your taste and event.
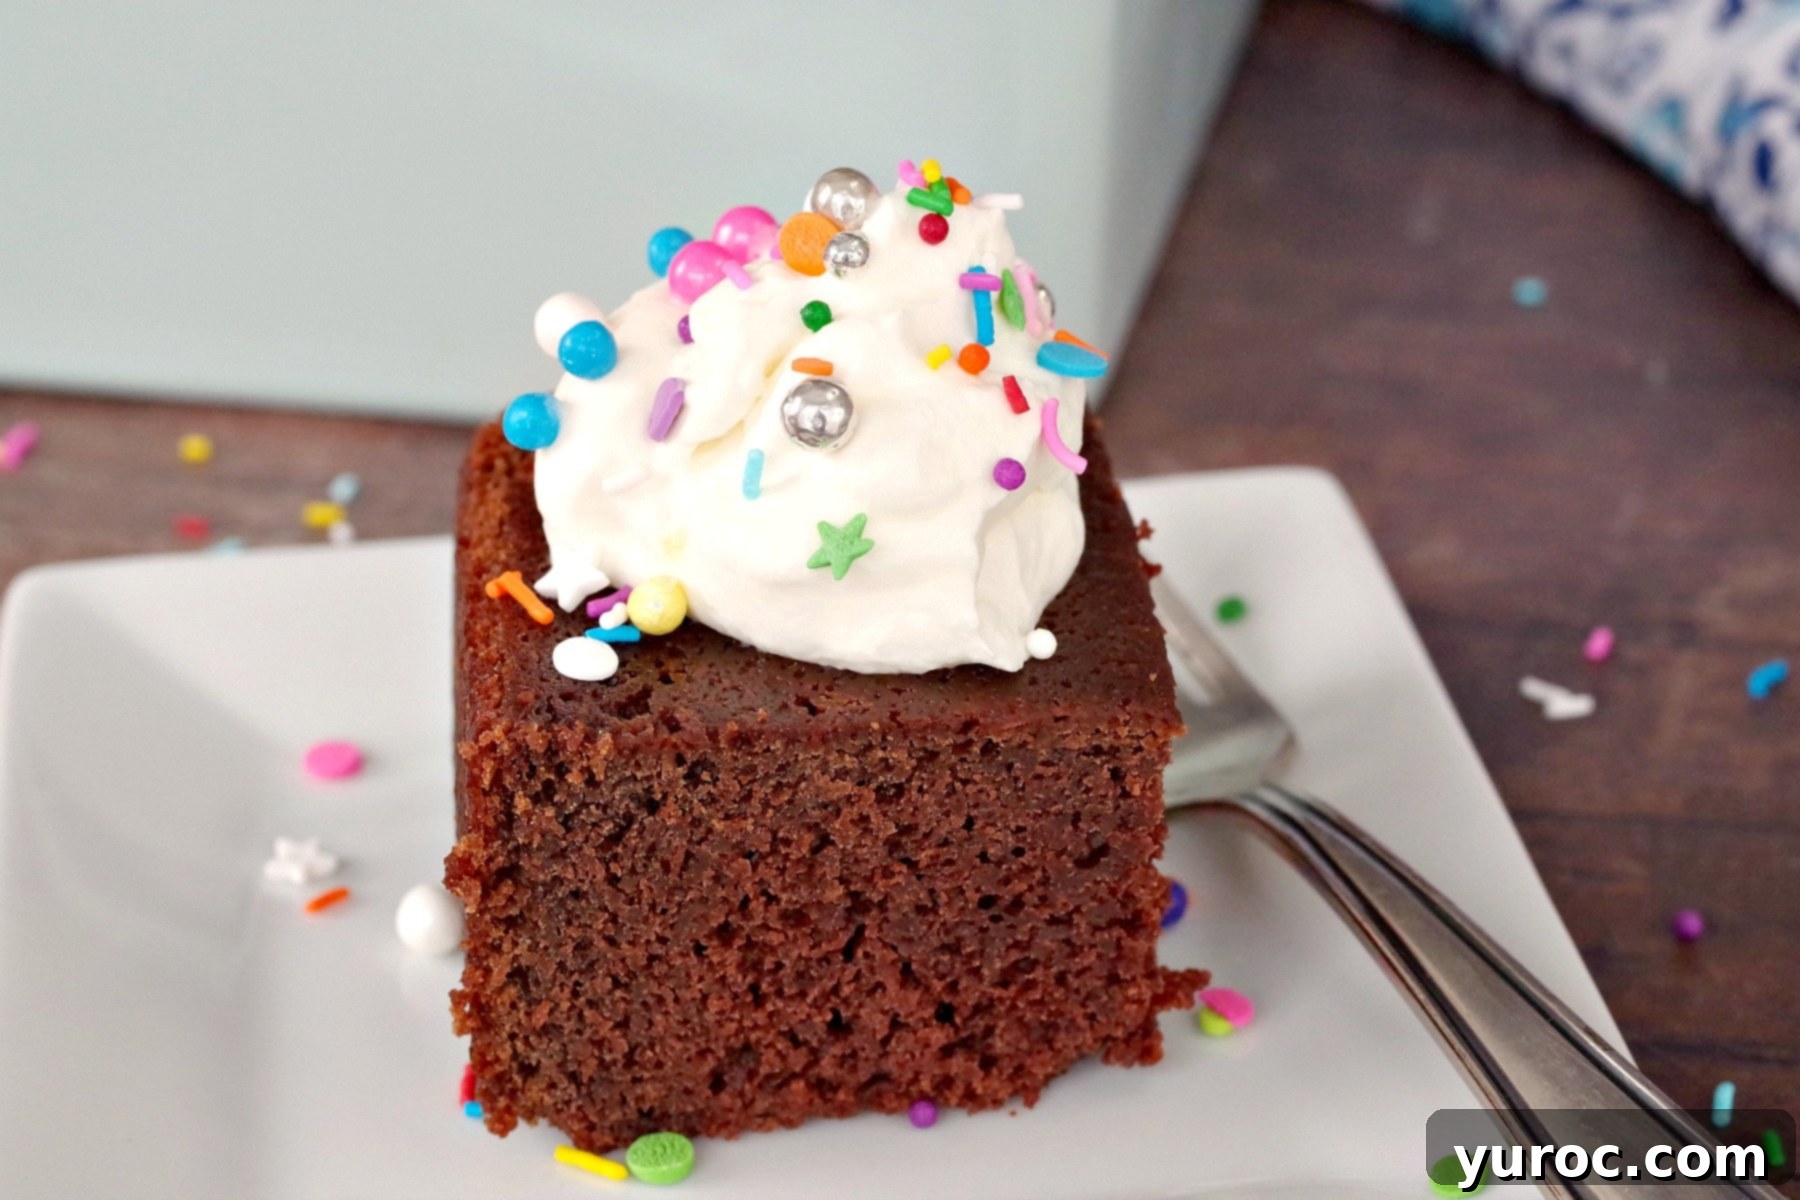
Its robust structure and exquisite taste make it ideal for elaborate decorated cakes or simple, elegant servings. The secret to its unparalleled texture lies in the inclusion of sour cream, which not only imparts a rich tang but also ensures a moist crumb that stays fresh longer. This isn’t just a great chocolate cake; it’s a foundational recipe every home baker needs in their repertoire.
🍰 Ingredient Notes for the Perfect Chocolate Cake
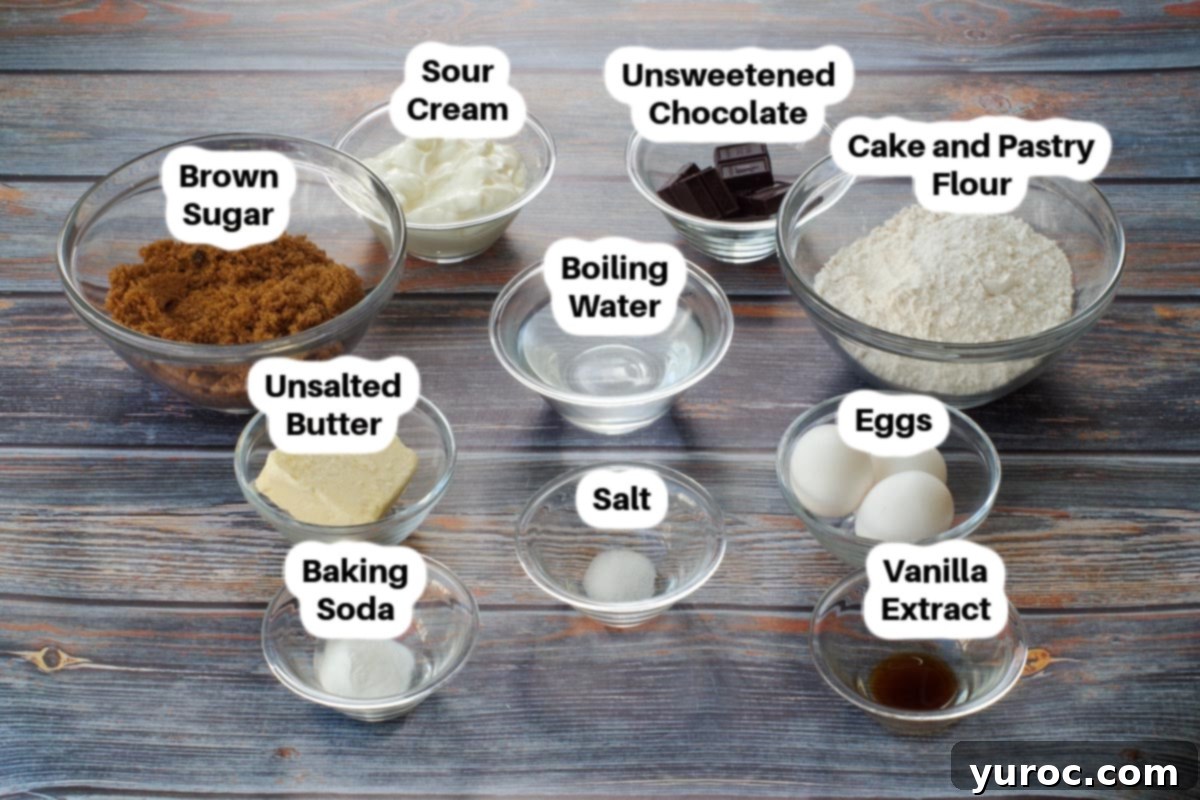
- Cake and Pastry Flour: This is a key ingredient for achieving the cake’s signature light and tender texture. Cake flour is milled from soft wheat and contains the lowest protein content (7-9%) compared to all-purpose flour (10-12%). Lower protein means less gluten development, which directly translates to a softer, more delicate crumb – precisely what we want in a truly tender chocolate cake. Many homemade chocolate cakes can turn out dense, but this recipe, thanks to cake flour and sour cream, remains wonderfully light. The chlorination process cake flour undergoes further weakens its gluten, enhancing its delicate nature. For an extra-light, extra-fluffy result that perfectly complements the richness of the sour cream, cake flour is highly recommended. Learn more about the differences between cake flour and all-purpose flour here.
- Unsalted Butter: Using unsalted butter is a common practice in baking as it gives you complete control over the salt content in your recipe. Different brands of butter contain varying amounts of salt, and by opting for unsalted, you can precisely adjust the seasoning to ensure optimal flavor balance. Furthermore, butter provides richness and helps create a tender crumb when creamed properly with sugar, incorporating air for a lighter texture. Ensure your butter is at room temperature for best results in creaming.
- Brown Sugar: This isn’t just a sweetener; brown sugar plays a crucial role in the unique depth of flavor and moisture of this chocolate cake. Unlike granulated white sugar, brown sugar contains molasses, which imparts a subtle caramel-like note that beautifully enhances the chocolate. The molasses also contributes to a moister cake, as it retains moisture more effectively than white sugar, resulting in a wonderfully soft and decadent crumb. This ingredient is truly transformative, setting this cake apart from others.
- Unsweetened Baker’s Chocolate Squares: For an authentic, deep chocolate flavor, unsweetened baker’s chocolate is essential. It provides a pure, intense chocolate base that cannot be replicated by other forms of chocolate. It’s crucial not to substitute chocolate chips here; chocolate chips contain less cocoa solids and more sugar and stabilizers, which will alter both the flavor intensity and the cake’s texture. Always use high-quality unsweetened baking chocolate for the best results.
- Sour Cream: The hero ingredient! Sour cream is what elevates this chocolate cake from good to extraordinary. Its rich, creamy texture is a secret weapon for achieving unparalleled moistness, far superior to what milk alone can provide. The thickness of sour cream also adds structure and richness to the batter without thinning it out, ensuring a luxurious mouthfeel. Beyond moisture and richness, sour cream’s natural acidity reacts with the baking soda, helping the cake rise and tenderizing the crumb. This acidity also subtly cuts through some of the sweetness, balancing the flavors for a perfectly harmonious bite. Delve deeper into the fascinating baking science behind using sour cream in cakes.
*Please see the comprehensive recipe card below for a full list of ingredients and precise quantities.
📖 Variations & Substitutions to Customize Your Cake
While this Old-Fashioned Sour Cream Chocolate Cake recipe is perfect as written, sometimes you need to adapt to what you have on hand or simply want to try something new. Here are some thoughtful variations and substitutions:
- Cake and Pastry Flour Alternatives: Although cake flour is highly recommended for its unique tenderizing properties, you can make a substitute in a pinch using all-purpose flour. For every 1 cup of cake or pastry flour called for in the recipe, measure 1 cup of all-purpose flour, then remove 2 tablespoons. To this remaining ⅞ cup of all-purpose flour (also known as a scant cup), add 2 tablespoons of cornstarch. The cornstarch helps to mimic the lower protein content and tenderizing effect of cake flour. *Please note: While this substitution works, the resulting cake may be slightly denser and less light and fluffy than when using true cake and pastry flour.
- Butter Swaps: If you only have salted butter available, you can certainly use it. However, remember to omit the ½ teaspoon of salt from the recipe to prevent the cake from becoming overly salty. Different brands of salted butter have varying sodium levels, so adjusting the recipe’s added salt is key to maintaining flavor balance.
- Greek Yogurt for Sour Cream: If sour cream isn’t available, full-fat Greek yogurt can be an excellent substitute, used in a 1:1 ratio. Greek yogurt offers a similar tang and thickness, providing moisture and richness. The texture and flavor might be slightly different, perhaps a touch more dense or a brighter tang, but it will still yield a delicious cake. Ensure it’s full-fat for the best consistency.
- Add a Coffee Kick: For an even deeper chocolate flavor, consider adding 1-2 teaspoons of instant espresso powder or strong brewed coffee to the boiling water. Coffee naturally enhances the taste of chocolate without making the cake taste like coffee itself.
- Extra Chocolate Goodness: Stir in ½ cup of mini chocolate chips or chopped chocolate chunks into the batter just before pouring it into the pan for an extra burst of melty chocolate in every bite.
- Flavor Enhancers: Experiment with different extracts. A touch of almond extract (½ teaspoon) can add a sophisticated note, or a hint of orange zest (1 teaspoon) can brighten the chocolate flavor beautifully.
- Nutty Addition: For added texture and flavor, fold in ½ cup of finely chopped walnuts or pecans into the batter. This adds a delightful crunch and complements the rich chocolate.
🔪 Step-by-Step Guide: Crafting Your Sour Cream Chocolate Cake
Follow these detailed steps to bake your incredibly moist and flavorful Old-Fashioned Sour Cream Chocolate Cake. Precision and attention to detail will ensure a perfect result every time.
PREP: Begin by preheating your oven to 350 degrees F (176 degrees C). This ensures the oven is at the correct temperature when the cake is ready to bake, leading to proper rising and even cooking. Next, prepare your cake pan(s) by greasing them thoroughly with a non-stick spray or butter and flour. For consistently perfect cake release, I highly recommend using Wilton Cake Release.
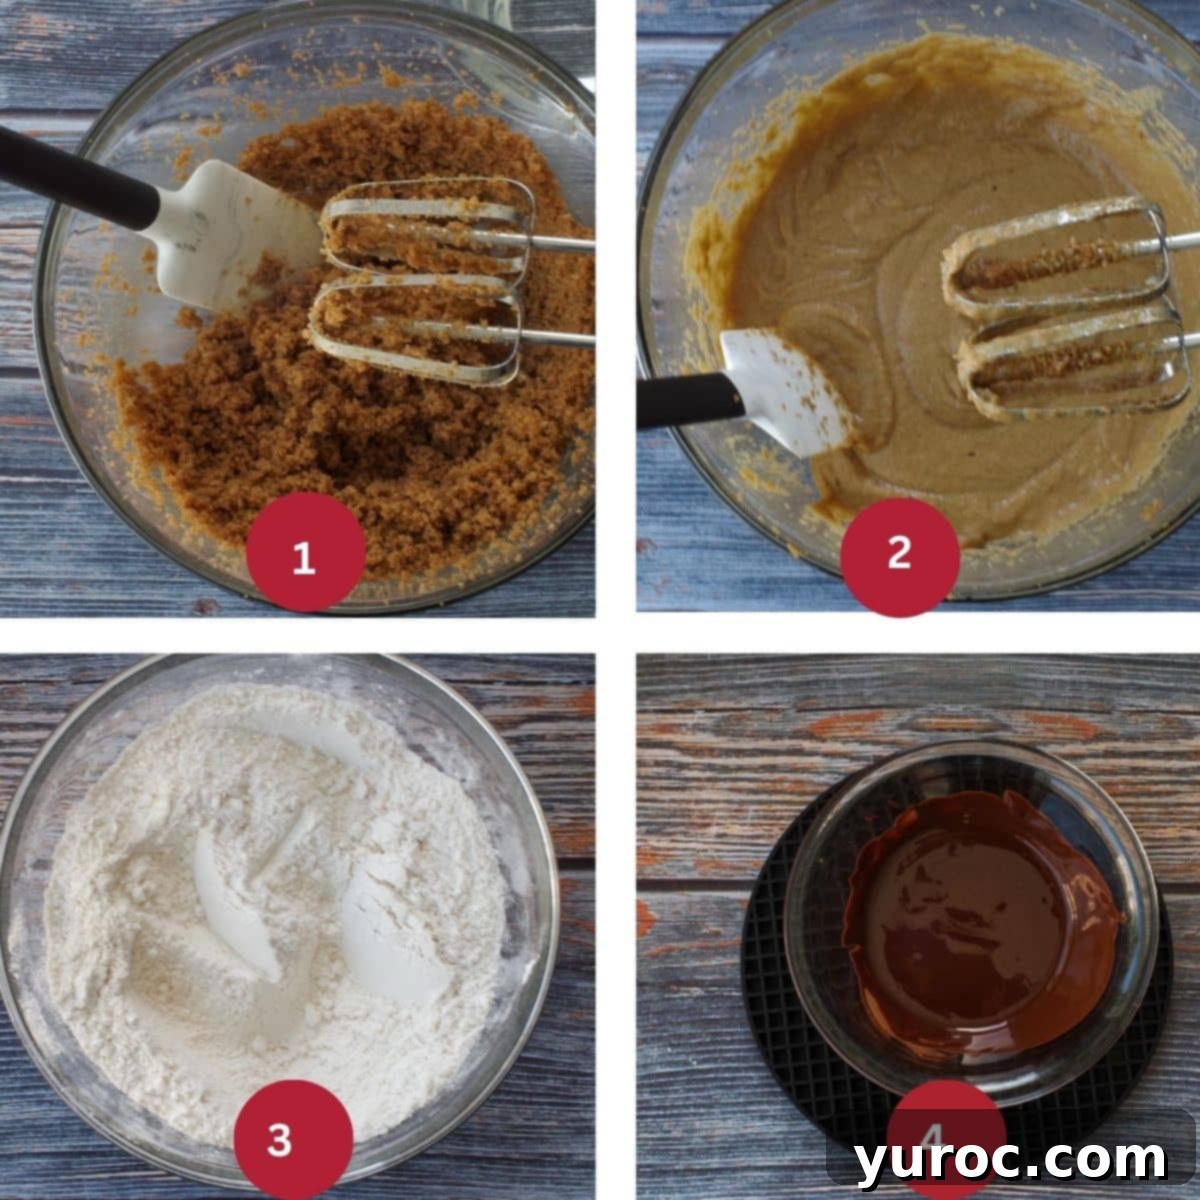
MAKE THE BATTER (Step 1): In a large mixing bowl, using an electric mixer, cream the softened butter for 2 minutes until it’s light and smooth. Gradually add the brown sugar, continuing to beat for another 5 minutes until the mixture is light, fluffy, and pale in color (IMAGE 1). This extended creaming process incorporates air, which is vital for the cake’s tender crumb. Add the eggs one at a time, beating thoroughly after each addition until fully incorporated before adding the next (IMAGE 2). In a separate, medium-sized bowl, sift together your dry ingredients: cake and pastry flour, baking soda, and salt (IMAGE 3). Sifting removes any lumps and aerates the flour, contributing to a lighter cake. Melt the unsweetened baker’s chocolate squares gently; use your microwave at 50% power for 1-2 minutes, stirring every 30 seconds to prevent scorching, or use a double boiler (IMAGE 4). Allow it to cool slightly before adding to the batter.
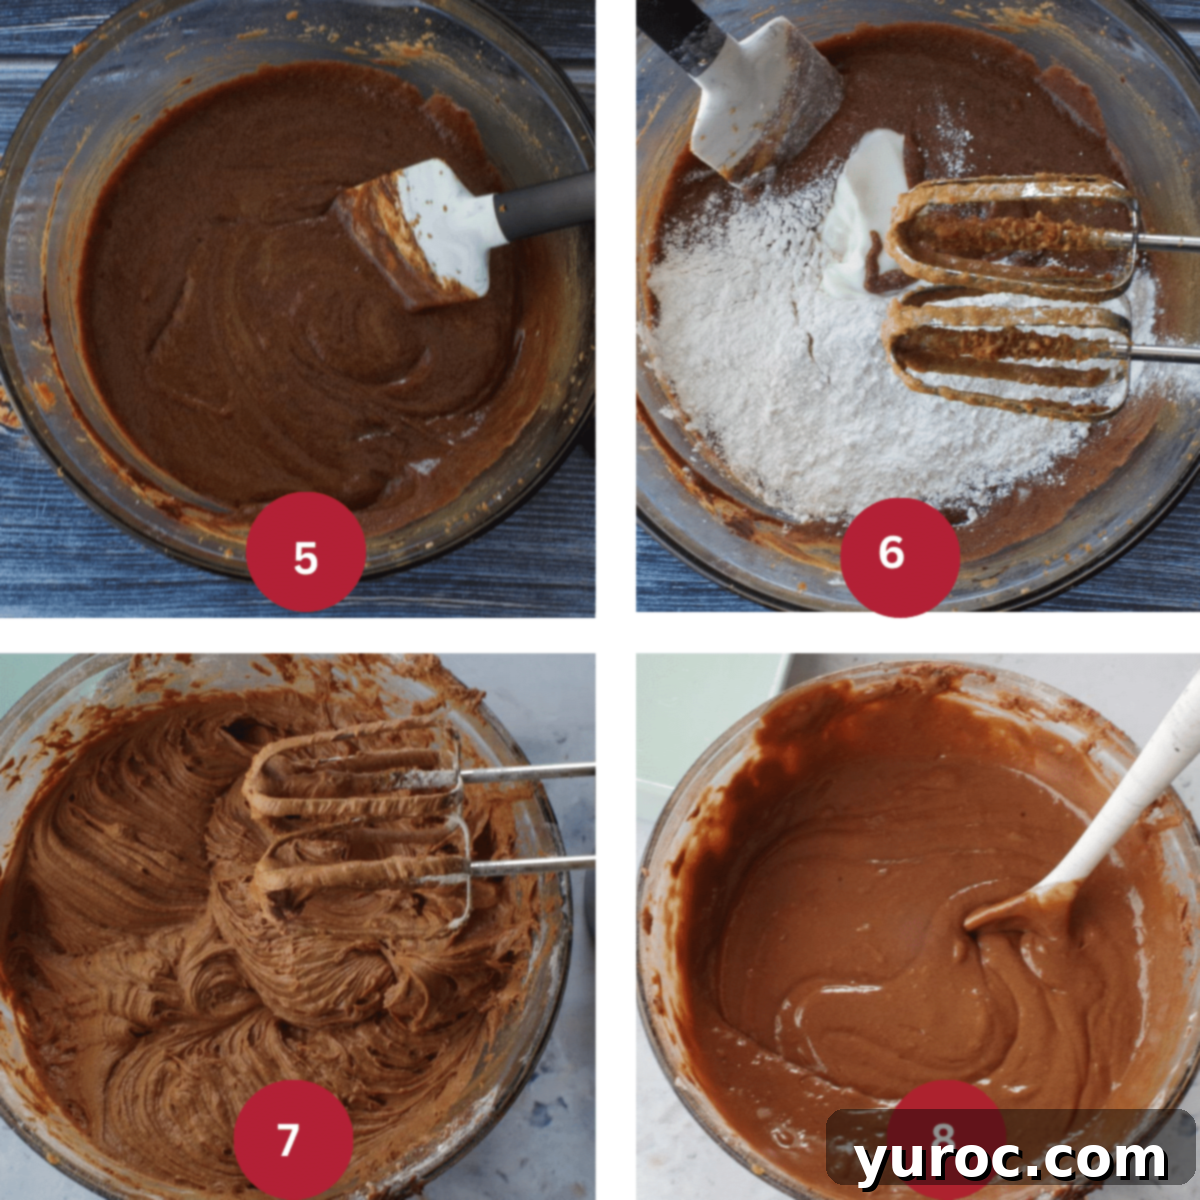
MAKE THE BATTER (Step 2 – Continued): Incorporate the vanilla extract and the cooled melted chocolate into your creamed butter and sugar mixture. Mix until just combined and smooth (IMAGE 5). Next, it’s time to alternately add the sifted flour mixture and sour cream to the batter. Do this in three additions, starting and ending with the flour mixture, and blending on low speed with your electric mixer after each addition (IMAGE 6). This method helps to prevent overmixing the gluten in the flour, ensuring a tender cake. Mix only until the ingredients are just blended and no dry streaks of flour remain (IMAGE 7). Finally, carefully pour in the boiling water. Using a spoon, blend it into the batter until well combined. Don’t be alarmed if the batter appears thin at this stage; this is expected and contributes significantly to the cake’s ultimate moistness (IMAGE 8).
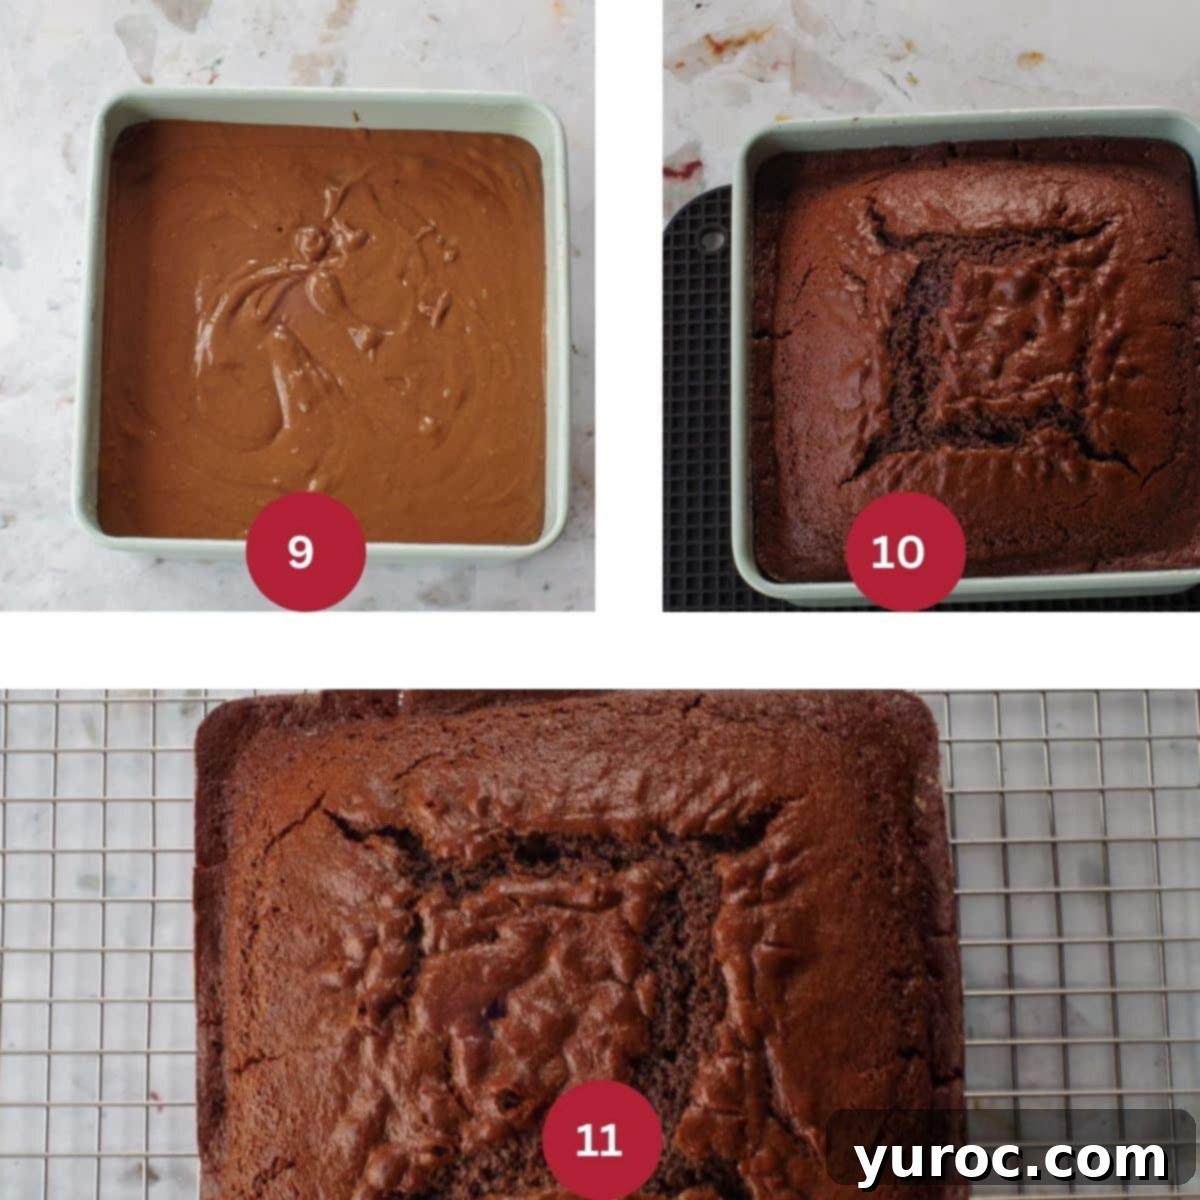
BAKE THE CAKE (Step 3): Pour the prepared cake batter evenly into your greased pan(s). This recipe yields enough for two 8 or 9-inch round layer cake pans, or one deep 8 or 9-inch square pan (as shown in the photos), and can also be used for cupcakes (IMAGE 9). Bake in the preheated oven at 350 degrees F (176 degrees C). For layer cakes, bake for approximately 35 to 40 minutes. If you’re using a deeper 8 or 9-inch square pan, you’ll need to bake for about 10-15 minutes longer. For cupcakes, reduce the baking time to roughly 15-20 minutes. The cake is done when a cake tester or wooden skewer inserted into the center comes out clean (IMAGE 10). Once baked, allow the cake to cool in its pan(s) for 10 minutes. This crucial cooling period helps the cake firm up before handling. After 10 minutes, carefully invert the cake(s) onto a wire rack and continue cooling completely before frosting (IMAGE 11). Cooling on a wire rack allows air circulation, preventing the bottom of the cake from becoming soggy.
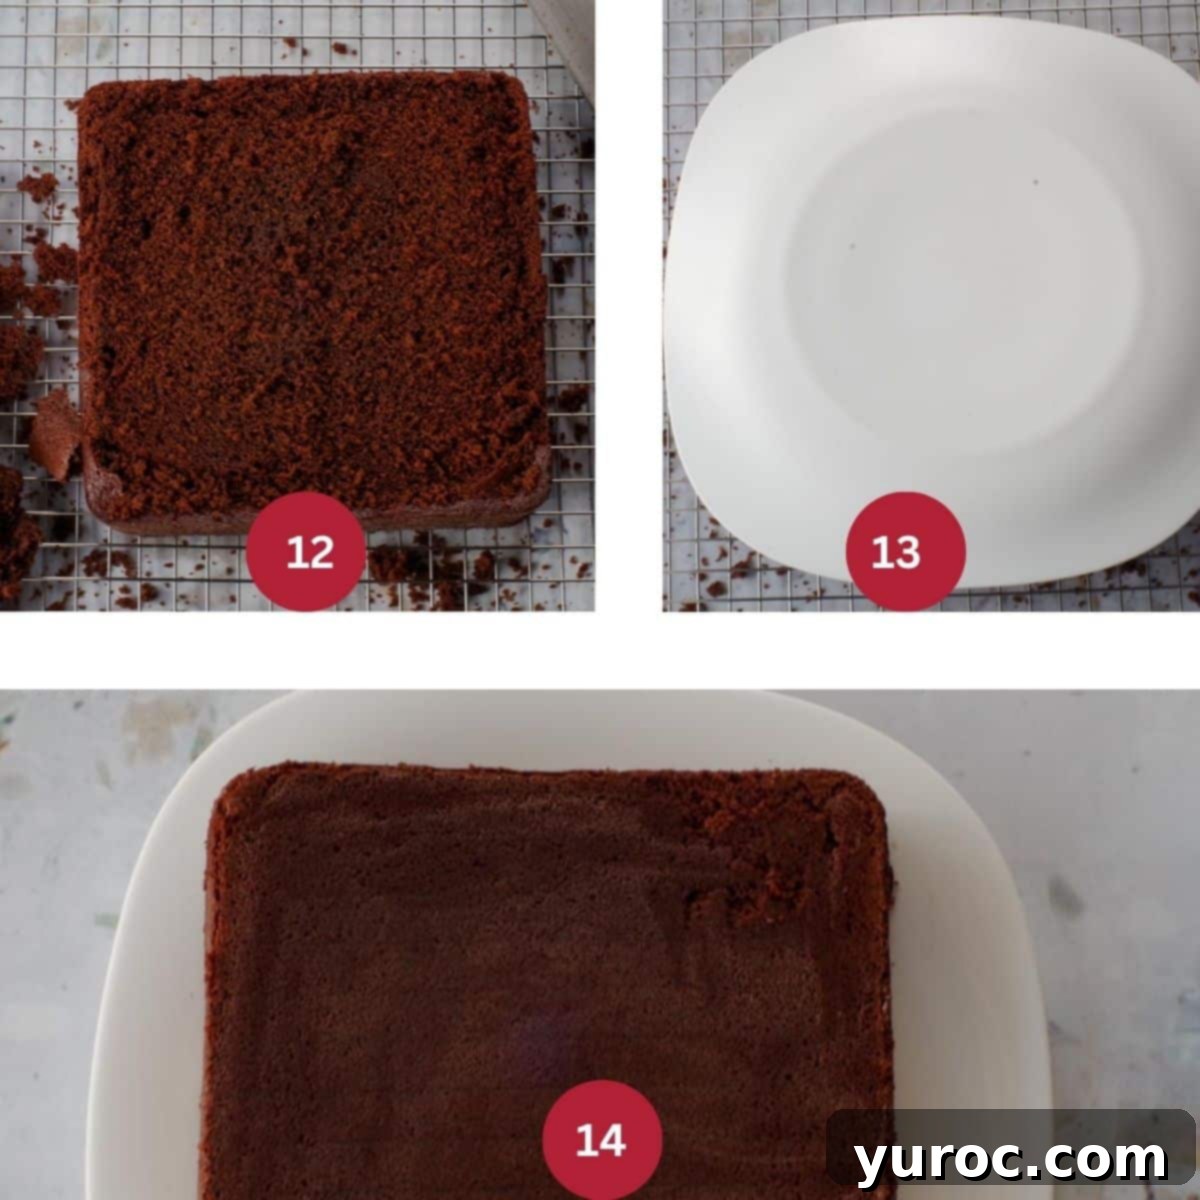
LEVEL AND FROST THE CAKE (Step 4): Patience is key! Ensure the cake is entirely cooled before proceeding. If baking a layer cake or if your cake has a slight dome, level the top by carefully slicing off the ‘hump’ with a long serrated knife or an adjustable wire cake leveler (IMAGE 12). For easier frosting and presentation, place your serving plate on the newly leveled side of the cake (IMAGE 13). Then, with a swift and confident motion, flip the cake over so the leveled side is now face down on your serving plate (IMAGE 14). This provides a perfectly flat surface for frosting.
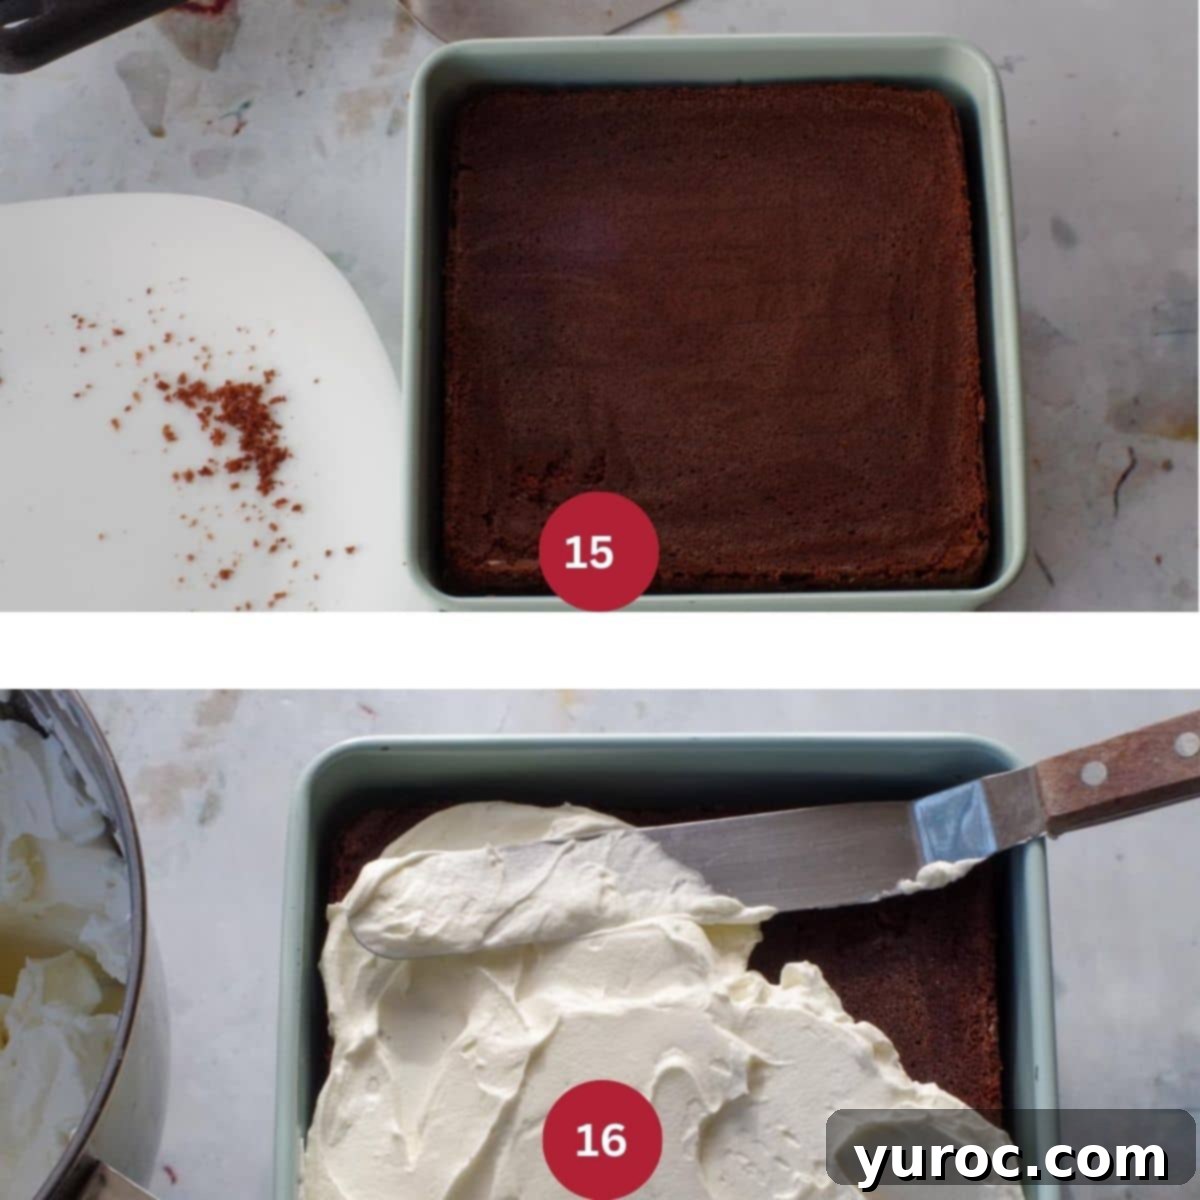
SERVE THE CAKE (Step 5): You can either place the cake back into the baking pan for easier transport or a rustic presentation (IMAGE 15) – a jumbo spatula/cake lifter (affiliate link) is invaluable for this! Alternatively, simply leave it on your chosen serving plate. Now, the fun part: generously frost your chocolate cake with your favorite icing (IMAGE 16). This cake is incredibly versatile and shines with a variety of frostings, so choose one you love!
✅ Expert Recipe Tips for a Flawless Chocolate Cake
- Embrace Room Temperature Ingredients: This tip is paramount for baking success! Ensure your butter, eggs, and sour cream are all at room temperature before you begin. Ingredients at a similar temperature emulsify much more effectively, leading to a smoother, more uniform batter that traps air better. This translates to a cake with a finer, more tender crumb and consistent texture.
- Never Skip Sifting Dry Ingredients: Sifting isn’t just about removing lumps; it’s about aeration. Sifting the dry ingredients, particularly cake flour, lightens them considerably. This extra air helps the leavening agents (like baking soda) work more efficiently, resulting in a lighter, fluffier cake texture.
- Cream Butter and Sugar Thoroughly: The “creaming method” is critical here. Beat the softened butter and brown sugar together for a full 5-6 minutes until the mixture is visibly lightened in color and fluffy. This process incorporates tiny air pockets into the fat, which expand during baking to create a tender, open crumb structure. Don’t rush this step!
- Melt Chocolate Gently: Chocolate can easily seize or scorch if exposed to too much heat too quickly. Use the microwave on 50% power, stirring frequently (every 30 seconds), or employ a double boiler for a gentle, even melt. Allow the melted chocolate to cool slightly before adding it to the batter to avoid cooking the eggs.
- Alternate Flour and Sour Cream Additions: When combining wet and dry ingredients, it’s best to add them alternately, in thirds, always starting and ending with the flour mixture. Mix only until just combined after each addition. This technique minimizes gluten development, which can make your cake tough if overmixed, and helps maintain the cake’s desirable soft texture.
- Avoid Overmixing: Once the flour is introduced to the wet ingredients, mix only until the flour streaks disappear. Overmixing develops the gluten in the flour, leading to a dense, chewy, and less tender cake. A light hand and a low speed on your mixer are your best friends here.
- Don’t Fear the Thin Batter: After adding the boiling water, the batter will appear quite thin. This is perfectly normal and actually a desired characteristic of this recipe. The hot water helps to bloom the cocoa powder (enhancing flavor) and contributes significantly to the cake’s exceptional moistness.
- Level Your Cakes Like a Pro: For multi-layer cakes, level the cooled cake tops with a serrated knife or a specialized cake leveler. This creates flat surfaces, ensuring that your layers stack neatly and evenly for a professional-looking finish.
- Unleash Its Versatility: This recipe is incredibly adaptable! Feel free to bake it into cupcakes, transform it into a stunning Black Forest Cake, or serve it as a simple layer cake with your favorite frosting. Its sturdy yet tender crumb also makes it robust enough for shaping into novelty cakes.
- Cool Completely Before Frosting: This cannot be stressed enough! Attempting to frost a warm or even slightly warm cake will result in a melted, runny mess as the frosting slides off. Allow the cake to cool fully on a wire rack to room temperature before applying any icing.
- Plan Ahead and Freeze: This cake is a fantastic make-ahead option. Once completely cooled, unfrosted cake layers can be wrapped tightly in several layers of plastic wrap, then an additional layer of aluminum foil, and stored in an airtight container. Freeze for up to 2 months. Thaw frozen layers at room temperature for several hours or overnight before frosting.
This Old-Fashioned Sour Cream Chocolate Cake is surprisingly quick and easy to prepare, yet it tastes like you’ve spent hours perfecting it! Its inherent versatility means it can be elegantly dressed up, filled, iced, and paired with virtually any accompaniment you desire. Whether you opt for a single-layer cake or stack it into an impressive multi-tiered creation, this recipe never disappoints.
🎂 Delicious Frostings for Your Old-Fashioned Sour Cream Chocolate Cake
This treasured recipe, which I received from a dear friend years ago, has undeniably become my all-time favorite chocolate cake. It truly is the best chocolate cake I’ve ever made, and I honestly can’t believe it took me this long to finally share it, given how much I adore it and how frequently it features in my baking.
The beauty of this rich chocolate cake is its perfect compatibility with a wide array of frostings. While it’s hard to pick favorites, my two top choices for pairing with this delightful cake are my Whipped Cream Buttercream Frosting, which offers a light yet rich counterpoint, and my Chocolate Frosting (without butter), featured beautifully in the birthday cake photo below. The latter provides an intense chocolate experience without the heaviness of traditional buttercreams.
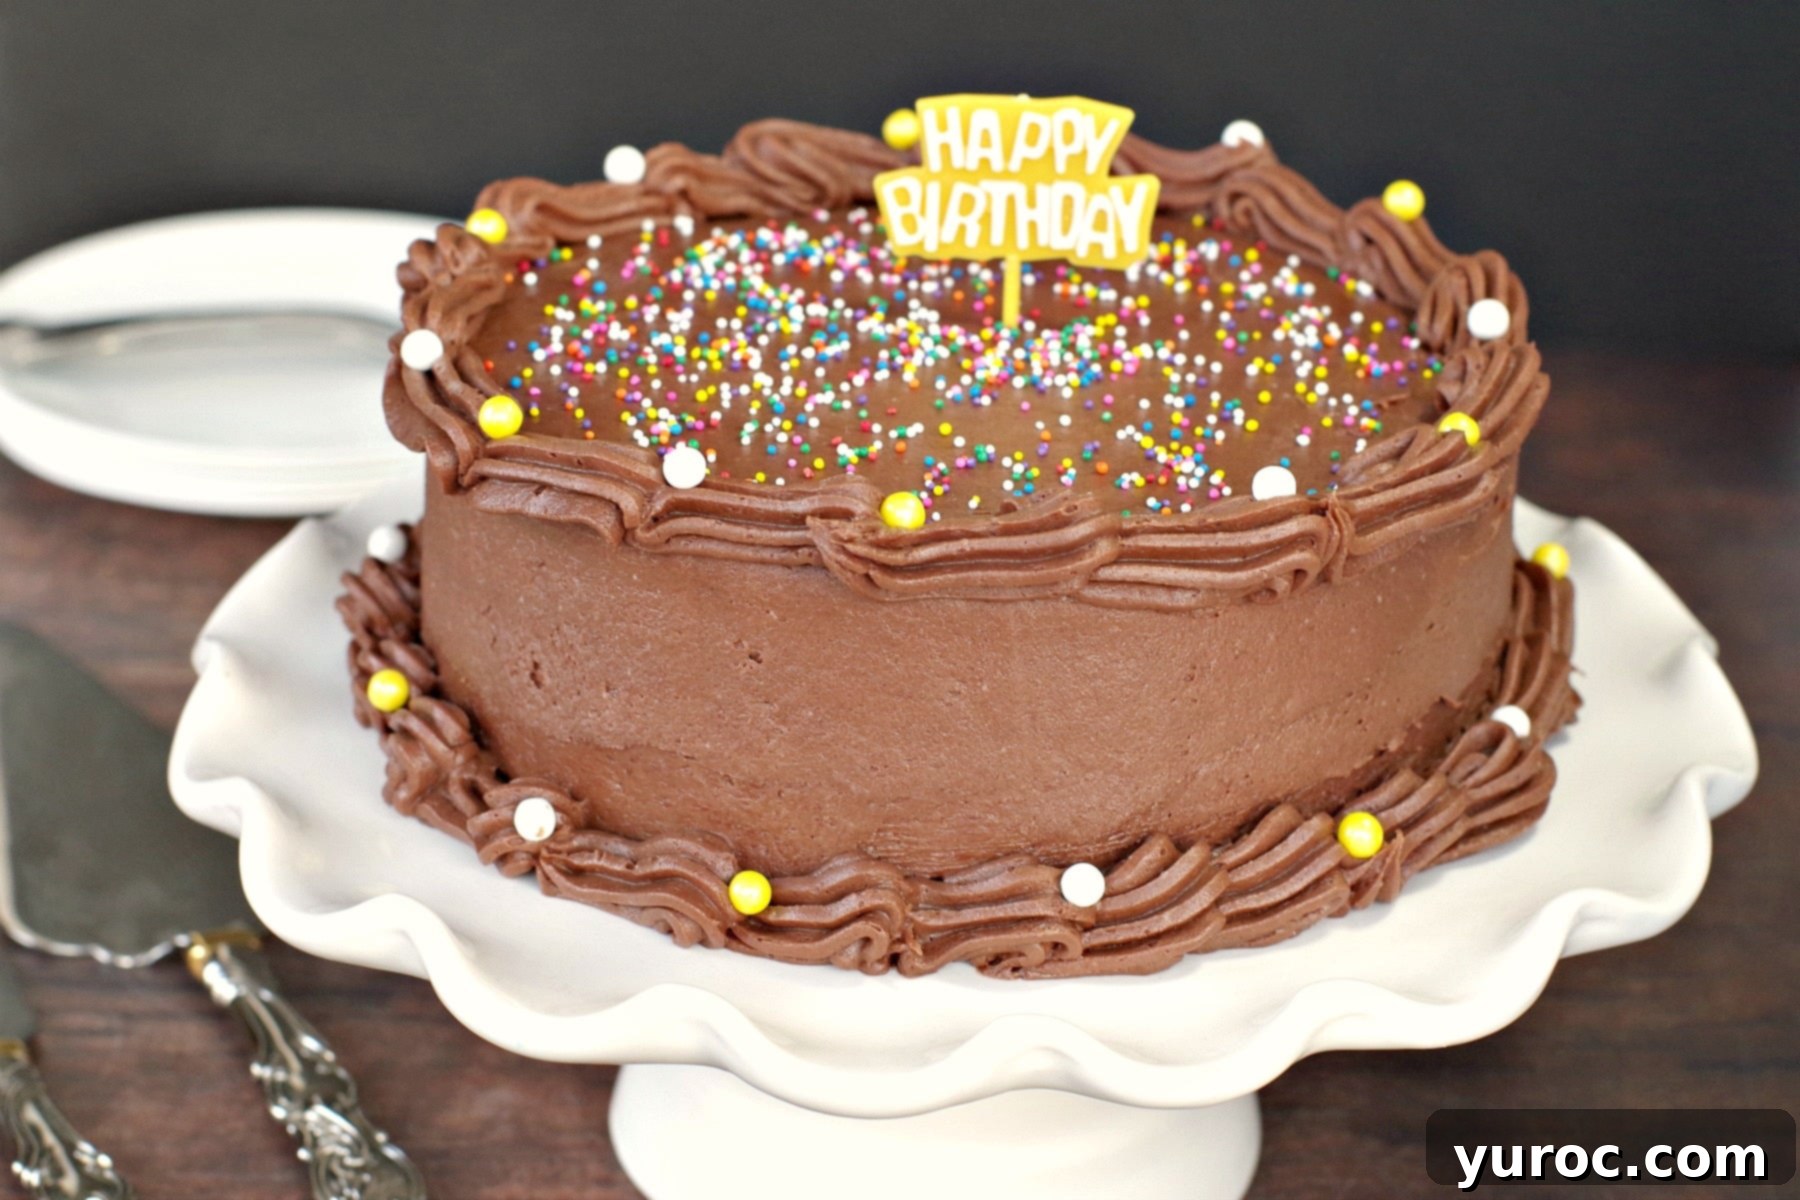
For those aiming to create a classic Black Forest Cake, this chocolate base is absolutely divine when topped with a Stabilized Whipped Cream Icing and fresh cherries. And if you’re looking to indulge in an utterly decadent, all-out chocolate experience, then you simply must try it with my incredible 2-Ingredient White Chocolate Whipped Cream Frosting! The contrast of the dark chocolate cake with a sweet, creamy white chocolate topping is simply irresistible.
👪 Serving Size
This generous Old-Fashioned Sour Cream Chocolate Cake recipe yields enough batter for two 8-inch or 9-inch round layer cakes, perfect for stacking and celebrating. You will likely have some leftover batter, which is ideal for making about 6 accompanying cupcakes. Alternatively, you can bake it as one deep 8-inch square cake, as depicted in many of the photos, which typically provides about 8 hearty slices. For larger gatherings, this recipe also adapts beautifully to a standard 9×13-inch sheet cake pan, offering even more servings.
🌡️ Storage
To keep your delicious chocolate cake fresh, store any leftovers in an airtight container at room temperature for up to 4 days. If you only plan to store it overnight, simply covering the cake tightly with plastic wrap will suffice. For longer preservation, the unfrosted cake layers can be wrapped meticulously in plastic wrap and then foil, and frozen for up to 2 months. Thaw at room temperature before frosting and serving.
🍽 Essential Equipment
To bake this magnificent sour cream chocolate cake, you’ll need either a deep 8-inch square cake pan (which provides a wonderfully tall, impressive cake) or two 8-inch round layer cake pans if you’re aiming for a classic stacked look. A versatile 9×13-inch cake pan can also be used for a more casual sheet cake. Beyond the pan, an electric mixer is highly recommended for efficient creaming of butter and sugar, and a cake tester or wooden skewer is essential for checking doneness. *For a complete list of recommended equipment, please refer to the detailed recipe card below.
❔ Recipe FAQs
Absolutely! This versatile cake batter works wonderfully in a Bundt pan. Just be sure to grease the Bundt pan exceptionally well with baking spray or butter and flour to prevent sticking. You’ll also need to adjust the baking time; expect it to bake for approximately 50-60 minutes. Always check for doneness by inserting a cake tester or wooden skewer into the thickest part of the cake – it should come out clean.
Yes, full-fat Greek yogurt is an excellent substitute for sour cream in this recipe, used in a 1:1 ratio. It provides a similar tang and richness, contributing to a moist cake. While the texture and flavor might have a slightly different nuance (Greek yogurt can be a bit thicker and tangier), it will still yield a delicious and tender chocolate cake. Ensure you use full-fat for the best results in moisture and richness.
A sinking cake can be frustrating, but it’s often due to a few common issues: underbaking (the center hasn’t fully set), opening the oven door too early during baking (a sudden drop in temperature), or overmixing the batter (which develops too much gluten, leading to a weak structure). To prevent this, ensure your oven temperature is accurate, avoid opening the oven door for at least the first 30 minutes of baking, and mix the batter only until just combined after adding the dry ingredients. If, despite your best efforts, your cake does sink, and is beyond salvaging as a whole cake, don’t despair! You can carefully cut off any overbaked or sunken sections and break up the remaining good parts into “cake bits.” These can be frozen for future use or repurposed into delightful desserts such as my Skor Bar Dessert, an easy NO-BAKE Black Forest Trifle, or my decadent Black Forest Tiramisu (No Bake).
Several factors contribute to the exceptional moistness of this sour cream chocolate cake. Firstly, using sour cream and brown sugar adds significant moisture. Secondly, the addition of boiling water at the end of the batter mixing process helps to bloom the cocoa powder and thin the batter, both of which are crucial for a moist crumb. Finally, avoid overbaking! Always check for doneness with a cake tester, and remove the cake from the oven as soon as the tester comes out clean to prevent it from drying out.
While this recipe is developed with wheat flour, you can experiment with a 1:1 gluten-free all-purpose baking flour blend that contains xanthan gum. The results may vary slightly in texture, but many readers have had success with gluten-free adaptations. Ensure all other ingredients are also certified gluten-free if catering to strict dietary needs.
So, if you’re searching for an extraordinary, incredibly versatile chocolate cake recipe suitable for anything from elegant birthday cakes to simple, comforting cupcakes, then this Old-Fashioned Sour Cream Chocolate Cake is an absolute must-try. Its ease of preparation and phenomenal taste are sure to make it your new go-to chocolate cake in no time!
And for those who appreciate the charm and deliciousness of easy, old-fashioned chocolate cakes, don’t miss out on my equally delightful Old-Fashioned Mayonnaise Chocolate Cake!
🎂 More Delicious Chocolate Cake Recipes
- Chocolate Genoise Sponge Cake (with Summer Berries)
- Dulce De Leche Chocolate Raspberry Icebox Cake
- Root Beer Float Layer Cake
- Red Wine Chocolate Strawberry Cake
Did your family ❤️ this recipe? Did you know that commenting and ⭐ rating recipes is one of the best ways to support your favorite recipe creators? If you LOVED this recipe, please comment and rate it in the recipe card below or share photos on social media using the hashtag #foodmeanderings or tagging @foodmeanderings!

📋 Old-Fashioned Sour Cream Chocolate Cake Recipe
Equipment
-
8 inch deep square cake pan
-
electric mixer
-
cake tester
Ingredients
- 2 ¼ cups cake and pastry flour * see NOTES for substitution
- 2 tsp. baking soda
- ½ tsp. salt
- ½ cup unsalted butter softened
- 2 ¼ cups firmly packed brown sugar
- 3 eggs
- 1 ½ tsp. vanilla extract
- 3 ounces (3- 1 ounce squares) baker’s unsweetened chocolate
- 1 cup sour cream
- 1 cup boiling water
Instructions
-
Preheat oven to 350 degrees F (175 degrees C) and grease your cake pan(s) thoroughly with non-stick spray or baking release. I personally use Wilton Cake Release for the best results and easiest cleanup.
-
In a large bowl, using an electric mixer, cream the softened butter for 2 minutes. Gradually add the brown sugar and continue beating for a full 5 minutes until the mixture is light, fluffy, and pale. This step incorporates essential air for a tender crumb.½ cup unsalted butter, 2 ¼ cups firmly packed brown sugar
-
Add the eggs one at a time, beating well after each addition until fully incorporated. Scrape down the sides of the bowl as needed to ensure everything is evenly mixed.3 eggs
-
In a separate, medium-sized bowl, sift together your dry ingredients: the cake and pastry flour, baking soda, and salt. Set this aside. Sifting prevents lumps and aerates the flour for a lighter cake.2 ¼ cups cake and pastry flour, 2 tsp. baking soda, ½ tsp. salt
-
Gently melt the unsweetened baker’s chocolate. You can do this in the microwave on 50% power for 1-2 minutes, stirring every 30 seconds, or use a double boiler. Ensure it’s cooled slightly before adding to the batter.3 ounces (3- 1 ounce squares) baker’s unsweetened chocolate
-
Add the vanilla extract and the cooled melted chocolate to the batter. Mix until just combined and smooth.1 ½ tsp. vanilla extract
-
Alternately blend in the sifted flour mixture and the sour cream, adding one-third of each at a time. Mix on the low speed of your electric mixer, mixing only until just combined after each addition. Begin and end with the flour mixture.1 cup sour cream
-
Carefully add the boiling water; blend well with a spoon or on very low speed. ***The batter will be noticeably thin at this stage, which is completely normal and key to a moist cake. Pour the batter into your prepared pan(s) (8 or 9-inch round layer cake pans, a deep square pan, or cupcake tins).1 cup boiling water
-
Bake at 350 degrees F (175 degrees C). If making layer cakes, bake for 35 to 40 minutes. For a deeper 8 or 9-inch square cake (as seen in the photos), bake for approximately 5-10 minutes longer. Cupcakes will require about half the time, typically 15-20 minutes. The cake is done when a cake tester inserted into the center comes out clean.
-
Allow the cake(s) to cool in the pan(s) for 10 minutes. This helps the cake firm up and prevents it from breaking when removed. Then, carefully invert the cake(s) onto a wire rack to continue cooling completely before frosting as desired.
Notes
- Use room temperature ingredients: For the best texture and even mixing, ensure your butter, eggs, and sour cream are at room temperature. This helps them emulsify better, creating a smooth and consistent batter that traps air more effectively.
- Don’t skip sifting: Sifting the dry ingredients (especially cake flour) aerates the flour and removes lumps, resulting in a lighter, fluffier cake.
- Cream butter and sugar thoroughly: Beat the butter and brown sugar until it’s light and fluffy (5-6 minutes). This step creates crucial air pockets in the batter, significantly contributing to the cake’s tender crumb.
- Melt chocolate gently: Use the microwave on 50% power or a double boiler to avoid scorching the chocolate. Stir every 30 seconds for even melting, and allow it to cool slightly before adding to the batter.
- Alternate flour and sour cream additions: Add the flour and sour cream in thirds, alternating between them and starting and ending with the flour. This minimizes gluten development, which keeps the cake soft and tender.
- Don’t overmix: Once the flour is added, mix only until just combined to avoid developing too much gluten, which can make the cake tough and dense.
- Thinner batter is normal: Don’t worry if the batter seems thin after adding the boiling water – this is expected and is the secret to a wonderfully moist cake.
- Level your cakes like a pro: For layer cakes, level the tops with a serrated knife or cake leveler to ensure they stack evenly and look professional.
- Customize it: This recipe is extremely versatile! Make cupcakes, a classic Black Forest Cake, or a beautiful layer cake with your favorite frosting. It’s also sturdy enough for shaped or novelty cakes.
- Cool completely before frosting: Make absolutely sure the cake is fully cooled to room temperature before applying any frosting, or the icing will melt and slide right off.
- Make ahead and freeze: This cake freezes exceptionally well! Wrap cooled, unfrosted layers tightly in plastic wrap, then an additional layer of aluminum foil, and store in an airtight container. Freeze for up to 2 months. Thaw at room temperature before frosting.
-
- Cake and Pastry Flour Substitute – Although genuine cake flour is recommended for the best texture, in a pinch you can substitute all-purpose flour. For every 1 cup of cake or pastry flour, measure 1 cup of all-purpose flour, then remove 2 tablespoons (leaving you with ⅞ cup). Add 2 tablespoons of cornstarch to this. *Note: This substitute will result in a cake that is slightly denser and less light and fluffy compared to using dedicated cake and pastry flour.
-
- Butter Substitution – If unsalted butter is unavailable, you can use salted butter. However, remember to skip the ½ teaspoon of salt called for in the recipe to avoid an overly salty cake.
