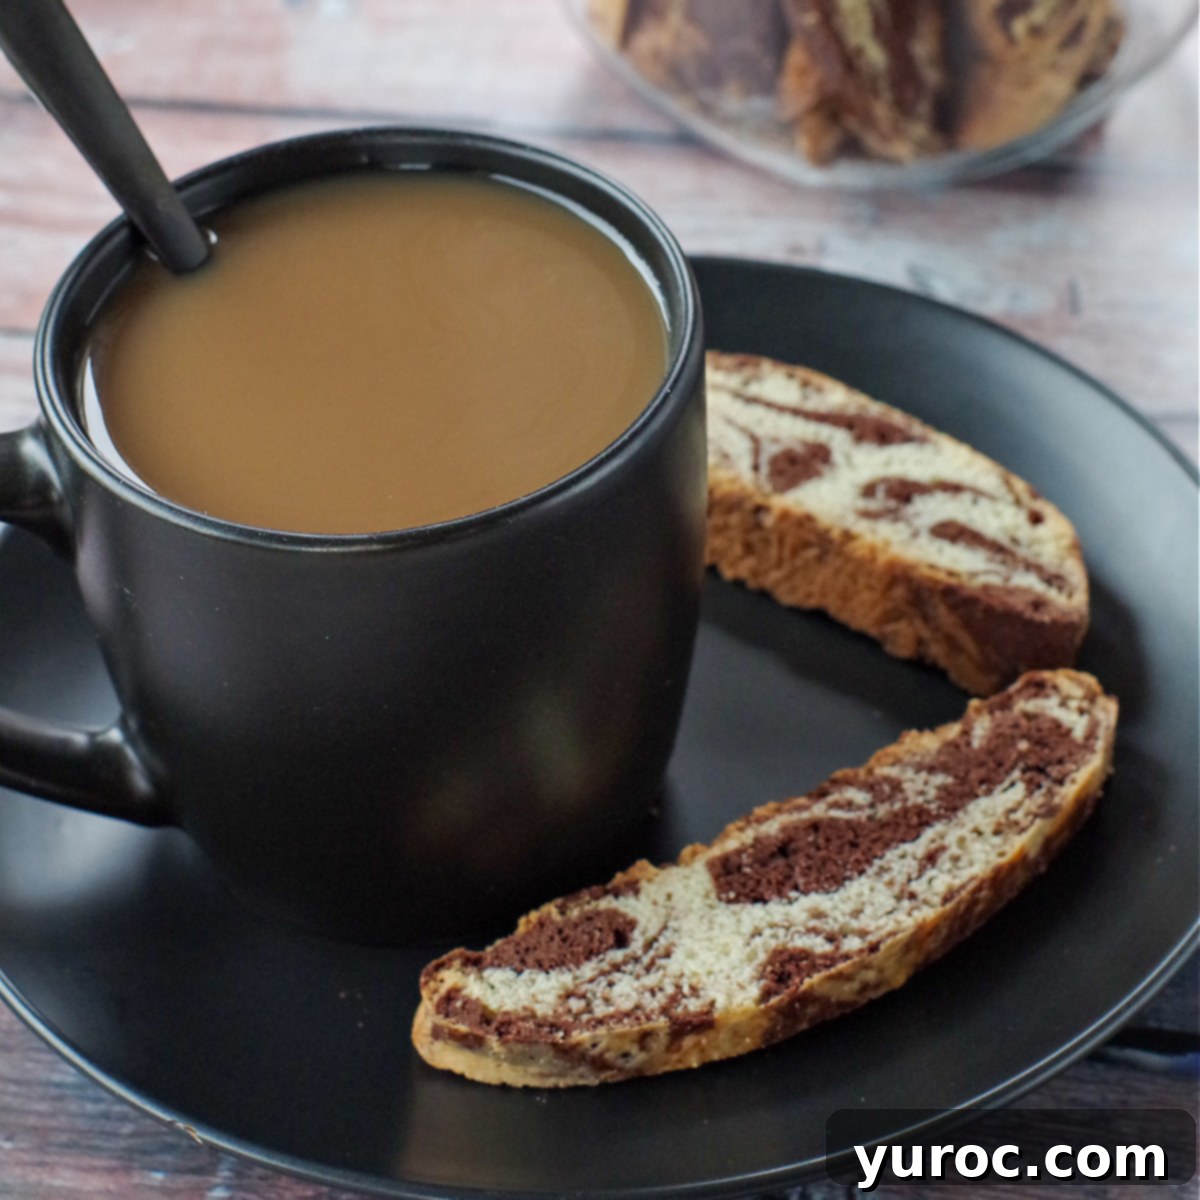
Homemade Chocolate Marble Biscotti: The Perfect Swirled Treat & Coffee Companion
There’s something undeniably special about biscotti. For me, it’s the ultimate “breakfast dessert” – a treat that feels indulgent without the guilt, especially when paired with a morning cup of coffee or tea. This particular recipe for Chocolate Marble Biscotti elevates the experience by harmoniously blending rich chocolate and delicate vanilla flavors into one beautifully swirled, crispy-yet-tender cookie. What makes it even better? It’s a fantastic, Weight Watchers-friendly option, proving that delicious treats can fit into a healthy lifestyle!
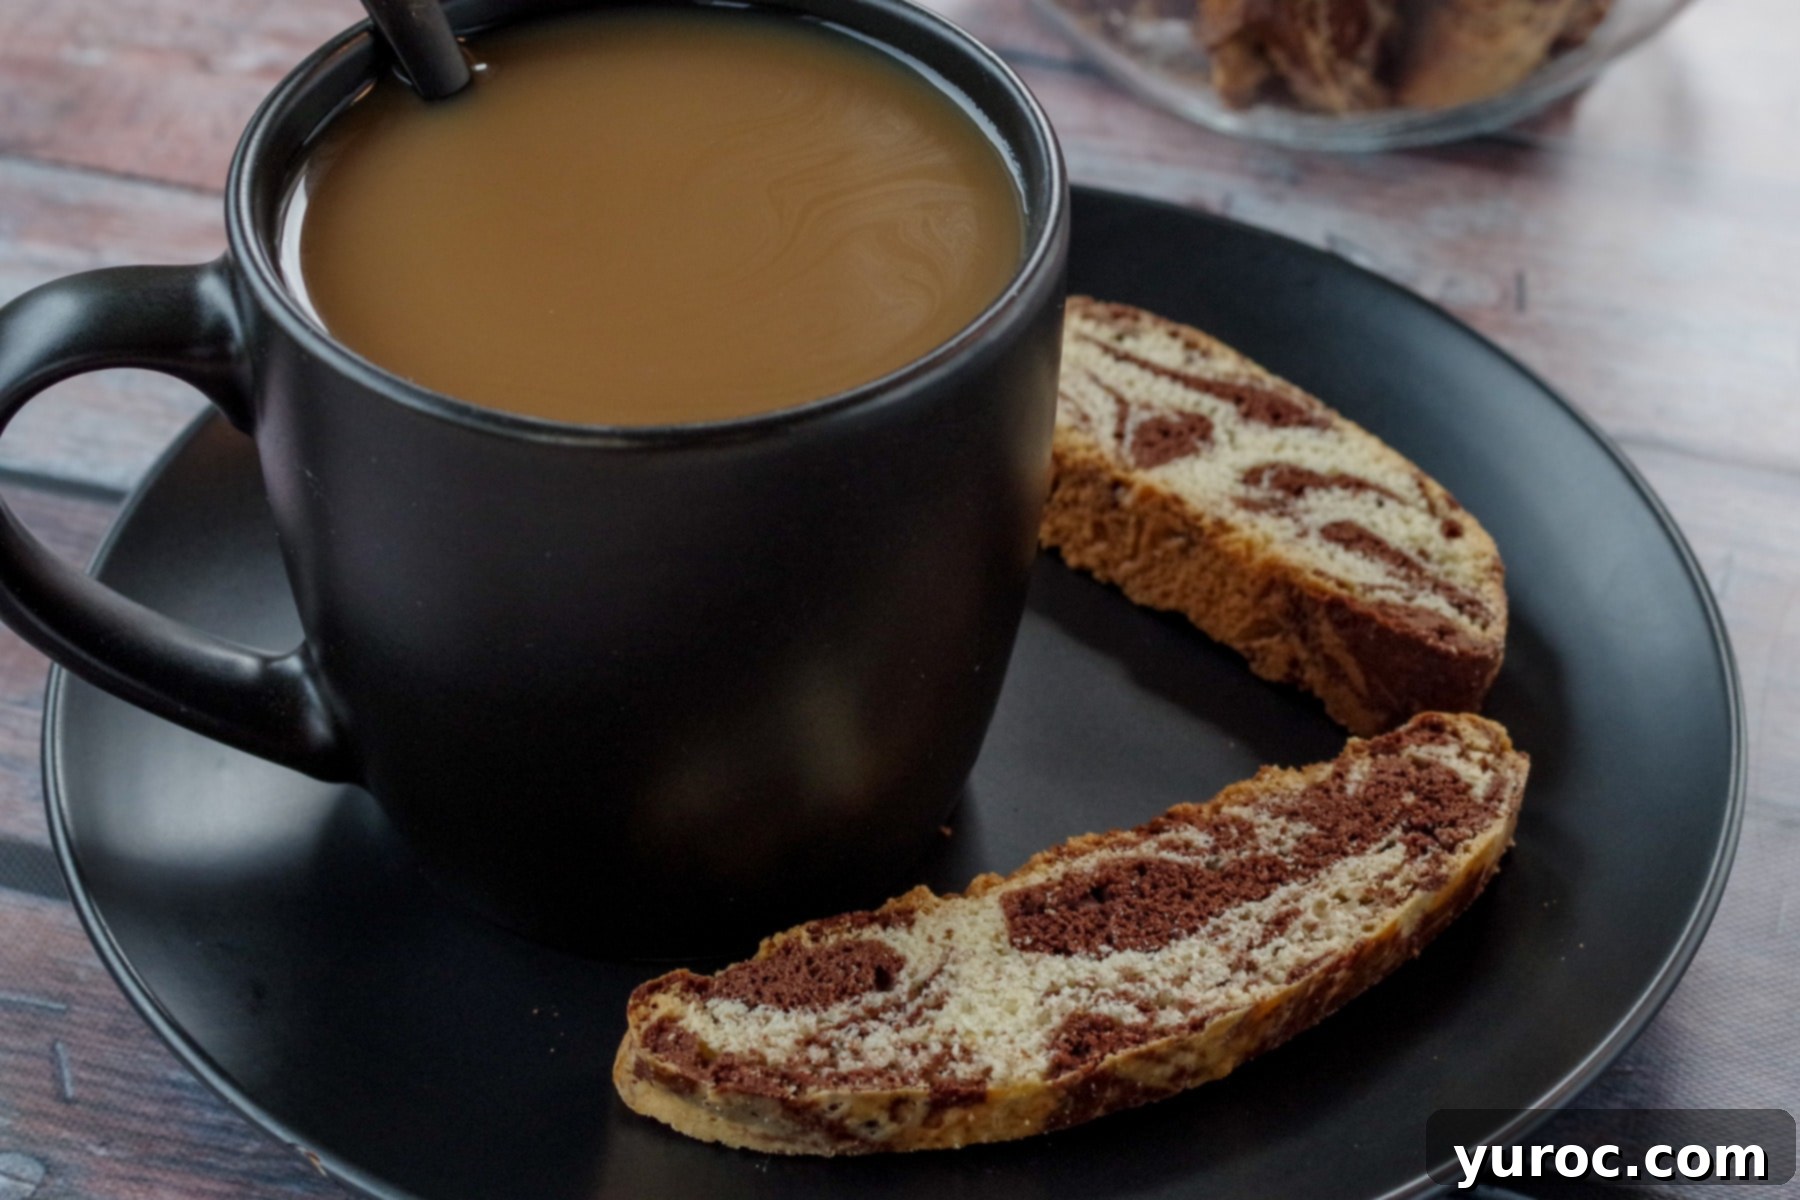
For years, my beloved Cranberry Pistachio Biscotti was a once-a-year holiday indulgence. However, the rest of my family and I found ourselves missing that enormous batch throughout the year, as it never seemed to last very long! This prompted me to broaden my biscotti horizons and experiment with new flavors. When considering the best dessert, especially for breakfast, chocolate always comes to mind. And so, this delightful Chocolate Marble Biscotti recipe was born, later inspiring other creations like my Chocolate Zucchini Biscotti. This recipe isn’t just a sweet treat; it’s a versatile, satisfying snack perfect for any time of day.
🌟 Pinterest Review
“I like it a lot! Easy to follow… a great recipe, thank you!!“ ⭐⭐⭐⭐⭐
— Milly
The Undeniable Charm of Homemade Biscotti
Before I embarked on my journey of making homemade biscotti, I confess, I didn’t quite understand the widespread adoration for these Italian cookies. If you’ve ever had a rock-hard, tooth-breaking piece of biscotti from a less-than-stellar coffee shop, you’ll know exactly the feeling of pure disappointment I’m describing. But trust me, making biscotti yourself is an entirely different experience altogether. Homemade biscotti transcends its often-misunderstood reputation. It’s wonderfully crispy, offering a satisfying snap, yet it retains a delicate tenderness that makes it truly enjoyable to eat. Forget stale; homemade versions are fresh, flavorful, and perfectly complement your favorite hot beverage, transforming a simple morning ritual into a moment of pure bliss.

🥘 Ingredient Notes for Perfect Marble Biscotti
One of the beauties of this biscotti recipe is that it relies on simple, readily available pantry ingredients. You likely have most of these on hand, making it easy to whip up a batch whenever a craving strikes for a delightful, marbled treat.
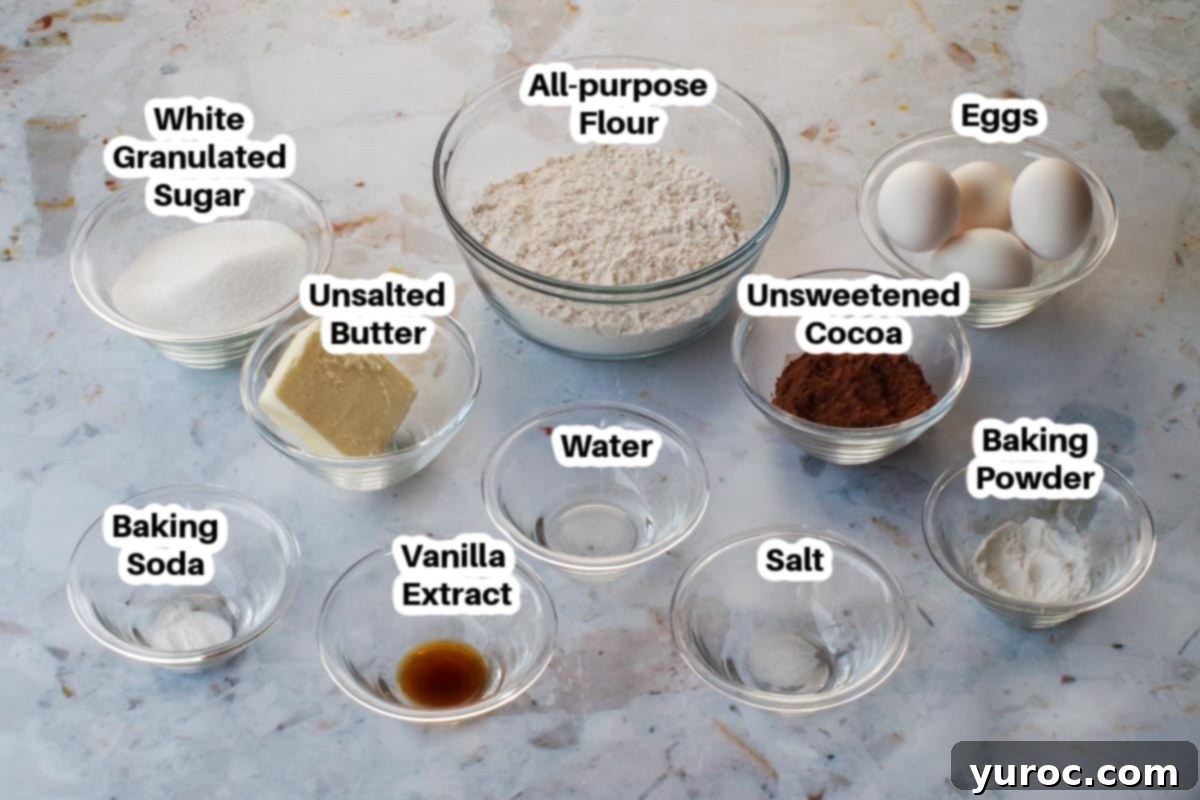
- Unsalted Butter: I always recommend using unsalted butter in baking recipes. This allows you to have precise control over the overall salt content in your biscotti, as the amount of salt in salted butter can vary significantly between brands. Room temperature butter creams beautifully with sugar, contributing to a tender crumb.
- Granulated Sugar: Provides sweetness and helps create the crisp texture characteristic of biscotti.
- Eggs: Act as a binding agent, providing structure and richness to the dough. Using room temperature eggs ensures they emulsify better with the other ingredients, leading to a smoother dough.
- Vanilla Extract: Essential for boosting the classic vanilla flavor in one half of our marbled dough. It adds a warm, aromatic depth that beautifully complements the chocolate.
- All-Purpose Flour: The primary structural component of our biscotti. Ensure it’s measured correctly (fluff, spoon into cup, level off) to avoid a dense or overly dry dough.
- Baking Powder & Baking Soda: These leavening agents work together to give the biscotti a slight rise during the first bake, ensuring it’s not too dense before its second crisping bake.
- Salt: A small amount of salt enhances all the other flavors, balancing the sweetness and deepening the chocolate notes.
- Unsweetened Cocoa Powder: This is what gives the chocolate portion of our marble biscotti its rich, deep cocoa flavor and signature dark color, all without adding extra calories from sugar. Opt for good quality cocoa for the best taste.
- Egg Wash (Egg + Water): Applied before the first bake, the egg wash gives the biscotti a beautiful golden-brown sheen and helps it crisp up perfectly.
📖 Variations & Smart Substitutions for Your Biscotti
While this Chocolate Marble Biscotti recipe is fantastic as is, it’s also incredibly versatile! Feel free to get creative with these delicious variations and substitutions to tailor it to your taste or what you have on hand:
- Dried Fruit: For an added burst of sweetness and chewiness, incorporate about ½ cup of dried fruit. Cranberries, dried cherries, or finely diced dried apricots work beautifully. If you’re mindful of sugar intake, you might want to slightly reduce the granulated sugar in the dough, as dried fruits add natural sweetness.
- Nuts: Toasted nuts add wonderful crunch and flavor. Sliced almonds or chopped pistachios are classic biscotti additions that pair well with both chocolate and vanilla. Walnuts or pecans could also be used. If you’re tracking Weight Watchers points, remember to adjust them accordingly when adding nuts.
- Chocolate Chips or Chunks: While this recipe features cocoa, you could fold in ½ cup of mini chocolate chips, white chocolate chips, or finely chopped chocolate chunks into either the vanilla or chocolate dough portion for extra pockets of chocolatey goodness.
- Different Extracts: Instead of or in addition to vanilla, try a touch of almond extract in the vanilla dough, or a hint of peppermint extract in the chocolate dough for a festive twist.
- Butter Alternatives: You can absolutely use salted butter if that’s what you have, but be sure to omit the ¼ teaspoon of added salt from the recipe to prevent your biscotti from becoming too salty.
- Citrus Zest: For a bright, fresh note, add 1-2 teaspoons of orange or lemon zest to the vanilla dough before combining.
- Glaze or Drizzle: Once your biscotti are completely cooled, you can take them to the next level with a simple glaze. A powdered sugar glaze (powdered sugar + a splash of milk or citrus juice) or a melted chocolate drizzle adds a touch of elegance and extra sweetness.
Biscotti: The Art of the Twice-Baked Italian Cookie
If the term “biscotti” conjures images of rustic Italian bakeries, you’re on the right track! Essentially, biscotti are Italian cookies, but with a defining difference: they are baked twice. This double-baking process is the magical secret behind their signature delicate texture – crisp, yet not overly hard, and perfect for dunking. Unlike a standard drop cookie, biscotti loaves are first baked whole, then sliced and baked again. This second bake slowly dries them out, giving them their characteristic dry, crunchy, and durable quality that allows them to be stored for extended periods. In essence, these Chocolate Marble Biscotti are much more than just chocolate marble cookies; they are an experience, a testament to a time-honored baking tradition that results in a unique and utterly satisfying treat.
🔪 How to Make Delicious Chocolate Marble Biscotti
Crafting these beautiful Chocolate Marble Biscotti begins with a single, versatile vanilla dough. This dough is then thoughtfully divided, allowing one half to be transformed into a rich chocolate dough. The two distinct doughs are then artfully blended to achieve that captivating marbled effect. The process, while requiring a bit of patience, is incredibly rewarding and simpler than you might think!
Heads up: Please note there is a crucial 2-hour chilling time required for the dough before you begin baking. This step is essential for easy handling and proper biscotti texture.
Step-by-Step Dough Preparation:
- In a large mixing bowl, beat the softened unsalted butter with an electric mixer on medium to high speed for about 30 seconds until creamy. Then, add the granulated sugar, baking powder, baking soda, and salt. Continue beating until all ingredients are well combined and the mixture is light and fluffy.
- Next, beat in the 3 eggs one at a time, ensuring each is fully incorporated before adding the next. Stir in the vanilla extract until just combined. Gradually add 2 ¼ cups of the all-purpose flour, mixing with the electric mixer until as much of the flour as possible is incorporated. Switch to a large spoon or your hands to stir in any remaining flour until a cohesive dough forms. *Reserve the final ¼ cup of flour for later steps.
- Carefully divide the entire dough mixture into two equal portions.
- To one portion, add the remaining ¼ cup of all-purpose flour. Mix and knead this flour into the dough with your hands until it’s fully combined and the dough is smooth. This will be your vanilla dough.
- To the second portion of dough, add the cocoa powder. Knead the cocoa into the dough with your hands until the color is uniform and the chocolate is well distributed. If this chocolate dough feels too sticky to work with, add an additional tablespoon of flour at a time, kneading after each addition, until it reaches a manageable consistency.
- **Cover both portions of dough (vanilla and chocolate) and refrigerate for a minimum of 2 hours. This chilling process is vital as it firms up the dough, making it much easier to handle and shape into logs without sticking. You can chill it longer, even overnight if preferred.
- Once the dough is adequately chilled, preheat your oven to 350 degrees F (175 degrees C).
Assembly & Baking for that Beautiful Marble Effect:
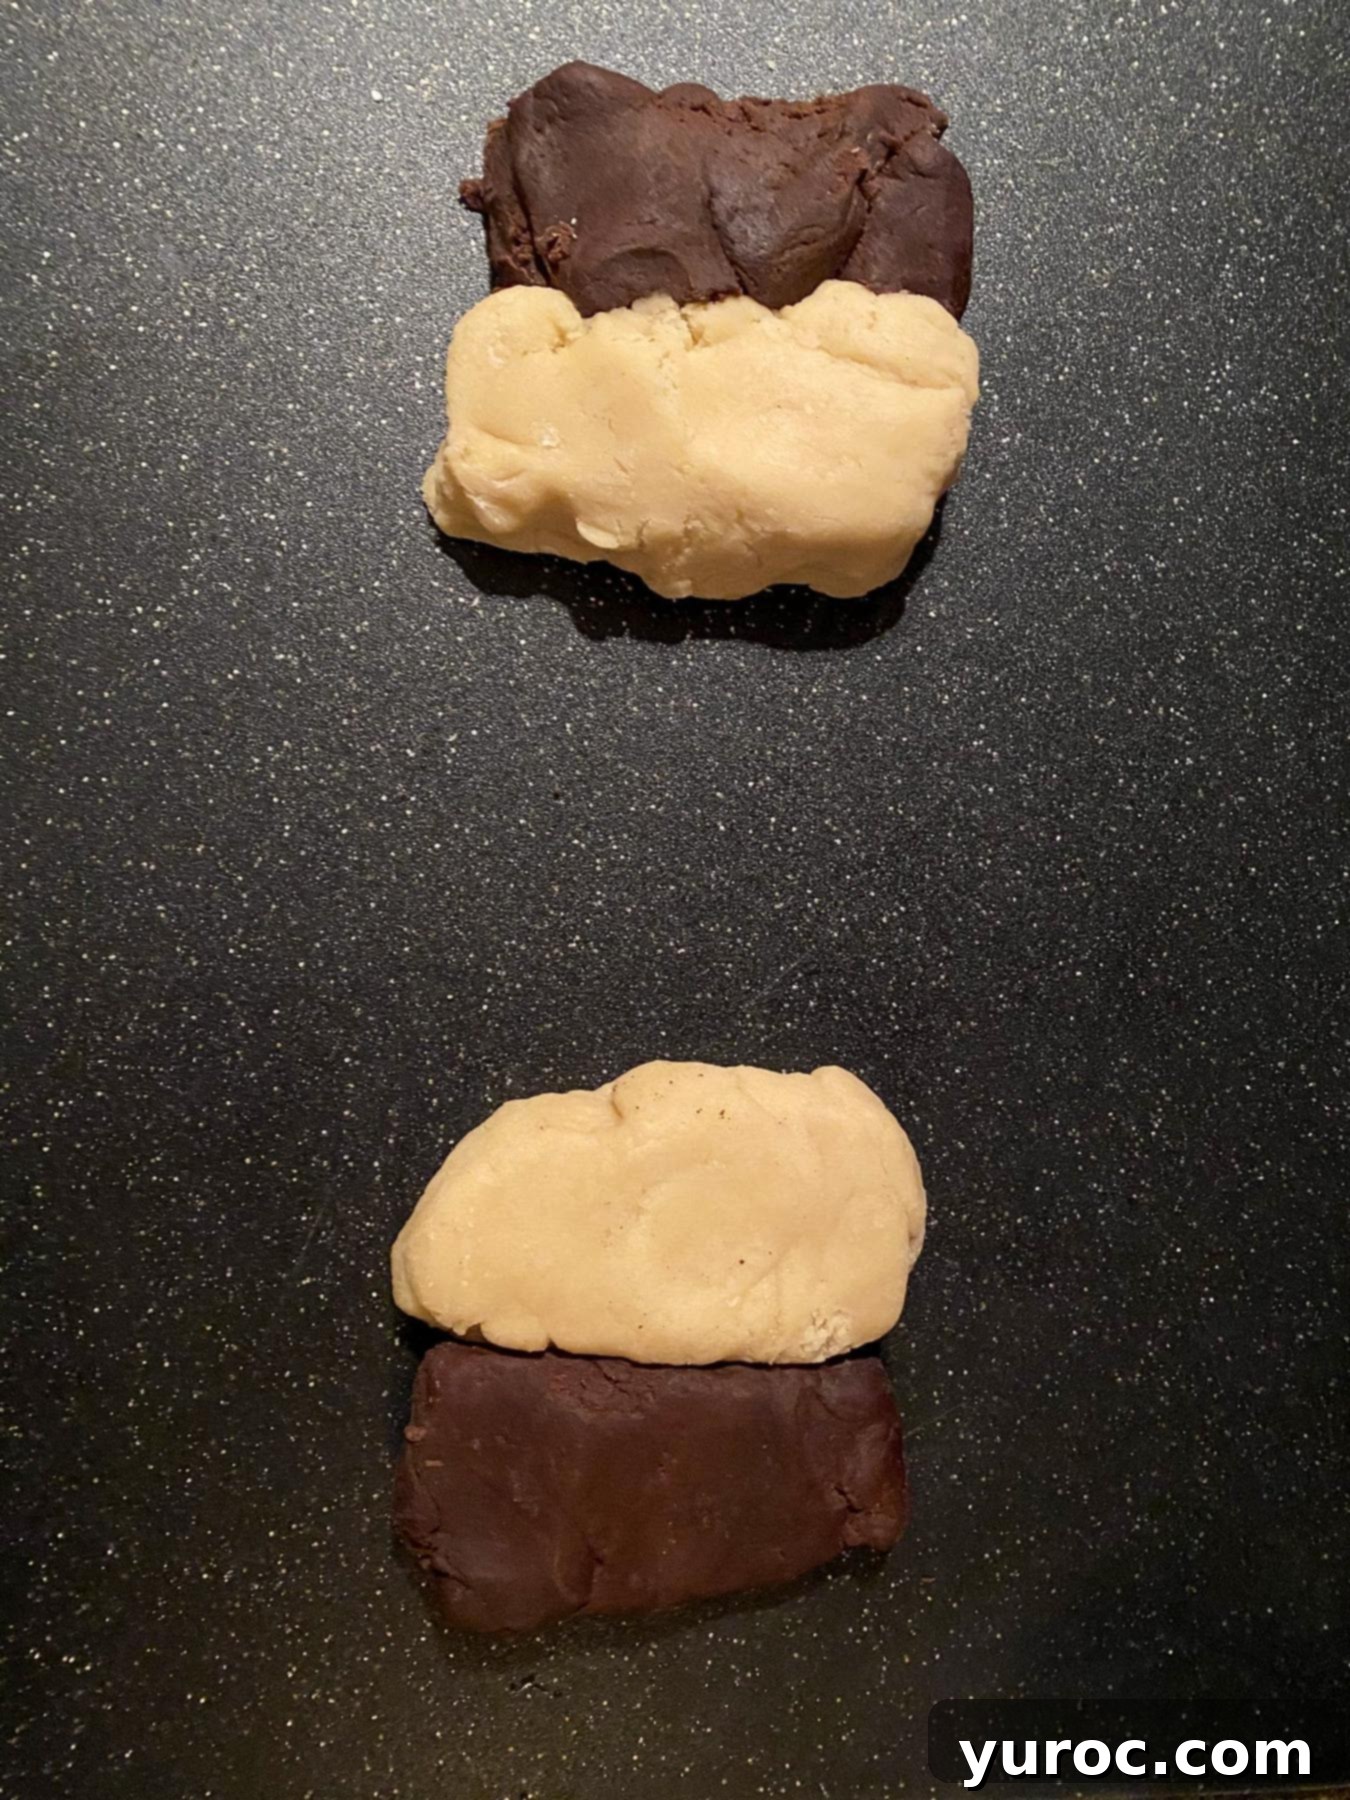
- Step 1: Take both your chilled vanilla and chocolate doughs. Divide each of these into two equal halves. Now you will have two vanilla portions and two chocolate portions. Arrange one vanilla half and one chocolate half side-by-side to form a larger section. Repeat with the remaining two halves to form a second section.
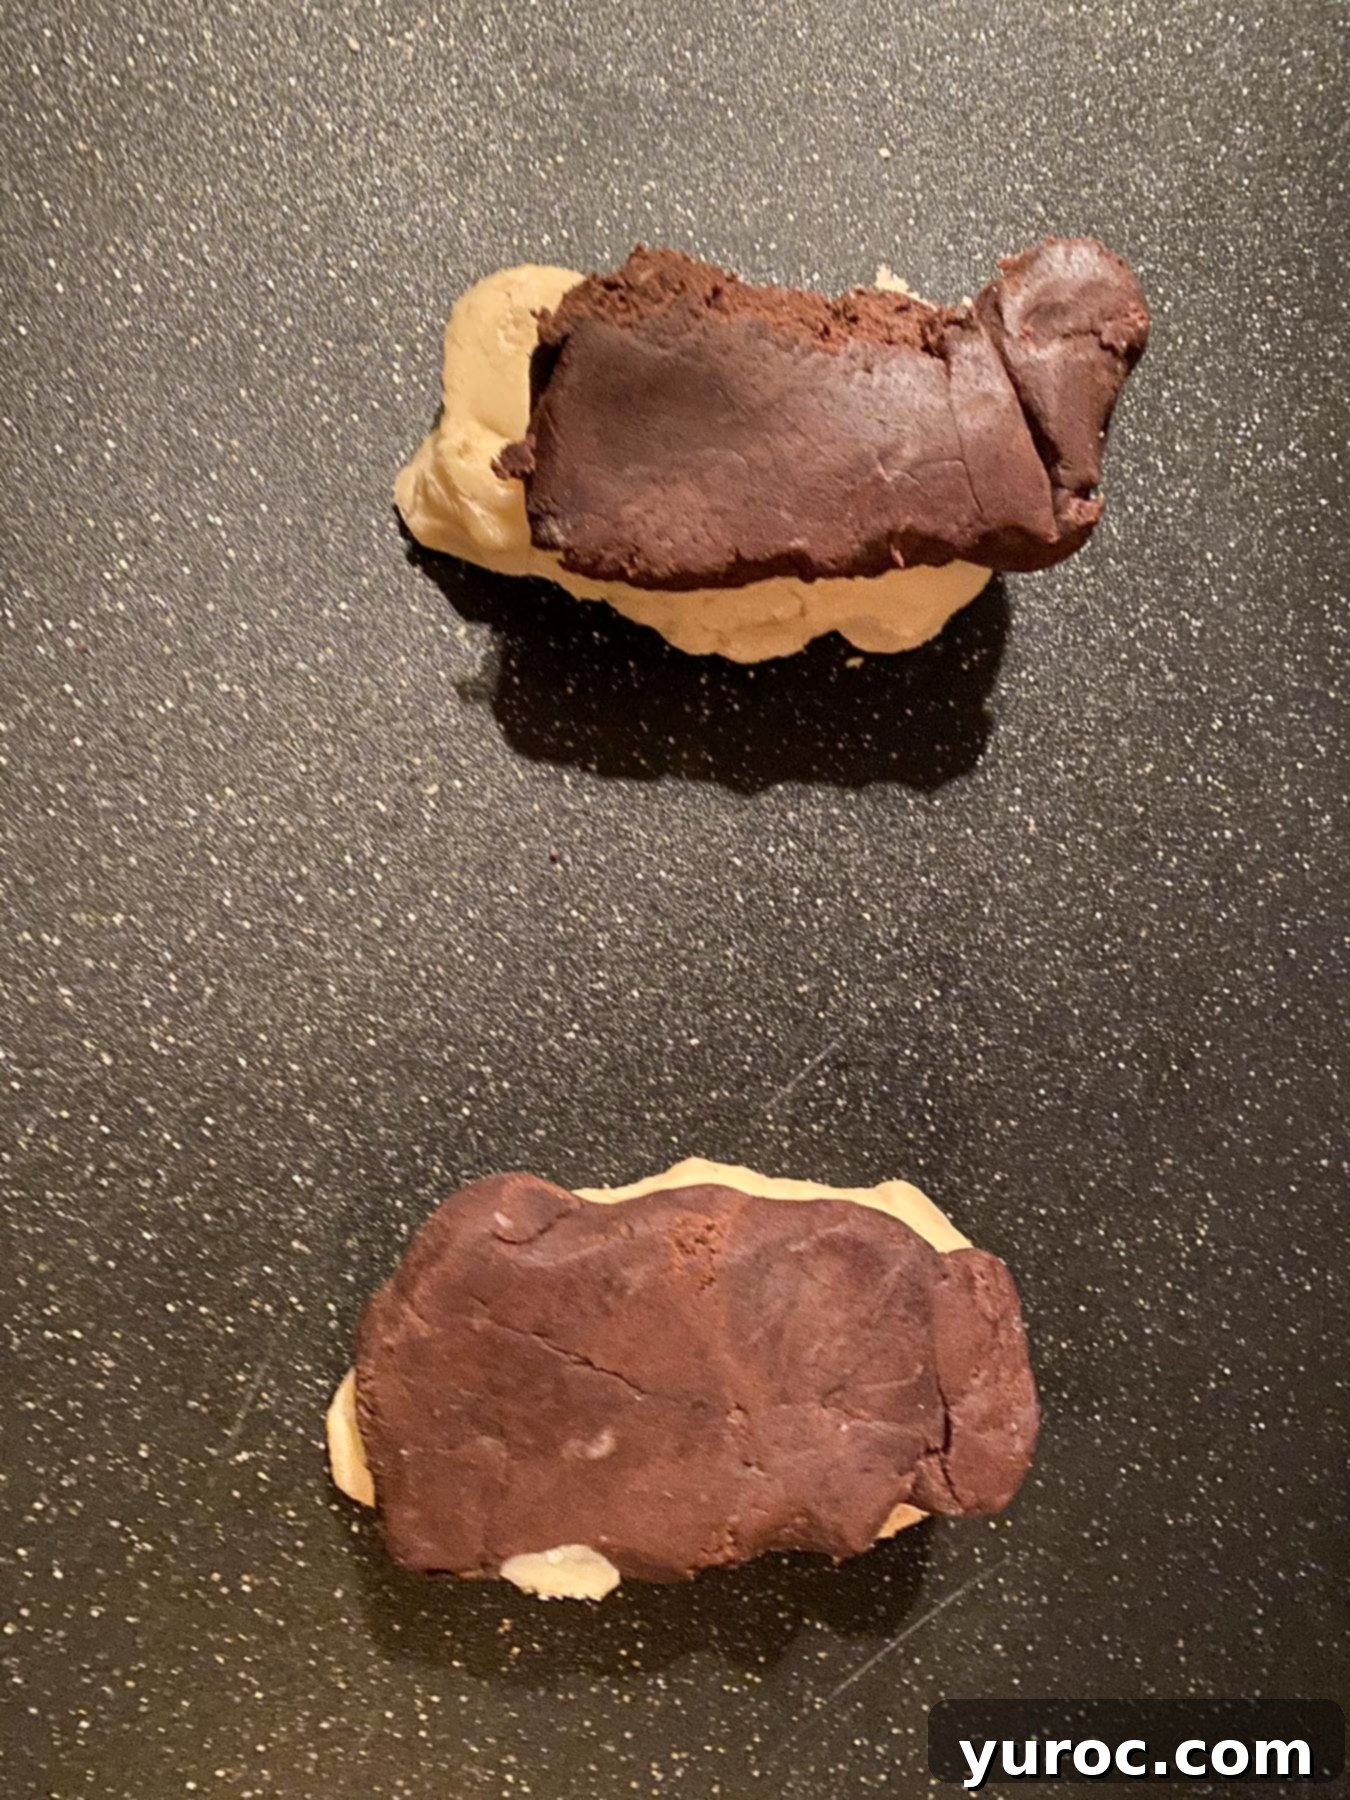
- Step 2: For each of your two larger sections (each containing a vanilla and chocolate half), gently flip one dough portion on top of the other. For instance, place the chocolate dough on top of the vanilla dough, keeping the two main marbled sections separate.
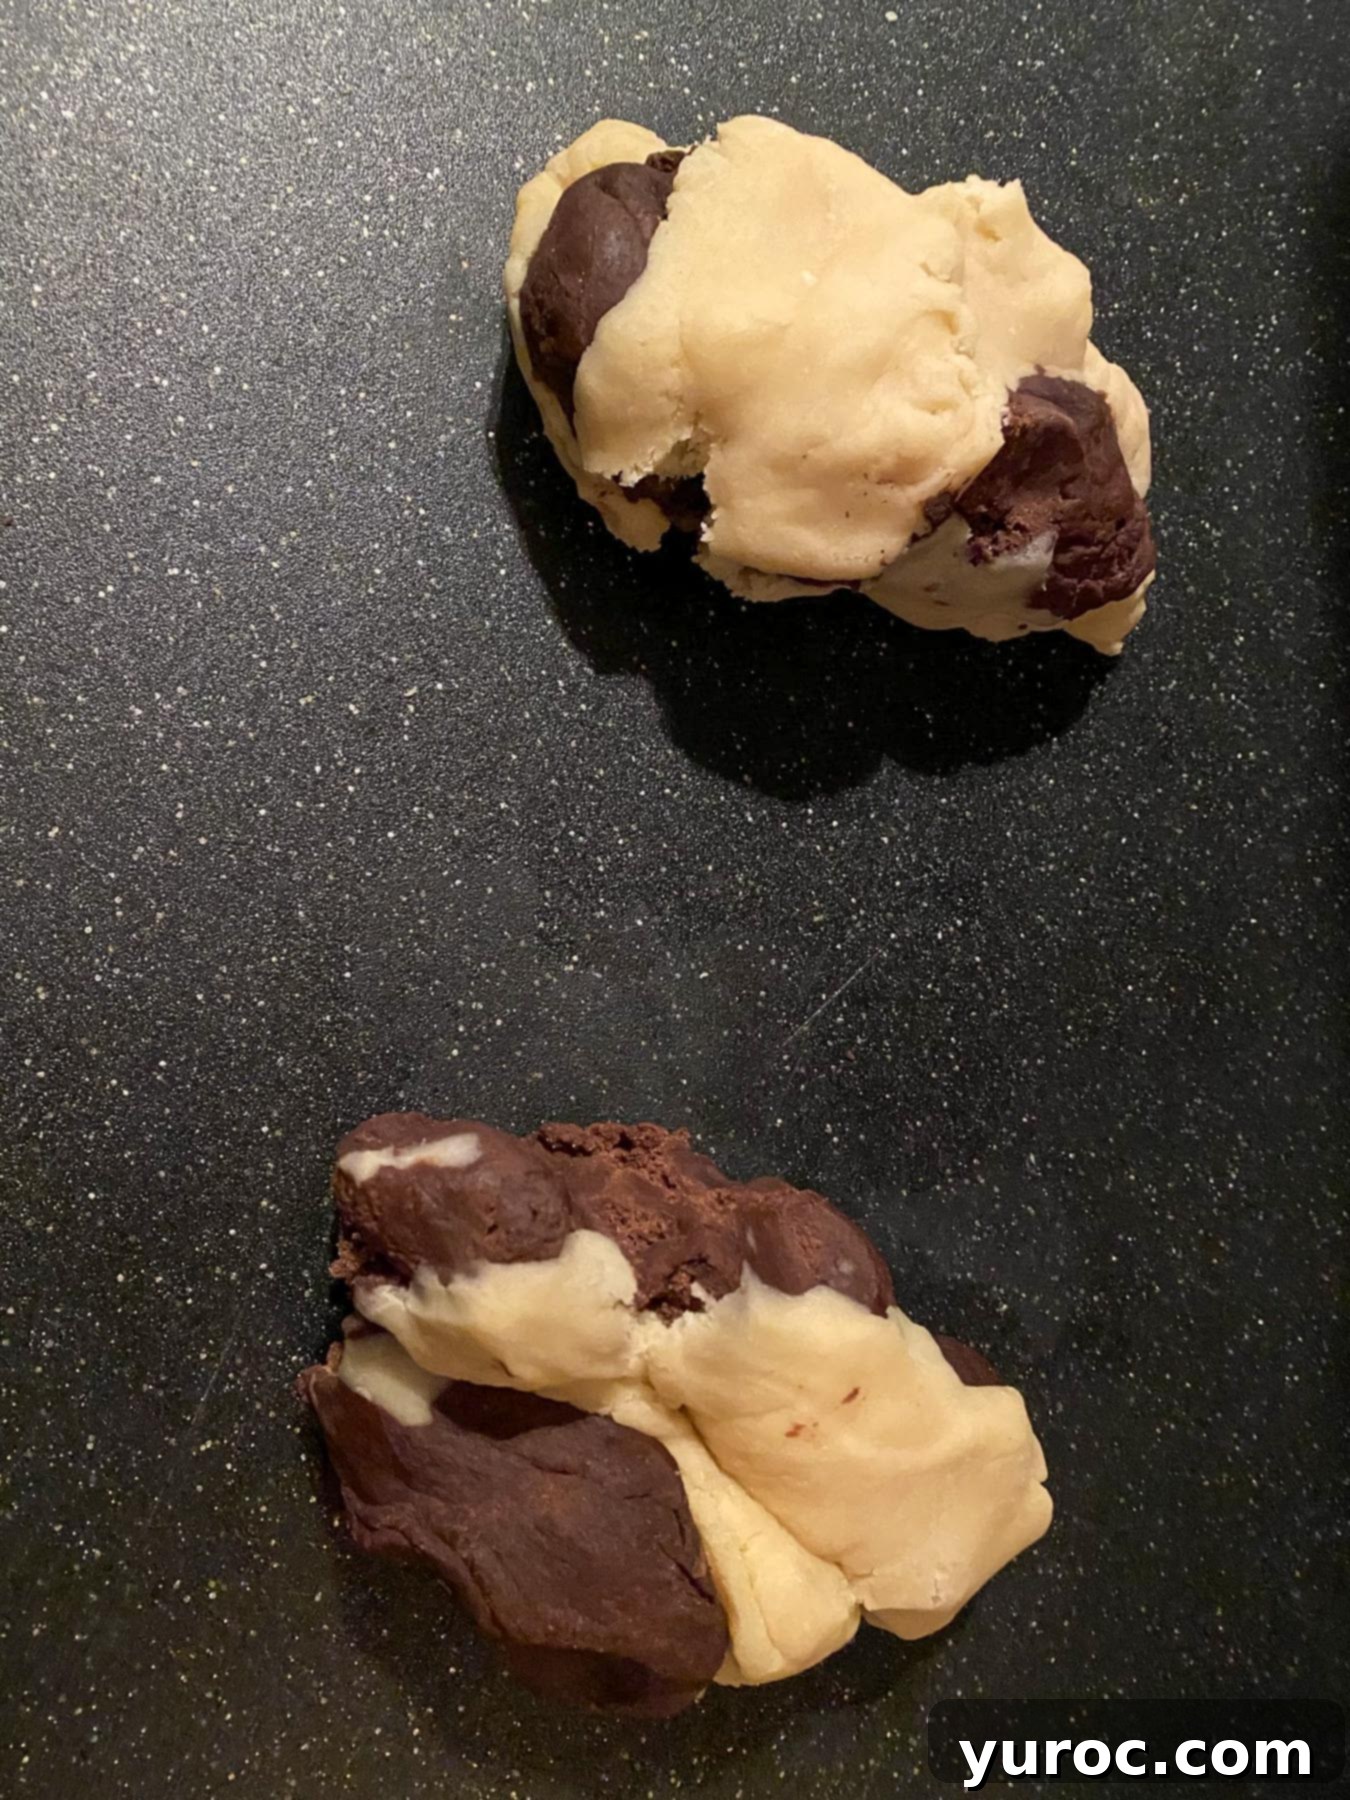
- Step 3: Now, for each section, gently begin to fold, twist, and lightly mix the two doughs together. The goal is to create swirls, not to completely blend the colors into a single brown dough.
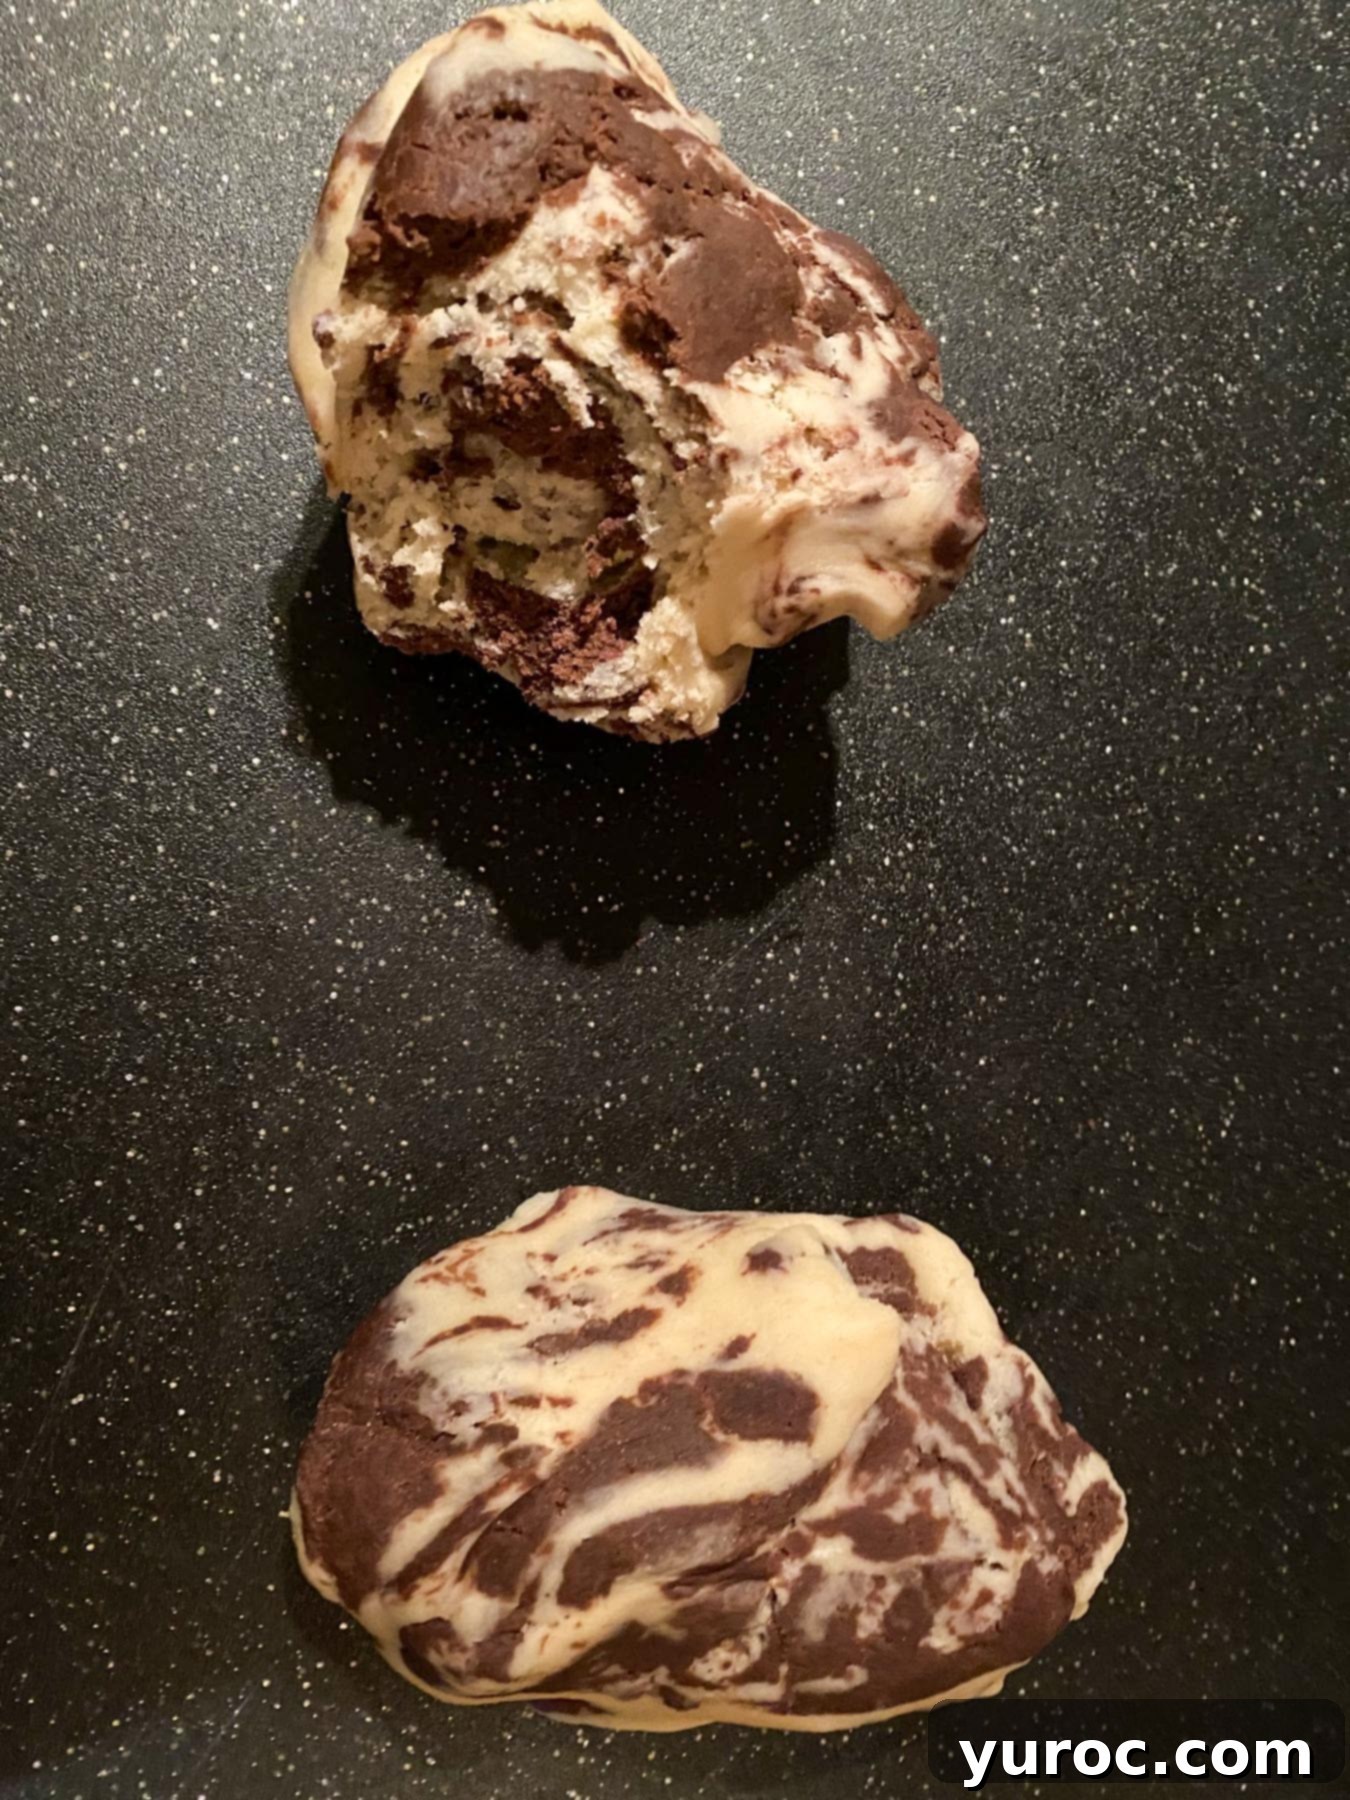
- Step 4: Continue this twisting and folding process until you achieve a beautiful, distinct marble effect in both dough sections. Remember, less is often more here to keep the contrasting colors. (For a visual guide, the cook in this video demonstrates a very similar technique to mine: How to marble dough – skip to the 6:15 mark).
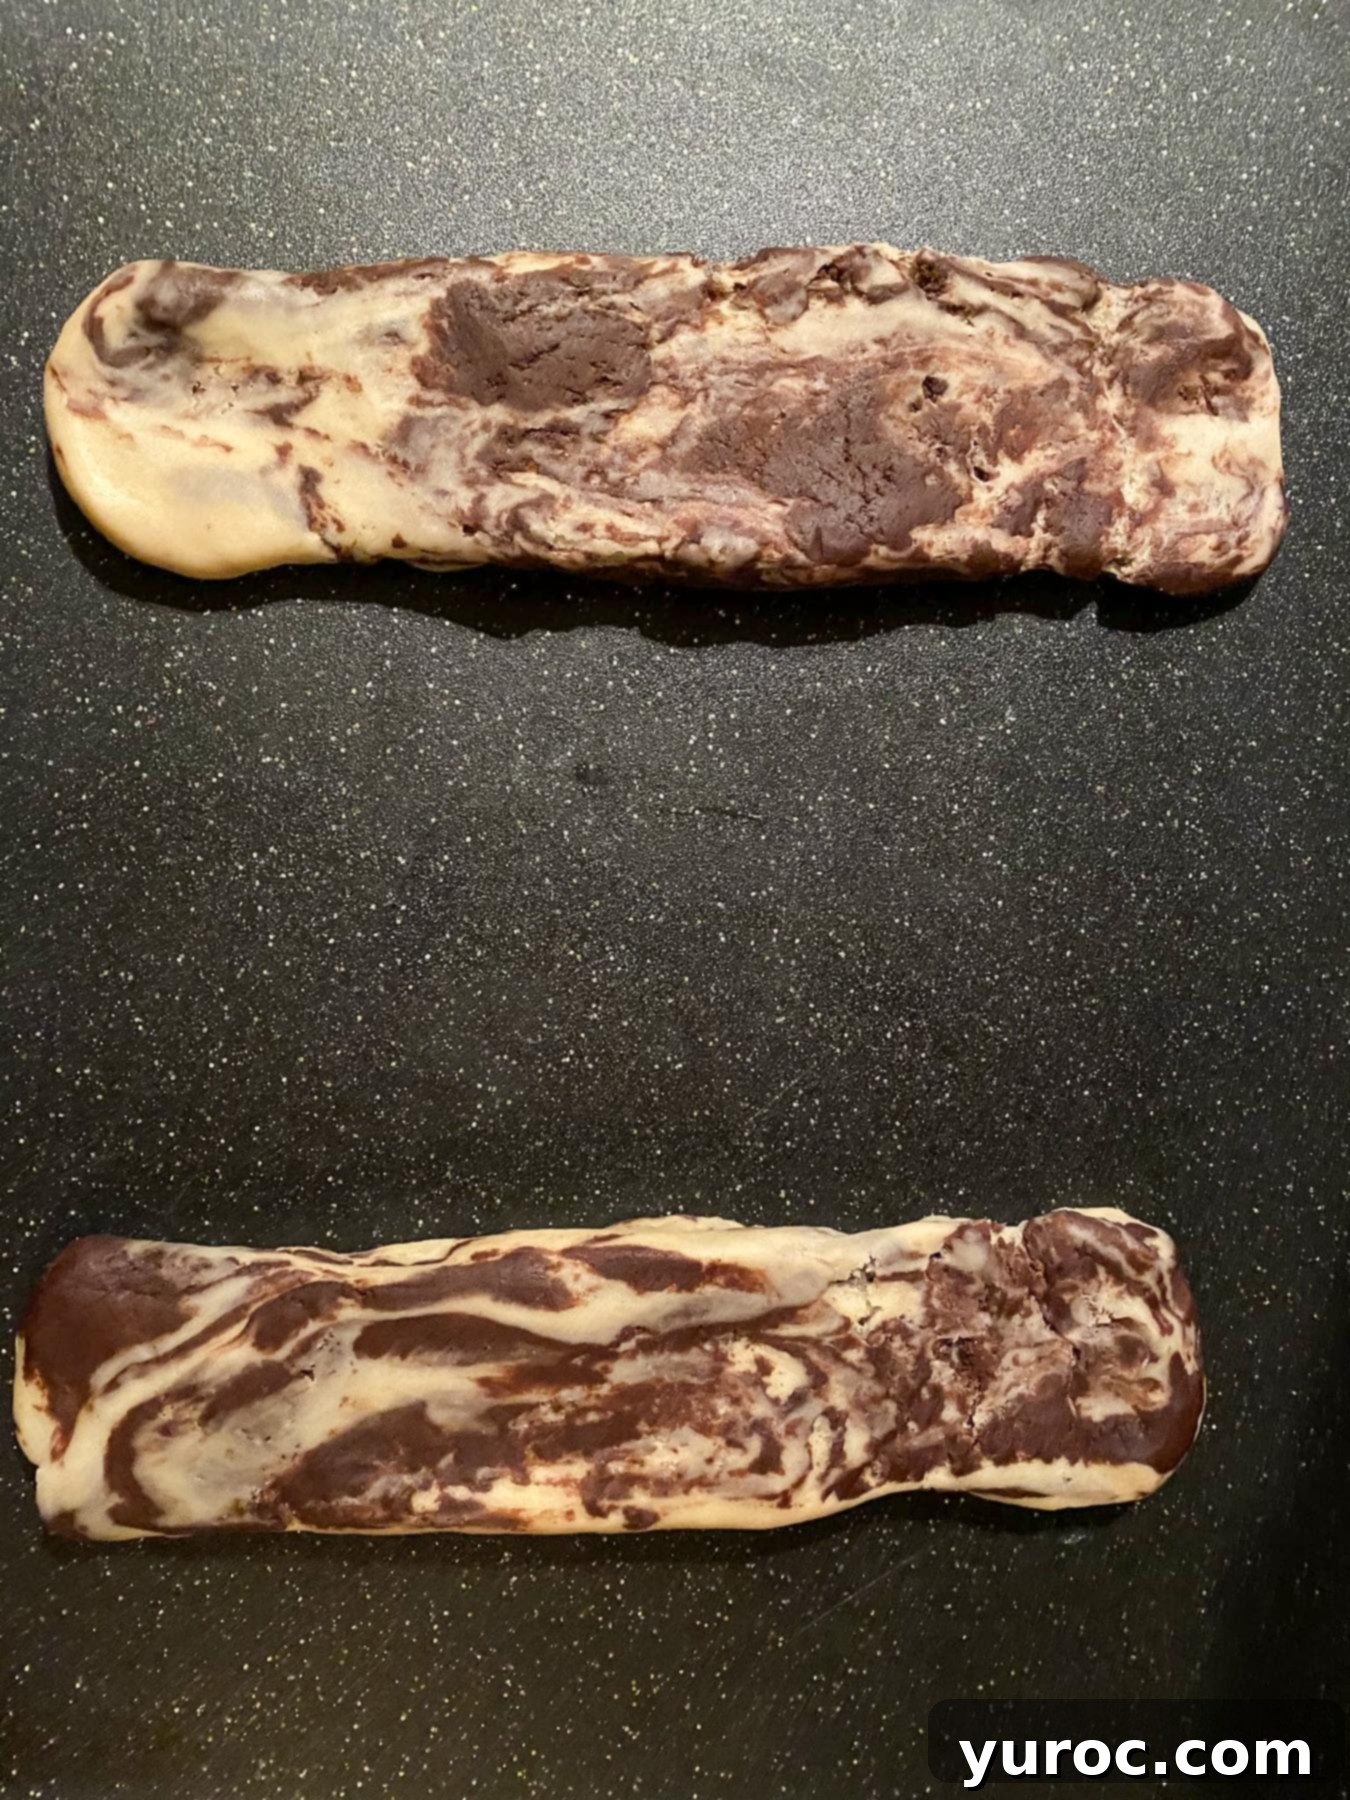
- Step 5: Take each marbled dough section and gently shape it into a log, approximately 12 inches long and about 1 ½ inches thick. Aim for consistent thickness across the entire log for even baking.
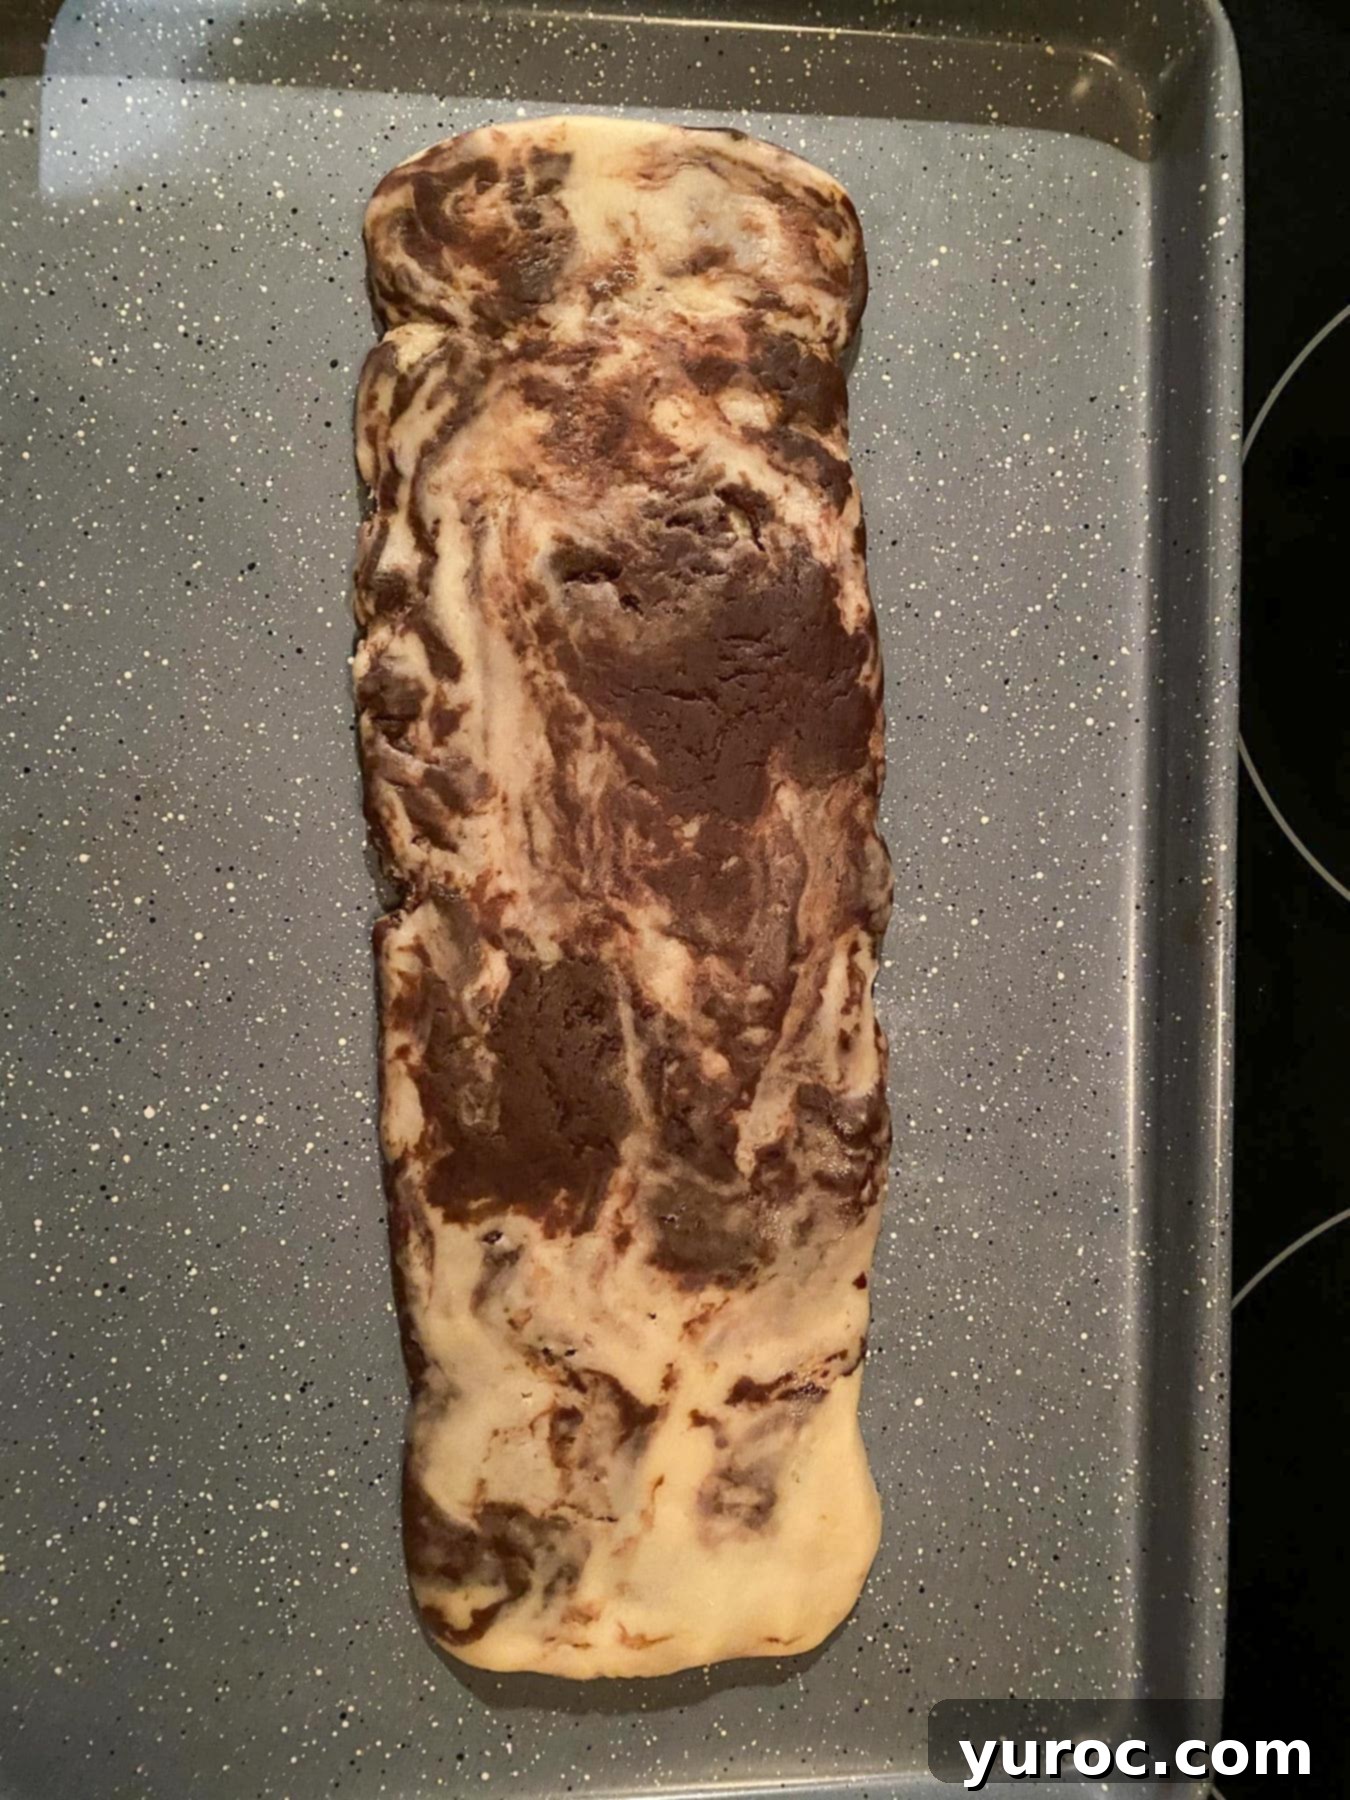
- Step 6: Place each shaped log onto separate, lightly greased cookie sheets (nonstick cooking spray works perfectly). Gently flatten each log to form a loaf about ¾ to 1 inch thick. Don’t worry if they seem quite flat; they will expand somewhat during baking.
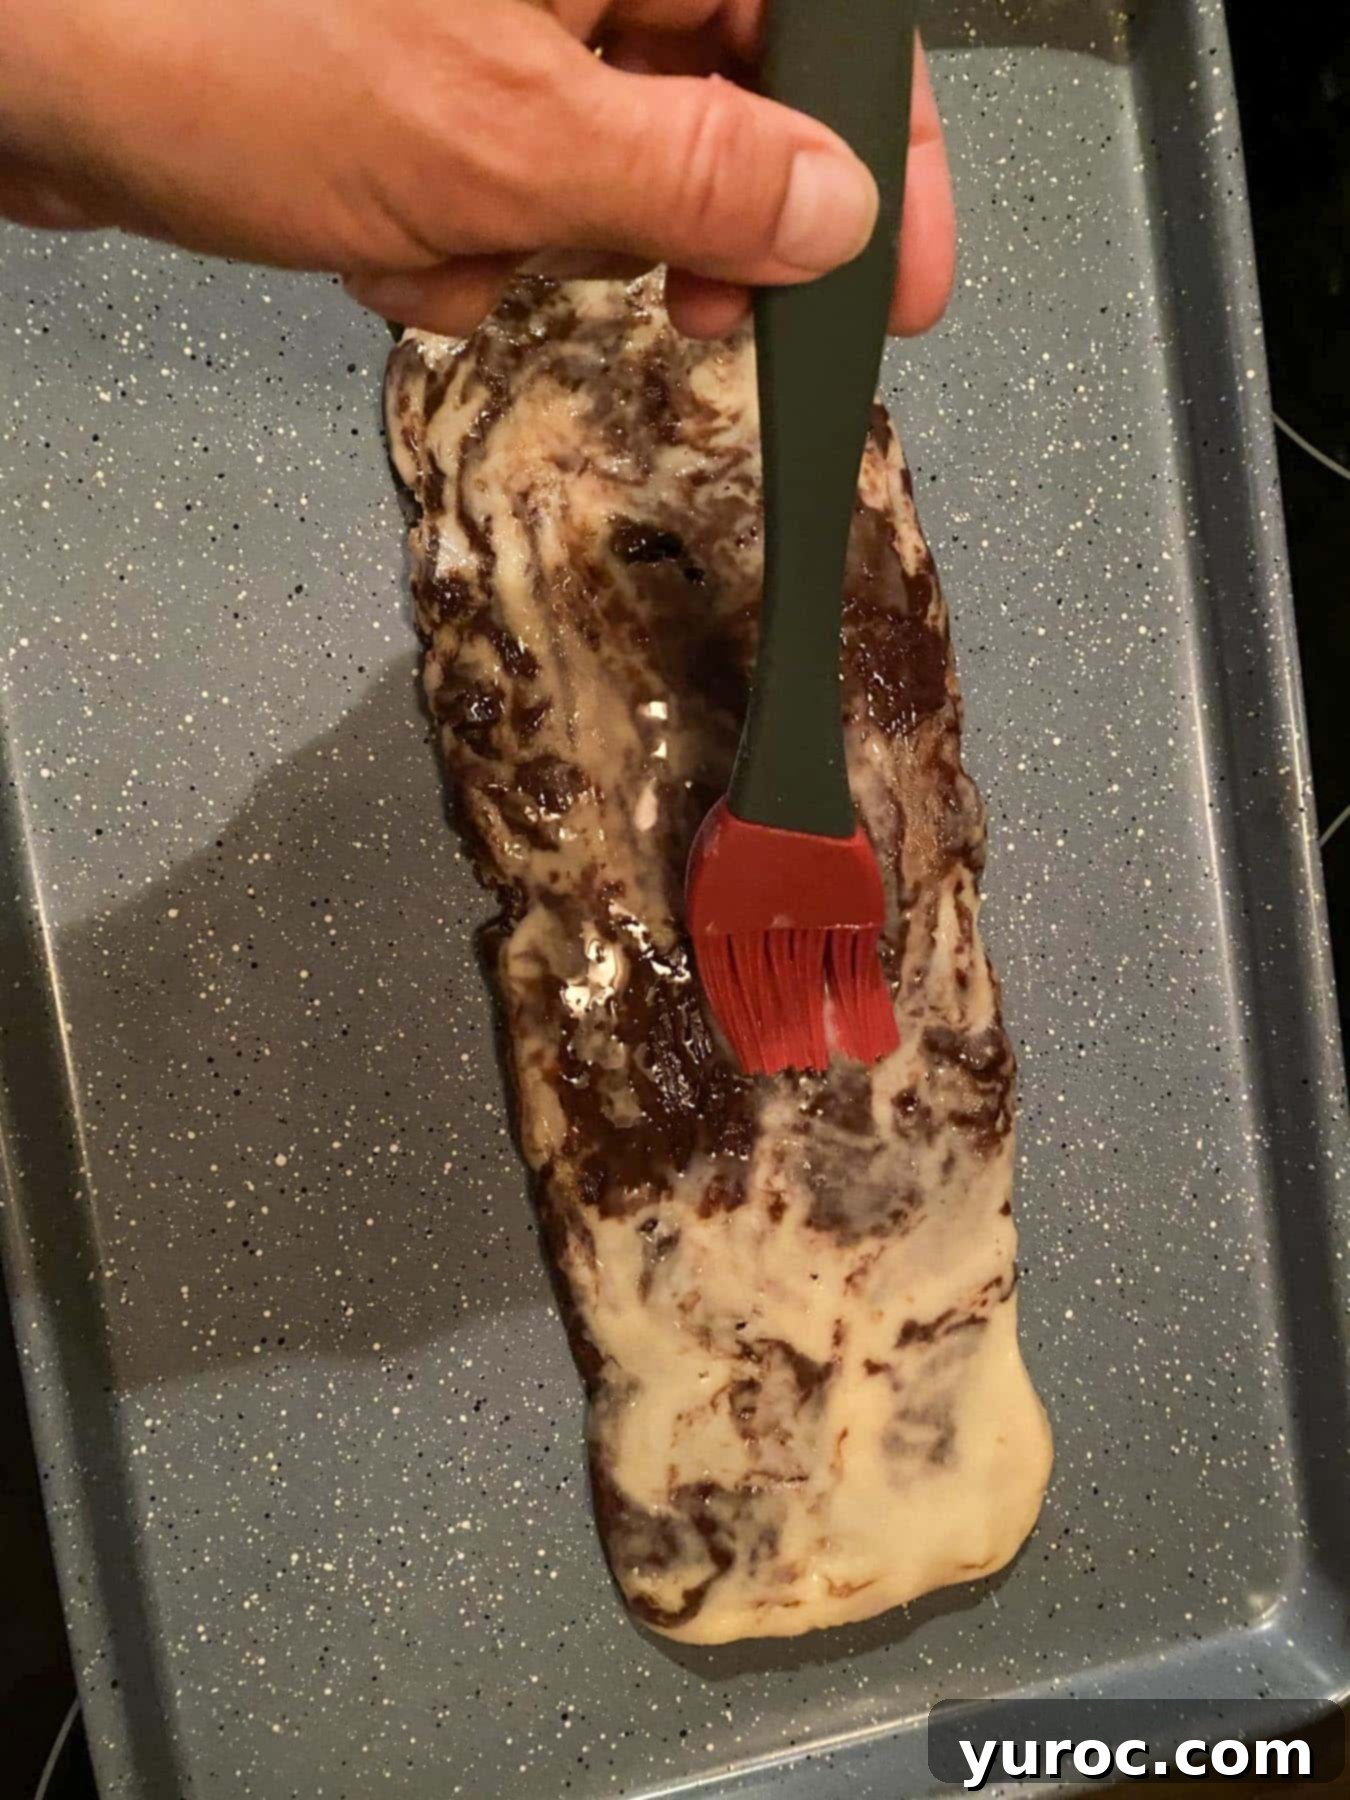
- Step 7 (Egg Wash): In a small bowl, whisk together the remaining 1 egg and 1 tablespoon of water to create an egg wash. Using a pastry brush, lightly brush this mixture over the tops and sides of both biscotti loaves. You’ll likely only use about ½ to ⅓ of the wash.
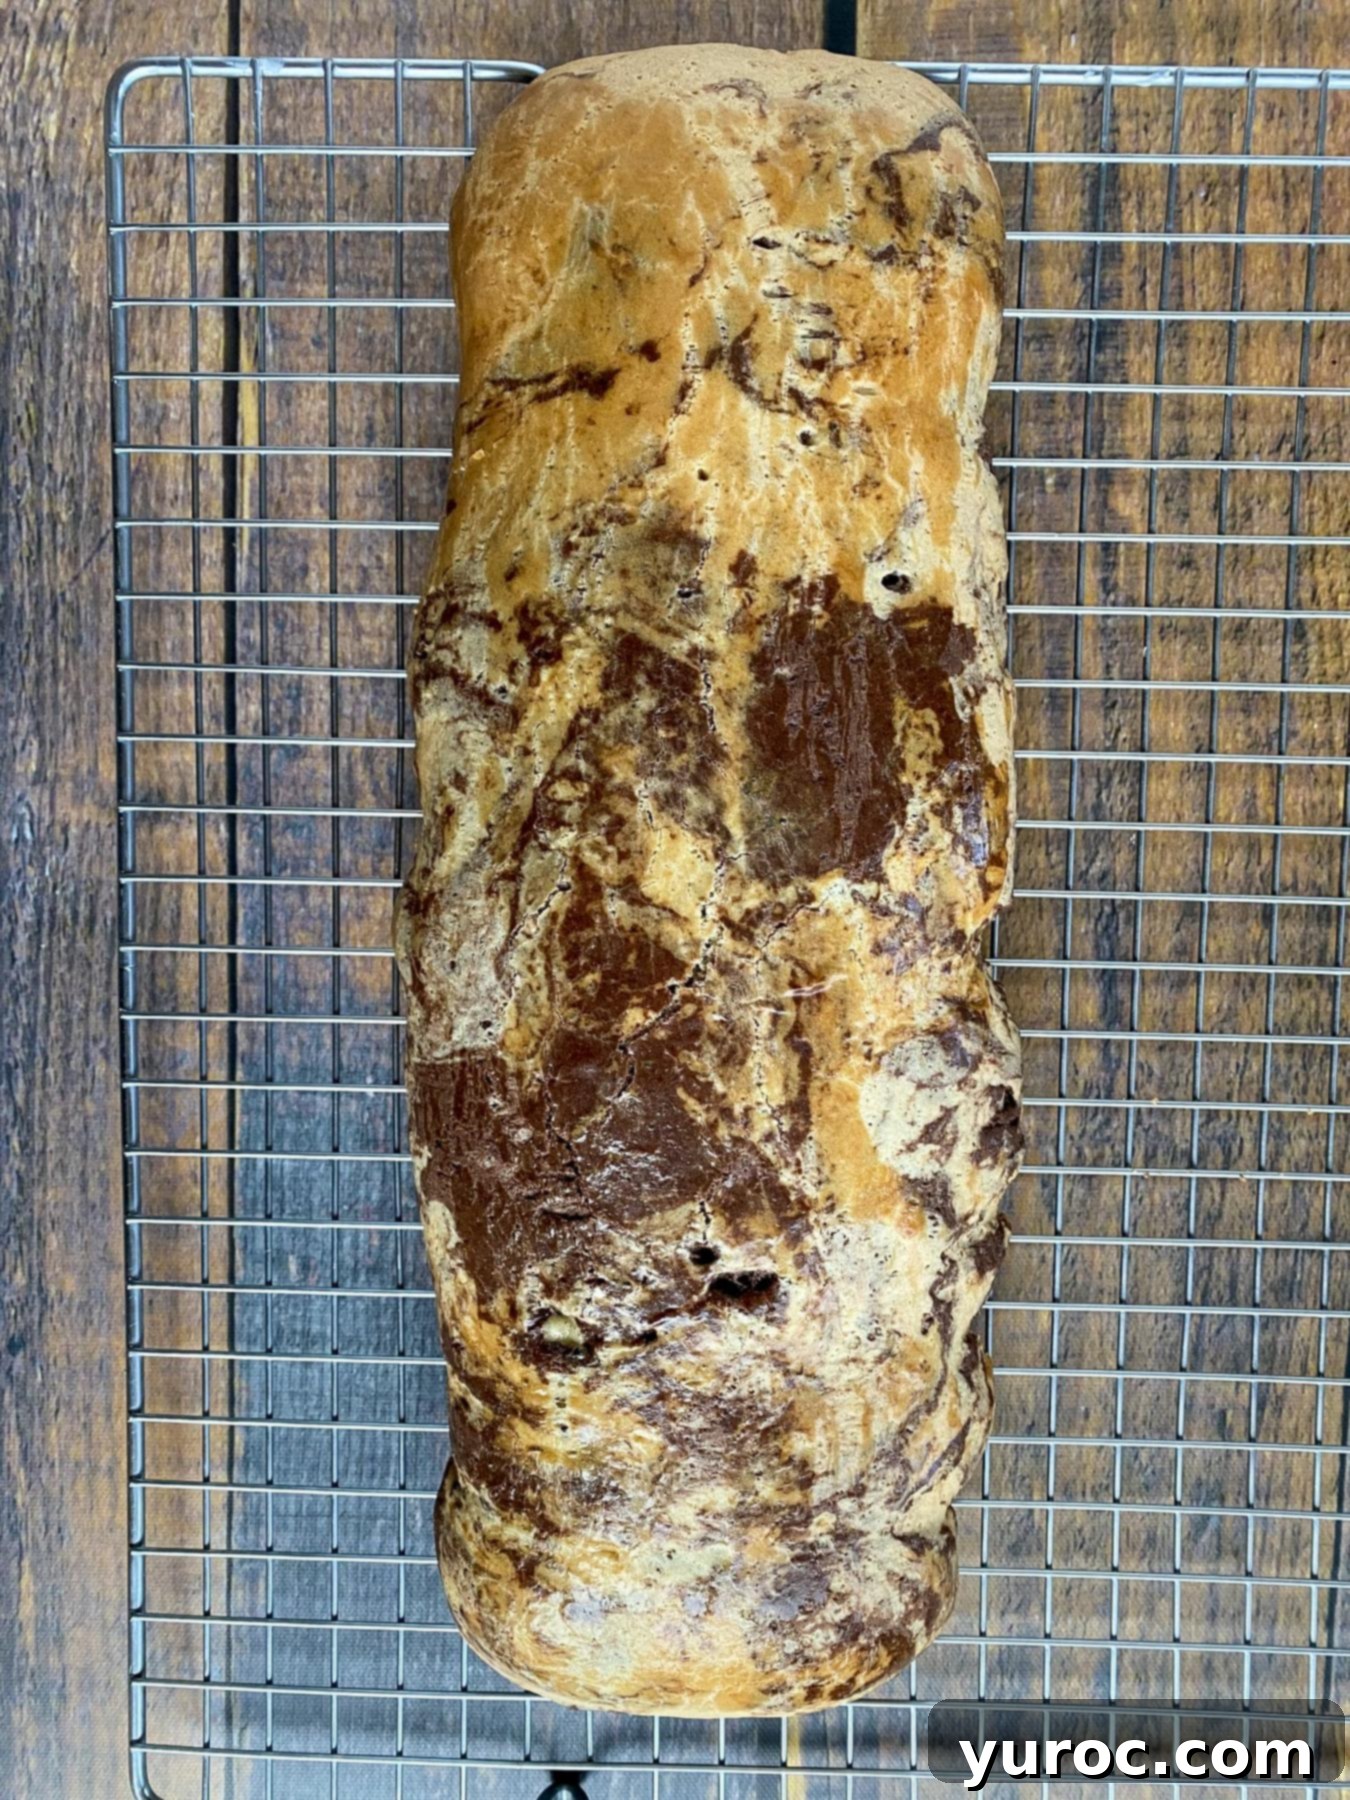
- Step 8 (First Bake & Cooling): Bake the loaves in your preheated oven for 25-30 minutes, or until they are very lightly browned and firm to the touch. Once baked, remove the cookie sheets from the oven and let the loaves cool on the sheets for 10-15 minutes. This helps them firm up slightly before moving. Carefully transfer the partially cooled loaves to a wire cooling rack and allow them to cool completely for another 45-50 minutes, or until they reach room temperature. This complete cooling is crucial before slicing.
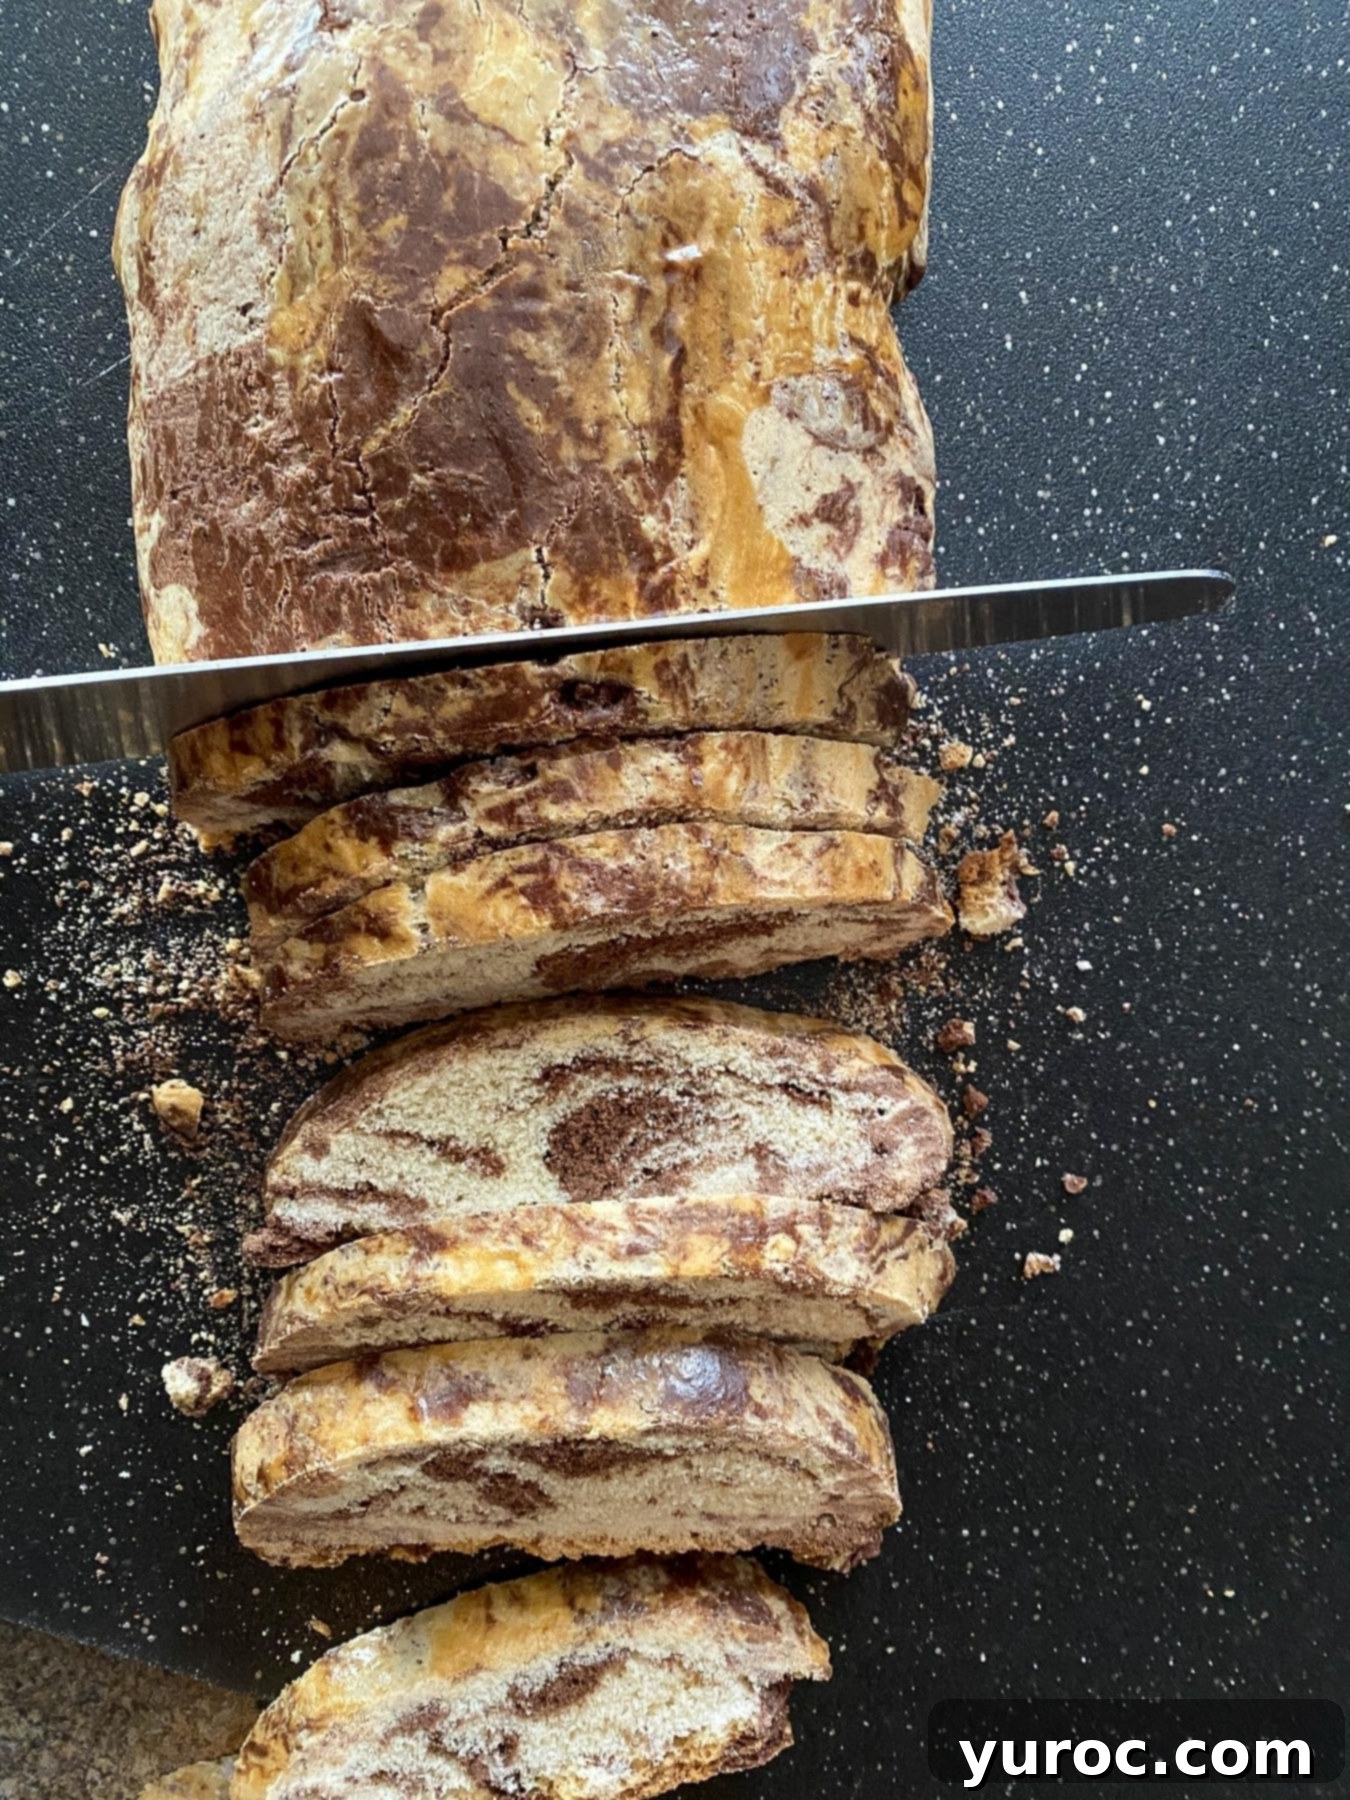
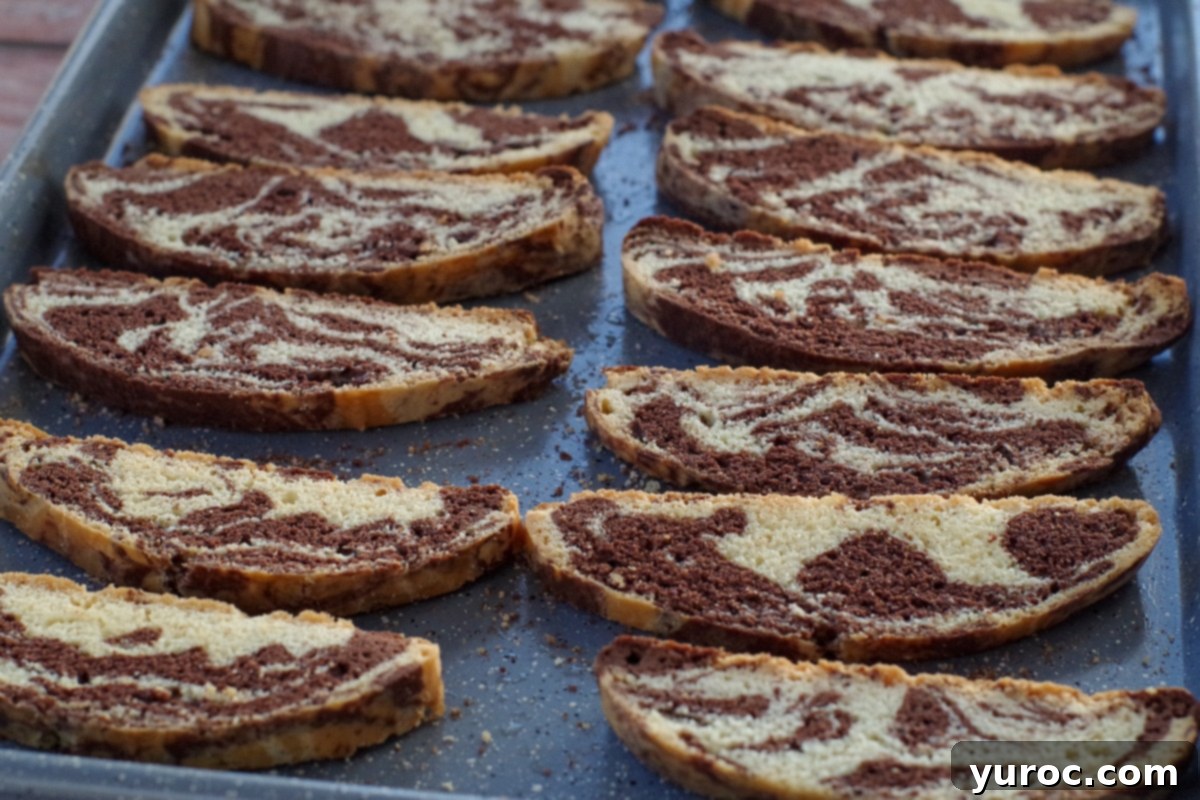
- Step 9 (Slicing & Second Bake): While the loaves are cooling, you can wash and re-spray your baking pans in preparation for the second bake. When the loaves are completely cool, preheat your oven to 325 degrees F (160 degrees C). Transfer the cooled loaves to a cutting board. Using a sharp serrated knife, carefully slice each loaf diagonally into ½-inch thick pieces. Lay these slices, cut-side down, back onto the prepared cookie sheets. Bake in the preheated oven for 5-10 minutes, or until the bottoms are lightly browned. Flip each slice over and bake for another 5-10 minutes, until both sides are dry and crisp. Transfer the finished biscotti to a wire rack to cool completely. They will crisp up further as they cool.
⏲️ Baking Time: A Commitment to Crisp Perfection
If you’re new to the art of biscotti making, it’s important to understand that it’s a bit of a time commitment – but one that is absolutely worth every minute for the superior homemade result. The process involves multiple stages: a critical 2-hour chilling period for the dough, two distinct baking phases (a 25-30 minute first bake and a 15-20 minute second bake for crisping), and substantial cooling time (up to an hour) in between the two bakes. In total, from start to finish, you’re looking at approximately 4 hours to create these delightful cookies. This extended timeline is what allows the biscotti to develop its unique, dry, and perfectly crisp texture, ensuring it’s never stale or overly soft. Embrace the process; the payoff is a batch of biscotti that will far exceed any store-bought version!
✅ Expert Tips for Achieving Biscotti Bliss
Mastering biscotti is all about a few key techniques. Follow these expert tips to ensure your Chocolate Marble Biscotti turn out perfectly crisp, flavorful, and beautifully marbled every time:
- Use Room Temperature Ingredients: This is a golden rule in baking. Ensure your butter and eggs are at room temperature before you begin. This allows them to cream together more easily and uniformly, resulting in a smoother, more consistent dough and a better texture in your final biscotti.
- Chill for Easy Handling: Do not skip the chilling step! A properly chilled dough is much firmer, less sticky, and significantly easier to handle and shape into logs. This also helps the marbling hold its distinct pattern during shaping and baking. If your dough still feels too sticky after the recommended 2 hours, chill it for an additional 30 minutes.
- Don’t Overmix the Marble: When you’re twisting and folding the chocolate and vanilla doughs together, stop as soon as you achieve a desirable, distinct marble pattern. Overmixing will cause the colors to blend too much, resulting in a muddy, uniform brown rather than beautiful swirls. You want clear streaks of both vanilla and chocolate.
- Shape Evenly for Consistent Baking: Take your time when forming the dough into logs. Aim for uniform thickness along the entire length of each log. This is crucial for even baking, preventing thinner ends from drying out too quickly and ensuring every slice is perfectly cooked.
- Let Logs Cool Completely Before Slicing: Patience is a virtue here! Cooling the baked biscotti logs fully before attempting to slice them is absolutely critical. Slicing warm or even slightly warm logs will cause them to crumble and break. Use a gentle, sawing motion with a sharp serrated knife on the diagonal to achieve clean, intact slices.
- Rotate the Pan for Even Browning: For both the first and second bakes, rotating your baking sheet halfway through the cooking time will help ensure that your biscotti browns and crisps evenly on all sides, preventing one side from becoming too dark while the other remains pale.
- Add-ins? Toast or Rehydrate First!: If you decide to incorporate nuts (like almonds or pistachios) or dried fruit (cranberries, cherries), consider a quick toast for the nuts to enhance their flavor, and lightly rehydrate dried fruits (by soaking them in warm water or juice for 10-15 minutes and then draining well) to keep them soft and juicy within the dry biscotti.
- Keep a Close Eye on the Second Bake: The second bake is where the magic happens, transforming the slices into crisp biscotti. However, they can go from perfectly golden to overly dry or burnt very quickly. Start checking at the 5-minute mark on each side. The goal is dry and crisp, not overly browned.
- Use a Serrated Knife and Cut on an Angle: A sharp serrated knife is your best friend for slicing biscotti. Cutting on a diagonal not only creates the traditional biscotti shape but also helps prevent crumbling. Many professional bakers, including the experts at King Arthur Baking Company, advocate for this technique as a “secret” to great biscotti.
- Customize Texture with Bake Time: Your desired crunch level is adjustable! If you prefer a crunchier biscotti, simply extend the second bake time by a few minutes. For a slightly softer, chewier center, shave off a few minutes from the second bake. Experiment to find your perfect texture.
- Biscotti Too Hard? Don’t Despair!: If your biscotti happens to turn out harder than you’d like, don’t throw them out! Let them sit uncovered at room temperature for a few hours. Exposure to the air can subtly soften their crispness, making them more enjoyable.
👪 Serving Size & Easy Scaling
This Chocolate Marble Biscotti recipe is designed to make a generous batch, yielding approximately 48 pieces. While that might sound like a lot, don’t be surprised how quickly they disappear – especially if you have a household of biscotti lovers! The good news is, this recipe is incredibly flexible. You can easily cut the recipe in half if you want a smaller batch, or double it if you’re baking for a crowd or want plenty to freeze. Many online recipe cards, like the one below, allow you to conveniently adjust the serving size, and the ingredient quantities will automatically scale for you. Plus, these biscotti freeze exceptionally well, making it easy to enjoy them whenever you want.
🔢 Weight Watchers Friendly Biscotti
As someone who enjoys a sweet treat after breakfast, I often find muffins and loaves too heavy, especially after a satisfying meal. Biscotti, however, strikes the perfect balance. Its ideal size, satisfying crunch, and balanced sweetness make it a guilt-free indulgence that perfectly curbs that sweet tooth without feeling overly indulgent. This homemade biscotti is also absolutely perfect for dunking into your morning coffee or afternoon tea, absorbing just enough liquid to soften beautifully. We’re thrilled to share that this delightful Chocolate Marble Biscotti recipe is Weight Watchers friendly, coming in at a mere 2 WW points per piece. Now you can enjoy your breakfast dessert with peace of mind!
🌡️ Storage Solutions for Freshness
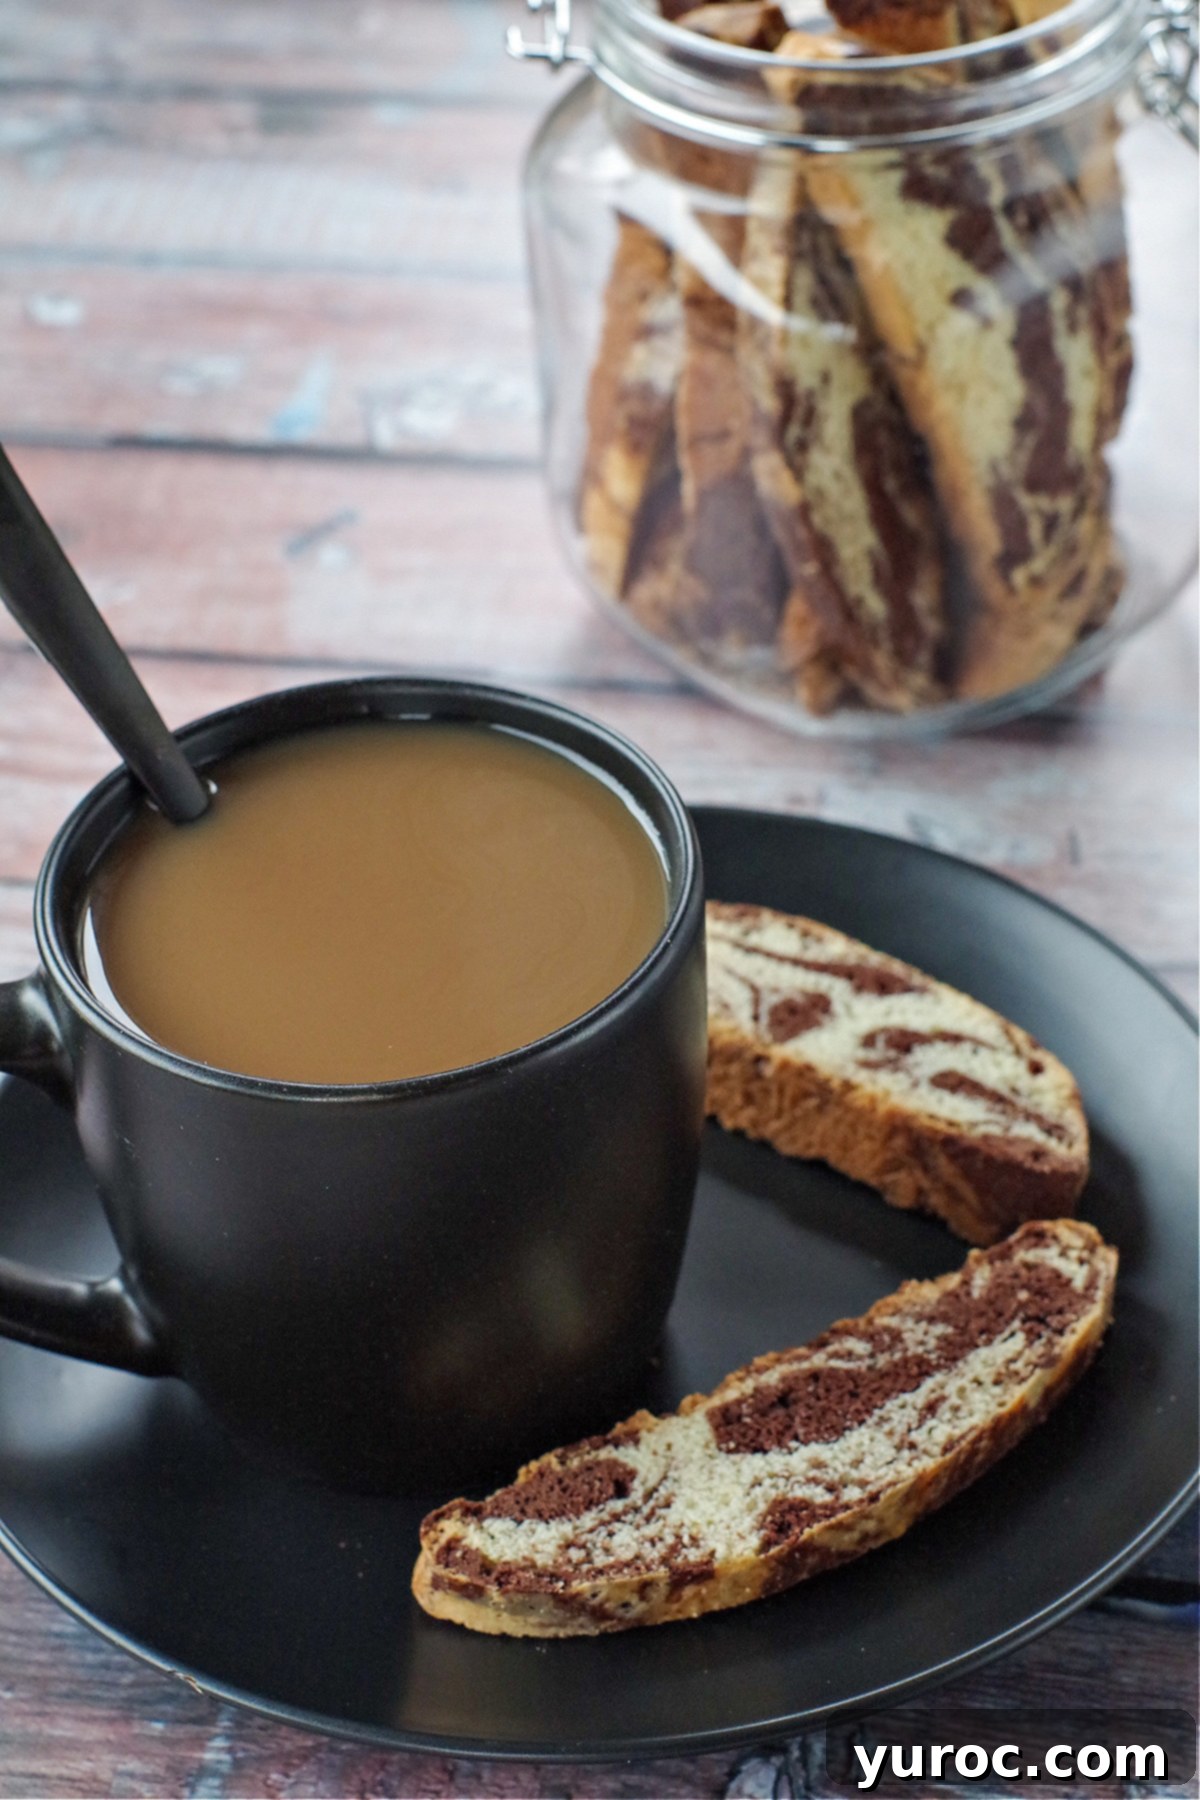
Proper storage is key to maintaining the crisp texture and delicious flavor of your homemade Chocolate Marble Biscotti. Once completely cooled, you can store them in an airtight container (a sealed jar, like the one pictured, works wonderfully) at room temperature for up to a week. For longer preservation, these biscotti freeze beautifully. Simply place them in a Ziplock freezer bag, ensuring as much air is removed as possible, and store them in the freezer for up to 3 months. I often pull them out of the freezer one or two at a time as needed, letting them come to room temperature for a few minutes before enjoying.
❔ Recipe FAQs
No, chilling the dough is absolutely essential. It helps firm up the dough, making it much easier to handle and shape into logs without it becoming sticky or spreading excessively. More importantly, it helps the marble pattern hold its structure during baking, ensuring beautiful swirls in your final biscotti.
During the second bake, the biscotti should become dry and crisp to the touch on both sides. If the center still feels slightly soft, give them a few more minutes in the oven, flipping them halfway through. Remember, they will continue to firm up and crisp as they cool completely on the wire rack.
Biscotti crumbling during slicing is a common issue, usually due to not cooling the loaves sufficiently. Ensure the baked loaves are completely cooled to room temperature before attempting to slice them. Always use a sharp serrated knife and employ a gentle sawing motion on the diagonal to achieve clean cuts and minimize breakage.
Absolutely! Once your Chocolate Marble Biscotti are fully cooled, a drizzle or dip in melted chocolate (dark, milk, or white) adds an extra layer of decadence. Simply melt your preferred chocolate, dip one end or drizzle lines across the biscotti, then let it harden at room temperature or in the refrigerator before serving.
Even after chilling, some doughs can be a bit sticky. Lightly flour your hands before handling and shaping the logs. If it’s still persistently sticky, you can try chilling it for another 30 minutes, or gently knead in a tiny bit (1-2 teaspoons) of extra flour until it’s easier to manage.
Whether you’re exploring new biscotti flavor ideas or specifically searching for a delightful chocolate biscotti, this Vanilla and Chocolate Marble Biscotti recipe is an absolute winner. Its elegant appearance and irresistible flavor make it a true crowd-pleaser!
🍳 More Delicious & WW Friendly Breakfast and Brunch Recipes!
So, if you’re on the hunt for the best chocolate biscotti, you are going to fall in love with this beautifully marbled biscotti recipe! Because this is a Weight Watchers friendly biscotti recipe, you can now enjoy the simple pleasure of biscotti (almost) daily, just like I do! Beyond personal enjoyment, these impressive cookies are also ideal for a thoughtful hostess gift, or for bringing along to a breakfast or brunch potluck – they always receive rave reviews. And if you’re looking for even more potluck-perfect ideas or delicious morning meals, be sure to check out these breakfast potluck ideas!
- Healthy Pumpkin Biscotti Recipe
- Roasted Red Pepper Egg White Bites Recipe
- Pumpkin Pie Sheet Pan Pancakes
- Belgian Chocolate Waffles
Did your family ❤️ this recipe? Did you know that commenting and ⭐ rating recipes is one of the best ways to support your favorite recipe creators? If you LOVED this recipe, please comment and rate it in the recipe card below or share photos on social media using the hashtag #foodmeanderings or tagging @foodmeanderings!

📋 Chocolate Marble Biscotti Recipe
Breakfast, Dessert, Snack
Italian
Weight Watchers Friendly
48
pieces
55
kcal
Terri Gilson
20
minutes
50
minutes
3
hours
4
hours
10
minutes
Ingredients
-
¼
cup
unsalted butter softened -
1
cup
white granulated sugar -
1
teaspoon
baking powder -
½
teaspoon
baking soda -
¼
teaspoon
salt -
3
eggs -
½
teaspoon
vanilla extract -
2 ½
cups
all-purpose flour -
¼
cup
cocoa powder
Egg Wash
-
1
egg -
1
tablespoon
water
Instructions
-
Heads up: There is a 2-hour chilling time required before baking.
-
In a large mixing bowl, beat the softened butter with an electric mixer on medium to high speed for 30 seconds. Add sugar, baking powder, baking soda, and salt; beat until well combined and fluffy.
-
Beat in the 3 eggs and vanilla extract until combined. Gradually beat in 2 ¼ cups of the all-purpose flour, adding as much as you can with the mixer. Stir in any remaining flour (from the 2 ¼ cups) with a large spoon until a dough forms. *Set aside the final ¼ cup of flour for dividing the dough.
-
Divide the dough into 2 equal portions.
-
Add the remaining ¼ cup flour into one portion and mix with your hands until fully combined. This is your vanilla dough.
-
Add the cocoa powder into the other portion and knead with your hands until well combined and uniform in color. You may need to add a little extra flour (1 tablespoon at a time) to the chocolate dough if it is too sticky to work with.
-
**Cover both dough portions and refrigerate for 2 hours or until the dough is firm and easy to handle.
-
Preheat oven to 350 degrees F (175 degrees C). Divide each dough (vanilla and chocolate) in half again, then place the halves together in two separate sections (one vanilla half with one chocolate half).
-
Flip one dough portion on top of the other within each section to prepare for marbling.
-
Gently start folding, twisting, and lightly mixing the doughs in each section.
-
Continue twisting and folding until you achieve the desired marble effect. Be careful not to overmix, as this will blend the colors too much. (See video in Notes for a similar technique).
-
Shape each marbled dough section into a 12-inch log, about 1 ½ inches thick.
-
Place the logs on separate, lightly greased cookie sheets (using nonstick cooking spray is recommended). Flatten each log to a ¾ -1 inch thick loaf. (Don’t worry if they seem flat; they will bake up somewhat).
-
Egg Wash: Combine the 1 egg and 1 tablespoon of water. Brush this egg mixture over the tops and sides of the loaves. You won’t use all of it (approx. ½ – ⅓).
-
Bake in the preheated oven for 25-30 minutes or until very lightly browned and firm.
-
Cool loaves on the cookie sheet for 10-15 minutes, then carefully transfer them to a wire cooling rack.
-
Cool for another 45-50 minutes, or until completely cooled to room temperature.
-
2nd Bake: At this point, I like to wash and re-spray my baking pans.
-
When the loaves are cool, preheat oven to 325 degrees F (160 C). Transfer the cooled loaves to a cutting board. Using a sharp serrated knife, cut each loaf diagonally into ½-inch thick slices. Lay the slices, cut sides down, on the prepared cookie sheet. Bake in the preheated oven for 5-10 minutes until lightly browned on the bottom.
-
Turn the slices over and bake for another 5-10 minutes, or until the biscotti are dry and crisp throughout. Transfer to a wire rack to cool completely.
Notes
The cook in this video demonstrates a very similar marbling technique to mine: How to marble dough (Skip to 6:15)
Expert Tips:
- Use Room Temperature Ingredients: Ensure your butter and eggs are at room temperature before starting. This helps the ingredients blend more easily and creates a smoother dough with better texture.
- Chill for Easy Handling: Don’t skip the chilling step. The dough is much easier to handle and shape after it’s been chilled. If it still feels sticky, lightly flour your hands or chill for an additional 30 minutes.
- Don’t Overmix the Marble: When twisting and folding the two doughs together, stop once you see a defined marble pattern. Overmixing will cause the colors to blend too much, losing the marbled effect.
- Shape Evenly for Consistent Baking: When forming the logs, try to keep them uniform in thickness. This ensures that they bake evenly and avoids having thinner ends that dry out faster.
- Let Logs Cool Completely Before Slicing: Cooling the biscotti logs fully before slicing (as directed) is key to keeping them from crumbling. Use a gentle sawing motion with a serrated knife to avoid breakage.
- Rotate the Pan for Even Browning: For both bakes, especially the second one, rotate your baking sheet halfway through to ensure even crisping and browning.
- Add-ins? Toast Them First! If you’re using nuts or dried fruit, consider toasting the nuts or rehydrating the fruit slightly to enhance flavor and improve texture in the final cookie.
- Keep an Eye on the Second Bake: The second bake can go from golden to overdone quickly. Check at the 5-minute mark on each side to avoid overly dry biscotti.
- Use a serrated knife and cut on an angle: You’ll want to cut this marbled biscotti on an angle, with a serrated knife. I use a serrated bread knife. I’ve just found it to be the best way to cut biscotti, and the King Arthur Baking Company agrees – they list the technique as one of their ‘secrets’ of great biscotti.
- Customize Texture with Bake Time: Prefer crunchier biscotti? Bake longer on the second round. Want a softer center? Shave off a few minutes from the second bake time.
- Biscotti Too Hard? If your biscotti ends up too crunchy for your liking, let it sit uncovered at room temperature for a few hours. Exposure to a bit of air can slightly soften the crispness.
Nutrition
Serving:
1
piece
|
Calories:
55
kcal
(3%)
|
Carbohydrates:
9
g
(3%)
|
Protein:
1
g
(2%)
|
Fat:
1
g
(2%)
|
Saturated Fat:
1
g
(6%)
|
Trans Fat:
1
g
|
Cholesterol:
16
mg
(5%)
|
Sodium:
29
mg
(1%)
|
Potassium:
28
mg
(1%)
|
Fiber:
1
g
(4%)
|
Sugar:
4
g
(4%)
|
Vitamin A:
49
IU
(1%)
|
Calcium:
8
mg
(1%)
|
Iron:
1
mg
(6%)
Did you make this recipe?
Please leave a star rating and review below!
