Irresistible Chocoholic Chocolate Squares: The Ultimate Fudgy, Easy-to-Make Dessert for Chocolate Lovers
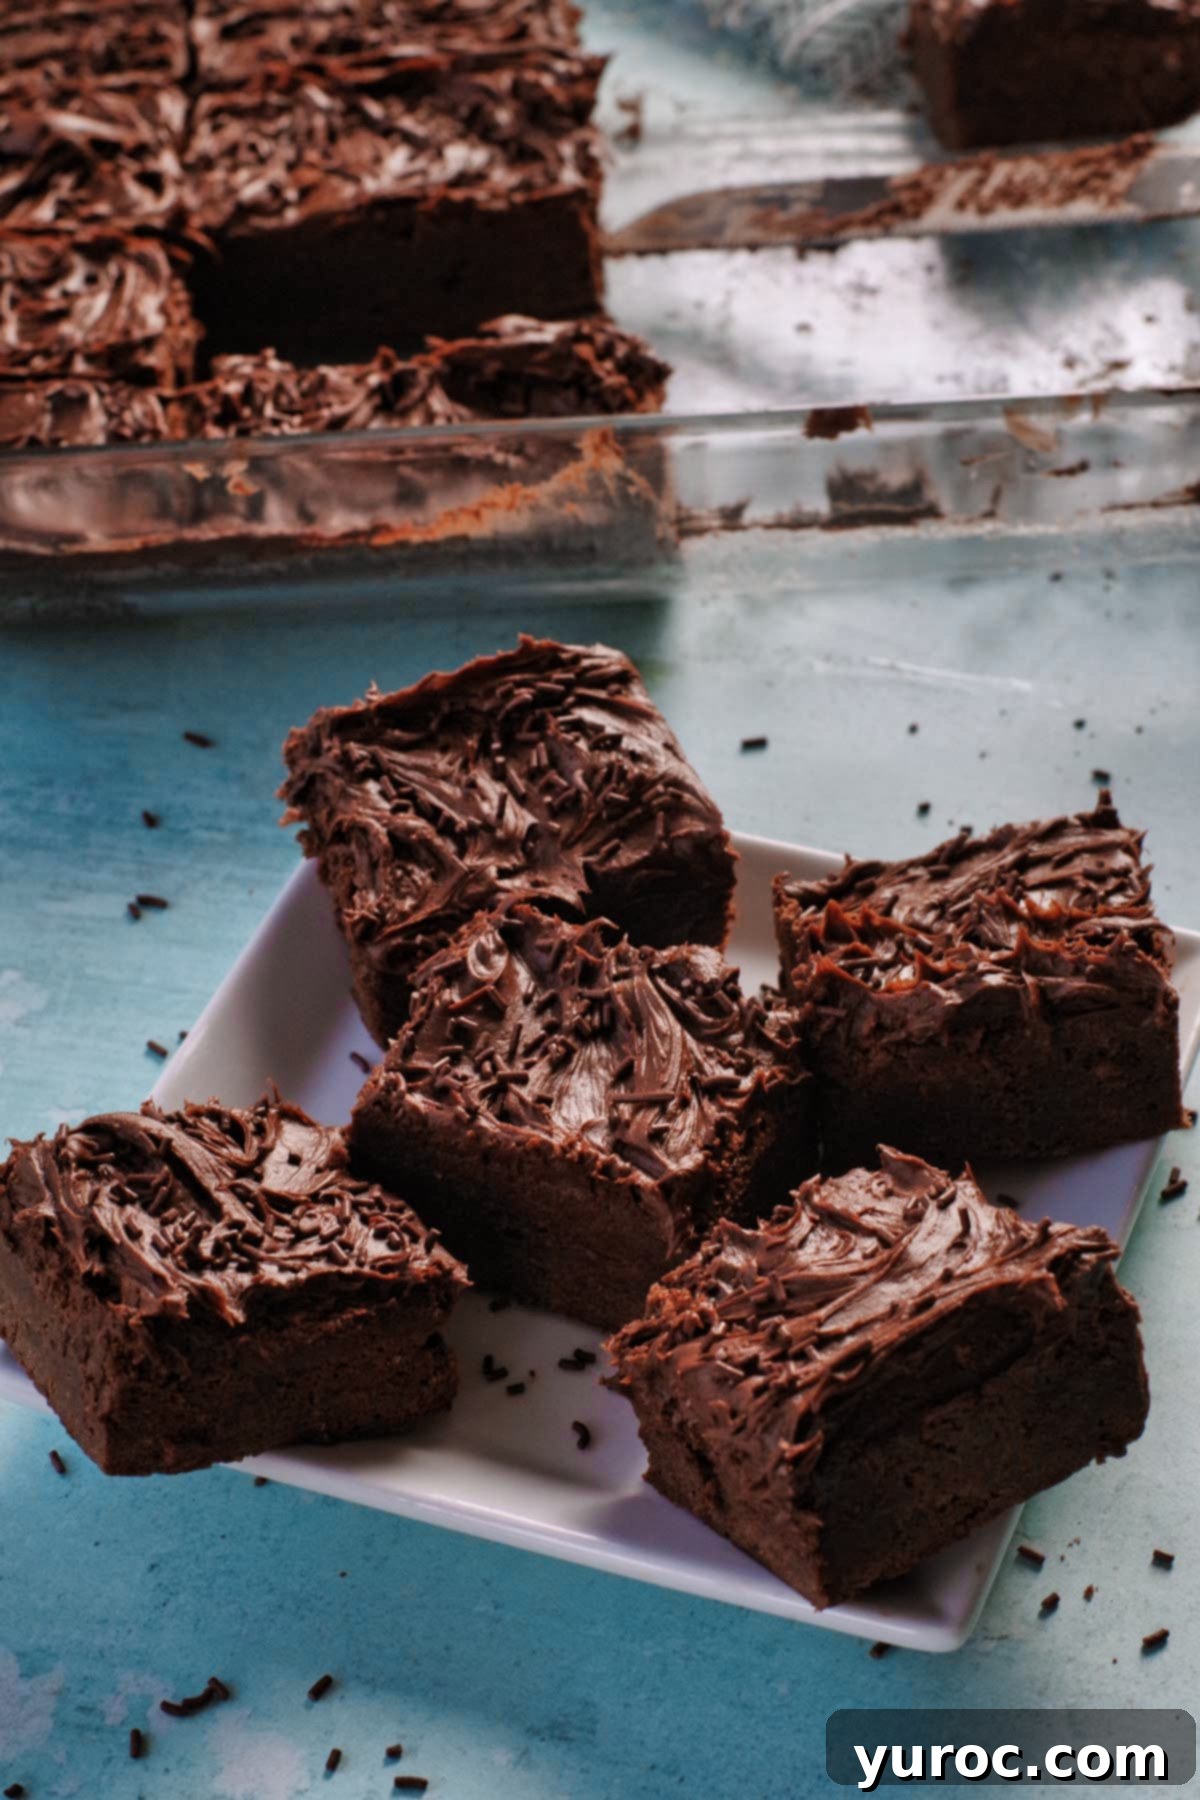
Prepare to be enchanted by these truly irresistible Chocoholic Chocolate Squares. Designed for the ultimate chocolate enthusiast, this recipe delivers an intensely rich and deeply satisfying experience that goes beyond a typical brownie. Imagine a dessert so decadent, so infused with chocolate in every layer, that it feels like a gourmet indulgence yet remains surprisingly simple to prepare. Crafted with not one, but two distinct types of premium chocolate, crowned with a luscious chocolate frosting, and finished with a playful scatter of chocolate sprinkles, these squares are a celebration of all things cocoa.
While undoubtedly indulgent and worth every single glorious calorie, these chocolate squares are a testament to how simple ingredients can come together to create something extraordinary. They strike the perfect balance between fudgy and cake-like, offering a texture that melts in your mouth and a flavor that lingers, making them an instant classic for any occasion or just because you crave a profound chocolate moment. This recipe is quick to assemble, making it ideal for both seasoned bakers and beginners eager to dive into the world of rich, homemade chocolate treats.
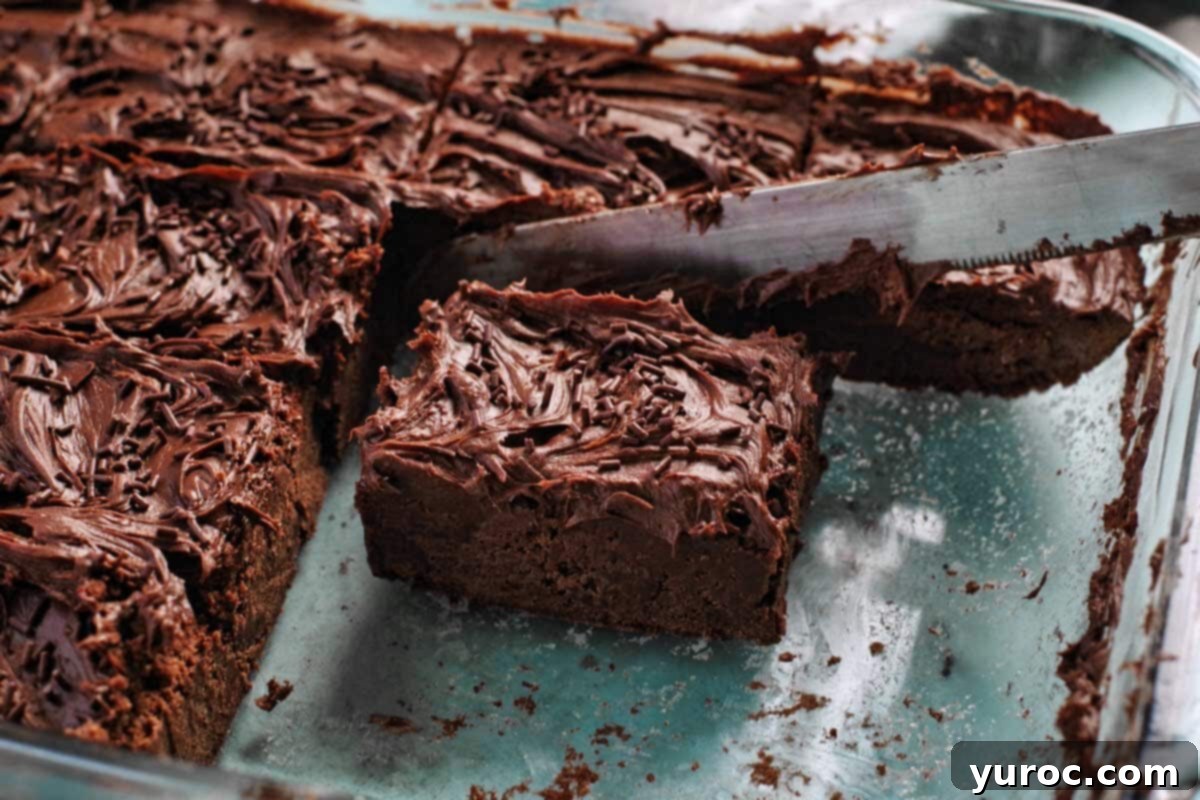
These versatile chocolate squares are a perfect dessert for almost any time of year. They shine brightly on a holiday baking tray, bringing joy during festive seasons, but are equally cherished for special days like Valentine’s Day or Mother’s Day – because, let’s be honest, chocolate is always the right answer! Beyond holidays, they are fantastic for potlucks, family gatherings, birthday parties, or simply as an elevated treat to enjoy with your afternoon coffee. This recipe pairs wonderfully with my Homemade Chocolate Frosting with Cocoa, but don’t hesitate to use your favorite store-bought chocolate frosting for convenience without sacrificing flavor.
The original recipe for these amazing Chocoholic Chocolate Squares has a charming history within my family, hailing from my Auntie Sue. She discovered this gem in a magazine back in the 1980s, and it quickly became a treasured family favorite. It’s a testament to timeless recipes that bring comfort and joy across generations. What started as a simple magazine clip has evolved into a beloved tradition, proving that some recipes are simply too good to ever fade away. This recipe holds a special place, reminding us of simpler times and the enduring power of delicious, homemade desserts.
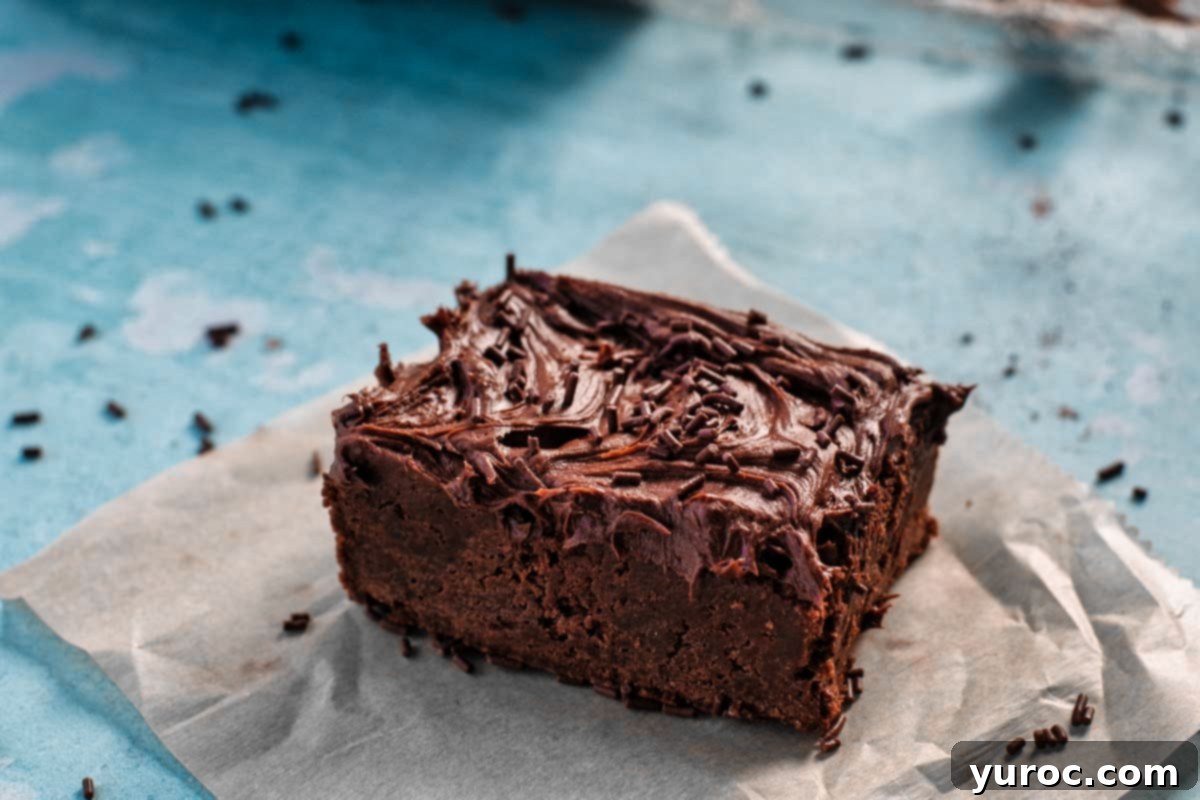
If your heart beats for rich chocolate desserts, you absolutely must explore my Death by Chocolate Trifle too! It’s another incredibly indulgent creation designed to satisfy even the most fervent chocoholic.
Essential Ingredient Notes for Perfect Chocoholic Chocolate Squares
Crafting these rich and delightful dark chocolate bars requires a selection of readily available ingredients, mostly staples you likely already have in your pantry, alongside fresh eggs and unsalted butter. The magic truly happens when these simple components are brought together with care.
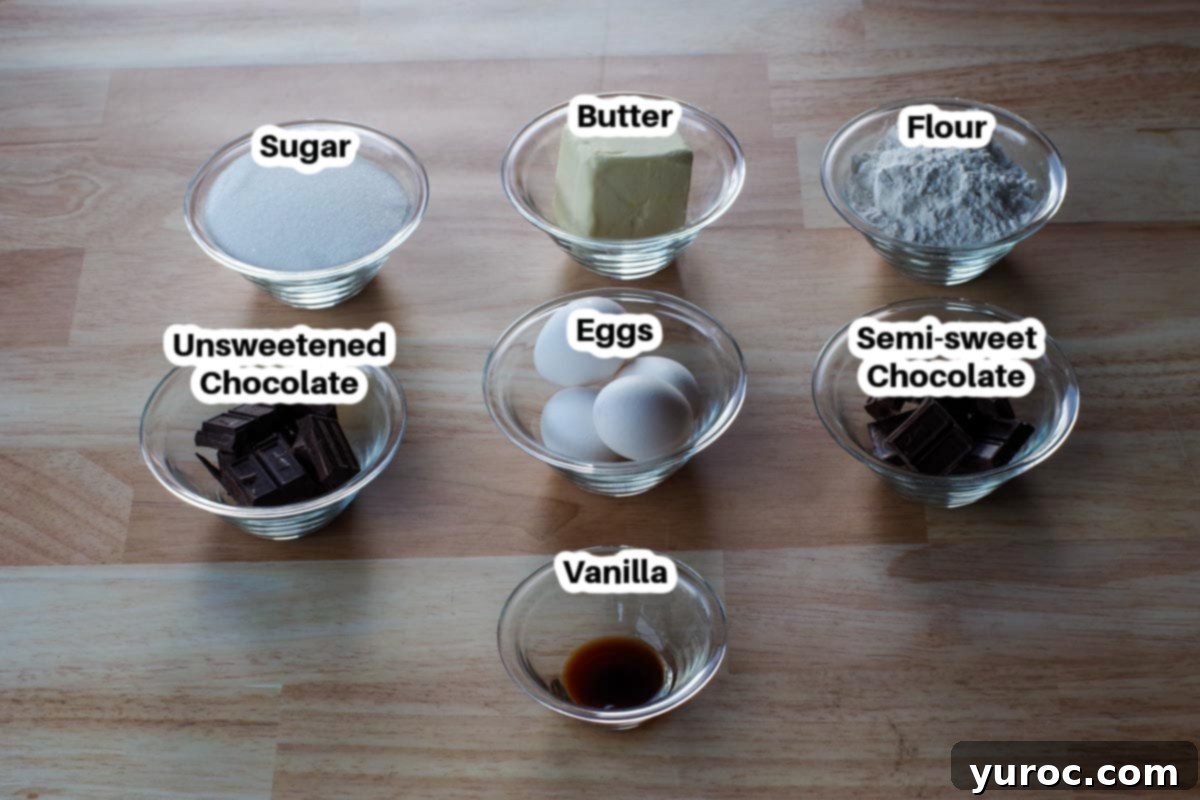
- Unsweetened Chocolate and Semi-Sweet Chocolate: For the ultimate depth of flavor and that signature “chocoholic” intensity, this recipe wisely calls for a combination of two chocolate types. I typically rely on Baker’s chocolate squares for their consistent quality and robust flavor profile. The unsweetened chocolate provides a deep, slightly bitter cocoa note, which is beautifully balanced by the mellower, sweeter semi-sweet chocolate. Using both ensures a complex and deeply satisfying chocolate taste that elevates these squares far beyond ordinary brownies. This dual chocolate approach is key to achieving their irresistible flavor.
- Unsalted Butter: Opting for unsalted butter is crucial as it gives you complete control over the salt content in your baked goods. Different brands of salted butter can vary significantly in their salt levels, potentially throwing off the delicate balance of the recipe. Using unsalted butter allows you to add salt precisely as needed, ensuring a consistent and perfectly flavored batch every time.
- Chocolate Frosting: While the base of these chocolate squares is incredibly delicious on its own, a generous layer of chocolate frosting takes them to the next level of indulgence. I often use Betty Crocker’s whipped chocolate frosting for its light, airy texture and rich flavor, which complements the dense squares beautifully. However, the beauty of this recipe is its flexibility: feel free to use your favorite homemade chocolate frosting, such as my Chocolate Frosting with Cocoa, or any other quality store-bought brand like Duncan Hines. The frosting is what gives these squares their extra touch of decadence and visual appeal.
- Eggs: Eggs are essential binders and contribute to the rich texture and structure of the chocolate squares. They help create that perfect fudgy consistency while ensuring the squares hold together beautifully.
- White Granulated Sugar: This provides the primary sweetness and also helps achieve a tender crumb. Its fine texture creams well with butter, incorporating air for a lighter base.
- All-Purpose Flour: The structural backbone of the squares, providing just enough body without making them overly cakey.
- Vanilla Extract: A crucial flavor enhancer that brings out the best in chocolate. Always use pure vanilla extract for the finest results.
*Important Note: Do NOT substitute chocolate chips for baking chocolate in the base recipe. Baking chocolate (like Baker’s squares) has a different fat and sugar composition designed for melting and integrating smoothly into batters, yielding a superior texture and richer flavor. Chocolate chips contain stabilizers that prevent them from melting completely, which can result in a grainy or less cohesive square. However, chocolate chips make an excellent *add-in* if you want extra pockets of melted chocolate!
For a complete list of ingredients and their precise quantities, please refer to the comprehensive recipe card below.
Creative Variations & Smart Substitutions for Your Chocolate Squares
One of the joys of baking is the ability to customize a recipe to suit your preferences or what you have on hand. These Chocoholic Chocolate Squares are wonderfully adaptable, allowing for delicious variations and thoughtful substitutions.
- Frosting Fun: The frosting is indeed optional, but highly recommended for that extra layer of richness. You have a wide array of choices! Opt for a classic dark chocolate frosting to intensify the cocoa flavor, or a milk chocolate frosting for a sweeter, creamier touch. Beyond typical frostings, consider a rich chocolate ganache for a sophisticated, glossy finish, or even a cream cheese frosting for a tangy contrast. You can easily use convenient grocery store brands like Duncan Hines or Betty Crocker, or whip up a batch of homemade chocolate frosting for a truly bespoke dessert.
- Chocolate Choices: While we recommend Baker’s chocolate squares for their quality, you’re welcome to experiment with other types of chocolate baking squares. Elevate your squares by using premium chocolate brands like Ghirardelli or Valrhona. If you enjoy a specific cocoa percentage, feel free to adjust. Using a higher percentage dark chocolate will result in a more intense, less sweet square, while a lower percentage or milk chocolate will make them milder and sweeter. Just ensure they are baking bars, not chips, for the optimal melted consistency.
- Sweetener Swaps: While the recipe calls for white granulated sugar, you can certainly substitute it with brown sugar. Brown sugar will impart a slightly chewier texture and a subtle caramel note, adding another layer of complexity to the chocolate flavor.
- Delicious Add-ins: Get creative with mix-ins! Stir in a cup of chopped walnuts or pecans for a delightful crunch. For an even more intense chocolate experience, fold in a handful of your favorite chocolate chips (dark, milk, or white chocolate work well) into the batter just before baking. A sprinkle of sea salt flakes on top of the frosting can beautifully enhance the chocolate’s flavor, creating a popular sweet-and-salty combination. Other ideas include a dash of espresso powder (which deepens chocolate flavor without making it taste like coffee), dried cherries or raspberries, or a swirl of peanut butter.
- Serving Suggestions: These squares are fantastic on their own, but can also be warmed slightly and served with a scoop of vanilla bean ice cream for an extra special treat. They also make wonderful edible gifts, beautifully packaged in decorative boxes for friends and family.
Step-by-Step Guide: How to Make Irresistible Chocoholic Chocolate Squares
Creating these divine chocolate squares is a straightforward process, designed for enjoyment from start to finish. Follow these detailed steps for perfect results every time.
Prep: Begin by preheating your oven to 350 degrees F (176 degrees C). This ensures the oven is at the correct temperature when your batter is ready, promoting even baking. Properly preheating is a fundamental step for any successful baked good.
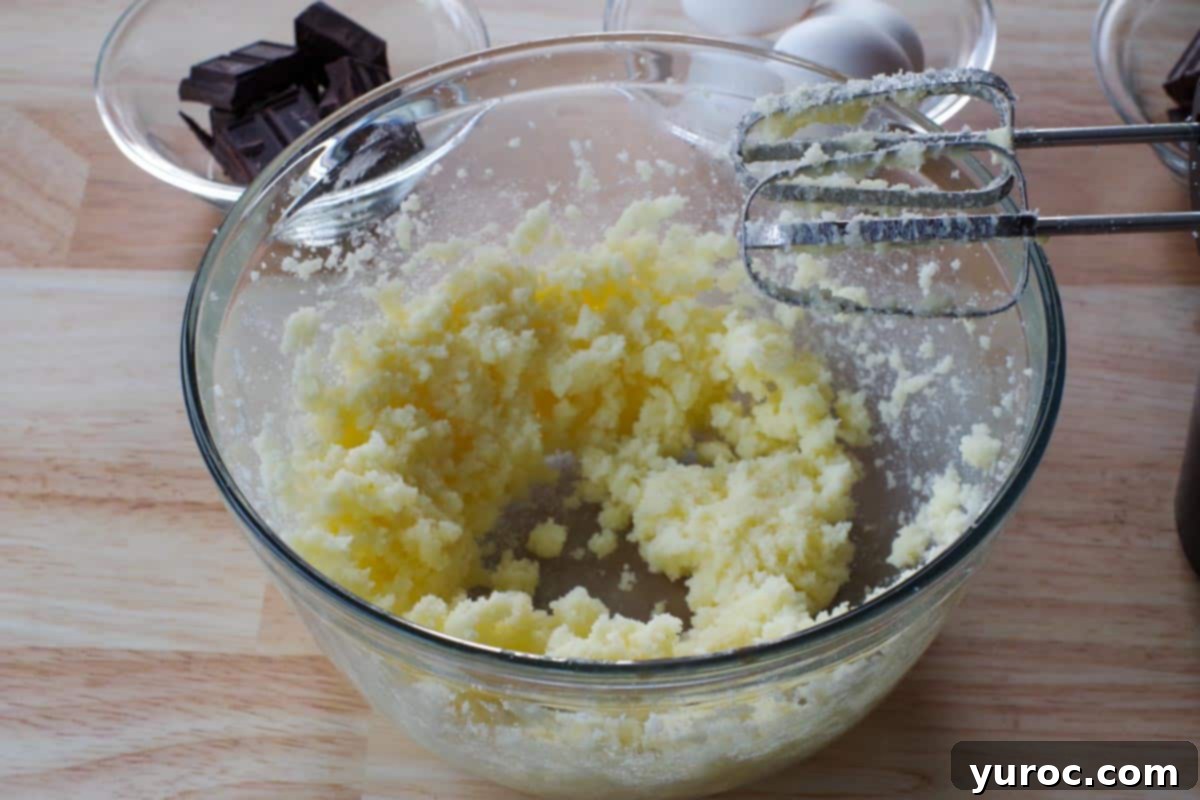
In a large mixing bowl, combine the unsalted butter with the white granulated sugar. Using a hand mixer or stand mixer, cream them together on medium speed until the mixture becomes light, pale, and fluffy. This process incorporates air, which contributes to the squares’ tender texture.
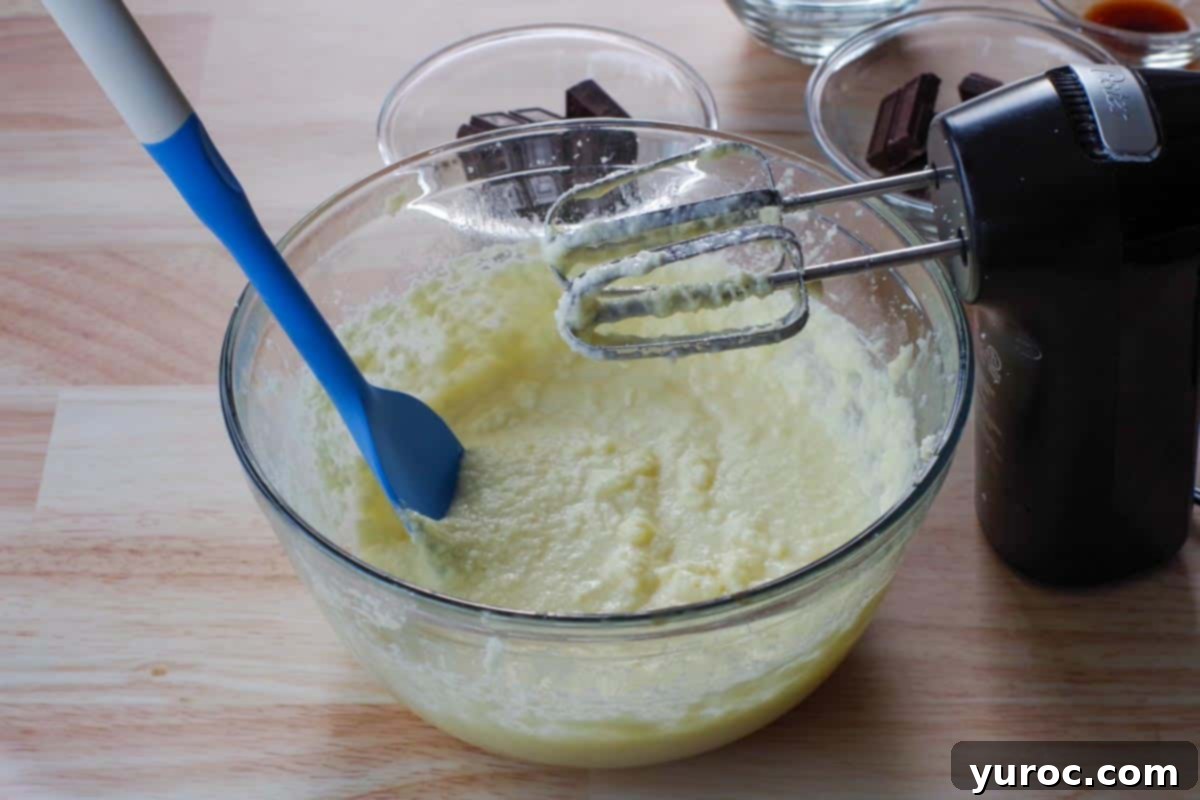
Add the eggs one at a time to the creamed butter and sugar mixture. After each egg addition, beat well until fully incorporated. This gradual addition ensures the eggs emulsify properly with the fats, preventing the batter from splitting and creating a smoother, more uniform dough.
*TIP: Always crack your eggs into a separate small or medium mixing bowl first before adding them to your main ingredients. This simple step makes it much easier to spot and remove any rogue bits of shell, preventing them from ending up in your delicious dessert. It also allows you to check for freshness before adding to the entire batch.
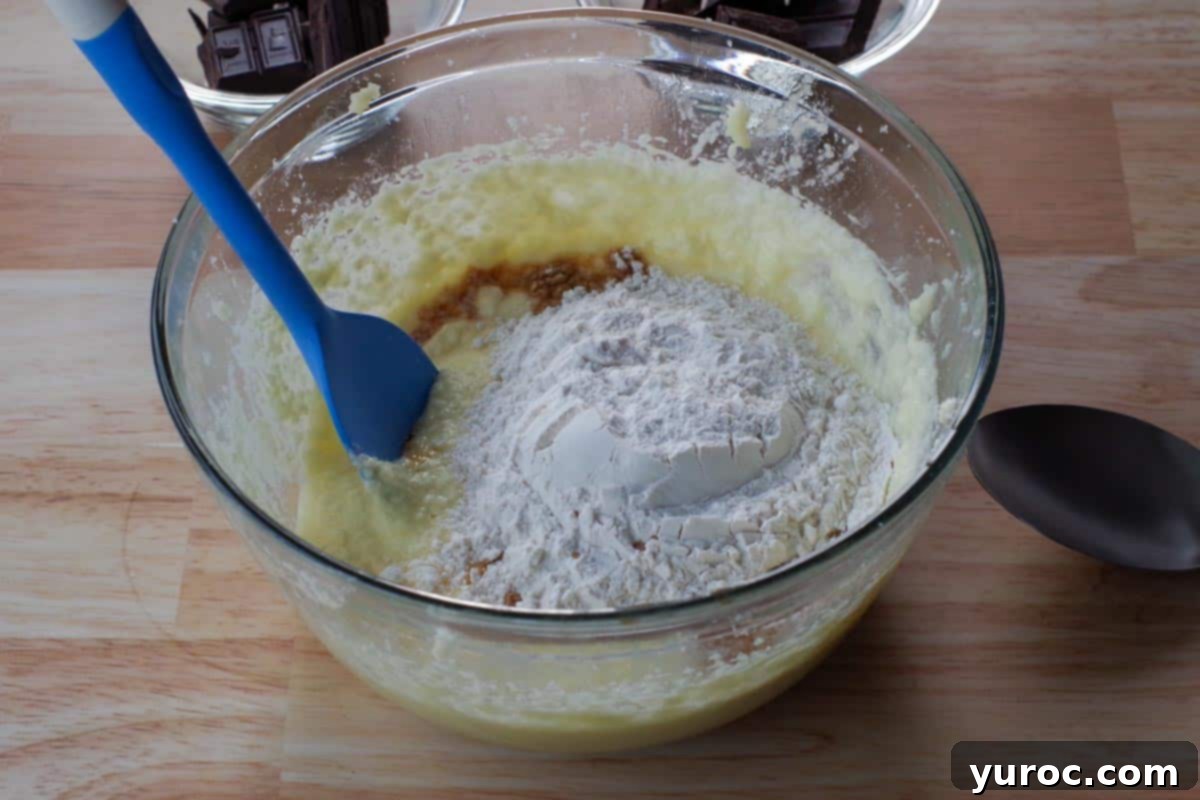
Once the eggs are fully incorporated, add the all-purpose flour and vanilla extract to the wet ingredients. The vanilla extract is crucial for enhancing the chocolate flavor, not masking it.
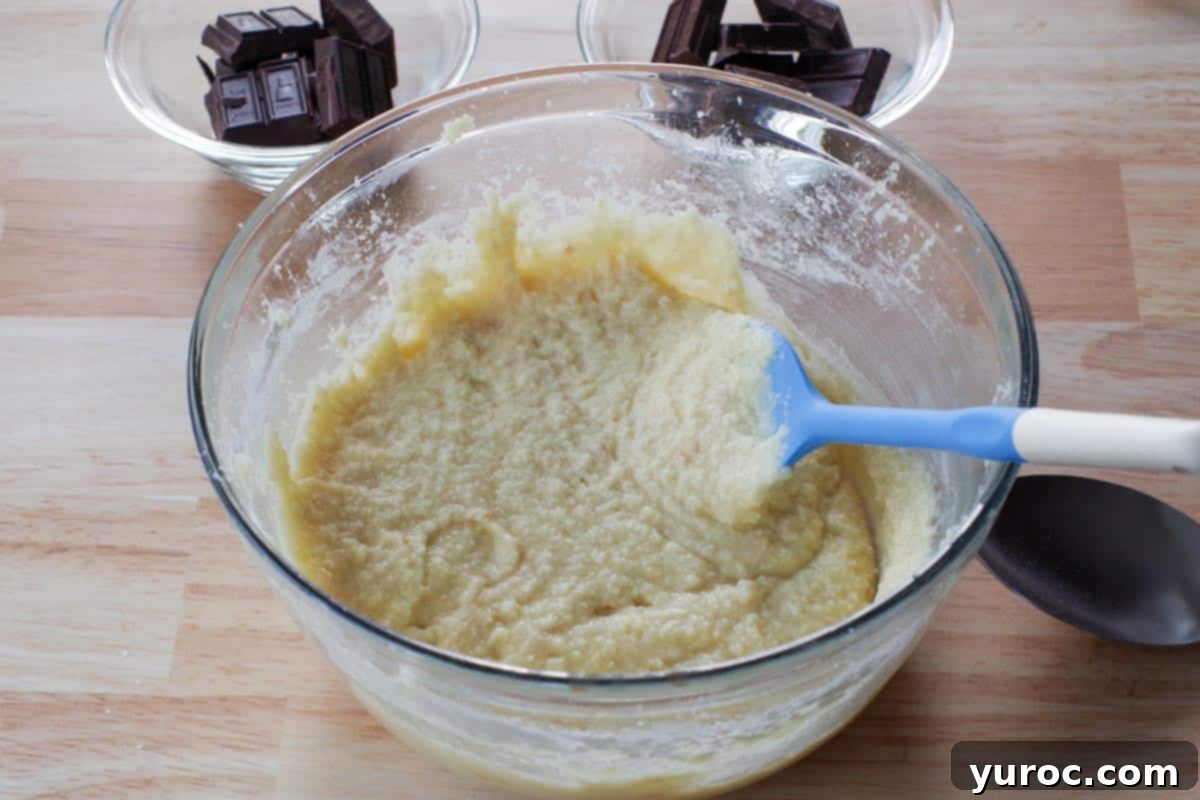
Mix the flour and vanilla into the butter-egg-sugar mixture using a spoon or spatula. Mix until just combined and no streaks of dry flour remain. Be careful not to overmix, as this can develop the gluten in the flour, leading to a tougher, less tender square.
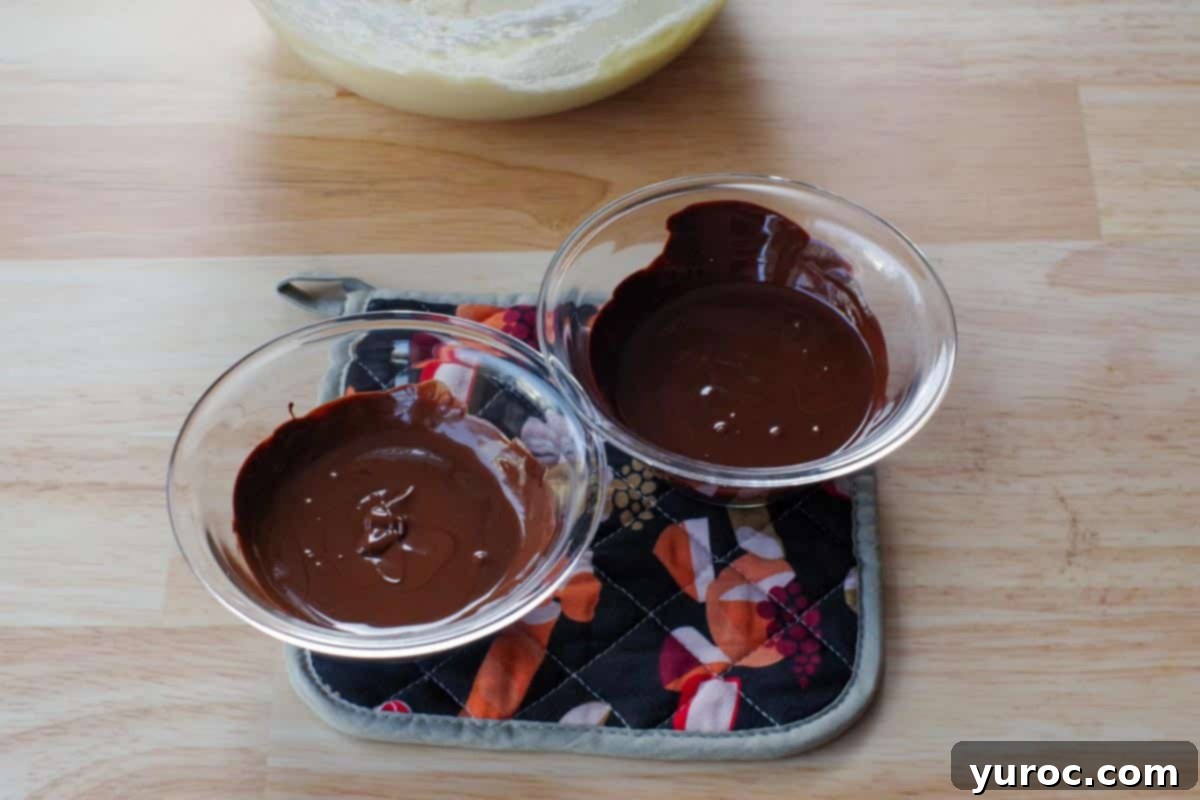
While the wet ingredients are being mixed, begin melting your chocolates. Break both the unsweetened and semi-sweet chocolate into approximately ½-ounce pieces. Place them in separate microwave-safe bowls. Heat on half power (50%) in the microwave for about 2 ½ to 3 minutes, or until the chocolate is completely melted and smooth. Make sure to take them out after two minutes and stir, then continue heating in short bursts, stirring frequently, to prevent burning. Alternatively, for a more traditional method, you can easily melt your chocolate in a double boiler on the stovetop using a heatproof bowl. This method provides more gentle, even heat, reducing the risk of scorching.
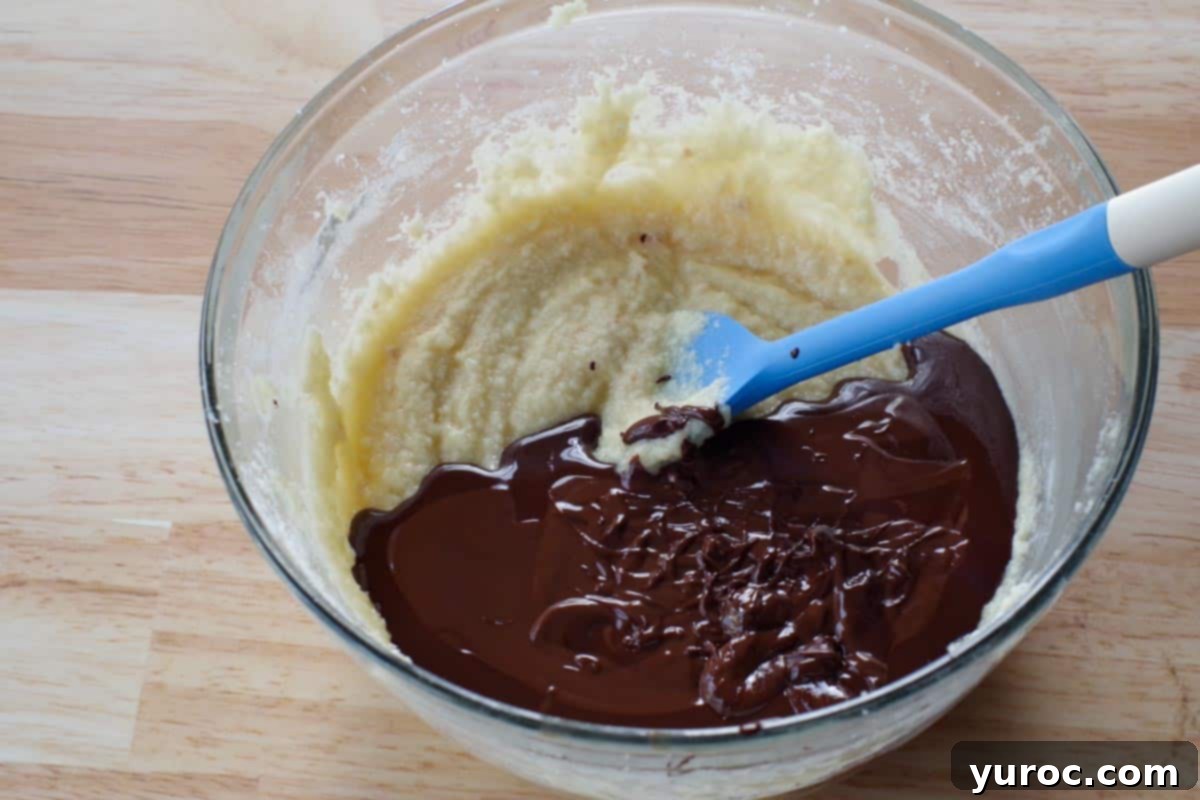
Once both chocolates are perfectly melted and smooth, gently pour the melted chocolate mixture into the prepared batter. This is where the magic really starts to happen, transforming the light batter into a rich, dark chocolate base.
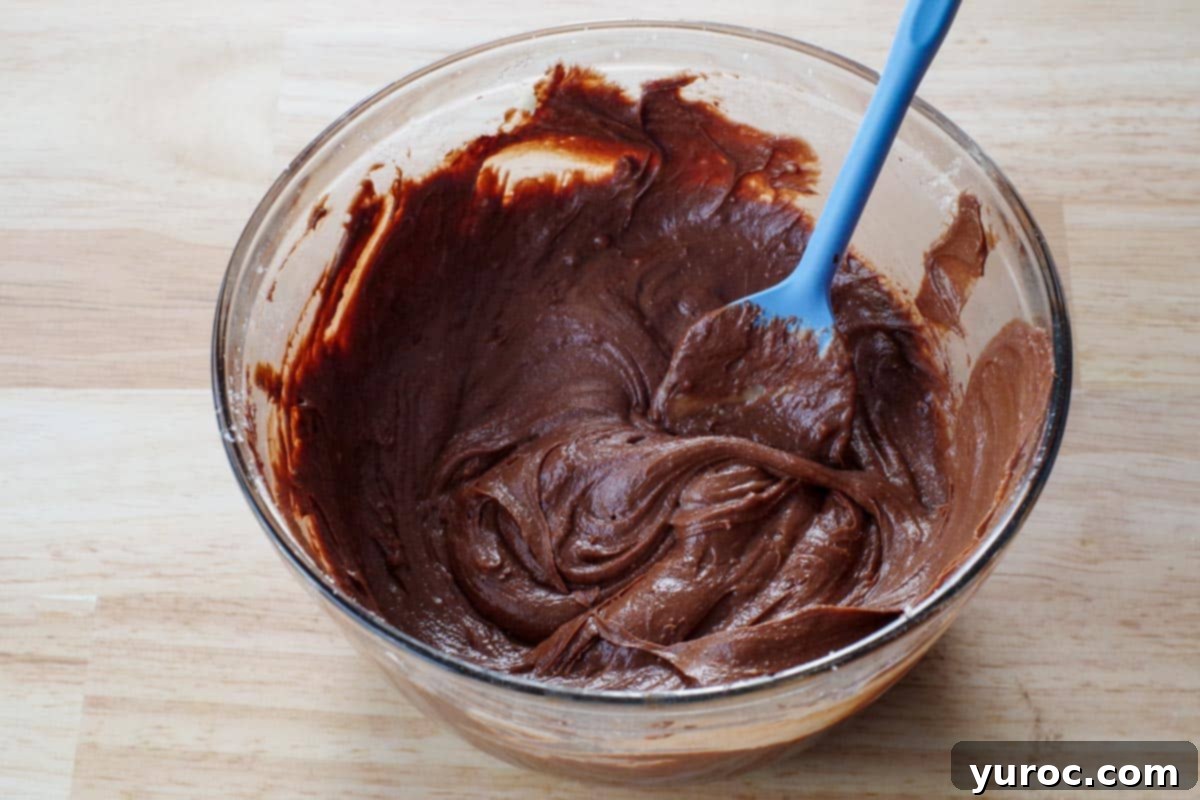
Carefully stir the melted chocolate into the batter using a spatula. Fold gently until the chocolate is fully incorporated, ensuring there are no streaks of unmixed batter. Again, avoid overmixing to maintain the tender texture.
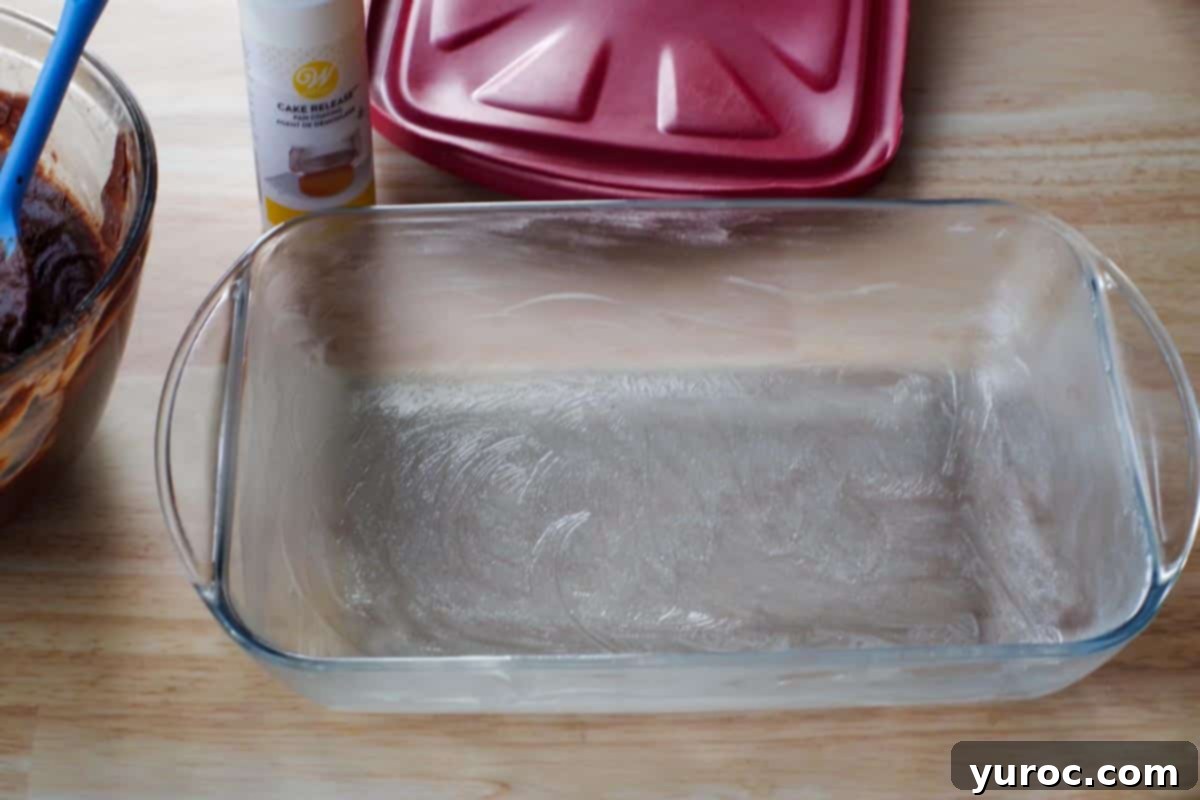
Prepare your baking pan. Grease a 9×13 inch baking pan thoroughly. For best results and incredibly easy removal, I highly recommend greasing the pan with Wilton cake release (affiliate link). This product is a lifesaver for ensuring your baked goods slide out perfectly without sticking. If you don’t have cake release, a good quality non-stick cooking spray or a generous coating of butter and flour will also work. Alternatively, line the pan with parchment paper, leaving an overhang on the sides, to lift the entire slab out once cooled.
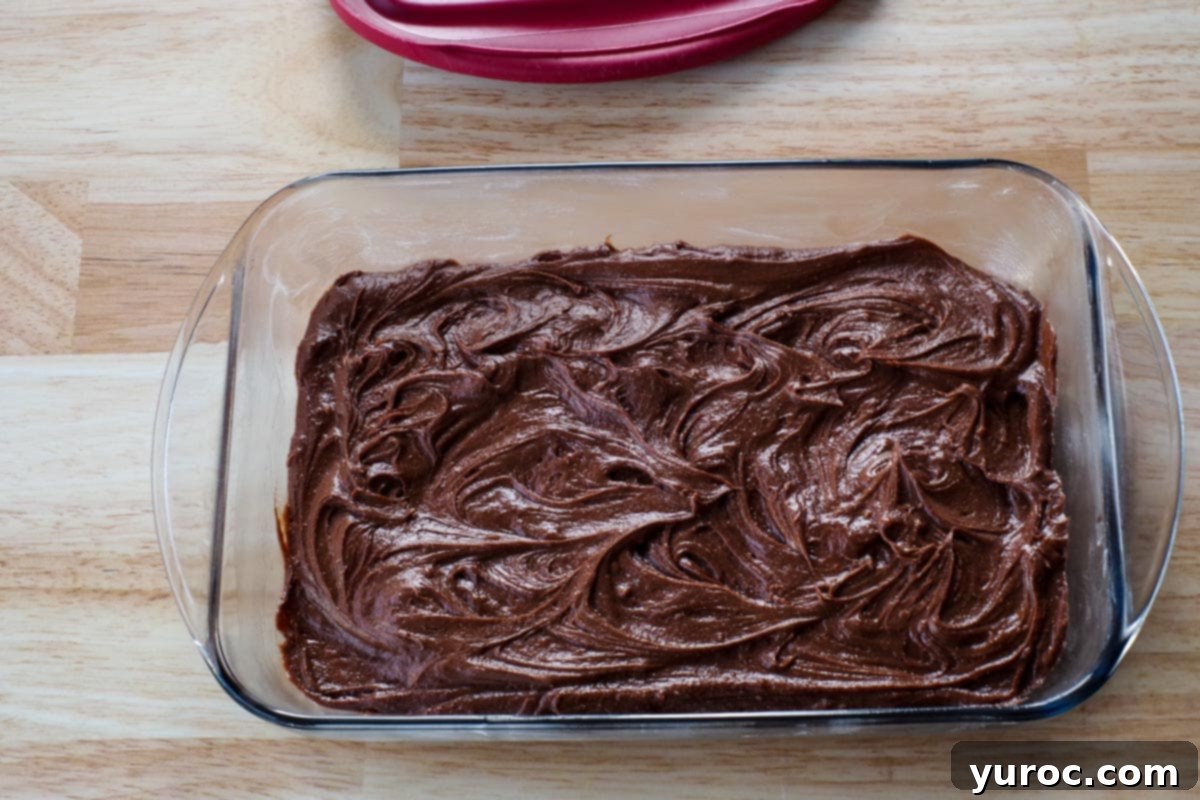
Pour the rich chocolate batter into the prepared 9×13 inch baking dish. Use your spatula to spread it evenly to the corners, ensuring an consistent thickness for uniform baking. A smooth, even layer will result in beautifully baked squares.
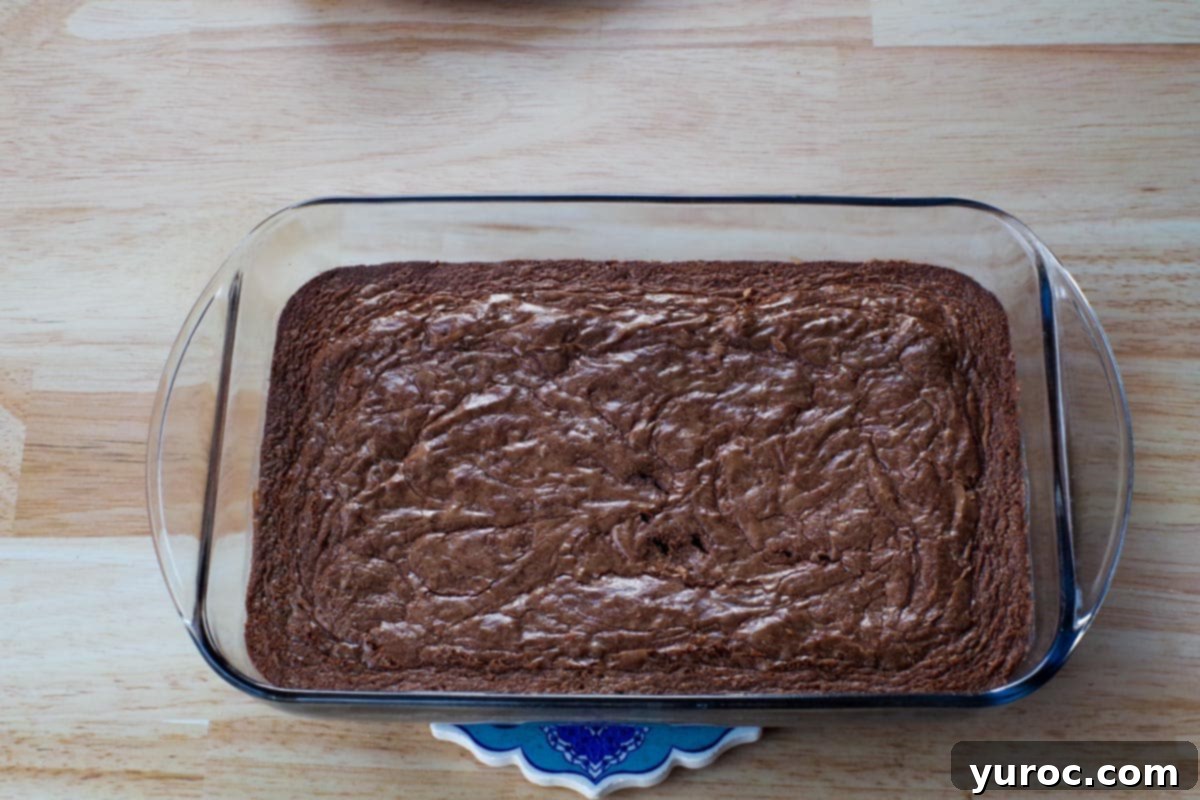
Bake in your preheated oven for approximately 30-35 minutes. The key is not to overbake; you want the squares to be perfectly fudgy. To test for doneness, insert a wooden skewer or cake tester into the center. It should come out slightly moist with a few moist crumbs clinging to it, but not wet with raw batter. Overbaking will lead to dry, cakey squares instead of the desired fudgy texture. Once baked, remove from the oven and allow them to cool completely in the pan on a wire rack. This is crucial for them to set properly before frosting.
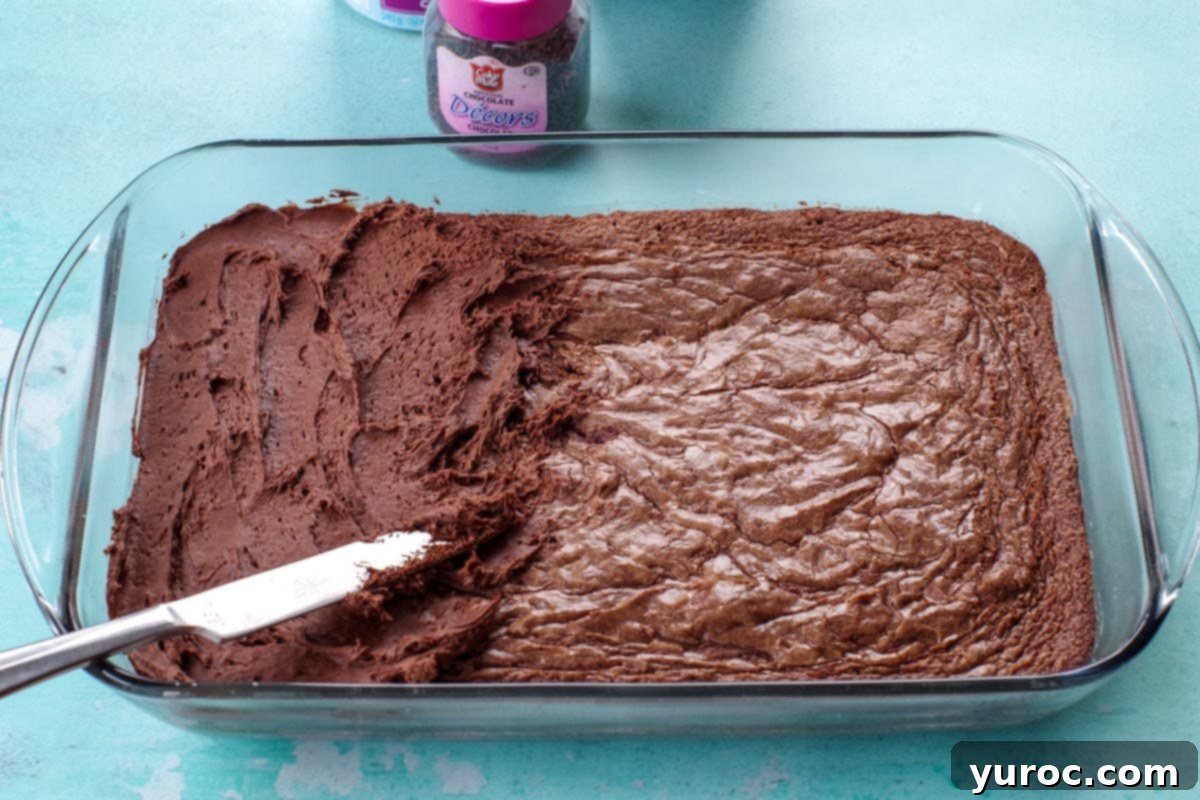
Once the chocolate squares are completely cooled (this is important to prevent the frosting from melting), spread your chosen chocolate frosting evenly over the top. Use an offset spatula or the back of a spoon to create a smooth, appealing layer. Remember, frosting is optional, but it truly elevates these squares into a magnificent dessert. You’ll typically need one 340g (12 oz) container of store-bought frosting, or about 1 ½ cups of homemade frosting, to cover a 9×13 inch pan generously.
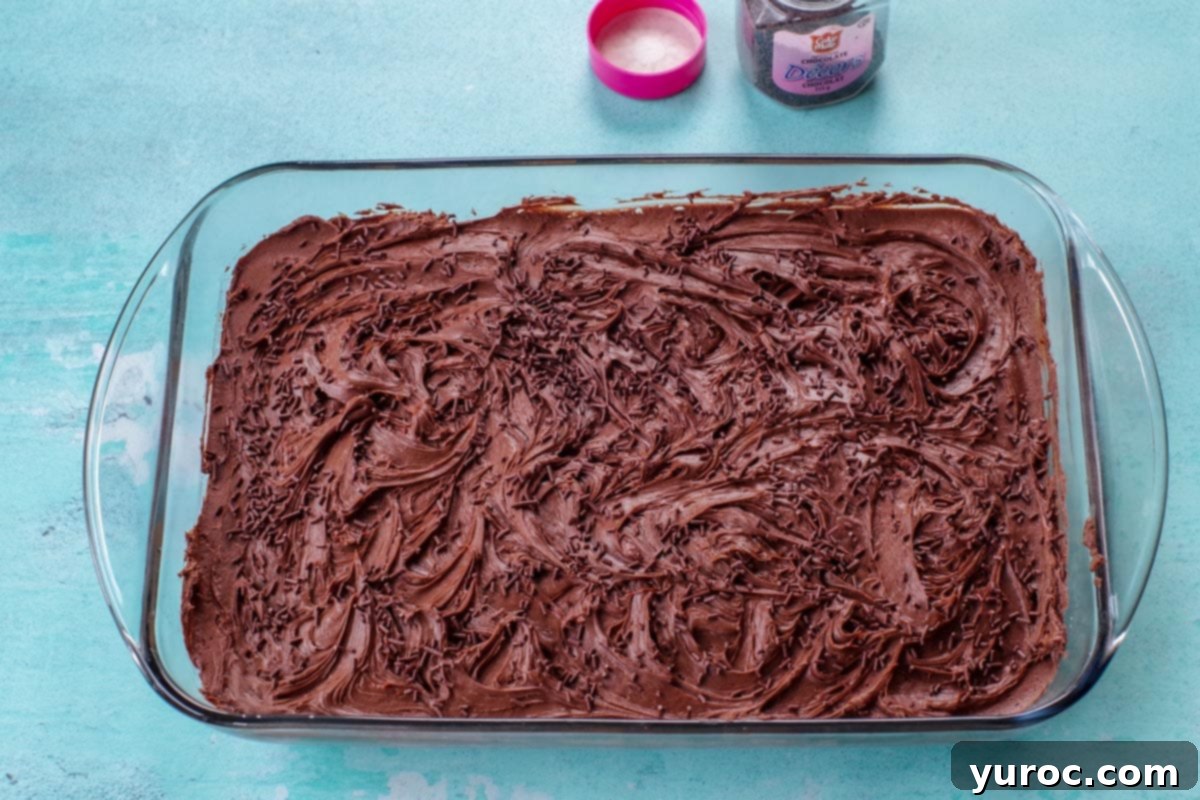
For an extra festive and fun touch, generously sprinkle chocolate sprinkles over the freshly frosted squares while the frosting is still soft. This adds a delightful textural contrast and a charming visual appeal. If you prefer, other toppings like shaved chocolate, mini chocolate chips, or even a dusting of cocoa powder can be used.
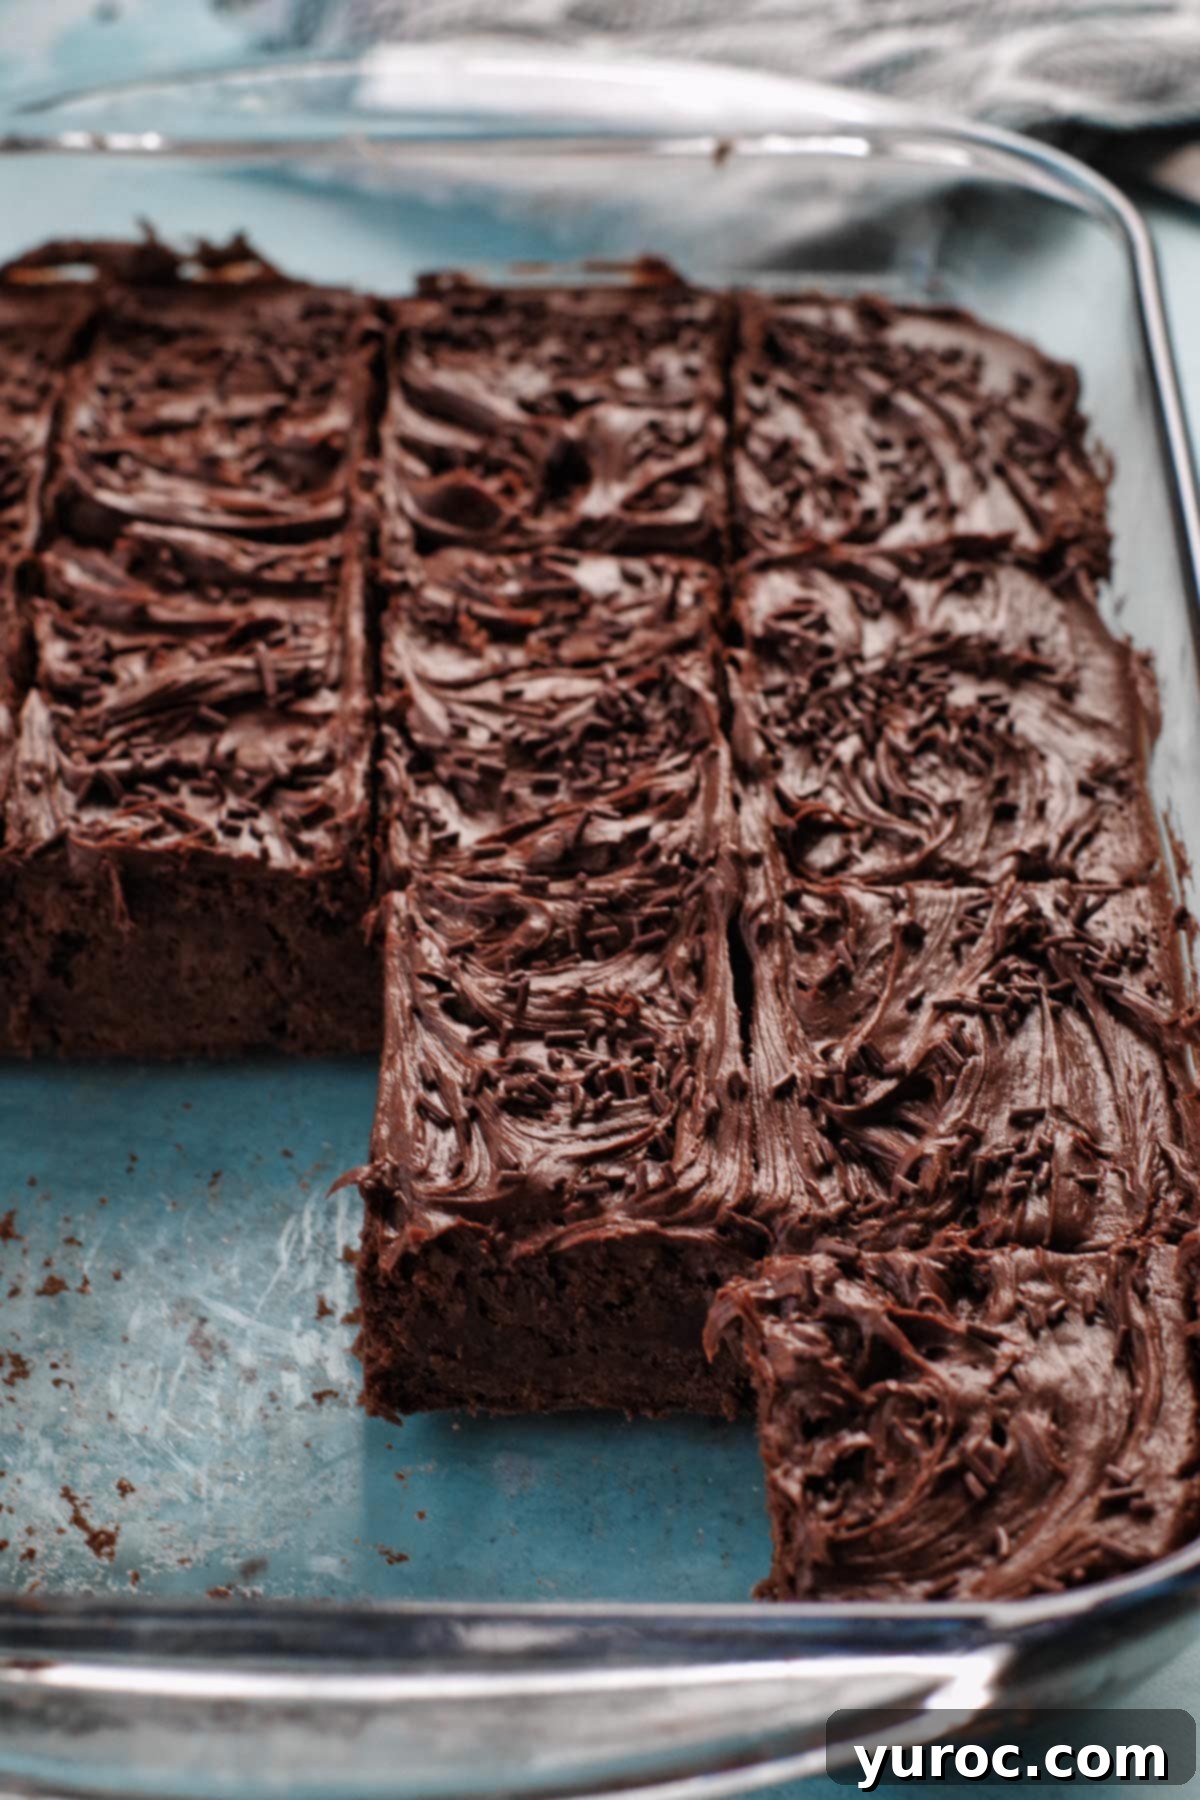
Finally, cut the cooled, frosted squares into 16 evenly sized pieces. A warm, sharp knife can help create clean cuts. Serve and enjoy!
Top Tip for Melting Chocolate
When melting chocolate, especially in the microwave, it is absolutely paramount to keep your chocolate, bowls, and any utensils completely dry and away from any moisture. Even a tiny drop of water can cause the chocolate to “seize.” Seizing is a process where the chocolate instantly clumps up and becomes a thick, grainy, unusable mass. It’s often irreversible, so take extreme caution to avoid any contact with water or steam during the melting process. Ensure your bowls are perfectly dry and that no steam from a hot stovetop or microwave condensation comes into contact with the chocolate.
Storage Solutions for Your Chocoholic Chocolate Squares
Properly storing your Chocoholic Chocolate Squares ensures they remain fresh and delicious for as long as possible.
- Room Temperature Storage: If you’re planning to enjoy them within one to two days and haven’t used a perishable frosting (like one made with cream cheese), these squares can be stored at room temperature in an airtight container. Make sure they are in a cool, dry place away from direct sunlight. Simply covering them tightly with plastic wrap overnight will also suffice.
- Refrigerated Storage: For longer freshness, especially if frosted, store these dark chocolate squares in an airtight container in the refrigerator for up to 5 days. Chilling also helps to firm up the squares, making them even fudgier and easier to handle. Before serving, you might want to let them sit at room temperature for 15-30 minutes to soften slightly and enhance their flavor and texture.
- Freezing for Later: These chocolate squares freeze beautifully! Place them in an airtight, freezer-safe container, separated by layers of parchment paper if stacking, for up to 3 months. You can frost them before freezing, which saves time later. However, if you plan to add sprinkles, it’s best to wait until the squares have fully defrosted, as sprinkles can become soggy or lose their appeal during the thawing process. Thaw frozen squares overnight in the refrigerator or at room temperature for a few hours.
Serving Size and Adjusting the Recipe
This easy recipe for Chocoholic Chocolate Squares yields 16 generous servings, perfect for a family dessert or a small gathering. However, the beauty of these squares is their versatility when it comes to serving. For smaller portions, you can easily cut them into 25 servings (by cutting 5 strips in both directions, instead of 4), making them ideal for a larger party or when serving alongside other desserts on a holiday baking tray.
Adjusting the recipe to fit your needs is simple! Most recipe cards (including the one below) allow you to click on the serving number and select the desired number of servings. The ingredient quantities will automatically adjust, saving you the hassle of manual calculations.
- Halving the Recipe: If you wish to make a smaller batch, simply halve the recipe. You’ll need an 8×8 inch square baking pan for this quantity. The baking time might be slightly reduced, so start checking for doneness a few minutes earlier.
- Doubling or Tripling the Recipe: For larger crowds, you can easily double or triple the recipe. Just ensure you have additional 9×13 inch baking dishes (or larger sheet pans) to accommodate the increased volume of batter. The baking time generally remains the same for each pan, but ensure you rotate the pans in the oven if baking multiple at once for even results.
No matter the size of your gathering, these chocolate squares are sure to be a hit!
Frequently Asked Questions About Chocolate Squares
These Chocoholic Chocolate Squares are a fantastic recipe for anyone who adores chocolate and is seeking a truly divine chocolate experience. Here are some common questions you might have:
A standard square of baker’s chocolate, like the ones used in this recipe (e.g., Baker’s unsweetened or semi-sweet), typically weighs 1 ounce (approximately 28 grams).
The easiest and safest way to break apart chocolate baking squares is to use a large, sharp chef’s knife. Place the chocolate bar on a cutting board and press down firmly with the knife, scoring it along the natural break lines. For smaller pieces, you can also give it a good whack with the side of your knife or a meat tenderizer (with the chocolate still in its wrapper or in a bag) to break it into chunks, then use the knife to chop to desired size.
While chocolate chips are delicious, they are not a direct substitute for baking chocolate in the base batter. Baking chocolate is formulated to melt smoothly and integrate into recipes, providing a rich, even chocolate flavor and texture. Chocolate chips contain stabilizers that help them hold their shape during baking, which can result in a different, often less fudgy, texture in the final squares. However, they make excellent additions as mix-ins to the batter for extra pockets of melted chocolate!
Chocolate seizes when it comes into contact with even a tiny amount of water or steam while melting. It instantly transforms from a smooth, liquid state into a thick, gritty, crumbly mass. Unfortunately, seized chocolate is very difficult to fully recover for baking. You might be able to *partially* rescue it by stirring in a tablespoon or two of vegetable oil or melted butter until it becomes a paste, but it won’t return to its original smooth consistency and is usually best discarded for this recipe.
The key to ultra-fudgy chocolate squares is careful baking. Avoid overbaking at all costs! Remove them from the oven when a toothpick inserted into the center comes out with moist crumbs, not liquid batter, and definitely not completely clean. The squares will continue to cook slightly as they cool in the hot pan, setting up to that perfect fudgy consistency.
Looking for more decadent chocolate recipes? Be sure to try my Old Fashioned Sour Cream Chocolate Cake for another rich, moist dessert! Or, if you’re a fan of squares and bars, don’t miss my delightful Date Squares and my festive Christmas Squares for different flavor profiles that are equally satisfying!

📋Chocoholic Chocolate Squares Recipe
Print Recipe
Pin
Save RecipeSave Recipe
Rate
Add to Shopping ListGo to Shopping List
Equipment
-
hand mixer
-
9X13 baking dish
-
large mixing bowl
Ingredients
- 4 oz. unsweetened chocolate *Do NOT substitute chocolate chips for baking chocolate
- 4 oz. semi-sweet chocolate *Do NOT substitute chocolate chips for baking chocolate
- 1 cup unsalted butter
- 1 ½ cups white granulated sugar
- 1 cup all-purpose flour
- 2 teaspoon vanilla
- 4 eggs
Optional Frosting and Sprinkles
- 340 g -container of whipped chocolate frosting Or 1.5 cups of homemade chocolate frosting
- 2 tablespoon chocolate sprinkles
Instructions
-
Preheat oven to 350 degrees F/ 176 degrees C. Ensure your oven is fully preheated for even baking.
-
In a large mixing bowl, cream the unsalted butter with the white granulated sugar until the mixture is light, pale, and fluffy. This usually takes about 2-3 minutes with a hand mixer.
-
Add the eggs one at a time, beating well with your mixer after each addition until fully incorporated. *TIP: Crack eggs into a medium mixing bowl first before adding to the other ingredients. If you end up with bits of shell, it’s easier to remove them this way.
-
Stir in the vanilla extract and all-purpose flour.
-
Mix until the flour and vanilla are just incorporated into the wet ingredients. Be careful not to overmix to maintain a tender crumb.
-
Meanwhile, break both types of chocolate into ½ ounce pieces and place in separate microwave-safe bowls. Cook on ½ power (50%) in the microwave for about 2 ½ – 3 minutes, stirring after 2 minutes, or until completely melted and smooth. Alternatively, melt using a double boiler on the stovetop. Remember to keep all bowls and utensils completely dry.
-
Add the melted chocolate to the batter mixture.
-
Stir the chocolate into the mixture until it is fully incorporated and the batter is a uniform dark color. Avoid overmixing.
-
Prepare a 9×13 inch baking pan (or lasagna pan) by greasing it thoroughly with non-stick cooking spray, or for best results, use Wilton cake release.
-
Pour the chocolate batter evenly into the prepared pan. Use a spatula to spread it to the corners.
-
Bake in the preheated oven for approximately 30-35 minutes, or until a cake tester inserted into the center comes out slightly moist with a few fudgy crumbs clinging to it (not completely clean). Cool completely in the pan on a wire rack.
-
Once the squares are completely cool, spread your choice of chocolate frosting evenly over the top (this step is optional but highly recommended). You’ll need about 340g (12 oz) of store-bought frosting or 1.5 cups of homemade.
-
If desired, generously sprinkle chocolate sprinkles over the frosted squares while the frosting is still soft.
-
Cut the cooled, frosted squares into 16 equal pieces. Serve and savor every irresistible bite!
Notes
Top Tip for Melting Chocolate
Keep your chocolate, bowls, and utensils completely dry and away from any water when melting chocolate (especially in the microwave). Even a tiny drop of water can cause the chocolate to seize, turning it into a grainy, unusable mass.
📖Variations & Substitutions
- Frosting: Frosting is optional but highly recommended. You can use dark chocolate, milk chocolate, or even cream cheese frosting. Feel free to use store-bought frosting (like Duncan Hines or Betty Crocker) or a homemade chocolate frosting. A rich chocolate ganache is another excellent topping option.
- Chocolate Baking Squares: Experiment with different types of chocolate baking squares, including premium chocolates like Ghirardelli or Valrhona, to adjust the intensity of the chocolate flavor. Just ensure they are baking bars, not chocolate chips, for optimal melting.
- Sugar: For a slightly chewier texture and a hint of caramel flavor, you can substitute brown sugar for the white granulated sugar.
- Add-ins: Enhance your squares with mix-ins like chopped nuts (walnuts, pecans), chocolate chips (dark, milk, or white), dried fruits, or a dash of espresso powder to deepen the chocolate notes. A sprinkle of sea salt flakes on top of the frosting also adds a delightful sweet-and-salty contrast.
Nutrition