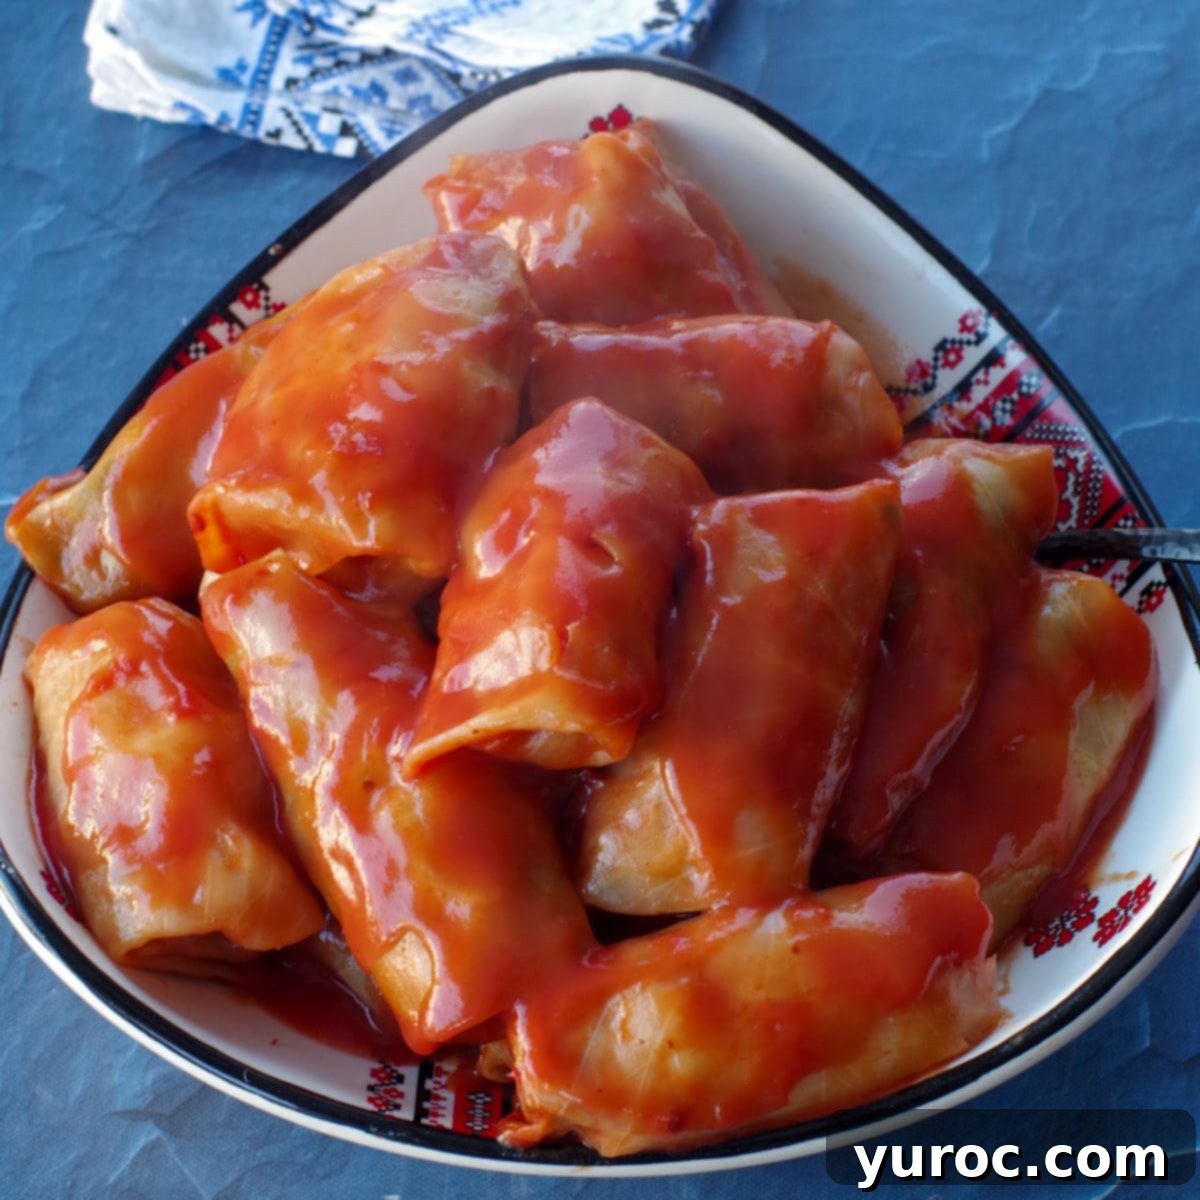
Hearty & Easy “Scottish-Style” Ukrainian Cabbage Rolls (Holubtsi) with Ground Beef & Rice
As the holiday season approaches, especially with Ukrainian Christmas just around the corner, my thoughts naturally turn to the ultimate comfort foods. Among them, one dish stands out as an absolute family favorite: our incredibly delicious, easy-to-make cabbage rolls. While I am deeply proud of my Ukrainian heritage and adore traditional Ukrainian cuisine, these aren’t your typical, traditional Ukrainian holubtsi. Instead, my family fondly refers to these as “Scottish Cabbage Rolls,” a unique fusion that features a hearty filling of ground beef and rice, all lovingly smothered in a rich, savory tomato soup sauce.
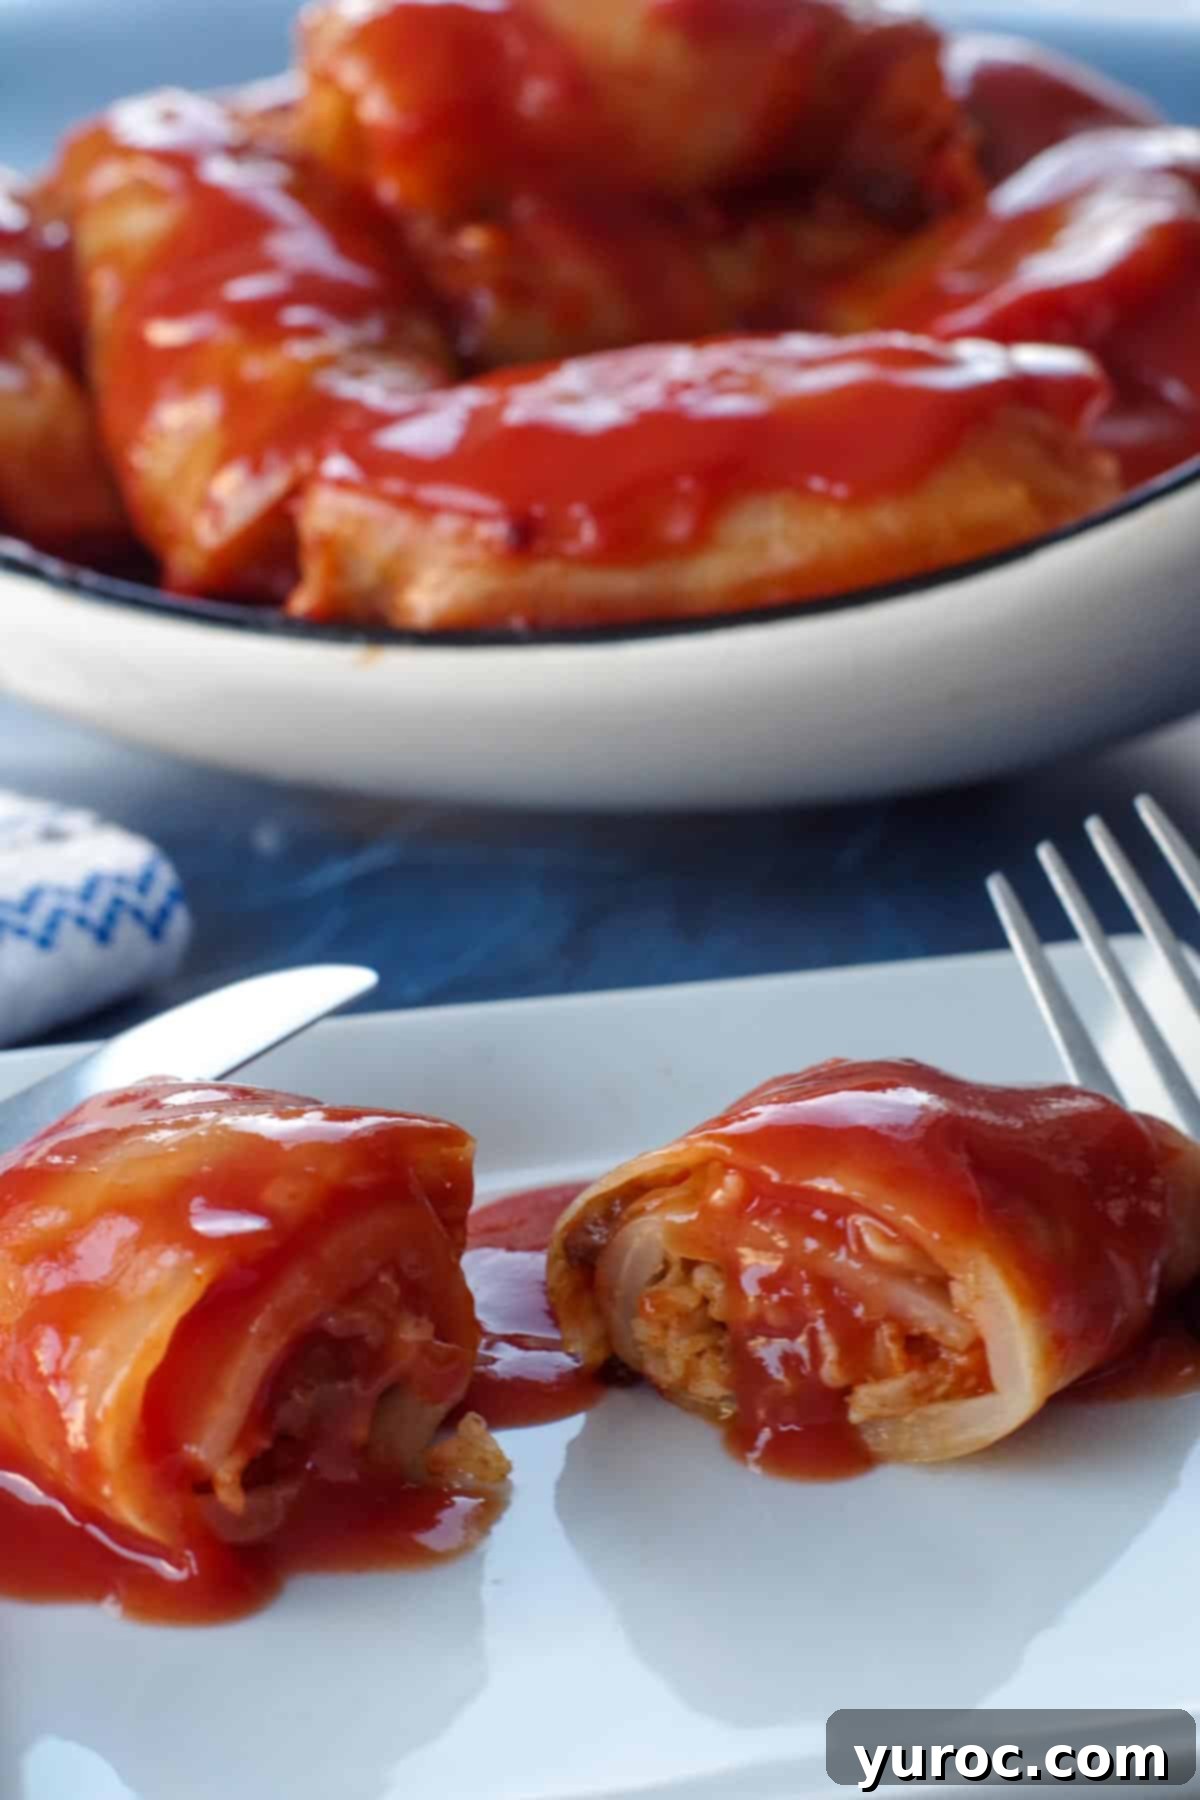
These Scottish-style Ukrainian cabbage rolls are a true crowd-pleaser, particularly cherished during festive gatherings, but they are equally wonderful any time of year. Their robust flavor and satisfying texture make them a perfect accompaniment to almost any holiday feast. They pair exceptionally well with classic Ukrainian dishes such as Potato and Cottage Cheese Perogies, a steaming bowl of borscht (especially with canned beets for quick prep), and a delightful Lemon Poppyseed Torte for a sweet finish. This recipe brings together the best of both worlds, offering a comforting and flavorful twist on a beloved classic.
🍒 Cherished Reader Reviews
Our “Scottish-Style” Cabbage Rolls have garnered enthusiastic praise from home cooks, becoming a staple in many kitchens. Here’s what some of our readers are saying:
“I got so many compliments from this!!” ⭐⭐⭐⭐⭐
“THANK THANK THANK YOU. I think you have the only recipe online for cabbage rolls that are made with cooked meat and cooked rice.
That is the only way my Grandma and Mum and aunts made them for 40 years.
Sincerely Grateful.!!” ⭐⭐⭐⭐⭐
It’s worth noting that these delicious cabbage rolls are a departure from a traditional Ukrainian Christmas Eve dinner, which typically features 12 meatless dishes. While my Baba (grandmother) might have raised an eyebrow, I simply can’t help but prefer these hearty beef-filled cabbage rolls over the more traditional, often plain, rice-only versions. This recipe offers a delightful and satisfying alternative that caters to a modern palate while still honoring the spirit of Ukrainian comfort food.
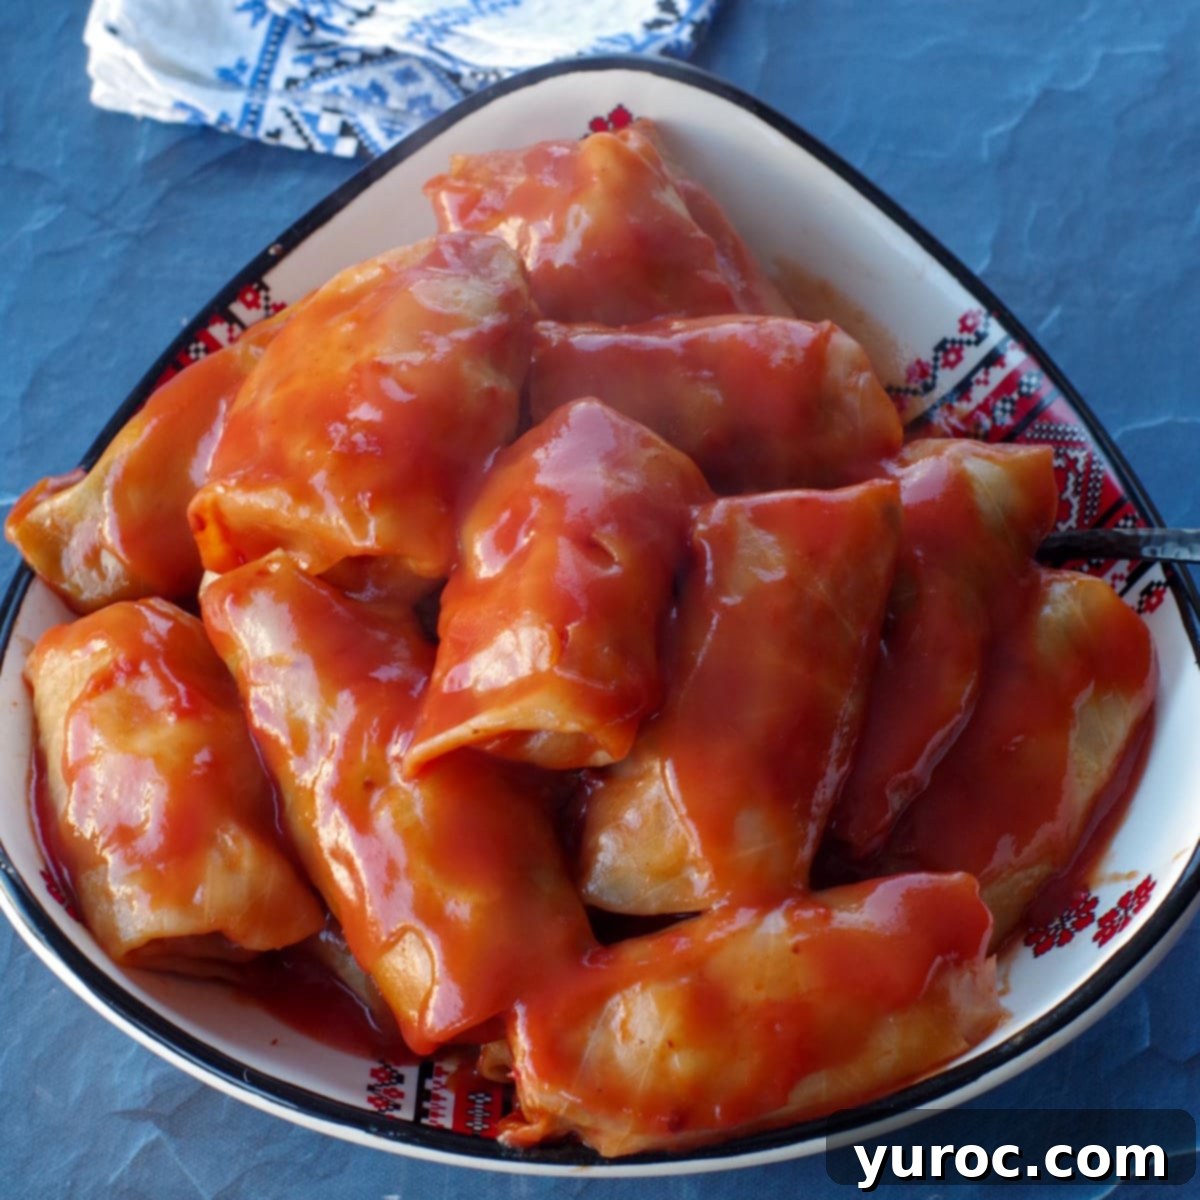
Why You’ll Love This Easy Cabbage Roll Recipe
These cabbage rolls aren’t just a meal; they’re a celebration of flavor and convenience. Here’s why they’re sure to become a new favorite in your kitchen:
- Effortless Cabbage Preparation: No Boiling Required! Forget the tedious and messy task of boiling a whole head of cabbage. Our recipe utilizes a brilliant microwave method that cooks the cabbage quickly and perfectly, making the leaves pliable and easy to work with. This dramatically cuts down on prep time and makes homemade cabbage rolls more accessible than ever before.
- Hearty & Satisfying: Packed with Flavor. Unlike traditional versions that often rely solely on rice, these cabbage rolls are generously filled with a robust mixture of ground beef and rice. This combination creates a rich, meaty, and incredibly filling dish that is sure to satisfy even the hungriest appetites. The savory filling paired with the tender cabbage and tangy tomato sauce makes for an unforgettable meal.
- Ideal for Make-Ahead & Freezing: Perfect for Busy Schedules. Cabbage rolls can be labor-intensive, making them an excellent candidate for meal prepping. You can assemble these ahead of time for big holiday meals or simply to have a delicious dinner ready on a busy weeknight. They store beautifully in the refrigerator for several days and freeze exceptionally well, ensuring you always have a taste of homemade comfort food at your fingertips.
- Simple, Economical Ingredients: Accessible to Everyone. You won’t need any gourmet or hard-to-find items for this recipe. We use basic, affordable ingredients that are likely already in your pantry or easily found at any grocery store. This makes our “Scottish-Style” cabbage rolls a budget-friendly option without compromising on flavor or quality.
The story behind these stuffed cabbage rolls is as rich as their flavor. This particular recipe originated from my Mom’s Auntie May, a Scottish woman who was married into a Ukrainian family. For my Mom, these were the only cabbage rolls she ever knew, as Auntie May’s version became her family’s go-to. She didn’t even realize the existence of other types (the truly traditional Ukrainian ones) until she met my Dad!
Funnily enough, my Mom actually prefers the traditional, plain rice-filled holubtsi now. However, she continued to make these ground beef cabbage rolls because my Dad, my siblings, and I absolutely adored them. It’s a testament to how family traditions evolve and how certain dishes, regardless of their origin, become deeply ingrained in our hearts and palates.
🥘 Essential Ingredient Notes
My Mom recounted that she started adding ketchup to these cabbage rolls out of a hunch that they needed a little more flavor, thinking, “ketchup goes so good with hamburger…” This simple addition proved to be a stroke of brilliance, elevating the sauce to a whole new level! She also noted that this method was considerably easier than preparing the traditional ones. Absolutely brilliant!
For this comforting recipe, you’ll need the following ingredients:
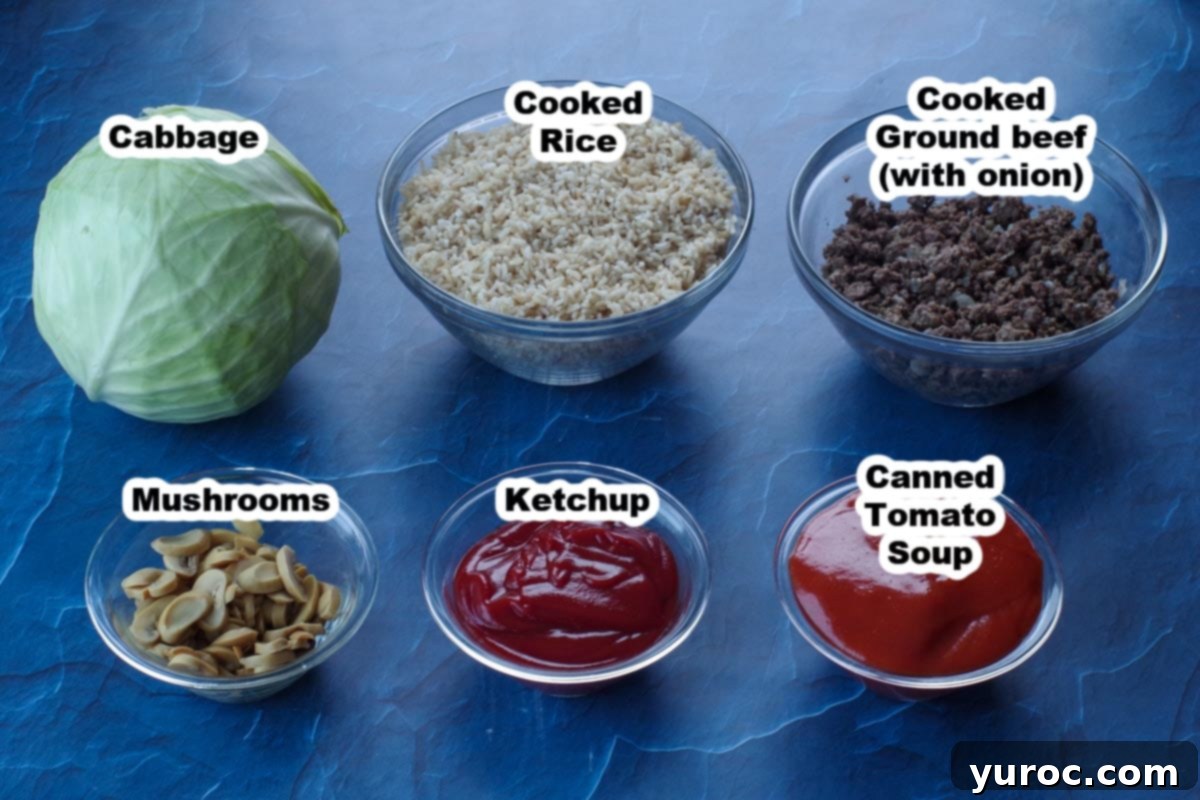
- Large Head of Green Cabbage: I highly recommend using regular green cabbage. Its sturdy leaves hold up beautifully during cooking and rolling, providing a satisfying texture and a mildly sweet flavor that complements the rich filling.
- Cooked Brown Rice: While I often opt for instant brown rice for its speed and convenience, feel free to use any type of cooked rice you prefer—be it white rice, basmati, or even a wild rice blend. Just ensure it’s cooked according to package directions before mixing into the filling.
- Ground Beef: For a healthier and less greasy end product, I prefer to use extra lean ground beef. However, lean or regular ground beef works perfectly fine. The key is to brown it thoroughly and drain off any excess fat before combining with other ingredients.
- Canned Mushrooms: These are an economical and incredibly convenient addition, adding a layer of umami depth to the filling. If you prefer, fresh mushrooms can be sautéed and used instead, offering a slightly different texture.
- Ketchup: This might seem like an unconventional ingredient for cabbage rolls, but trust me, it’s the secret weapon! Ketchup adds a subtle sweetness and tang that truly enhances the flavor profile of the beef and rice filling, creating a uniquely delicious taste. Heinz is a reliable choice.
- Condensed Canned Tomato Soup: This forms the delicious, comforting sauce that coats and tenderizes the cabbage rolls as they bake. Campbell’s Tomato Soup is my go-to for its consistent flavor and texture, providing that classic, hearty sauce.
*A complete list of ingredients and their exact quantities can be found in the comprehensive recipe card below.
📖 Recipe Variations & Smart Substitutions
This recipe is wonderfully adaptable, allowing you to tailor it to your preferences or what you have on hand. Don’t hesitate to experiment!
- Slow Cooker Method: For a truly hands-off approach, you can cook these cabbage rolls in your crock pot. Arrange them in the slow cooker, pour over the tomato soup, and cook on low for approximately 6 hours, or until the cabbage is fork-tender and the flavors have melded beautifully.
- Instant Pot Convenience: If you’re short on time, the Instant Pot is your friend! These cabbage rolls can be cooked in about 20 minutes under pressure, making them a fantastic option for a quicker meal.
- Gluten-Free Option: To make this recipe gluten-free, simply ensure you use a certified gluten-free condensed tomato soup. Most other ingredients are naturally gluten-free, but always check labels.
- Ground Meat Alternatives: While ground beef is traditional for this “Scottish-style” version, you have flexibility. Feel free to use regular ground beef, lean, extra lean, or even a delicious blend of half ground beef and half ground pork for added richness and flavor. Ground turkey or chicken could also be used for a lighter option.
- Fresh vs. Canned Mushrooms: If you prefer the texture and earthy flavor of fresh mushrooms, simply sauté them with the onions and ground beef until softened before mixing them into the filling. This adds a lovely fresh element.
- Flavorful Toppings: Enhance your serving by adding a dollop of sour cream on top of each cabbage roll – its creamy tang pairs perfectly with the savory dish. A sprinkle of fresh dill or parsley also adds a vibrant color and fresh herbaceous note.
Let’s be honest, these homemade cabbage rolls are certainly not a quick side dish! They are indeed labor-intensive, a true labor of love. This is precisely why, when I was growing up, we only had them for special holiday dinners. However, I can wholeheartedly guarantee that these are the best stuffed cabbage rolls (with a meat and rice filling) I have ever tasted. The time and effort invested truly pay off in the unparalleled flavor and comfort they deliver!
But if your schedule is tight or you’re simply feeling lazy, yet still crave that incredible cabbage roll flavor, you must try my Slow Cooker Lazy Cabbage Rolls! They capture the exact same delicious taste without all the rolling and intricate prep, making them perfect for those busy days.
🔪 Step-by-Step: How to Make Ground Beef and Rice Cabbage Rolls
Making these delightful cabbage rolls is a process, but with our detailed steps, you’ll find it manageable and rewarding. Don’t be intimidated by the number of steps – many can be done in advance!
*Pro Tip: I often cook the ground beef and rice the night before to save significant time on the day of assembly.
Phase 1: Advance Preparation (Can be done up to 3 days ahead):
- Preheat your oven to 250 degrees F (121 degrees C). Lightly spray a large casserole dish or a sturdy roaster pan with a non-stick cooking spray to prevent sticking.
- In a large skillet or Dutch oven on the stovetop, brown the ground beef with the chopped onion over medium heat until the beef is fully cooked and the onions are soft and translucent. If you’re using fresh mushrooms, add them when the beef is nearly done and continue cooking until softened. If you’re using canned mushrooms, you can simply add them later when you mix the filling ingredients. Once cooked, drain off any excess fat from the beef mixture.
- Cook the rice according to the package directions. For instant rice, this is typically a quick process. Ensure the rice is fully cooked but not mushy, as it will continue to cook in the oven.
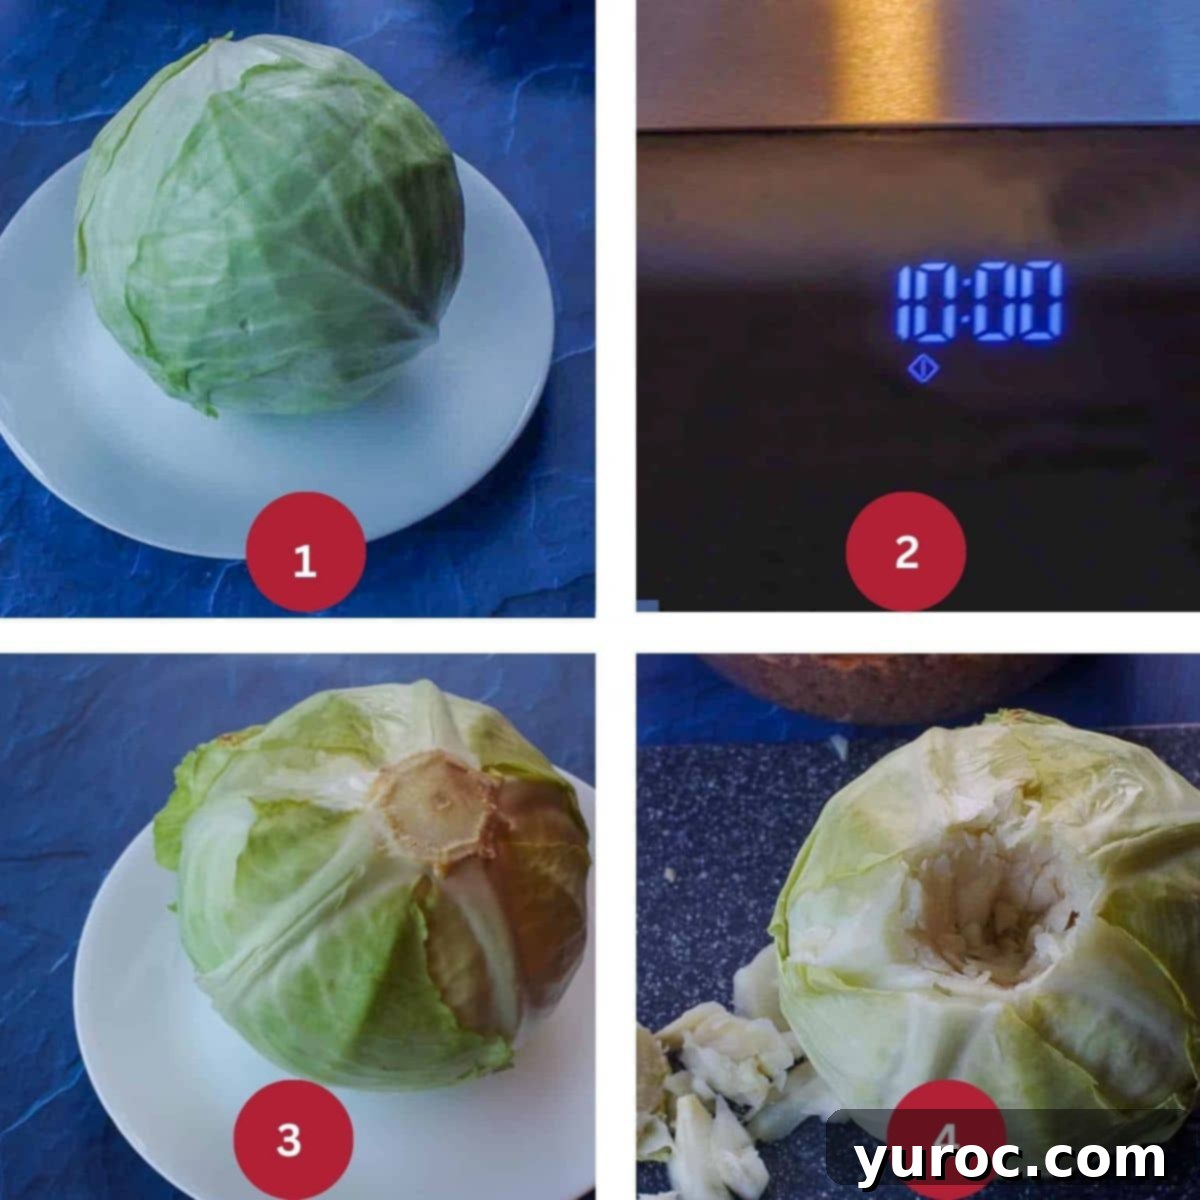
Phase 2: Preparing the Cabbage (STEP 1): Place the whole head of cabbage on a microwave-safe plate or dish (Image 1). Microwave the cabbage for 10 minutes, then carefully remove it and allow it to cool slightly (Image 2). Flip the cabbage over, return it to the microwave, and cook for another 10 minutes (my Mom adopted this faster microwave method when she got her first microwave in the 1980s, and it truly is a game-changer!) (Image 3). Let it cool for a few minutes until it’s comfortable enough to handle. Then, carefully remove the core from the cabbage (Image 4).
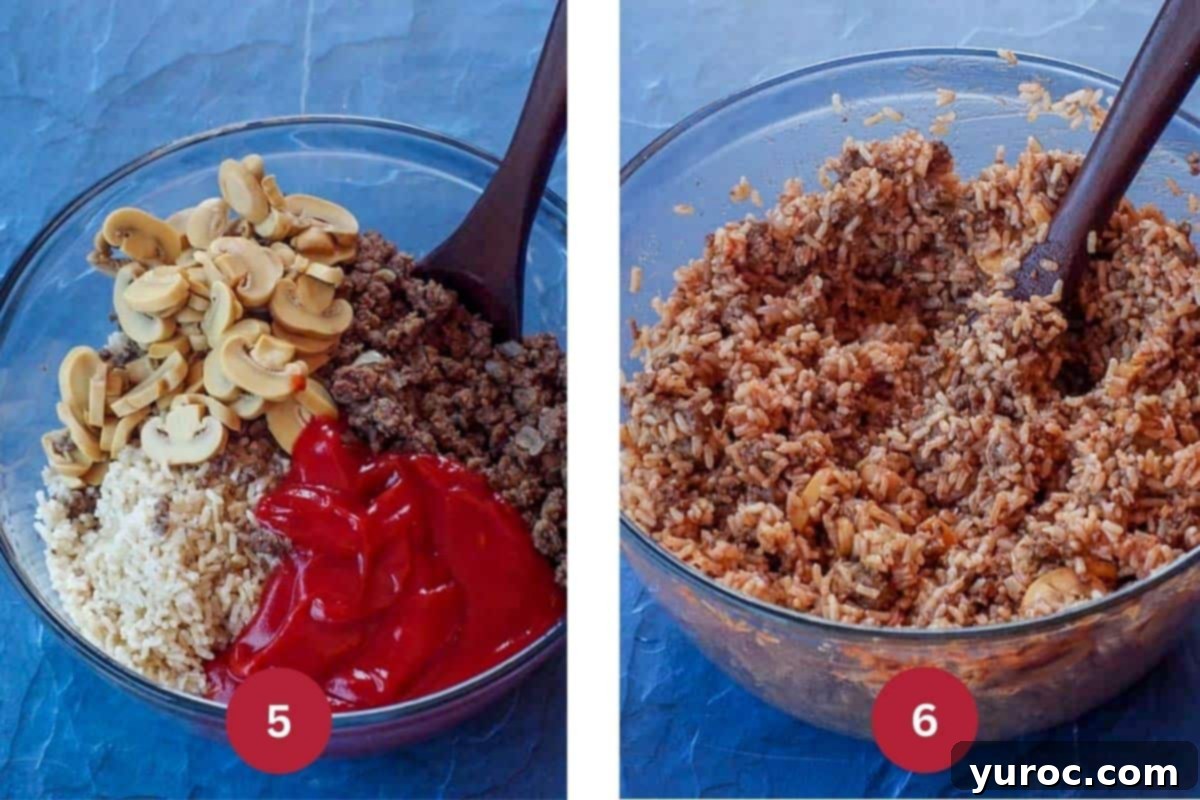
Phase 3: Crafting the Flavorful Filling (STEP 2): While the cabbage cools, combine the cooked ground meat and onion mixture, cooked rice, and canned mushrooms (if using fresh, ensure they are cooked) and ketchup in a large mixing bowl (Image 5). Mix all the ingredients thoroughly until they are well combined. Taste and adjust the ketchup quantity to your preference, adding a little more if you desire a sweeter or tangier flavor (Image 6).
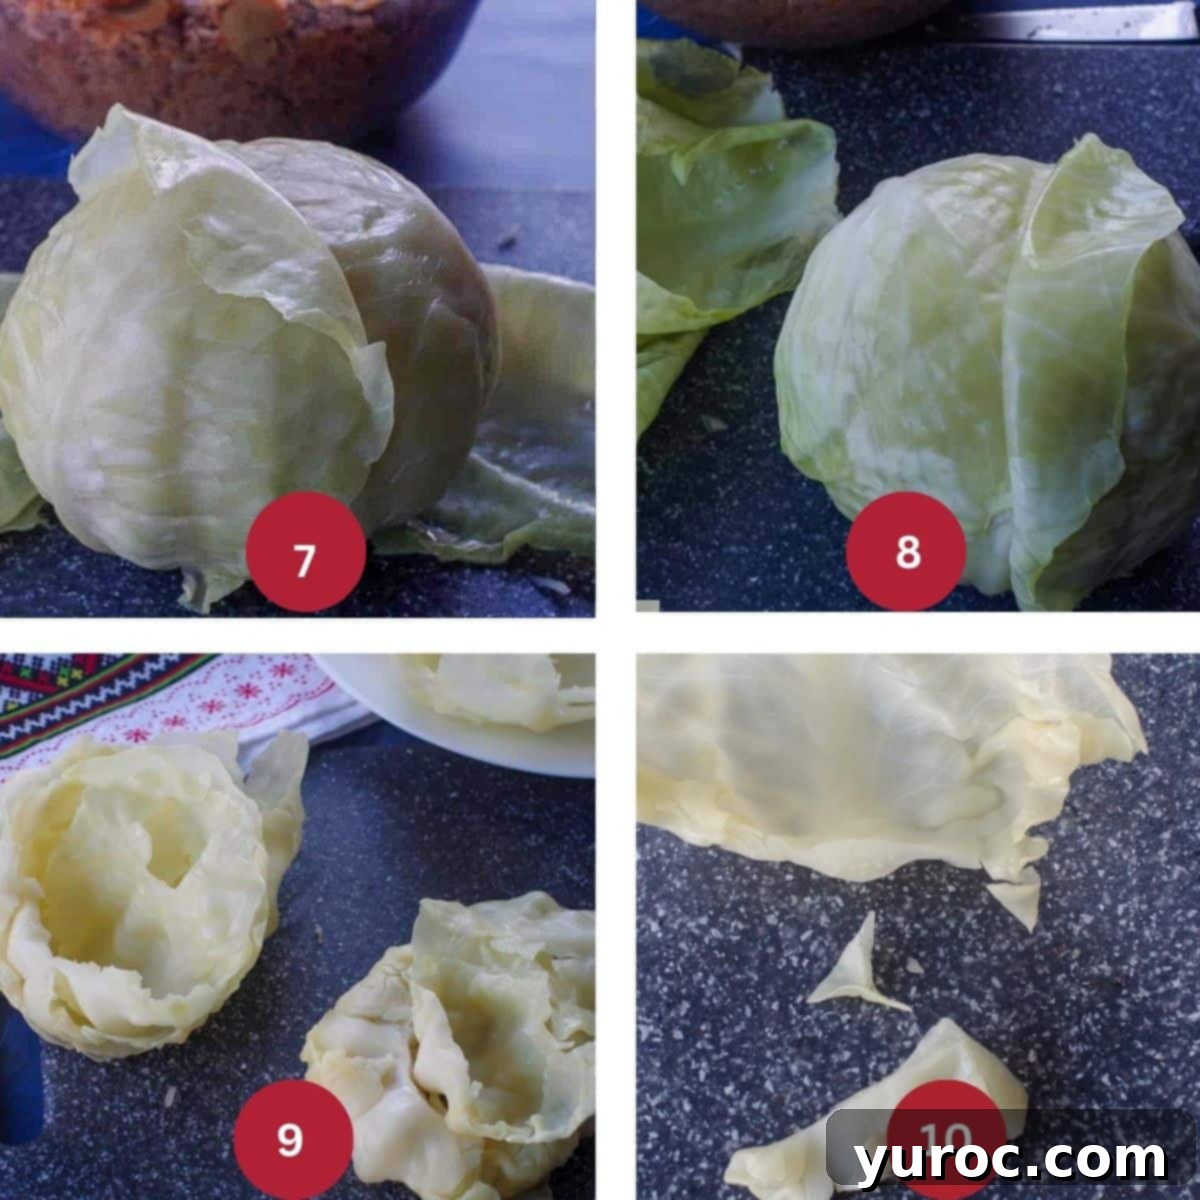
Phase 4: Preparing the Cabbage Leaves (STEP 3): Begin gently peeling away the softened cabbage leaves from the head (Image 7). *Important Tip: If the leaves are not coming off easily or are tearing, return the cabbage to the microwave for another 5 minutes to soften them further. Continue to very gently peel away the leaves (Image 8). *Should you encounter difficulty again, and the leaves begin to rip, place the cabbage back in the microwave in 2-minute increments until they are pliable. Continue this process until all usable leaves have been removed (Image 9). You can trim off any discolored or tough parts of the leaves and discard any that are too damaged to roll. Set aside any leaves that are too ripped – these can be used for our “Pro Tip” for a lazy cabbage roll casserole. Place a single cabbage leaf on a clean work surface (a cutting board works perfectly) and carefully cut off about ½ to ¾ an inch of the tough, thick stem part at the bottom of the leaf (Image 10). This makes rolling much easier and the finished product more tender.
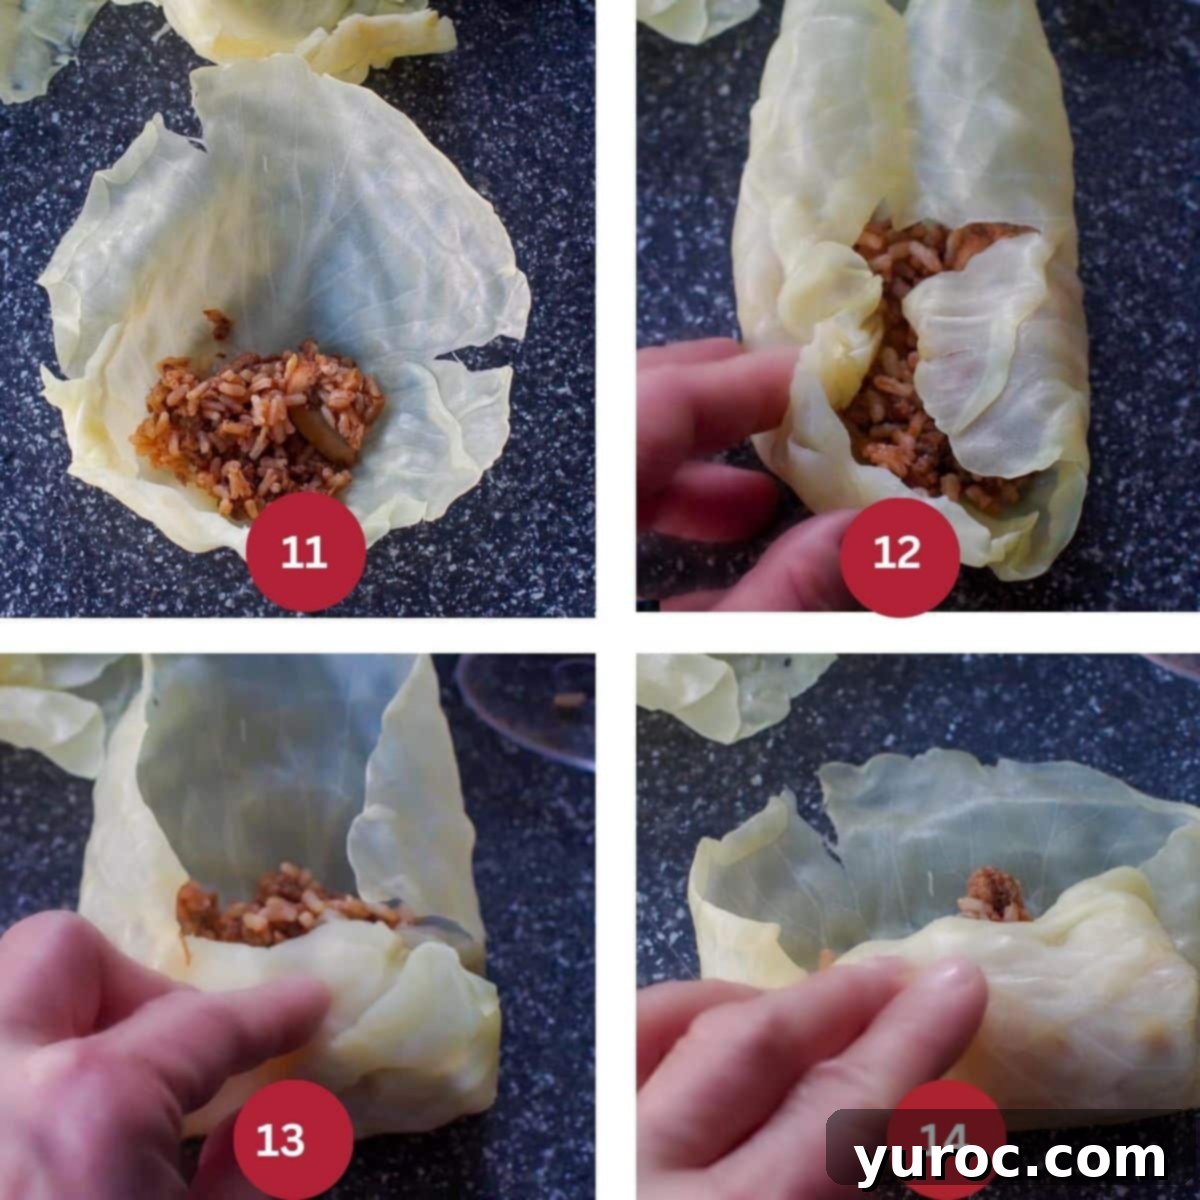
Phase 5: Rolling the Perfect Cabbage Rolls (STEP 4): Take a prepared cabbage leaf and place about a tablespoon of the delicious filling in the center (the exact amount will vary based on the leaf size – use slightly more for larger leaves, slightly less for very small ones) (Image 11). Start by folding the sides of the cabbage leaf inwards, then fold the bottom edge up over the filling (Image 12). Continue to tightly roll the cabbage roll from the bottom upwards, just as you would roll a burrito or wrap (Image 13). Roll it snugly all the way to the top (Image 14). *Once rolled, you can gently push any stray filling back into the roll. Place the finished cabbage roll, seam-side down, into your prepared casserole dish. This technique helps prevent them from unrolling during baking.
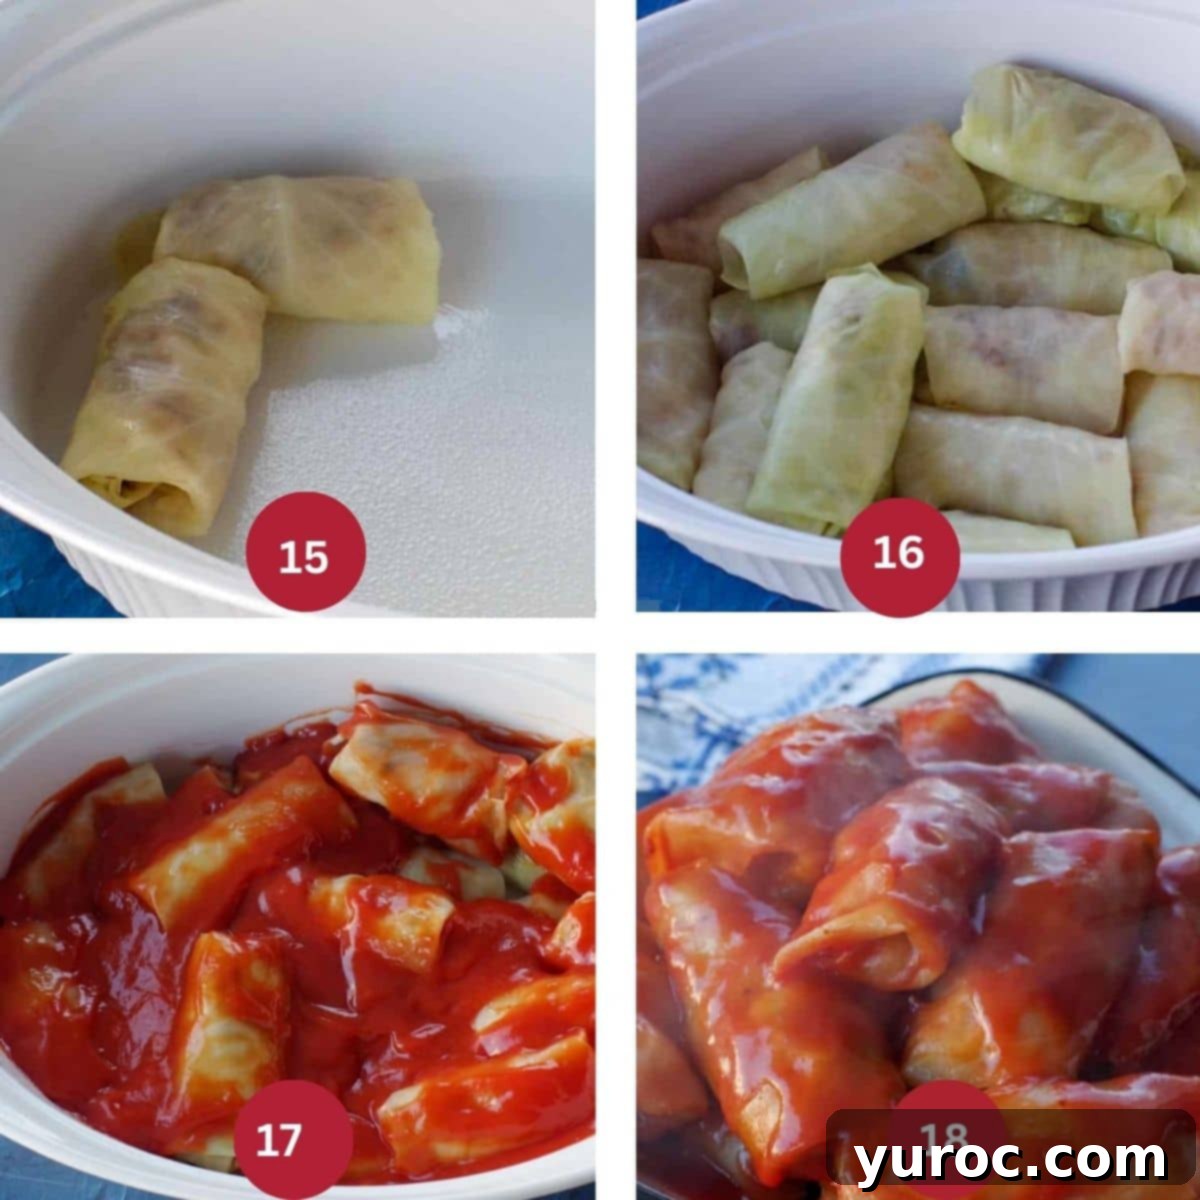
Phase 6: Baking to Perfection (STEP 5): Carefully arrange the rolled cabbage rolls in the prepared baking dish (Image 15). Continue adding them, stacking them gently if necessary, until all the cabbage rolls are neatly placed in the dish (Image 16). Evenly pour the condensed tomato soup over the layers of cabbage rolls, ensuring they are well covered (Image 17). Cover the casserole dish tightly with a lid or aluminum foil. Bake in the preheated oven for approximately 2 hours, or until the cabbage is wonderfully tender and the filling is heated through. Serve these comforting rolls warm (Image 18). *As an alternative cooking method, you can also slow cook these for 6 hours on a low setting in your crock pot for a hands-off approach.
Pro Tip: Making the Most of Leftovers and Torn Leaves
Don’t let any leftover cabbage roll filling or torn cabbage leaves go to waste! They’re perfect for creating a quick and delicious “lazy” cabbage roll casserole, often referred to as deconstructed cabbage rolls. This is a fantastic way to enjoy all the flavors without the rolling.
Alternatively, the versatile filling can also be used to make a delightful Stuffed Green Pepper Casserole if you’re looking for a slightly different, yet equally comforting, meal.
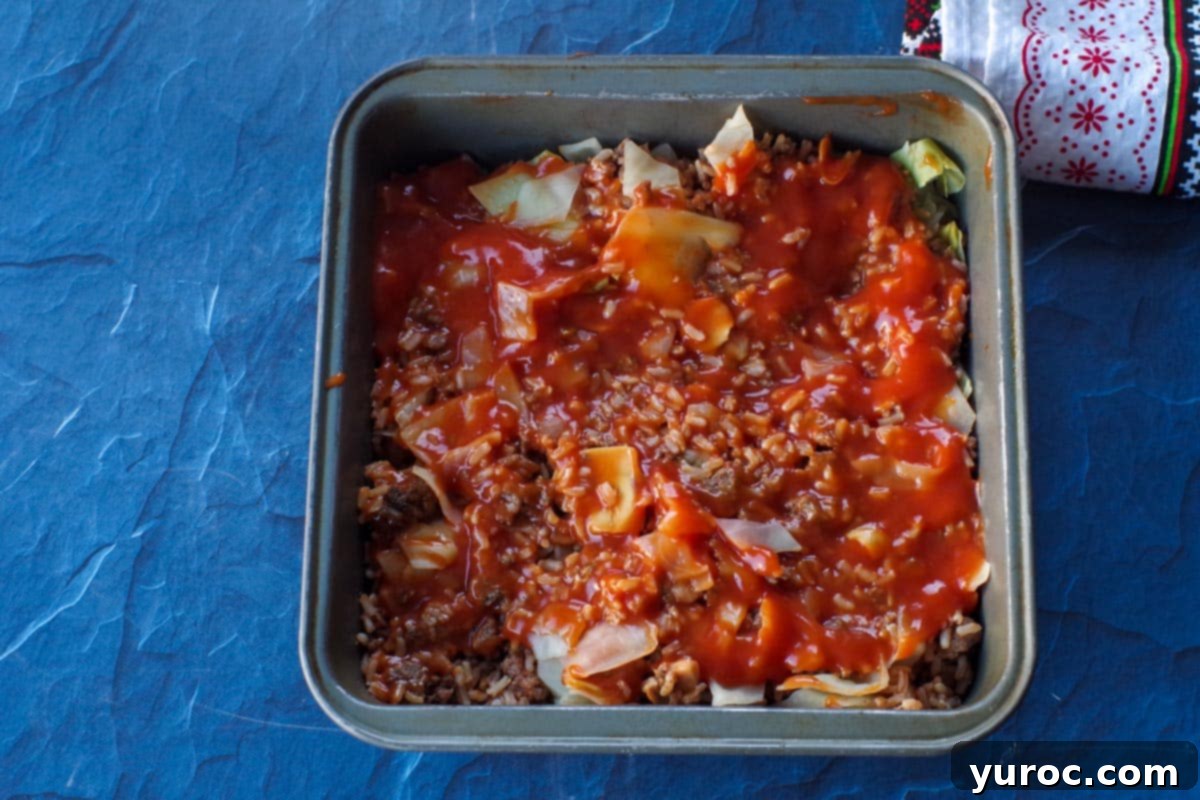
Simply add your leftover filling and any chopped, unusable cabbage leaves to a small oven-safe pan. Cover the mixture generously with a can of condensed tomato soup.
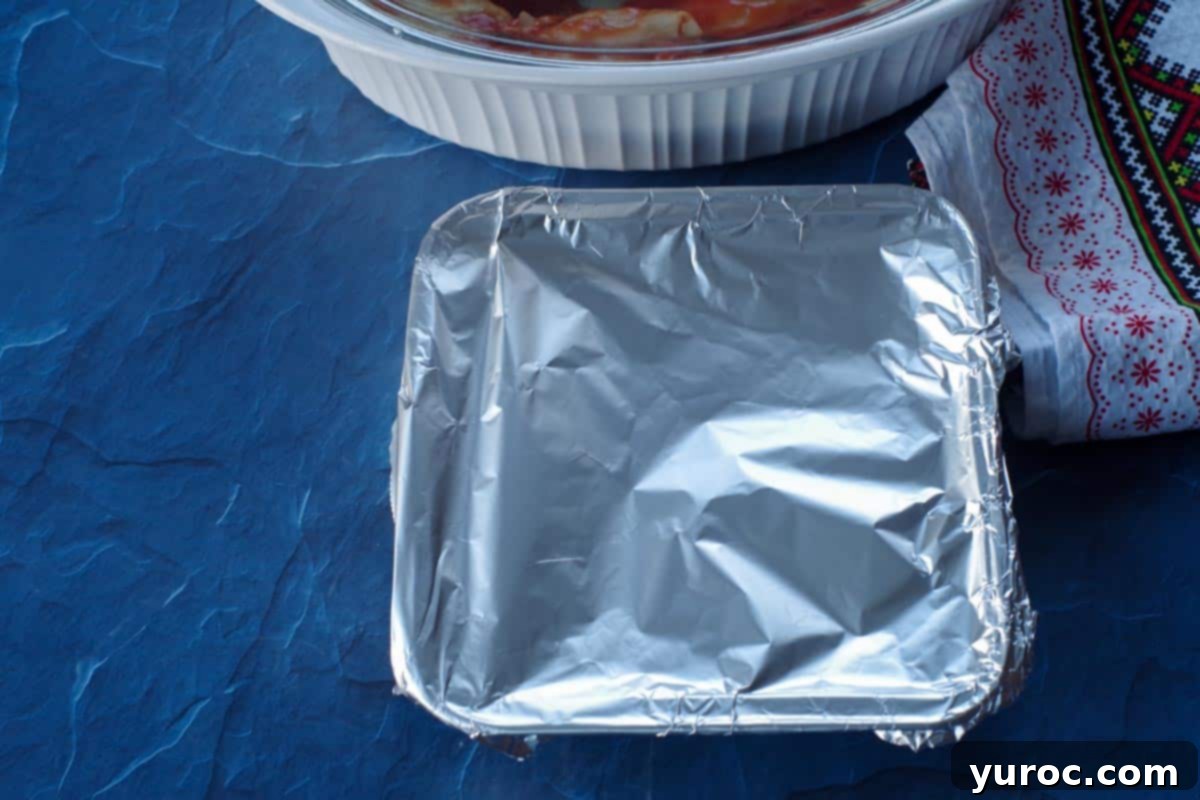
Cover the pan tightly with aluminum foil and bake in your preheated oven (around 350°F or 175°C) for approximately 1 hour. The cooking time may vary slightly depending on the quantity of your leftovers.
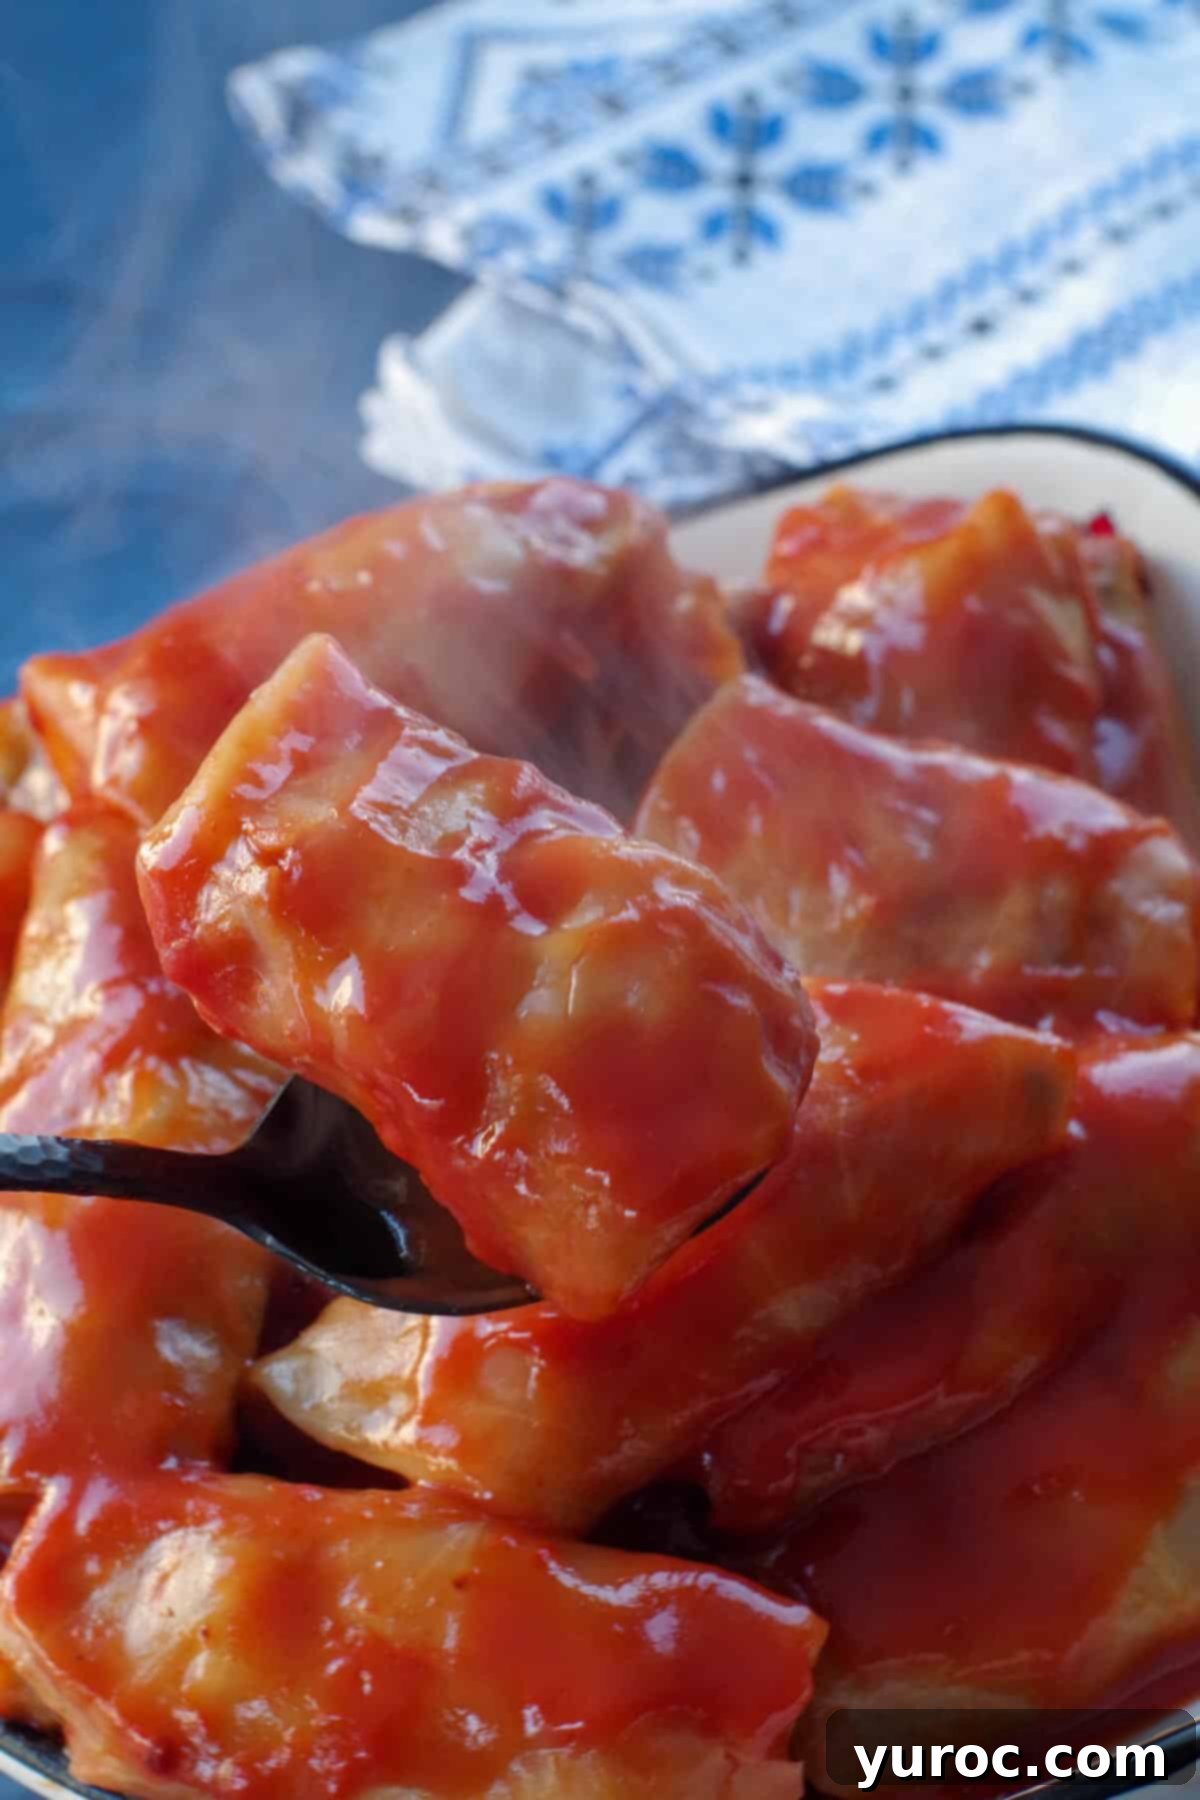
🥗 Perfect Pairings: What to Serve with Cabbage Rolls
Cabbage rolls are a complete meal in themselves, but they truly shine when served alongside complementary dishes. Here are some ideas for traditional and creative pairings:
- Classic Ukrainian Comforts: Traditionally, cabbage rolls are often served with a hearty bowl of borscht (as shown below), savory Air Fryer Kielbasa (Kovbasa), and fluffy Potato and Cottage Cheese Perogies. These combinations create an authentic and fulfilling Ukrainian feast.
- Modern Twists & Everyday Sides: Beyond the traditional, I also love to serve them with speedier alternatives like Shortcut Lazy Pierogies. For a refreshing contrast, a side of Quick Cucumber Kimchi adds a delightful crunch and tang.
- Breads for Sopping: Don’t forget something to soak up that delicious tomato sauce! Warm Dinner buns are always a hit, or for special occasions, a slice of traditional Paska Ukrainian Bread adds a wonderful festive touch.
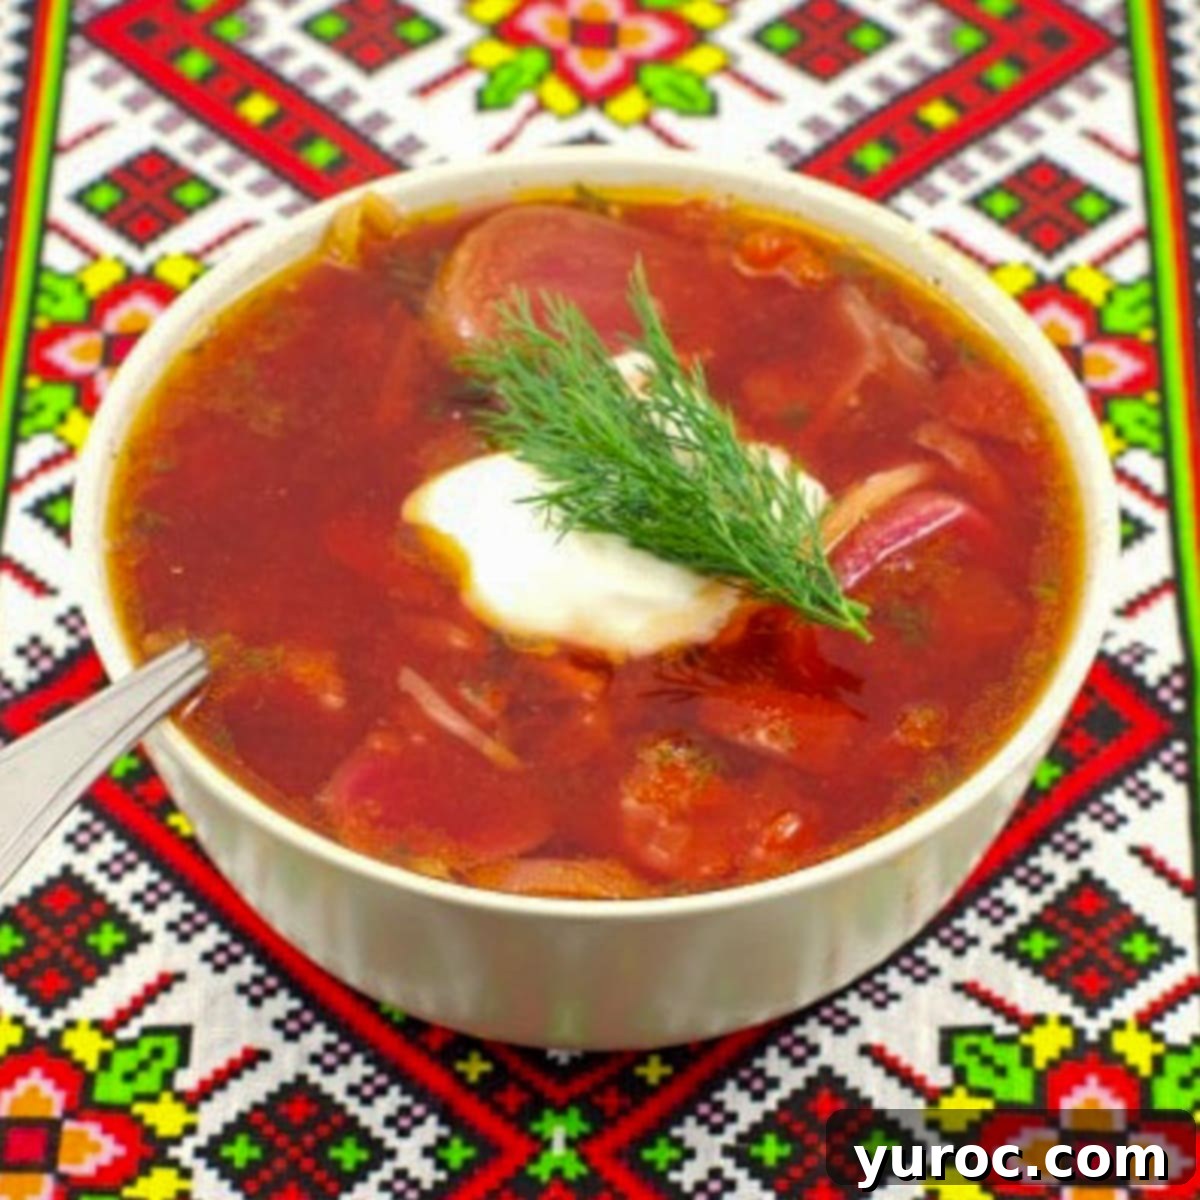
🌡️ Storing and Freezing Cabbage Rolls
One of the many advantages of these cabbage rolls is how well they store, making them perfect for meal prep or enjoying leftovers throughout the week.
- Refrigerator Storage: Leftover cabbage rolls can be stored in an airtight container in the refrigerator for up to 4 days. They often taste even better the next day as the flavors have more time to meld.
- Make-Ahead Mastery: These are ideal for making in advance when you have a bit more free time. Prepare them fully, bake, and then cool before storing. This is a huge bonus for busy weeks or upcoming holiday meals.
- Freezer-Friendly: Cabbage rolls freeze exceptionally well, extending their shelf life for a very long time – up to 6 months! For best results, allow them to cool completely. You can freeze them individually by wrapping each roll tightly in plastic wrap, then placing them in a freezer-safe bag. Alternatively, arrange them in an airtight freezer-safe container, separating layers with parchment paper to prevent sticking. When ready to enjoy, thaw them overnight in the refrigerator and reheat gently in the oven or microwave until warmed through.
❔ Frequently Asked Questions (FAQs)
While regular green cabbage is recommended for its sturdiness and ideal flavor, you can certainly experiment with other varieties like savoy cabbage or Napa cabbage. Just be aware that their texture might be slightly different, and savoy cabbage, for instance, might be a bit more delicate to roll.
No, the microwave method is simply a quicker and easier way to soften the cabbage leaves. If you prefer the traditional method, you can boil the whole head of cabbage in a large pot of salted water for about 10-15 minutes, or until the outer leaves are tender enough to peel away.
Cabbage leaves usually tear if they haven’t been softened enough. If you encounter tearing, simply return the cabbage to the microwave for additional 2-5 minute increments until the leaves are pliable and peel off easily without resistance. Patience here is key!
There are a few tricks for this: first, make sure you roll the cabbage rolls as tightly as possible. Second, always place them seam-side down in the baking dish. Lastly, packing the rolls snugly together in the dish provides mutual support, helping them maintain their shape throughout the baking process.
Absolutely! While ground beef is featured in this recipe, you can easily substitute it with ground pork, ground turkey, or a mixture of beef and pork. Each will impart a slightly different flavor profile, but all will be delicious. Just ensure the meat is fully cooked and drained before mixing with the rice and other ingredients.
More Ukrainian-Inspired Recipes to Explore
If you loved these cabbage rolls, you’ll surely enjoy exploring more delicious Ukrainian-inspired recipes from our kitchen:
- Ukrainian Walnut Torte
- Ukrainian Daughter’s Crock Pot Casserole
- Loaded Pierogi Soup
- Pampushky – Ukrainian Doughnuts
Did your family ❤️ this recipe? Did you know that commenting and ⭐ rating recipes is one of the best ways to support your favorite recipe creators? If you LOVED this recipe, please take a moment to comment and rate it in the recipe card below, or share photos on social media using the hashtag #foodmeanderings or by tagging @foodmeanderings! Your feedback means the world to us!

📋 “Scottish-Style” Ukrainian Cabbage Rolls (with Ground Beef & Rice)
Equipment
- large casserole dish (or roaster pan)
Ingredients
- 1 large head of green cabbage
- 1 lb extra lean ground beef
- 4 cups cooked brown rice (about 10 servings of instant rice, or any cooked rice)
- 1 medium onion diced
- 1 cup sliced mushrooms (canned, or sautéed fresh)
- 1 cup ketchup (add additional to taste)
- 2 10 oz cans condensed tomato soup (*use gluten-free if needed)
Instructions
- Step 1: Prepare Your Baking Dish & Oven. Preheat your oven to 250 degrees F (121 degrees C). Lightly spray a large casserole dish or roaster pan with a non-stick cooking spray to ensure the cabbage rolls don’t stick.
- Step 2: Cook Beef & Rice. Brown the ground beef with the diced onion in a large skillet until the beef is fully cooked and the onion is translucent. Drain off any excess fat. Separately, cook your brown rice according to package directions. *You can easily complete these two steps the night before to streamline your cooking process.
- Step 3: Microwave the Cabbage. Place the whole head of cabbage on a microwave-safe plate. Cook in the microwave for 10 minutes.
- Step 4: Cool & Flip Cabbage. Carefully remove the cabbage from the microwave and allow it to cool for a few minutes. Turn the cabbage over and return it to the microwave to cook for another 10 minutes.
- Step 5: Prepare the Filling. While the cabbage is cooling, combine the cooked ground beef and onion mixture, cooked rice, sliced mushrooms (if using canned, add now; if fresh, they should have been cooked with the beef), and ketchup in a large bowl.
- Step 6: Mix & Season Filling. Mix all filling ingredients thoroughly until well combined. Taste the mixture and add additional ketchup to your preference if you desire more tang or sweetness.
- Step 7: Core Cabbage & Peel Leaves. After the second microwave session and cooling, carefully remove the core from the cabbage. Begin gently peeling away the softened cabbage leaves.
- Step 8: Soften Stubborn Leaves. If the leaves are difficult to peel or start tearing, return the entire cabbage head to the microwave for another 5 minutes to soften further. Continue peeling gently.
- Step 9: Continue Peeling in Increments. If leaves still tear at any point, microwave the cabbage in 2-minute increments until they can be easily removed. Continue this until all usable leaves have been peeled. *You may need to cut away more of the core as you go to facilitate easier leaf removal.
- Step 10: Trim & Prep Leaves. Trim off any bad parts on the leaves or discard heavily damaged leaves. For leaves that are too ripped to roll, save them with any leftover filling for a “lazy cabbage roll” casserole (see Pro Tip). Place a good cabbage leaf on a clean work surface (like a cutting board) and cut off about ½ to ¾ inch of the tough, thick stem portion at the bottom.
- Step 11: Fill the Leaves. Spoon approximately one tablespoon of the prepared filling into the middle of each cabbage leaf. Adjust the amount based on the size of the individual leaf – larger leaves will need a bit more filling.
- Step 12: Fold the Sides. Begin rolling by folding the two side edges of the cabbage leaf inwards, over the filling.
- Step 13: Roll from the Bottom. Next, fold the bottom edge of the leaf up and over the folded sides and filling, then continue to roll the cabbage tightly upwards, as you would a burrito or spring roll.
- Step 14: Finish Rolling. Continue rolling all the way up to the top of the leaf. If any filling escapes, gently push it back in. Place the finished cabbage roll seam-side down in your prepared casserole dish.
- Step 15: Layer in Baking Dish. Continue placing the rolled cabbage rolls gently into the prepared baking dish. You can stack them if necessary, ensuring they fit snugly. *Refer to the Pro Tip for ideas on using any leftover filling and ripped leaves.
- Step 16: Add Tomato Soup. Pour the two cans of condensed tomato soup evenly over the layers of cabbage rolls, ensuring they are well coated. Cover the dish tightly with a lid or aluminum foil.
- Step 17: Bake Until Tender. Bake in the preheated oven for approximately 2 hours, or until the cabbage leaves are wonderfully tender and the filling is heated through. Serve these comforting cabbage rolls warm. *Alternatively, for a slow-cooked option, you can cook them in your crock pot on low for 6 hours.
Notes
Nutrition
🍒 More Enthusiastic Feedback!
We love hearing from you! Here’s another glowing review for these beloved cabbage rolls:
“I got so many compliments from this!!” ⭐⭐⭐⭐⭐
