Easy Homemade Dairy Queen Copycat Cookie Dough Ice Cream Cake Recipe
There’s something truly magical about ice cream cakes, especially when they combine the creamy coolness of ice cream with the irresistible chewiness of cookie dough. If you’ve ever craved the iconic Dairy Queen Cookie Dough Blizzard in cake form, get ready to be amazed! This homemade Cookie Dough Ice Cream Cake (Dairy Queen Copycat) recipe is not only incredibly delicious but also surprisingly simple to create, using readily available store-bought ingredients like ice cream and edible cookie dough. Forget the fuss of complicated baking; this dessert brings all the joy with minimal effort.
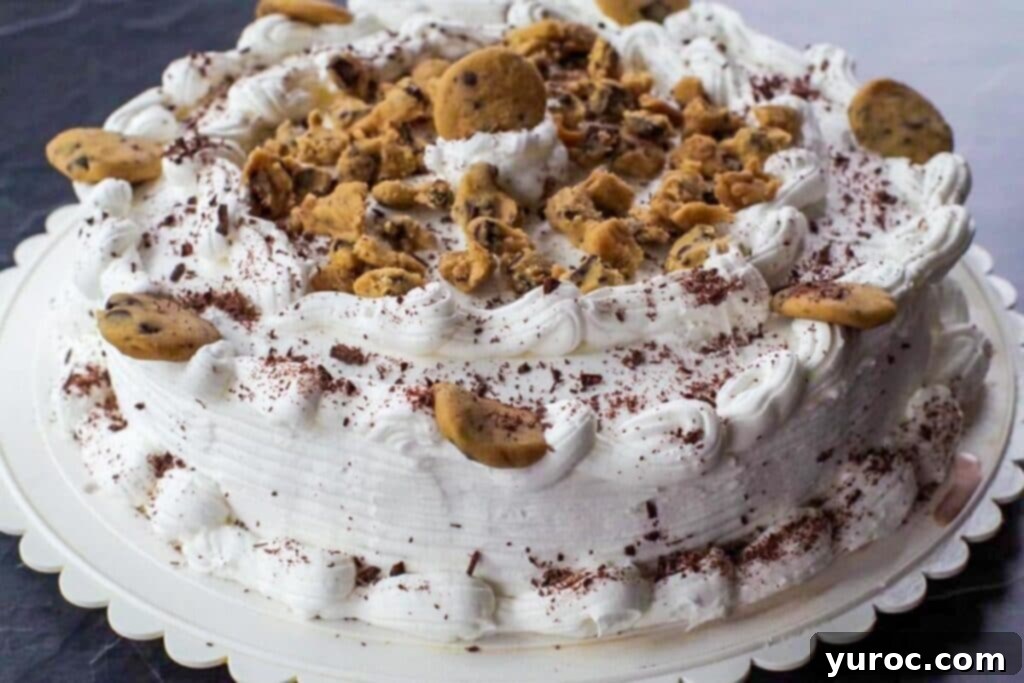
Ice cream cakes are the quintessential celebratory dessert, perfect for any special occasion, from summer backyard barbecues to cozy winter birthdays. While they might seem like a seasonal treat, their universal appeal makes them ideal year-round. I personally find myself requesting an ice cream cake for my January birthday, proving that this delightful dessert knows no season. This particular cookie dough ice cream cake was lovingly inspired by my popular Neapolitan Ice Cream Cake, a testament to the endless possibilities of frozen dessert creations.
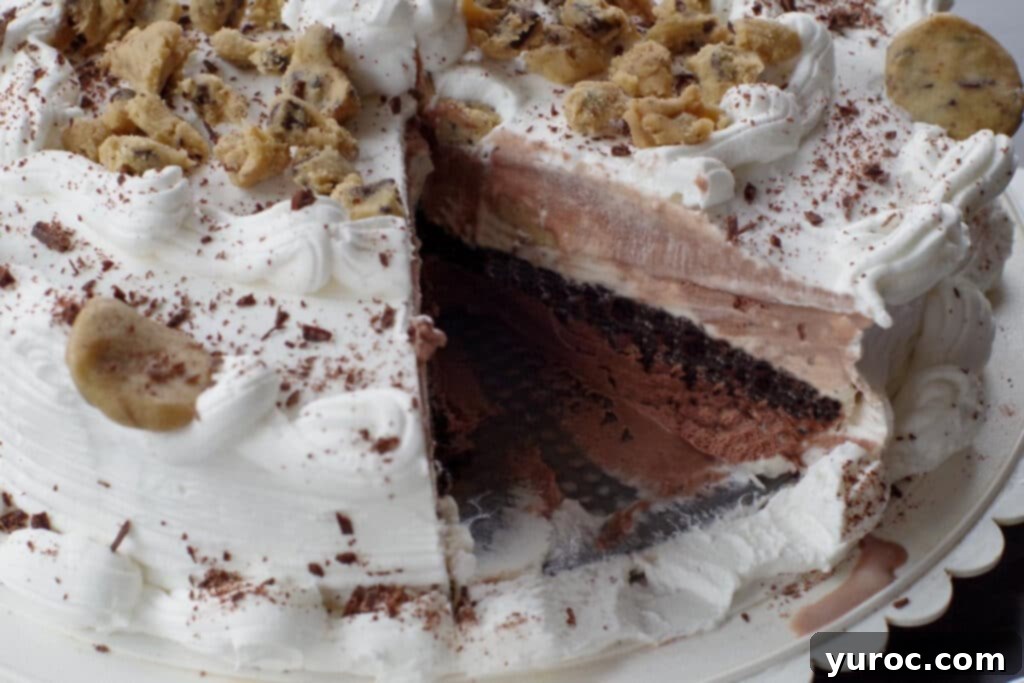
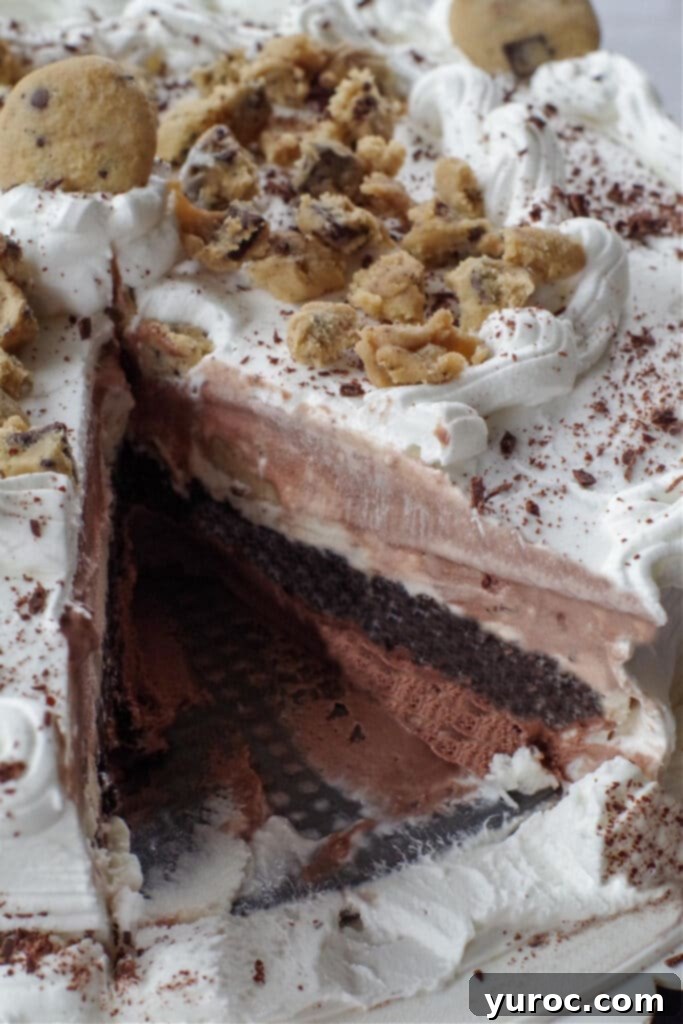
What makes this Dairy Queen copycat so exceptional is its simplicity without compromising on flavor or texture. We’re talking about layers of rich vanilla and chocolate ice cream, generously studded with chunks of edible chocolate chip cookie dough, all built upon a decadent Oreo cookie crust. The whole masterpiece is then crowned with a smooth, perfectly pipeable frosting, making it taste uncannily like the beloved Dairy Queen Cookie Dough Blizzard in a convenient, sliceable cake form. If you’re a fan of ice cream cakes and delightful desserts that impress, you’ll definitely want to try my Red Velvet Ice Cream Cake too, featuring fluffy cake layers and a no-churn ice cream filling!
Why This Cookie Dough Ice Cream Cake is a Must-Try
- Effortlessly Delicious: Utilizing store-bought ingredients simplifies the process dramatically, letting you enjoy a gourmet-tasting dessert without the extensive prep.
- Dairy Queen Flavor at Home: This recipe perfectly captures the essence of a Cookie Dough Blizzard, delivering that signature creamy, chunky, and sweet profile you adore.
- No-Bake Brilliance: Unlike traditional cakes, there’s no oven required, making it a perfect project for warmer months or when you just want to keep things cool in the kitchen.
- Crowd-Pleaser: Everyone loves cookie dough and ice cream. Combine them, and you have an undeniable hit for parties, birthdays, or any gathering.
- Customizable: While it’s a copycat, there’s plenty of room to tweak flavors and textures to suit your personal preferences.
🥘 Ingredient Notes for Your Homemade DQ Ice Cream Cake
This Dairy Queen ice cream cake recipe is a true no-bake ice cream cake, meaning it focuses entirely on layers of delicious frozen treats rather than traditional cake layers. While some ice cream cakes, like my Red Velvet Ice Cream Cake, incorporate actual cake, this version relies on an Oreo cookie crust and delightful cookie dough bits for incredible texture and flavor. It’s essentially eating a sophisticated, layered ice cream dessert in the form of a cake!
- Vanilla and Chocolate Ice Cream: These classic flavors form the creamy foundation of our cake. I personally recommend using high-quality vanilla and chocolate ice cream brands for the best taste and texture, as they are prominent flavors. Chapman’s is a personal favorite for its rich and creamy consistency. Ensure your ice cream is slightly softened but not completely melted, making it easier to spread evenly in the pan.
- Edible Cookie Dough: The star of the show! To keep things incredibly easy, this recipe calls for store-bought chocolate chip edible cookie dough. These are specifically formulated to be safe to eat raw, as they typically use heat-treated flour and no raw eggs. You can find them in most grocery stores in the refrigerated dessert section. If you’re feeling adventurous, you can also make your own edible cookie dough by simply swapping the raisins for chocolate chips in that recipe.
- Oreo Baking Crumbs: These form the delicious, crunchy middle layer. While Oreo baking crumbs might be a bit harder to find in some areas (they can sometimes be discontinued seasonally or regionally), you can easily substitute them with any chocolate baking crumbs. Alternatively, you can create your own Oreo crust by crushing whole Oreos (creme filling included!) and mixing them with melted butter, similar to how I did in my Black Forest Cheesecake crust.
- Unsalted Butter: Used to bind the Oreo crumbs together for a perfect crust. I always opt for unsalted butter in baking to have full control over the salt content in my recipes, ensuring the flavors are perfectly balanced.
- Frosting: A smooth and stable frosting is crucial for an ice cream cake. A vanilla frosting that holds up well in the freezer is ideal. This recipe offers flexibility to use your favorite store-bought whipped frosting or a homemade shortening-based frosting, which freezes beautifully. More details on frosting choices are provided below.
📖 Variations & Substitutions for Your Ice Cream Cake
While this recipe is fantastic as written, there are many ways to customize your Cookie Dough Ice Cream Cake to suit your taste or dietary needs. Get creative and make it your own!
- Frosting Flavors: You can experiment with various frosting flavors. While vanilla is a classic choice that complements the cookie dough, chocolate frosting would also be delicious, creating an even more decadent experience. You can use any store-bought or homemade frosting you prefer, but be mindful of their freezing properties. As mentioned, I do NOT recommend traditional whipped cream frosting, as it doesn’t freeze well and can become watery upon thawing. *When using store-bought, I often opt for Betty Crocker Vanilla Whipped Frosting.
- Ice Cream Flavors: The combination of vanilla and chocolate is a crowd-pleaser, but feel free to mix it up! Caramel swirl, coffee, or even a different cookie-flavored ice cream (like cookies and cream) would be delightful. Just ensure your chosen flavors pair well with chocolate chip cookie dough. Any brand of ice cream works, but for superior creaminess and taste, investing in a good quality brand like Chapman’s can elevate your cake.
- Edible Cookie Dough Customization: Most grocery stores now carry safe-to-eat raw cookie dough. Beyond chocolate chip, look for double chocolate, peanut butter, or even sprinkle-filled varieties for added fun. Alternatively, if you prefer to make your own edible cookie dough, you can easily adapt my Oatmeal Raisin Edible Cookie Dough recipe by simply replacing the raisins with chocolate chips or other desired mix-ins.
- Crust Options: Instead of Oreo crumbs, consider Graham cracker crumbs for a slightly less intense chocolate flavor, or use crushed shortbread cookies for a buttery base. You could also add a layer of hot fudge or caramel sauce over the crust before the ice cream for an extra burst of flavor.
- Lactose-Free / Dairy-Free Adaptation: This recipe can easily be made dairy-free! Simply replace regular ice cream with your favorite lactose-free or dairy-free ice cream alternatives (many excellent coconut milk, almond milk, or oat milk-based options are available). For the crust, use a dairy-free margarine (such as Becel vegan margarine) instead of butter. Finally, ensure your frosting is also dairy-free; a dairy-free shortening-based frosting would work perfectly.
- Add-ins and Toppings: Sprinkle in mini chocolate chips, chopped candy bars, or a drizzle of chocolate fudge or caramel sauce between layers. For the top, consider adding more cookie dough pieces, mini M&Ms, or a shower of chocolate shavings.
🔪 How to make Cookie Dough Ice Cream Cake: Step-by-Step
Creating this delicious Dairy Queen Copycat Cookie Dough Ice Cream Cake is a fun and straightforward process. Follow these steps for a perfectly layered and irresistible frozen treat.
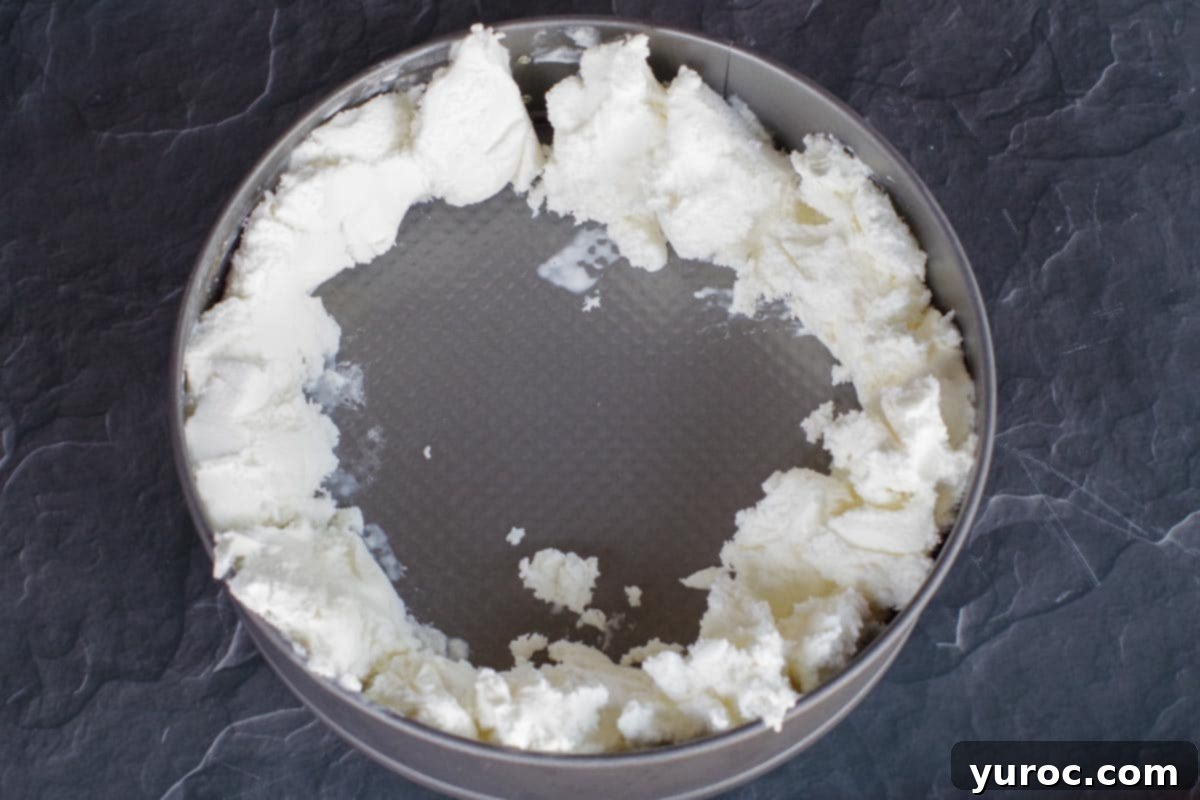
Step 1: Form the Vanilla Ice Cream Ring. In a 10-inch springform pan, take half of the softened vanilla ice cream and carefully arrange it in an outer ring around the edge of the pan. Use a spatula to gently smooth it down, creating an even, firm wall.
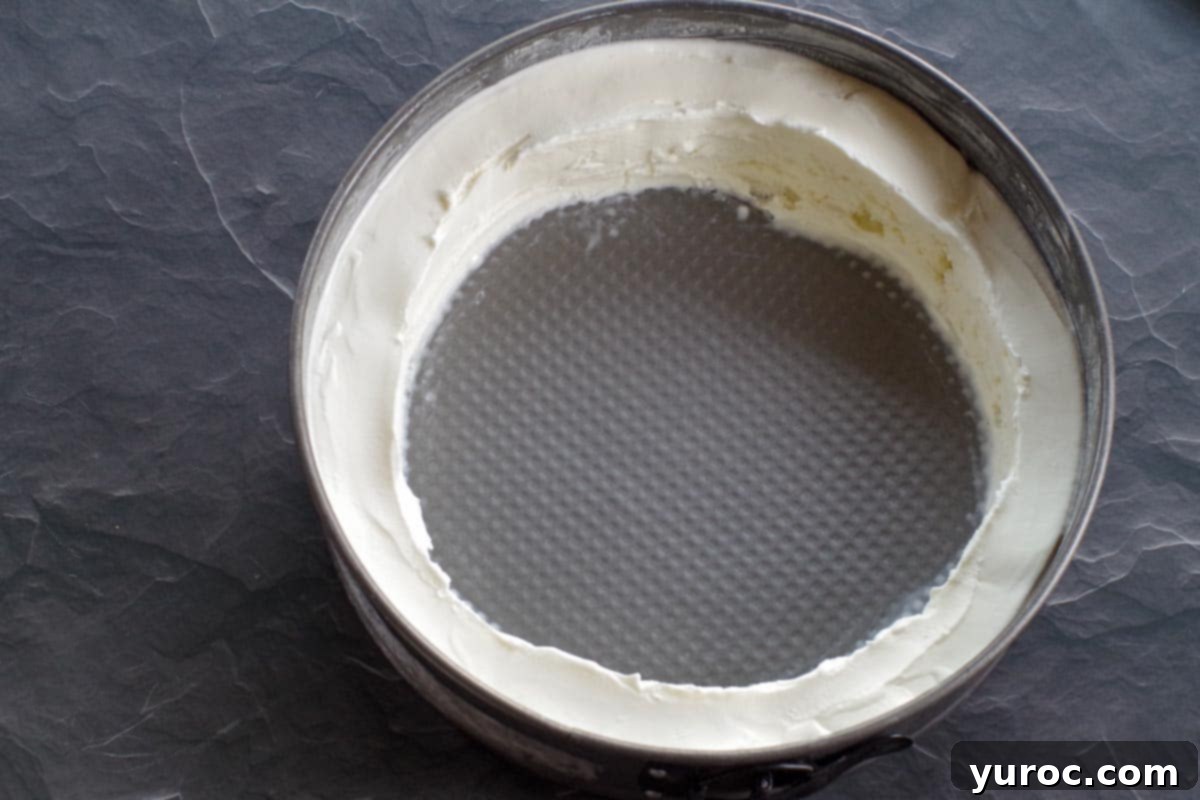
Step 2: Smooth the Ice Cream. Use the back of a spoon or a small offset spatula to ensure the vanilla ice cream layer is smooth and uniform. This creates a neat boundary for the next layer.
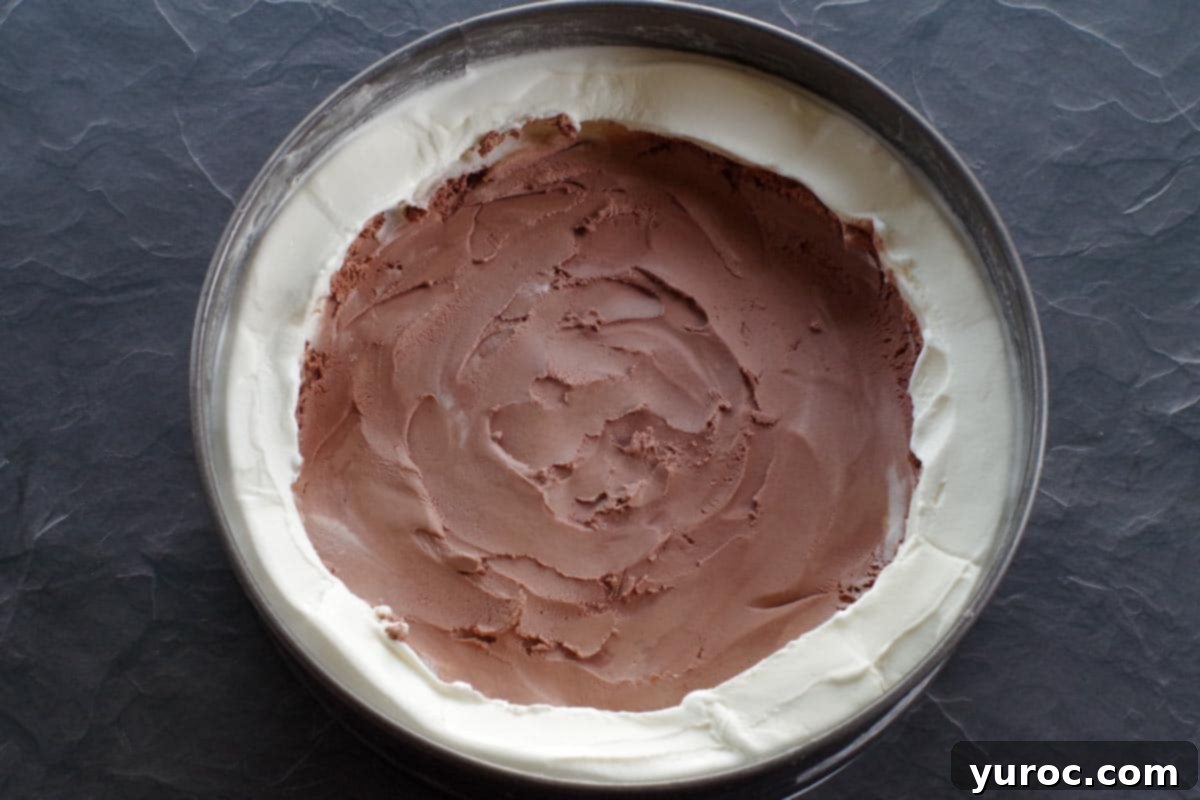
Step 3: Add the Chocolate Ice Cream Center. Now, add half of the chocolate ice cream to the empty middle section of the pan, within the vanilla ice cream ring. Smooth it out. Place the pan in the freezer for at least 15 minutes to allow this layer to firm up. This layering and freezing process is crucial for distinct sections.
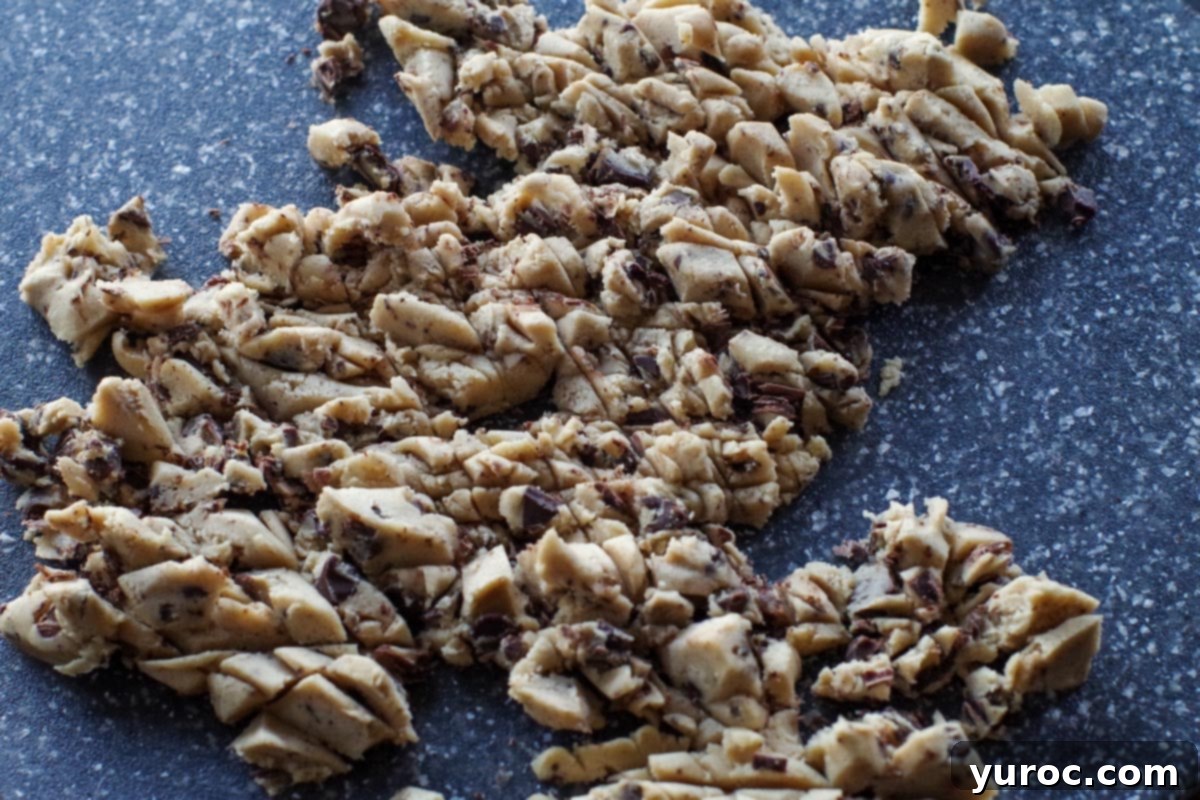
Step 4: Prepare the Cookie Dough. While the cake is chilling, chop half of the edible cookie dough (approximately 12 pieces or half a standard package) into small, bite-sized pieces. These will be incorporated into the next ice cream layer. Refrigerate the remaining cookie dough; it will be used for decoration later.
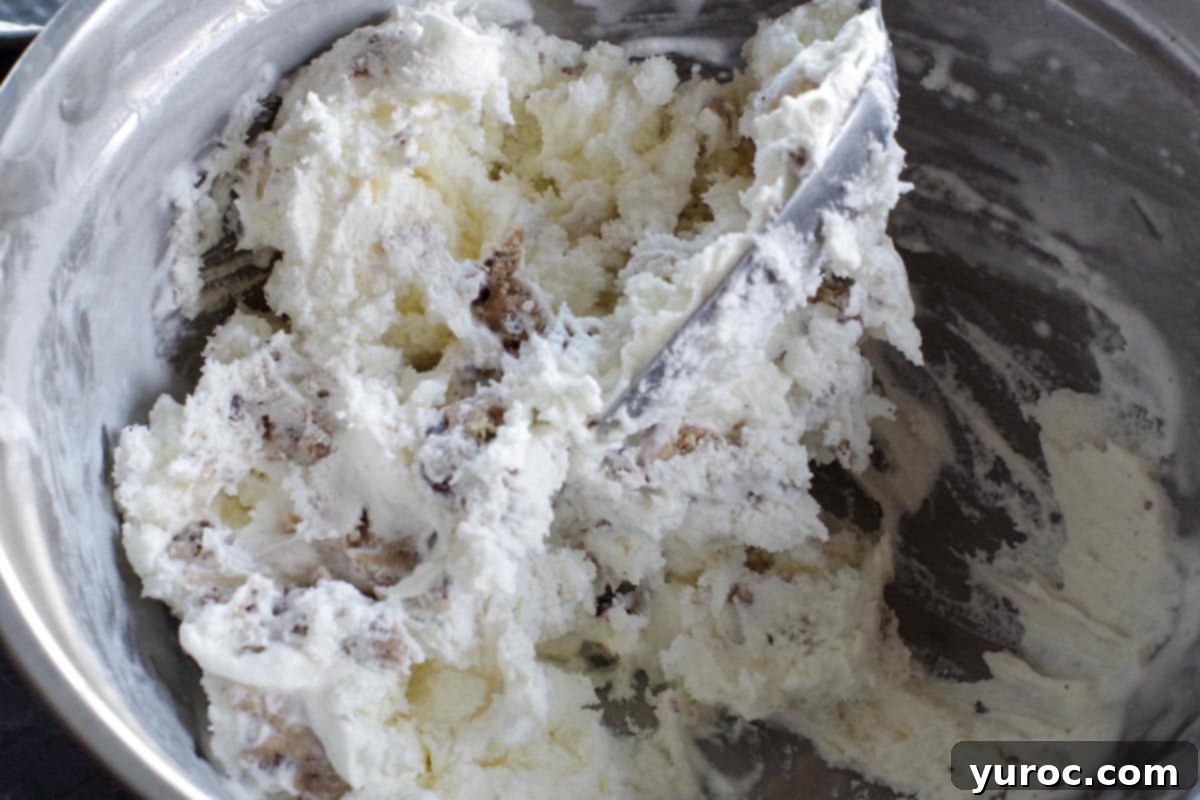
Step 5: Create the Cookie Dough Ice Cream Layer. In a large mixing bowl, combine the remaining vanilla ice cream with the chopped edible cookie dough. Gently fold them together until the cookie dough is evenly distributed. Place this mixture back into the freezer to prevent it from melting too much while you prepare the crust.
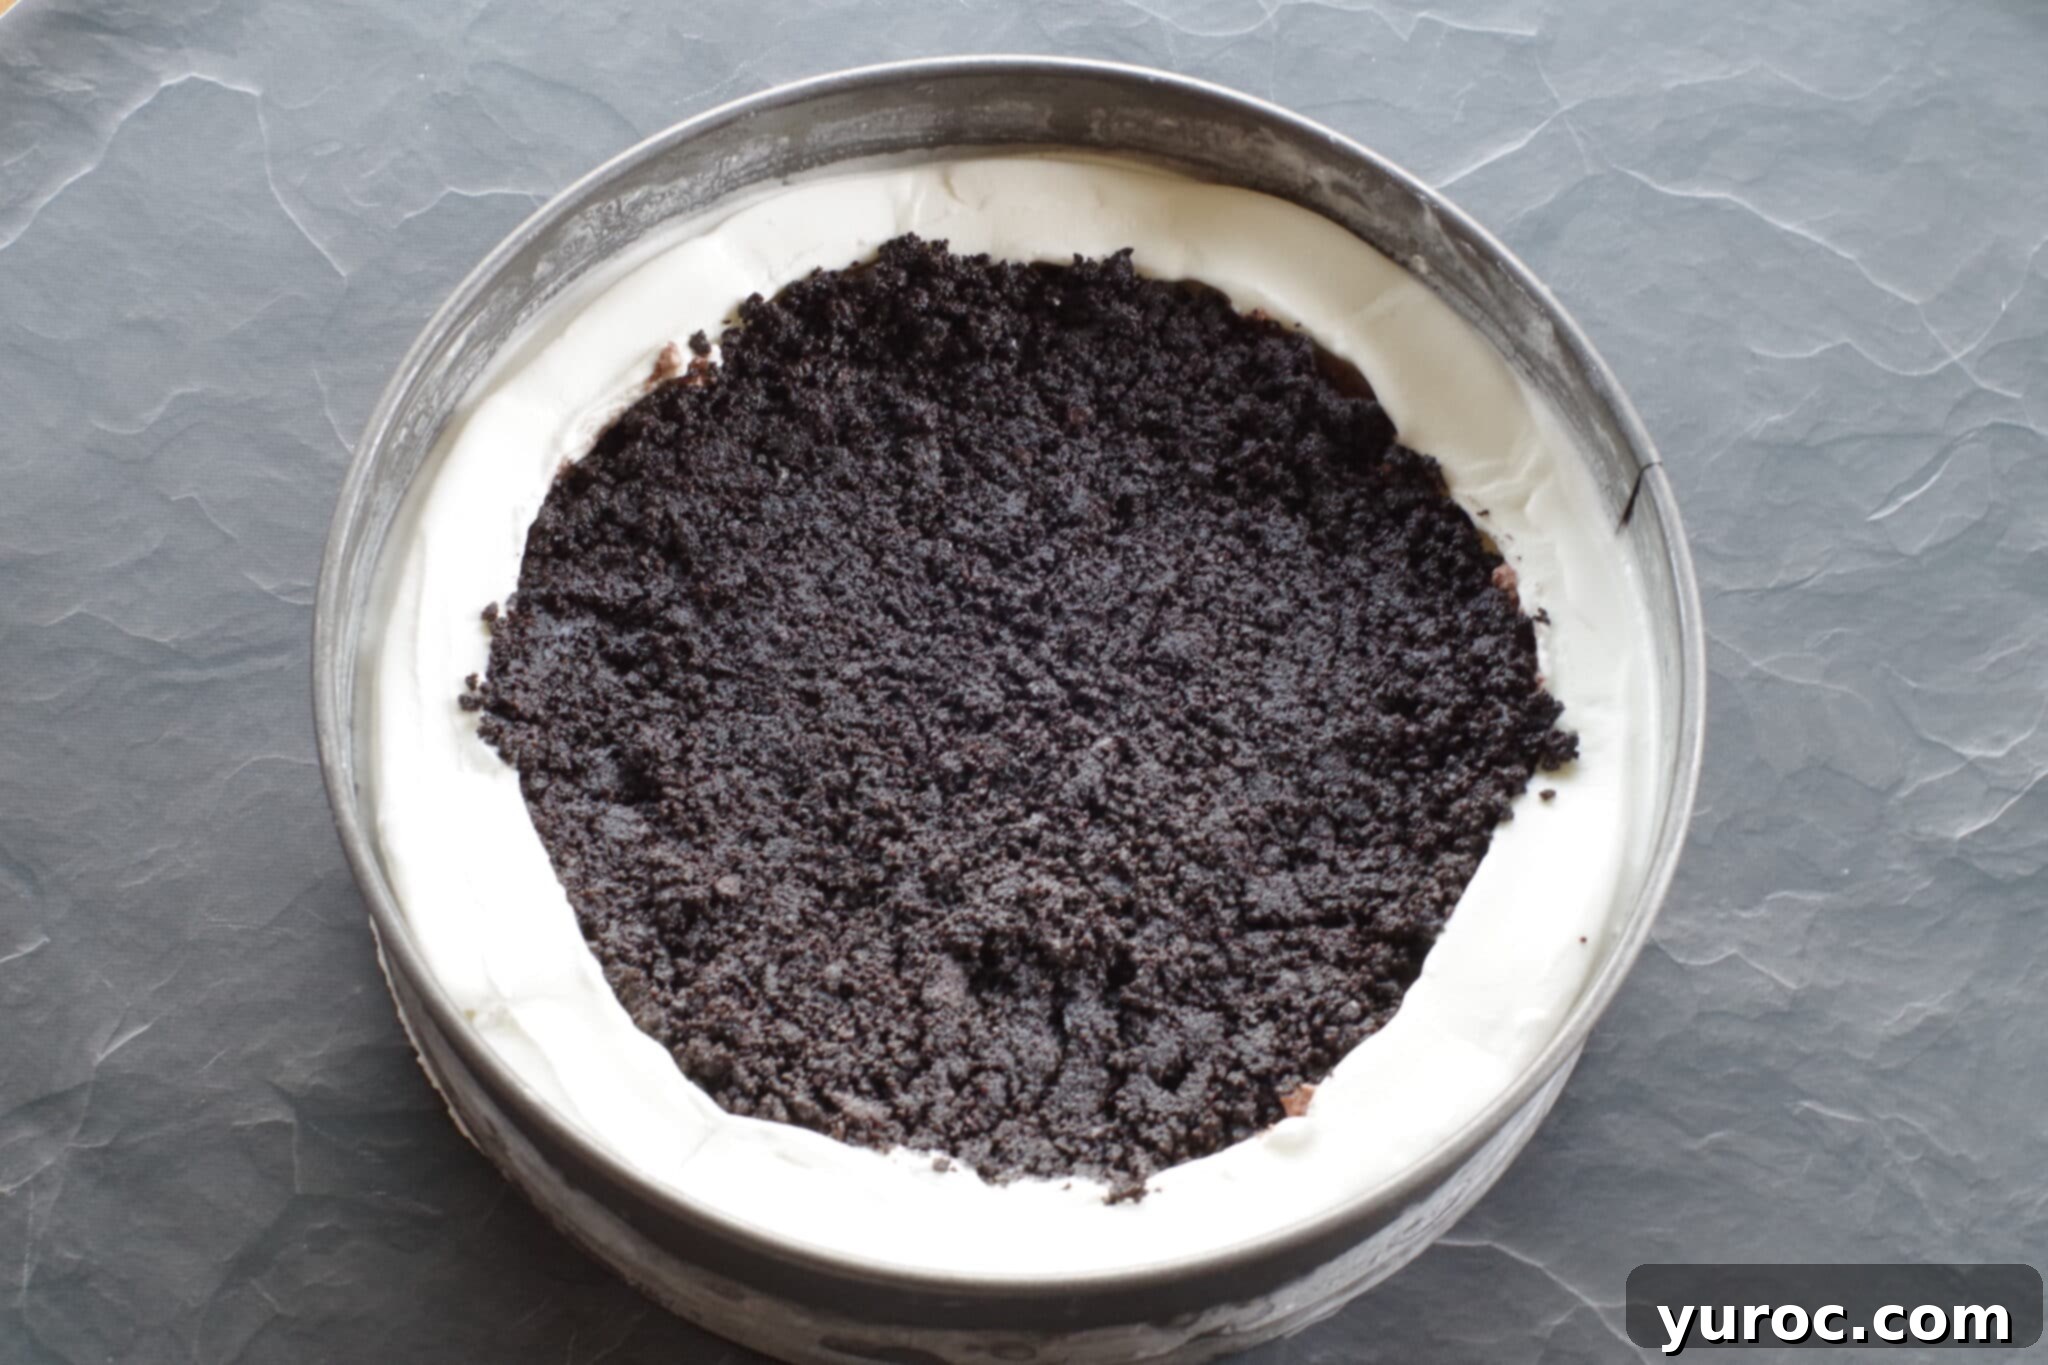
Step 6: Add the Oreo Crust. Melt ½ cup of unsalted butter. In a separate bowl, mix the melted butter with the Oreo cookie crumbs until well combined and the crumbs cling together. Remove the partially frozen ice cream cake from the freezer. Carefully spread the cookie crumb mixture over the chocolate ice cream in the middle of the pan. Gently press it down with the back of a spoon to create a firm, even crust.
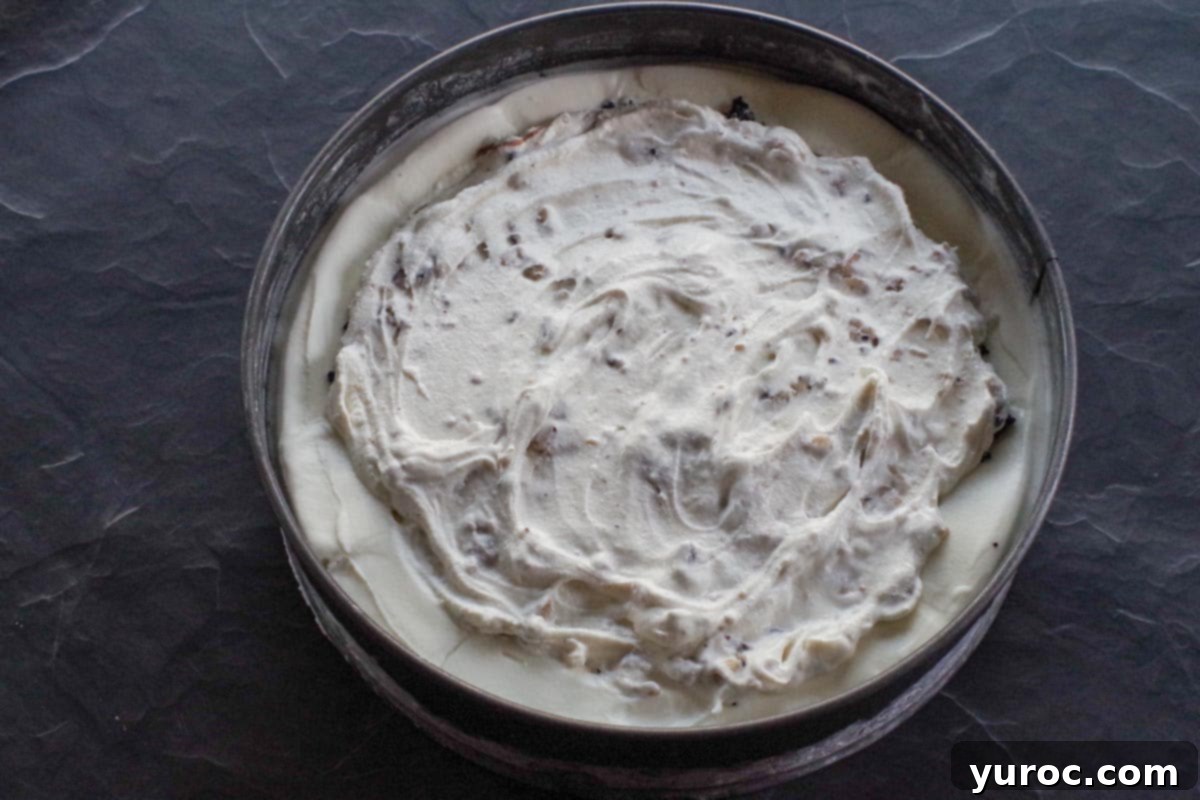
Step 7: Layer the Cookie Dough Ice Cream. Retrieve the vanilla ice cream/cookie dough mixture from the freezer. Spoon this mixture into the middle of the cake, directly on top of the Oreo baking crumb layer. Smooth it gently to create an even surface.
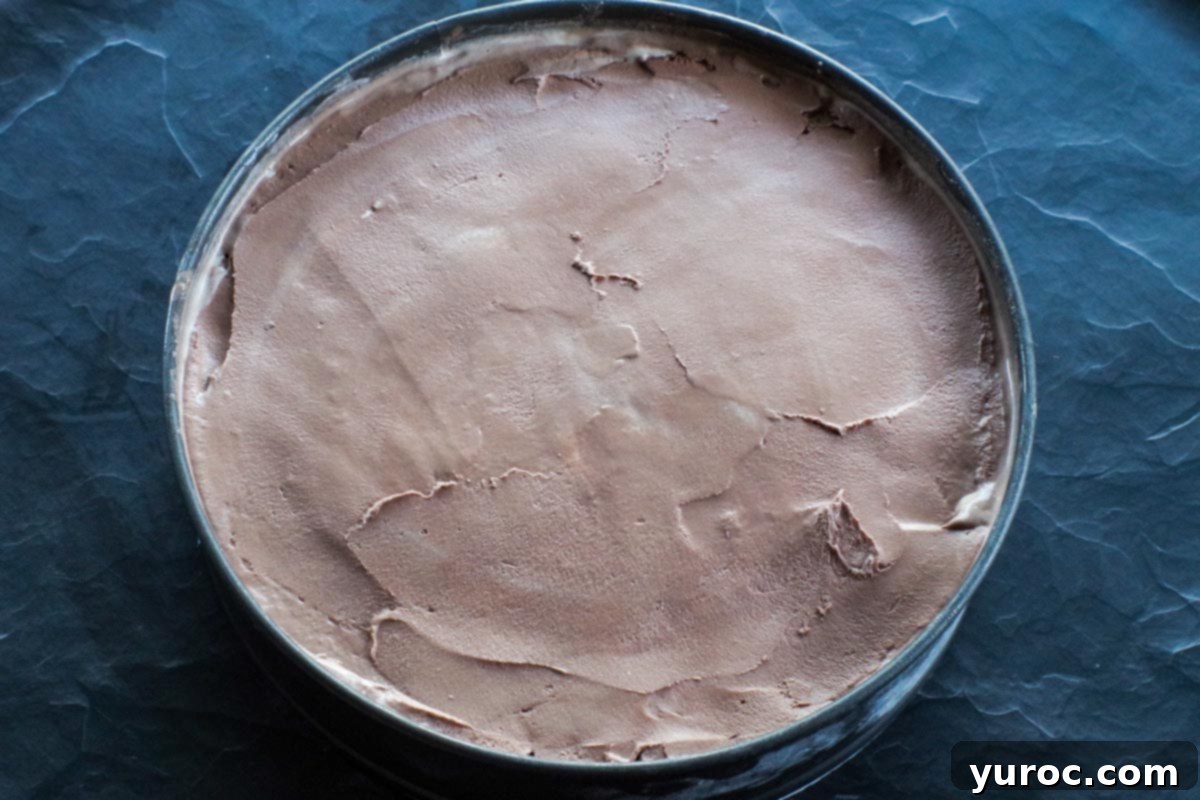
Step 8: Top with More Chocolate Ice Cream. Take the remaining chocolate ice cream and spread it over the entire top surface of the cake, covering all previous layers. Smooth it out carefully to create a flat top. Return the cake to the freezer for at least 15 minutes, or ideally for several hours, until completely firm. This firming step is crucial before frosting.
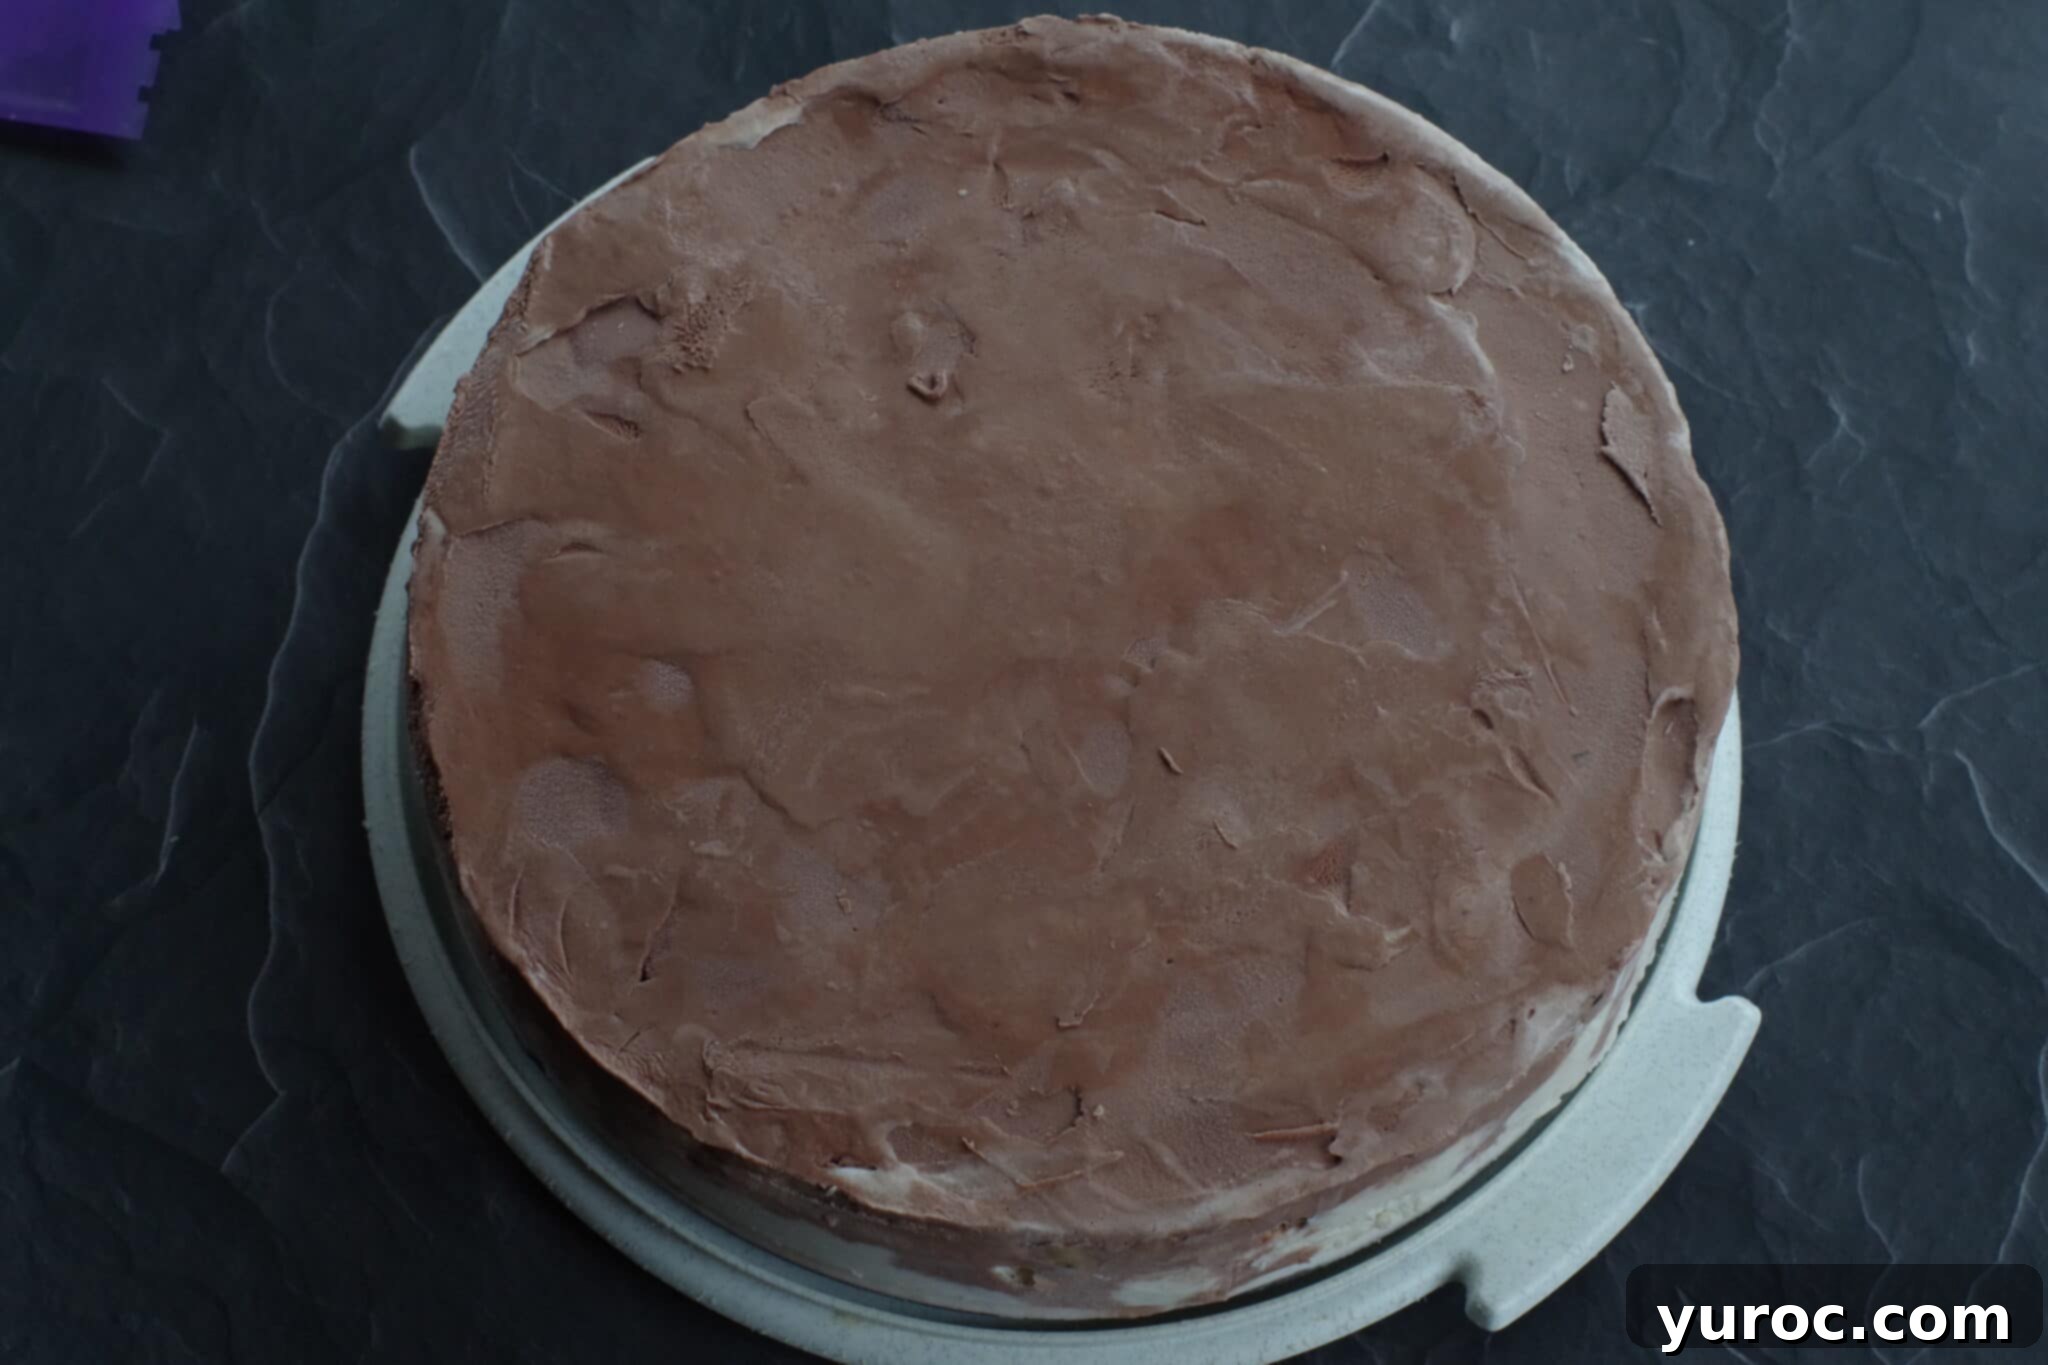
Step 9: Release from Pan. Once the cake is completely firm, carefully remove the sides of the springform pan. If needed, run a hot knife (dipped in hot water and wiped dry) around the edge of the cake to help release it cleanly. Transfer the cake to a serving platter or a sturdy cake board.
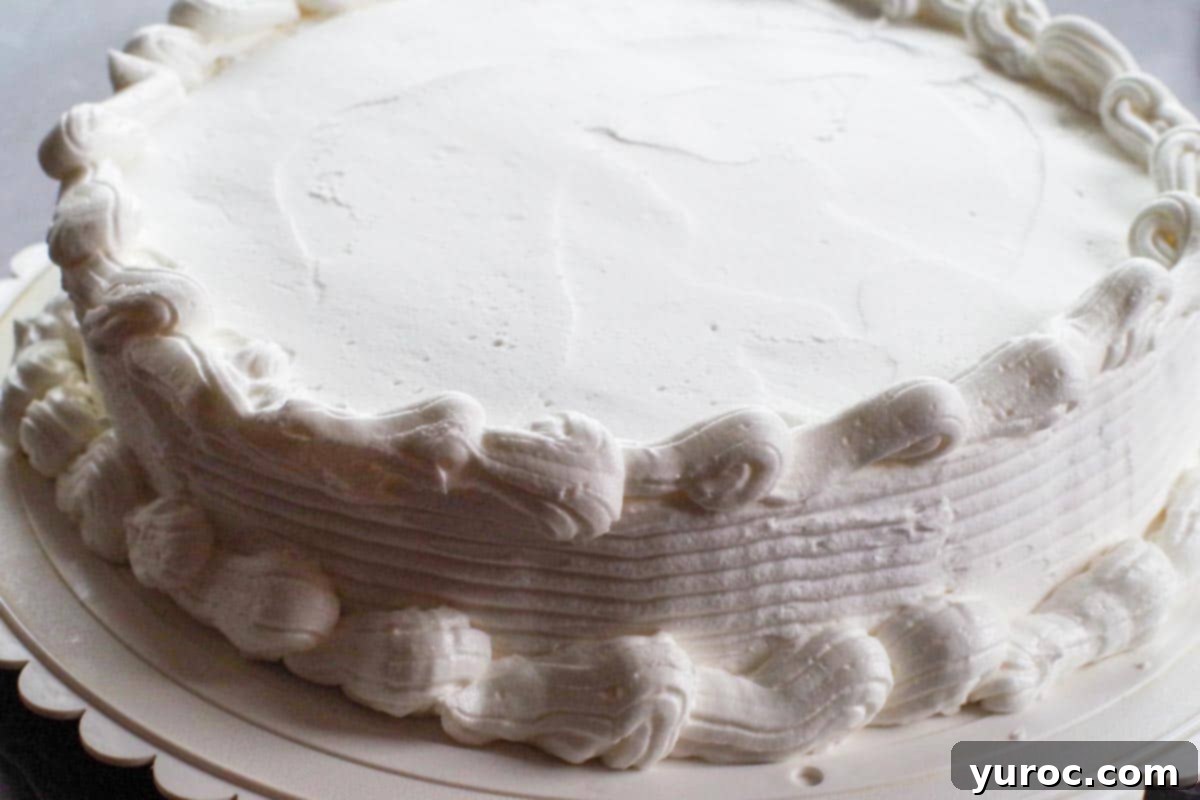
Step 10: Frost and Decorate the Sides. Frost the entire cake with your chosen store-bought or homemade frosting (refer to the frosting recommendations below for best results). For a decorative touch, use a cake comb to create beautiful ridges on the sides. You can also pipe simple shell decorations around the top and bottom edges using a #21 star tip for an elegant finish. See the videos below for piping and combing techniques.
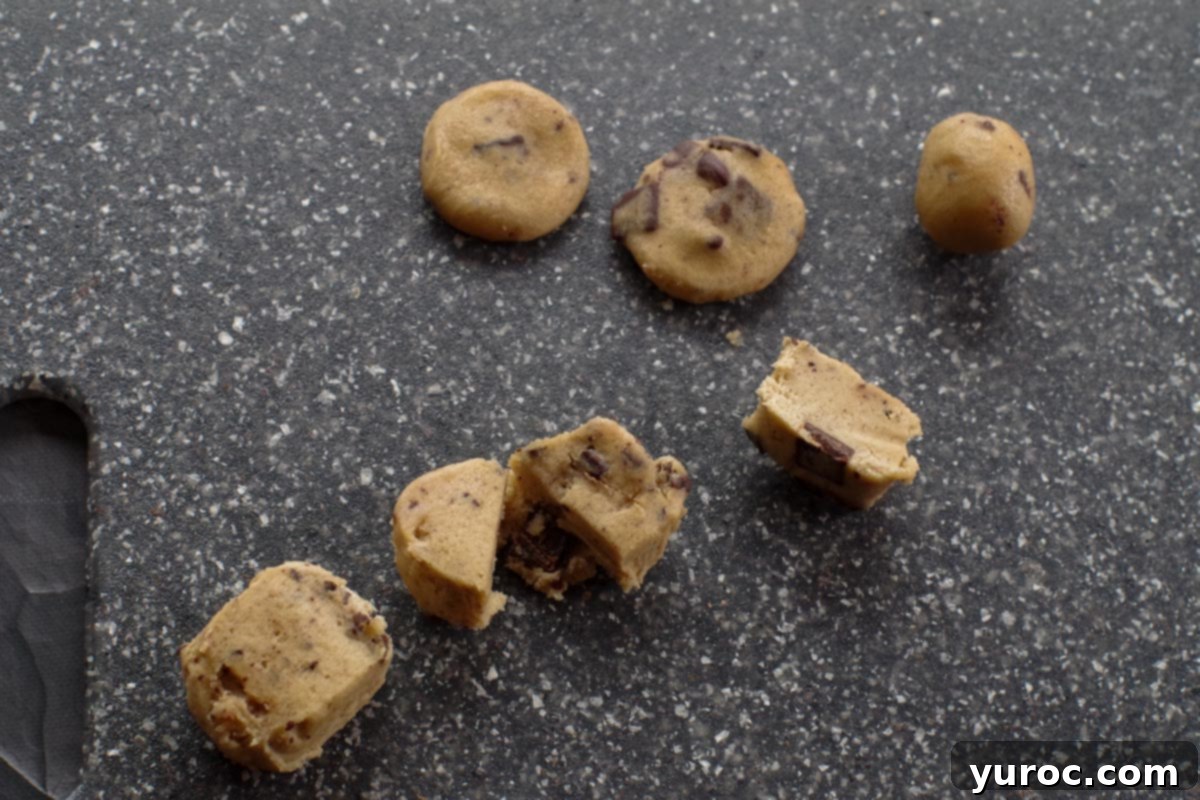
Step 11: Shape Cookie Dough for Topping. Take the remaining edible chocolate chip cookie dough. Pinch off small pieces and shape them into miniature cookies. These will be placed strategically on top of the cake for a charming visual and textural element.
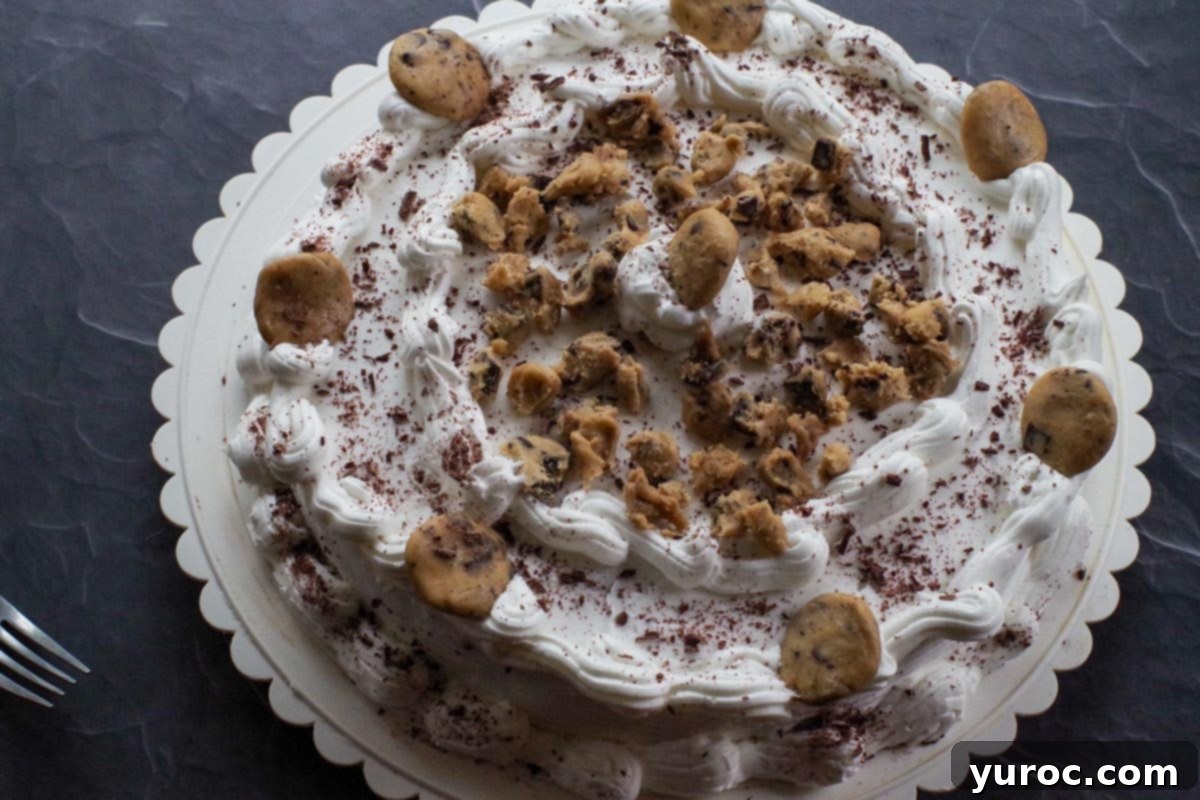
Step 12: Final Garnish. Arrange the shaped mini cookie dough pieces on top of the cake as desired. Break up any remaining cookie dough into smaller chunks and sprinkle them generously over the cake. For an extra touch of decadence, sprinkle grated semi-sweet chocolate over the entire surface. Return the decorated cake to the freezer until ready to serve.
🎂 Frosting for Ice Cream Cakes: Choosing the Best Option
The choice of frosting is critical for an ice cream cake, as not all frostings perform well in freezing temperatures. Many people instinctively reach for whipped cream frosting, but this is a common mistake for frozen desserts. Here’s why and what to use instead:
- Why Whipped Cream Frosting is Not Ideal: Both homemade whipped cream and many store-bought whipped toppings (unless specifically formulated for freezing) do not freeze well. When frozen and then thawed, they tend to weep, become watery, and lose their light, airy texture, compromising the overall appearance and taste of your beautiful cake.
- Recommended: Shortening-Based, Non-Dairy Frosting: For this Dairy Queen cookie dough cake (and most ice cream cakes), a shortening-based or non-dairy frosting is your best bet. These frostings are much more stable in the freezer, maintain their texture, and defrost without becoming watery. This is the type of frosting I used in the photos for its excellent hold and smooth finish. You can easily find store-bought whipped frosting (affiliate link) that is shortening-based, or make your own shortening-based homemade frosting.
- Buttercream Considerations: Traditional buttercream frosting, while delicious, can also be tricky with ice cream cakes. Due to its high butter content, it becomes very stiff and hard when cold, making it difficult to spread smoothly onto a frozen cake. If you choose to use buttercream, a helpful tip is to slightly warm your knife under hot water, dry it thoroughly, and then use the warm blade to spread the buttercream. This will help create a smoother finish. However, for ease of application and stability, shortening-based frostings are generally preferred for ice cream cakes.
Expert Recipe Tips for Ice Cream Cake Success
Making an ice cream cake is quite simple, but a few key tips can elevate your creation from good to spectacular. Pay attention to these expert recommendations for the best results:
- Soften Ice Cream Properly: This is crucial! Allow your ice cream to sit at room temperature for about 10-15 minutes before you begin spreading. It should be soft enough to spread easily but not completely melted or soupy. Over-softened ice cream can become too icy when refrozen, compromising the creamy texture.
- Layer Freezing is Key: Patience is a virtue here. Freeze each layer for at least 15 minutes before adding the next one. This prevents the layers from bleeding into each other, maintaining clean, distinct lines and ensuring the cake holds its shape. For best results, consider longer freezing times between complex layers.
- Use a Flat Bottom Glass for the Crust: To ensure your Oreo crumb mixture forms an even, firm, and compact crust, press it down firmly with the bottom of a flat glass, a measuring cup, or a sturdy spatula. This prevents the crust from crumbling when sliced.
- Pre-Chill for a Stronger Base: After you’ve pressed the crust into the pan, place it in the freezer for 15-20 minutes before adding any ice cream layers. This initial chill helps to set the crust, making it more stable and less prone to breaking apart.
- Chill the Cake Before Frosting: Before you even think about frosting, ensure your ice cream cake is frozen solid. Ideally, freeze it overnight. A rock-solid cake prevents melting while you apply the frosting, allowing for a much cleaner and more professional finish.
- Choose a Sturdy Frosting: As discussed above, a shortening-based frosting is your best friend for ice cream cakes. It holds its shape beautifully in the freezer and doesn’t become watery upon thawing. Steer clear of traditional whipped cream as it tends to collapse and run.
- Work Quickly & Freeze in Intervals: Ice cream melts fast, especially when exposed to room temperature or the warmth of your hands. If you’re decorating or frosting, work in small sections, then return the cake to the freezer for a few minutes to firm up before continuing. This technique helps maintain the cake’s integrity.
- Use a Hot Knife for Slicing: For perfectly clean slices, dip a sharp knife in hot water, wipe it dry, and then make your cut. Repeat this process for each slice. The warm blade cuts through the frozen layers effortlessly.
- Serve Immediately: Ice cream cakes are, by nature, quick to melt. Slice and serve your masterpiece as soon as it comes out of the freezer to enjoy it at its best, creamy and firm. If it starts to soften during serving, simply pop it back into the freezer for a quick chill.
👪 Serving Size and Cutting Your Ice Cream Cake
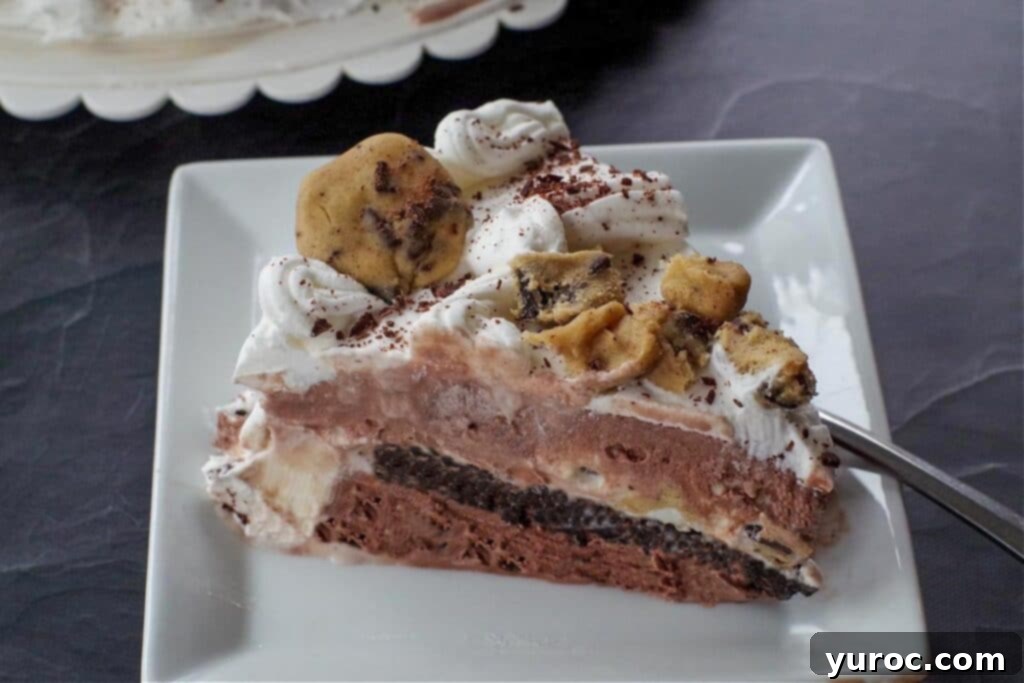
This Cookie Dough Ice Cream Cake recipe yields a generously sized cake, typically providing 12 large servings, like the slice you see pictured below. These are substantial portions, perfect for a decadent dessert. However, if you’re serving a larger crowd or prefer smaller slices, you can easily cut this cake into 16 or even 24 pieces, and each slice will still be a satisfying treat. For special occasions with many guests, smaller portions are often ideal.
To achieve clean, elegant slices, remember the hot knife tip from the expert section. Running your knife under hot water and wiping it dry before each cut ensures a smooth separation of layers, making your cake as appealing to the eye as it is to the palate. For serving, don’t forget to have plates and forks ready, as this delicious dessert melts fairly quickly once out of the freezer.
🥗 What to serve with Ice Cream Cake
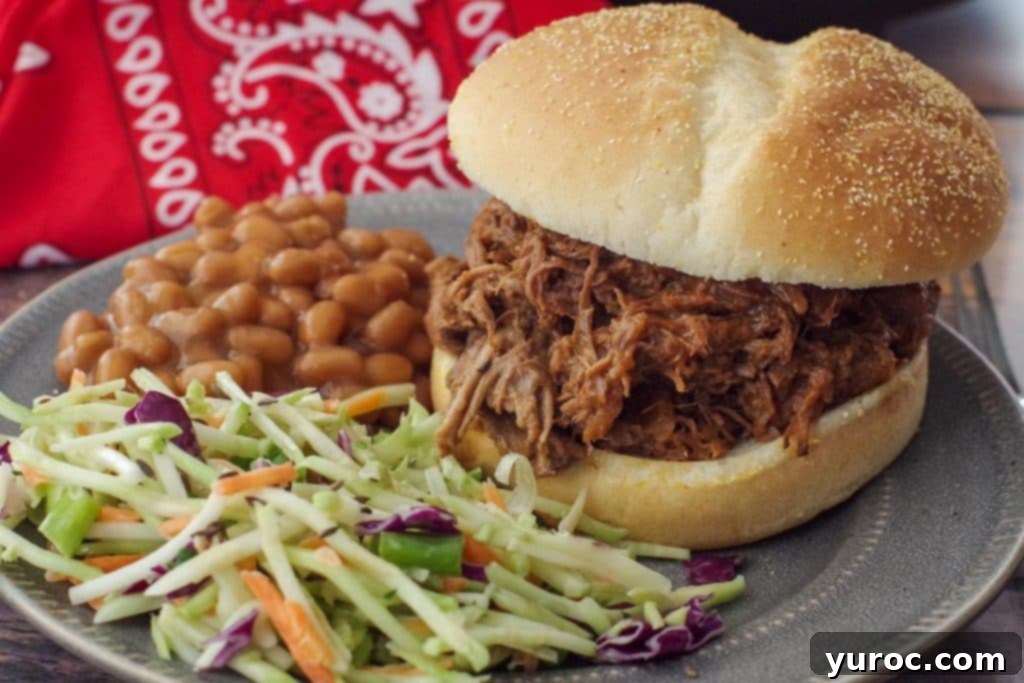
While this homemade cookie dough ice cream cake is a showstopper all on its own, it also pairs wonderfully with a variety of meals, especially if you’re planning a full celebratory spread. For a fantastic and easy main course that perfectly complements this sweet finale, consider my Slow Cooker Beef on a Bun, pictured below. It’s a comforting and hearty option that balances the richness of the dessert.
If you’re aiming for something a bit more refined for a special occasion, why not try a themed Greek meal? My Greek Chicken Souvlaki, served with flavorful Greek Style Potatoes and a refreshing Easy Healthy Tzatziki Sauce, would make for an unforgettable culinary experience, leading up to the grand reveal of your impressive ice cream cake.
For beverage pairings, milk or coffee are classic companions to cookie dough flavors. For adults, a sweet dessert wine or a creamy liqueur could also provide a delightful contrast or enhancement to the cake’s sweetness.
🌡️ Storage Tips for Your DQ Cookie Dough Ice Cream Cake
Proper storage is essential to keep your homemade Dairy Queen cookie dough ice cream cake tasting fresh and maintaining its structure. Since it’s an ice cream-based dessert, freezing is key!
- Long-Term Storage: For storing this delightful cake for an extended period, place it in the freezer within an airtight container. This will protect it from freezer burn and prevent it from absorbing any unwanted odors from other foods in your freezer. Stored correctly, your ice cream cake can last for up to 3 months, making it a great make-ahead option for future celebrations.
- Short-Term Storage (Overnight): If you plan to serve the cake the very next day, a simple solution is to tightly cover it with plastic wrap. Ensure the plastic wrap adheres closely to the cake’s surface to minimize air exposure. You can then place it back in the springform pan (without the sides) or on a plate before wrapping, if preferred.
- Preventing Freezer Burn: The enemy of all frozen desserts is freezer burn, which can make the ice cream taste stale or icy. Always ensure your cake is thoroughly wrapped or placed in an airtight container to seal out air.
Remember, always return any leftover slices to the freezer immediately after serving to preserve their texture and flavor.
❔ Recipe FAQ’s
The best frosting for an ice cream cake is one that holds up well in the freezer and doesn’t become watery upon thawing. For this reason, traditional whipped cream frosting is definitely NOT recommended, as it doesn’t freeze well and will break down. A shortening-based frosting, whether homemade or store-bought, is a much better choice. These frostings remain stable and creamy at freezing temperatures. Buttercream frostings can also work, but they tend to stiffen significantly when cold, making them harder to apply and slice through; if using buttercream, warm your knife for easier spreading and cutting.
Not always! Ice cream cakes can come in various forms. Some feature layers of actual cake (like sponge cake or sheet cake) with ice cream sandwiched between them. Others, like this cookie dough ice cream cake, are “no-bake” cakes consisting solely of layered ice cream, possibly with a cookie crust and other mix-ins, creating a rich, multi-textured frozen dessert experience that still holds a cake shape.
Yes, absolutely! Ice cream cake will eventually melt if it’s not kept in the freezer. It’s an ice cream dessert after all! You have a limited window of time before an ice cream cake begins to soften and melt once it’s removed from the freezer, especially in a warm environment. For the best experience, it should be served and eaten immediately after slicing. Homemade ice cream cakes tend to melt faster than their store-bought counterparts due to fewer stabilizers. If your cake starts to melt during serving, simply place it back into the freezer to firm up again.
So, if you’re on the hunt for easy ice cream cake recipes that deliver big on flavor, look no further than this Dairy Queen Copycat Blizzard Chocolate Chip Cookie Dough Ice Cream Cake. With its clever use of store-bought ice cream, edible cookie dough, and frosting, it proves that homemade indulgence doesn’t have to be complicated. It’s the perfect, crowd-pleasing birthday cake or special occasion dessert for any time of the year!
And if you’re craving more delightful DQ-inspired frozen treats, be sure to explore my recipe for an amazing Buster Bar Ice Cream Cake!
🎂 More Delicious Birthday Cake Recipes
- Coffee Flavored Cake with White Chocolate Mocha Frosting
- Root Beer Float Layer Cake
- Easy Black Forest Cake Recipe
- Birthday Cake Cheesecake (No Bake)
Did your family❤️this recipe? Did you know that commenting and⭐rating recipes is one of the best ways to support your favorite recipe creators? If you LOVED this recipe, please comment and rate it in the recipe card or share photos on social media using the hashtag #foodmeanderings or tagging @foodmeanderings !

📋 Cookie Dough Ice Cream Cake Recipe (Dairy Queen Copycat)
Print Recipe
Pin
Save RecipeSave Recipe
Rate
Add to Shopping ListGo to Shopping List
Equipment
-
10 inch springform pan
-
cake comb
-
pastry bag
-
#21 star frosting tip
Ingredients
- 2 litre container vanilla ice cream
- 2 litre container chocolate ice cream
- 454 g package edible cookie dough
- 2 cups Oreo baking crumbs
- 1 cup unsalted butter
- 6 340 g containers of store-bought whipped frosting or homemade frosting (6 cups) (see recipe for homemade frosting)
Garnish
- 4 oz semi-sweet chocolate baking bar grated
Instructions
-
In a 10-inch springform pan, take ½ the vanilla ice cream, ensuring it’s softened enough to spread, and arrange it in an outer circle around the edge of the pan. Smooth it evenly with a spatula, forming a nice wall for the next layer.
-
Add ½ the chocolate ice cream into the middle section of the vanilla ice cream ring. Smooth it out gently to fill the space. Place the pan in the freezer for at least 15 minutes to allow this initial layer to firm up.
-
Meanwhile, chop up ½ the edible cookie dough (this should be approximately 12 pieces or half of a standard package) into small, desirable pieces. Set aside these chopped pieces and put the remainder of the cookie dough back in the fridge, as it will be used for decoration later.
-
In a large bowl, mix the remaining vanilla ice cream with the freshly chopped cookie dough. Stir gently to distribute the cookie dough evenly. Place this mixture back into the freezer to keep it firm while you prepare the crust.
-
Melt ½ cup of unsalted butter. In a separate bowl, combine the melted butter with the 2 cups of Oreo cookie crumbs, mixing until the crumbs are thoroughly moistened and cling together. Remove the partially set ice cream cake from the freezer and carefully add this cookie crumb mixture to the middle area, directly on top of the chocolate ice cream layer. Press down firmly to create a compact crust.
-
Retrieve the vanilla ice cream/cookie dough mixture from the freezer. Spoon this mixture into the middle of the cake, precisely on top of the Oreo baking crumb layer. Smooth it gently to create an even surface.
-
Finally, add the remaining chocolate ice cream over the entire cake, smoothing it carefully to cover all previous layers and create a flat top. Return the cake to the freezer for at least 15 minutes, or preferably for several hours or overnight, until it is completely firm.
-
Once the cake is completely frozen solid, carefully release it from the springform pan. You may run a hot, dry knife around the edge to help it detach cleanly. Transfer the cake to a serving platter or cake board.
Decorating
-
Frost the entire cake with your chosen store-bought or homemade frosting (refer to my recommendations in the post for the best type of frosting for ice cream cakes). For a decorative finish, use a cake comb to create textured ridges on the sides of the cake. You can also pipe a simple shell border around the top and bottom edges using a #21 star tip to add elegance.
-
Take the remaining edible chocolate chip cookie dough. Pinch off small portions and shape them into miniature cookie shapes. Chop any larger remaining pieces into small chunks.
-
Arrange the shaped mini cookie dough pieces artistically on top of the frosted cake, as shown in the photos. Sprinkle the chopped cookie dough chunks generously into the middle of the cake, creating a tempting visual and textural element.
Garnish
-
For a final touch, sprinkle grated semi-sweet chocolate baking bar over the entire top surface of the cake. Return the fully decorated cake to the freezer until you are ready to serve.
Notes
Combing a cake is a very simple decorating technique that works beautifully on ice cream cakes to create textured sides. If you’ve never tried it, this video is a great guide: How to ice and comb a cake.
For those new to piping, a shell border is a classic and elegant decoration that’s easier than it looks. Learn how to pipe a shell border with this helpful video: How to pipe a shell border.
Frosting Tip: If you decide to make your Homemade frosting from my recipe, you will need approximately 6 cups to cover and decorate the entire cake.
Expert Tips:
-
- Soften Ice Cream Properly: Allow ice cream to soften at room temperature for about 10-15 minutes before spreading. Over-softened ice cream can become too melty and refreeze with an icy texture.
- Layer Freezing is Key: Freeze each layer for at least 15 minutes before adding the next to maintain clean, distinct layers and prevent melting.
- Use a Flat Bottom Glass: To ensure an even, firm crust, press down the Oreo crumb mixture with the bottom of a flat glass, measuring cup, or spatula.
- Pre-Chill for a Stronger Base: After pressing the crust into the pan, freeze for 15-20 minutes before adding the ice cream layers to prevent crumbling.
- Chill the Cake Before Frosting: Before frosting, freeze the cake solid (overnight is ideal). This prevents melting and movement while applying the frosting, leading to a much cleaner finish.
- Use a Sturdy Frosting: A shortening-based frosting works best for ice cream cakes as it holds up beautifully when frozen. Avoid whipped cream, as it doesn’t hold well and can become watery upon defrosting.
- Work Quickly & Freeze in Intervals: Ice cream melts fast. Frost the cake in small sections, then return it to the freezer for a few minutes as needed to keep it firm.
- Use a Hot Knife: Dip a sharp knife in hot water, wipe it dry, and then slice. Repeat this for each cut to get perfectly clean, smooth slices.
- Serve Immediately: This cake melts quickly once out of the freezer, so slice and serve as soon as possible to enjoy it at its optimal texture.