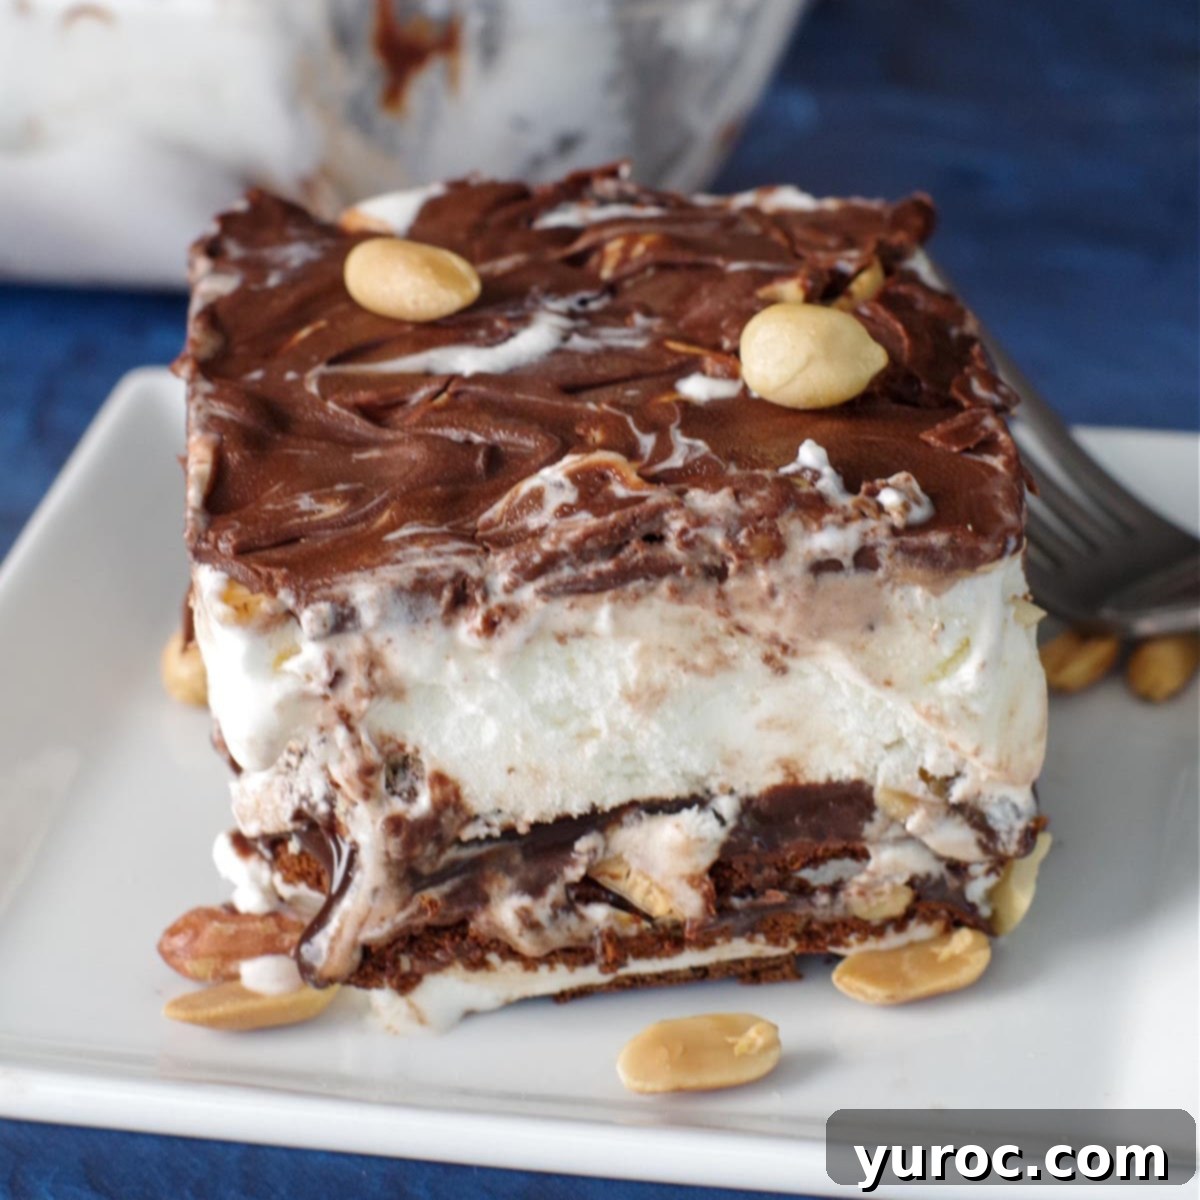
Easy Dairy Queen Copycat Buster Bar Ice Cream Cake: The Ultimate No-Bake Summer Treat
If you’re searching for an incredibly easy ice cream cake recipe that captures the nostalgic taste of a Dairy Queen Buster Bar, then look no further! This Easy Buster Bar Ice Cream Cake is a dream come true for dessert lovers. Crafted with simple layers of classic ice cream sandwiches, rich chocolate fudge sauce, creamy vanilla ice cream, and a satisfyingly crunchy chocolate magic shell, this no-bake treat is quick to assemble and guarantees to be a show-stopping dessert that will have everyone requesting the recipe.
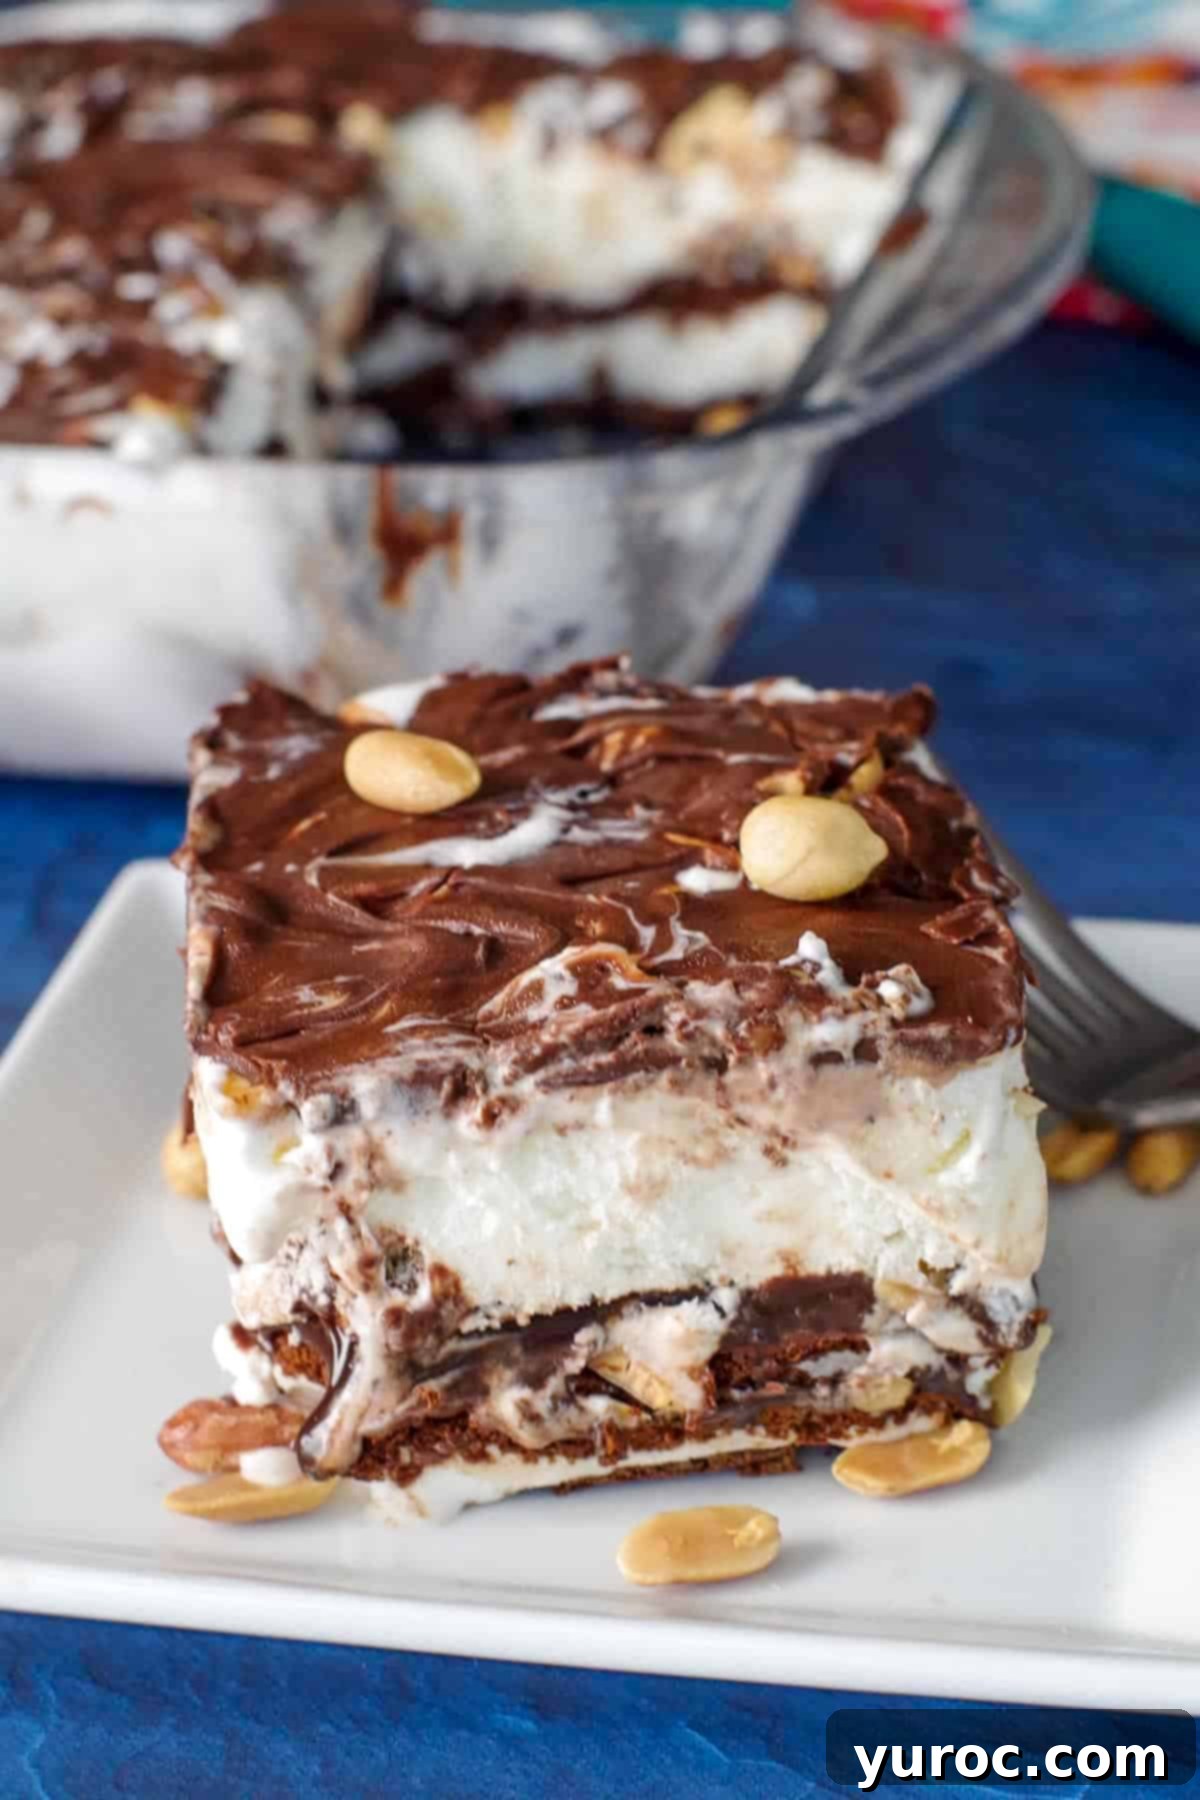
This delightful ice cream sandwich cake recipe truly shines on warm summer days. I recently had the pleasure of serving it at a bustling summer BBQ and a lively family gathering, and it was an absolutely HUGE hit! Guests couldn’t get enough of its familiar yet exciting flavors and textures. This particular recipe draws inspiration from my popular Cookie Dough Ice Cream Cake (Dairy Queen Copycat), also featured on this site, but offers an even quicker and simpler preparation process. It pairs wonderfully with a wide array of potluck-friendly dishes, making it a versatile choice for any casual get-together. We enjoyed it as the perfect sweet ending after a delicious spread that included Slow Cooker Beef on a Bun, a refreshing Healthy Potato Salad, and savory Dill Deviled Eggs, among other favorites.
Whether you’re hosting a party, celebrating a special occasion, or simply craving a taste of childhood, this homemade Buster Bar Ice Cream Cake delivers on all fronts. It’s an effortless way to bring smiles to faces with its creamy, crunchy, and chocolatey goodness, evoking the joy of a classic Dairy Queen treat without needing to leave your kitchen.
Why You’ll Adore This Easy Buster Bar Ice Cream Cake Recipe
There’s genuinely nothing quite as satisfying and refreshing on a scorching summer day as a perfectly chilled ice cream cake. But this isn’t just any ice cream cake; it’s a nostalgic journey back to your fondest childhood memories, tasting remarkably like the iconic Buster Bar from Dairy Queen! What makes this recipe truly special, and why we know you’ll fall in love with it, extends beyond its delicious taste.
Firstly, its **simplicity is unparalleled**. Forget complicated baking steps or hours spent in the kitchen. With just a handful of readily available ingredients, you can whip up this impressive dessert in minimal time. It’s a fantastic no-bake option that saves you from turning on your oven during hot weather, making it an ideal choice for summer entertaining.
Secondly, the **flavor profile is pure bliss**. Each bite offers a harmonious blend of textures and tastes: the soft, slightly chewy ice cream sandwich base, the rich and decadent chocolate fudge, the cool and smooth vanilla ice cream, and finally, the delightful crunch of peanuts and the signature “crack” of the chocolate magic shell. It’s a symphony for your taste buds that perfectly replicates the beloved Buster Bar experience.
Thirdly, it’s a **guaranteed crowd-pleaser**. From picky eaters to gourmet enthusiasts, this dessert appeals to everyone. It’s perfect for family gatherings, barbecues, birthday parties, or just a casual weeknight treat. The layers make it visually appealing, and the familiar flavors ensure there are never any leftovers. It’s the kind of dessert that sparks conversations and brings smiles to every face.
Finally, the **make-ahead convenience** is a huge bonus. You can assemble this cake days, or even weeks, in advance and keep it in the freezer, ready to pull out whenever a craving strikes or unexpected guests arrive. This ease of preparation combined with its irresistible flavor makes it a staple in our dessert rotation, and we’re confident it will become one in yours too.
🥨 Essential Ingredients for Your Buster Bar Ice Cream Cake
Creating this irresistible Buster Bar-inspired dessert requires only a few simple, accessible ingredients. The key is choosing quality components that will layer together to form that distinct, delicious flavor and texture profile:
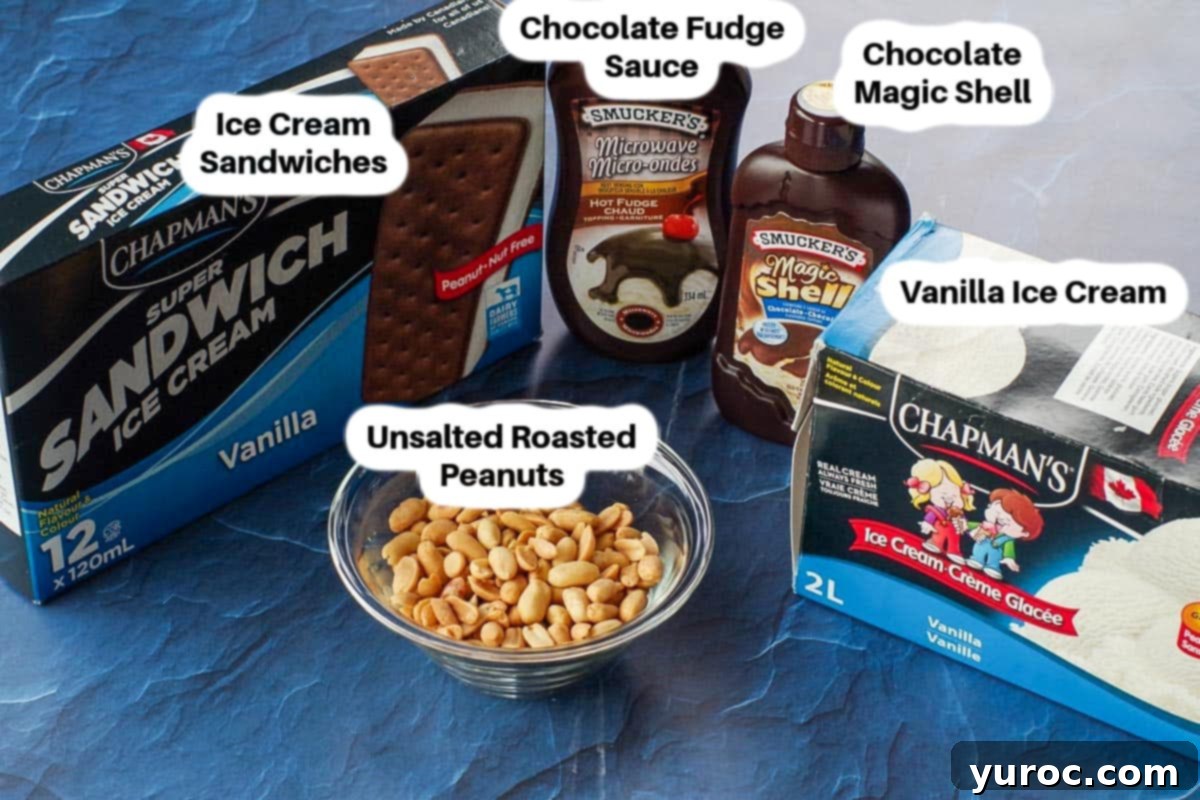
- Ice Cream Sandwiches and Vanilla Ice Cream: For the ultimate creamy foundation, I consistently opt for Chapman’s brand for both these ingredients. In my experience, they produce some of the highest quality and best-tasting ice cream products available. However, feel free to choose your personal favorite brand. The important thing is a good quality vanilla ice cream that scoops smoothly when slightly softened and firm ice cream sandwiches to form a solid base. The ice cream sandwiches provide a convenient and delicious cake-like layer without any baking!
- Chocolate Fudge Sauce (aka Hot Fudge Sauce): This is a critical component for that authentic Buster Bar taste. It needs to be a rich, thick hot fudge sauce. A crucial tip: **DO NOT use chocolate sundae sauce or thin chocolate syrup!** I’ve tested this, and using a thin syrup will result in a runny, messy layer that won’t hold its shape or provide the desired decadent texture. Stick to a proper hot fudge for the best results. The thick consistency is essential for maintaining the cake’s structure and delivering that gooey, chocolatey punch.
- Unsalted Peanuts: I prefer using regular unsalted roasted peanuts over Spanish peanuts for this recipe. They provide the perfect crunchy contrast to the soft, creamy ice cream and rich fudge, without overwhelming the sweetness of the dessert. Their mild, nutty flavor closely mimics the original Dairy Queen Buster Bar, contributing to both the taste and authentic texture. Using unsalted peanuts also allows you to control the overall saltiness of the dessert, ensuring it’s just right.
- Chocolate Magic Shell: This iconic topping is what gives the Buster Bar its distinctive “crack” when you bite into it. It creates a hard, chocolatey shell that encapsulates the peanuts and adds another layer of texture and flavor. Don’t skip this for the true Buster Bar experience!
*Refer to the full recipe card below for a comprehensive list of ingredients and precise quantities to ensure your Buster Bar Ice Cream Cake turns out perfectly every time.
📞 Creative Variations & Smart Substitutions
One of the joys of this Buster Bar Ice Cream Cake recipe is its versatility. While the classic combination is hard to beat, you can easily customize it to suit dietary needs, personal preferences, or whatever ingredients you have on hand. Here are some fantastic ways to switch things up:
- Gluten-Free Adaptation: Making this dessert gluten-free is simpler than you might think! Many brands now offer delicious gluten-free ice cream sandwiches, which form the base of this cake. For the sauces, both Smuckers hot fudge sauce and most chocolate magic shell products are typically gluten-free, but always double-check the labels to ensure they comply with your specific dietary requirements. Enjoy this classic treat without compromising on flavor!
- Peanut Alternatives: While traditional Buster Bars feature peanuts, you have options. You can use either regular roasted peanuts (salted or unsalted, depending on your preference for a sweet-and-salty contrast) or Spanish peanuts, which have their red skins intact, offering a slightly different texture and a more robust nutty flavor. If you have a peanut allergy or simply prefer other nuts, consider using chopped almonds, pecans, or walnuts. For a nut-free option, crushed pretzels or gluten-free crunchy cookies could add a similar textural element.
- Fudge Sauce: Homemade vs. Store-Bought: Convenience is king with this recipe, so a good quality store-bought hot fudge sauce is perfectly acceptable and makes assembly quick. However, if you enjoy making things from scratch or want to control the ingredients, you can absolutely make your own homemade fudge sauce. There are many simple recipes available online for rich, decadent chocolate fudge that would elevate this cake even further.
- Ice Cream Sandwich Selection: The beauty of using ice cream sandwiches as the base is their ease and the instant structure they provide. I typically use Chapman’s or Costco brand due to their quality and value. They are much simpler to work with than layering ice cream with crushed graham crackers, especially since chocolate graham wafers have become harder to find. Don’t be afraid to experiment with different flavors of ice cream sandwiches too! Chapman’s, for instance, offers caramel and “double decker” (a mix of vanilla and chocolate) varieties that could add an exciting twist to your cake.
- Ice Cream Flavors: While vanilla ice cream is the classic choice for a Buster Bar, there’s no rule against creativity! You could easily swap it for chocolate ice cream for an extra chocolatey kick, or even a coffee ice cream for a sophisticated mocha flavor. Strawberry or mint chip could also provide an interesting contrast, depending on your palate. For an extra touch of indulgence, consider making your own homemade ice cream to use in the cake – though store-bought works wonderfully for speed and ease.
- Add-Ins and Toppings: Before the magic shell sets, you can sprinkle additional toppings for extra flair. Mini chocolate chips, chopped candy bars (like Snickers or Butterfinger for more crunch!), or even a drizzle of caramel sauce can take this cake to the next level. For festive occasions, colorful sprinkles are always a hit.
These variations allow you to personalize your Buster Bar Ice Cream Cake, making it uniquely yours while retaining the spirit of the original beloved dessert. Experiment and discover your favorite combination!
🔪 Step-by-Step Guide: Crafting Your Easy Buster Bar Ice Cream Cake
Assembling this delicious Buster Bar Ice Cream Cake is incredibly straightforward and requires no baking! Just follow these simple steps to create a show-stopping dessert that tastes just like the Dairy Queen original.
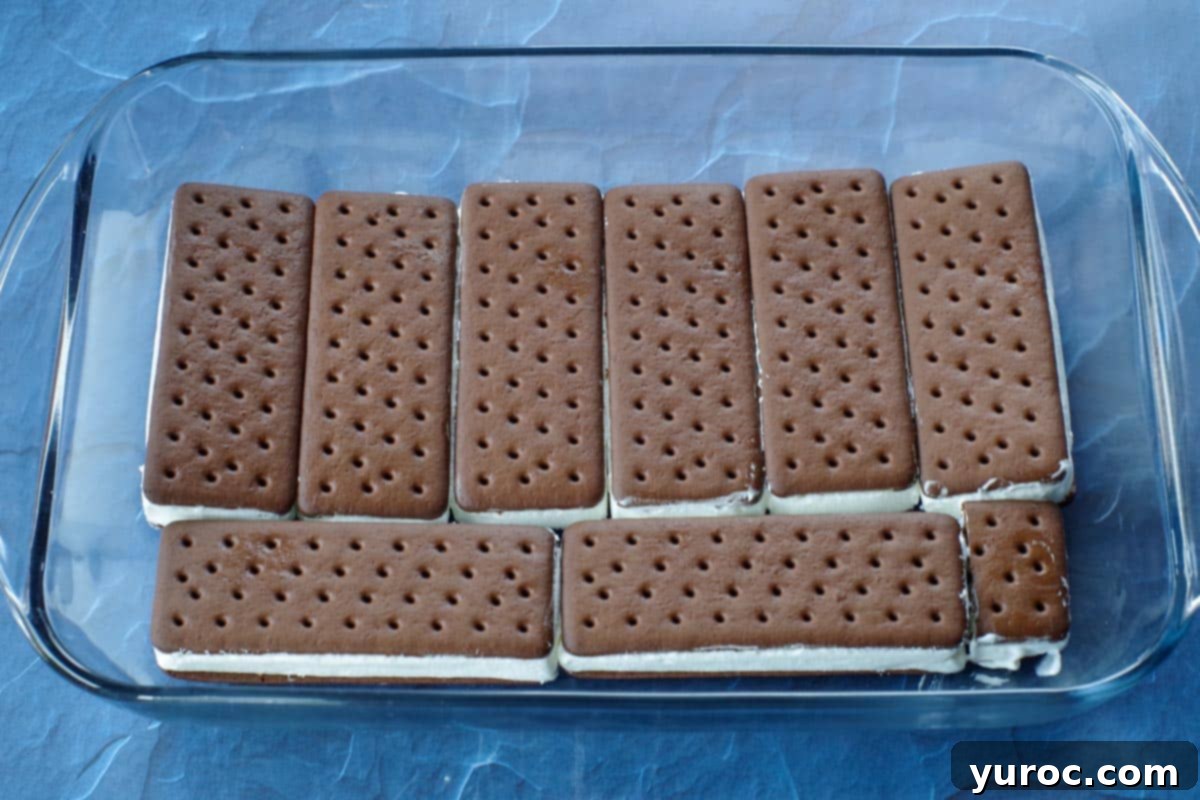
Prepare the Base: Begin by lining the bottom of a 9×13 inch baking pan with a single layer of ice cream sandwiches. You might need to cut some of the ice cream bars to fit snugly into any gaps, depending on the brand and size you purchase. Aim for a complete, even layer that covers the entire bottom of the pan. This forms the delicious and sturdy base of your ice cream cake.
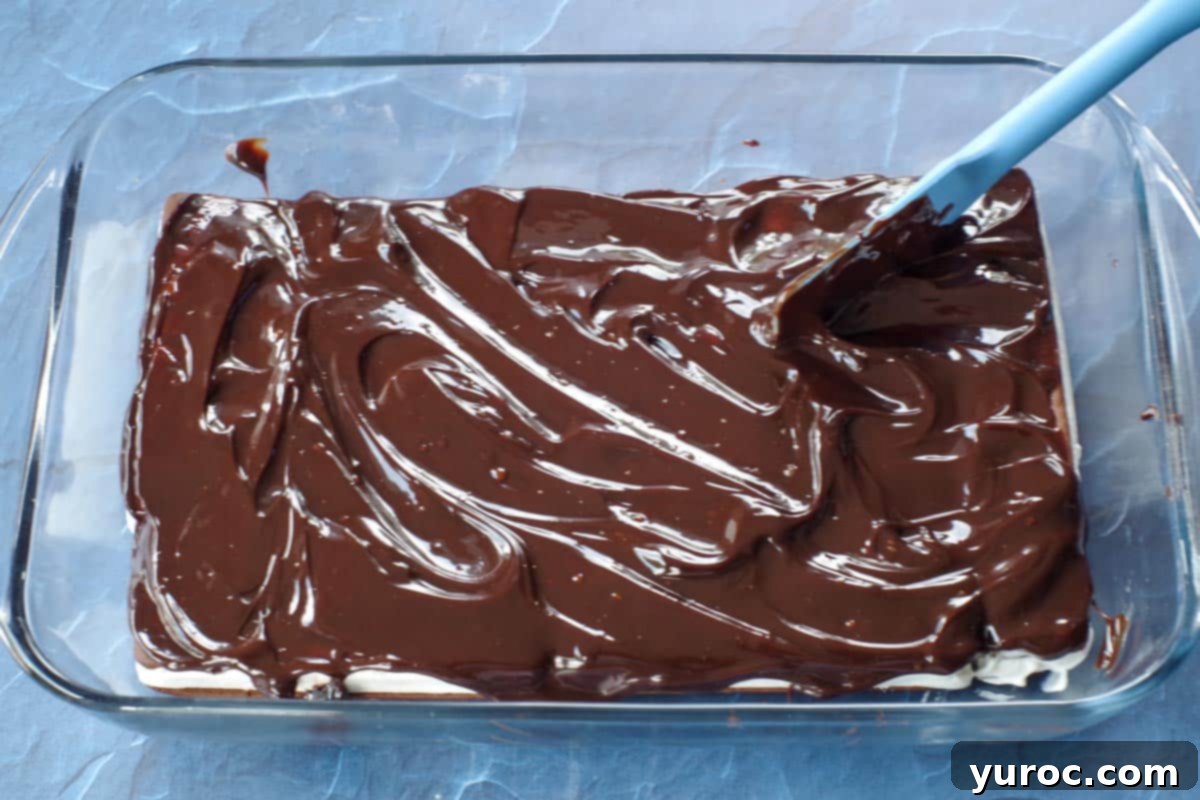
Add the Fudge Layer: Generously pour the chocolate fudge sauce directly over the layer of ice cream sandwiches. Using an offset spatula or the back of a spoon, carefully spread the fudge evenly across the entire surface. Ensure every ice cream sandwich is coated in this rich, chocolatey goodness, which will be a key flavor in your cake.
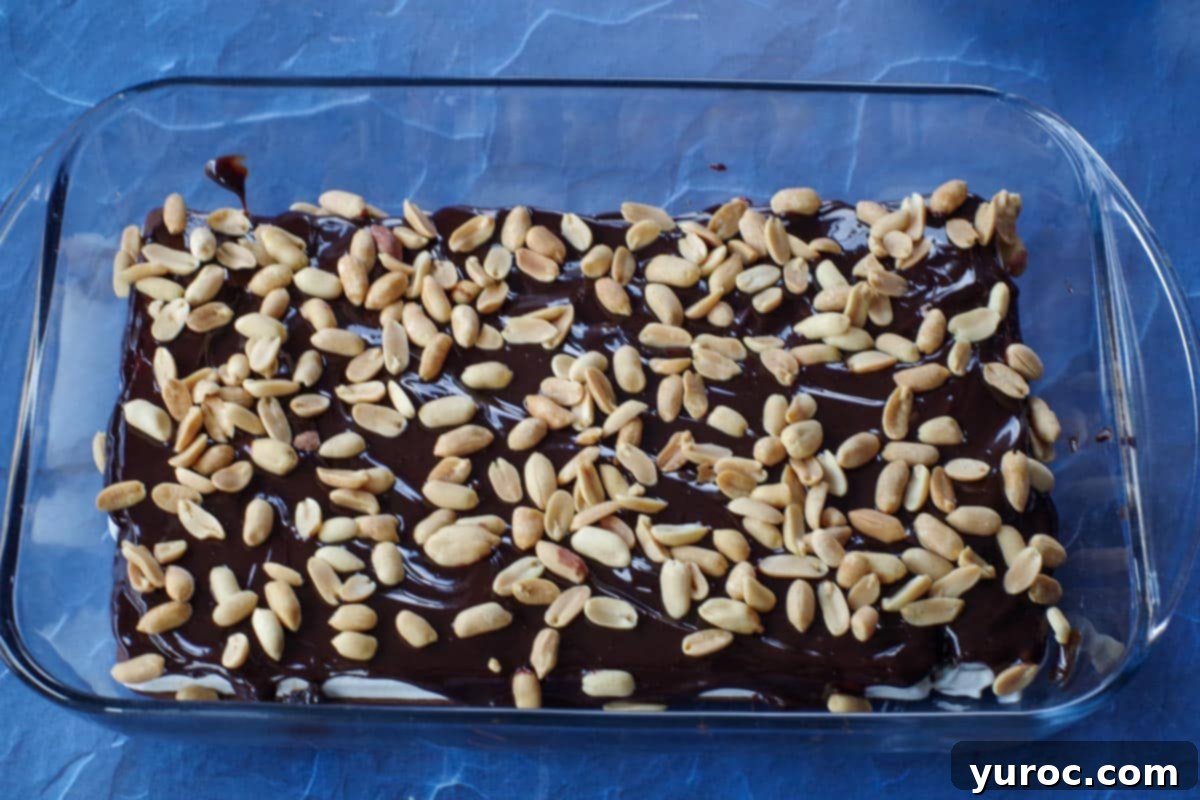
First Peanut Sprinkle: Now, take half of your unsalted peanuts (approximately ¾ cup) and sprinkle them evenly over the smooth fudge layer. The peanuts will adhere slightly to the sticky fudge, providing a delightful crunch that’s present throughout the cake. This layer ensures a nutty flavor in the middle of your dessert.
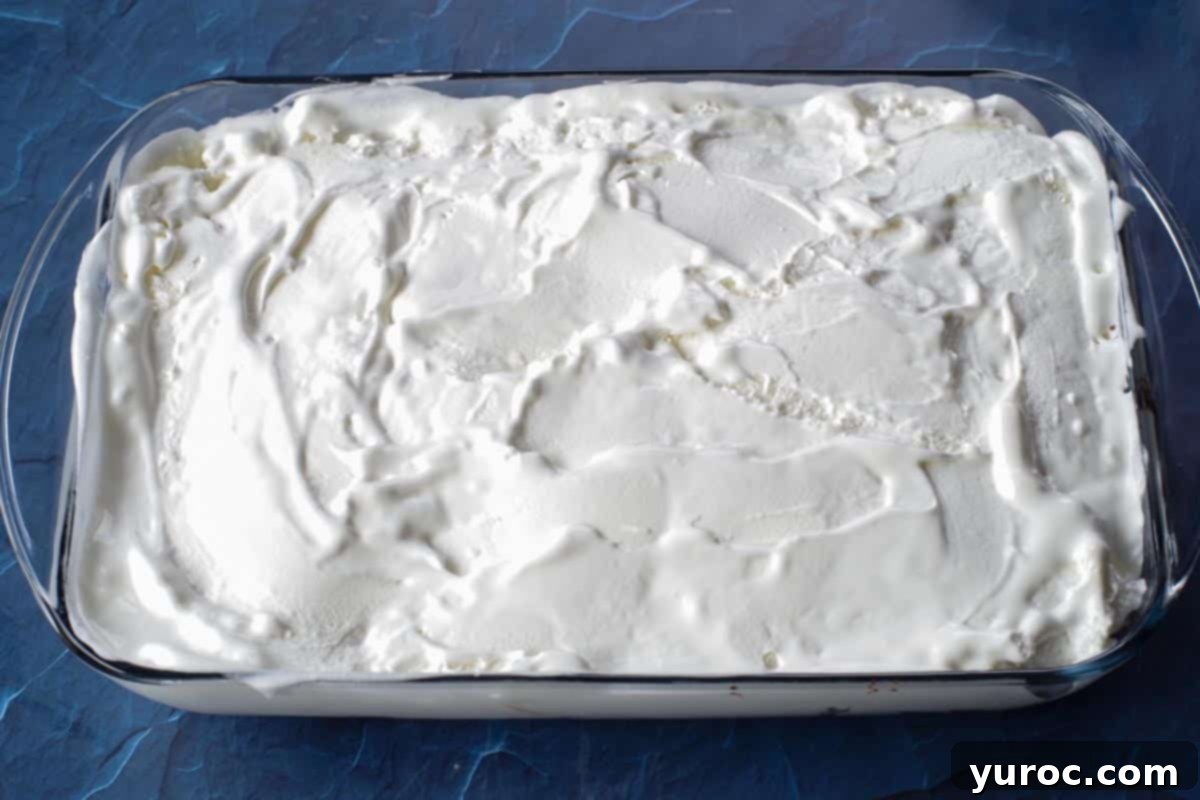
Add the Vanilla Ice Cream: Scoop the slightly softened vanilla ice cream on top of the peanut-fudge layer. Using a sturdy spatula or the back of a large spoon, gently but firmly smooth the ice cream into a flat, even layer. Make sure to press it down enough to seal in the fudge and peanuts below, creating a distinct, smooth layer without mixing the ingredients too much.
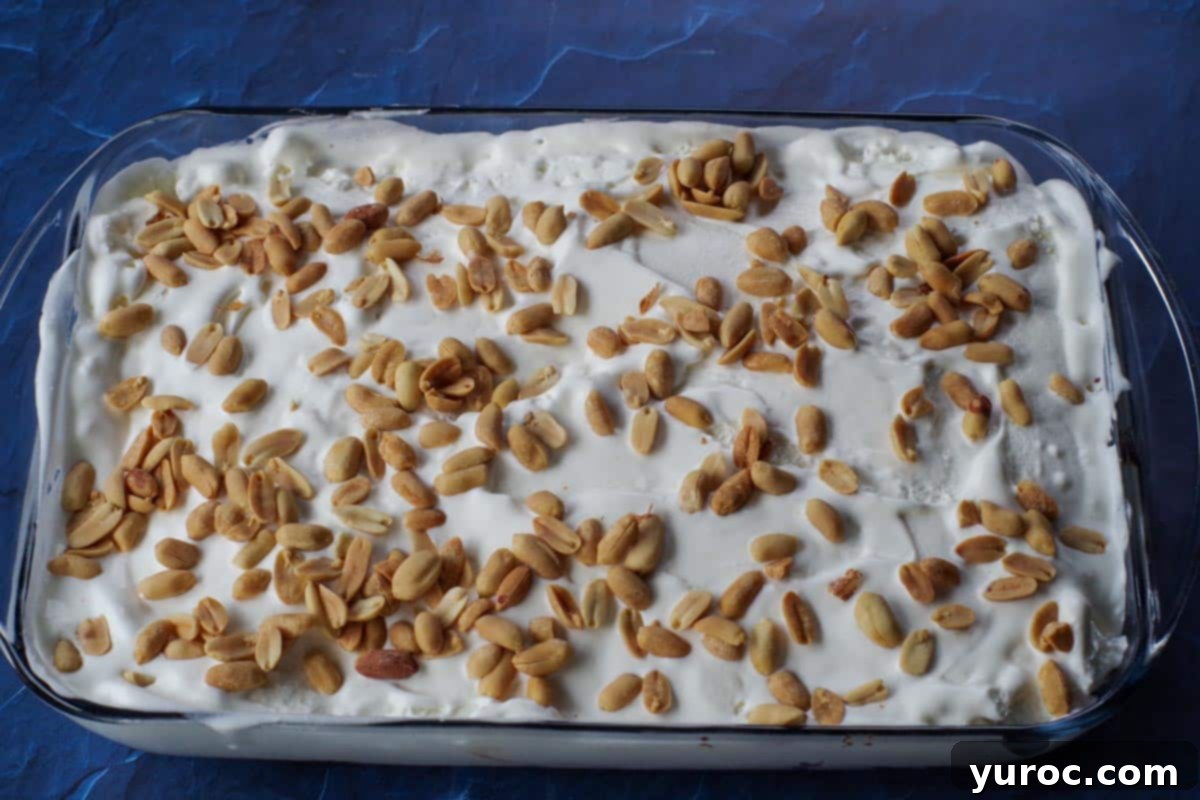
Second Peanut Sprinkle: Now, sprinkle the remaining peanuts (the other ¾ cup) over the top of the vanilla ice cream layer. This ensures that every slice of your Buster Bar Ice Cream Cake will have that satisfying peanut crunch, from top to bottom.
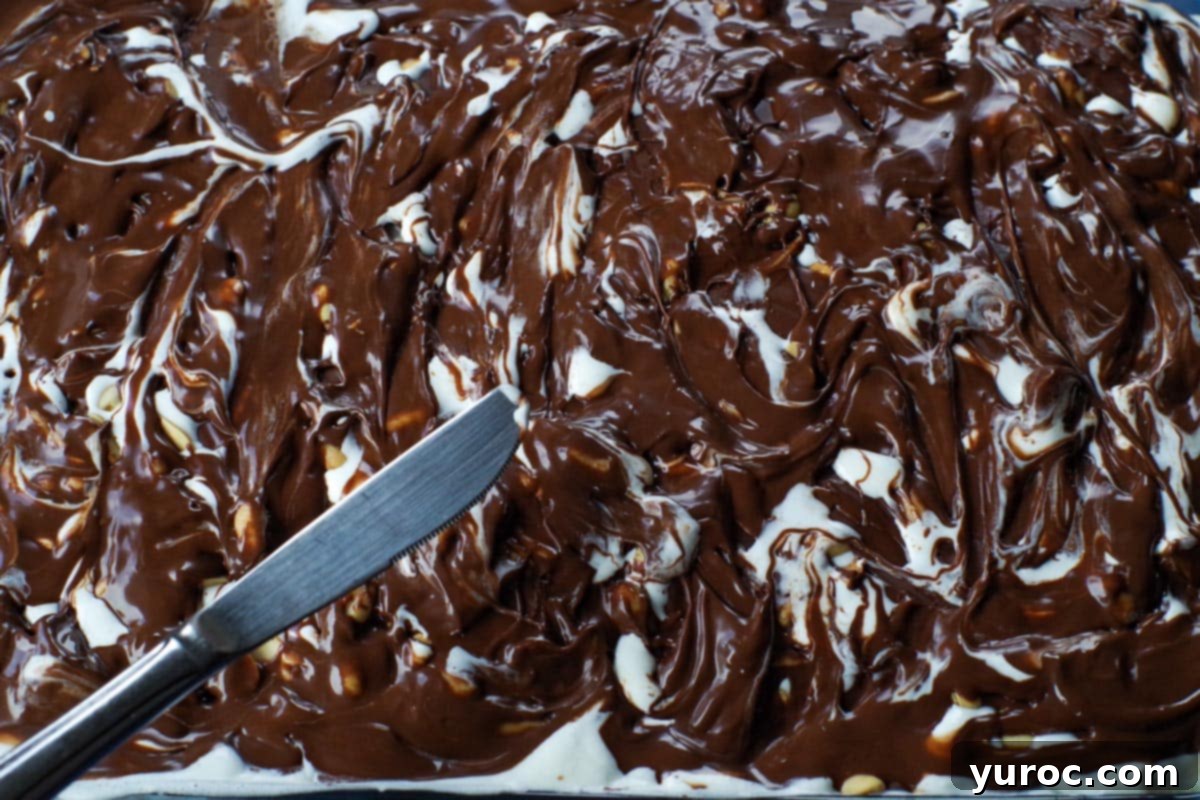
Apply Magic Shell: Drizzle both bottles of the Magic Shell chocolate coating generously over the layer of peanuts and ice cream. The Magic Shell will harden almost instantly upon contact with the cold ice cream, creating that iconic crackly topping and helping to secure the peanuts in place. *For a slightly marbled effect, you can swirl the magic shell into the very top layer of softened ice cream a little with a butter knife immediately after drizzling, but work quickly before it hardens.
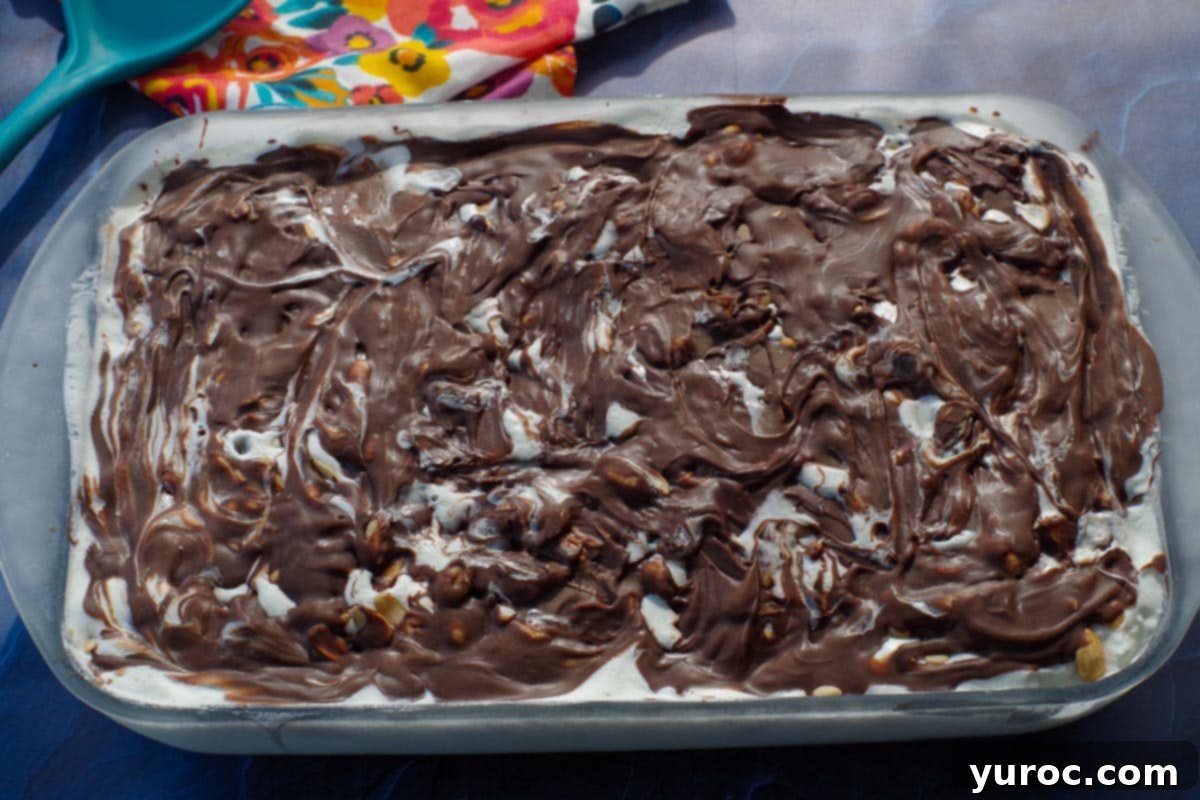
Freeze and Chill: Carefully place the pan in the freezer. It needs at least 3 hours to set completely before you can slice and serve. For optimal results and ease of cutting, I strongly recommend leaving it in overnight. After the first 1-2 hours (once the Magic Shell chocolate coating has fully set and hardened), cover the pan securely with plastic wrap or a lid to prevent freezer burn for the remainder of its time in the freezer. This ensures your Buster Bar Ice Cream Cake is perfectly firm and ready to enjoy.
Hint: Remember to allow your vanilla ice cream to soften for a few minutes before spreading it. This crucial step makes the ice cream much more pliable and easier to spread evenly over the fudge layer, ensuring a smooth, creamy texture throughout your cake without it being too runny.
Expert Recipe Tips for a Perfect Buster Bar Ice Cream Cake
Achieving a flawless and delicious Buster Bar Ice Cream Cake is easy with these expert tips. They’ll help you navigate the process like a pro, ensuring your no-bake dessert is a resounding success every time.
- Soften the Ice Cream Just Right: This is a key step for smooth layering. Take your vanilla ice cream out of the freezer and let it sit at room temperature for about 5-10 minutes. The goal is for it to be soft enough to spread easily with a spatula, but not so melted that it becomes liquid or starts to mix too much with the fudge layer. A perfectly softened ice cream layer will maintain its integrity and contribute to the cake’s beautiful defined strata.
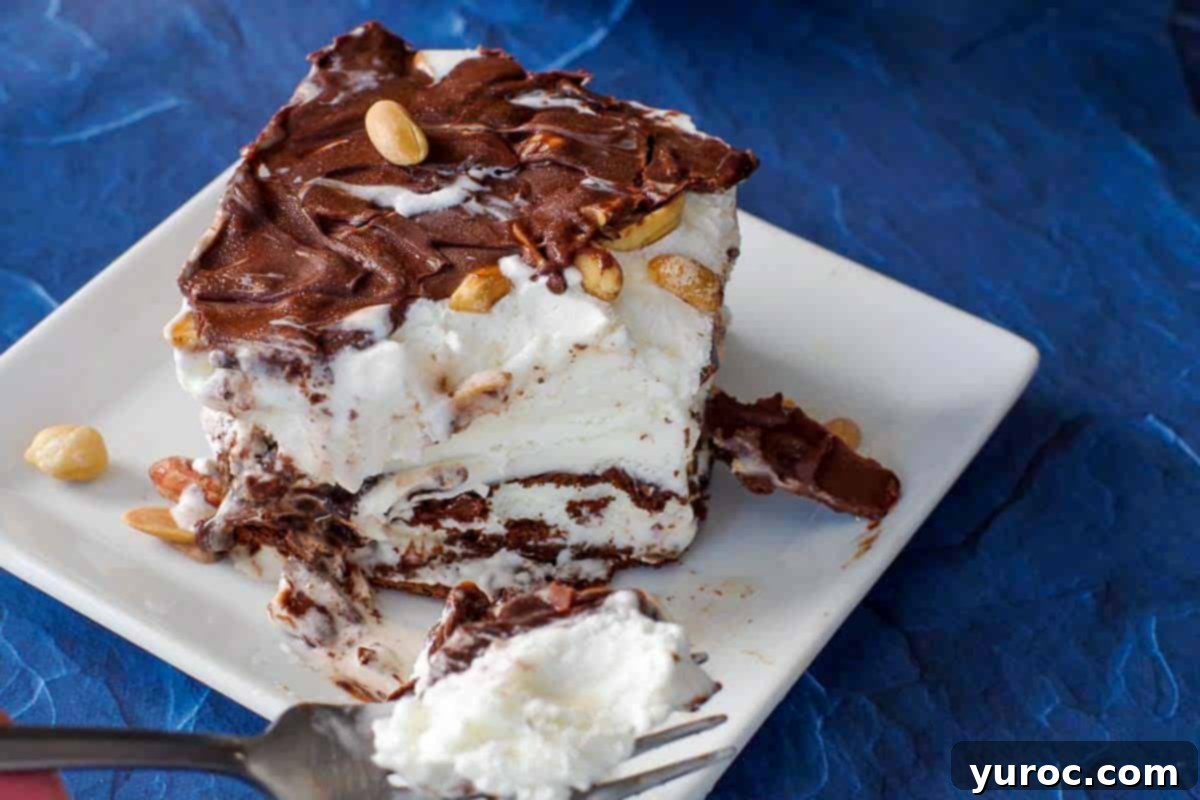
- Use a Hot Knife for Clean Slices: For bakery-quality, neat slices that glide through the frozen layers without cracking or crumbling, employ this simple trick. Dip a sharp knife into hot water for a few seconds, then quickly wipe it dry with a clean cloth before making each cut. The warmth of the blade helps it melt through the ice cream and fudge cleanly. Repeat this process for every slice to ensure pristine presentation.
- Line the Pan for Easier Removal (Optional but Recommended): If you plan to transfer the entire cake out of the pan for a more elegant presentation, lining the pan is a game-changer. Use parchment paper or plastic wrap, allowing extra material to hang over the sides. Once frozen, you can use these overhangs to lift the entire cake effortlessly out of the pan before slicing and serving.
- Don’t Skip the Magic Shell: This isn’t just a topping; it’s an essential element for the authentic Buster Bar experience. The Magic Shell not only adds that signature crackly chocolate layer that everyone loves but also plays a functional role in securing the top layer of peanuts in place. Its quick-setting nature and unique texture contrast beautifully with the soft ice cream and chewy fudge.
- Chop or Crush Peanuts for Finer Texture: If you or your guests prefer a less chunky texture, or if you want the peanut crunch to be more evenly distributed throughout each bite, consider giving your unsalted peanuts a quick rough chop before sprinkling. This breaks them into smaller pieces, ensuring a consistent crunch without any large, overwhelming nut clusters.
- Work Efficiently When Layering: Since you’re dealing with frozen and semi-frozen ingredients, time is of the essence. Try to assemble the layers as efficiently as possible to minimize melting. Rapid assembly prevents the ice cream from becoming too soft, which can affect the final texture and cause layers to blend together. Keeping everything cold ensures clean layers and a better eating experience.
- Customize with Fun Toppings: Make this Buster Bar Ice Cream Cake your own! Before the magic shell fully sets, or just before serving, you can add a festive twist. Think colorful sprinkles for birthdays, mini chocolate chips for extra chocolate goodness, or crushed cookies for another layer of texture. This is a great way to personalize the cake for specific holidays or celebrations.
- Freeze Overnight for Best Results: While the cake can be ready to slice in about 3 hours, allowing it to freeze overnight is highly recommended. An extended freezing period ensures that all layers are completely set and thoroughly firm. This not only makes for much easier and cleaner slicing but also results in a more stable and enjoyable dessert experience, especially if it will be sitting out for a little while during serving.
By following these expert tips, your homemade Buster Bar Ice Cream Cake will not only taste incredible but also look professionally made, making you the star of any gathering!
🌡️ Storage and Make-Ahead Tips
This fantastic summer treat is not only delicious but also incredibly convenient when it comes to storage and meal planning. Once assembled and fully frozen, your Easy Buster Bar Ice Cream Cake can be stored beautifully for an extended period, making it an ideal make-ahead dessert.
To ensure optimal freshness and to prevent freezer burn, always store the ice cream cake in an **airtight container** in the freezer. If you’ve used a baking pan with a lid, ensure it’s tightly sealed. Alternatively, if your pan doesn’t have a lid, cover the cake securely with multiple layers of plastic wrap, followed by a layer of aluminum foil. This dual protection helps to create a barrier against ice crystals and unwanted freezer odors.
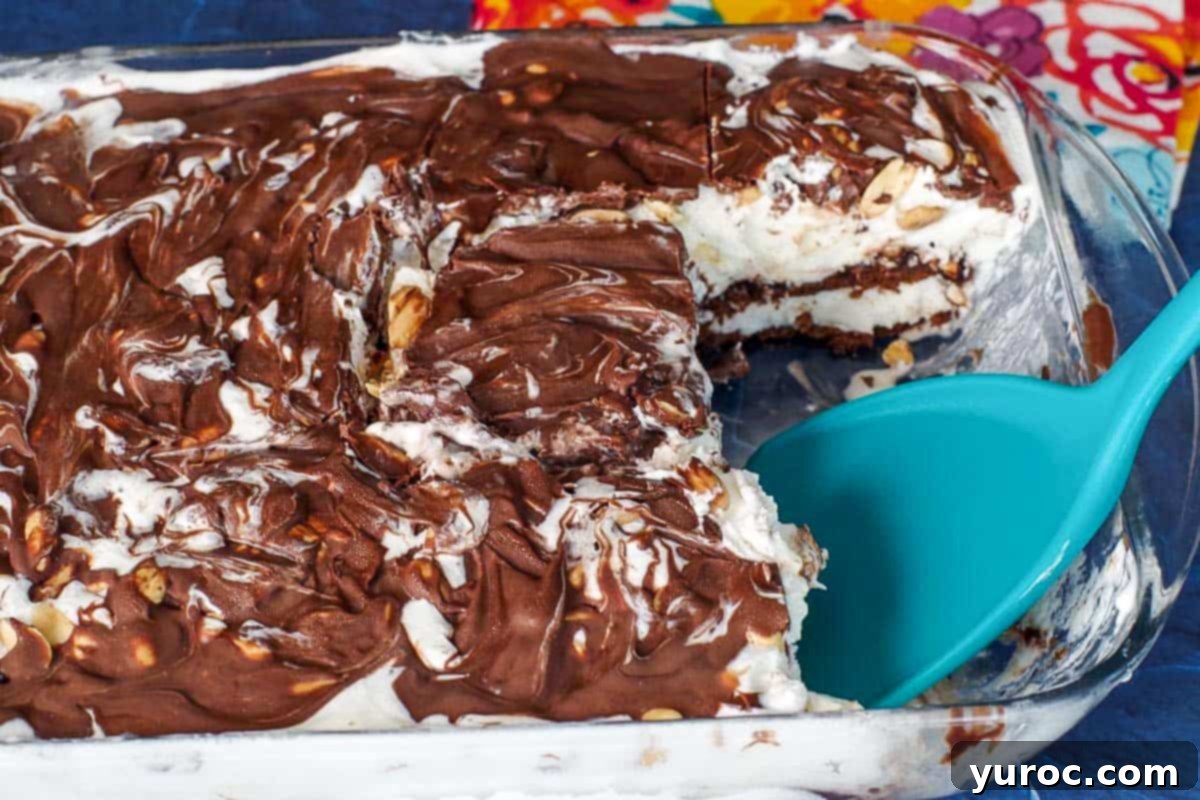
Properly stored, this indulgent dessert will maintain its quality in the freezer for **up to 3 months**. This generous storage time means you can prepare it well in advance for upcoming events, holiday gatherings, or simply to have a ready-to-serve dessert on hand whenever a craving strikes. Its ability to be made several days or even months ahead of time makes it a stress-free option for busy hosts and home cooks. Just remember to allow it to sit out for 5-10 minutes at room temperature before slicing for the cleanest cuts and best texture.
👪 Serving Size and Recipe Adjustments
This delightful Copycat Dairy Queen Buster Bar Ice Cream Cake recipe is designed to yield approximately **12 generous servings**, making it perfect for family meals, small gatherings, or even splitting into individual portions for a quick dessert throughout the week. The 9×13 inch pan size is standard and convenient for this quantity.
However, one of the great advantages of this recipe is its flexibility. You can easily adjust the serving size to meet your specific needs. If you’re hosting a larger crowd or simply want more of this irresistible treat, you can **double or even triple the recipe**. To do this, simply click on the serving number in the recipe card below and select your desired number of servings. The ingredient quantities will automatically adjust to scale up (or down) accordingly, saving you the hassle of manual calculations.
Keep in mind that if you choose to double or triple the recipe, you will naturally **require additional baking pans** of the same 9×13 inch size to accommodate the increased volume of ingredients. This ensures each cake has ample space to freeze properly and maintain its structure. Preparing multiple cakes can be a fantastic idea for big parties, potlucks, or to have several on hand for different occasions throughout the summer. Enjoy the flexibility of this crowd-pleasing ice cream cake!
🥗 What to Pair with This Irresistible Buster Bar Dessert
This homemade Buster Bar dessert is the quintessential choice for a summer BBQ, a festive potluck, or any casual gathering where you want to impress without the stress. Its cool, creamy, and crunchy profile makes it a delightful counterpoint to hearty, savory main courses, perfectly rounding out a satisfying meal. I especially love to serve it after a laid-back, comfort food-inspired meal that’s packed with flavor. Here are some ideal pairings:
- Slow Cooker Pulled Pork: The rich, tangy, and savory flavors of Slow Cooker Pulled Pork are beautifully complemented by the sweet and refreshing qualities of the ice cream cake. It’s a classic pairing that embodies casual summer dining.
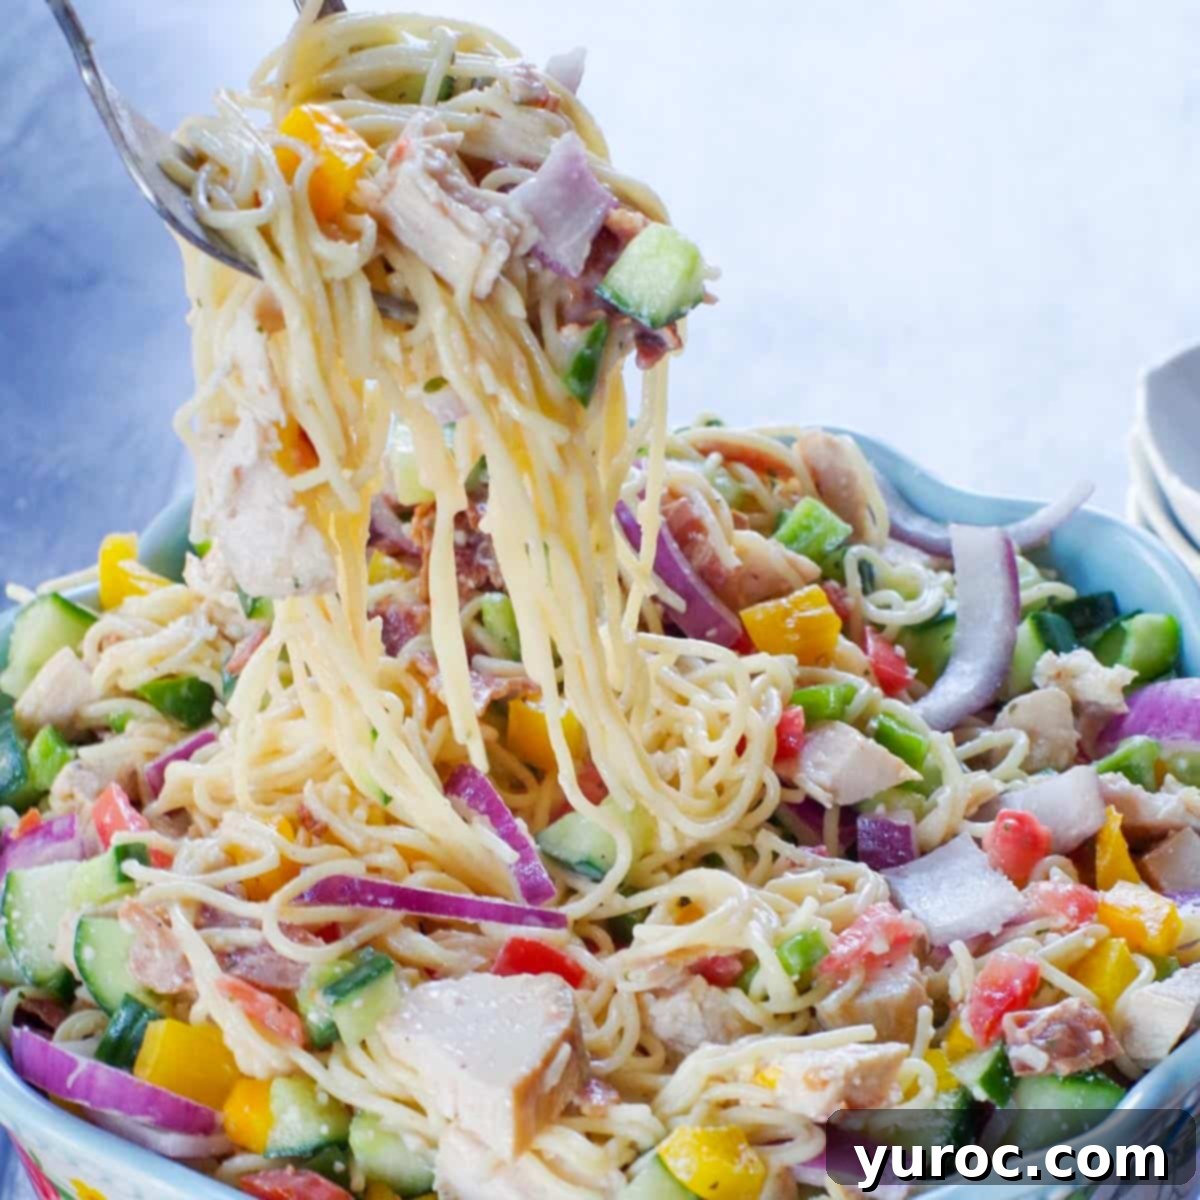
- Bacon Ranch Chicken Pasta Salad: As shown in the image below, a vibrant and flavorful Bacon Ranch Chicken Pasta Salad offers a medley of textures and zesty flavors that lead perfectly into a cool, sweet dessert. The creamy pasta and crispy bacon provide a delicious contrast.
- BBQ Beer Can Chicken: If you’re firing up the grill, a smoky and juicy BBQ Beer Can Chicken is an excellent main course. The bold, savory notes of grilled chicken are wonderfully balanced by the sweet, cold indulgence of the Buster Bar Ice Cream Cake.
- Other BBQ Favorites: Think juicy burgers, grilled sausages, or smoked brisket. Any classic BBQ fare that’s hearty and full of grilled flavor will find its perfect match in this cool dessert.
- Casual Sandwiches or Wraps: For a lighter lunch or dinner, serve this cake after substantial sandwiches or wraps, allowing the dessert to be the main highlight.
No matter what main dish you choose, this Buster Bar Ice Cream Cake is designed to be the star dessert, leaving a lasting impression on your guests and providing a perfectly sweet ending to any meal. It’s the ultimate hassle-free yet incredibly delicious option for any summer occasion.
❔ Frequently Asked Questions About This Easy Ice Cream Cake
Here are some common questions and helpful answers about making and enjoying your Buster Bar Ice Cream Cake:
Absolutely, this ice cream cake is an ideal make-ahead dessert! Its layered structure and frozen nature mean it’s perfectly suited for preparation in advance. You can easily assemble it several days, or even up to a few months, before you plan to serve it. Just ensure it’s stored in an airtight container or tightly wrapped to prevent freezer burn and maintain its fresh taste and texture until you’re ready to enjoy.
No, you should not thaw the ice cream sandwiches. For the base layer, you want them to be firm and frozen when you place them in the pan. This ensures they hold their shape and create a stable, solid foundation for the cake. The only ice cream component that benefits from a brief softening is the large tub of vanilla ice cream, which should sit out for a few minutes to become easier to spread, but not melted.
This recipe is a fantastic choice for birthday parties! It’s a fun, crowd-pleasing dessert that both kids and adults absolutely adore. Its make-ahead convenience means less stress on party day, and you can easily customize it. To make it extra festive for a birthday, consider decorating the top with colorful sprinkles, extra chocolate drizzles, or even some birthday candles just before serving. It’s sure to be a highlight of any celebration!
For the cleanest, most attractive slices, allow the frozen cake to sit at room temperature for 5-10 minutes before you begin cutting. This brief softening period makes it easier to slice without cracking or breaking. Then, use a sharp knife that has been dipped in hot water and thoroughly wiped dry. The warm blade will glide through the cold layers more smoothly. Repeat this process – dip, wipe, slice – between each cut to ensure every piece looks perfect.
Absolutely! While peanuts are traditional for a Buster Bar, you can certainly experiment. Chopped almonds, pecans, or walnuts would all be delicious. If you need a nut-free option due to allergies, crushed pretzels offer a fantastic salty crunch, or you could use a favorite nut-free cookie, crumbled, to add a similar textural element.
To protect your ice cream cake from freezer burn, ensure it is thoroughly covered. After the Magic Shell has set, wrap the pan tightly with at least two layers of plastic wrap, pressing it directly onto the surface of the cake to remove as much air as possible. Follow this with a layer of aluminum foil. If your pan has an airtight lid, use that in conjunction with the plastic wrap for maximum protection. This multi-layer approach keeps air out and moisture in, preserving the cake’s fresh taste and texture.
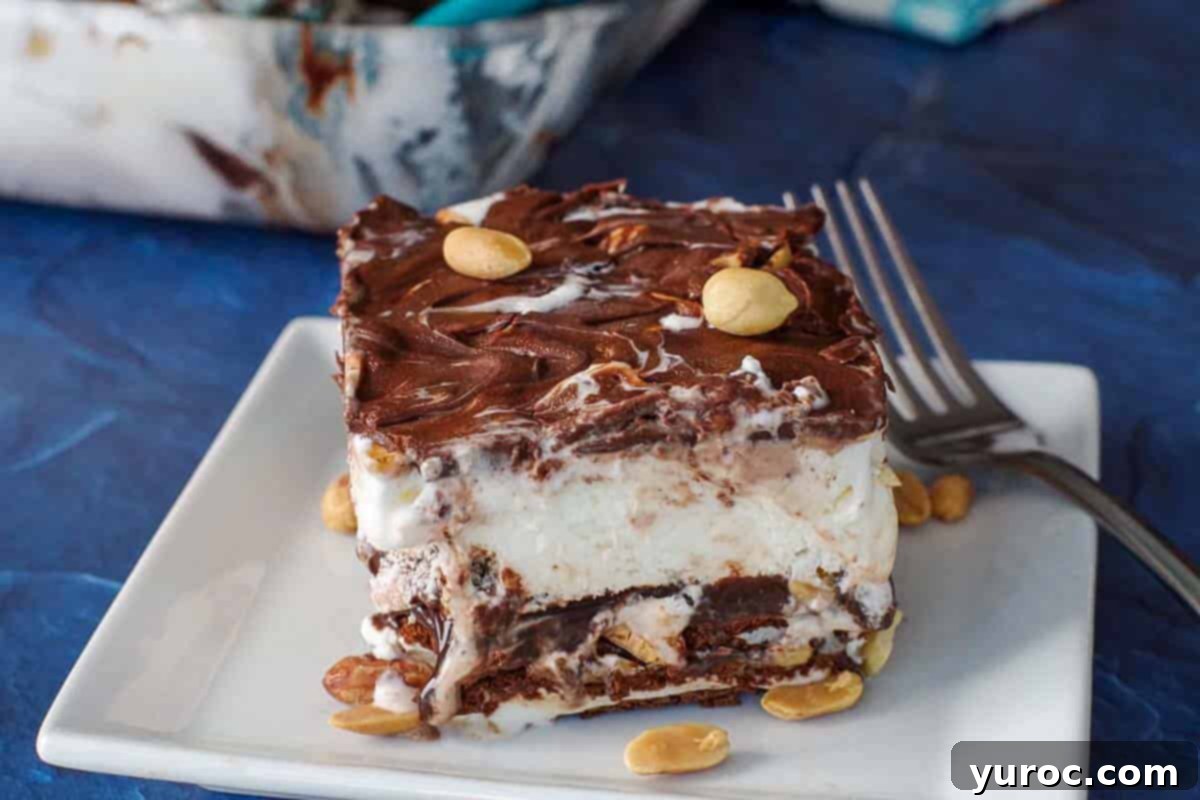
So, if you’re on the hunt for a truly delicious, remarkably easy, and impressively quick ice cream dessert that’s perfect for summer parties, casual family gatherings, or any special birthday celebration, you will absolutely adore this Buster Bar Ice Cream Cake! Its irresistible blend of creamy, crunchy, and chocolatey layers is guaranteed to satisfy every sweet tooth and is sure to become a beloved staple in your dessert repertoire. Get ready for rave reviews!
📋 More Delightful Summer Dessert Recipes to Explore
If you’ve enjoyed the simplicity and deliciousness of this Buster Bar Ice Cream Cake, you’re in for a treat! Here are more fantastic, easy-to-make summer dessert recipes that are perfect for beating the heat and satisfying your sweet cravings:
- Red Velvet Ice Cream Cake Recipe
- Drumstick Dessert
- Neapolitan Ice Cream Cake
- Dairy-free Orange Creamsicle Pie
Did your family ❤️ this recipe? Did you know that commenting and ⭐️ rating recipes is one of the best ways to support your favorite recipe creators? If you LOVED this recipe, please comment and rate it in the recipe card or share photos on social media using the hashtag #foodmeanderings or tagging @foodmeanderings !

📋 Easy Buster Bar Ice Cream Cake Recipe
Equipment
-
9×13 pan with lid
Ingredients
- 8-10 ice cream sandwiches
- 2 litres vanilla ice cream
- 14 ounces hot fudge sauce
- 1 ½ cups unsalted peanuts
- 15 ounces -bottle Magic Shell chocolate coating (2 bottles)
Instructions
-
Set the ice cream out to soften slightly for easier spreading. Then, line the bottom of a 9×13 inch pan with a single layer of ice cream sandwiches, cutting some to fit perfectly if needed.8-10 ice cream sandwiches
-
Pour the hot fudge chocolate sauce over the ice cream sandwich layer and spread it out evenly with a spatula, ensuring good coverage.14 ounces hot fudge sauce
-
Sprinkle half of the unsalted peanuts (approximately ¾ cup) over the surface of the fudge layer, distributing them evenly.1 ½ cups unsalted peanuts
-
Scoop the slightly softened vanilla ice cream on top of the peanut-fudge layer. Use a scooper or a stiff spatula to gently smash and smooth the ice cream into a flat, even layer, pressing down to seal in the fudge and nuts.2 litres vanilla ice cream
-
Sprinkle the remaining peanuts (the other ¾ cup) evenly over the top of the vanilla ice cream layer.
-
Then, generously drizzle both bottles of Magic Shell chocolate coating over the peanuts and ice cream. It will harden quickly upon contact with the cold surface, creating that signature crackly top.15 ounces -bottle Magic Shell chocolate coating
-
Place the pan in the freezer for 1-2 hours to allow the Magic Shell to fully set. After it’s hardened, cover the pan securely with plastic wrap or a lid and return it to the freezer for at least another hour, or until it is completely frozen solid, before slicing and serving. *For the best results and easiest slicing, I highly recommend freezing it overnight.
Notes
- Soften the ice cream just right. Let the vanilla ice cream sit out for 5-10 minutes until it’s soft enough to spread easily, but not melted. This ensures a smooth layer that won’t mix into the fudge.
- Use a hot knife for clean slices. For neat, bakery-style cuts, dip your knife in hot water and wipe it dry before slicing. This helps glide through the frozen layers without cracking or crumbling.
- Line the pan for easier removal (optional). If you want to lift out the entire cake for cleaner presentation, line the pan with parchment paper or plastic wrap, allowing extra to hang over the sides.
- Don’t skip the magic shell. Magic shell not only adds that signature crackly chocolate topping, but also helps secure the peanuts in place and adds great texture contrast.
- Chop or crush peanuts if you want smaller pieces. If you prefer a less chunky texture, give the peanuts a quick rough chop. This distributes the crunch more evenly throughout each bite.
- Work quickly when layering. Since you’re working with ice cream, try to assemble the layers as efficiently as possible to prevent melting and refreezing, which can affect texture.
- Customize with fun toppings. Add sprinkles, mini chocolate chips, or crushed cookies over the magic shell layer before freezing for a festive twist-especially great for birthdays or holidays.
- Freeze overnight for best results. While 3 hours may be sufficient, freezing overnight ensures the layers are completely set and easier to slice and serve cleanly.
