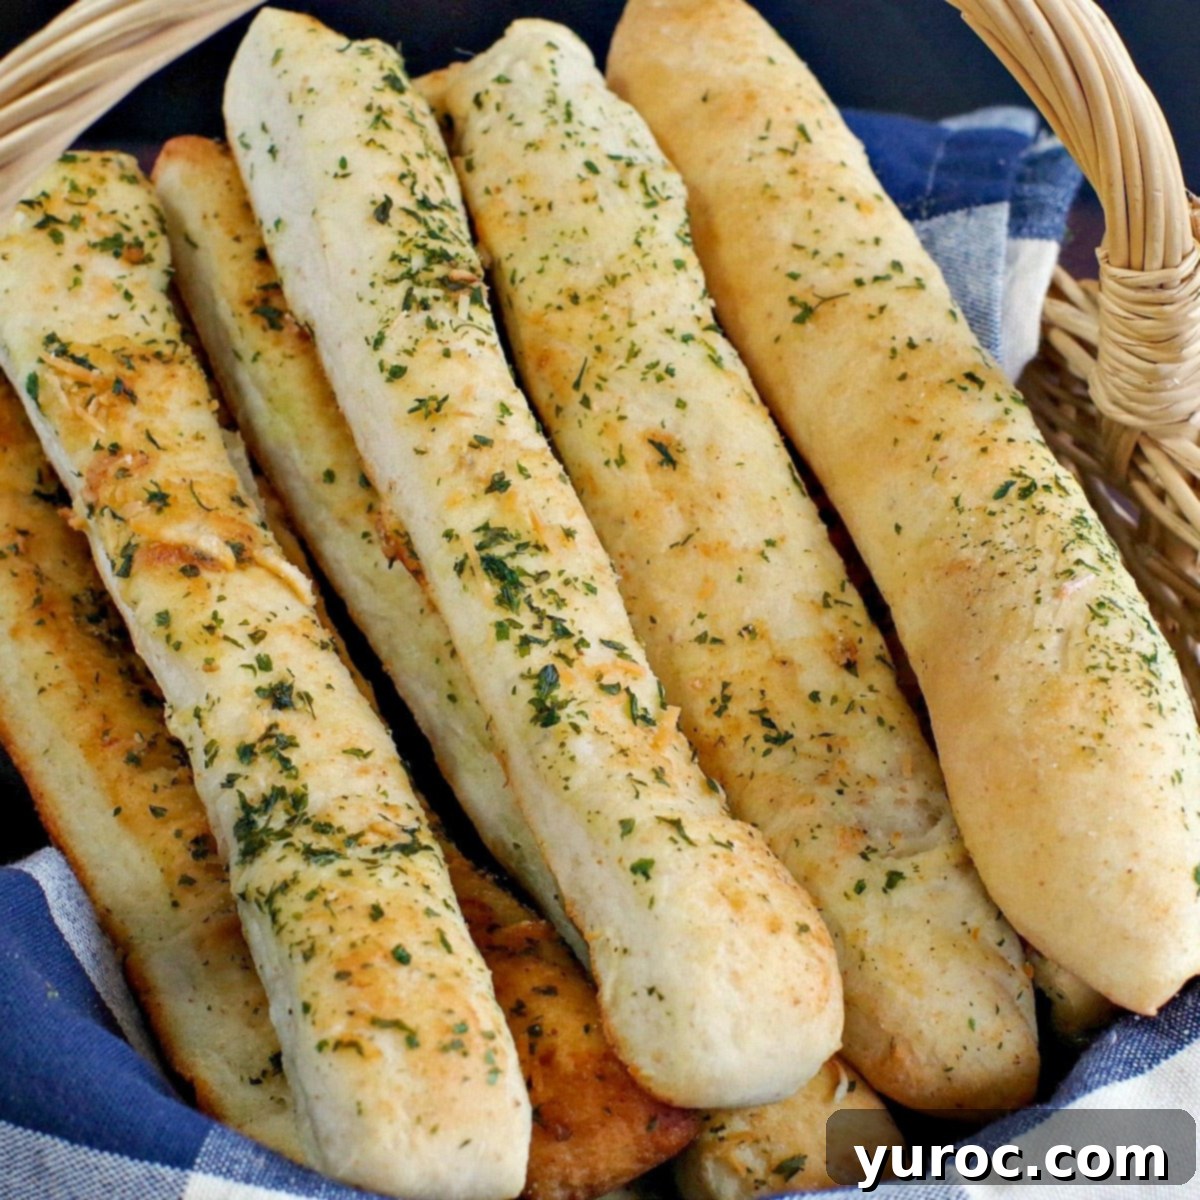
Effortless Italian Breadsticks from Your Bread Machine

Reheating from Storage: To reheat, simply pop them into the microwave for about 15-20 seconds. The exact time may vary slightly depending on the wattage of your microwave, so adjust as needed until they are warm and soft.
*NOTE: This recipe is specifically designed for a 1 lb bread maker or using the 1lb setting on your bread machine. Adjusting quantities for larger machines might require proportionate changes.
**NOTE: I have a very old bread machine that necessitates adding ingredients in a specific order (liquids first, then dry, with yeast isolated). This might not be the case for newer or different bread maker models. Always check your machine’s manual for its recommended ingredient loading sequence.

Nutrition

Serving: 1breadstick | Calories: 104kcal (5%) | Carbohydrates: 16g (5%) | Protein: 3g (6%) | Fat: 3g (5%) | Saturated Fat: 2g (13%) | Cholesterol: 8mg (3%) | Sodium: 306mg (13%) | Potassium: 55mg (2%) | Fiber: 1g (4%) | Sugar: 2g (2%) | Vitamin A: 91IU (2%) | Vitamin C: 1mg (1%) | Calcium: 15mg (2%) | Iron: 1mg (6%)
Did you make this recipe? Please leave a star rating and review below!
Rate this Recipe

Easy Bread Machine Italian Breadsticks: Homemade, Soft & Garlicky Perfection

There’s nothing quite like the aroma of freshly baked bread filling your home, and with a bread machine, creating that magic is incredibly simple. If you’re looking to elevate your mealtime or simply enjoy a fantastic homemade snack, these Italian Bread Machine Breadsticks are an absolute game-changer. They’re wonderfully soft on the inside, with a golden crust, and infused with a delightful garlic flavor. Many compare them favorably to those famous restaurant breadsticks (yes, even Olive Garden’s!), but with the undeniable freshness and quality of homemade.

Basket filled with golden brown, soft bread machine Italian breadsticks, ready to be served as an appetizer or side.

Owning a bread machine is truly a culinary asset, making tasks like kneading and rising dough effortless. It transforms what might seem like a daunting baking project into a quick and enjoyable process. This recipe for Italian breadsticks highlights just how convenient and rewarding a bread machine can be. Not only do these breadsticks emerge perfectly delicious every time, but they also impart an irresistible aroma throughout your kitchen, a scent that promises warmth and comfort.

My journey into baking started with a bread machine early in my adult life, and I honestly can’t imagine making bread by hand now! While I once attempted traditional Ukrainian Easter bread manually, I soon discovered my bread maker could handle that too, saving me countless hours and effort. The convenience of simply adding ingredients and letting the machine do the heavy lifting for the dough cycle is unparalleled, making homemade bread and breadsticks a regular treat rather than an occasional indulgence.

🥘 Essential Ingredient Notes for Perfect Breadsticks

Crafting delicious breadsticks begins with understanding the role of each ingredient. For these Italian breadsticks, the combination of garlic and Parmesan is key, delivering a savory depth that truly makes them “sing.” Their soft texture and rich flavor often draw comparisons to beloved restaurant breadsticks, but we think you’ll find these homemade versions even better!

While some bread recipes specifically call for high-protein bread flour, this particular recipe works beautifully with a blend of standard flours. Here’s what you’ll need:

📖 Creative Variations & Easy Substitutions

This breadstick recipe is wonderfully versatile, allowing for several modifications to suit your pantry or taste preferences. Don’t hesitate to experiment with these simple changes:

💡 Expert Tips for Bread Machine Breadstick Success

Achieving perfect bread machine breadsticks is straightforward when you follow a few key guidelines. These tips will help ensure your dough rises beautifully and your breadsticks turn out soft, flavorful, and perfectly golden:

  • Use Bread Machine Yeast (Instant Yeast): This recipe specifically calls for bread machine yeast, which is a type of instant yeast. It’s designed to be mixed directly with other dry ingredients and doesn’t require prior activation. Do NOT substitute with active dry yeast without adjusting the method, as active dry yeast typically needs to be proofed in warm liquid first.
  • Shape the Ends for a Polished Look: If the ends of your breadsticks appear a little pointy or uneven after cutting, don’t worry! Simply use your hands to gently round the dough, shaping them to your desired aesthetic. Remember, homemade doesn’t mean perfect uniformity; the slight variations add to their rustic charm!
  • Check Your Yeast’s Expiration Date: Yeast is a living organism, and its potency diminishes over time. Bread machine yeast typically lasts for 3-4 months after the bottle has been opened. However, exposure to air, moisture (if not sealed tightly), or higher temperatures can drastically shorten its shelf life. Always check the expiration date and ensure your yeast is fresh for a reliable rise. If your yeast is old, your dough won’t rise properly.
  • Use Warm Water: The temperature of your water is crucial for activating the yeast. It should be warm to the touch, similar to bathwater – ideally between 105°F and 115°F (40°C-46°C). Water that’s too hot can kill the yeast, while water that’s too cold will inhibit its activation, leading to a poor rise.
  • Add Ingredients in the Specified Order: While some modern bread machines are more forgiving, many, especially older models like mine, require ingredients to be added in a specific order. Typically, liquids go in first, followed by dry ingredients, with yeast placed in a small crater on top of the flour, away from salt and sugar. Salt can inhibit yeast activity if in direct contact, while sugar can over-activate it. Always refer to your bread machine’s manual for its recommended loading order to ensure optimal results.
  • Measure Accurately: Precision is paramount in baking, especially with yeast doughs. Ensure all your measurements are level. Avoid “heaping” tablespoons or cups unless explicitly stated in the recipe. Too much or too little of any ingredient, particularly flour or liquid, can drastically alter the dough’s consistency, affecting its rise and final texture. Use proper measuring cups and spoons, leveling off dry ingredients with a straight edge.

🔪 Step-by-Step: How to Make Bread Machine Italian Breadsticks

The beauty of this recipe lies in its simplicity. Your bread machine handles the hard work of dough preparation, leaving you with minimal hands-on time to create these delectable breadsticks. Here’s how it unfolds:

First, prepare the dough by adding all the dough ingredients to your bread machine according to the instructions (and the order given in the recipe card below). Select the “Dough” setting and let your machine work its magic. Once the dough cycle is complete, the machine will beep, indicating your perfectly kneaded and risen dough is ready to be transferred from the bread machine pan to a lightly floured surface.

Step 1: Gently roll out the soft and pliable breadstick dough into a large, even rectangle. Aim for a thickness of about ½ inch.

Step 2: Generously brush the entire surface of the rolled-out dough with melted butter. This provides a rich base for our seasonings and helps create that golden crust. Then, evenly sprinkle with garlic powder, salt, dried parsley, and freshly grated Parmesan cheese. This flavorful topping will bake into a delicious, savory crust.

Step 3: Using a pizza cutter, carefully cut the rectangle of dough into approximately 1-inch wide strips. You should get around 15 breadsticks from this recipe. Don’t worry if they’re not perfectly uniform; homemade is about flavor and enjoyment!

Step 4: Carefully transfer the cut breadsticks to a baking sheet that has been lined with parchment paper. Leave a little space between each breadstick to allow for even baking and browning.

Four-step visual guide showing how to roll, season, cut, and place bread machine breadsticks on a baking sheet before baking.

⏲️ Baking Time & Temperature

Preheat your oven to 375 degrees F (190 degrees C). Once hot, bake the breadsticks for 12 to 15 minutes. Keep a close eye on them; you’re looking for a beautiful golden-brown color on top and a lightly browned bottom, indicating they are cooked through and perfectly crisp yet soft.

🥗 Perfect Pairings: What to Serve with Homemade Breadsticks

These warm, garlicky, and soft homemade breadsticks are incredibly versatile and can complement a wide array of dishes. They are truly the perfect addition to almost any meal, transforming a simple dinner into a comforting feast.

They shine brightest alongside hearty, comforting pasta dishes and casseroles. Imagine dipping these into the rich sauce of my Turkey Tetrazzini with Cream of Mushroom Soup, or soaking up the flavors of Spaghetti with secret ingredient spaghetti sauce. They also pair wonderfully with creamy Chicken Fettuccine or classic, baked goodness of Baked Beef Cannelloni. The breadsticks provide an ideal textural contrast and a savory counterpoint to these rich, saucy meals.

Beyond pasta, these breadsticks are a fantastic accompaniment to lighter fare such as fresh salads and robust soups and stews. Serve them alongside a vibrant Strawberry Spinach Pecan Salad for a delightful crunch, or use them to sop up the savory broth of a Slow Cooker Chicken Stew. They are also absolutely incredible with a comforting bowl of Crockpot Zuppa Toscana Soup, adding a much-needed vehicle for those delicious flavors.

And for a truly exceptional experience, these warm, pillowy breadsticks are the ultimate partner for my Loaded Pierogi Soup, making every spoonful even more satisfying (as pictured below).

But the versatility doesn’t stop there! These breadsticks are also absolutely wonderful dipped in your favorite pizza sauce, creating a quick and easy snack or a fun addition to a casual meal.

Italian breadsticks in a rustic basket, accompanied by a small bowl of savory pizza sauce and a pizza cutter on the side.

This fantastic breadstick recipe hails from the instruction manual that accompanied my very first bread machine many years ago. It’s a classic for a reason – it consistently delivers incredible results. The intoxicating aroma alone will draw everyone to the kitchen, leaving them eager for more. In fact, my own kids could hardly wait for me to finish photographing them before diving in! We especially love them dipped in a simple mixture of balsamic vinegar and olive oil, a truly delightful combination.

Freshly baked bread machine Italian breadsticks arranged on a wooden board, with a dipping bowl of balsamic vinegar and olive oil.

👪 Serving Size

This easy-to-follow recipe is perfectly proportioned for a 1 lb bread machine or for use on the 1lb setting of your bread maker. Following the instructions, you will yield approximately 15 delicious and satisfying homemade breadsticks, ideal for a family meal or a gathering with friends.

🌡️ Storing Your Homemade Breadsticks

Proper storage ensures your delicious breadsticks remain fresh and enjoyable. Here’s how to best store and reheat them:

Make-ahead & Room Temperature Storage: These breadsticks can be prepared in advance and stored at room temperature for up to 3 days. To maintain their softness and prevent them from drying out, always keep them in an airtight container. There’s no need to refrigerate baked goods like breadsticks, as the cold air in the fridge can actually make them stale more quickly.

Freezing for Longer Freshness: For longer storage, you can easily freeze these breadsticks. Once they have cooled completely to room temperature, transfer them to a freezer-safe Ziplock bag or an airtight freezer container. They will maintain their quality in the freezer for up to 3 months. When ready to enjoy, simply thaw them at room temperature or reheat directly from frozen.

Reheating Instructions: To bring your stored breadsticks back to their warm, soft glory, a quick reheat is all that’s needed. Pop them into the microwave for approximately 15-20 seconds. The exact time may vary slightly depending on the wattage of your microwave, so start with 15 seconds and add more time if needed until they are heated through and soft.

❔ Recipe FAQs for Bread Machine Breadsticks

Got questions about making bread machine breadsticks? Here are answers to some common queries to help you achieve perfect results every time.

Why is bread machine flour different, and do I need it?

Some bread machine recipes specifically call for “bread flour” because it has a higher protein level (typically around 12-14%) compared to all-purpose flour. This higher protein content leads to stronger gluten development, which helps the dough hold its shape better and rise straight up, resulting in a chewier texture. All-purpose flour, with its lower protein content (around 10-12%), tends to produce a softer, more spread-out dough. However, in many regions, including Canada, all-purpose flour is naturally higher in protein than in other places, often making the distinction between bread flour and all-purpose flour less critical for home baking. For this specific breadstick recipe, the blend of all-purpose and whole wheat flour works perfectly to achieve the desired soft yet slightly chewy texture without needing specialized bread flour.

What can I use instead of dry milk powder in a bread maker?

If your recipe calls for dry milk powder but you don’t have any, a simple substitution can be made. You can replace the water specified in the recipe with an equal volume of regular liquid milk (skim, 2%, or whole milk). This will provide the necessary liquid while also incorporating the milk solids that contribute to the bread’s tenderness and crust. Just ensure you adjust the total liquid amount accordingly, effectively swapping the water and dry milk for liquid milk.

My bread dough is too sticky – what should I do?

If you find your bread dough is excessively sticky after the bread machine’s kneading cycle, it likely needs a bit more flour. Humidity, flour brand, and even slight measurement inaccuracies can affect dough consistency. To remedy this, add extra flour gradually. Sprinkle in one tablespoon of all-purpose flour at a time, allowing the machine to knead it in for a few minutes before assessing the dough again. Continue this process until the dough is no longer too sticky to handle and forms a smooth, elastic ball.

So, dust off that bread maker and prepare to delight your senses with these incredible homemade Italian breadsticks! They are incredibly easy to make and guaranteed to be a hit.

Happy and easy bread making!

🍞 Explore More Delicious Bread Machine Recipes!

If you’ve enjoyed the simplicity and deliciousness of these bread machine Italian breadsticks, you’re in for a treat! Your bread machine is capable of so much more than just basic loaves. Discover a world of effortless baking with these other fantastic bread machine recipes:

  • Savory Onion and Olive Bread Machine Recipe
  • Effortless Bread Machine Pizza Dough Recipe
  • Gourmet Gruyère Apple Pie Bread Machine Cinnamon Rolls
  • Classic Bread Maker Cinnamon Raisin Bread

Did your family ❤️ this recipe? Did you know that commenting and ⭐ rating recipes is one of the best ways to support your favorite recipe creators? If you LOVED this recipe, please comment and rate it in the recipe card below or share photos on social media using the hashtag #foodmeanderings or tagging @foodmeanderings!

Delicious bread machine Italian breadsticks served in a rustic basket, highlighting their golden-brown perfection.
Food Meandering Logo

📋 Easy Italian Bread Machine Breadsticks Recipe

Create these incredibly easy and delicious Italian Breadsticks effortlessly with your bread machine! The dough is prepared by the machine, then quickly shaped with a pizza cutter, baked to golden perfection in just 12-15 minutes. These soft, garlicky homemade breadsticks will fill your home with an amazing aroma and are perfect as a side for soups, salads, or pasta, and fantastic for dipping in oil and balsamic vinegar or your favorite pizza sauce.
5 from 2 votes
Print Recipe Pin Save RecipeSave Recipe Rate
Course: Appetizer, Side Dish
Cuisine: Italian
Special Diet: Vegetarian
Servings: 15 breadsticks
Calories: 104kcal
Author: Terri Gilson
Prep Time: 5 minutes
Cook Time: 15 minutes
Dough preparation: 1 hour 20 minutes
Total Time: 1 hour 40 minutes
Prevent your screen from going dark
Add to Shopping ListGo to Shopping List

Equipment

  • bread machine
  • baking sheet
  • Pizza Cutter

Ingredients

Dough

  • 8 oz warm water (105-115°F / 40-46°C)
  • 2 cups all-purpose flour
  • 2 tablespoon whole wheat flour
  • 1 ½ tablespoon unsalted butter
  • 2 tablespoon dry milk powder (skim, 2% or whole)
  • 1 ½ tablespoon white granulated sugar
  • 1 teaspoon salt
  • 2 teaspoon bread machine yeast (instant yeast)

Topping

  • 2 tablespoon melted butter
  • 2 teaspoon garlic powder
  • 1 tablespoon grated Parmesan cheese
  • 1 ½ teaspoon dried parsley
  • ¾ teaspoon salt
US Customary – Metric

Instructions

Dough Preparation:

  • Add all dough ingredients to your bread machine pan. It is crucial to add them in the exact order given in the ingredient list: liquids first, then dry ingredients. Ensure salt is placed along one edge and sugar along another, then create a small crater in the center of the flour with your finger and carefully pour the bread machine yeast into this crater. This separation helps prevent premature yeast activation or inhibition. *Note: The specific order of ingredients is important for some breadmakers, particularly older models, so always check your machine’s manual.
  • Set your bread machine to the “Dough” cycle. This cycle typically includes kneading, rising, and sometimes a second punch-down and rise. Once the dough cycle is complete (your machine will usually alert you with a beep), carefully remove the perfectly kneaded and risen dough from the bread machine pan and place it onto a lightly floured clean surface.
  • While preparing the dough, preheat your oven to 375 degrees F (190 degrees C). Simultaneously, line a large baking sheet with parchment paper. This prevents sticking and makes cleanup a breeze.
  • Using a rolling pin, roll the soft bread dough into a large, even rectangle, aiming for a thickness of about ½ inch (approximately 1.25 cm). This uniform thickness ensures consistent baking for all your breadsticks.

Topping & Baking:

  • Generously brush the entire surface of the rolled-out dough rectangle with 2 tablespoons of melted butter. This butter layer will help the seasonings adhere and create a wonderfully golden crust. Immediately after, sprinkle evenly with garlic powder, salt, dried parsley, and grated Parmesan cheese. This combination delivers that classic Italian breadstick flavor.
  • Using a pizza cutter (it’s the easiest tool for this job!), cut the seasoned dough into approximately 15 strips, each about 1 inch (2.5 cm) wide. Don’t worry about them being absolutely perfect – the rustic, homemade look adds to their charm.
  • Carefully transfer the individual breadsticks onto your prepared baking sheet, ensuring there’s a small amount of space between each one to allow for even heat circulation and browning.
  • Bake the breadsticks in your preheated oven for 12 to 15 minutes. The baking time can vary slightly depending on your oven, so watch for a beautiful golden-brown color on the top and a lightly browned bottom. This indicates they are perfectly baked and ready to be enjoyed!

Notes

Top Baking Tips for Success:
  • Always check your yeast’s expiration date. Fresh yeast is paramount for a good rise. Bread machine yeast (instant yeast) typically remains viable for about 3-4 months after the bottle has been opened. However, its effectiveness can rapidly diminish if exposed to air and moisture (meaning the bottle isn’t sealed tightly) or if stored in warmer temperatures. If your yeast is past its prime, your dough will not rise as expected.
  • Use warm water, not hot or cold. For optimal yeast activation, the water temperature should be warm to the touch, ideally between 105°F and 115°F (40°C-46°C). Water that is too hot can kill the yeast, preventing your dough from rising, while cold water will slow down or completely halt the yeast’s activity.
  • Add ingredients in the order specified in the recipe card. For many bread machines, especially older models, the sequence in which you add ingredients matters significantly. Place salt along one edge of the pan and sugar around the other, then create a small crater in the top of the flour and add the yeast there. This method helps prevent salt from directly contacting and potentially inhibiting the yeast prematurely. *Please note: Your specific bread maker model may have different recommendations, so always refer to your user manual if unsure.
  • Measure accurately and level your ingredients. Precision in measuring is critical in baking. Ensure your measuring spoons and cups are level and avoid “heaping” amounts unless the recipe explicitly instructs otherwise. Adding too much of any ingredient, particularly flour or liquid, can throw off the delicate balance of the dough, leading to issues with texture and rise.
🌡️Storing Your Breadsticks:
Make-ahead & Room Temperature Storage: These breadsticks are great for making ahead! Once cooled completely, store them in an airtight container at room temperature for up to 3 days. There is no need to refrigerate them, as refrigeration tends to dry out baked goods and makes them stale faster.
Freezing for Longer Freshness: After the breadsticks are cooled completely, you can freeze them for extended enjoyment. Place them in a Ziplock freezer bag or a similar airtight freezer-safe container. They will keep well for up to 3 months.
Reheating from Storage: To reheat, simply pop them into the microwave for about 15-20 seconds. The exact time may vary slightly depending on the wattage of your microwave, so adjust as needed until they are warm and soft.
*NOTE: This recipe is specifically designed for a 1 lb bread maker or using the 1lb setting on your bread machine. Adjusting quantities for larger machines might require proportionate changes.
**NOTE: I have a very old bread machine that necessitates adding ingredients in a specific order (liquids first, then dry, with yeast isolated). This might not be the case for newer or different bread maker models. Always check your machine’s manual for its recommended ingredient loading sequence.

Nutrition

Serving: 1breadstick | Calories: 104kcal (5%) | Carbohydrates: 16g (5%) | Protein: 3g (6%) | Fat: 3g (5%) | Saturated Fat: 2g (13%) | Cholesterol: 8mg (3%) | Sodium: 306mg (13%) | Potassium: 55mg (2%) | Fiber: 1g (4%) | Sugar: 2g (2%) | Vitamin A: 91IU (2%) | Vitamin C: 1mg (1%) | Calcium: 15mg (2%) | Iron: 1mg (6%)
Did you make this recipe? Please leave a star rating and review below!
Rate this Recipe