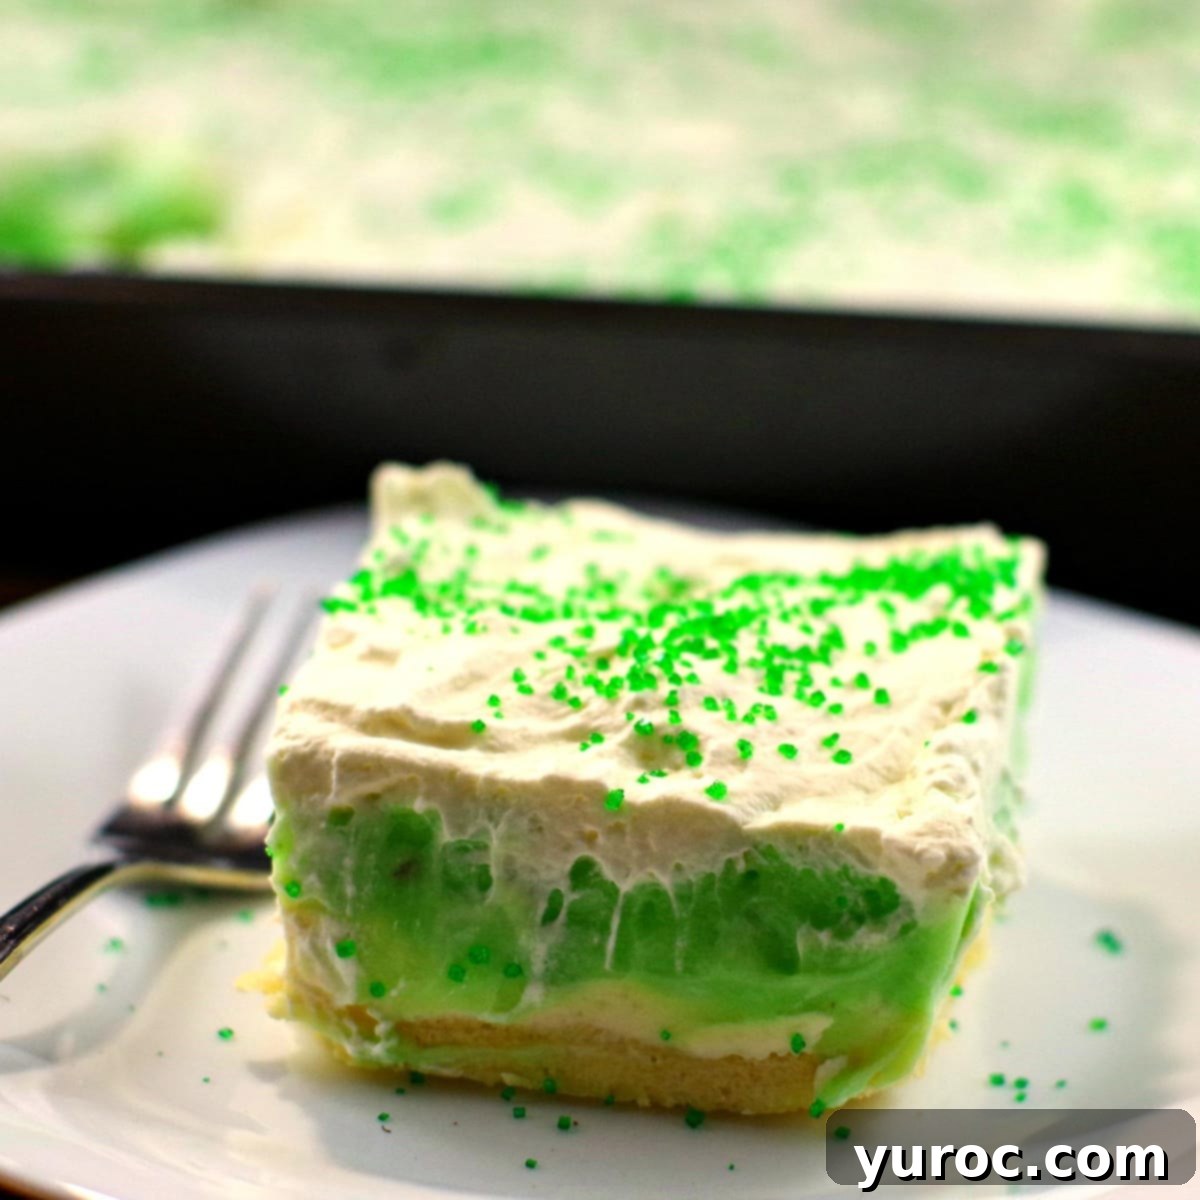
Delightful Pistachio Pudding Dessert: The Ultimate Layered Green Sweet Treat
This Pistachio Pudding Dessert is an absolute showstopper and a guaranteed crowd-pleaser, making it an ideal choice for any potluck or family gathering. Its effortless preparation combined with its irresistibly delicious flavor makes it a true go-to recipe. Imagine a simple yet decadent green dessert, beautifully layered with light whipped cream, rich cream cheese, and luscious pistachio pudding, all resting on a perfectly nutty shortbread crust. It’s a symphony of textures and flavors that will leave everyone asking for more.
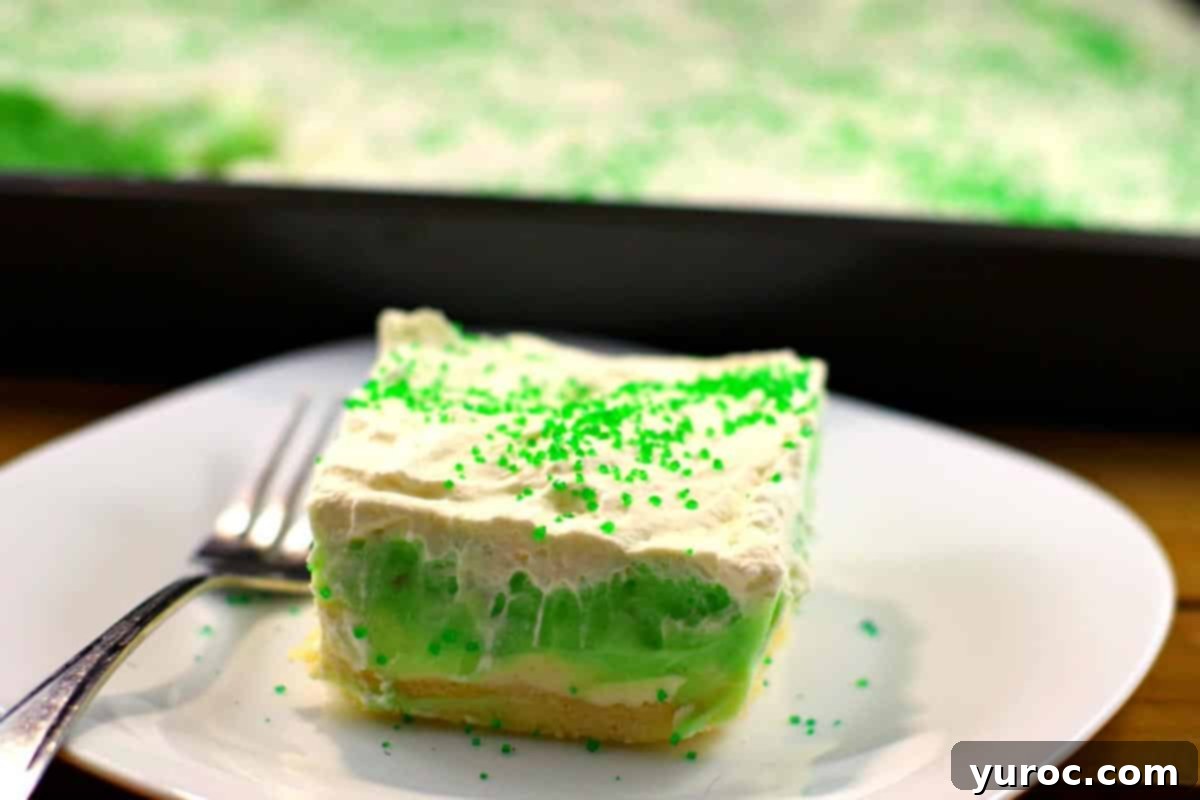
While this delightful pistachio pudding dessert recipe shines brightly any time of the year, it truly comes into its own when you need a vibrant green dessert for special holidays. Think St. Patrick’s Day, Christmas, or even spring celebrations! Its eye-catching color and superb taste make it a versatile treat. It pairs wonderfully with savory dishes like a hearty Reuben Soup or a satisfying Turkey Reuben Panini, offering a refreshing and sweet contrast.
🍒 Reader Review
“I made this for my ladies’ group this week and it was a huge hit! I made it gluten-free by using my homemade GF flour mix for the crust. Everyone had seconds. Will definitely make this again. Might try using some GF ginger cookies for the base for some extra zing!“ ⭐⭐⭐⭐⭐
Potlucks can be a mixed bag, can’t they? I genuinely appreciate the social aspect, the chance to sample an array of new and interesting dishes, and the welcome break from cooking a full meal myself. And, of course, there’s the enjoyable challenge of deciding what delectable dish to contribute. Yet, that decision-making process can also be a source of frustration. It’s surprisingly difficult to pick something that will impress and be enjoyed by all. That’s why I often find myself falling back on a few tried-and-true recipes that never fail to deliver – and this pistachio pudding dessert recipe is consistently at the top of that list!
If you’re specifically searching for more festive St. Patrick’s Day dessert recipes that are perfect for a potluck, you might also consider giving my Shamrock Irish Cream Dessert Shots a try! They offer a fun and elegant touch to any celebration and can be prepared with or without alcohol, catering to all preferences.
🥘 Essential Ingredient Notes for Your Pistachio Pudding Dessert
One of the fantastic aspects of this pistachio lush layered dessert is its naturally vibrant green color, which means you won’t need to add any artificial food coloring. To create this stunning and delicious pistachio dessert, you’ll need the following simple, high-quality ingredients. Pay attention to these notes to ensure the best results for your culinary masterpiece:
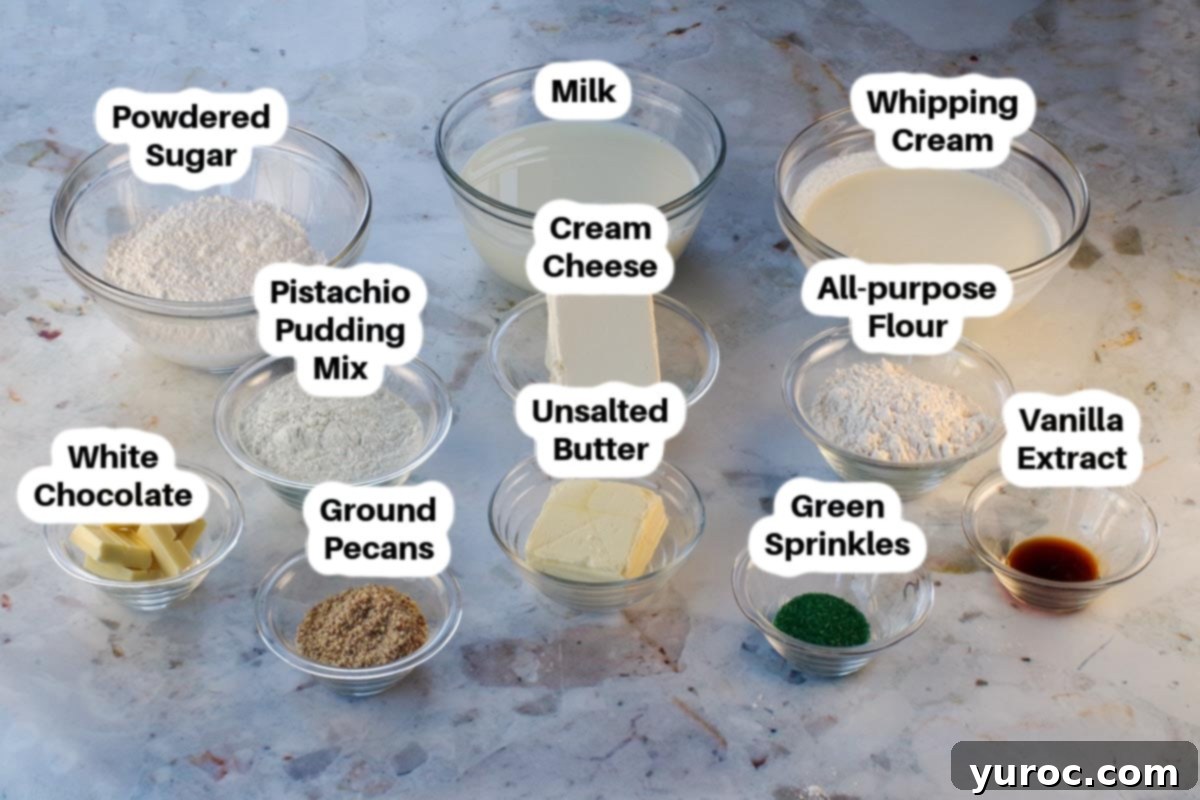
- Pistachio Instant Pudding Mix: This is the star ingredient for our pistachio layer. It’s crucial to use the dry mix and adhere strictly to my specific directions in the recipe card, not the instructions on the box. The box directions often result in a much runnier pudding, which won’t hold up well in a layered dessert. Using the right amount of milk is key for that perfect, thick consistency.
- Butter: I always opt for unsalted butter in my baking and cooking. This allows me complete control over the salt content in the final dish. The amount of salt in salted butter can vary significantly between different brands, making it harder to achieve consistent flavor profiles. For this recipe, a good quality unsalted butter will provide a rich, foundational flavor for the crust.
- Ground Pecans: These provide the delightful nutty base for our shortbread crust. You can easily grind your own pecans using a coffee grinder or a food processor for the freshest flavor. If pecans aren’t readily available or you prefer a different nut, ground almonds make an excellent substitute, offering a slightly different but equally delicious flavor profile.
- Icing Sugar: Also widely recognized as ‘powdered sugar’ or ‘confectioners sugar’, this finely milled sugar dissolves beautifully, ensuring a smooth texture in our cream cheese and whipped cream layers without any grittiness.
- White Chocolate: This ingredient adds a wonderfully subtle sweetness and depth of flavor that complements the pistachio perfectly, enhancing the overall richness of the dessert. It’s important to use Baker’s white chocolate baking squares, as these are formulated for melting and incorporating smoothly. Avoid using white chocolate chips, which often contain stabilizers that prevent them from melting as smoothly and can result in a grainy texture.
- Whipping Cream: For a stable and fluffy whipped cream layer, make sure to use whipping cream with a fat content of 33-36%. This higher fat content is essential for achieving stiff peaks that will hold their shape beautifully in your layered dessert. Heavy cream or heavy whipping cream are suitable terms for this.
*Please refer to the detailed recipe card below for a full list of ingredients and precise quantities.
📖 Variations & Creative Substitutions
This pistachio pudding dessert is wonderfully adaptable, allowing you to customize it to your taste or what you have on hand. Don’t hesitate to experiment with these variations and substitutions to make this dessert uniquely yours:
- Whipping Cream Alternatives: While fresh whipping cream offers the best flavor and texture, you can substitute store-bought whipped topping (like Cool Whip) for convenience. Be aware that this will likely make your dessert sweeter, so you might consider slightly reducing the icing sugar in the cream cheese layer.
- Diverse Toppings: The garnish is an opportunity to add visual appeal and extra flavor! Beyond green sparkling sugar or sprinkles for St. Patrick’s Day, consider a variety of toppings. Shaved toasted almonds add a sophisticated crunch, finely chopped or crushed pistachios amplify the pistachio flavor, other chopped nuts like walnuts or cashews offer different nutty notes, or even elegant chocolate shavings can be used. These changes can transform the dessert for any potluck throughout the year.
- White Chocolate – Optional but Recommended: The white chocolate adds a unique, subtle richness that beautifully melds with the pistachio. However, if you don’t have it on hand, or simply prefer to omit it, the dessert will still be incredibly delicious. It’s a nice enhancement, but not strictly essential.
- Ground Pecans for the Crust: If pecans aren’t your preference or are hard to find, ground almonds are an excellent alternative for the crust, providing a similar texture and a lovely, mild nutty flavor. You can also use other finely ground nuts like walnuts.
- Homemade Pistachio Pudding: For a truly gourmet experience or if you prefer to avoid instant mixes, you could use homemade pistachio pudding. If going this route, you might want to add a drop or two of green food coloring to achieve that signature vibrant green hue, as natural pistachio pudding might be paler.
- Milk Choices: The type of milk used for the pudding can also be adjusted. Whole milk will yield the creamiest pudding, but 2% milk or even 1% milk can be used if you’re looking to slightly reduce the fat content without significantly compromising on texture.
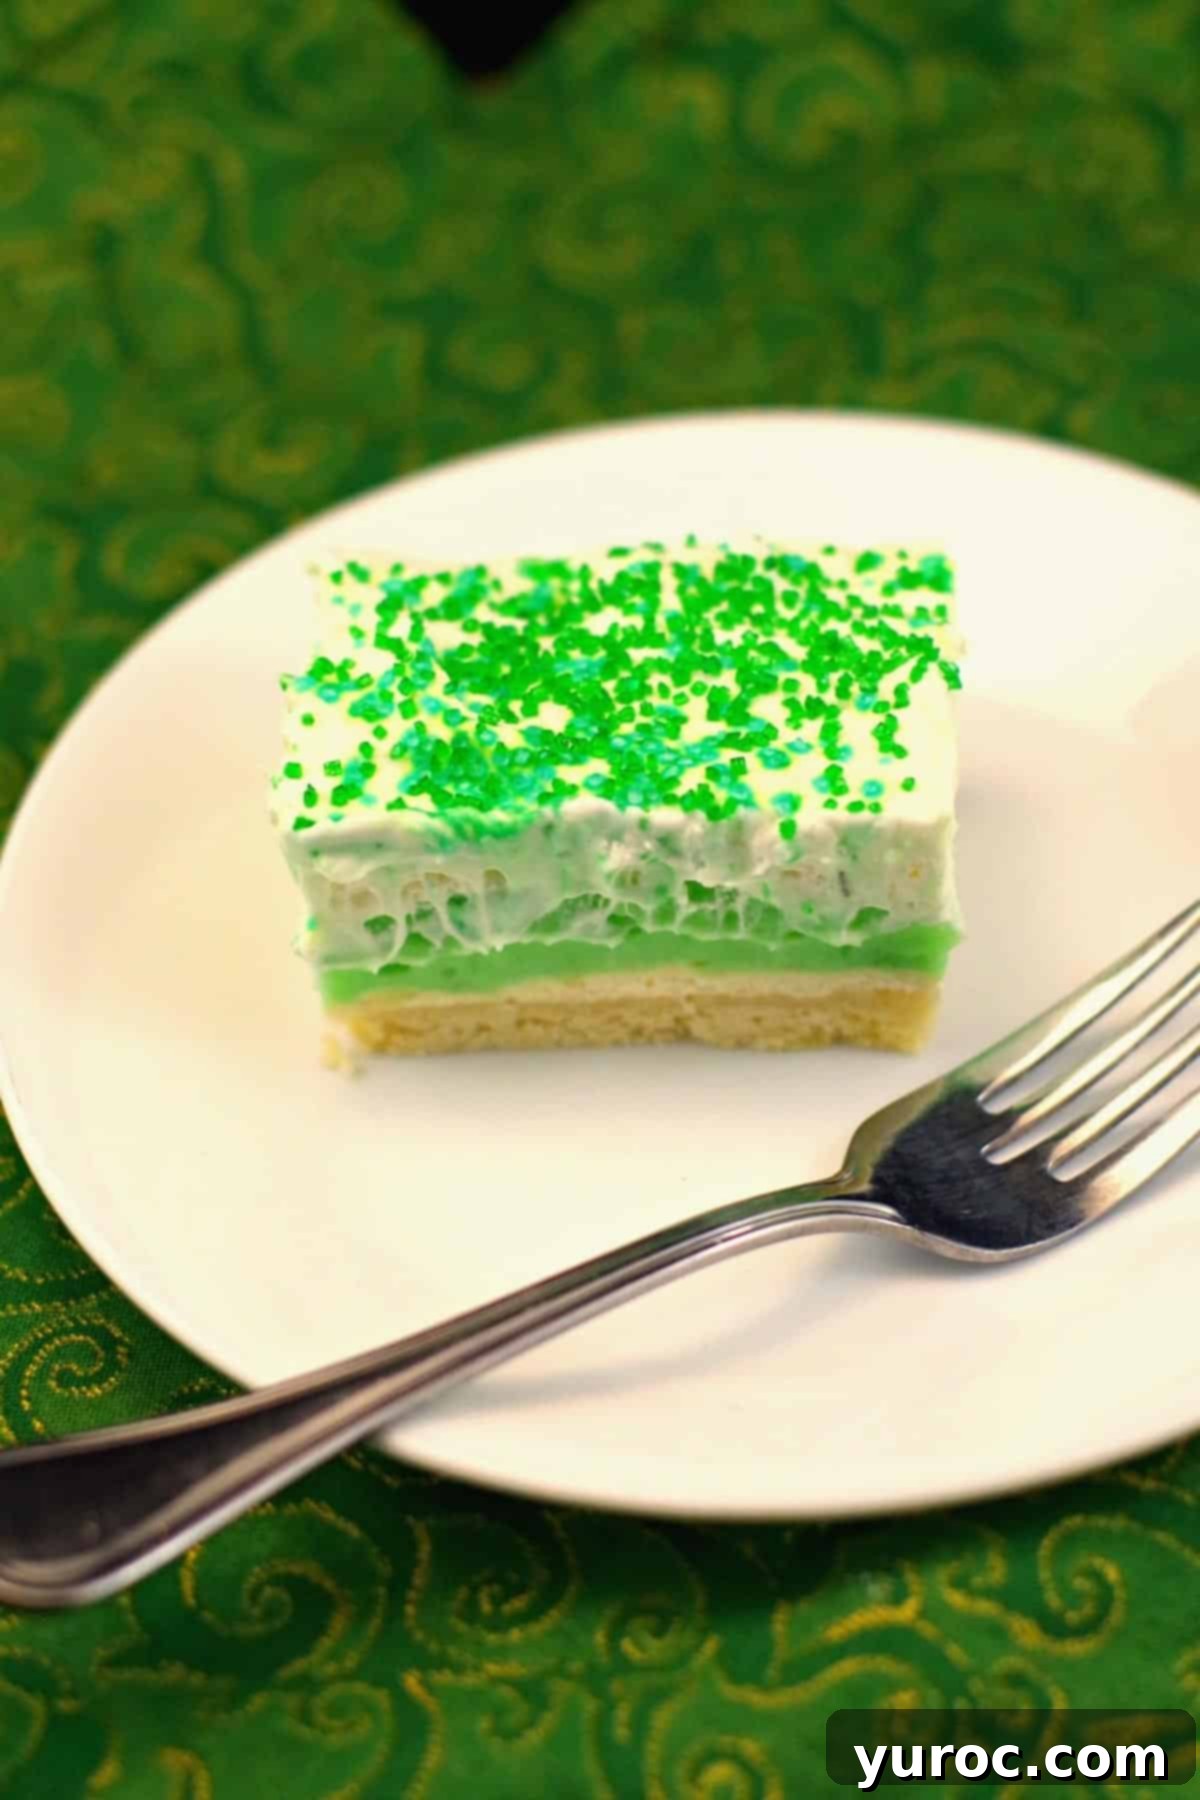
🔪 How to Make This Irresistible Pistachio Pudding Dessert
*Heads up: This magnificent green dessert recipe requires ample refrigeration time, either 3-4 hours or ideally overnight, to allow the layers to set perfectly and the flavors to meld beautifully.
Step-by-Step Instructions:
PREP WORK: Begin by preheating your oven to 350 degrees F (176 degrees C). This ensures it’s ready for your crust. Lightly spray a 9×13 inch baking pan with a non-stick cooking spray to prevent sticking and make for easy removal.
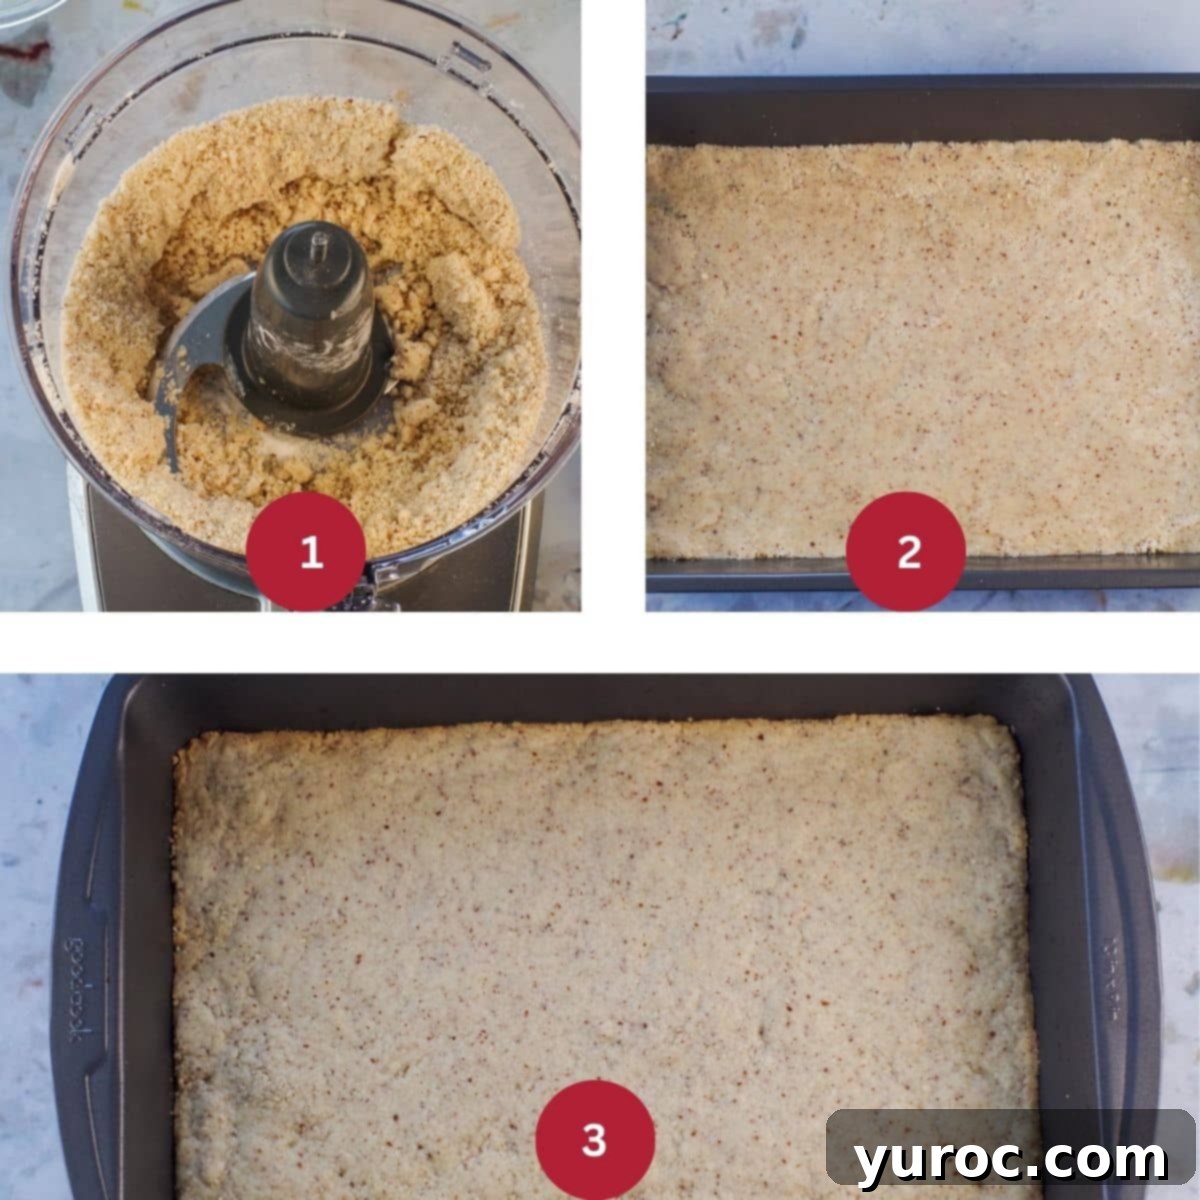
MAKE THE CRUST/BASE: In the bowl of a food processor, combine the ground pecans with the softened butter, all-purpose flour, and 2 tablespoons of icing sugar. Pulse until the mixture comes together and clings to itself, forming a crumbly yet cohesive dough (IMAGE 1). Press this mixture firmly and evenly onto the bottom of your prepared 9×13 inch pan. A flat-bottomed glass or measuring cup can help you achieve a compact, uniform layer (IMAGE 2). Bake for 12-15 minutes, or until the edges are lightly golden brown. It’s crucial to let the crust cool completely before proceeding to the next step, as a warm crust will melt the subsequent cream cheese layer (IMAGE 3).
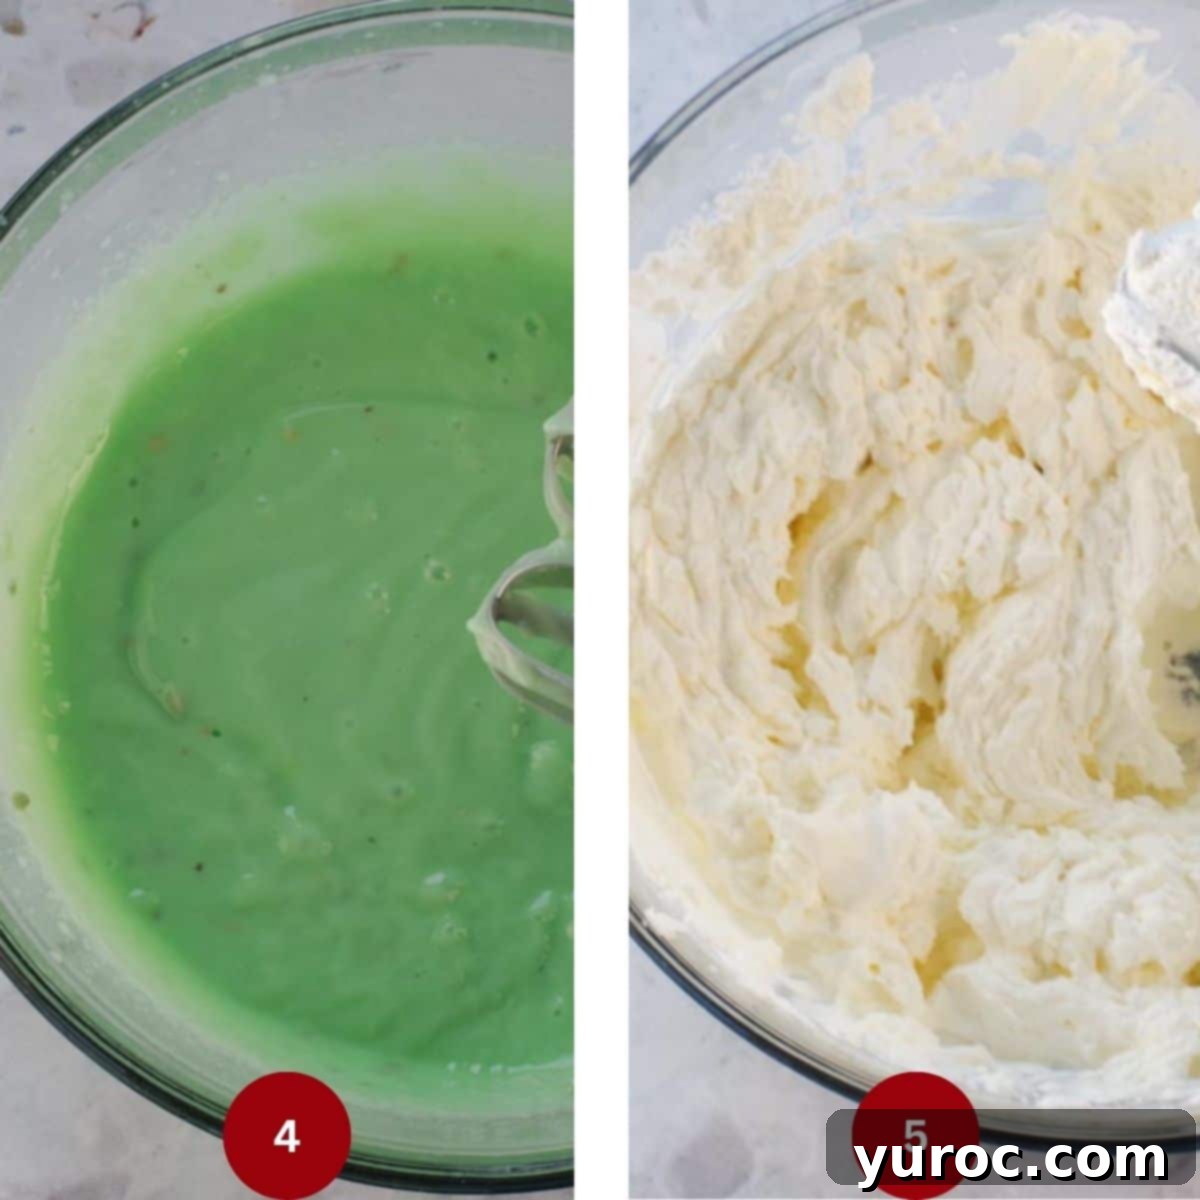
PREPARE THE PUDDING & CREAM CHEESE LAYERS: In a large mixing bowl, combine the pistachio instant pudding mixes and cold milk. Using an electric mixer, beat on low speed for 30 seconds to incorporate the ingredients, then increase to medium speed and beat for a full 2 minutes. Set the pudding mixture aside and allow it to stand for about 5 minutes until it has visibly thickened. This extra thickening time is essential for a firm pudding layer (IMAGE 4). In a separate medium bowl, beat the softened cream cheese, vanilla extract, and the remaining icing sugar with an electric mixer until the mixture is completely smooth and well blended, with no lumps (IMAGE 5).
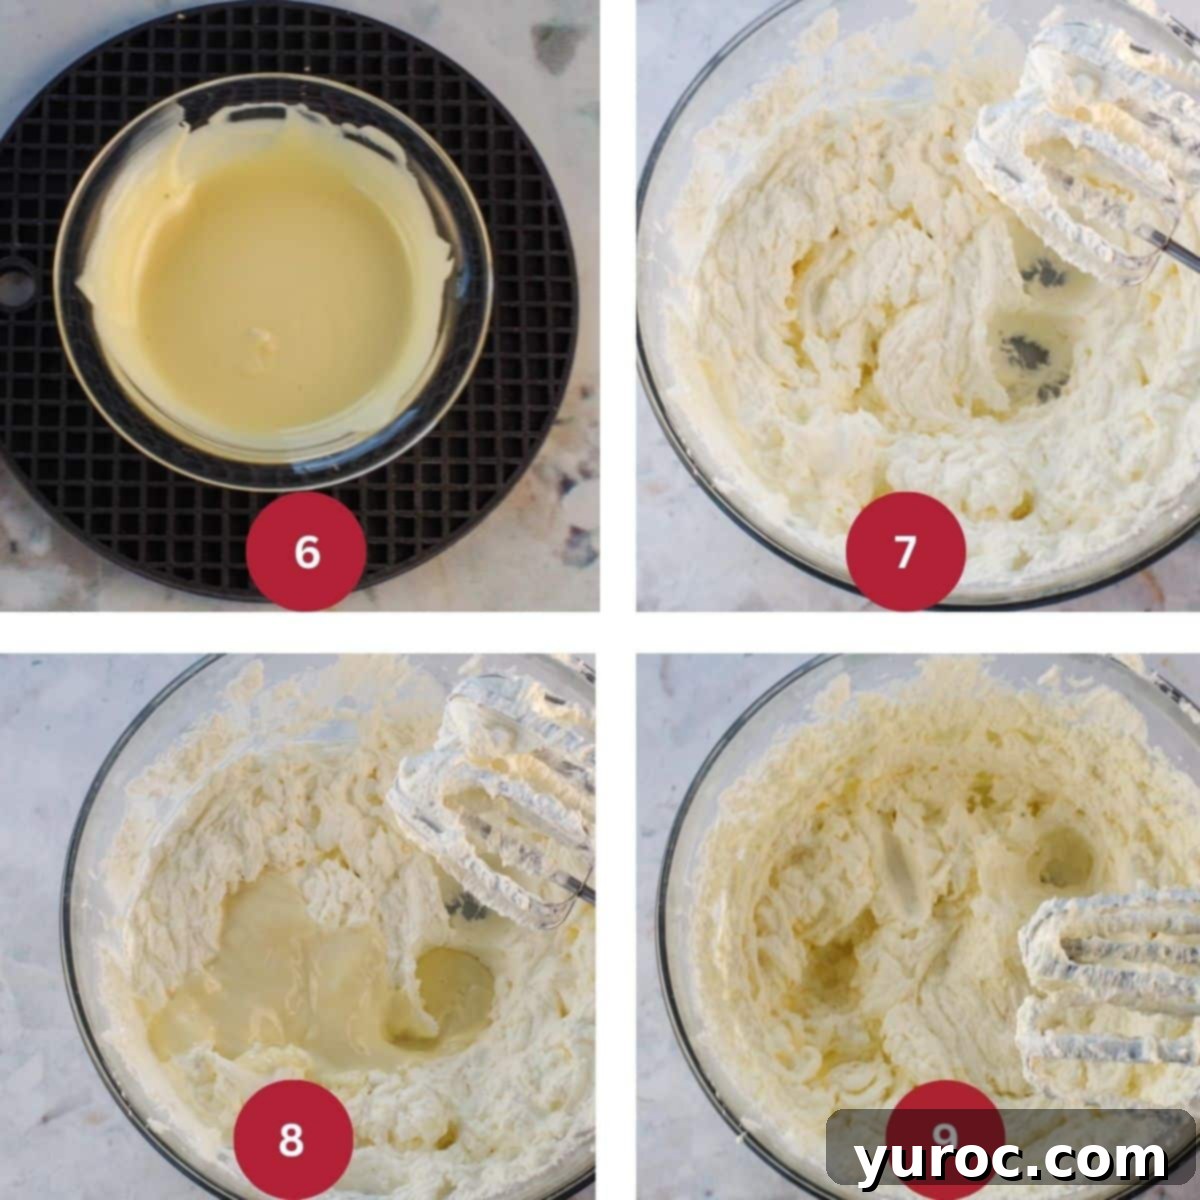
CREATE THE WHIPPED CREAM LAYER: Carefully melt the white chocolate. You can do this in the microwave on half power (50%) for about 40 seconds. Stir well, and if it’s not fully melted, return it to the microwave for additional 10-second intervals, stirring thoroughly after each interval, until smooth and completely melted (IMAGE 6). In a chilled large mixing bowl (this helps the cream whip faster and stabilize), beat the whipping cream with an electric mixer until it forms soft peaks (IMAGE 7). Gradually add the slightly cooled melted white chocolate to the whipped cream (IMAGE 8) and continue beating until the cream reaches stiff peaks, holding its shape firmly (IMAGE 9).
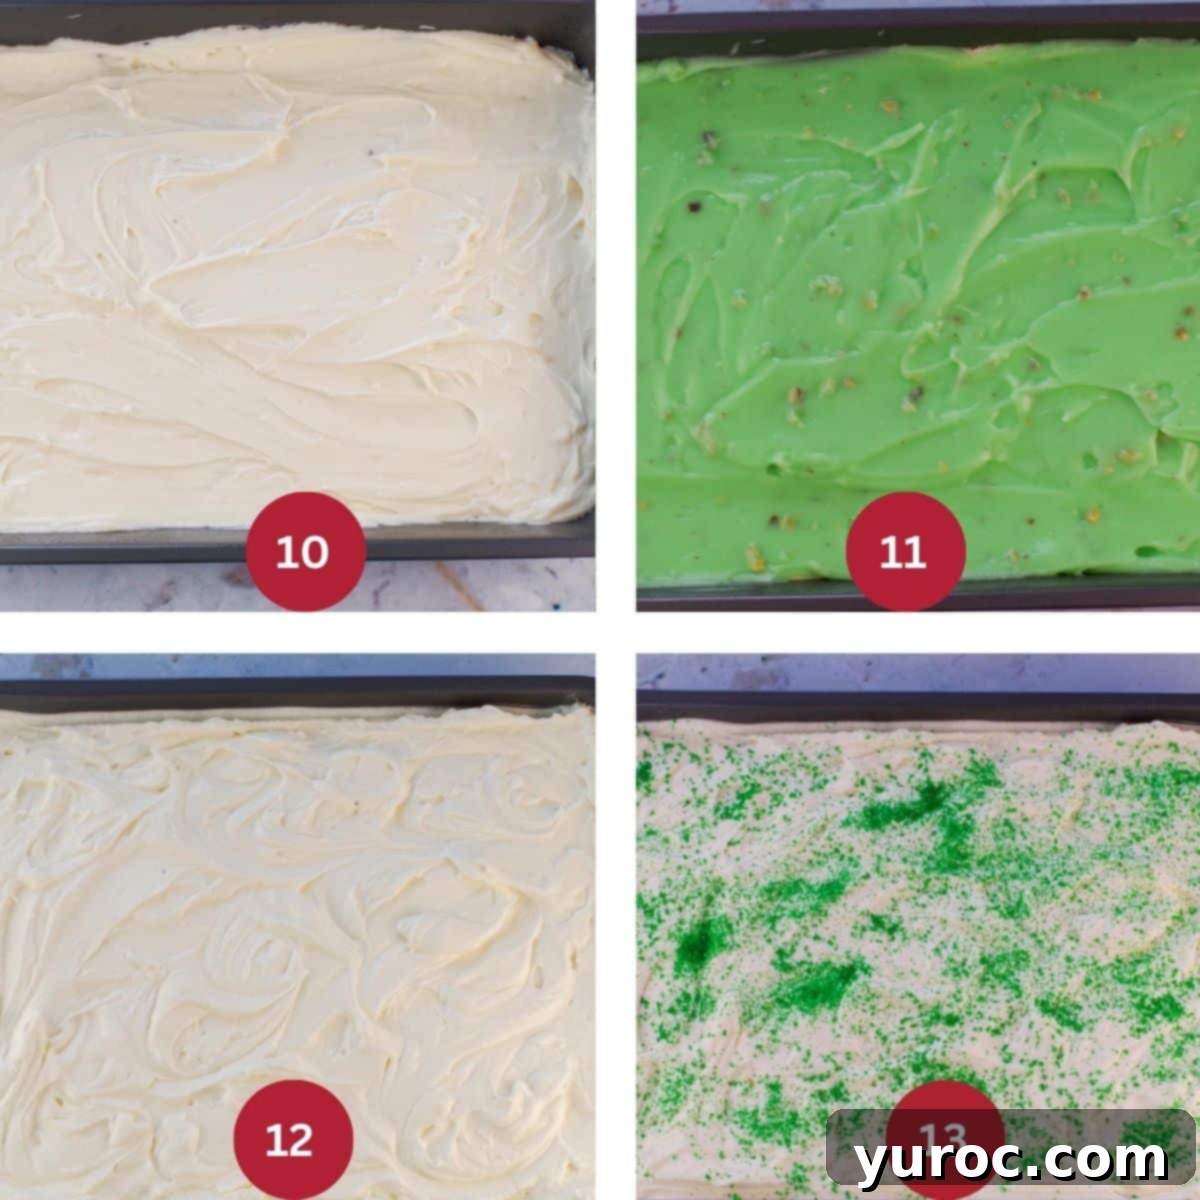
ASSEMBLE YOUR PISTACHIO DESSERT: Begin by gently spreading the cream cheese mixture evenly over the completely cooled shortbread crust (IMAGE 10). Don’t worry if the crust has a few small cracks; the cream cheese layer will help hold everything together. Next, carefully pour and spread the thickened pistachio pudding mixture over the cream cheese layer, ensuring an even distribution (IMAGE 11). Finally, cover the pudding layer with the prepared white chocolate whipped cream. Spread it gently, taking care to keep the layers distinct and separate for that beautiful visual effect (IMAGE 12). Once assembled, cover the pan with plastic wrap and refrigerate for a minimum of 3-4 hours, or ideally overnight, to allow all the layers to set firmly and the flavors to fully develop. Before serving, garnish with your chosen sprinkles or chopped nuts for an appealing finish (IMAGE 13).
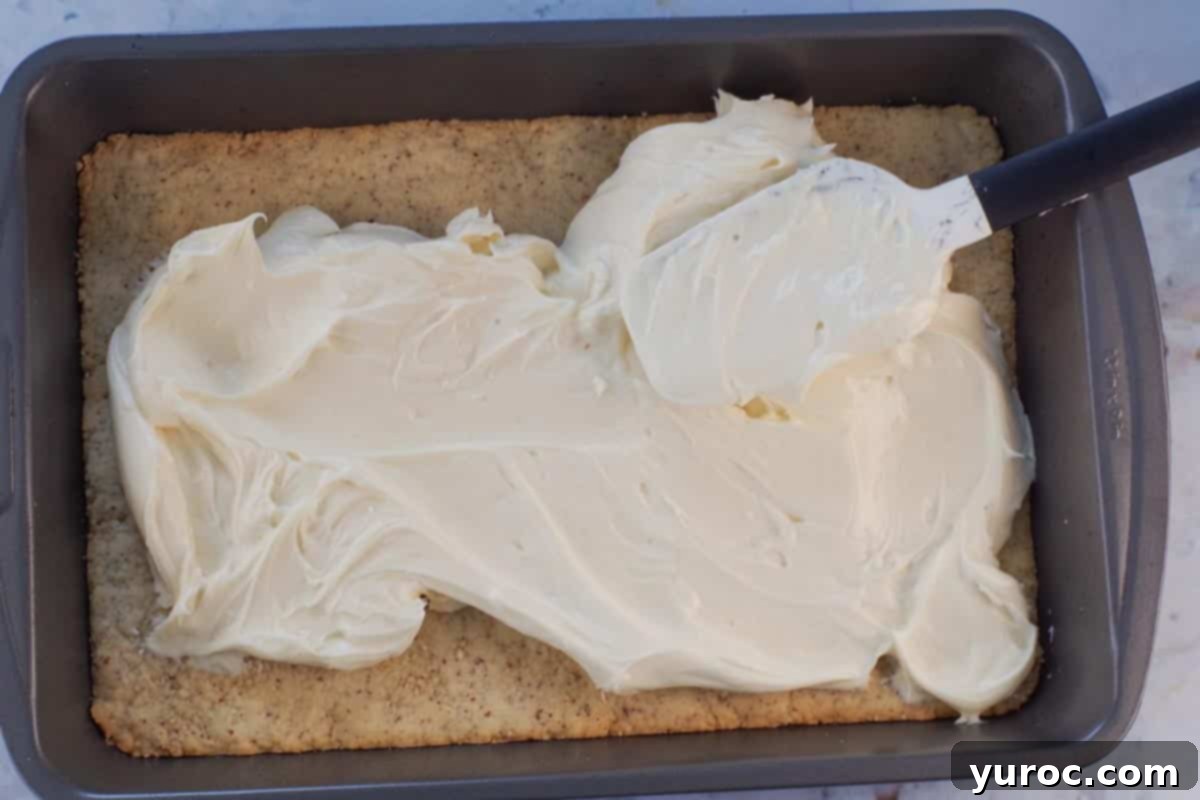
EXPERT HINT FOR LAYERING: To achieve perfectly clean, distinct layers without them mixing, dollop a generous mound of each subsequent layer (cream cheese, then pudding, then whipped cream) onto several sections of the previous layer. Then, gently spread from the middle outwards. This technique ensures that your spatula primarily touches the new layer you’re spreading, rather than disturbing the layer beneath. For even sharper layer definition, consider chilling the dessert briefly (for 15-20 minutes) between applying each layer.
Mastering Your Pistachio Pudding Dessert: Essential Recipe Tips
Achieving a perfect layered pistachio dessert is simple with these expert tips:
- Ensure a Firm Crust: For a stable foundation, press the crust mixture very firmly into the pan. Using a flat-bottomed glass or a measuring cup can help you create an even and compact layer, preventing it from crumbling when sliced. Most importantly, allow the baked crust to cool completely to room temperature before adding the cream cheese layer. This prevents the warmth from the crust melting and mixing with the cream cheese, ensuring distinct layers.
- Achieve the Right Pudding Consistency: When preparing the pistachio pudding, strictly follow the beating times specified in this recipe (not the box). It’s crucial to allow the pudding to thicken properly for at least 5 minutes before spreading. If it still seems a bit too runny after this time, let it sit for a few extra minutes; patience here pays off.
- Use Room Temperature Cream Cheese: Softened cream cheese is key to a smooth, lump-free filling. If you forget to take it out ahead of time, you can quickly soften it by microwaving it in its packaging (if foil-free) or a microwave-safe bowl for 10-15 seconds. Ensure it’s soft enough to blend easily.
- Secrets to Perfectly Fluffy Whipped Cream: For whipped cream that’s light, airy, and holds its shape beautifully, chill your mixing bowl and beaters in the freezer for 10-15 minutes before you start. This cold environment helps the cream whip up faster and maintain its volume. Beat the whipping cream to soft peaks first, then gently fold in the slightly cooled melted white chocolate before continuing to beat until stiff peaks form. This technique integrates the chocolate smoothly and provides excellent stability.
- Layer with Utmost Care: The visual appeal of this dessert comes from its distinct layers. To keep them separate, gently spread each layer using an offset spatula or the back of a spoon. A great technique is to spoon large dollops of the mixture onto various sections of the previous layer and then spread from the center of each dollop outwards. This prevents your spreading tool from dragging through the layer below. If you’re aiming for exceptionally defined layers, a quick chill (15-20 minutes) between applying each layer can work wonders.
- Enhance the Pistachio Flavor: To truly highlight the nutty essence of this dessert, consider garnishing the top with finely chopped and lightly toasted pistachios. The toasting process intensifies their flavor and adds a delightful textural crunch.
- Make It Ahead for Optimal Texture: This dessert is a fantastic make-ahead option! In fact, it often tastes even better the next day after chilling overnight. This extended refrigeration time allows all the wonderful flavors to meld together and ensures that each layer sets perfectly, resulting in a dessert that’s easy to slice and incredibly satisfying.
- Tips for Cutting Clean Slices: To achieve neat, attractive slices that showcase all the layers, use a sharp knife. For the cleanest cuts, wipe your knife blade clean with a warm, damp cloth between each slice. For maximum precision and firm layers, ensure the dessert has been refrigerated for at least 6 hours (or overnight) before you attempt to cut into it.
👪 Serving Size & Customization
This layered pistachio dessert recipe generously serves 18 people, making it perfect for larger gatherings. However, its versatility allows for easy adjustment. You can effortlessly cut the recipe in half (and bake it in a smaller pan, such as an 8×8 or 9×9 inch square pan) for a more intimate setting, or double it (using two 9×13 inch pans) if you’re hosting a big party. Simply click on the serving size in the interactive recipe card below, choose your desired number of servings, and the ingredient quantities will automatically adjust to make your cooking experience seamless.
🌡️ Storage Solutions for Your Pistachio Pudding Dessert
Proper storage ensures your delicious pistachio dessert stays fresh and enjoyable for longer:
Refrigeration: If you’re fortunate enough to have leftovers of this easy pistachio dessert, they can be stored in the refrigerator. If your baking dish doesn’t come with a lid, simply cover the pan tightly with plastic wrap to prevent it from absorbing other odors and drying out. This vibrant green dessert will remain fresh and delicious for up to 4 days when stored in an airtight container in the fridge.
Freezing for a Delightful Treat: This dessert also makes an excellent frozen treat, almost like an ice cream cake! You can freeze individual pieces for convenient, portioned indulgence. To do this, line a baking sheet with parchment paper. Carefully arrange individual slices of the dessert on the baking sheet, ensuring they are spaced at least 2 inches apart to prevent them from freezing together. Freeze the pieces flat and uncovered for 8 hours or overnight, or until they are completely firm. Once solid, wrap each individual piece tightly in plastic wrap, then transfer them to a large freezer bag or an airtight freezer-safe container. Store them in the freezer for up to 3 months. Important: When you want to enjoy a frozen piece, eat it directly from the freezer! Do not attempt to defrost it, as the whipped cream layer will melt and become a runny mess, significantly impacting the dessert’s texture and presentation. It’s truly best enjoyed frozen, where it offers a wonderfully cool and creamy consistency reminiscent of ice cream.
🍀 St. Patrick’s Day Green Desserts and More!
Has it ever happened to you? It’s the eleventh hour, and you’re still agonizing over what to bring to the potluck. Don’t worry; I’ve got your back! If you’re specifically searching for a festive St. Patrick’s Day green food idea, look no further. This beautiful and tasty creamy dessert is here just in time for your potluck or dinner party. Its vibrant hue and delightful flavor make it an instant hit for the holiday.
This layered pistachio pudding dessert is actually a bit of a retro potluck dish that was incredibly popular “back in the day” – perhaps 15 to 20 years ago. It fell out of circulation for a while, but I firmly believe that some classics deserve a revival! I decided to resurrect this nostalgic favorite, incorporating a few modern tweaks and enhancements to make it even more irresistible for today’s palates. Its timeless appeal combined with its undeniable deliciousness ensures it’s a dessert that will be cherished by new generations and fondly remembered by others.
❔ Frequently Asked Questions About This Pistachio Pudding Dessert
Absolutely! This dessert is an excellent candidate for make-ahead preparation. In fact, many people find that it tastes even better when prepared a day in advance, as it allows all the delicious flavors to fully meld together and the layers to set perfectly. Just be sure to refrigerate it for at least 3-4 hours, or ideally overnight, before serving.
Yes, you certainly can! I actually discovered that individual pieces of this dessert make for a fantastic frozen treat, similar to an ice cream cake! The key is to eat it directly from the freezer. Do not attempt to defrost it, as the delicate whipped cream layer will melt and become a runny mess, ruining the texture. When eaten frozen, it has a delightful consistency much like ice cream and is absolutely delicious!
Don’t worry at all! A few small cracks in the crust after baking are perfectly normal and won’t negatively affect the taste or structural integrity of the dessert. Once you gently spread the creamy layer over it, it will act as a binder and hold everything together beautifully. No one will ever notice!
For those beautiful, clean, and distinct layers, ensure that your shortbread crust is completely cooled before you begin spreading the cream cheese layer. When applying subsequent layers (cream cheese, pudding, and whipped cream), spread each very gently using an offset spatula or the back of a spoon. A helpful technique is to spoon a thick mound onto various sections of the current layer and then gently spread it from the middle of each section outwards. This minimizes contact with the layer beneath. For even greater definition, you can briefly chill the dessert (15-20 minutes) after applying each layer.
And if you’re looking for even more easy green desserts to celebrate St. Patrick’s Day or simply enjoy a festive treat, make sure to try my Shamrock Tarts! They taste just like a classic Shamrock shake, offering another delightful green indulgence.
Happy Potlucking and Happy Baking!
📋 Explore More Delicious Pistachio Recipes
- Pistachio Frappuccino (Starbucks Copycat)
- Pistachio Watergate Salad (Pistachio Fluff)
- White Chocolate Pistachio Cake (with Pistachio Pudding Filling)
- Christmas Biscotti Recipe (with cranberry and pistachio)
Did your family ❤️ this recipe? Did you know that commenting and ⭐ rating recipes is one of the best ways to support your favorite recipe creators? If you LOVED this recipe, please comment and rate it in the recipe card or share photos on social media using the hashtag #foodmeanderings or tagging @foodmeanderings!

📋 Pistachio Pudding Dessert Recipe
Print Recipe
Pin
Save RecipeSave Recipe
Rate
Add to Shopping ListGo to Shopping List
Equipment
-
electric mixer
-
9X13 pan
-
food processor
Ingredients
Base:
- ½ cup butter * I use unsalted
- ⅓ cup ground pecans or can substitute ground almonds
- 1 cup all-purpose flour
- 2 tablespoon icing sugar *also known as ‘powdered sugar’ or ‘confectioners sugar’
Layers:
- 1 teaspoon vanilla extract
- 2 – 250 g pkg cream cheese softened
- 1 ⅔ cup icing sugar/powdered sugar
- 3 oz melted white chocolate *Baker’s white chocolate squares, NOT white chocolate chips
- 3 cups whipping cream
- 2 -packages of Pistachio Instant Pudding 4-serving size, 99 g each
- 3 cups cold milk
Garnish:
- green sparking sugar/sprinkles or toasted shaved almonds, ground pistachios or chocolate shavings
Instructions
-
*Heads up: This recipe needs to be refrigerated for 3-4 hours or overnight
-
Preheat oven to 350 degrees F/176 degrees C. Spray 9X13 baking pan with non-stick cooking spray.
-
For base: In a food processor, add ground pecans with butter, flour and 2 Tblsp icing sugar and blend until it clings together; press onto bottom of prepared pan. Bake 12- 15 minutes or until lightly brown around edges; let the crust cool completely.½ cup butter, ⅓ cup ground pecans, 2 tablespoon icing sugar, 1 cup all-purpose flour
-
In a large bowl, beat pudding mixes and milk with an electric mixer on low speed for 30 seconds, then increase to medium speed for 2 minutes. Set aside and let stand until thickened for 5 minutes.2 -packages of Pistachio Instant Pudding, 3 cups cold milk
-
Beat cream cheese, vanilla and icing sugar in medium bowl with electric mixer until well blended.1 teaspoon vanilla extract, 2 – 250 g pkg cream cheese, 1 ⅔ cup icing sugar/powdered sugar
-
Spread cream cheese mixture gently over cooled crust.* If the crust cracks a little, don’t worry it’s not a big deal.
-
Pour pistachio pudding mix over the cream cheese layer.
-
Melt white chocolate in the microwave on ½ power (50%) for about 40 seconds or until melted. Put back in for 10 second intervals if not melted, stirring between.3 oz melted white chocolate
-
Beat whipped cream to soft peaks.3 cups whipping cream
-
Add melted white chocolate.
-
Beat to stiff peaks.
-
Cover pudding layer with whipped cream by spreading gently, ensuring you keep the layers separate. Refrigerate for 3-4 hours or overnight.
Garnish
-
Add sprinkles or nuts to the top of the dessert.green sparking sugar/sprinkles
Notes
Recipe Tips:
-
- Ensure a Firm Crust. Press the crust mixture firmly into the pan to prevent crumbling. A flat-bottomed glass or measuring cup works well for an even, compact layer. Let the crust cool completely before adding the cream cheese layer to avoid melting and mixing the layers.
-
- Get the Right Pudding Consistency. When making the pistachio pudding, beat it for the recommended time and allow it to thicken properly before spreading. If it’s too runny, let it sit for a few extra minutes.
-
- Use Room Temperature Cream Cheese. Softened cream cheese blends better and prevents lumps in the filling. If needed, microwave it for 10-15 seconds to speed up softening.
-
- How to Get Perfectly Fluffy Whipped Cream. Chill your mixing bowl and beaters before whipping the cream to help it whip up faster and hold its shape better. Beat to soft peaks first, then add melted white chocolate before beating to stiff peaks for the best texture.
-
- Layer with Care. Gently spread each layer using an offset spatula or back of a spoon to avoid mixing. Add a large mound to each section, spreading from the middle. This way you’ll never have to touch the layer beneath. Chilling between layers can help keep them defined.
-
- Enhance the Pistachio Flavor. Toasted chopped pistachios on top add a nice crunch and enhance the nutty flavor.
-
- Make It Ahead for Best Texture. This dessert tastes even better after chilling overnight as the flavors meld together, and the layers set properly.
-
- Cutting Clean Slices.Use a sharp knife and wipe it clean between cuts for neat layers. For extra precision, refrigerate for at least 6 hours before cutting.
🌡️Storage
Refrigeration: If you don’t have a dish with a lid for the easy pistachio dessert, cover it in plastic wrap and store this green dessert for up to 4 days in the fridge in an airtight container.
Freezing: You can freeze leftovers of this dessert in individual pieces- it makes an excellent frozen treat . Line a baking sheet with parchment paper and space individual pieces on baking sheet at least 2 inches apart. Freeze flat and uncovered for 8 hours or overnight or until firm. Then wrap individual pieces in saran wrap and store in large freezer bag or airtight container. Enjoy frozen *Don’t defrost it or the whipped cream melt and become a runny mess.
Nutrition
