Light Pumpkin Cheesecake with Oreo Crust: Your Healthy, Delicious Thanksgiving Dessert
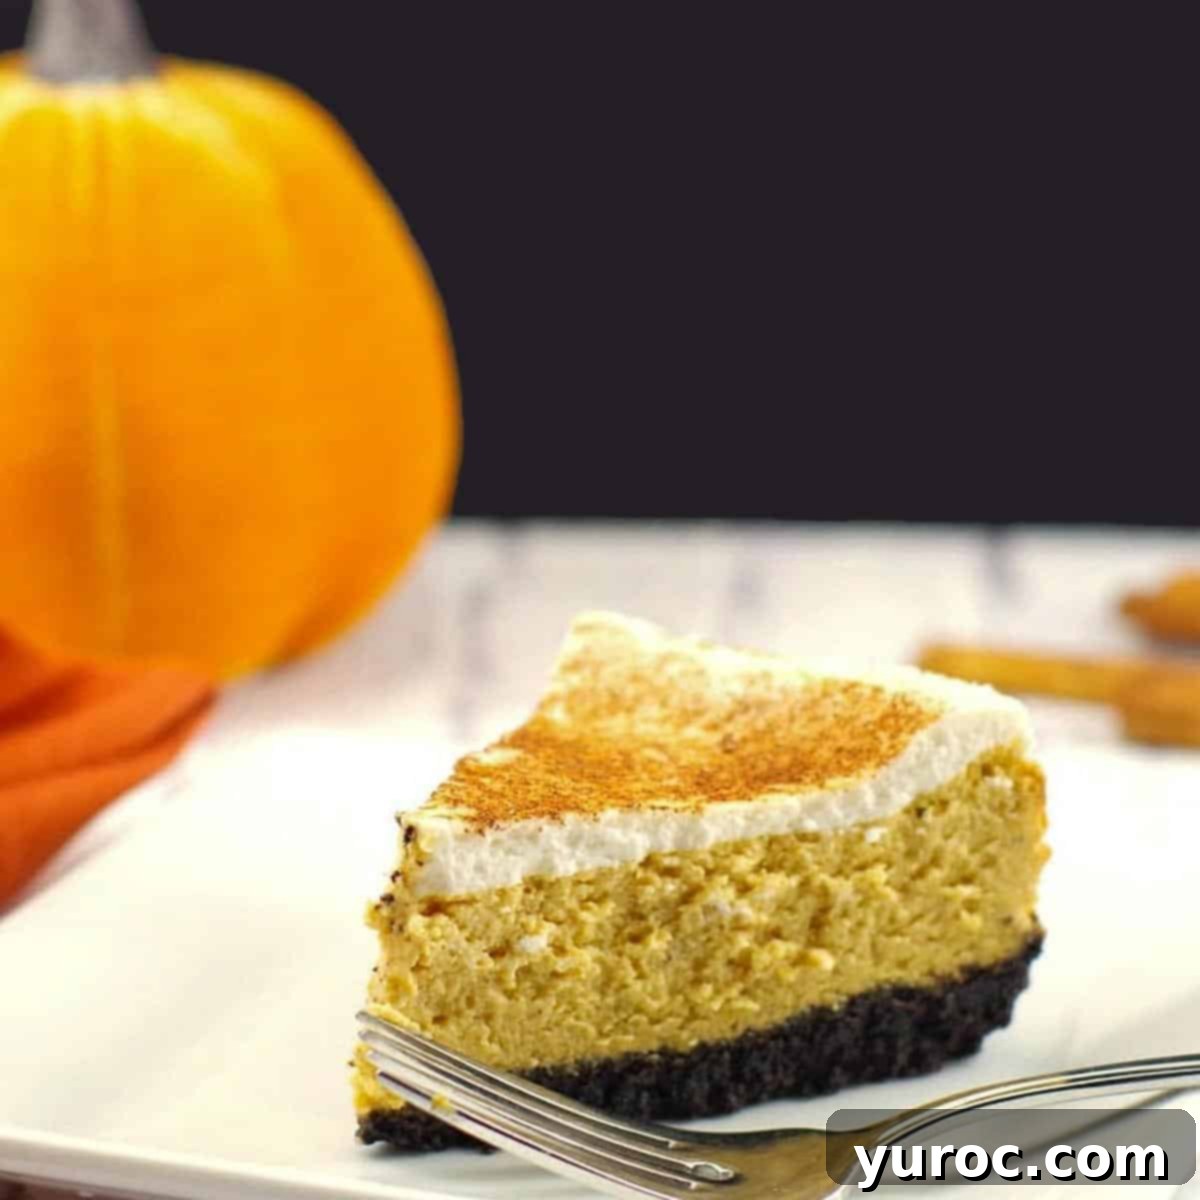
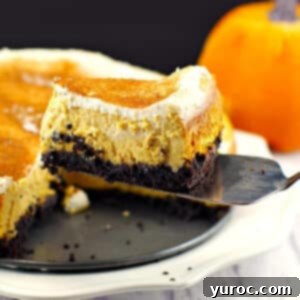
Just in time for the festive season, especially Thanksgiving, this **Light Pumpkin Cheesecake** offers a delightful and healthier alternative to traditional pumpkin pie. While cheesecakes are often perceived as rich and heavy desserts, this particular recipe defies expectations. It’s a wonderfully light and incredibly delicious low-fat pumpkin cheesecake, featuring a creamy, spiced pumpkin filling nestled within a decadent chocolatey Oreo crust. This “skinny” pumpkin cheesecake is not only a fantastic option for those following a Weight Watchers program but is also surprisingly easy to prepare, making it the ideal Thanksgiving dessert for anyone looking for a lighter yet intensely flavorful treat. Say goodbye to heavy desserts and hello to a refreshingly delicious canned pumpkin pie alternative!
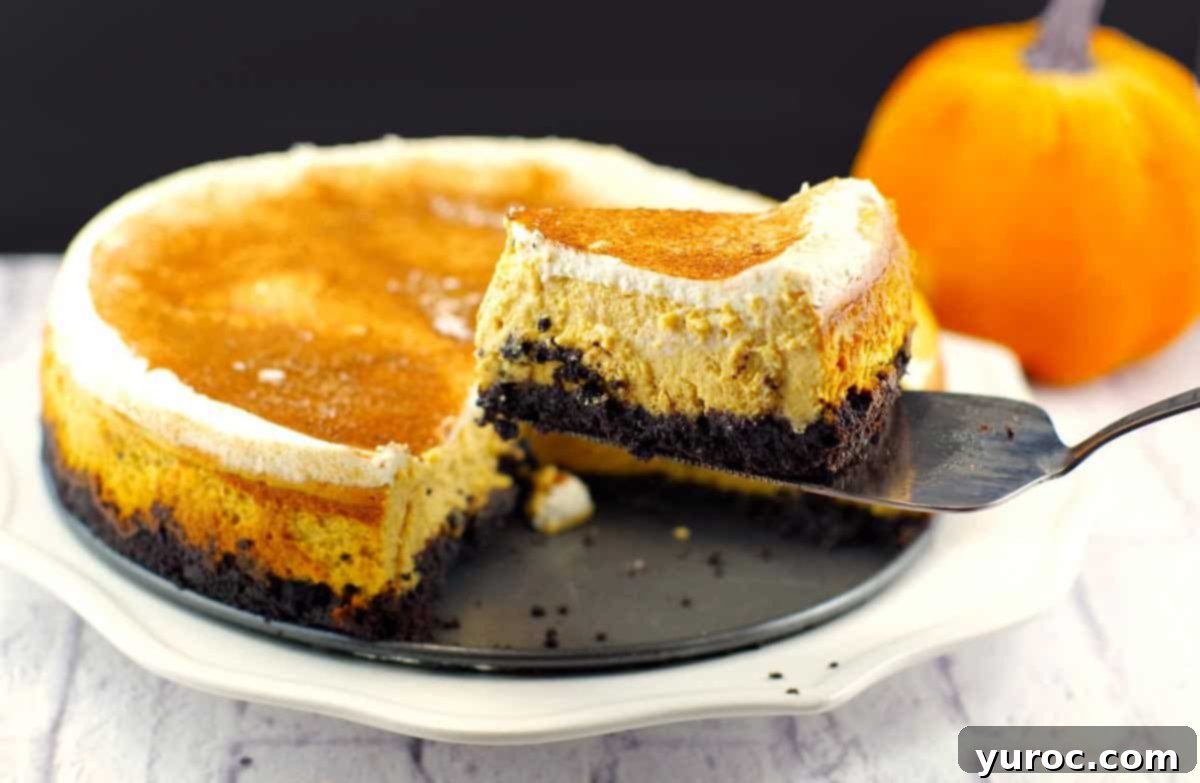
Our Weight Watchers Pumpkin Cheesecake consistently gains popularity as pumpkin season arrives. If your search for Thanksgiving pumpkin desserts leads you to something a bit different, lighter, and yet utterly satisfying, then this healthy dessert is an absolute must-try. You’ll be genuinely astonished by the incredible taste of this light pumpkin cheesecake recipe, all while being remarkably Weight Watchers friendly at only 10 points per serving. The best part? No one will ever guess it’s a lightened-up version; it delivers all the classic cheesecake indulgence without the guilt.
For those who love light cheesecake recipes, don’t miss out on my Easy No Bake Baileys Cheesecake and my vibrant Birthday Cake Cheesecake! These recipes offer more delicious ways to enjoy your favorite dessert with a lighter touch.
Essential Tips for a Perfect Light Pumpkin Cheesecake
Achieving a flawless, crack-free cheesecake with a silky-smooth texture doesn’t have to be complicated. Follow these expert tips for making this light pumpkin cheesecake recipe:
- Ensure Ingredients are at Room Temperature: This is crucial for a lump-free batter. Room temperature cream cheese and eggs blend much more smoothly and evenly than cold ones, preventing unsightly lumps and ensuring a consistent texture throughout your cheesecake. Plan ahead and take them out of the fridge at least 30 minutes to an hour before you start baking.
- Utilize High-Quality Ingredients: The quality of your ingredients directly impacts the final taste and texture. This is especially true for cream cheese. I’ve found that brand-name light cream cheeses tend to be less watery and offer a superior texture and flavor compared to generic or store-brand options, which can sometimes result in a less creamy or more granular cheesecake.
- Employ a Water Bath (Bain-Marie): While not strictly mandatory for this recipe due to the forgiving nature of the topping, a water bath is a secret weapon against cracks. It provides a moist, even cooking environment, preventing the edges of the cheesecake from baking too quickly and cracking while the center sets. This technique ensures a perfectly smooth top and a creamy, uniform texture from edge to center.
- Use a Springform Pan: Springform pans are the ideal vessel for cheesecakes because their removable sides allow for effortless release and beautiful presentation. Cheesecake has a more custard-like consistency than a traditional cake, making it delicate to unmold. While you can bake a cheesecake in other pans, a springform pan guarantees a stunning display and helps ensure even cooking.
- Thoroughly Spray Your Pan: To avoid any sticking disasters, generously coat your springform pan with non-stick cooking spray, especially the sides. A well-greased pan ensures your cheesecake slides out cleanly and easily, preserving its perfect shape.
- Avoid Overmixing the Batter: Overmixing introduces too much air into the batter. This excess air can cause the cheesecake to puff up significantly during baking, only to collapse and crack dramatically as it cools. Mix just until ingredients are combined and smooth, then stop.
- Resist Opening the Oven Door: Sudden fluctuations in temperature are a cheesecake’s worst enemy. Opening the oven door during baking can cause a cold draft, shocking the cheesecake and almost guaranteeing cracks. Trust the process and keep the oven door closed until it’s time to check for doneness.
- Use an Instant-Read Thermometer: The most reliable way to determine if your cheesecake is perfectly cooked is by checking its internal temperature. Your cheesecake is ready when it reaches 150 degrees F (65 degrees C). Cooking at higher temperatures can compromise its delicate texture. If possible, insert the thermometer into the side of the cheesecake where it rises slightly above the pan to avoid a visible hole on top. Otherwise, a small hole in the center will be covered by the delicious topping.
- Do Not Skimp on Chilling Time: Patience is a virtue when it comes to cheesecake. Adequate chilling time (at least 6 hours or overnight) is essential for the cheesecake to fully firm up and for the flavors to meld beautifully. Attempting to remove or cut the cheesecake before it’s properly chilled will result in a messy, unset dessert.
Essential Ingredients for Your Healthy Pumpkin Cheesecake
Crafting this light and healthy pumpkin cheesecake requires a few key ingredients. Each plays a vital role in achieving its unique flavor and texture profile, especially for those mindful of their diet and following programs like Weight Watchers. Here’s a closer look at what you’ll need:
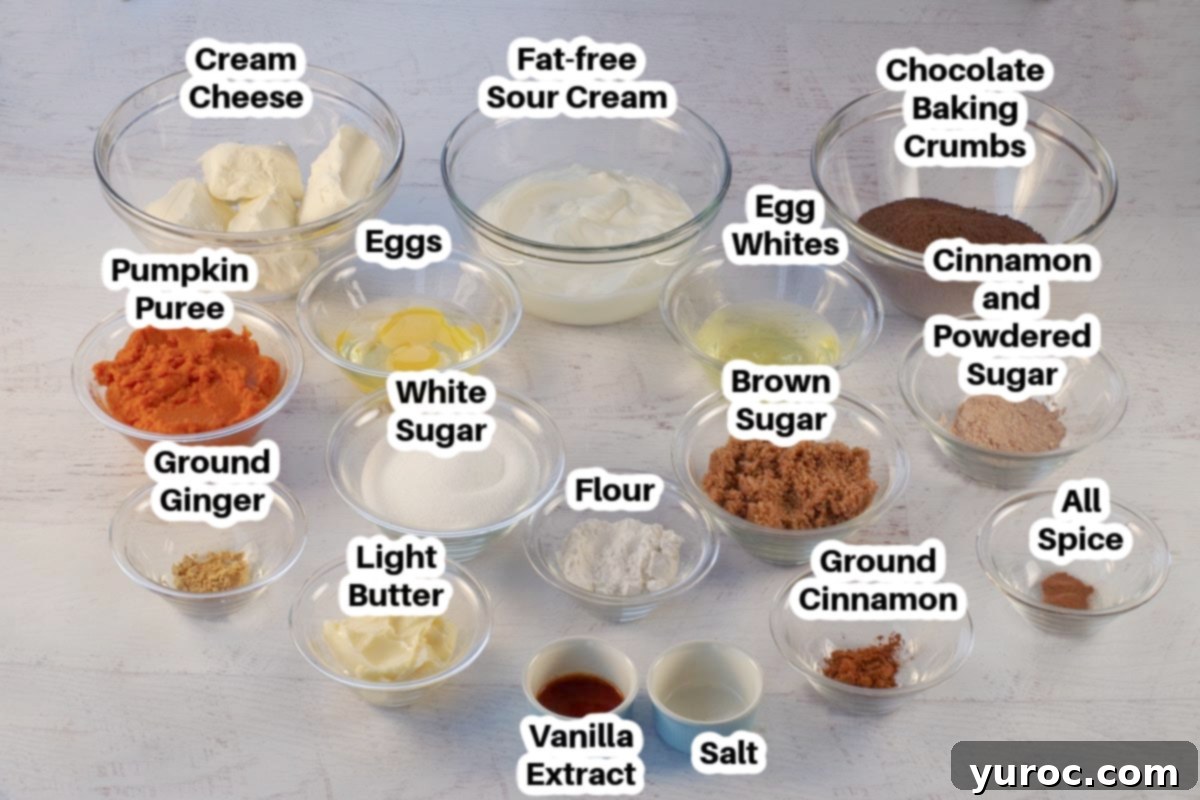
- The Crust: While the star of this dessert is undoubtedly the rich pumpkin filling, the chocolate Oreo cookie crust forms an incredibly harmonious base. It provides a delightful contrast in texture and a complementary flavor that elevates the entire cheesecake. Interestingly, this recipe originally featured a gingersnap crust, but the switch to Oreo crumbs proved to be a stroke of genius, creating a truly irresistible combination.
- Cream Cheese: To keep this recipe light and Weight Watchers-friendly, we opt for light cream cheese. However, if you’re aiming for even lower fat content, non-fat cream cheese can also be used. Always ensure your cream cheese is at room temperature for a smooth, lump-free batter.
- All-Purpose Flour: A small amount of all-purpose flour is added to the filling. This acts as a stabilizer, helping the cheesecake set properly and preventing it from cracking during baking and cooling.
- Pumpkin Puree: The heart of this pumpkin cheesecake is pure pumpkin. You can use readily available canned pumpkin puree (make sure it’s 100% pumpkin, not pumpkin pie filling) or prepare your own homemade pumpkin puree from scratch. It’s crucial to differentiate this from pumpkin pie filling, which already contains added sugars and spices that would alter the recipe’s balance.
- Cinnamon and Powdered Sugar: This simple yet effective topping adds the perfect finishing touch. A delightful mix of powdered sugar (also known as icing sugar or confectioners’ sugar) and cinnamon is lightly sprinkled over the cooled cheesecake. This not only enhances the visual appeal but also adds a subtle warmth and sweetness that complements the pumpkin flavor beautifully. We recommend a second sprinkle just before serving for maximum impact.
*Refer to the comprehensive recipe card below for detailed information on all ingredients and precise quantities needed.
Savory Substitutions & Delightful Variations
This light pumpkin cheesecake recipe is wonderfully adaptable, allowing you to customize it to your taste or dietary needs. Here are some ideas for substitutions and variations:
- Chocolate Crust Alternatives: If Oreo baking crumbs aren’t available, don’t fret! You can easily substitute them with any other chocolate baking crumbs. Crushed Oreo thins also work great for a slightly lighter option. For a richer, more homemade chocolate crust, you can crush whole Oreo cookies (either in a food processor or by hand with a rolling pin), similar to how I prepare the crust for my No Bake Black Forest Cheesecake. Just keep in mind that using whole Oreos will increase the calorie and Weight Watchers point count significantly. For a different flavor profile, consider using crushed ginger cookies for a spicy kick, or a classic graham cracker crust (homemade or store-bought). If you happen to find chocolate graham crackers, they’re also a fantastic option, though they can be harder to locate as they’ve sometimes been discontinued.
- Mini Pumpkin Cheesecakes: For individual servings or portion control, transform this recipe into adorable mini pumpkin cheesecakes. Simply press the crust mixture into mini aluminum foil pie pans or muffin tins lined with paper liners. Bake for a shorter duration, typically around 15 minutes, or until an instant-read thermometer registers 150 degrees F (65 degrees C) in the center of a mini cheesecake.
- Fat-Free Sour Cream / Greek Yogurt: While the recipe calls for fat-free sour cream to keep it light and creamy, you can experiment with non-fat Greek yogurt as a substitute. I’ve personally tried this, and while it works, be aware that Greek yogurt will impart a tangier flavor to the topping. If you prefer a milder, more classic sour cream taste, stick with the fat-free sour cream.
- Spice Blend Customization: The recipe uses a traditional blend of cinnamon, ginger, and allspice to capture that quintessential pumpkin pie flavor. For convenience, you can easily substitute these individual spices with an equal amount of pre-made pumpkin pie spice. This offers a quick way to achieve a well-balanced autumnal flavor profile.
Top Tip for Selecting Light Cream Cheese
When preparing this light pumpkin cheesecake, especially if you’re meticulously tracking points with the Weight Watchers program, exercise caution and discernment when selecting your light cream cheese. The fat content can vary significantly between different brands, often leading to surprising discrepancies. I’ve consistently observed that most generic or “no-name” store brands tend to have a substantially higher fat content – sometimes nearly matching that of regular cream cheese – compared to established brand names. For consistent results, better texture, and accurate point calculation, I strongly recommend sticking to well-known brand names for your light cream cheese, such as Philadelphia. This ensures both the quality and the health benefits you’re aiming for in your delicious light pumpkin cheesecake.
Step-by-Step Guide: How to Make Light Pumpkin Cheesecake
Making this light pumpkin cheesecake is a straightforward process that yields impressive results. Follow these detailed steps to create your perfect Thanksgiving dessert:
PREP: Begin by preheating your oven to 350 degrees F (176 degrees C). This ensures the oven is at the correct temperature when you’re ready to bake.
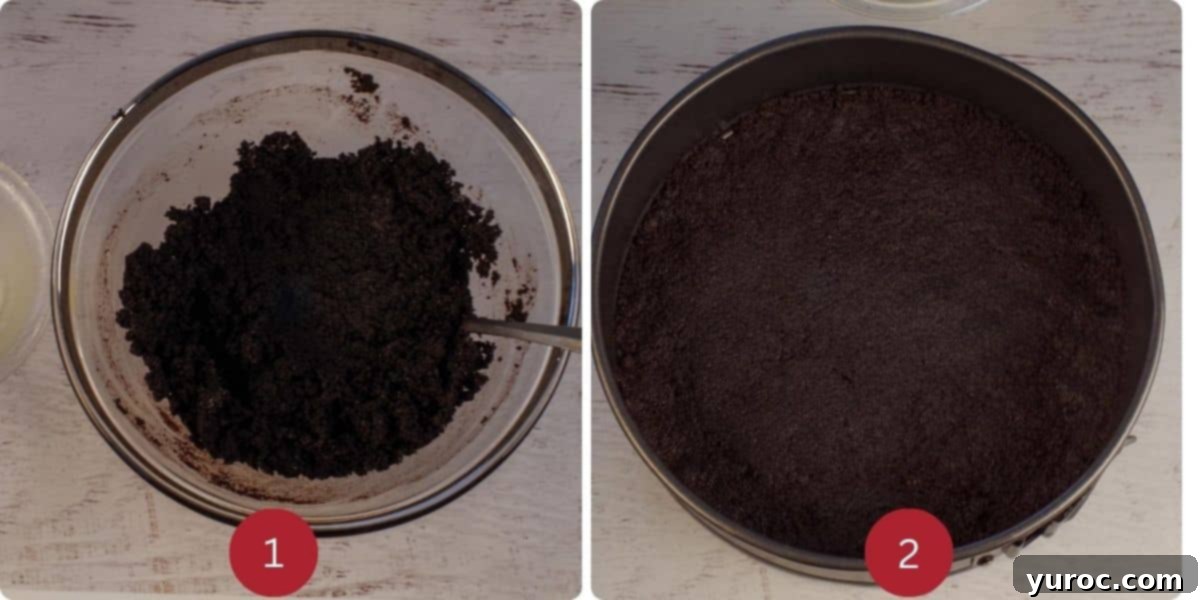
MAKE THE CRUST (STEP 1): In a medium-sized mixing bowl, combine all the crust ingredients: Oreo baking crumbs (or your chosen chocolate baking crumbs), granulated white sugar, and melted light butter. Stir them together until well combined (as shown in **Image 1**). Prepare a 9-inch or 10-inch springform pan by generously spraying it with a non-stick cooking spray to prevent sticking (**Image 2**). Evenly press the crumb mixture onto the bottom and up the sides of the prepared pan, forming a firm crust. Bake this crust in your preheated oven at 350 degrees F (176 degrees C) for 10 minutes. This helps to set the crust and give it a slight crispness before adding the filling.
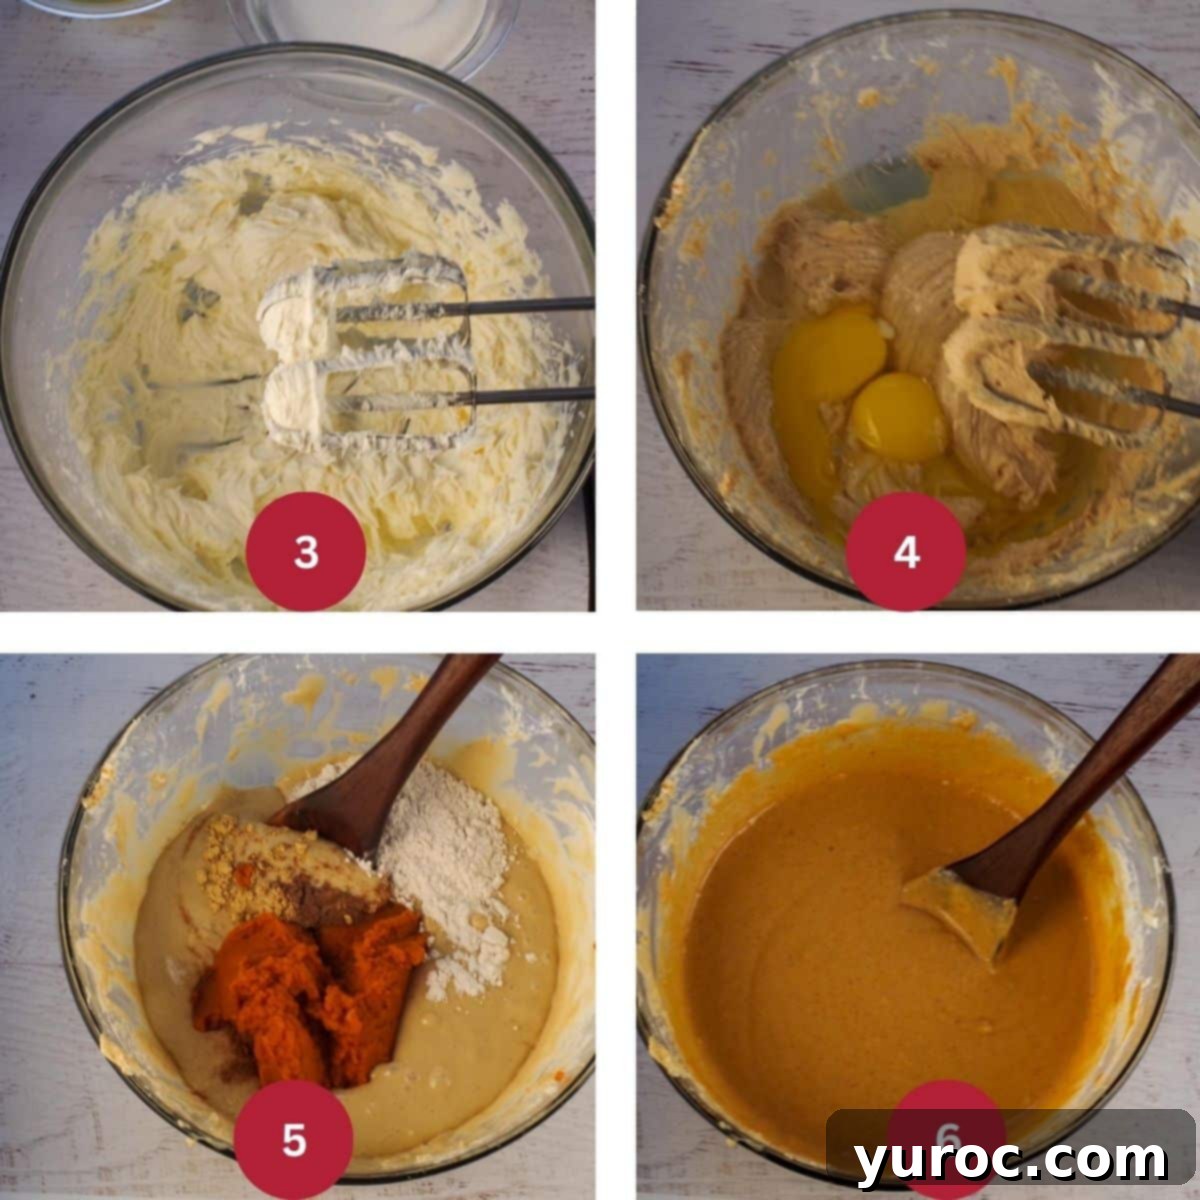
MAKE THE FILLING (STEP 2): While the crust bakes, prepare the creamy pumpkin filling. In a large mixing bowl, using an electric hand mixer or the paddle attachment of a stand mixer, beat the room-temperature cream cheese until it’s smooth and creamy (**Image 3**). Gradually beat in both the brown sugar and ⅔ cup of white granulated sugar until fully incorporated. Next, add the large eggs and egg whites, beating on the lowest possible setting for about 30 seconds until the mixture is smooth and slightly fluffy (**Image 4**). Be careful not to overmix at this stage to avoid incorporating too much air. Finally, fold in the pumpkin puree, salt, all-purpose flour, ground dry ginger, ground cinnamon, and allspice (**Image 5**). Mix gently with a wooden spoon or spatula just until all ingredients are combined and the mixture is uniform (**Image 6**). Do not overmix.
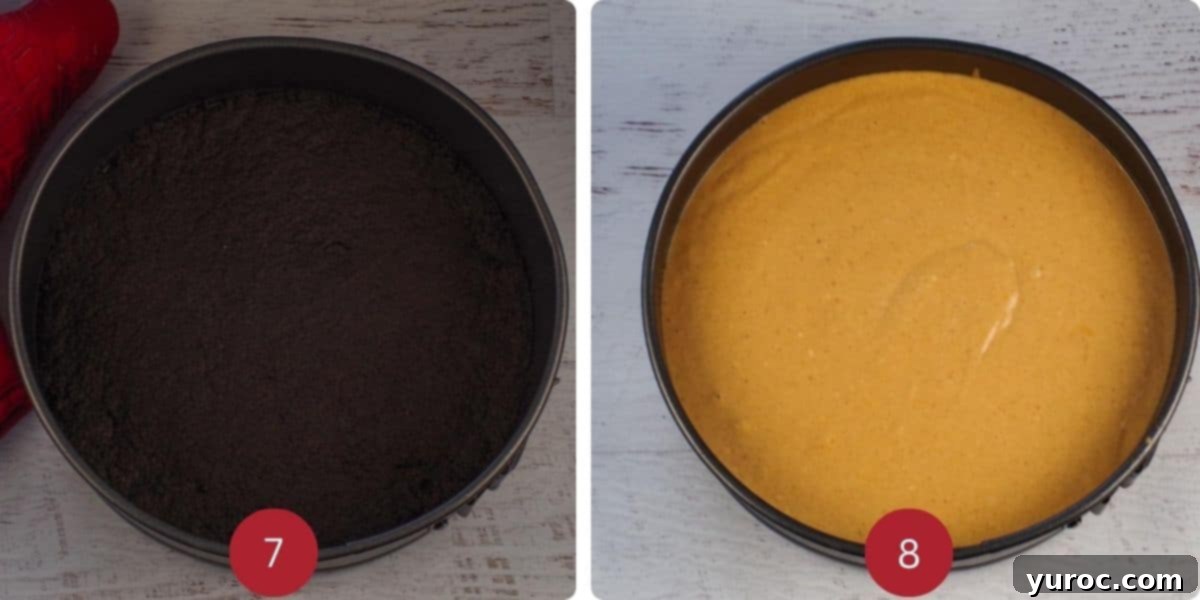
COMBINE THE CRUST AND FILLING (STEP 3): Once the chocolate crust has finished baking, remove it from the oven and allow it to cool completely on a wire rack (**Image 7**). Cooling the crust prevents the filling from becoming soggy. Once cool, carefully pour the prepared pumpkin cheesecake filling evenly over the cooled crust (**Image 8**).
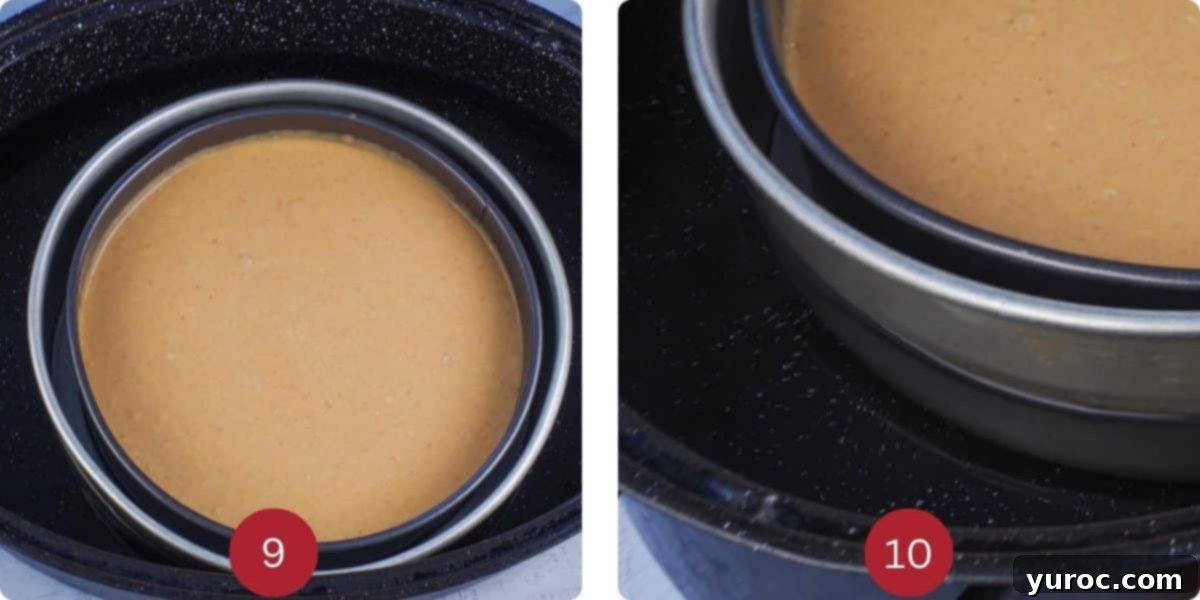
MAKE A WATER BATH (STEP 4): For a crack-free cheesecake, preparing a water bath is highly recommended. Place your cheesecake-filled springform pan into a slightly larger pan. Then, place both of these pans into a very large roasting pan (**Image 9**). You can also refer to a video for a visual guide on how to set up a water bath effectively. Carefully pour hot water into the largest roasting pan, ensuring the water level comes up about ½ to ⅔ of the way up the sides of the pan holding your cheesecake (**Image 10**). Transfer this entire setup back to the preheated oven and bake for approximately 35-50 minutes at 350 degrees F (176 degrees C). The cheesecake is ready when it appears puffed and set. The most accurate way to check for doneness is using an instant-read thermometer, which should read 150 degrees F (65 degrees C) when inserted into the side or center. It’s advisable to start checking at the 35-minute mark to avoid overbaking.
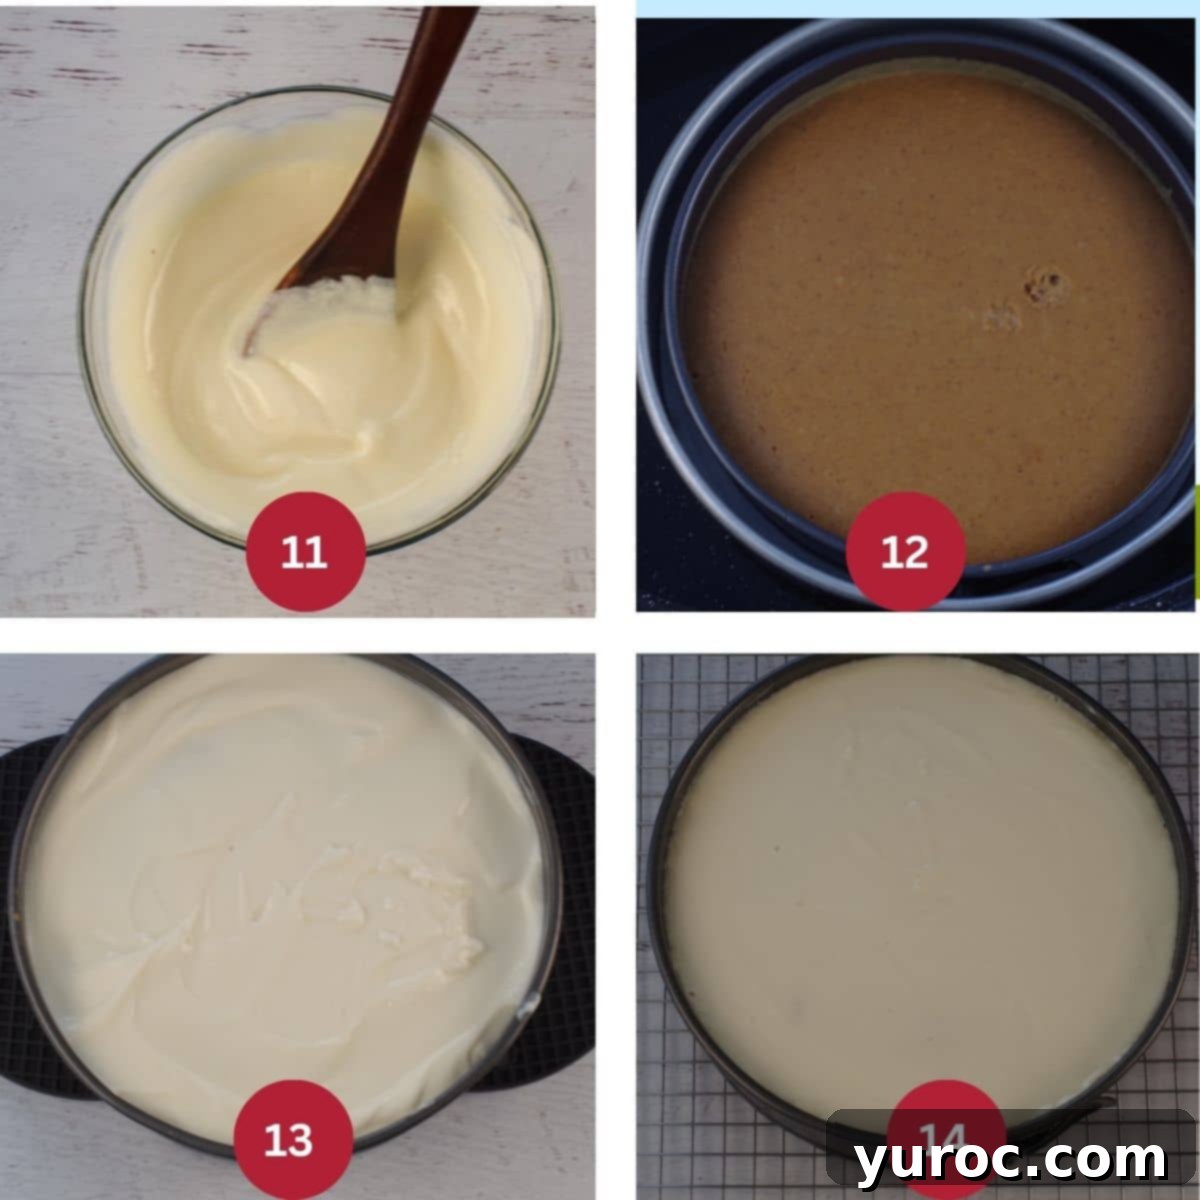
MAKE THE TOPPING (STEP 5): While the cheesecake bakes, prepare the simple and refreshing topping. In a small bowl, whisk together the vanilla extract, fat-free sour cream, and the remaining 6 tablespoons of white granulated sugar (**Image 11**). Once the cheesecake is baked, remove it from the oven (**Image 12**). At this point, it might still have a slight jiggle in the center when gently shaken, and the sides should have slightly pulled away from the pan edges. You’ll notice a slight puffiness around the center. As mentioned, the most reliable test is the internal temperature. If you insert a thermometer, aim for 150 degrees F (65 degrees C). Don’t worry about any small marks from the thermometer, as they will be covered by the topping. Carefully spread the prepared topping evenly over the warm cheesecake (**Image 13**). Return the cheesecake (without the water bath this time) to the oven for an additional 10 minutes to allow the topping to set. After this final bake, remove the cheesecake from the oven and let it cool completely on a wire rack for about 30 minutes (**Image 14**).
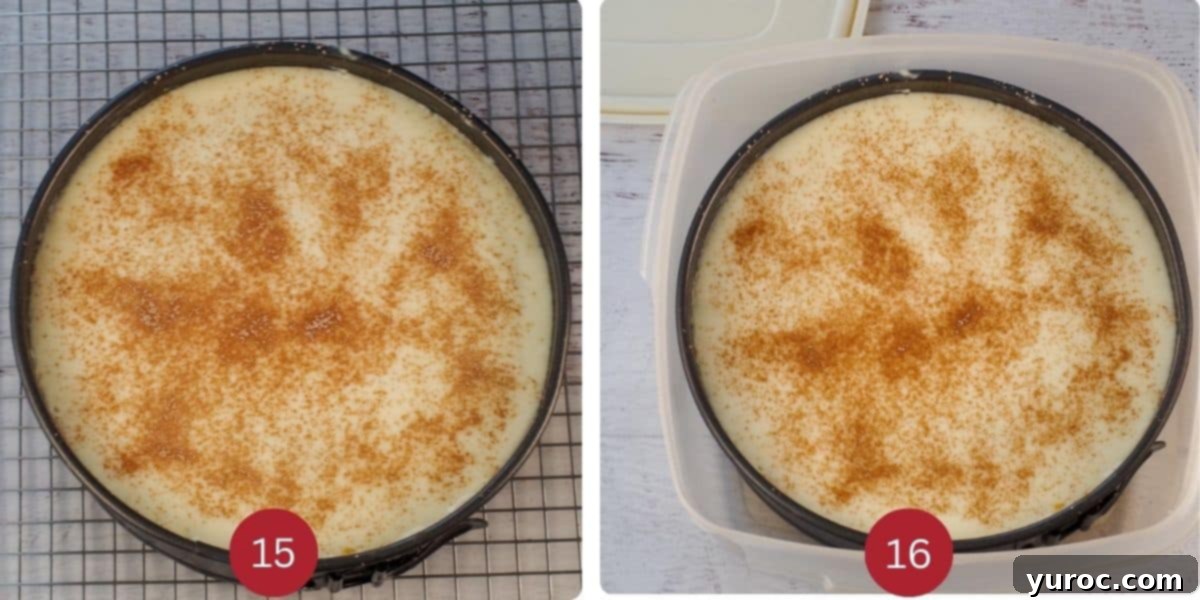
REFRIGERATE THE CHEESECAKE (STEP 6): Once the cheesecake has cooled slightly, generously sprinkle a mixture of cinnamon and icing sugar over the top, adjusting the amount to your personal preference (**Image 15**). You can always add more after chilling. To protect your beautiful cheesecake while it chills overnight, place it in an airtight container with a lid. Alternatively, you can simply cover it tightly with plastic wrap. Transfer the cheesecake to the refrigerator and chill for a minimum of 6 hours, or ideally, overnight (**Image 16**). This crucial chilling time allows the cheesecake to firm up completely and for all the flavors to deepen and meld.
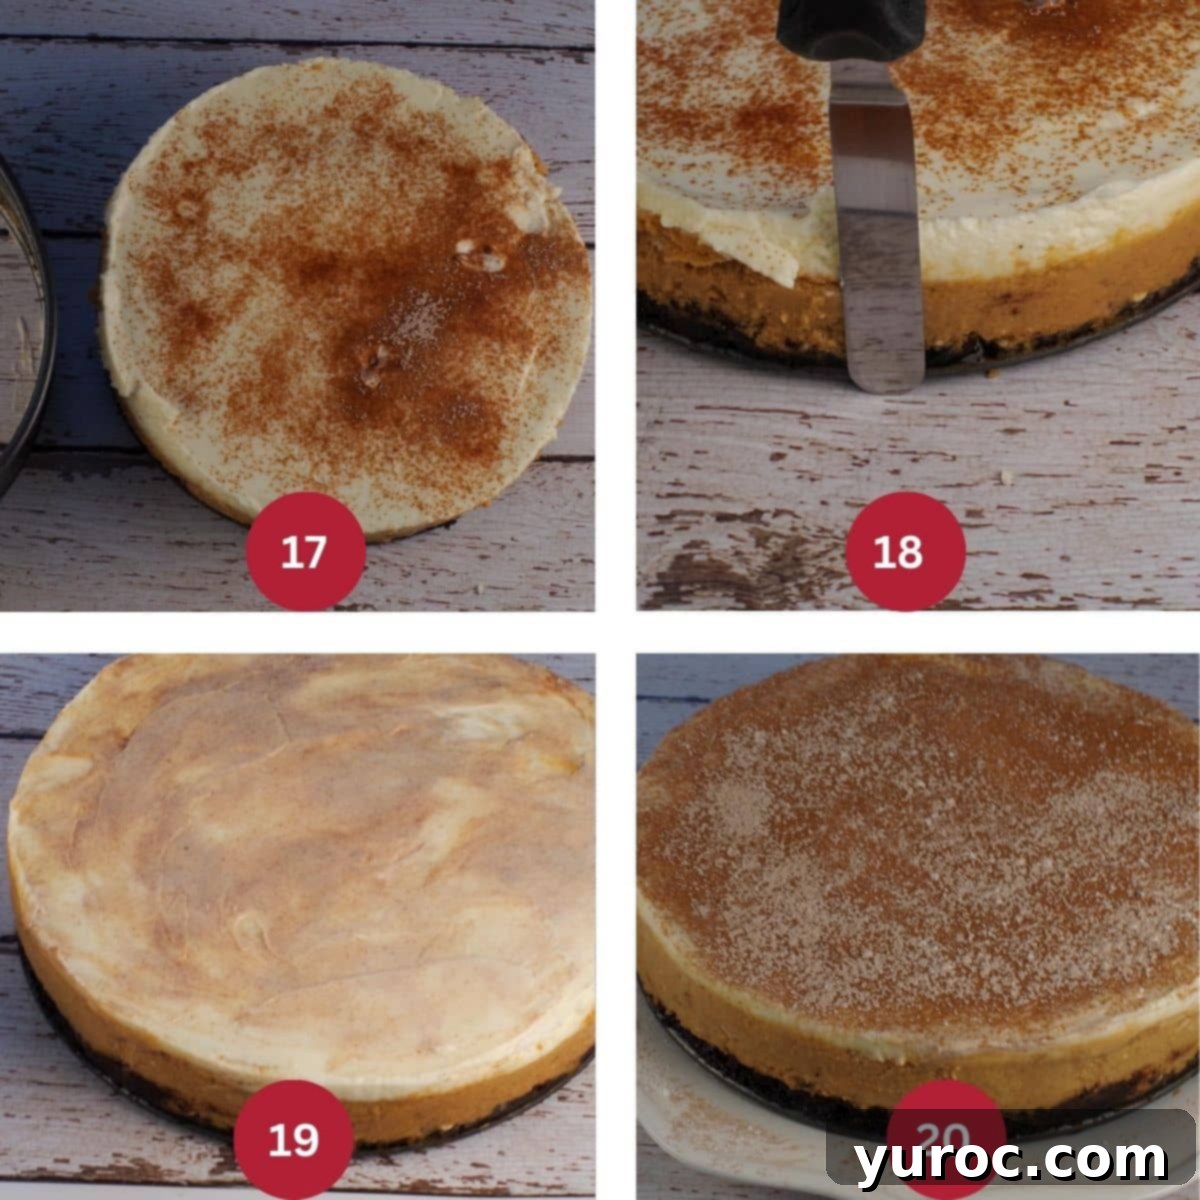
DECORATE AND SERVE THE CHEESECAKE (STEP 7): When you’re ready to serve your perfectly chilled light pumpkin cheesecake, gently release the sides of the springform pan by unhinging it (**Image 17**). To achieve a smooth, professional finish on the sides of the cake, use a hot offset spatula or a butter knife (run it under hot water and wipe dry before each pass) (**Image 18**). If the top of your cheesecake has any slight dimples or imperfections (like mine sometimes does!), you can smooth these out with the same hot knife or spatula (**Image 19**). Don’t be afraid to fix things – I once had my light cover fall directly into this cheesecake while photographing it, and I was able to repair it perfectly! Finally, for a fresh look and added aroma, sprinkle a little more cinnamon and sugar mixture over the top before serving (**Image 20**). Slice and enjoy your delightful, healthy Thanksgiving dessert!
Mastering Cheesecake Doneness: The Jiggle Test and Temperature Check
Knowing exactly when your cheesecake is perfectly baked is key to its creamy texture. Here’s how to tell if your light pumpkin cheesecake is done:
You’ll notice that the cheesecake will still have a slight, barely perceptible jiggle in the very center when you gently shake or move the pan from side to side. The outer edges, however, should appear set and will have visibly separated from the sides of the pan. You’ll also likely observe that the cheesecake has puffed up a little around its center. For this particular recipe, I recommend checking for doneness after about 45 minutes of baking.
While the “jiggle test” is a classic indicator, it can be subjective and difficult to judge accurately, especially for novice bakers. The most foolproof and guaranteed method to determine if your cheesecake is ready to come out of the oven is by checking its internal temperature. The cheesecake is perfectly done when the internal temperature reaches 150 degrees F (65 degrees C). Baking it at higher temperatures can overcook the filling, leading to a dry or crumbly texture that suffers in comparison to a perfectly creamy one.
To measure the temperature, if possible, insert an instant-read thermometer into the side of the cheesecake, targeting the area where it rises above the pan. This avoids creating a visible mark on the top surface. If that’s not feasible, inserting it into the center of the cake is perfectly fine, as any small mark will be artfully concealed by the delicious topping. I personally rely on this instant-read thermometer (affiliate link); it’s an invaluable tool for precise cooking and baking!
Mastering the Cheesecake Water Bath Technique
While making cheesecake isn’t inherently difficult, a single negative experience, particularly with cracking, can deter even enthusiastic home bakers. Because cheesecakes are prone to cracking due to uneven heat distribution, I often employ a water bath, also known as a bain-marie. This method introduces steam into the oven, creating a moist, even cooking environment that helps the cheesecake bake gently and prevents the edges from drying out and cracking.
For this specific Light Pumpkin Cheesecake recipe, using a water bath is technically optional. Even if it cracks a little without one, the generous sour cream topping will beautifully conceal any imperfections, ensuring your cheesecake still looks absolutely stunning! Moreover, the recipe is formulated to prevent excessive dryness even without the water bath. However, if you are accustomed to using a water bath and prefer the added security it offers for a perfectly smooth, crack-free surface, then by all means, continue to use it. If you’re new to this technique and want to learn how to properly set one up, I highly recommend watching this helpful video tutorial on how to make a water bath for cheesecake!
*My preferred method for a water bath involves placing the springform pan (which is already nestled in a slightly larger pan for extra protection) into an even larger roasting pan. This multi-pan approach provides excellent protection against leaks. Alternatively, you can meticulously wrap your springform pan with several layers of heavy-duty aluminum foil to create a waterproof barrier, though I find the larger pan method more reliable.
Another alternative is to place a separate pan of hot water on the rack directly underneath your cheesecake as it bakes. The steam generated from this water will rise and contribute to a more moist oven environment, helping to prevent cracks. *However, in my experience, this method typically does not work as effectively as directly placing the cheesecake in a water bath.
Water Bath Worries? How to Handle a Cheesecake Leak
Discovering a water bath leak can be alarming, but don’t panic! A leak does not automatically mean your cheesecake is ruined. This is a common occurrence, and there are steps you can take to salvage your delicious dessert. If you find your cheesecake pan has taken on water, act quickly:
Get the cheesecake out of the water bath as soon as possible. Immediately remove it from the roasting pan and drain off any water that may have collected in the springform pan’s base. Give the pan a gentle shake and jiggle to check for excess water inside, then thoroughly dry the exterior of the springform pan with a clean tea towel or paper towel. Once dried, you can return your cheesecake to the oven to continue baking using the alternative steaming method (a pan of hot water on a lower rack) or simply bake it dry, hoping for the best. Rest assured—this has happened to me several times in the past, particularly before I adopted the more secure larger-pan-in-roasting-pan method, and my cheesecakes were never spoiled. They always turned out perfectly delicious!
This light pumpkin cheesecake has been my trusted, go-to recipe for many years. I vividly recall bringing it to work once, and the recipe was eagerly requested by several colleagues afterwards. One coworker later told me his wife tried to make it, but it didn’t quite taste like mine. It turned out I had made a few simple, personal adjustments—like generously sprinkling icing sugar and cinnamon on top—that I hadn’t explicitly included in the initial recipe share. Apparently, these small changes made all the difference in flavor and presentation. It was a valuable lesson learned: now, I always make sure to include all my personal touches and nuanced steps in every recipe I share with others, ensuring they can achieve the same delicious results.
Perfect Pairings: What to Serve with Healthy Pumpkin Cheesecake
This healthy pumpkin cheesecake is a showstopper on its own, but it pairs beautifully with a range of savory and light dishes, especially if you’re planning a Weight Watchers-friendly meal or a lighter Thanksgiving spread. Here are some fantastic recipes that complement its flavors perfectly:
- My Slow Cooker Turkey Cranberry Meatballs offer a savory, festive starter.
- For a vibrant and nutritious side, try my Healthy Glazed Carrots with Brown Sugar.
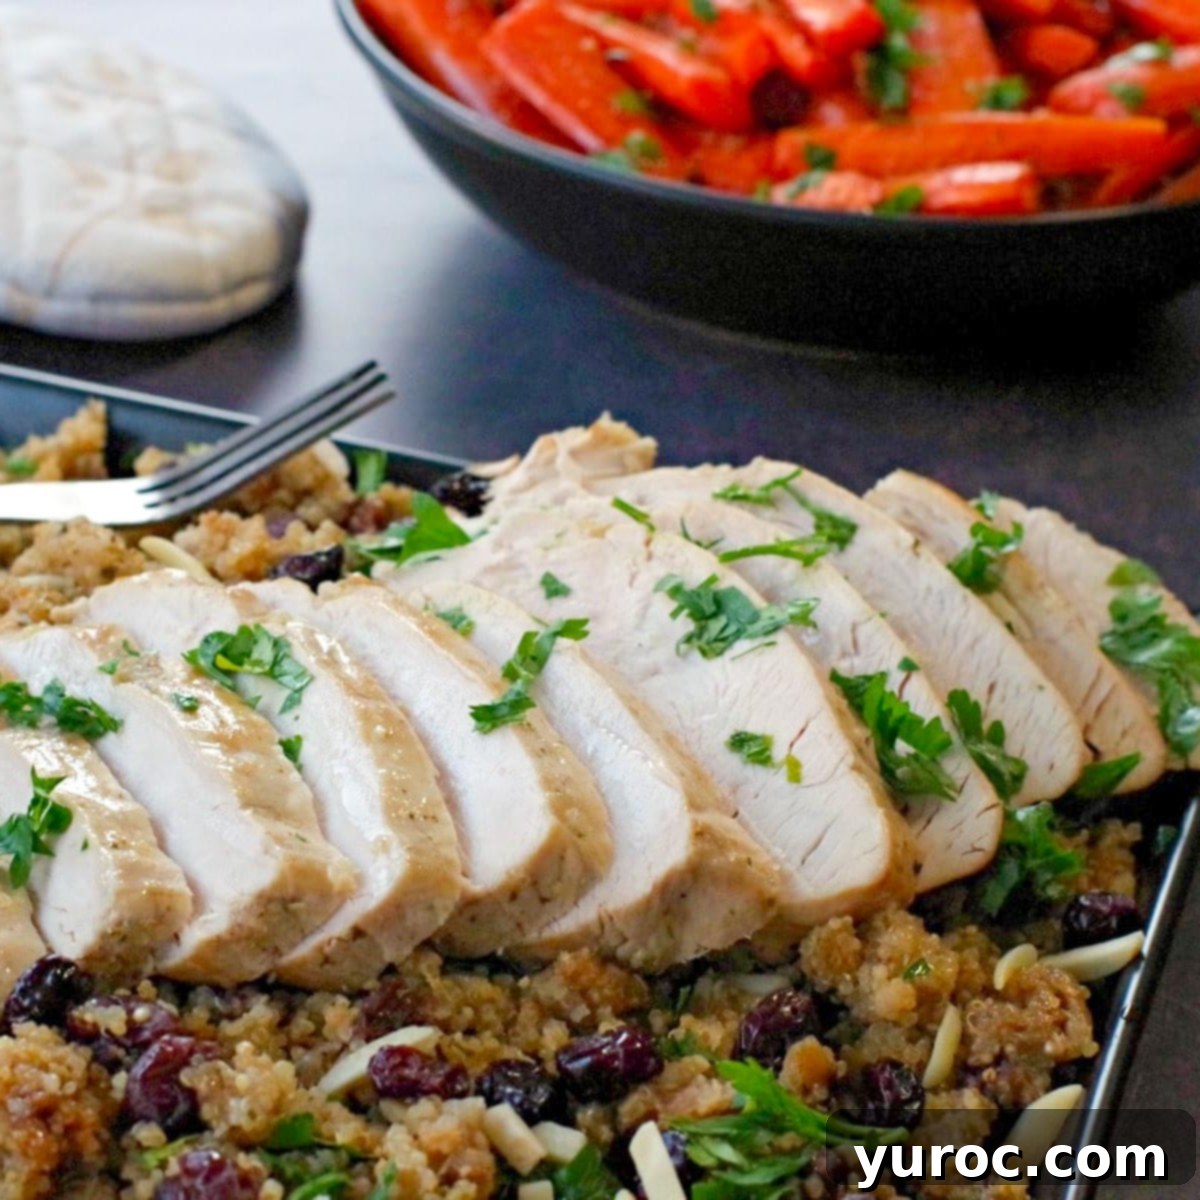
- A wonderful main course option is my Crockpot Turkey Breast with Cranberry Quinoa Stuffing (pictured below), which is both flavorful and lean.
- And for another comforting side dish, my Turnip and Apple Casserole adds a lovely sweet and earthy touch.
Generous Servings for Your Thanksgiving Table
This healthy Thanksgiving cheesecake is designed to be made in a standard 9-inch or 10-inch springform pan, yielding 16 generous servings. While 16 slices might seem like a lot, it’s important to remember that even a lighter cheesecake is still quite rich and satisfying, meaning a smaller slice is often perfectly sufficient to curb that dessert craving. This makes it an ideal dessert for family gatherings or holiday parties, ensuring there’s enough to go around for everyone to enjoy.
Weight Watchers Friendly: Enjoying Dessert Guilt-Free
One of the best features of this Light Pumpkin Cheesecake is its Weight Watchers friendliness, coming in at just 10 WW points per serving. This makes it a fantastic choice for those committed to a healthier lifestyle without sacrificing deliciousness, especially during the holidays. If you’re looking to further reduce the points and make this dessert even lighter, there are a few simple adjustments you can make:
- Opt for Fat-Free Cream Cheese: Swapping reduced-fat cream cheese for a fat-free version will significantly lower the fat and calorie content, thereby reducing the overall Weight Watchers points.
- Choose Light Margarine: If you use margarine in your crust, ensure it’s a light or low-fat variety.
- Consider Sugar Substitutes: For those who wish to cut down on sugar, a sugar substitute like monk fruit can be used. Monk fruit is much sweeter than sugar, so you’ll only need to use approximately half the amount of monk fruit as you would regular sugar in the recipe. Always adjust to taste and consider how it impacts the texture.
By implementing these small changes, you can tailor this light pumpkin cheesecake to perfectly fit your dietary goals, making it an even more accessible and enjoyable healthy dessert.
Storage Solutions: Make Ahead, Refrigerate & Freeze
Planning ahead for holiday meals or simply want to enjoy your delicious light pumpkin cheesecake over several days? Proper storage is key to maintaining its freshness and flavor. Here’s how to best store your cheesecake:
Make Ahead and Refrigeration
This healthy pumpkin cheesecake is an excellent candidate for making ahead. You can prepare it a day or even two in advance, which is perfect for reducing stress during busy holiday preparations. Once baked and completely cooled, store the cheesecake in an airtight container in the refrigerator for up to 3 days. Ensure it’s well-covered to prevent it from absorbing any other odors from the fridge and to maintain its moisture.
Freezing
Cheesecakes freeze remarkably well, making them ideal for long-term storage or preparing for future events. If you plan to freeze your cheesecake, I highly recommend consulting Taste of Home’s comprehensive guide on how to freeze cheesecakes for detailed instructions. Generally, for the best quality, I do not recommend freezing this cheesecake for longer than 2 months. When freezing, it’s best to do so before applying the cinnamon and icing sugar mixture. Sprinkle this garnish fresh once the cheesecake has completely defrosted and just prior to serving to ensure its optimal appearance and flavor.
Frequently Asked Questions About Light Pumpkin Cheesecake
Yes, it is possible to bake this cheesecake without a water bath. However, baking without one carries a much higher risk of the cheesecake burning around the edges, cracking significantly on the surface, and cooking unevenly. A water bath (bain-marie) uses steam to ensure the cake cooks slowly and evenly, creating a moist environment that prevents these common issues and results in a beautifully smooth, crack-free top and a perfectly creamy texture.
Yes, generally, canned pumpkin and pumpkin puree refer to the same product: 100% cooked and mashed pumpkin with no other ingredients. However, it’s crucial to distinguish this from “pumpkin pie filling,” which is a completely different product. Pumpkin pie filling already has sweeteners, spices (like cinnamon, nutmeg, ginger), and sometimes other ingredients added to it, making it ready for pie-making without further seasoning.
If you mistakenly use pumpkin pie filling instead of plain pumpkin puree in this Light Pumpkin Cheesecake recipe, you’ll need to adjust the other ingredients significantly. Since pumpkin pie filling is already sweetened and spiced, I recommend omitting the individual spices called for in the recipe (ground ginger, cinnamon, allspice). Additionally, reduce the amount of brown sugar in the filling to only ⅓ cup to prevent the cheesecake from becoming overly sweet. Taste your batter before baking to ensure the sweetness level is to your liking.
A cheesecake leaking liquid, sometimes referred to as “weeping,” in the fridge can be caused by a few factors. Common reasons include undermixing the batter (which can lead to separation), using poor quality or overly watery cream cheese, or over-baking the cheesecake. Sometimes, it can also just happen despite your best efforts. If you encounter this, don’t despair! Next time you bake, try mixing a couple of tablespoons of cornstarch with the sugar before creaming it with the cream cheese; cornstarch can help absorb excess moisture. If all else fails and your cheesecake is weeping excessively, stick it in the freezer and enjoy it as a delightful frozen dessert!
So, whether you’re actively searching for a lighter pumpkin cheesecake recipe, exploring healthy pumpkin desserts for Thanksgiving, or simply seeking innovative healthy Thanksgiving dessert ideas, this recipe is your answer! It successfully delivers all the rich, comforting flavors you expect from a classic cheesecake, but with significantly fewer calories than its traditional counterparts. It’s a truly guilt-free indulgence, packed with delightful autumnal taste!
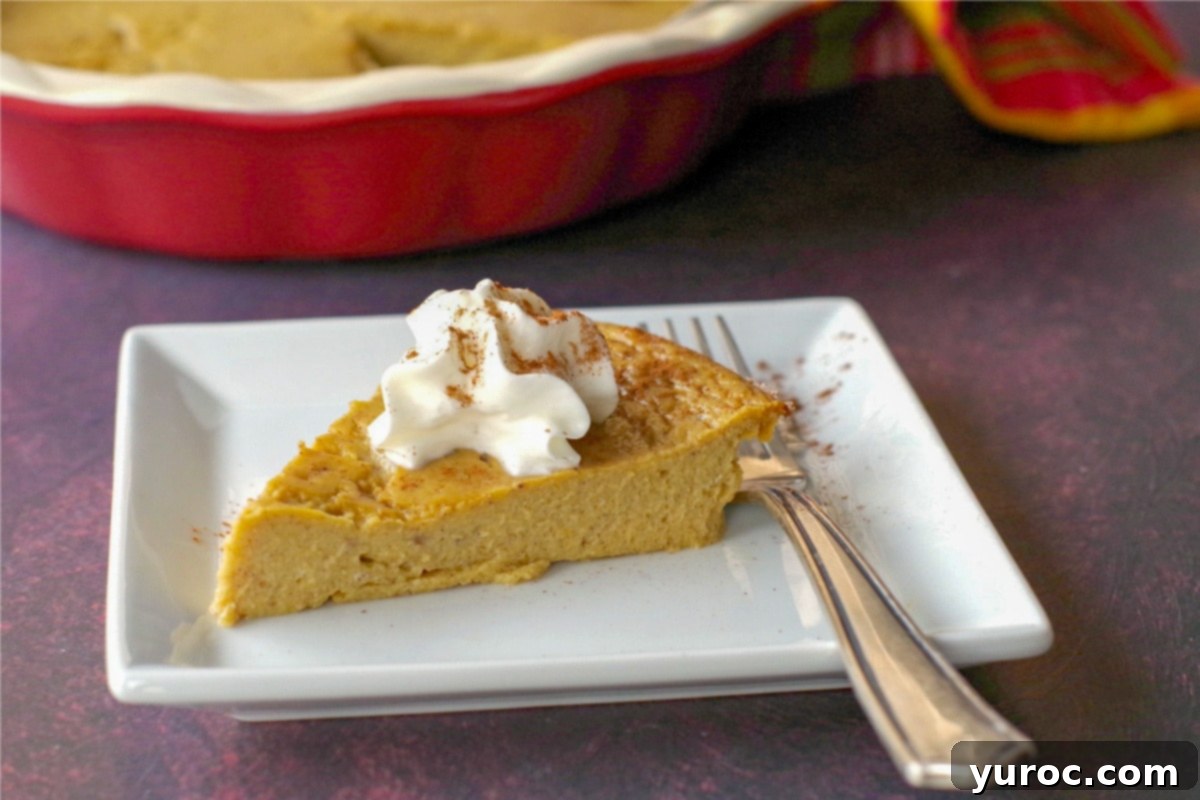
And if your love for pumpkin knows no bounds, be sure to also try my incredibly simple and delicious Crustless Pumpkin Pie!
Explore More Delicious Pumpkin Recipes
- Healthy Pumpkin Soup (without cream)
- Pumpkin Pie Sheet Pan Pancakes
- Pumpkin Pie Ice Cream (no churn)
- Apricot Bran Pumpkin Muffins
Did your family truly ❤️ this recipe? Did you know that commenting and ⭐ rating recipes is one of the best ways to support your favorite recipe creators? If you LOVED this recipe, please take a moment to comment and rate it in the recipe card below, or share your delicious photos on social media using the hashtag #foodmeanderings or by tagging @foodmeanderings! Your feedback means the world!

📋 Light Pumpkin Cheesecake (with Oreo Crust) Recipe
Equipment
- 9-inch springform pan
- electric mixer
Ingredients
CRUST:
- 1 ½ cups Oreo baking crumbs or chocolate baking crumbs
- 2 tablespoon white granulated sugar
- 4 tablespoon light butter melted
FILLING:
- 16 oz reduced-fat cream cheese 2 – 8 oz packages *Name brand, such as Philadelphia brand, works better!
- ⅔ cup brown sugar
- ⅔ cup white granulated sugar
- 2 large eggs
- 3 large egg whites
- 1 cup pumpkin puree (canned or fresh) Fresh pumpkin puree: https://foodmeanderings.com/how-to-cook-a-whole-pumpkin-and-make-pumpkin-puree/
- ¼ teaspoon salt
- 2 tablespoon all-purpose flour
- ½ teaspoon ground dry ginger
- ½ teaspoon ground cinnamon
- ¼ teaspoon allspice
TOPPING:
- 2 cups fat-free sour cream
- 6 tablespoon white granulated sugar
- 1 teaspoon vanilla extract
GARNISH:
- About 2 Tbsp each of cinnamon and icing sugar mixed together for sprinkling
Instructions
CRUST:
- PREP: Preheat your oven to 350 degrees F (176 degrees C).
- In a medium mixing bowl, stir together all crust ingredients. Generously spray a 9-inch or 10-inch springform pan with non-stick cooking spray.1 ½ cups Oreo baking crumbs or chocolate baking crumbs, 2 tablespoon white granulated sugar, 4 tablespoon light butter
- Press the mixture firmly onto the bottom and up the sides of the pan to form the crust.
- Bake the crust in the preheated oven at 350 degrees F (176 degrees C) for 10 minutes. Remove and cool on a wire rack.
FILLING:
- In a large mixing bowl, beat the room-temperature cream cheese with an electric mixer until smooth.16 oz reduced-fat cream cheese
- Beat in both the brown sugar and white granulated sugar until combined. Add the eggs and egg whites, beating on the lowest setting for about 30 seconds until the mixture is smooth and slightly fluffy. Do not overmix.⅔ cup brown sugar, ⅔ cup white granulated sugar, 2 large eggs, 3 large egg whites
- Gently mix in the pumpkin puree, salt, all-purpose flour, ground dry ginger, ground cinnamon, and allspice until just combined.1 cup pumpkin puree (canned or fresh), ¼ teaspoon salt, 2 tablespoon all-purpose flour, ½ teaspoon ground dry ginger, ½ teaspoon ground cinnamon, ¼ teaspoon allspice
- Pour the pumpkin cheesecake filling onto the cooked and cooled crust.
- Place the cheesecake pan into a larger pan for a water bath (or wrap with foil). Fill the outer pan with hot water halfway up the cheesecake pan. Return to a 350 degrees F (176 degrees C) oven and bake for approximately 35-50 minutes, or until puffed and set. The center may still jiggle slightly. Check the internal temperature: it should read 150 degrees F (65 degrees C). Start checking at 35 minutes.
TOPPING & CHILLING:
- In a separate bowl, mix together the fat-free sour cream, 6 tablespoons white granulated sugar, and vanilla extract for the topping. Set aside.2 cups fat-free sour cream, 6 tablespoon white granulated sugar, 1 teaspoon vanilla extract
- Remove the cheesecake from the oven (and water bath). Spread the prepared topping evenly over the warm cheesecake. Return to the oven (without the water bath) and bake for an additional 10 minutes.
- Cool the cheesecake on a wire rack for 30 minutes.
- Lightly sprinkle the cinnamon and icing sugar mixture over the top, adjusting to your preference. (You can always add more after chilling.) Cover the cheesecake with plastic wrap or place it in an airtight container for refrigeration.about 2 Tblsp each of cinnamon and icing sugar mixed together for sprinkling
- Chill in the refrigerator for at least 6 hours, or ideally, overnight, until fully set.
- When ready to serve, gently unhinge the sides of the pan. Smooth the sides and top of the cake with a hot offset spatula or butter knife for a clean finish. Sprinkle with additional cinnamon and sugar if desired. Slice and enjoy!
Notes
- Room Temperature Ingredients: Always ensure your cream cheese and eggs are at room temperature. This creates a smooth, lump-free batter that bakes evenly.
- Water Bath Benefits: Using a water bath helps prevent cracking and promotes even cooking, resulting in a perfectly creamy cheesecake texture.
- Springform Pan Advantage: A springform pan is ideal for cheesecakes, allowing for easy removal and beautiful presentation due to its custard-like texture.
- Thoroughly Spray Pan: Don’t skimp on spraying your pan. A well-greased pan is essential to prevent the cheesecake from sticking, which can otherwise create a messy situation.
- Avoid Overmixing: Overmixing introduces excess air, which can cause the cheesecake to rise too much, then fall and crack as it cools. Mix just until combined.
- Keep Oven Closed: Resist the urge to open the oven door during baking. Sudden temperature changes can shock the cheesecake and lead to cracks.
- Instant-Read Thermometer: The most reliable way to check for doneness is with an instant-read thermometer. The cheesecake is ready when it reaches an internal temperature of 150 degrees F (65 degrees C). Higher temperatures will negatively affect the texture. Insert the thermometer into the side of the cheesecake where it rises above the pan, or into the center if necessary (the topping will cover the mark).
- Crucial Chilling Time: Do not rush the chilling process. If you try to remove or slice your cheesecake before it’s thoroughly chilled, it won’t firm up properly and won’t cut as cleanly. Allow at least 6 hours, or ideally overnight, for chilling.