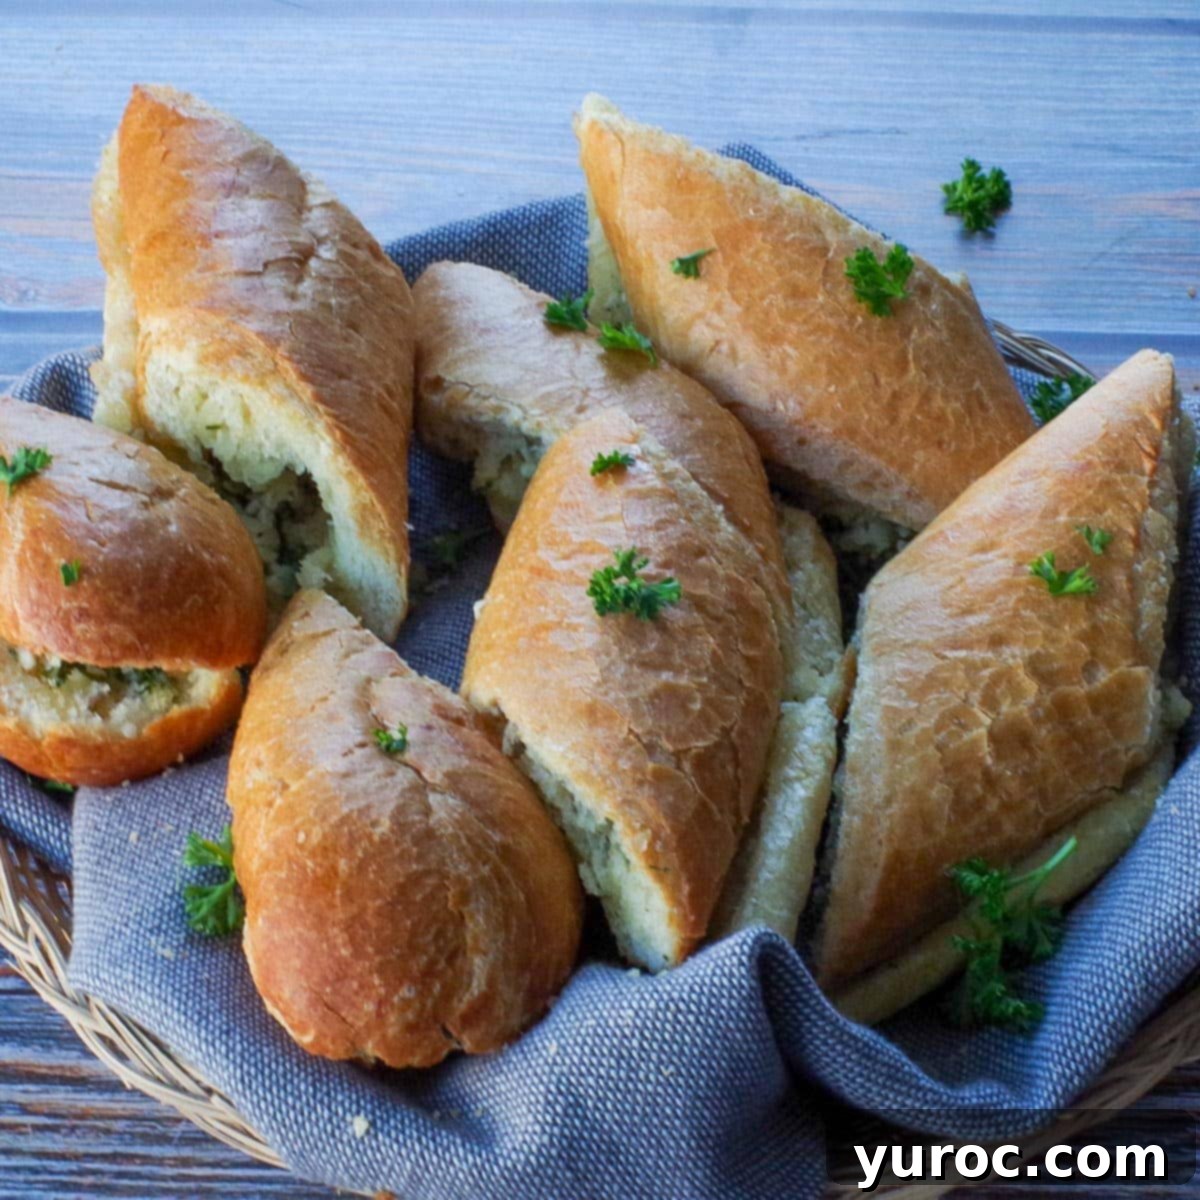
Effortless Homemade Baguette Garlic Bread: Crispy, Flavorful & Perfect Every Time
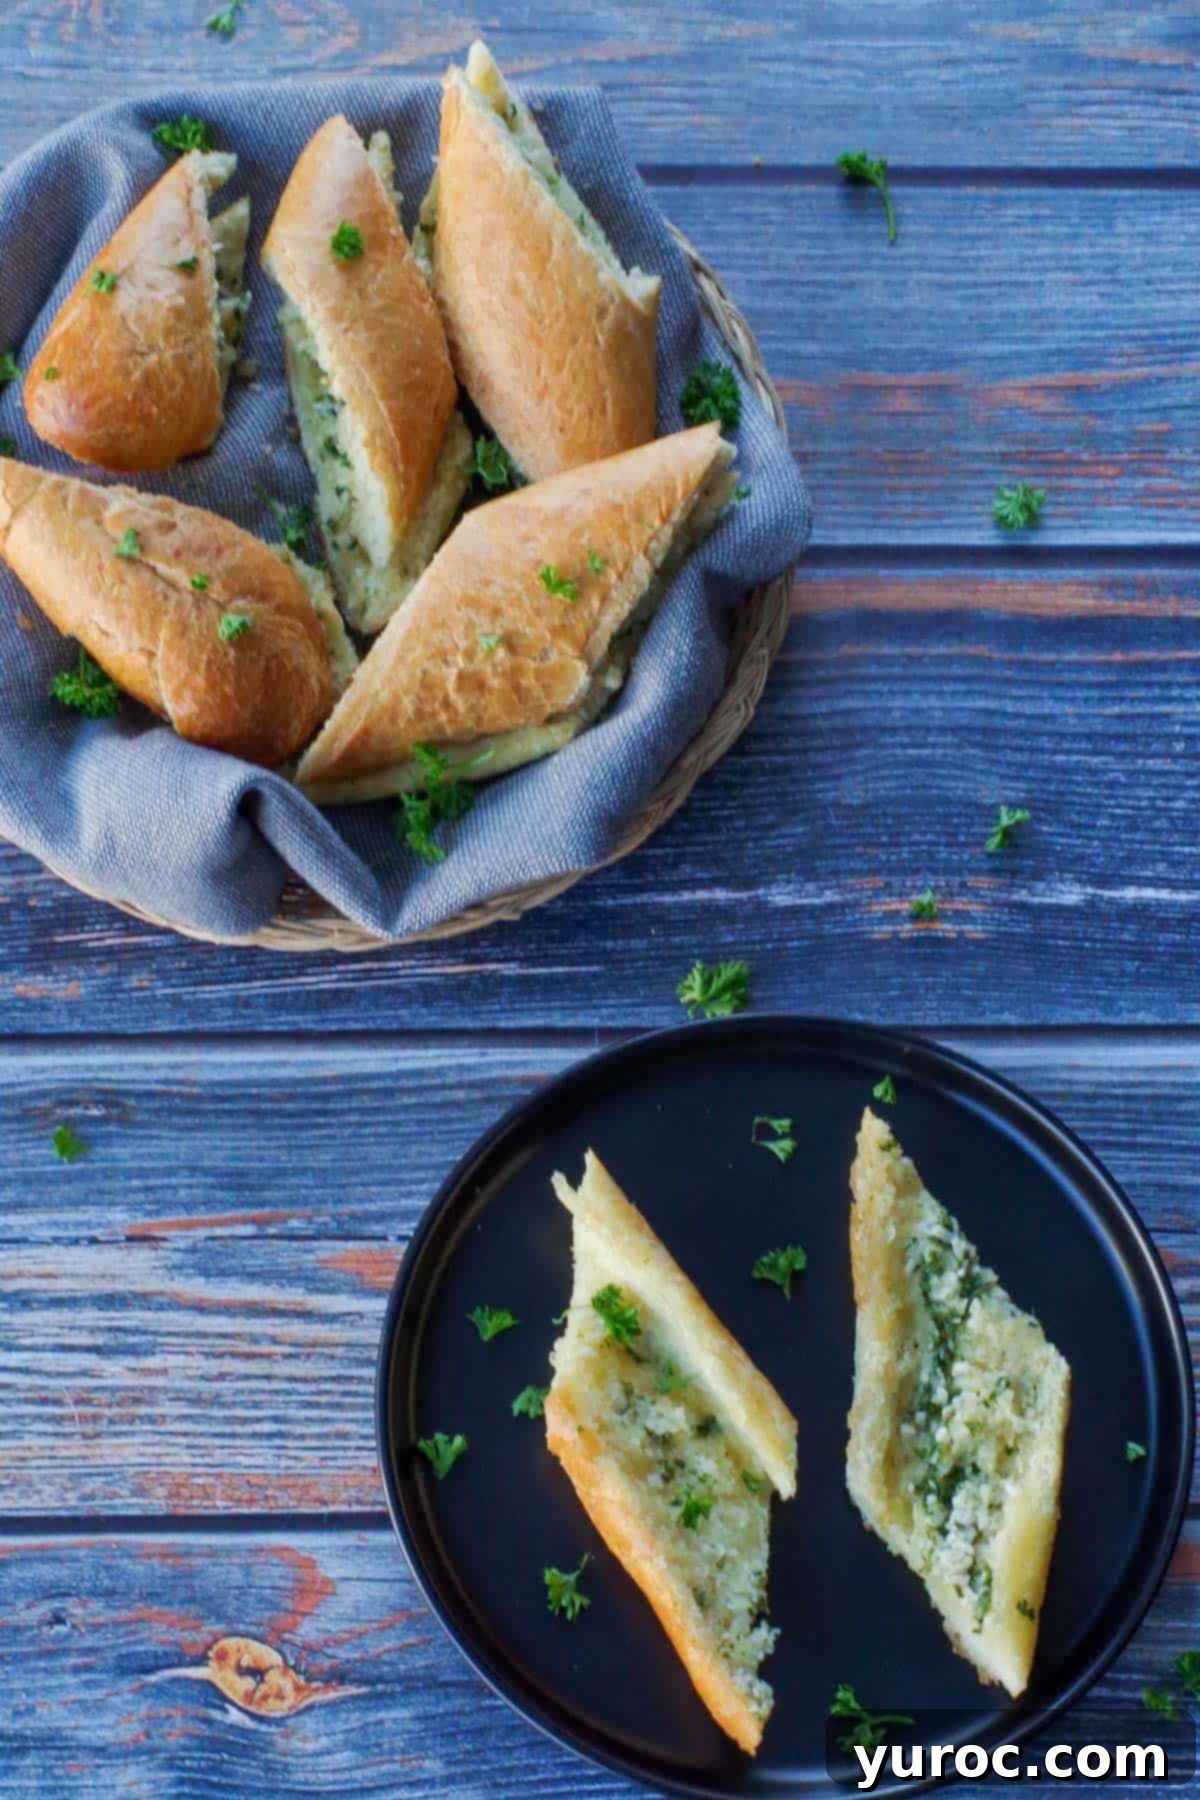
There’s nothing quite like the irresistible aroma and delightful taste of freshly baked garlic bread. Forget the bland, pre-packaged versions from the grocery store – this homemade garlic bread from a baguette is incredibly quick, surprisingly easy to make, and tastes infinitely better. With just a few staple ingredients, you can transform a simple baguette into a gourmet side dish that elevates any meal. It’s the ultimate accompaniment, perfectly complementing a wide array of recipes, from hearty stews to vibrant salads, and especially your favorite pasta dishes. My personal absolute favorite way to serve a side of this golden, aromatic garlic bread is alongside my Make-ahead Lasagna, creating a truly satisfying and memorable dining experience.

For years, this recipe has been my trusted go-to for garlic bread, and I felt it was high time to share this culinary gem. It’s more than just simple to prepare; it offers a healthier alternative to many store-bought options, bursting with incredible fresh flavor. Its homemade quality makes it taste genuinely gourmet, yet it requires minimal effort. Whether it’s a summer barbecue, a cozy winter dinner, or a holiday feast, this garlic bread is a popular crowd-pleaser that’s enjoyed enthusiastically all year round. Its universal appeal lies in its perfect balance of crispy crust, tender interior, and rich garlic-herb infusion.
Essential Ingredient Notes for Perfect Garlic Bread
Crafting this easy baguette garlic bread recipe requires only a handful of simple yet high-quality ingredients. The beauty of this recipe lies in how these few components come together to create such an impactful flavor profile. Choosing fresh, quality ingredients will truly make all the difference in achieving that superior homemade taste.
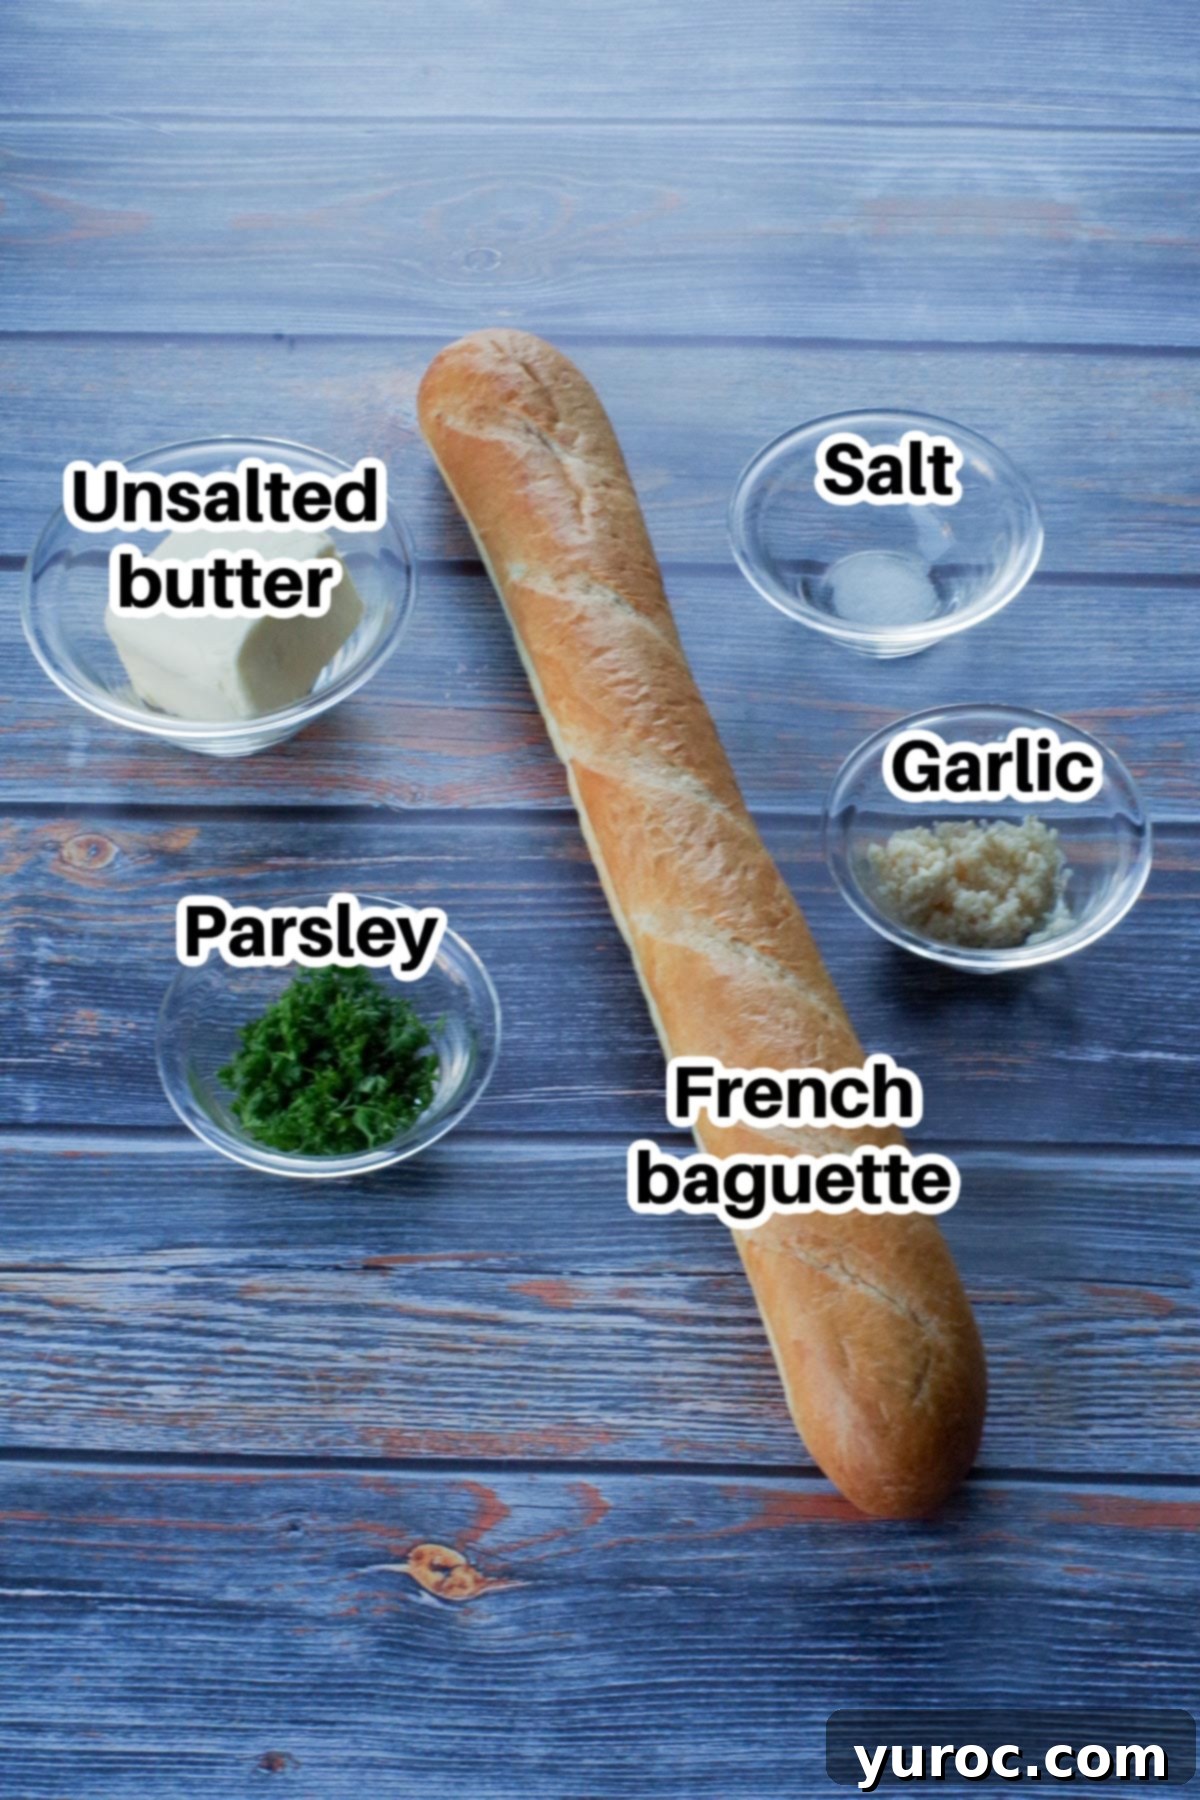
- Unsalted Butter: I strongly recommend using unsalted butter for this recipe. This allows you complete control over the salt content, ensuring your garlic bread is seasoned exactly to your preference. Different brands of salted butter can vary significantly in their salt levels, making it harder to achieve a consistent taste. Softened butter is key for easy mixing and smooth spreading onto the baguette.
- Fresh Garlic & Fresh Parsley: These are non-negotiables for truly exceptional garlic bread. Fresh garlic provides a pungent, aromatic flavor that can’t be replicated by dried or pre-minced jarred alternatives. Similarly, fresh parsley offers a vibrant, herbaceous note and a beautiful pop of green that enhances both the taste and visual appeal. Opting for fresh ingredients ensures the most authentic and robust flavor profile.
- French Baguette: The choice of bread is paramount, and a French baguette is undeniably the best bread for garlic bread. Its characteristic structure, with a wonderfully crusty exterior and a soft, airy, yet chewy interior, provides the perfect canvas. The crust crisps up beautifully in the oven, while the soft crumb readily absorbs the fragrant garlic butter, creating an ideal contrast in textures and an explosion of flavor in every bite.
*For a full, detailed list of ingredients and precise quantities, please refer to the comprehensive recipe card located further down the page.
Versatile Variations & Easy Substitutions for Your Garlic Bread
While the classic garlic bread recipe is fantastic on its own, it’s also incredibly versatile, allowing for various adaptations to suit your taste, dietary needs, or what you have on hand. Don’t hesitate to get creative with these simple variations and substitutions!
- Parsley: Fresh parsley offers the brightest flavor, but if fresh herbs aren’t available, you can easily use dried parsley. Remember that dried herbs are more concentrated, so you’ll only need about 1 tablespoon of dried parsley for every 2 tablespoons of fresh. For best results, gently crush the dried parsley between your fingers before adding it to the butter mixture; this helps release its essential oils and maximizes its flavor.
- Baguette: A classic French baguette is ideal, but if you can’t find one, a Traditional baguette or even an Italian bread loaf works wonderfully. The key is to choose a bread with a good crust that can crisp up and a tender interior to soak up the butter. Ensure it’s not too soft, or it might become soggy.
- Butter: Unsalted butter gives you control over seasoning, but if you only have salted butter, simply reduce the added salt in the recipe by about ⅛ of a teaspoon. Taste and adjust as needed. For those who adore a truly rich and buttery experience, feel free to add an extra tablespoon or two of softened butter to the mixture.
- Garlic: Fresh garlic cloves are superior for flavor. However, in a pinch, you can substitute jarred minced garlic (about 1.5 times the fresh amount, as it’s often less potent). If you’re really desperate and have no fresh or jarred garlic, garlic powder can be used – start with ½ teaspoon and adjust to taste, but be aware the flavor will be less fresh and more muted.
- Add-ins: To introduce an extra layer of savory flavor, sprinkle on a little Parmesan cheese (about 2 teaspoons) over the buttered baguette before baking. Other options include a touch of mozzarella for a melty, cheesy top, or a dash of red pepper flakes for a subtle kick.
- Salt: While regular table salt works perfectly, consider using sea salt for a slightly different texture and mineral notes. Flaky sea salt sprinkled on top after baking can also add a delightful crunch and visual appeal.
- Toaster Oven: This recipe adapts beautifully to a toaster oven, perfect for smaller portions. To ensure even baking, cut the baguette loaf in half (or into individual servings) before spreading the butter. Wrap each piece snugly in aluminum foil to prevent drying out and ensure a tender interior.
- Herb Butter Variations: Elevate your garlic bread by experimenting with other herbs. A pinch of dried oregano or basil, or even a blend of Italian herbs, can add a wonderful aromatic complexity to your garlic butter mixture. For a gourmet touch, finely chopped chives or dill can also be fantastic additions.
Step-by-Step Guide: How to Make Irresistible Baguette Garlic Bread
Creating this delicious garlic bread is a straightforward process, ensuring fantastic results every time. Follow these simple steps for a perfect, golden-brown loaf with a wonderfully soft interior.
Prep: Begin by preheating your oven to 350 degrees F (176 degrees C). This ensures the oven is at the optimal temperature for even baking as soon as your baguette is ready.
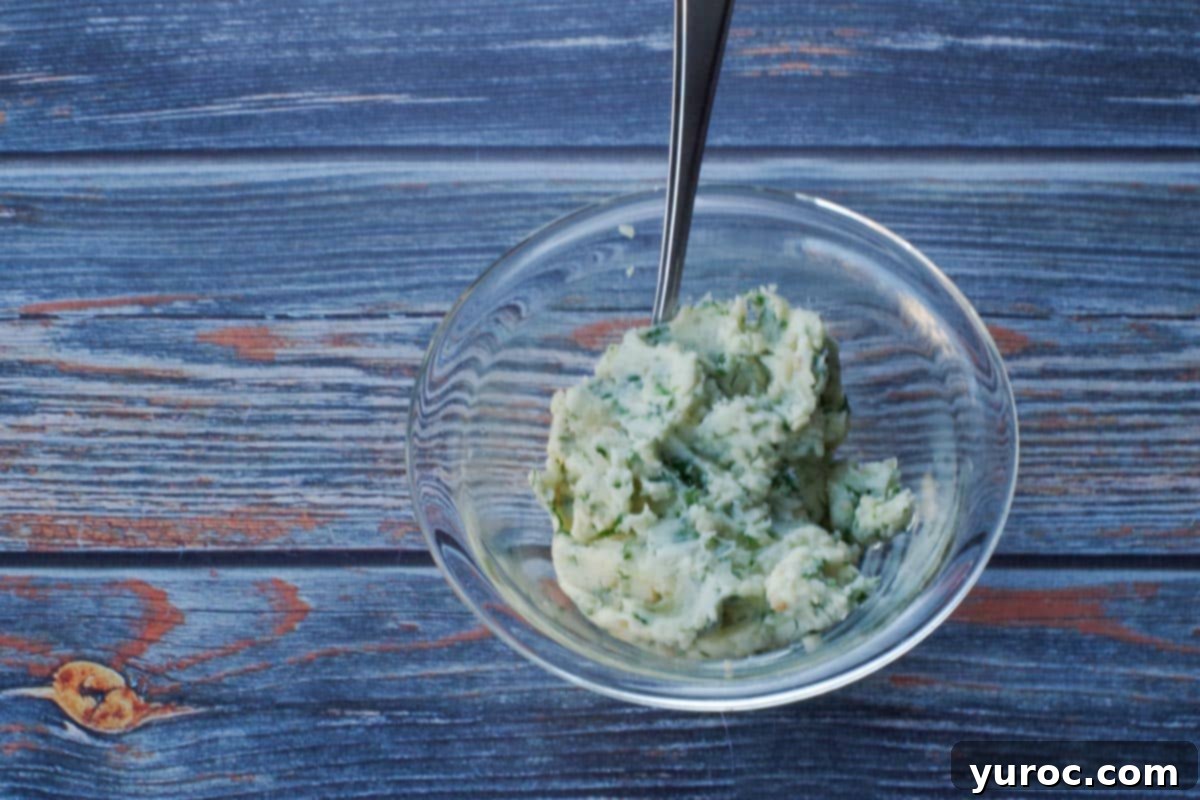
In a small mixing bowl, combine the softened unsalted butter, finely minced fresh parsley, fresh minced garlic, and salt. Use a fork or a small spatula to mix these ingredients thoroughly until they are well incorporated and form a fragrant, uniform spread. Ensure the butter is truly soft, but not melted, for the best consistency.
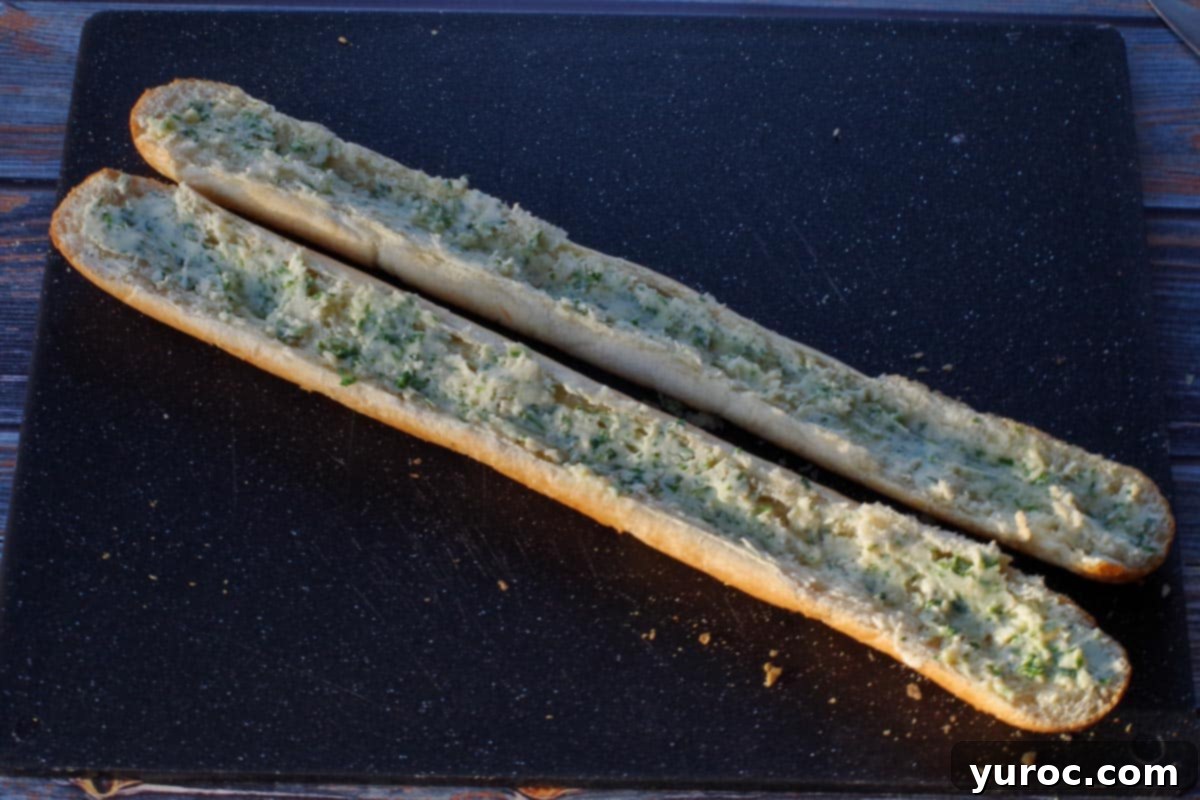
Carefully slice the baguette horizontally through the middle, creating two long halves. Take your fragrant garlic butter mixture and spread it generously and evenly across the cut surface of both baguette halves. Make sure to reach the edges to ensure every bite is packed with flavor.
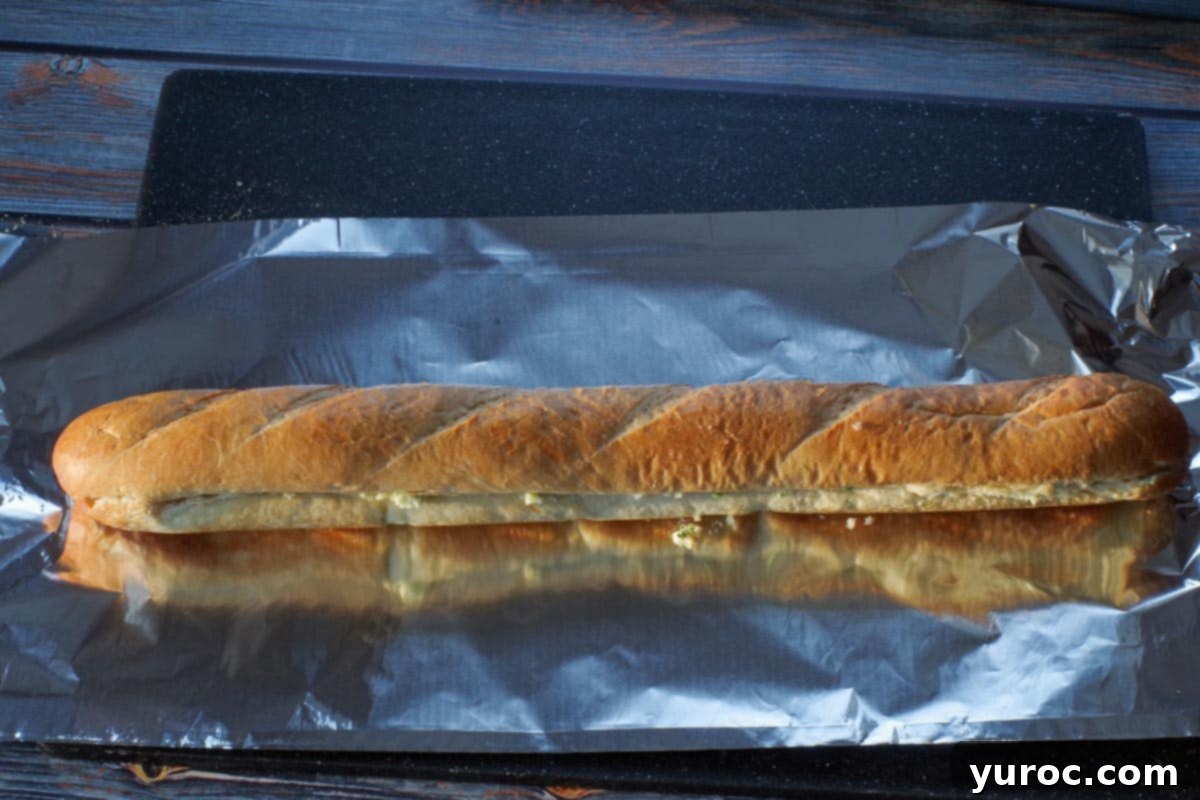
Place the top half of the baguette back onto the bottom half, essentially reassembling the loaf. Now, lay the entire buttered baguette onto a long piece of aluminum foil. The foil should be substantial enough to wrap the baguette completely, extending about 3-4 inches beyond the short ends and 6-8 inches beyond the long sides to allow for a secure seal.
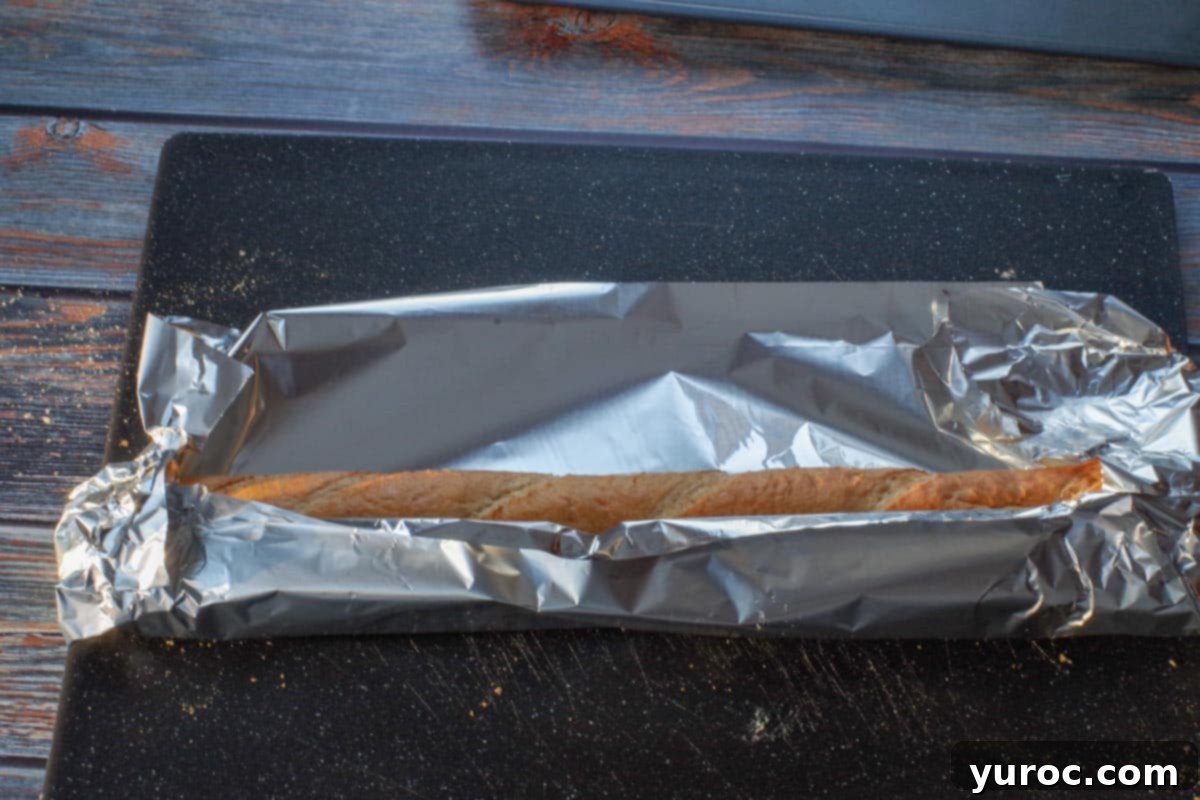
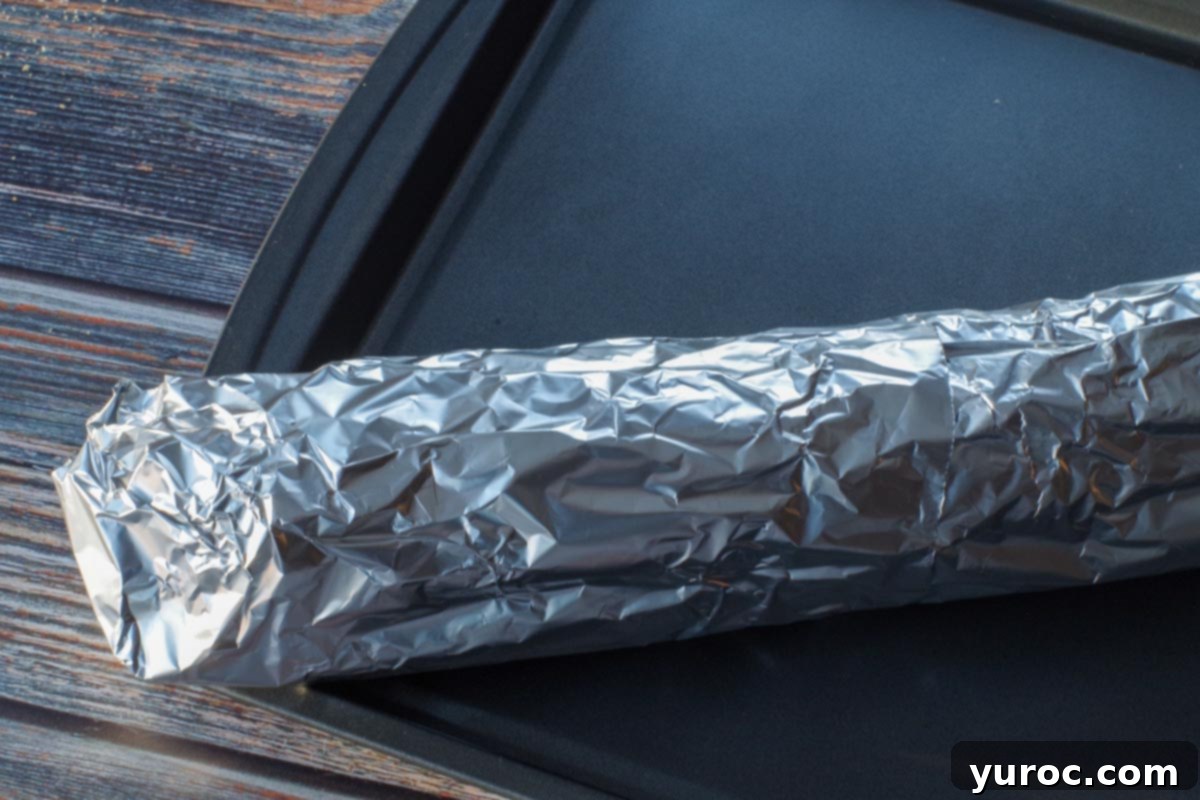
Begin the wrapping process by folding the aluminum foil over the short sides of the baguette first, creating neat, tight seams. This initial fold helps secure the ends and prevents the butter from escaping. Then, bring the long sides of the foil up and over the baguette, preparing for the final seal.
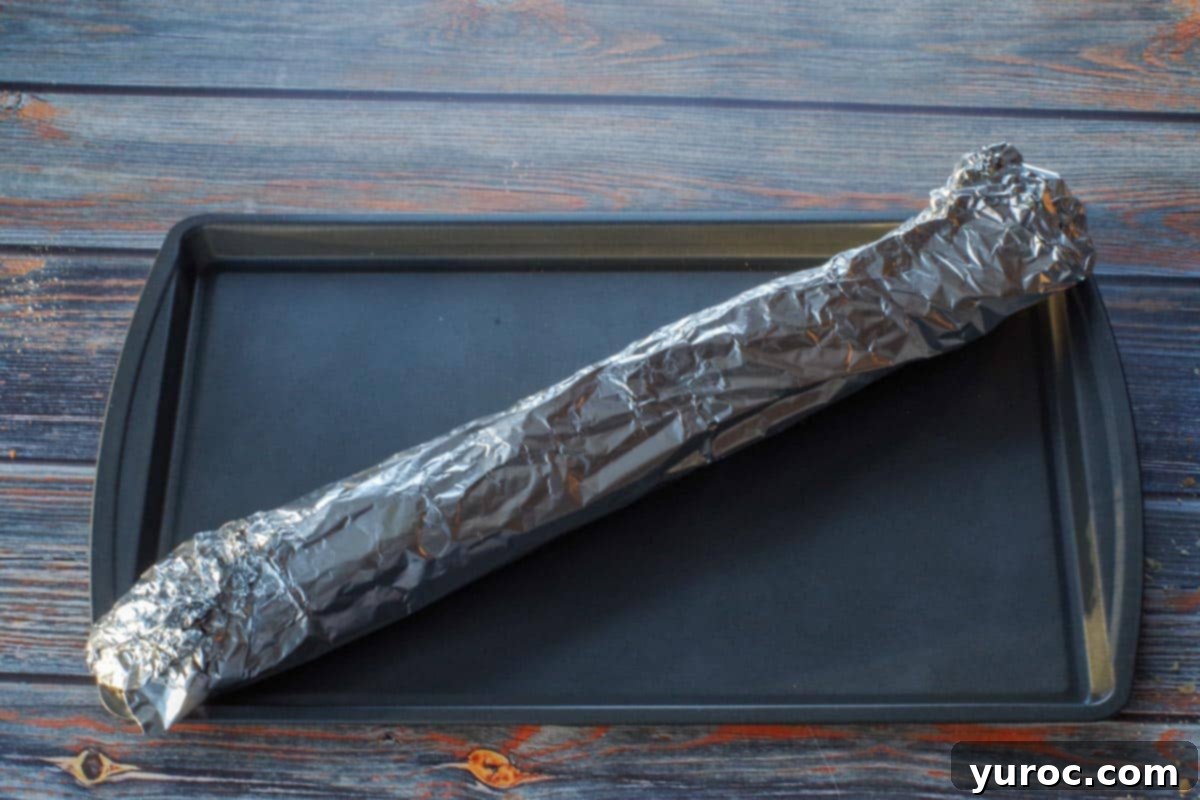
Now, fold the long sides of the aluminum foil tightly over the baguette, creating a snug, airtight seal around the entire loaf. This foil packet will trap the steam and moisture, ensuring the bread remains soft and the butter melts perfectly. Once securely wrapped, place the foil-wrapped baguette onto a baking sheet.
*If, during the wrapping process, the foil happens to tear, don’t worry! Simply refer to the hint below for a quick and effective repair method.
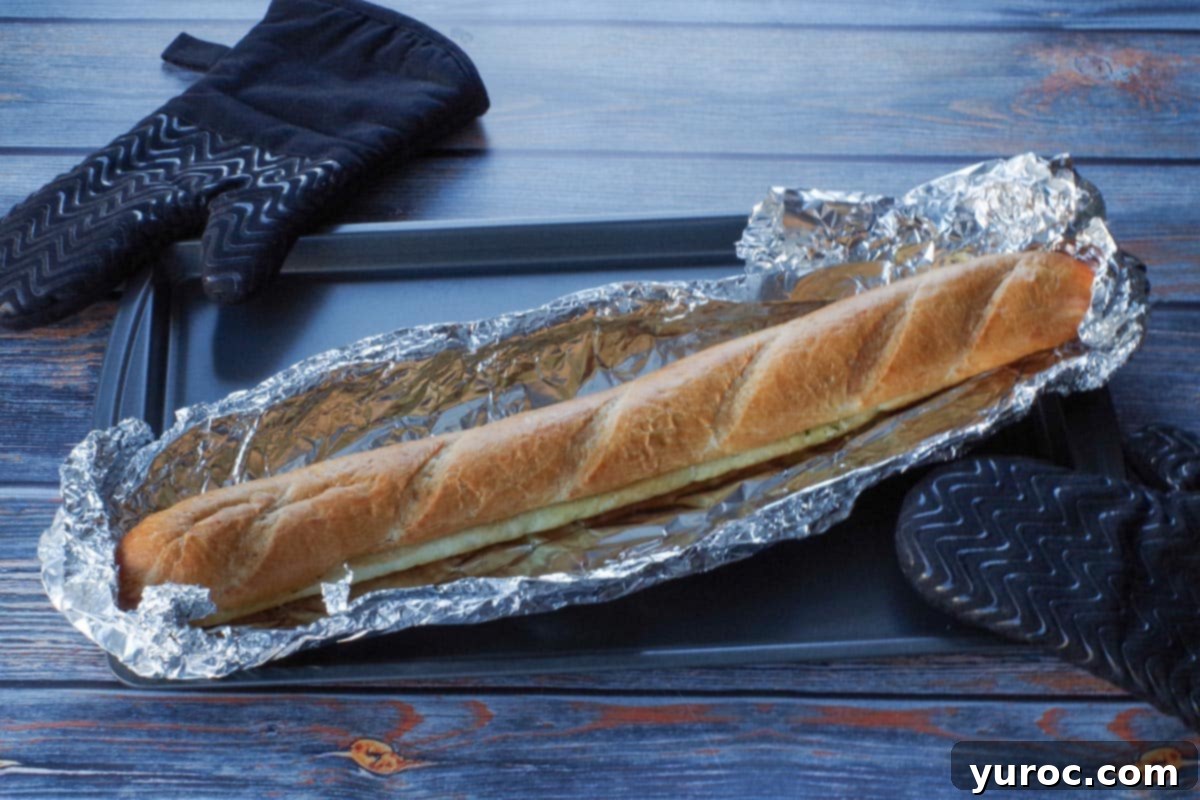
Place the baking sheet with the foil-wrapped baguette into your preheated oven. Bake for approximately 25 minutes. This baking time allows the butter to melt completely into the bread, infusing it with garlic and herb flavors, while keeping the interior wonderfully soft. Once the baking time is complete, carefully remove the baking sheet from the oven. Using oven mitts, cautiously open the foil packet; be mindful of the steam that will escape. You’ll notice the bottom of the baguette will have a lovely golden-brown hue, indicating it’s cooked through.
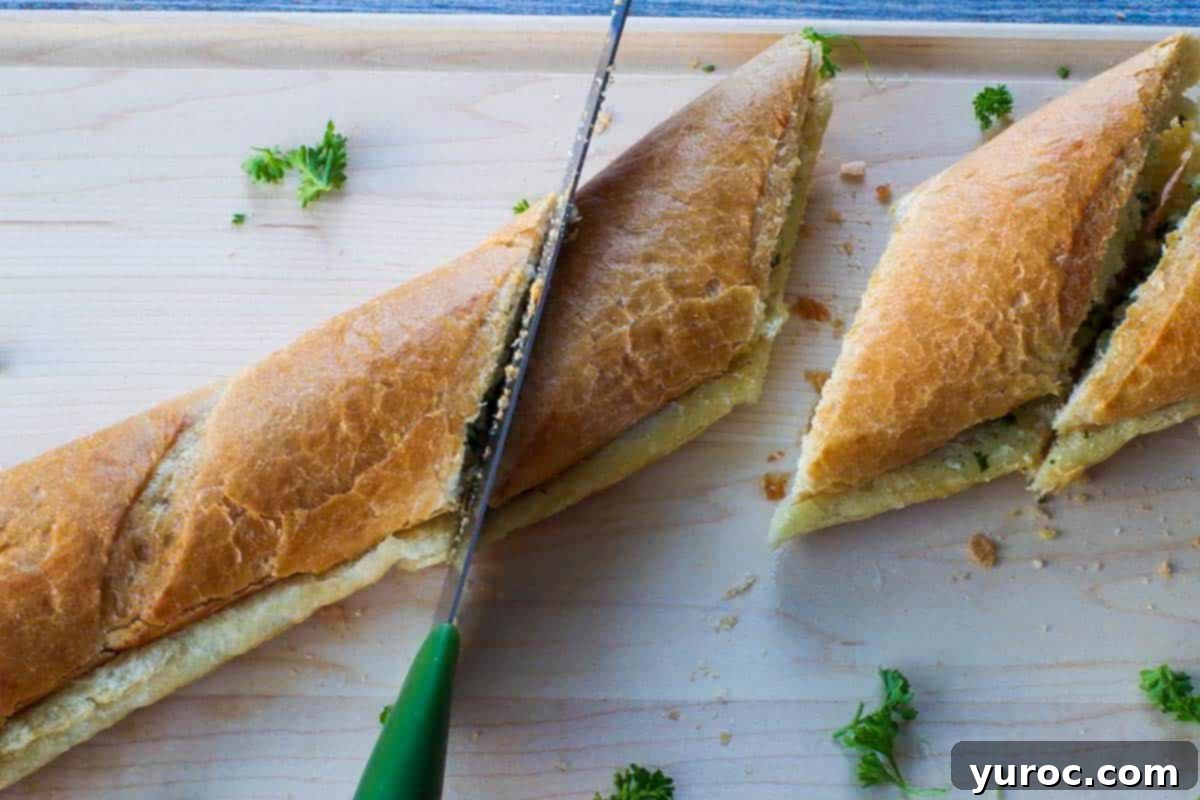
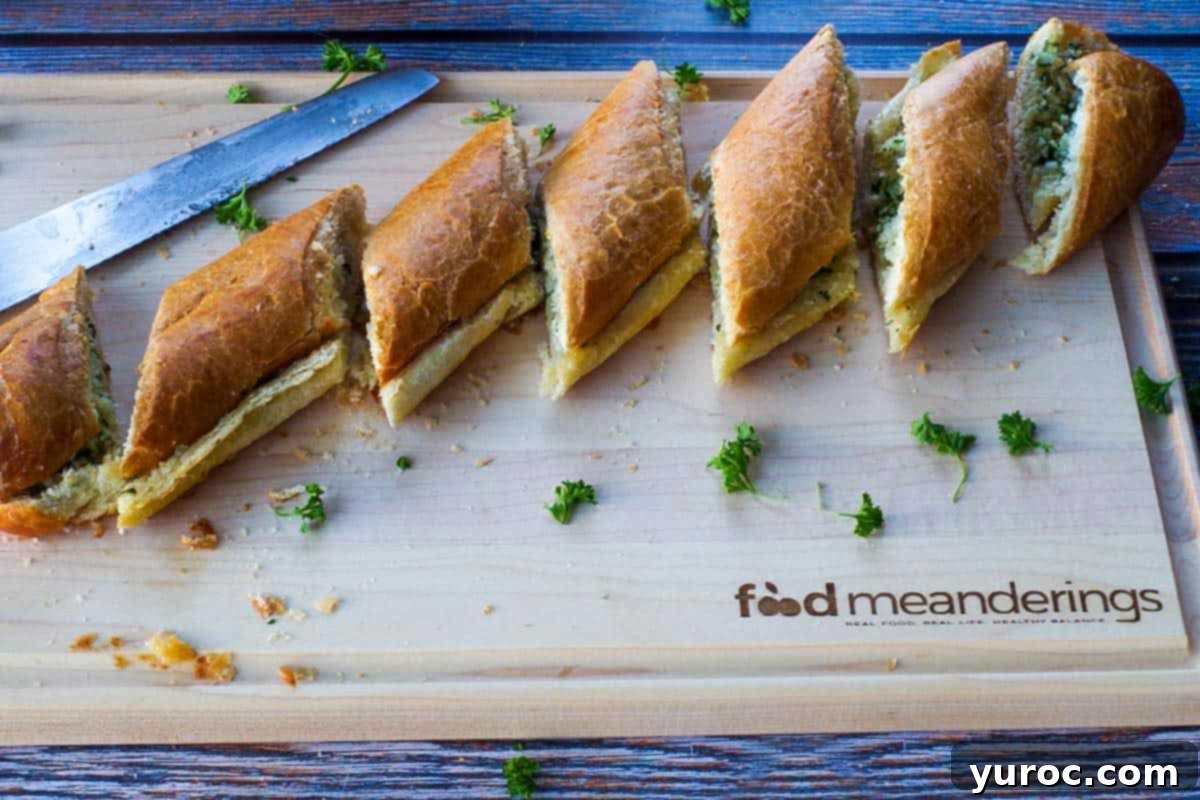
Carefully transfer the hot, unwrapped baguette to a clean cutting board. Using a serrated bread knife, slice the baguette along its natural indented lines. These pre-formed lines make it easy to cut uniform, individual slices of garlic bread, perfect for serving. Serve immediately and enjoy the warm, aromatic deliciousness!
Hint: If the aluminum foil happens to tear while you’re wrapping the baguette, simply grab a small, extra piece of foil. Wrap this additional piece securely around the ripped section to create a patch and maintain a tight seal. This prevents any butter from leaking out and ensures even steaming during baking.
Expert Recipe Tips for the Best Garlic Bread
Achieving perfectly crisp yet tender garlic bread is simple with a few insider tricks. These expert tips will help you consistently create a delicious side dish that rivals any restaurant offering:
- Butter Consistency is Key: For seamless spreading and even flavor distribution, ensure your unsalted butter is fully softened, but critically, not melted. If it’s too hard, it will tear the bread; if it’s liquid, it will soak in unevenly. Room temperature butter (left out for about 30-60 minutes) is ideal for creating a smooth, spreadable paste.
- Fresh vs. Dried Parsley: Fresh parsley brings a brighter, more vibrant flavor and color. If you’re opting for dried parsley, which is more potent, use about half the amount (1 tablespoon dried for 2 tablespoons fresh). To unlock its full aromatic potential, crush the dried parsley between your fingers before mixing it into the butter.
- The Foil Wrapping Trick: The magic of wrapping the baguette tightly in foil is twofold: it steams the bread, keeping the interior incredibly soft and moist, and ensures the garlic butter melts thoroughly into every crevice. If you desire a slightly crunchier crust for the last few minutes of baking, simply unwrap the bread and return it to the oven, or even under the broiler, until it reaches your preferred level of crispness.
- Toaster Oven Tip for Smaller Batches: For a quick individual serving or when you’re making less, a toaster oven works perfectly. Use the same temperature (350°F / 176°C) but reduce the baking time by 5-7 minutes, as toaster ovens tend to heat up and cook faster. Always keep a close eye on it to prevent burning.
- Quick Broil Option for Golden Perfection: For those who love a beautifully golden and crispy top on their garlic bread, consider a quick broil. After the initial baking in foil, unwrap the bread and place it under the broiler for just the last 1-2 minutes. Watch it *very closely* – bread can go from golden to burnt in a matter of seconds!
- Cheese Lovers Rejoice: For an extra layer of savory indulgence, sprinkle on a generous amount of grated Parmesan cheese or shredded mozzarella over the buttered baguette before wrapping it in foil. The cheese will melt into the bread, creating a gooey, flavorful crust.
- Herb Butter Variations to Explore: Don’t limit yourself to just parsley! Get adventurous by mixing in other dried herbs like oregano, basil, or a blend of Italian seasoning to your garlic butter. For a hint of heat, a tiny pinch of red pepper flakes can add a wonderful kick. Fresh chives or finely chopped rosemary can also introduce delightful new dimensions of flavor.
Delectable Pairings: What to Serve with Garlic Baguette
This versatile Baguette Garlic Bread isn’t just a delicious side; it’s a culinary chameleon that pairs perfectly with a wide array of dishes. Its rich, aromatic flavor and satisfying texture make it an ideal accompaniment for almost any meal. It shines brightly alongside comforting soups, hearty stews, and crisp, fresh salads, adding a delightful element to each. However, without a doubt, my absolute favorite way to serve this aromatic garlic bread is with classic pasta dishes. The crusty bread is simply perfect for soaking up every last drop of flavorful sauce, enhancing the entire meal.
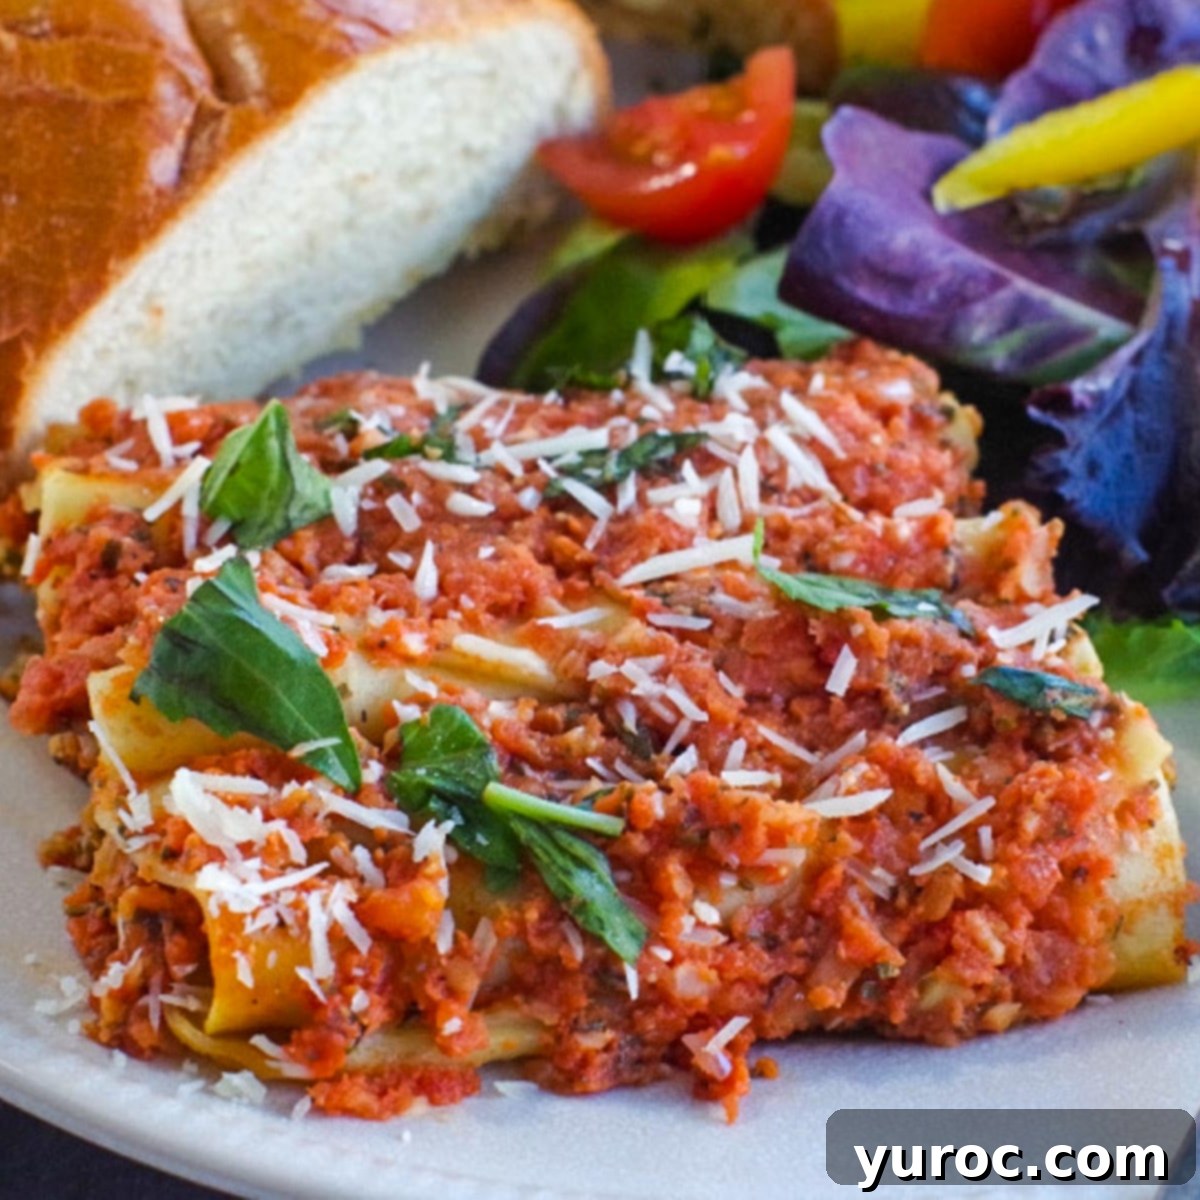
I particularly love serving it with my Secret Ingredient Spaghetti, where it complements the robust meat sauce beautifully. It’s also an incredible match for this rich and creamy Creamy Chicken Fettuccine, providing a welcome contrast in texture. And for an undeniably satisfying experience, there’s nothing better than pairing it with Baked Beef Cannelloni (as pictured), allowing you to scoop up all that savory goodness. Beyond Italian cuisine, imagine it with a steaming bowl of French onion soup, or as a side to a rustic pot roast – the possibilities are endless!
Essential & Recommended Equipment for Garlic Bread
You won’t need a kitchen full of gadgets to make this easy garlic bread recipe, but having the right tools can certainly make the process smoother and more enjoyable. Here’s what you’ll need, along with a special recommendation:
- Cutting Board: A sturdy cutting board is essential for safely slicing the baguette and for subsequent serving. I particularly love this gorgeous Personalized Cutting Board by Forest Decor. It’s not just functional but also a beautiful piece for presentation.
- Serrated Bread Knife: This is a must-have for slicing the baguette neatly without crushing its delicate crust and soft interior. The serrated edge glides through bread effortlessly.
- Large Baking Sheet: A standard large baking sheet is needed to hold the foil-wrapped baguette in the oven, ensuring even heat distribution and easy handling.
- Small Mixing Bowl: For combining your butter, garlic, and herbs.
- Spatula or Fork: For mixing your garlic butter.
- Aluminum Foil: For wrapping the baguette during baking, which keeps it moist and tender.
- Oven Mitts: To safely handle the hot baking sheet and baguette when removing it from the oven.
*For visual references and convenient purchasing links for specific equipment recommendations, please consult the dedicated section within the recipe card below.
Storage & Reheating Tips for Leftover Garlic Bread
Homemade garlic bread is best enjoyed fresh from the oven, but if you happen to have any leftovers, proper storage ensures you can savor its deliciousness later. It’s also fantastic for making ahead, which can be a real time-saver!
Refrigeration: To store leftover garlic toast baguette, allow it to cool completely to room temperature. Then, place it in an airtight container or a heavy-duty Ziploc bag. Stored this way, it will keep fresh in the fridge for 3-4 days. If you’re only planning to store it overnight, simply wrapping it tightly in plastic wrap will suffice to prevent it from drying out.
Freezing for Longer Storage: Garlic bread freezes exceptionally well, making it perfect for meal prep. You can freeze it either baked and sliced, or assembled but unbaked. Wrap individual slices or the whole loaf (if unbaked) very tightly in aluminum foil, then place it in an airtight container or a Ziploc freezer bag. It can be frozen for up to 3 months, offering a convenient way to always have delicious garlic bread on hand.
Freezing for Convenience: For ultimate convenience, prepare your baguette with the garlic butter mixture, reassemble the loaf, and wrap it securely in foil. Instead of baking immediately, place the foil-wrapped loaf directly into the freezer. When you’re ready to enjoy, simply bake directly from frozen, adding approximately 5-10 extra minutes to the normal baking time (adjust based on your oven and desired crispness). This method ensures a fresh-baked taste with minimal fuss.
Reheating Without Drying Out: When reheating leftover garlic bread (whether from the fridge or freezer), the goal is to revive its tenderness and crispness without making it dry or hard. Avoid microwaving, as this tends to make bread chewy and tough. Instead, preheat your oven to 300°F (150°C). Wrap the garlic bread loosely in aluminum foil and reheat for about 10-15 minutes, or until warmed through. The foil helps trap moisture, keeping the bread soft. For a crisper crust, you can unwrap it for the last 2-3 minutes of reheating.
Adjusting Serving Size for Your Needs
This garlic bread recipe, as written, generously yields 8 servings. However, the beauty of a baguette is its flexibility! You can easily cut it into smaller pieces to create more servings, perfect for a larger gathering or when serving alongside very rich dishes.
The recipe is also designed for effortless scaling. If you’re hosting a big family dinner or a party, you can double or even triple the recipe with ease. Conversely, if you’re cooking for a smaller household or just yourself, you can halve the recipe. To do this, simply click on the serving number in the recipe card (typically “8 slices”) and select your desired number of servings. The ingredient quantities will automatically adjust, saving you the hassle of manual calculations. Remember that if you’re increasing the servings significantly, you’ll naturally need to purchase additional baguettes to accommodate the larger yield.
WW Points Consideration
For those mindful of Weight Watchers (WW) points, there’s a simple adjustment you can make to reduce the point value in this delicious homemade garlic bread. By substituting regular unsalted butter with a light butter or a butter-flavored spread, you can significantly lower the fat and calorie content, thereby decreasing the overall WW points per serving. Always check the specific point values of the light butter product you choose, as these can vary by brand.
Frequently Asked Questions About Garlic Bread
While both are delicious, a baguette is a specific type of elongated, crusty bread of French origin. Baguettes are typically characterized by their distinctive crisp crust, which shatters satisfyingly when broken, and a soft, airy, and chewy interior. In contrast, “bread” is a much broader term encompassing countless varieties, which can range from soft sandwich loaves to dense artisan boules, often with varying crust textures and crumb structures compared to a baguette.
No, garlic bread is not exclusively made from a baguette, although baguettes are an excellent choice due to their crusty exterior and soft interior. Traditionally, garlic bread is also commonly made from other types of bread loaves, such as Italian bread or French bread (the wider, shorter loaves often found in grocery stores). In fact, the beauty of garlic bread lies in its adaptability; almost any type of bread can be transformed into garlic bread, including Texas toast, sourdough, or even sliced sandwich bread, by simply applying the garlic butter mixture and baking.
Absolutely! This recipe is fantastic for making ahead, which is perfect for entertaining or busy weeknights. You can fully prepare the baguette by slicing it, spreading the garlic butter mixture, and then reassembling and wrapping it tightly in aluminum foil. Once wrapped, you can store it in the fridge for up to 24 hours before baking. For even longer storage, you can freeze the wrapped baguette for up to 3 months. When ready to bake from frozen, simply place the foil-wrapped loaf directly into a preheated oven and add an extra 5-10 minutes to the recommended baking time.
For an extra crispy crust, after baking the baguette in foil for most of the recommended time, unwrap it completely for the last 5-10 minutes of baking. For an even more intense crisp, or if you prefer a golden-brown top, you can place the unwrapped baguette under the broiler for 1-2 minutes. Be extremely vigilant during broiling, as bread can burn very quickly.
To prevent sogginess, ensure your butter is softened, not melted, so it coats the bread rather than saturating it. Also, don’t over-spread the butter; a generous but even layer is sufficient. The foil wrapping method helps create steam, which keeps the inside tender without making it soggy. If you plan to serve it immediately, unwrapping it for the last few minutes can help dry out any excess moisture and crisp up the crust.
In conclusion, if you’re searching for an easy, flavorful, and genuinely homemade garlic bread recipe, this Baguette Garlic Bread is an absolute must-try. Its simple preparation, use of fresh ingredients, and superior taste will undoubtedly make it a new favorite in your kitchen. It consistently beats any garlic bread you’ll find at the grocery store, delivering a delicious side dish that perfectly complements a multitude of meals and leaves everyone asking for more. Enjoy the satisfaction of creating something so wonderfully tasty from scratch!
Discover More Delicious Bread Recipes
- Italian Bread Machine Breadsticks
- Onion and Olive Bread Machine Recipe
- Everything Bagel Cloud Bread Recipe
- Granny Buns (Old Fashioned Dinner Rolls)
Did your family❤️this recipe? Did you know that commenting and⭐rating recipes is one of the best ways to support your favorite recipe creators? If you LOVED this recipe, please comment and rate it in the recipe card or share photos on social media using the hashtag #foodmeanderings or tagging @foodmeanderings !


🥖Garlic Bread Baguette Recipe
Equipment
- baking sheet
- cutting board
- bread knife
Ingredients
- ½ cup butter unsalted, softened (use ⅔ cups for extra buttery!)
- 4-5 cloves garlic, minced
- 2 tablespoon fresh parsley (or 1 tablespoon dried parsley)
- 350 g baguette
- ½ tsp salt
Instructions
NOTE: The photos in this recipe card will NOT print unless you set them to print by selecting “recipe image”
- Preheat oven to 350 degrees F/176 degrees C.
- Mix butter, parsley, garlic and salt in a small bowl.
- Cut baguette in half and spread butter mixture evenly on both sides.
- Put the top of the baguette on the bottom side and place baguette on a long piece of aluminum foil (foil should be 3-4 inches longer than the baguette on the short sides and 6-8 inches on the long sides).
- Fold the aluminum foil over the short side first, then from the long side.
- Then fold the long side over and create a tight seal. Then place on a baking sheet.
- *If the foil tears, just repair it with another section of foil
- Bake in preheated oven for 25 minutes.Remove from oven and carefully open with oven mitts.
- Move to a cutting board and with a bread knife, slice along the indented lines on the baguette.
Notes
-
- Butter Consistency: Ensure the butter is fully softened but not melted. This allows for easy spreading and even distribution of garlic flavor.
-
- Fresh vs. Dried Parsley: Fresh parsley adds a bright flavor, but if using dried, crush it between your fingers before adding it to release its natural oils.
-
- Foil Wrapping Trick: Wrapping the baguette in foil keeps the inside soft while allowing the crust to crisp up. If you prefer a crunchier texture, unwrap it in the last 5 minutes of baking.
-
- Toaster Oven Tip: For small batches, use a toaster oven at the same temperature and reduce baking time by 5-7 minutes.
-
- Quick Broil Option: For a golden, crispy top, broil the bread for the last 2 minutes, but watch closely to prevent burning.
-
- Cheese Lovers: Add a sprinkle of Parmesan or mozzarella for extra richness.
-
- Herb Butter Variations: Mix in oregano, basil, or a pinch of red pepper flakes for added depth.
