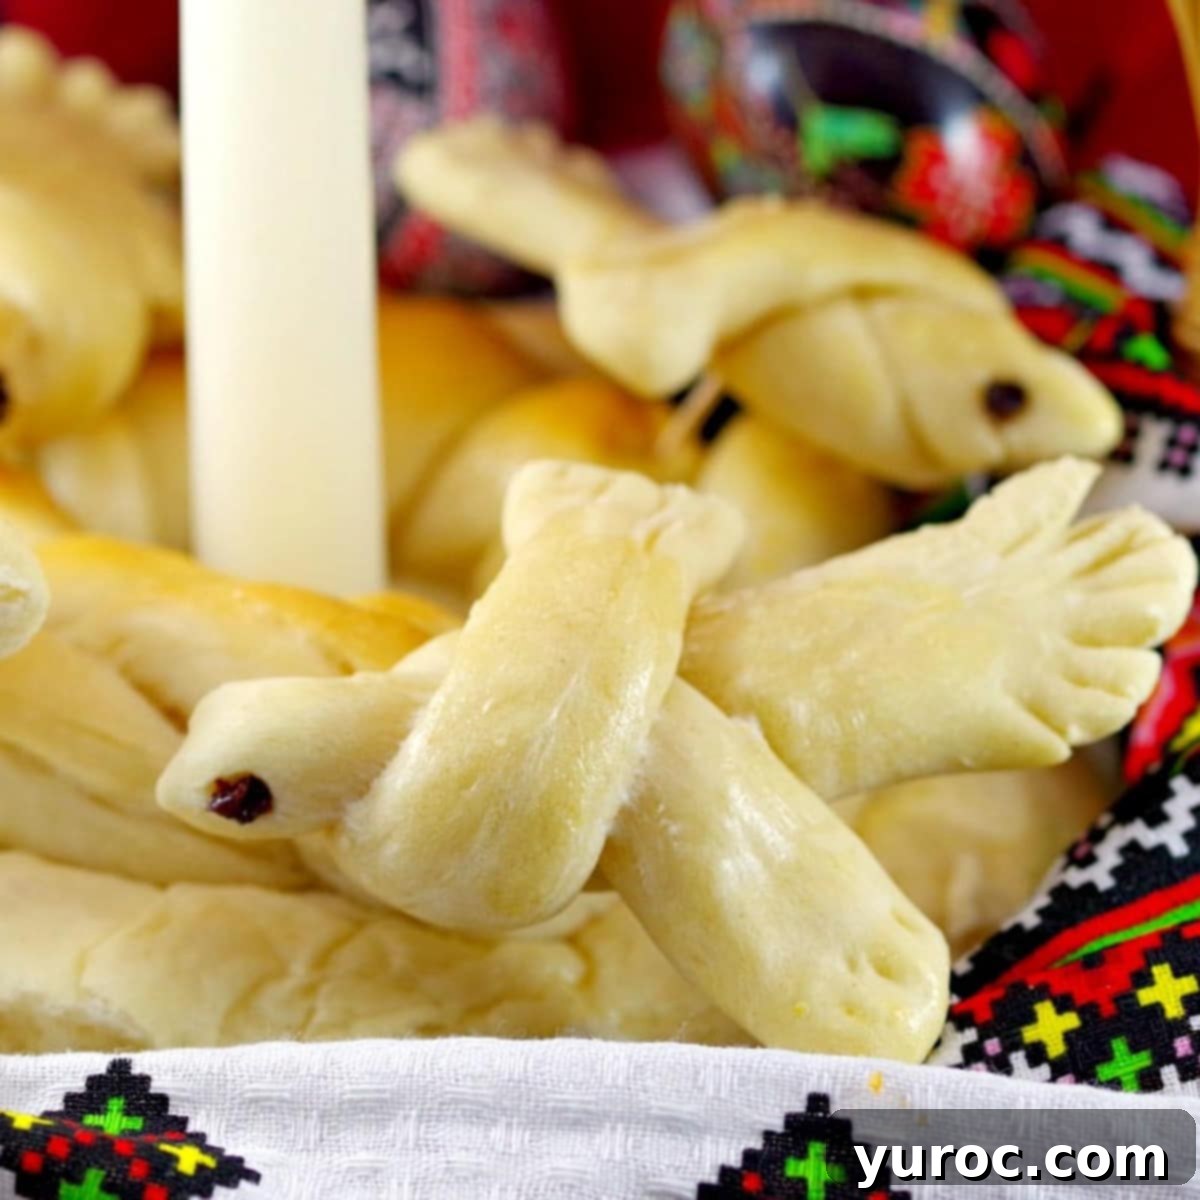
How to Make Traditional Ukrainian Easter Bread Doves (Holuby) | Step-by-Step Guide
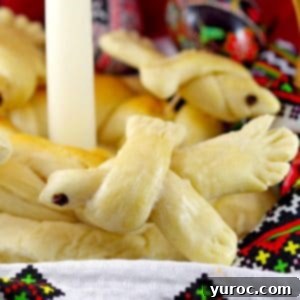
Embark on a delightful culinary journey to learn how to create charming and traditional Ukrainian Easter Bread Doves, known as Holuby. This comprehensive, easy-to-follow tutorial, complete with a detailed recipe, guides you through every step of crafting these beautiful edible ornaments. Holuby are more than just decorative elements; they are deeply symbolic, representing spring, peace, and new beginnings. Traditionally, these intricately shaped bread doves adorn Ukrainian Easter Baskets, grace the tops of festive Paska and Babka breads, and are a significant feature on the grand Korovai (Ukrainian wedding bread).
As a child, I vividly recall seeing these exquisite Easter doves. They often topped elaborate bread towers, seemingly too perfect to be edible. In some instances, they were even varnished to preserve their beauty, making them purely ornamental. The thought of making and actually eating these delicate bread creations felt like a childhood fantasy. Now, I’m thrilled to share this experience with you, allowing you to bring this cherished tradition into your own home and enjoy these delightful, edible symbols of spring.
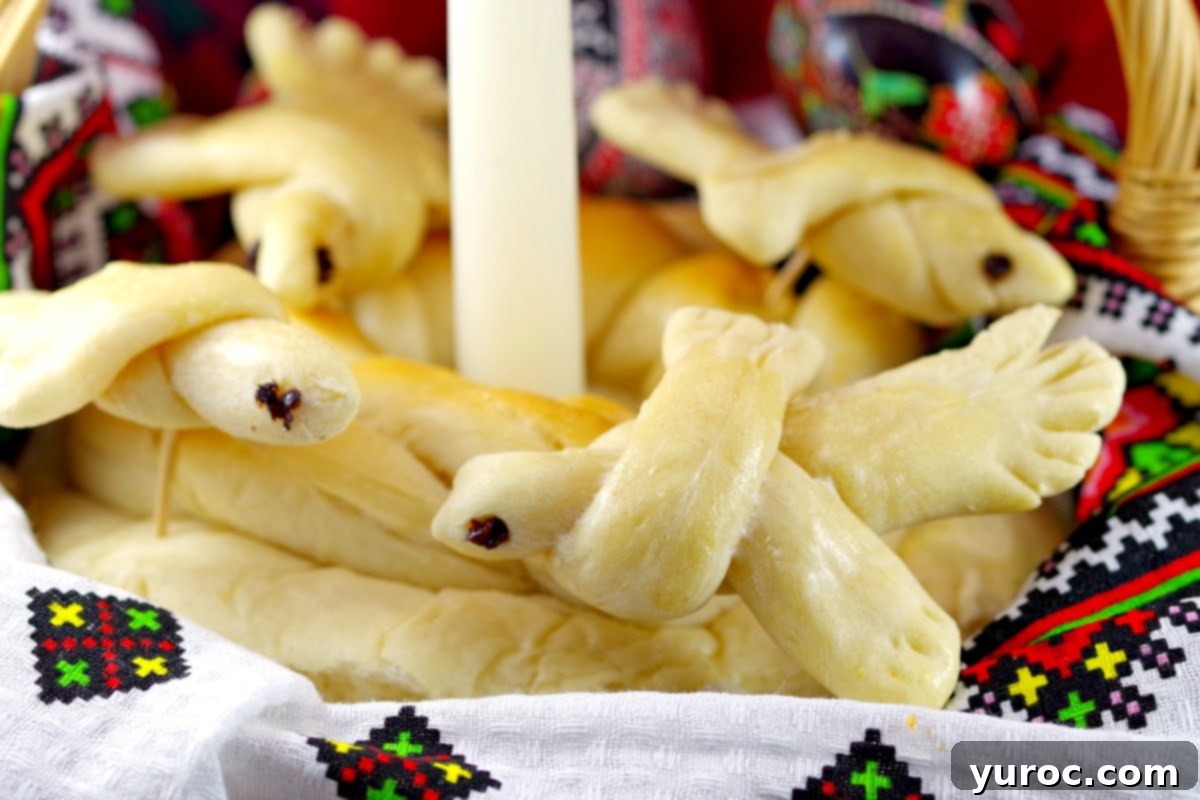
These adorable edible doves serve a beautiful purpose in Ukrainian Easter traditions. They are carefully placed on Easter baskets, which carry blessed breads and other foods to church on Easter Sunday as an offering, symbolizing devotion and renewal. For me, making these bread doves is a cherished tradition, and I love decorating my homemade Ukrainian Easter bread with them. This simple, step-by-step tutorial makes crafting these doves both fun and accessible, perfect for adding a touch of authentic charm to your Paska Bread recipe and my Ukrainian Babka.
Beyond Easter, if you’re a connoisseur of traditional Ukrainian baked goods, you’ll also adore my easy bread machine Kolach, a wonderfully braided bread often served during Ukrainian Christmas celebrations. Each of these breads carries a unique story and cultural significance, making them central to Ukrainian festivities.
The tradition of baking bird-shaped bread ornaments dates back centuries in Ukraine. Historically, on the Holy Day of the 40 Martyrs (celebrated on March 9th in the Old Style calendar and March 22nd in the New Style calendar), villagers would celebrate the return of migratory birds, particularly larks, as a sign of spring’s arrival. This celebration involved special spring songs, known as “vesnianky,” and the baking of dough birds to welcome the larks migrating back to the north. These practices highlight a deep connection to nature and the cyclical renewal it brings.
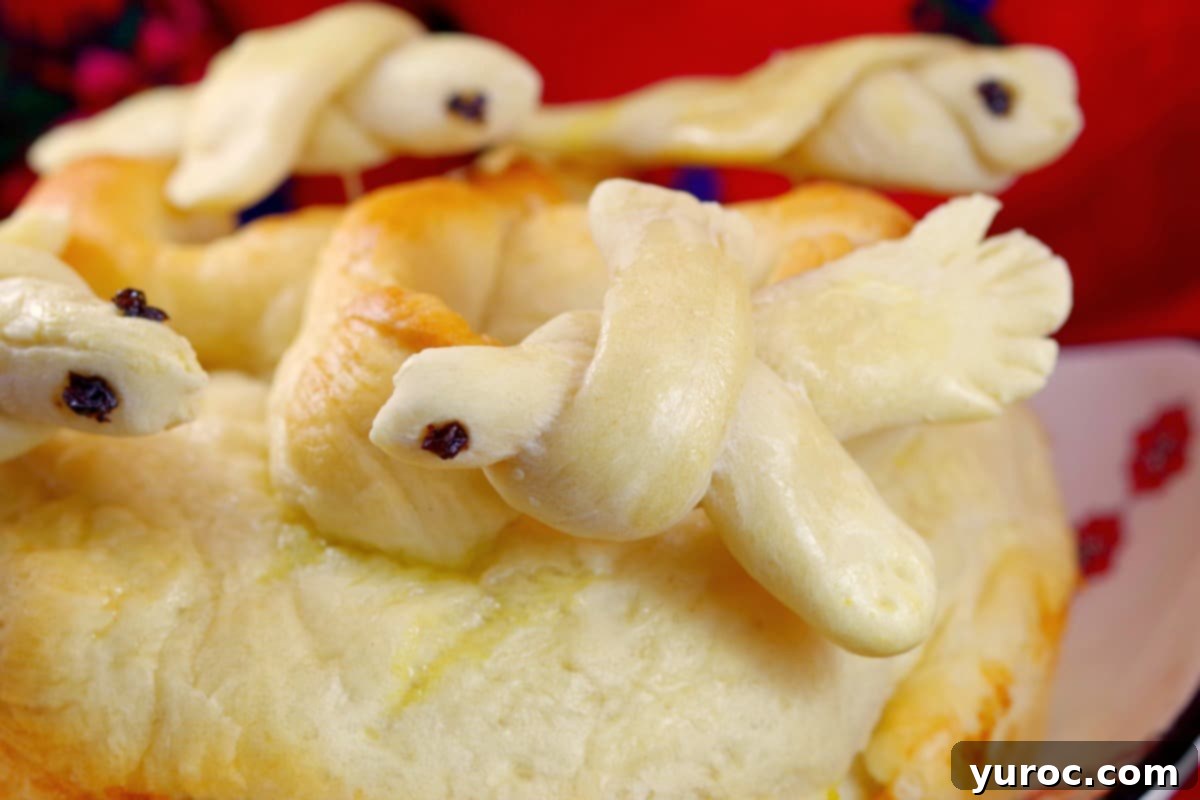
Today, these delightful bread “doves” continue to symbolize the arrival of spring, peace, and hope, making them an indispensable part of Easter festivities. Their symbolism extends beyond Easter to other significant life events. These doves are famously used to embellish the Korovai, a magnificent traditional wedding bread that represents family unity, community bonds, and abundance. On a Korovai, two prominent doves typically symbolize the newlywed couple, while smaller dove ornaments represent their extended family and friends, all wishing them a life filled with love and harmony. The creation of Korovai is often a communal event, steeped in ritual and meaning, with each decorative element carefully crafted to convey blessings and good fortune.
🥘 Ingredient Notes for Perfect Bread Doves
Crafting the perfect dough for your Holuby requires just a few simple ingredients. Here are some key notes to ensure your doves turn out beautifully:
- Cooking oil: For this recipe, I typically use Canola oil, which is a versatile and neutral-tasting option. However, any standard vegetable oil will work equally well. The oil contributes to the dough’s softness and pliability, making it easier to handle and shape.
- Yellow food coloring: You’ll only need a very small amount of yellow food coloring to give your doves a lovely, warm, golden hue. Regular grocery store food coloring is perfectly suitable for achieving this subtle color enhancement, mimicking the natural golden tones of baked bread. While optional, it adds to the visual appeal, making your doves truly stand out.
*Refer to the full recipe card below for a complete list of ingredients and their precise quantities.
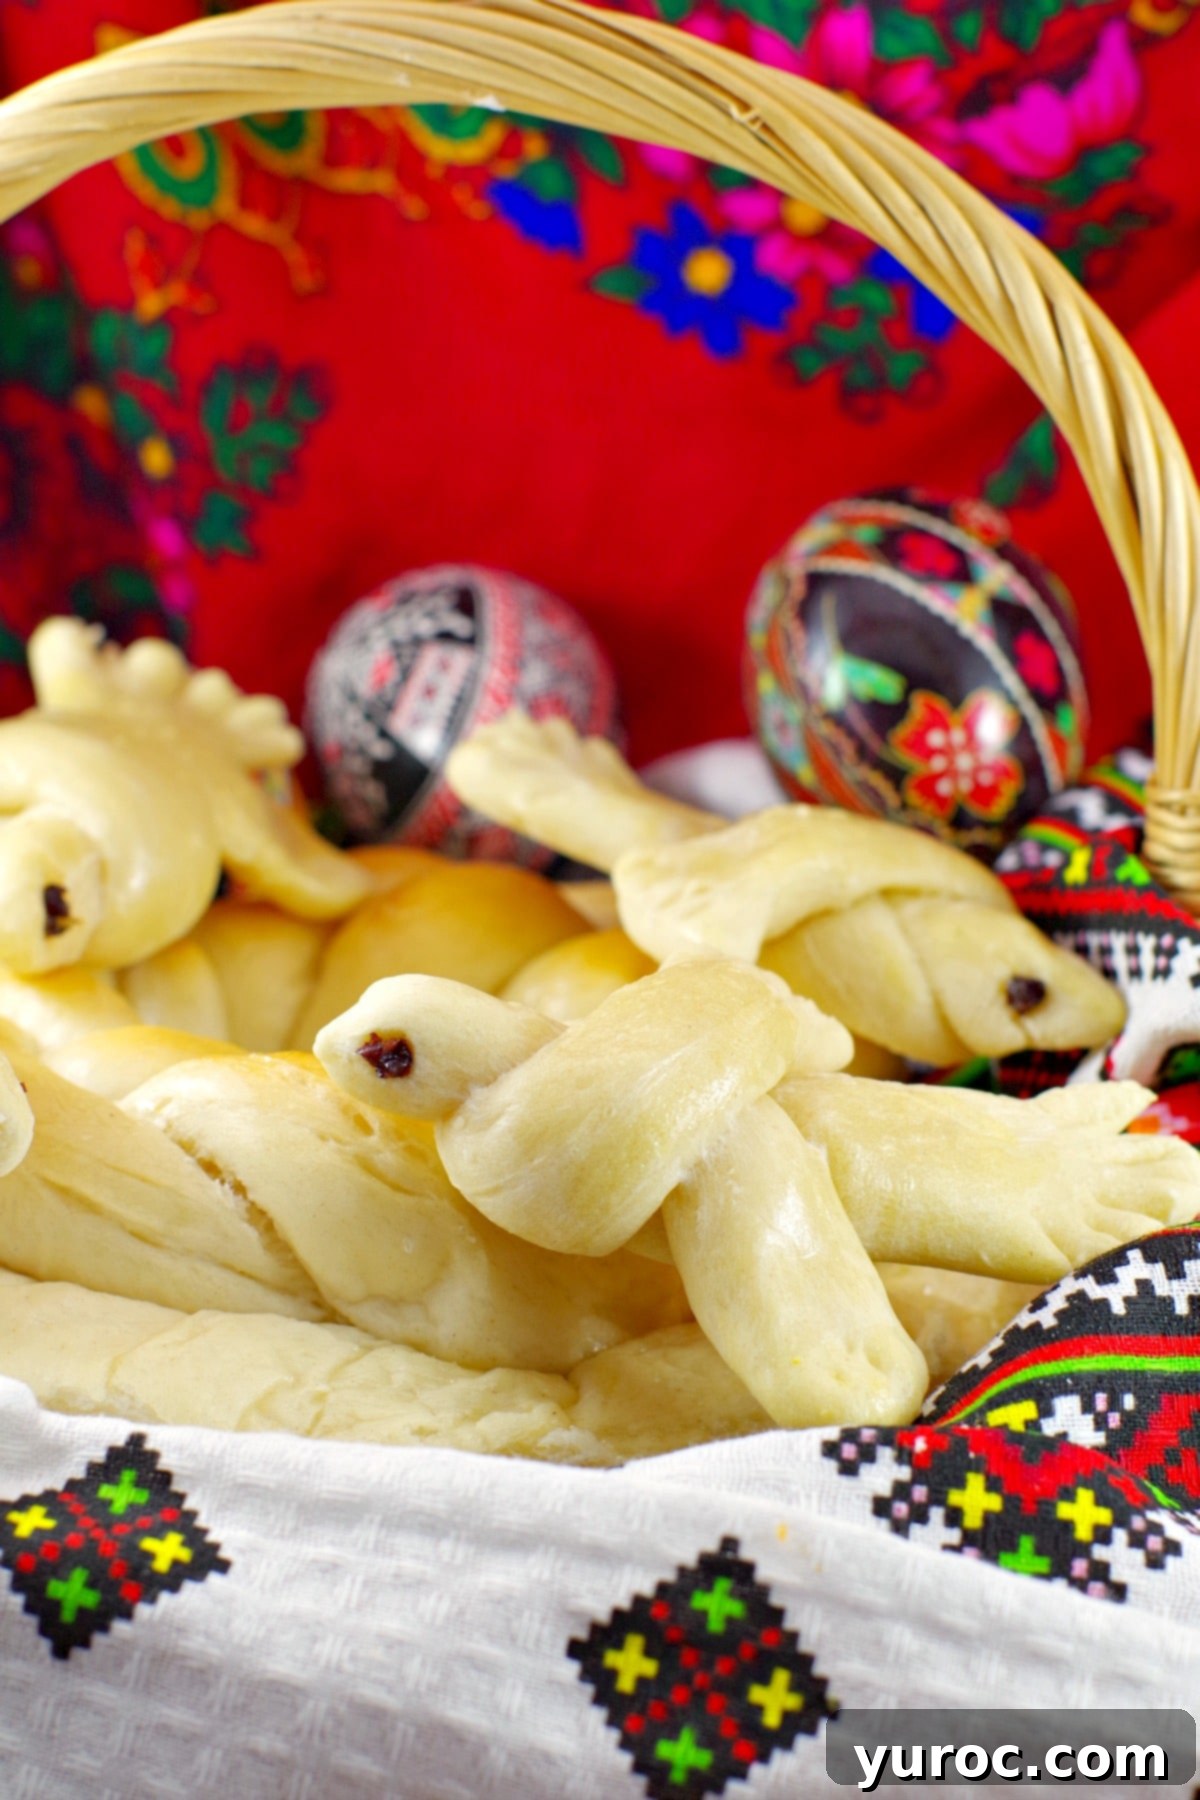
In Ukrainian culture, bread transcends its role as a mere staple; it is revered as one of the holiest and most significant foods. This deep respect for bread is woven into the fabric of daily life and special occasions. On Easter Sunday, loaves of blessed bread are lovingly brought to church as an offering, signifying gratitude and faith. Beyond religious ceremonies, bread plays a central role in hospitality. It is customary to greet honored guests at home with bread and salt, a profound gesture symbolizing welcome, friendship, and abundance.
Ukrainians celebrate nearly every major holiday and special occasion with distinct bread traditions. From the intricate Kolach served at Christmas to the vibrant Paska of Easter, bread is a centerpiece. Weddings and anniversaries are particularly marked by the magnificent Korovai, which can often be towering, elaborately decorated structures. These impressive breads are not only a feast for the eyes but also a testament to generations of culinary artistry and deep cultural heritage. Attending a traditional Ukrainian wedding offers a marvelous spectacle of these richly embellished breads, each decoration telling a story and conveying blessings.
🔪 Step-by-Step Guide: How to Make Ukrainian Easter Doves
Creating these beautiful Holuby is a rewarding process that combines simple dough work with artistic touches. Follow these steps carefully to shape your perfect doves:
PREP: Begin by preparing your dough according to the recipe instructions. Ensure it reaches a pliable, Play-Doh-like consistency. If it’s too sticky, gradually add a little more flour until it’s smooth and easy to handle.
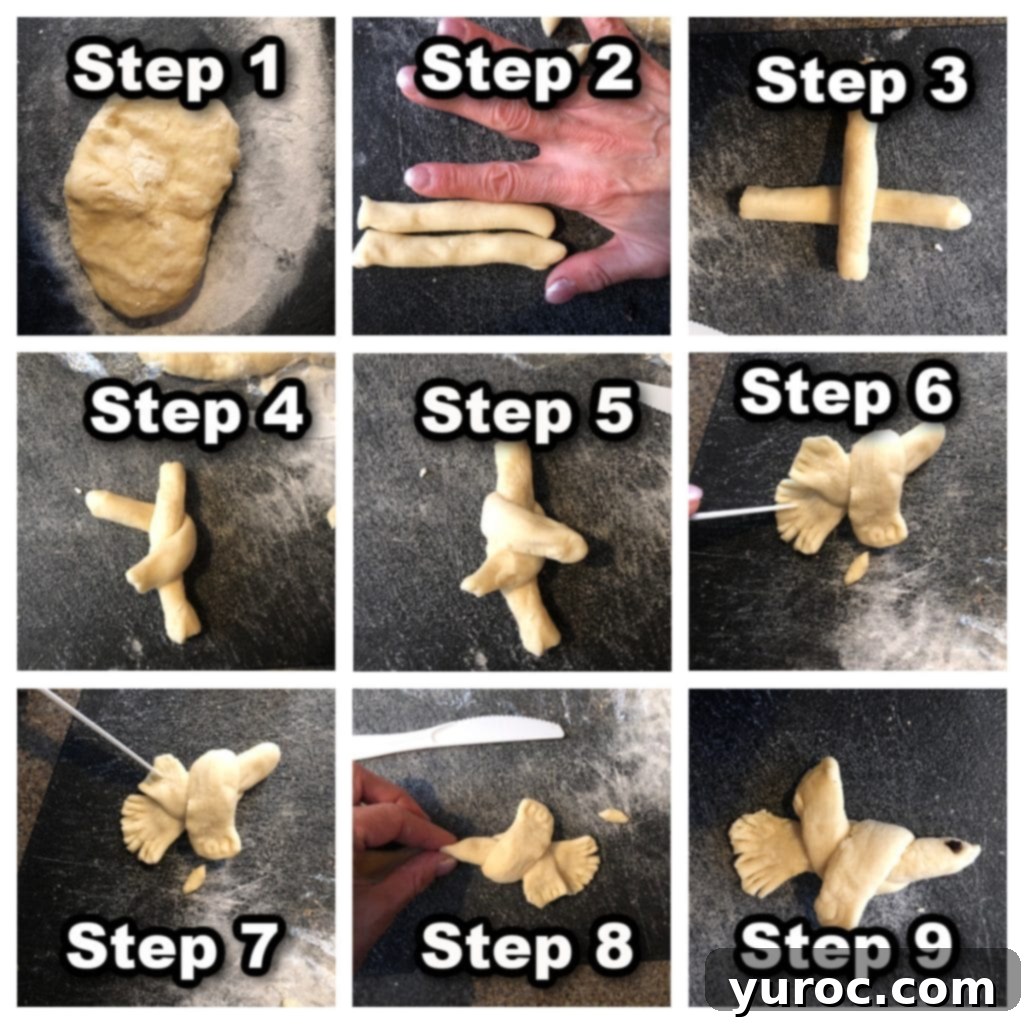
- Once your dough is ready, roll it out into long, even “snakes” or ropes, approximately the thickness of your finger. Using a knife or dough cutter, divide these ropes into sections that are about 2 to 4 inches long. These will form the basic body of your doves.
- Take one dough strip and place it horizontally on your lightly floured work surface. This will be the foundational piece for the dove’s body.
- Lay a second dough strip directly on top of the first, creating a cross shape. Ensure the intersection is roughly in the middle of both strips.
- Gently take the “arm” of the strip that is beneath the horizontal one and pull it upwards, crossing it over to the opposite side of the horizontal strip. This begins to form the looped structure of the dove’s body and wings.
- Now, take the other side (the left side of the upper strip) and pull it across, similarly looping it over the horizontal strip. The original left side will now be on the right, and vice-versa, creating an interwoven effect.
- Carefully flatten and shape the looped sections slightly to resemble graceful wings. With a plastic or regular knife, make small, shallow cuts along the end of the strips to create delicate feather impressions for the tail. This adds texture and realism to your doves.
- Using the non-cutting side (the dull edge) of your knife blade, gently press additional feather impressions into the shaped wings. This detail enhances the bird-like appearance and gives your doves character.
- To form the head, pinch one end of the straight, central strip of dough and shape it into a small head, adding a tiny pinch at the very tip for a beak.
- Finally, for the eyes, carefully press a poppy seed or a tiny piece of a currant into the dough on either side of the head. I find that small pieces of currants work wonderfully, creating a subtle and authentic look.
⏲️ Baking Your Holuby: Essential Steps for a Golden Finish
Proper baking is crucial to ensure your bread doves are perfectly cooked and beautifully golden. Here’s how to manage the baking process:
- After shaping, allow your doves to rise for just 5 minutes. This brief rising time is critical; do not let them rise any longer than this, or they may puff up excessively and lose their delicate, intended shape, resulting in a less refined appearance.
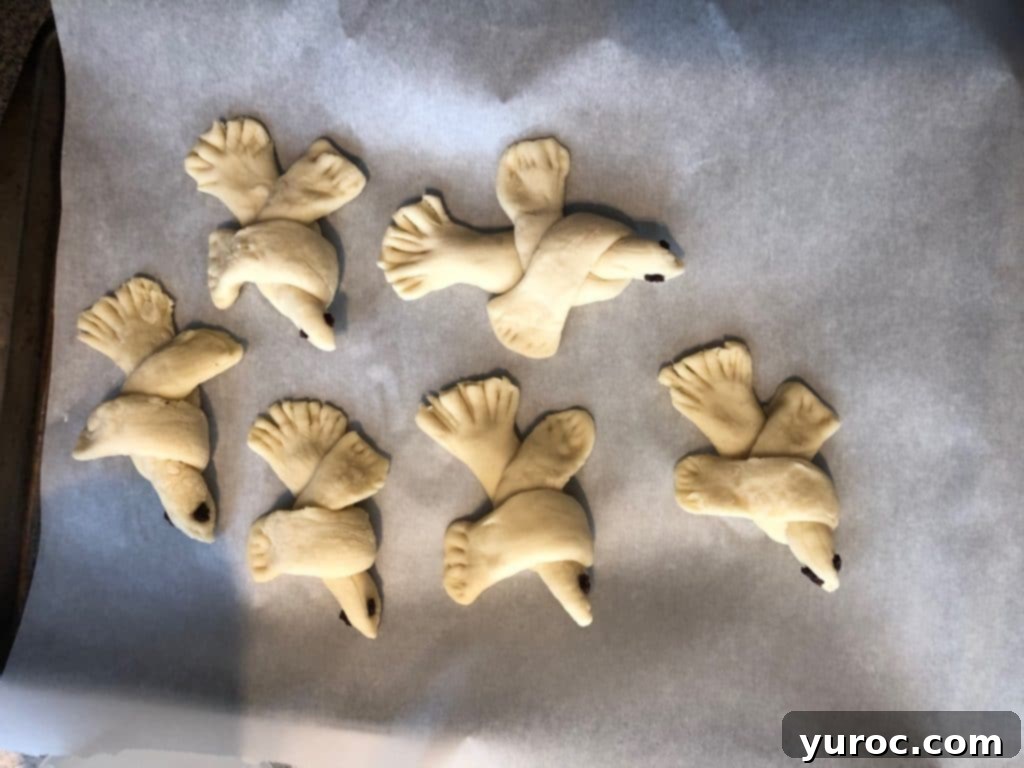
- Carefully place the slightly risen doves on your parchment-lined baking sheet and insert them into a preheated oven. Bake for an initial 10 minutes to allow them to set and begin to brown.
- After the first bake, gently remove the baking sheet from the oven. Using a pastry brush, liberally brush each dove with the prepared egg wash (one beaten egg diluted with 1 teaspoon of water). This wash will give them a gorgeous golden sheen and a slightly crispy crust. Return them to the oven for an additional 10 minutes to finish baking and achieve that perfect golden-brown color.
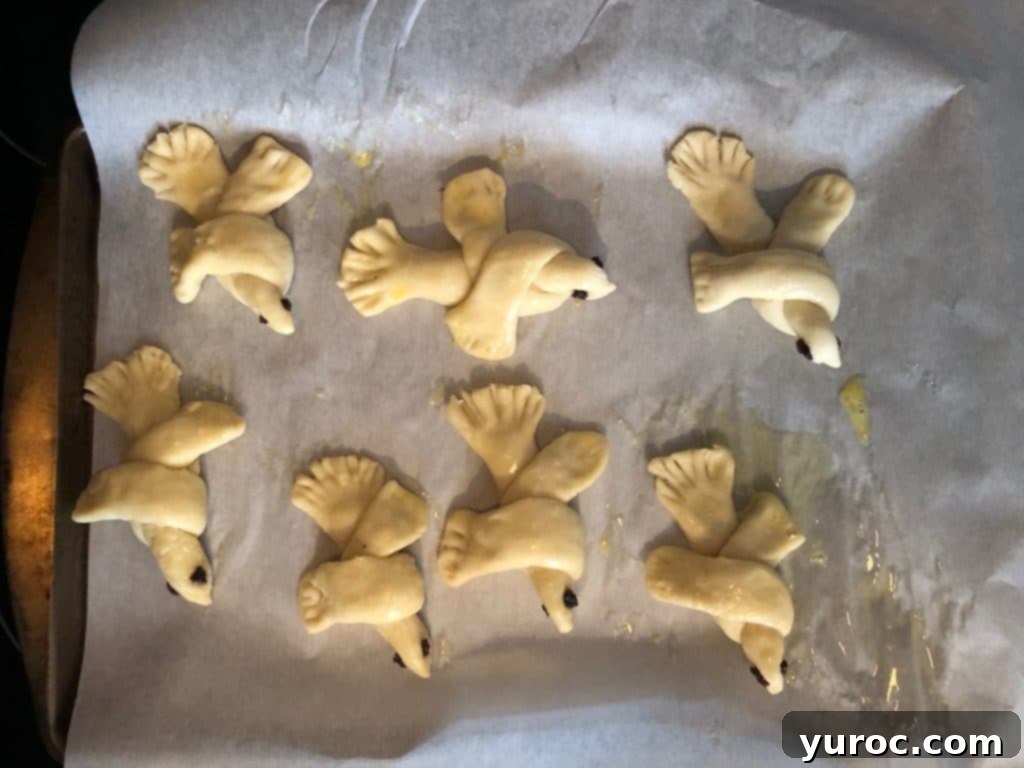
- Once baked to a beautiful golden perfection, remove the doves from the oven and let them cool on the baking sheet for approximately 5 minutes. This allows them to firm up slightly before handling.
- While still warm, carefully insert a toothpick into the bottom of each dove. This small but essential step will enable you to easily insert them into your decorative ritual breads, such as Paska or Korovai, ensuring they stand upright and proud.
Ukrainian Dove Tutorial: A Fun Family Activity
Making Ukrainian Easter Doves is not just a culinary task; it’s a wonderful way to immerse your family in meaningful Easter traditions. This activity is perfect for celebrating the season and offers a fantastic opportunity for kids to get involved in the kitchen. The process is simple enough to be a delightful family Easter activity, fostering creativity and a sense of accomplishment.
I’ve personally found this tutorial to be incredibly effective when working with larger groups of children. It’s so straightforward that I successfully guided a class of 8-year-olds (my son’s Grade 3 class) and my daughter’s Girl Guides group (ages 8 and 9) through making these doves. The children absolutely loved the hands-on experience and were thrilled with their edible creations! For ease, I often print out the step-by-step instructions and give them to each child, which truly helps them follow along independently and enjoy the process even more.

Expert Recipe Tips for Flawless Holuby
To ensure your Ukrainian Easter Bread Doves are a resounding success, keep these expert tips in mind:
- Use Warm Water for Better Dough Texture: When preparing the dough, the boiling water plays a crucial role in creating a supple and pliable texture. However, it’s vital to allow the water to cool slightly before incorporating the egg to prevent it from scrambling, ensuring a smooth dough consistency.
- Knead Until Smooth: The goal is to achieve a dough that is firm and thick, much like modeling clay (Play-Doh). If your dough feels too sticky after the initial mixing and kneading, add extra flour gradually, a small amount at a time, until it reaches this ideal, easy-to-handle consistency.
- Avoid Over-Rising: Precision is key during the proofing stage. Only allow the shaped doves to rise for a brief 5 minutes before they go into the oven. Exceeding this time can cause them to over-proof, leading to an overly puffy appearance that might distort their delicate shape.
- Shape Doves on a Non-Stick Surface: To prevent your beautifully shaped dough from sticking, always work on a lightly floured surface or, even better, use parchment paper. This ensures easy transfer to the baking sheet without losing their form.
- Be Gentle with the Feather Details: When using a knife to create the intricate feather impressions on the tails and wings, apply light pressure. The goal is to create texture, not to cut through the dough. Gentle scoring will give the best results.
- Egg Wash for a Golden Finish: The egg wash applied after the first bake is essential. It provides a beautiful, glossy golden-brown finish that makes your doves truly shine and enhances their visual appeal.
- Use a Toothpick for Easy Placement: As soon as the doves are baked and slightly cooled but still warm, insert a toothpick into the base of each. This small addition makes it incredibly simple to attach them securely to your Paska, Korovai, or other decorative breads.
- Make Smaller Doves for Weddings: If you intend to use these doves to decorate a traditional Korovai (Ukrainian wedding bread), consider making them slightly smaller. This allows for more intricate arrangements and ensures they complement the overall grandeur of the wedding bread’s decoration.
🌡️ Storing Your Ukrainian Bread Doves
Once baked, your lovely bread doves can be kept at room temperature for approximately 3-4 days. For longer preservation, I highly recommend freezing them, especially if they are already decorating a loaf of bread. When frozen in an airtight container or freezer bag, these delicate doves will maintain their quality for up to 3 months, allowing you to enjoy them well past the Easter season or prepare them in advance for special occasions.
👪 Serving Size and Adjustments
This recipe is designed to yield a generous batch of 30 delightful bread doves, perfect for decorating multiple Paskas or a large Korovai, or for sharing as thoughtful edible gifts. Should you need fewer or more doves, you can easily adjust the recipe by clicking on the serving size option on the recipe card below. Simply select your desired number, and the ingredient amounts will automatically adjust to scale accordingly, making preparation hassle-free.
❔ Recipe FAQs for Ukrainian Easter Doves
Absolutely! You can prepare the dough up to 24 hours in advance. Simply cover it tightly and store it in the refrigerator. When you’re ready to shape the doves, allow the dough to come to room temperature for easier handling.
Yes, these beautiful bread doves freeze exceptionally well. To preserve their freshness and shape, store them in an airtight container or freezer bag for up to 3 months. When you wish to use them, simply thaw them at room temperature.
Over-proofing is the most common reason for overly puffy doves. If the dough rises for too long before baking, it can expand excessively and lose its intended structure. To maintain their delicate shape, ensure you only let them rise for a short 5 minutes before placing them in the oven.
If currants aren’t available, don’t worry! You have several excellent alternatives for the doves’ eyes. Poppy seeds, black sesame seeds, or even tiny, finely chopped bits of chocolate can work perfectly to give your doves character.
No, the yellow food coloring is entirely optional. It primarily serves to give the doves a slightly more vibrant golden appearance. However, even without it, the egg wash applied during baking will ensure your doves achieve a beautiful, appealing golden-brown color.
For more authentic and delicious Ukrainian Easter Recipes, be sure to explore my collection. You’ll find a variety of dishes to complete your festive spread!
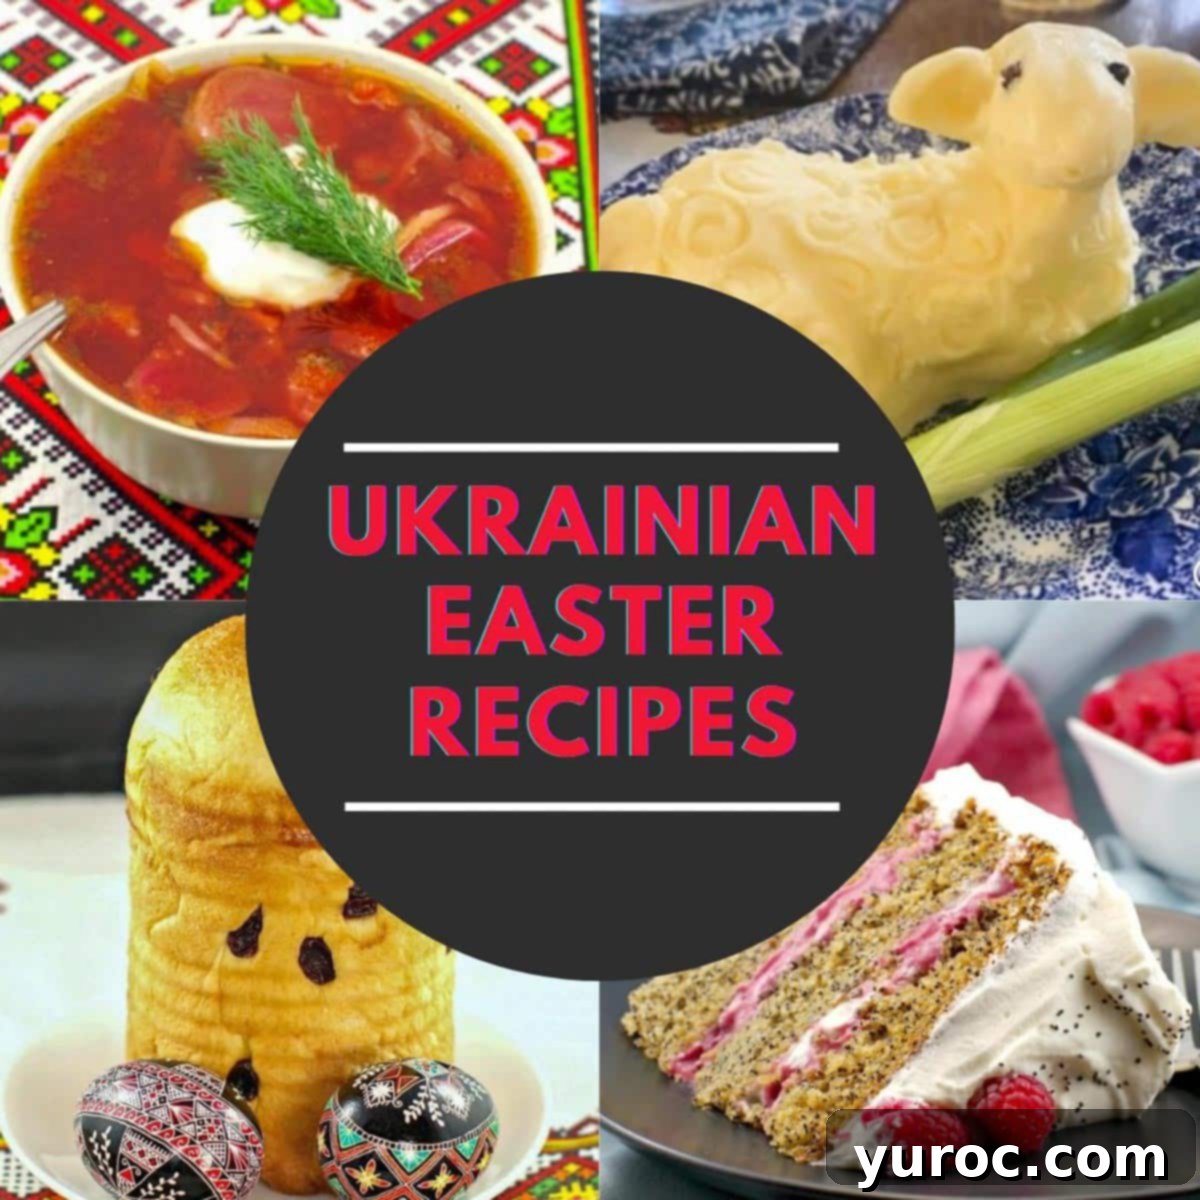
📋 Explore More Beloved Ukrainian Recipes
Delve deeper into the rich culinary traditions of Ukraine with these other cherished recipes:
- Ukrainian Daughter’s Crock Pot Casserole
- Pampushky – Ukrainian Doughnuts
- Lazy Slow Cooker Cabbage Rolls
- Potato and Cottage Cheese Perogies
Did your family ❤️ this recipe? Your feedback means the world to us! Did you know that commenting and ⭐rating recipes is one of the best ways to support your favorite recipe creators? If you LOVED creating these beautiful Ukrainian Easter Bread Doves, please take a moment to leave a comment and rate this recipe in the recipe card below. We’d also be absolutely delighted if you shared photos of your stunning creations on social media using the hashtag #foodmeanderings or by tagging @foodmeanderings! Your participation helps our community grow and inspires others to embrace these wonderful traditions.

🕊️Ukrainian Easter Bread Doves Recipe (Holuby)
Ingredients
Dough:
- 1 cup boiling water
- 1 teaspoon cooking oil
- 1 teaspoon white sugar
- 1 egg
- 2 drops yellow food coloring
- 3 cups all- purpose flour
Egg Wash:
- 1 egg beaten
- 1 teaspoon water or milk
Garnish
- currants (for doves’ eyes)
Instructions
- Preheat the oven to 350 degrees F / 176 degrees C and line a baking sheet with parchment paper. This prevents sticking and ensures even baking.
Make the dough:
- In a large bowl, combine the first 5 ingredients: boiling water, cooking oil, white sugar, egg, and yellow food coloring. Mix them thoroughly with a wooden spoon until well integrated.1 cup boiling water, 1 teaspoon cooking oil, 1 teaspoon white sugar, 1 egg, 2 drops yellow food coloring
- Initially add only 2 cups of the all-purpose flour to the wet ingredients. Transfer the mixture to a lightly floured surface and begin to knead the dough by hand.3 cups all- purpose flour
- Continue kneading. If the dough remains too sticky, gradually add more flour, a little at a time, until you reach a thick, pliable consistency resembling Play-Doh. You might not need all 3 cups of flour.
Shape the doves:
- Once the dough is ready, roll it into long, thin snakes, each about the thickness of a finger. Cut these snakes into individual sections, roughly 2-4 inches long.
- Place one of these dough strips horizontally on your work surface to form the base. Lay another strip on top, perpendicular to the first, creating a cross shape.
- Take the lower “arm” of the strip that is underneath and pull it upwards, crossing it over to the opposite side of the horizontal strip. This creates the first loop of the wings.
- Next, pull the other (original left) side of the upper strip across, looping it over the horizontal strip in the opposite direction. The left side will now be on the right, and the right side on the left, forming an interlocking structure.
- Gently flatten and shape the looped sections to resemble elegant wings. Using a plastic or regular knife, make small, shallow cuts along the tail end of the dough strips to create delicate feather details.
- Using the non-cutting edge of your knife blade, lightly press feather impressions into the shaped wings to add further texture and realism.
- Pinch one end of the straight, central strip of dough to form a small head, then pinch a tiny bit at the tip to create a distinct beak.
- For the eyes, carefully press a poppy seed or a small piece of a currant into each side of the dove’s head. (I prefer using pieces of currants rather than whole ones for better proportion).
- Once all doves are shaped, let them rest on the parchment-lined baking sheet to rise for precisely 5 minutes. This brief rise is crucial to maintain their shape.
Bake the doves:
- Place the prepared baking sheet with the doves into your preheated oven and bake for an initial 10 minutes.
- Remove the baking sheet from the oven. In a small bowl, whisk together one egg with 1 teaspoon of water or milk to create an egg wash. Brush this mixture evenly over the surface of each dove.1 egg, 1 teaspoon water or milk
- Return the doves to the oven for another 10 minutes, allowing them to bake until they achieve a beautiful golden-brown color and a slightly glossy finish.
- Once fully baked, remove the doves from the oven. Let them cool on the baking sheet for 5 minutes before handling.
- For easy placement into larger ritual breads (such as Paska or Korovai), insert a toothpick into the bottom of each dove while they are still warm. This allows for secure and beautiful decoration.
Notes
-
- Use Warm Water for Better Dough Texture. The boiling water helps create a pliable dough, but let it cool slightly before adding the egg to prevent scrambling.
-
- Knead Until Smooth. The dough should be thick, like Play-Doh. If it’s too sticky, gradually add more flour until it reaches the right consistency.
-
- Avoid Over-Rising. Only let the doves rise for 5 minutes before baking. Any longer, and they may puff up too much and lose their shape.
-
- Shape Doves on a Non-Stick Surface. Use a lightly floured surface or parchment paper when shaping the doves to prevent sticking.
-
- Be Gentle with the Feather Details. When creating the feather impressions with a knife, press lightly to avoid cutting through the dough.
-
- Egg Wash for a Golden Finish. Brushing the doves with an egg wash after the first bake gives them a beautiful golden color and slight shine.
-
- Use a Toothpick for Easy Placement. Insert a toothpick into the base of each dove while they are still warm-this makes it easier to attach them to Paska or Korovai later.
-
- Make Smaller Doves for Weddings. If using the doves for Korovai (Ukrainian wedding bread), make them slightly smaller to fit the bread’s decoration.

