Easy Root Beer Float Fudge: A Nostalgic, No-Bake Homemade Delight
This Easy Root Beer Float Fudge is a truly decadent and indulgent dessert that beautifully marries the timeless, effervescent flavors of classic root beer with the creamy sweetness of vanilla ice cream. Imagine the delightful taste of a fizzy root beer float, perfectly encapsulated within a rich, smooth, and dreamy piece of candy. This simple root beer fudge recipe doesn’t just capture that sweet, nostalgic essence; it transforms it into an irresistible treat that’s both fun and incredibly easy to make, making it a perfect project for bakers of all skill levels.
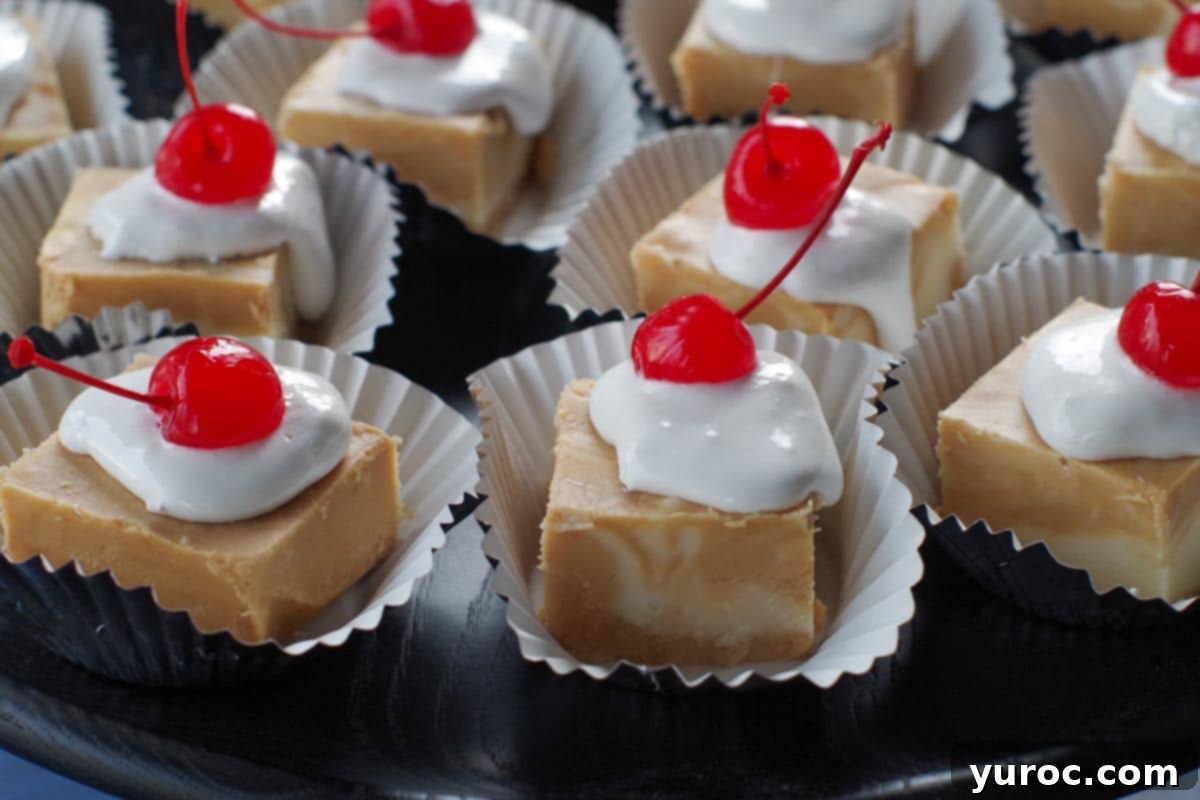
While often a huge hit during summer gatherings, root beer fudge is a versatile treat that’s fantastic any time of the year. Its unique and beloved flavor profile makes it particularly popular at community events and school bake sales, standing out alongside other favorites like Strawberry Milkshake Cookies and a comforting Butter Tart Slice. This particular recipe draws inspiration from my popular Root Beer Float Cake, ensuring that beloved flavor combination translates perfectly into fudge form.
I’ve been perfecting and making this root beer float fudge for many years, and it consistently remains a well-loved sweet treat that disappears quickly! Its unique flavor makes it a standout amongst classic fudge recipes, offering a fun, whimsical twist that appeals to both kids and adults.
If you’re a true fudge aficionado, you might also enjoy exploring my other easy recipes, such as the delightful Microwave Sugar Cookie Fudge and the festive Microwave Easter Egg Fudge. Each offers a different flavor adventure, but all share the common thread of being incredibly simple to prepare.
🥘 Essential Ingredients for Root Beer Float Fudge
Creating this delicious root beer float fudge requires just a few key ingredients. Here’s a closer look at what you’ll need and why each component is important:
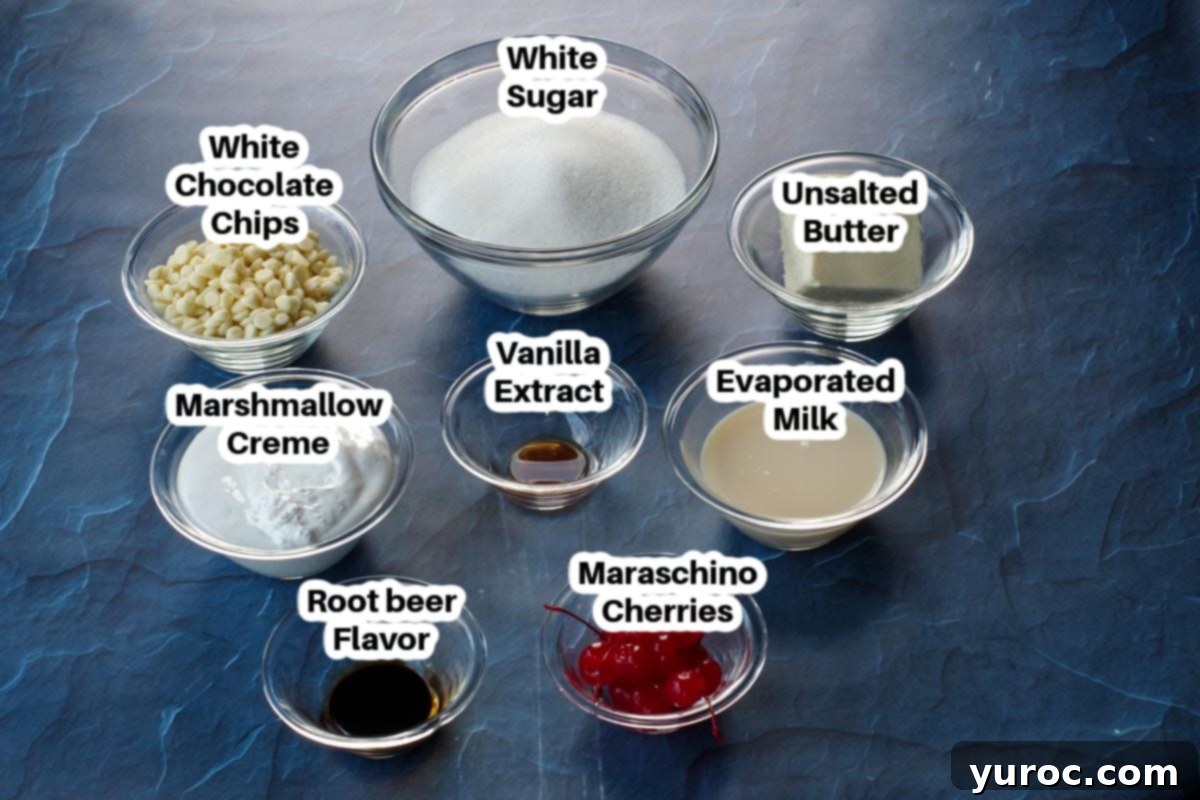
- Unsalted Butter: I always opt for unsalted butter in my recipes. This allows for precise control over the salt content, which can vary significantly between different brands of salted butter. For fudge, maintaining the right balance of sweetness is crucial, and unsalted butter helps achieve that consistency. If you only have salted butter, you can use it, but be aware it might subtly cut down on the overall sweetness.
- Evaporated Milk (2%): Make sure to use 2% evaporated milk. Evaporated milk is crucial for the fudge’s creamy texture and helps it set properly. The lower fat content of 2% milk is perfectly fine for this recipe and contributes to a smooth, rich consistency without being overly heavy. It’s not the same as condensed milk, so double-check your can!
- Root Beer Extract or Concentrate: This is where the magic happens! I highly recommend using a quality root beer concentrate for the most authentic and robust root beer flavor. While root beer extract can be used in a pinch, concentrate generally offers a deeper, more pronounced taste, truly capturing the essence of a root beer float.
- Maraschino Cherries: These are primarily for garnish and add a vibrant pop of color and a touch of fruity sweetness, reminiscent of a classic ice cream sundae topping. For the best presentation, look for cherries that still have their stems, often referred to as “cocktail cherries.”
- White Granulated Sugar: The foundation of any good fudge, providing the sweetness and structure.
- White Chocolate Baking Chips: These chips melt into the fudge, adding a rich, creamy vanilla flavor and contributing to the smooth texture.
- Marshmallow Creme: A key ingredient for achieving that silky, smooth, and soft fudge consistency without needing to worry about a candy thermometer. It also forms the delightful “float” topping.
- Vanilla Extract: Enhances the vanilla “ice cream” flavor in one portion of the fudge, creating a delicious contrast to the root beer layer.
Please refer to the detailed recipe card below for the full list of ingredients and precise quantities.
📖 Creative Variations & Smart Substitutions
This root beer float fudge recipe is quite forgiving and allows for some delightful variations and substitutions to suit your preferences or what you have on hand. Don’t be afraid to experiment and make it your own!
- Root Beer Concentrate vs. Extract: As mentioned, for the boldest root beer flavor, root beer concentrate is ideal. However, if you only have root beer extract, you can certainly use it. Just be sure to double the amount (using 4 teaspoons instead of 2 teaspoons of concentrate) to ensure the root beer flavor truly shines through.
- Butter Choices: Unsalted butter is preferred for better control over the sweetness. If you use salted butter, be aware that the salt content might slightly reduce the perceived sweetness of the fudge. This isn’t necessarily a bad thing if you prefer a less intensely sweet treat!
- Marshmallow Creme Alternatives: Marshmallow creme (or fluff) is key for the smooth texture. If you can’t find it, you can easily make your own marshmallow creme substitute from regular marshmallows (see the Pro Tip below for instructions). Alternatively, store-bought marshmallow fluff can be used, but note that it may result in a slightly different texture – your fudge might be a bit denser and not quite as light and silky as with marshmallow creme.
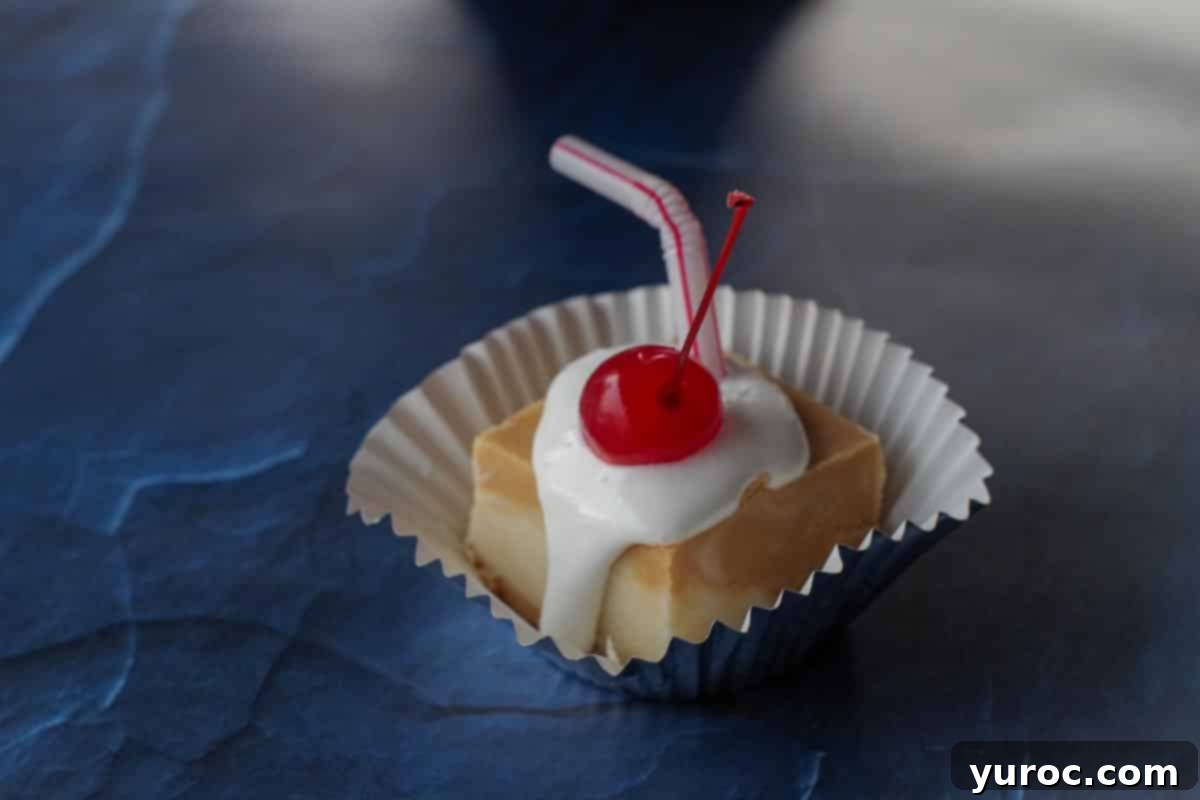
- Fun Straw Decoration: For an extra whimsical “float” aesthetic, consider cutting colorful drinking straws into small pieces and inserting one into each fudge square just before serving, alongside the marshmallow creme and cherry garnish. It adds a really fun and cute touch, especially if you’re serving these at a party or bake sale!
- Add-ins for Texture: Feel free to stir in mini marshmallows or even a handful of mini white chocolate chips into the root beer portion of the fudge for added texture and visual appeal before it sets.
- Different Flavor Swirls: While vanilla is classic, you could experiment with other extracts for the lighter swirl. A hint of almond or a touch of cream soda extract could create an interesting twist, though it would deviate from the true root beer float profile.
🌟 Pro Tip: How to Make Your Own Marshmallow Creme
Easy Marshmallow Creme Substitute from Marshmallows
If you can’t find marshmallow creme at your local grocery store, don’t worry! You can easily make your own substitute using regular marshmallows. Combine one 16-ounce bag of standard marshmallows with 3 ½ tablespoons of white corn syrup and ⅛ teaspoon of cream of tartar. Melt these ingredients together over a double boiler, stirring constantly until the mixture is completely smooth and free of lumps. This homemade version will work beautifully in your fudge recipe.
🔪 Step-by-Step: Crafting Your Root Beer Float Fudge
Follow these simple steps to create your perfectly swirled and delicious root beer float fudge. Precision in timing and constant stirring are key to success with this no-fail recipe!
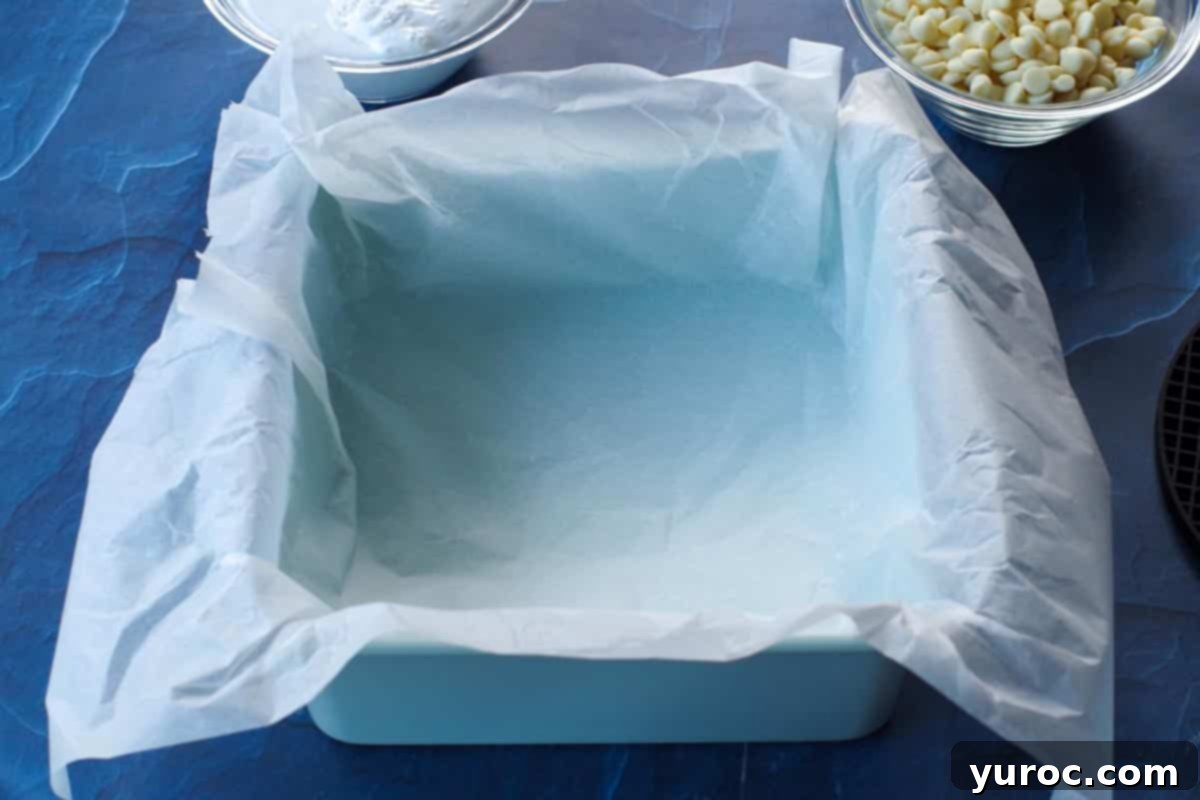
Line an 8 or 9-inch square baking pan with parchment paper. Allow the parchment to overhang on the sides; this creates convenient “handles” that will make lifting the fudge out later much easier. Don’t worry if the parchment isn’t perfectly even or smooth.
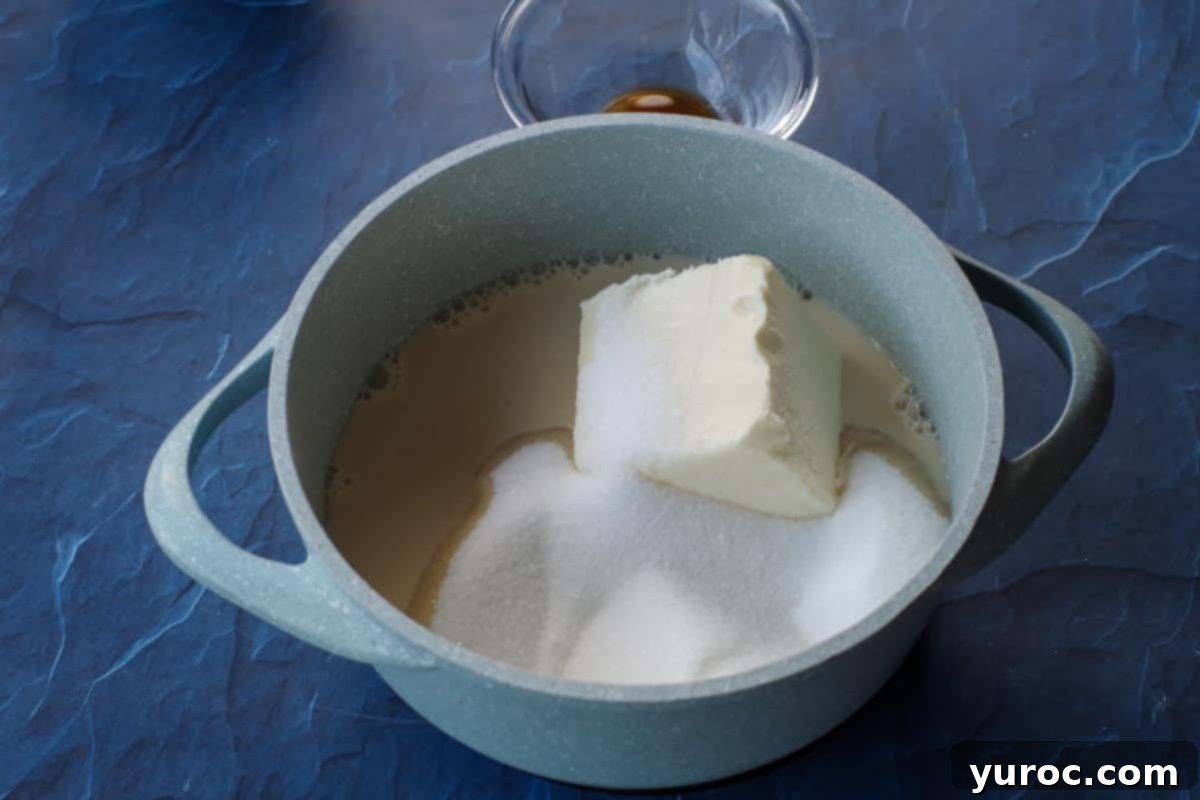
In a large, heavy-bottomed pot or saucepan, combine the granulated sugar, evaporated milk, and butter. Bring this mixture to a rapid boil over medium heat, making sure to stir constantly to prevent scorching. This initial boiling phase will typically take about 10-12 minutes.
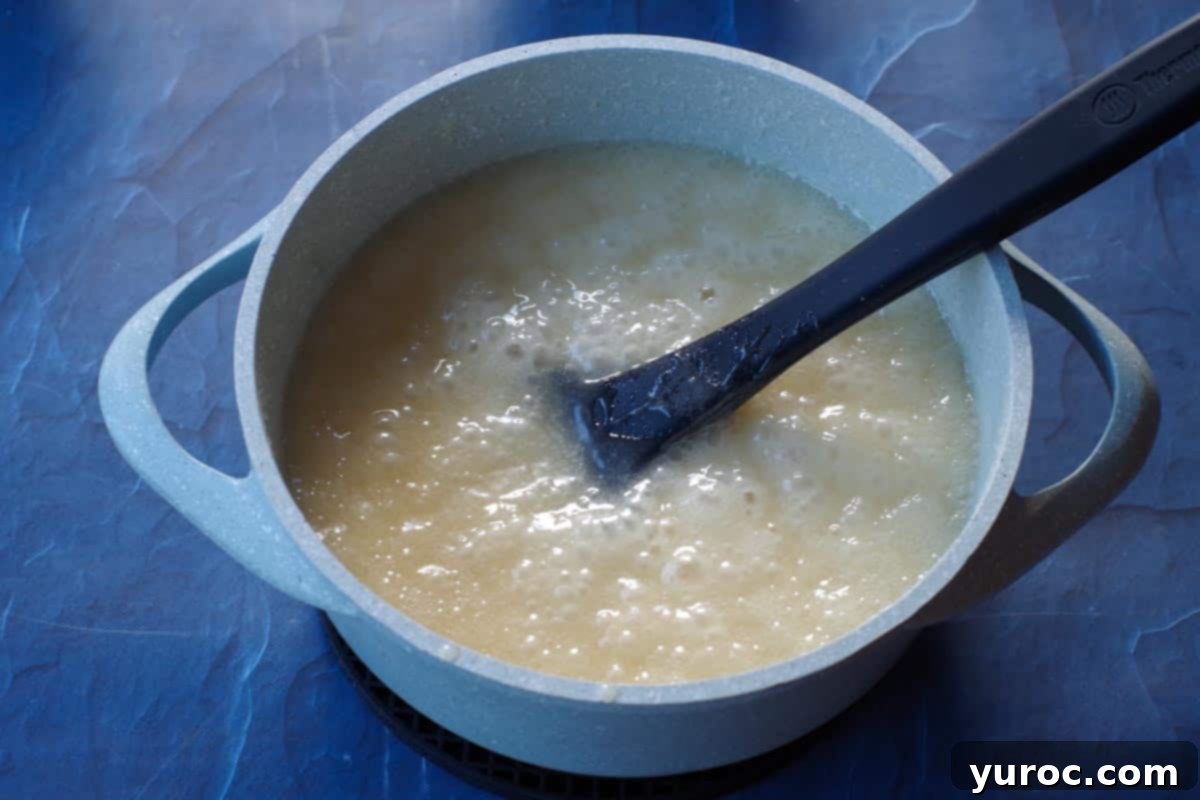
Once the mixture has reached a rapid boil, continue to cook and stir vigorously for exactly 4 minutes. It’s crucial to time this step accurately and stir continuously to achieve the correct fudge consistency. Then, remove the pot immediately from the heat. The color should be a light caramel hue.
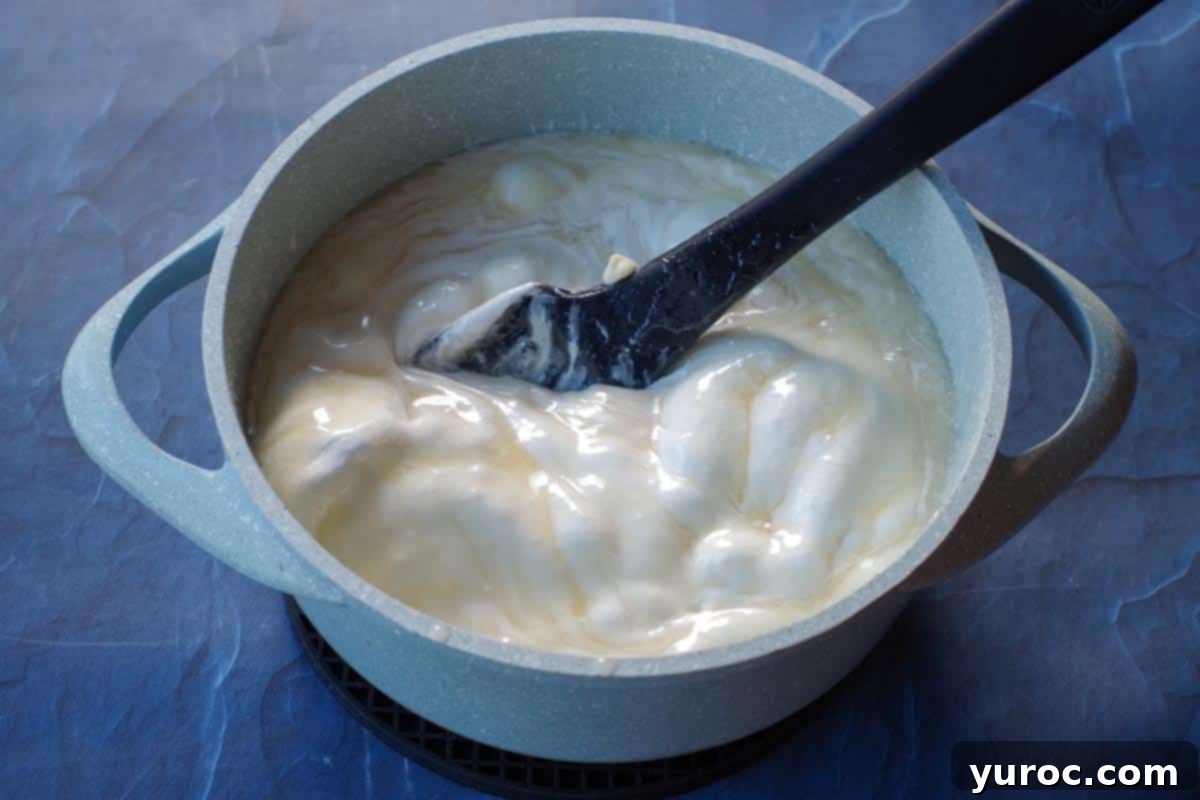
While the pot is removed from the heat, quickly stir in the white chocolate chips and 1.5 containers of marshmallow creme. Be sure to reserve the remaining half container of marshmallow creme for the topping or garnish later.
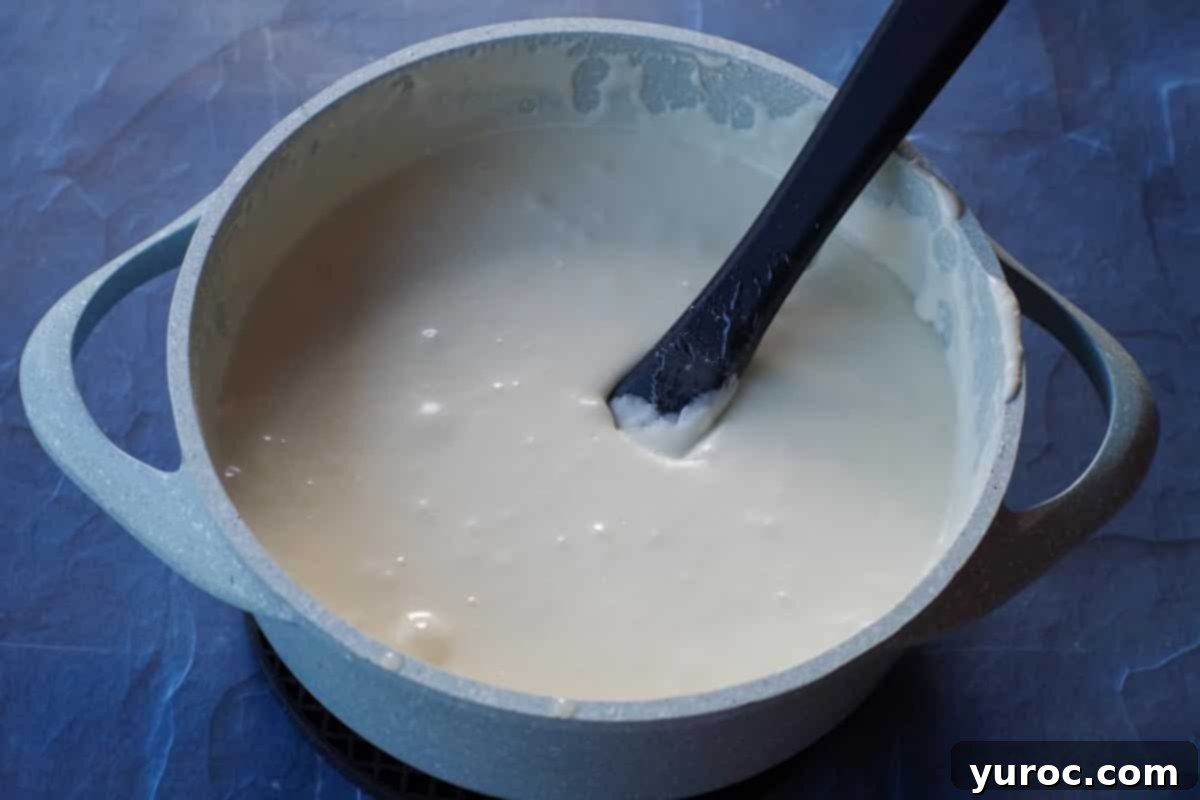
Continue stirring the mixture until the white chocolate chips are completely melted and the marshmallow creme is fully incorporated, creating a smooth and glossy fudge base. Do NOT return the pot to the heat during this stage.
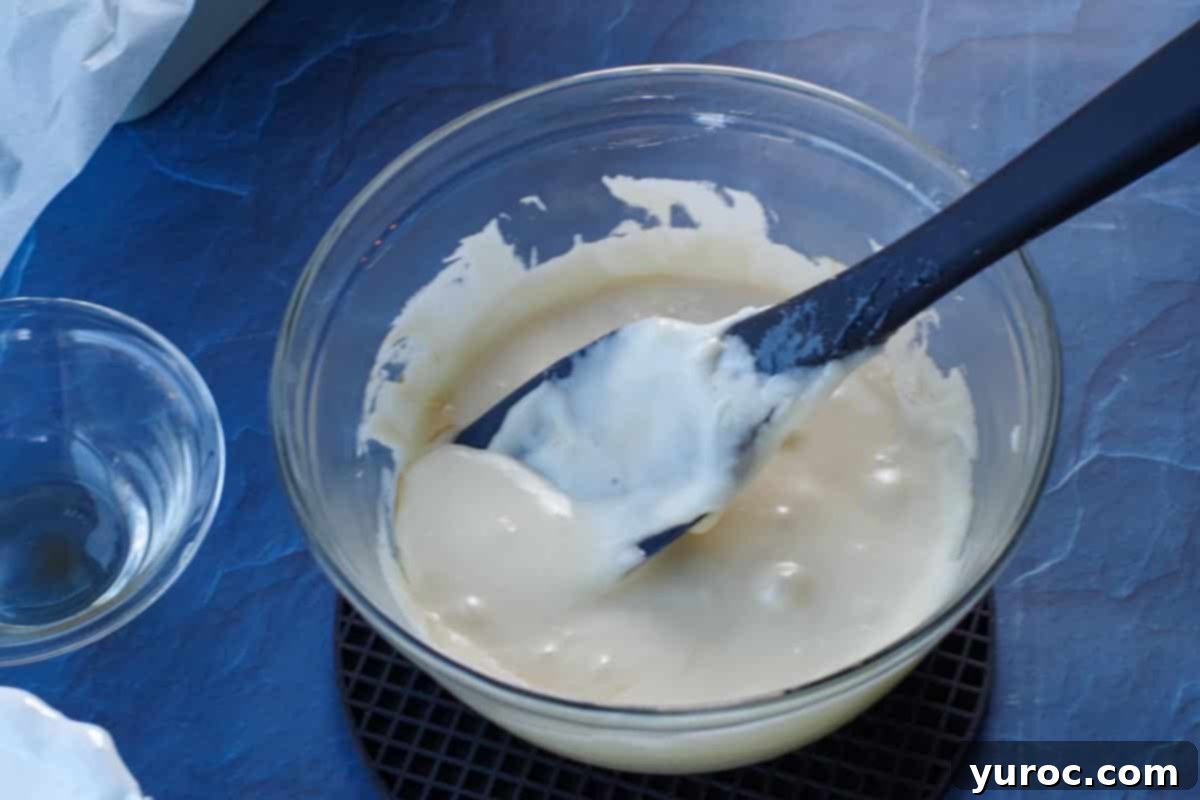
Promptly pour about one-third of the prepared fudge mixture into a separate small bowl. Stir the vanilla extract into this smaller portion until well combined. This will be your “vanilla ice cream” swirl.
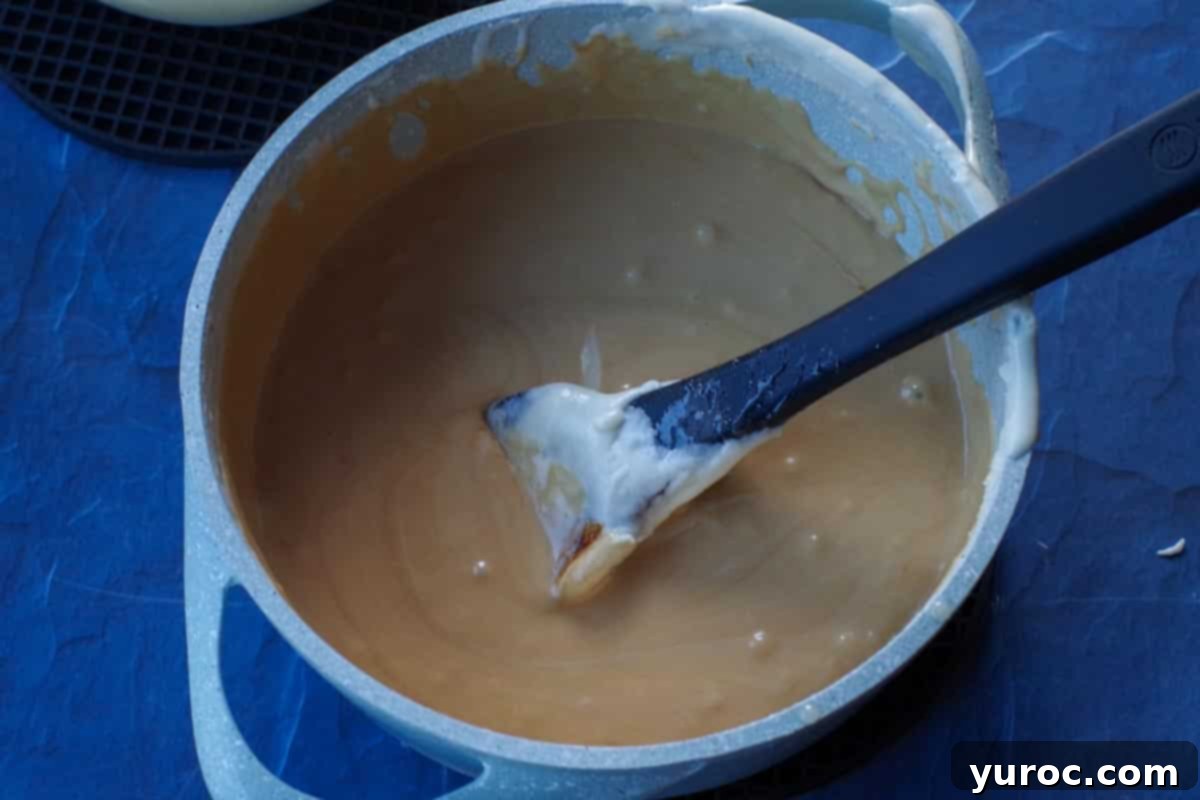
To the remaining two-thirds of the fudge mixture in the larger pot, stir in the root beer concentrate (or extract). Mix thoroughly until the root beer flavor is evenly distributed and the fudge has a uniform, light brown color. This will be your “root beer” base.
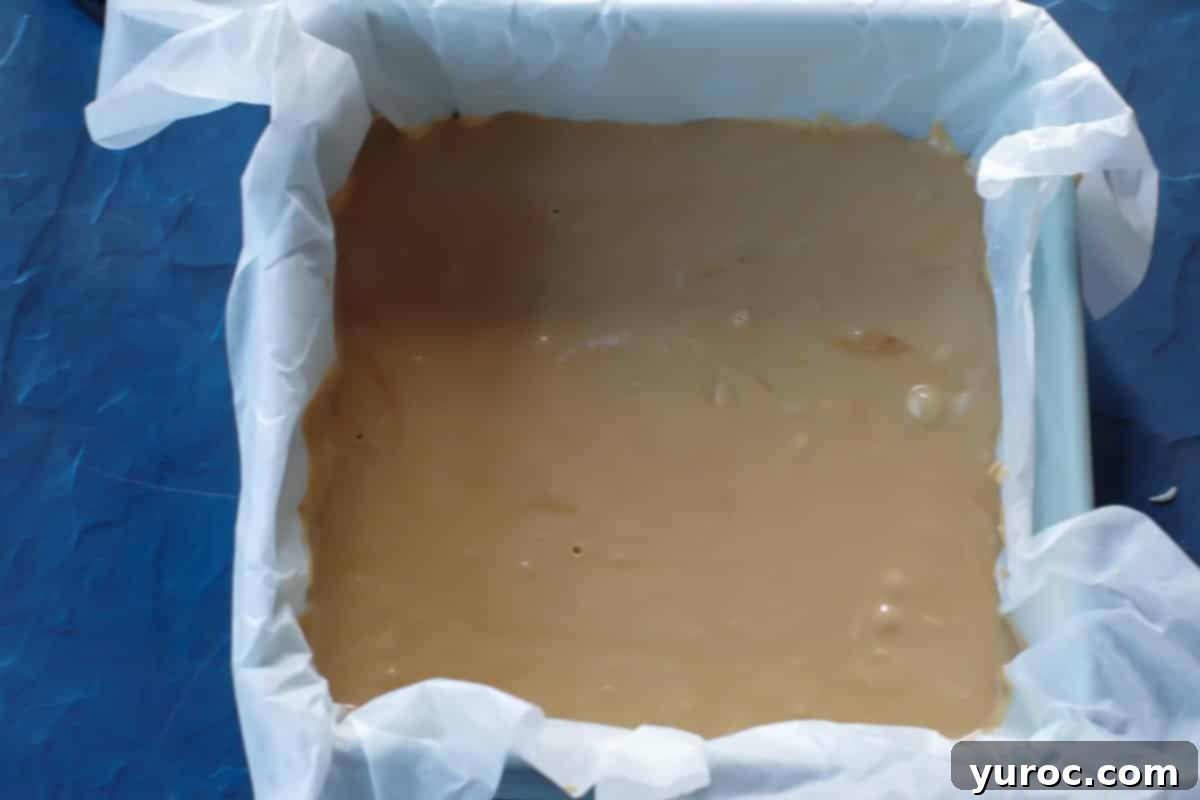
Immediately and quickly spread the root beer-flavored portion of the mixture evenly into your prepared 8 or 9-inch square pan. You need to work efficiently during this stage, as the fudge will begin to set quite rapidly.
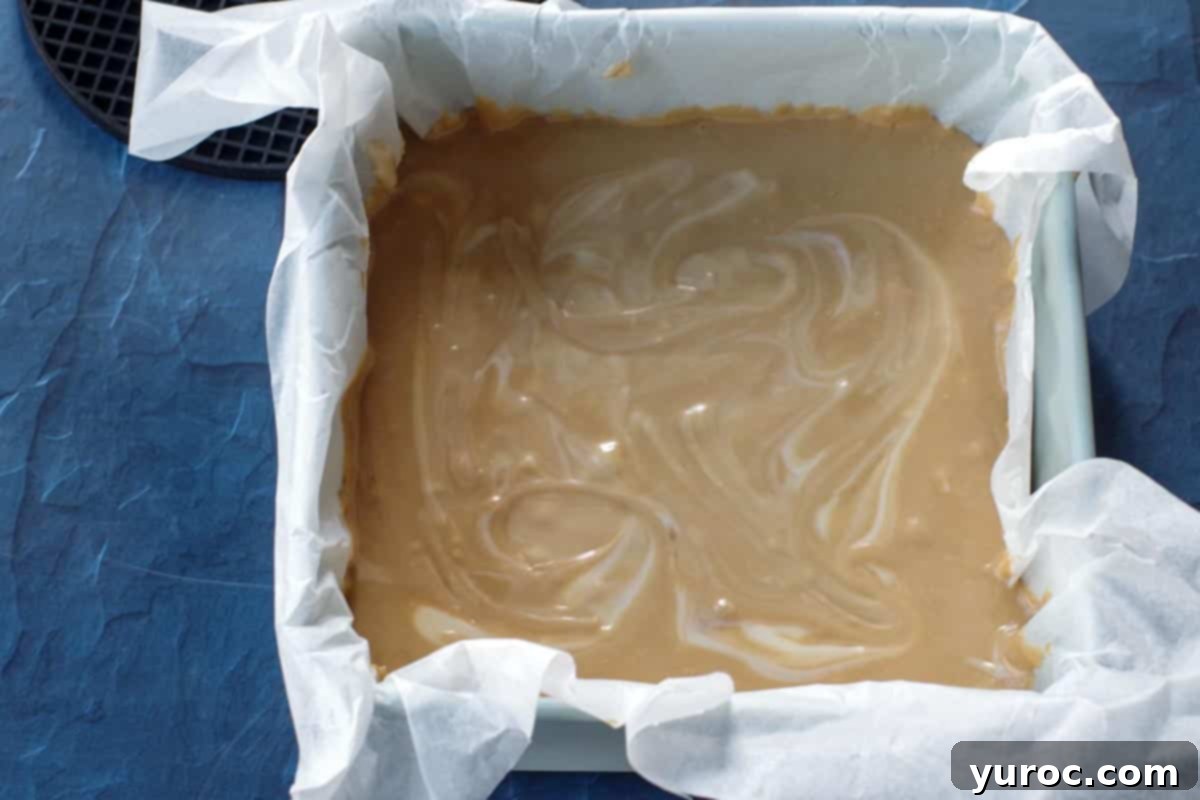
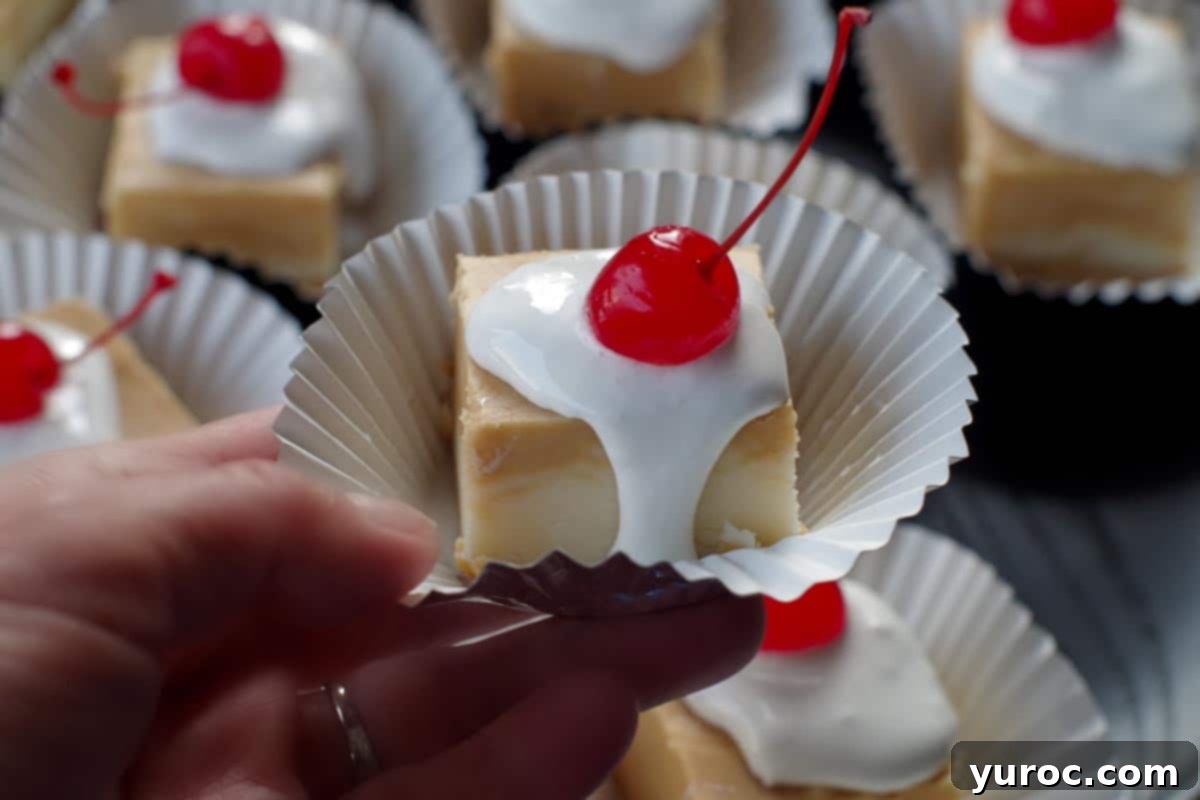
Dollop spoonfuls of the vanilla-flavored mixture over the top of the root beer base in the pan. Using a knife or a thin spatula, gently swirl the vanilla into the root beer layer to create an attractive marbled effect, mimicking the foam of a root beer float. Do not overmix. Once swirled, refrigerate the fudge for at least 1 hour, or until it is completely firm and set.
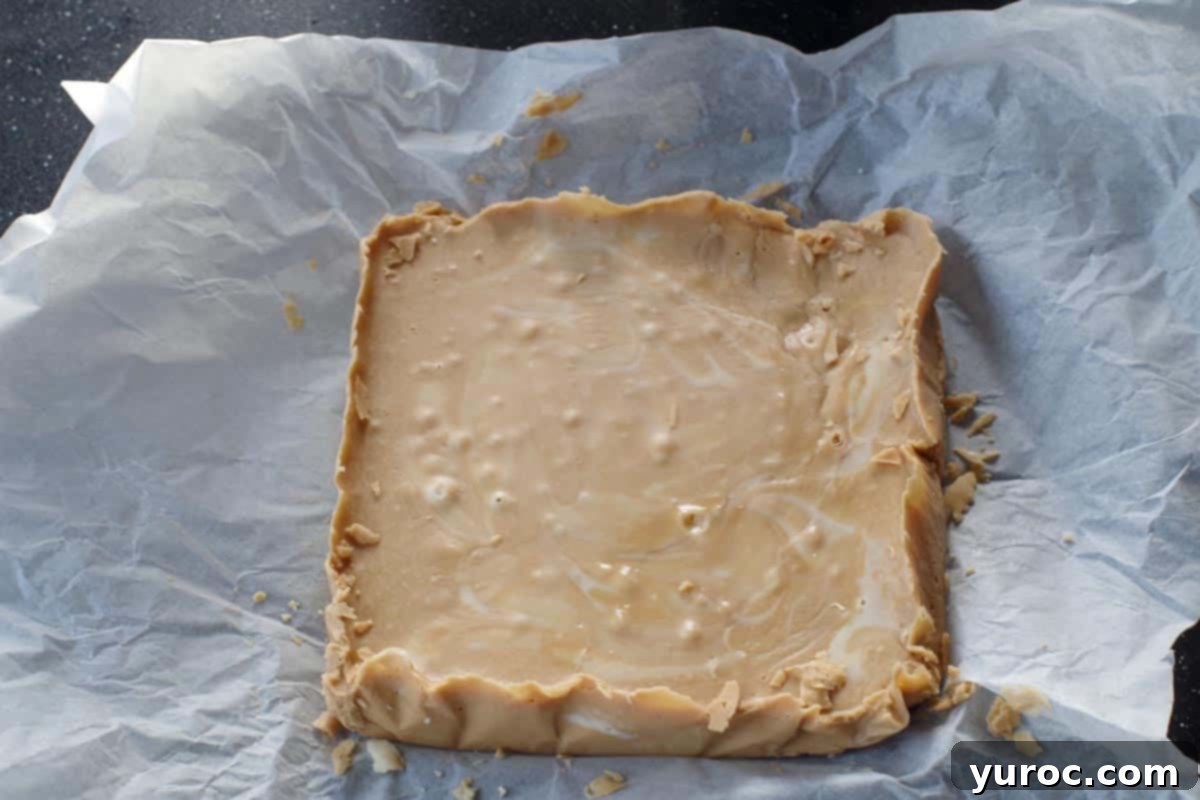
Once the fudge is firm, use the parchment paper overhang as handles to carefully lift the entire slab of fudge out of the baking pan and transfer it onto a clean cutting surface, such as a large cutting board.
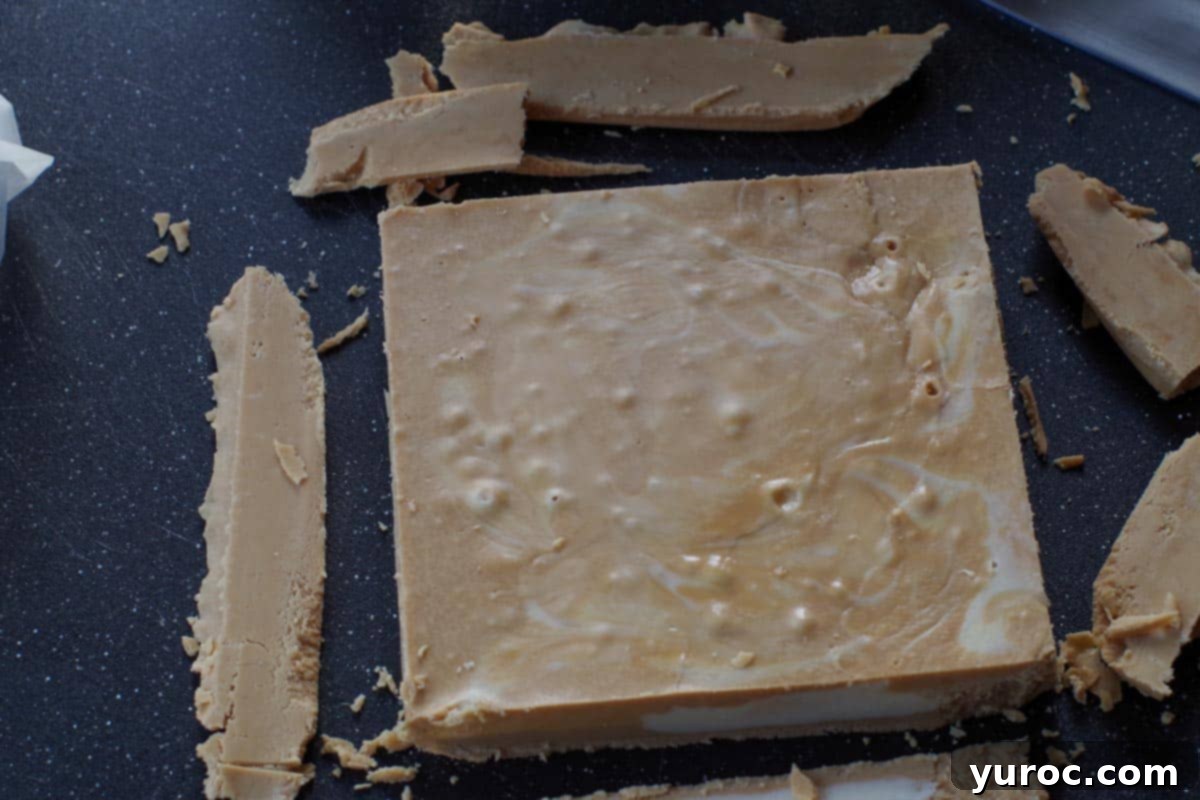
Carefully peel away the parchment paper from the fudge. Using a sharp knife, trim off the slightly rough or uneven edges of the fudge block to create clean, straight lines. These trimmed pieces are perfectly edible and make great “baker’s samples” – I like to store them in a Ziploc bag in the fridge or freezer for a personal treat!
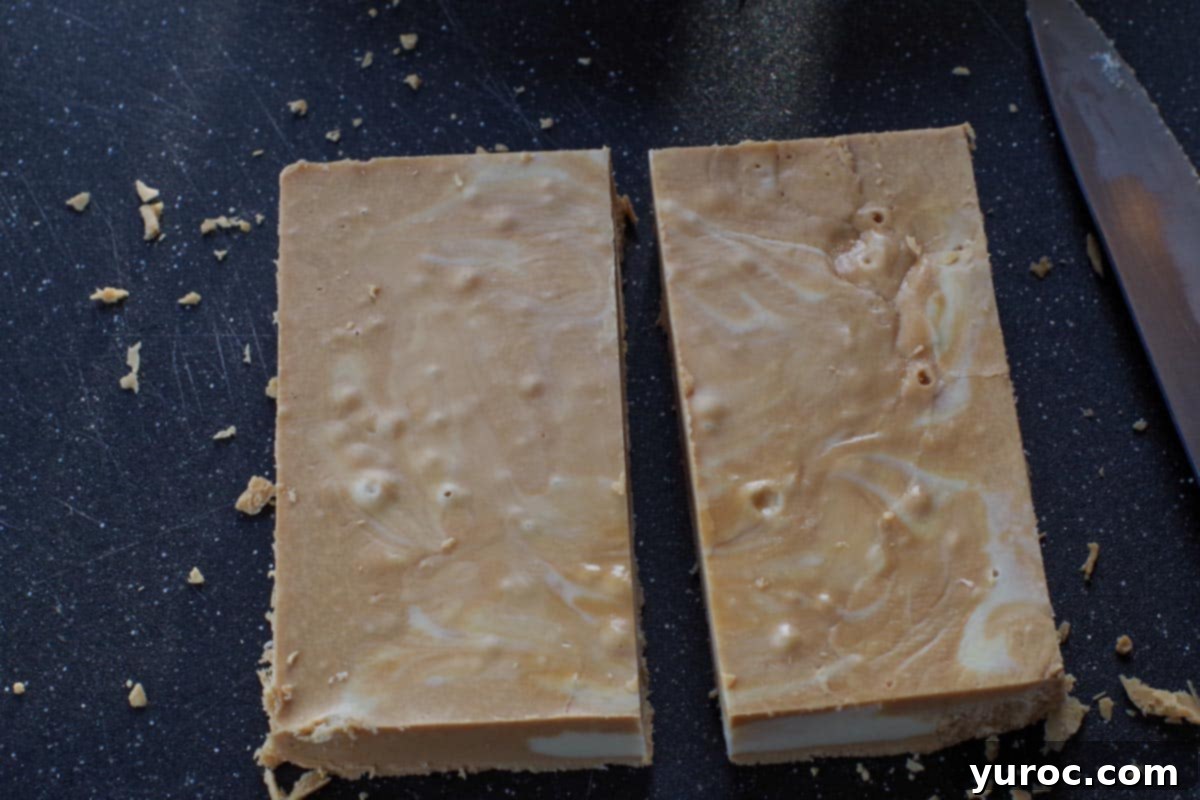
Once the edges are trimmed, cut the large fudge slab in half, either lengthwise or crosswise, depending on your preferred final piece size. This helps in managing the cutting process for smaller, uniform pieces.
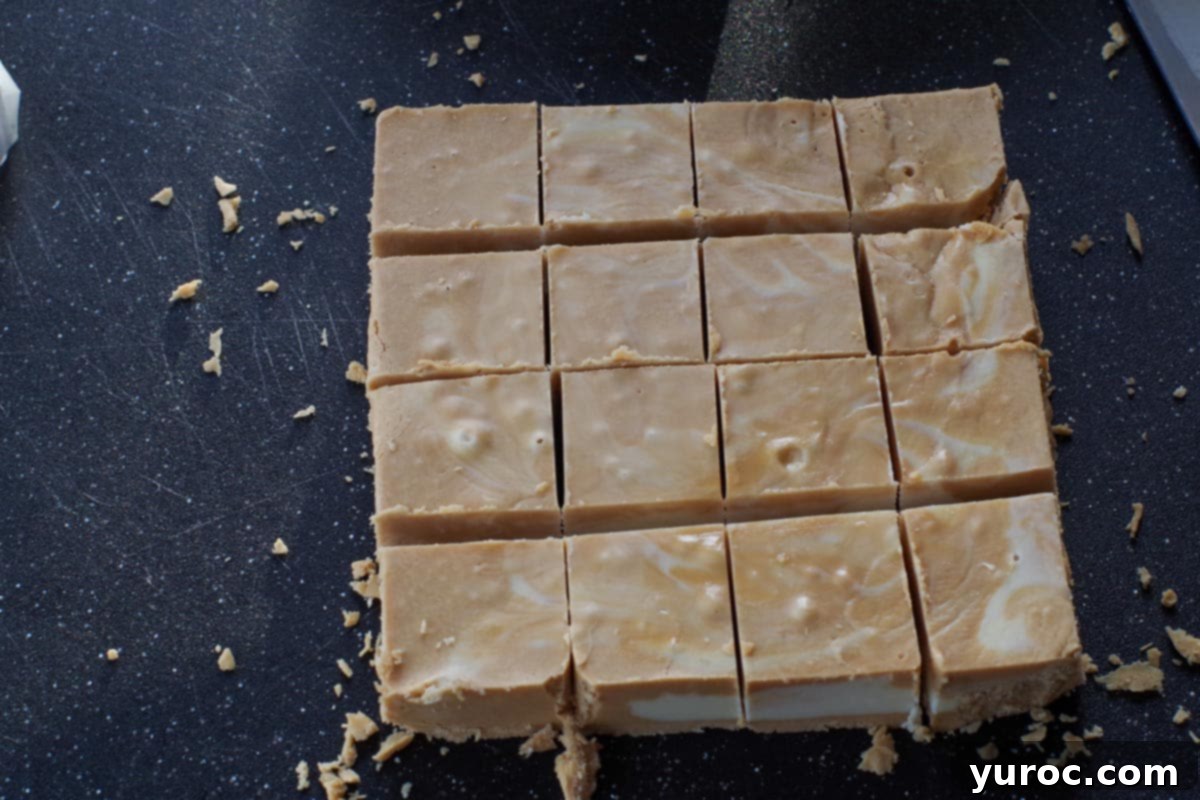
Now, cut the fudge into bite-sized pieces, aiming for approximately 1-inch squares. For example, cutting it 4×4 will yield 16 pieces, a 4×5 cut will give you 20 pieces, and a 5×5 cut can produce 25 pieces. Adjust according to your desired serving size.
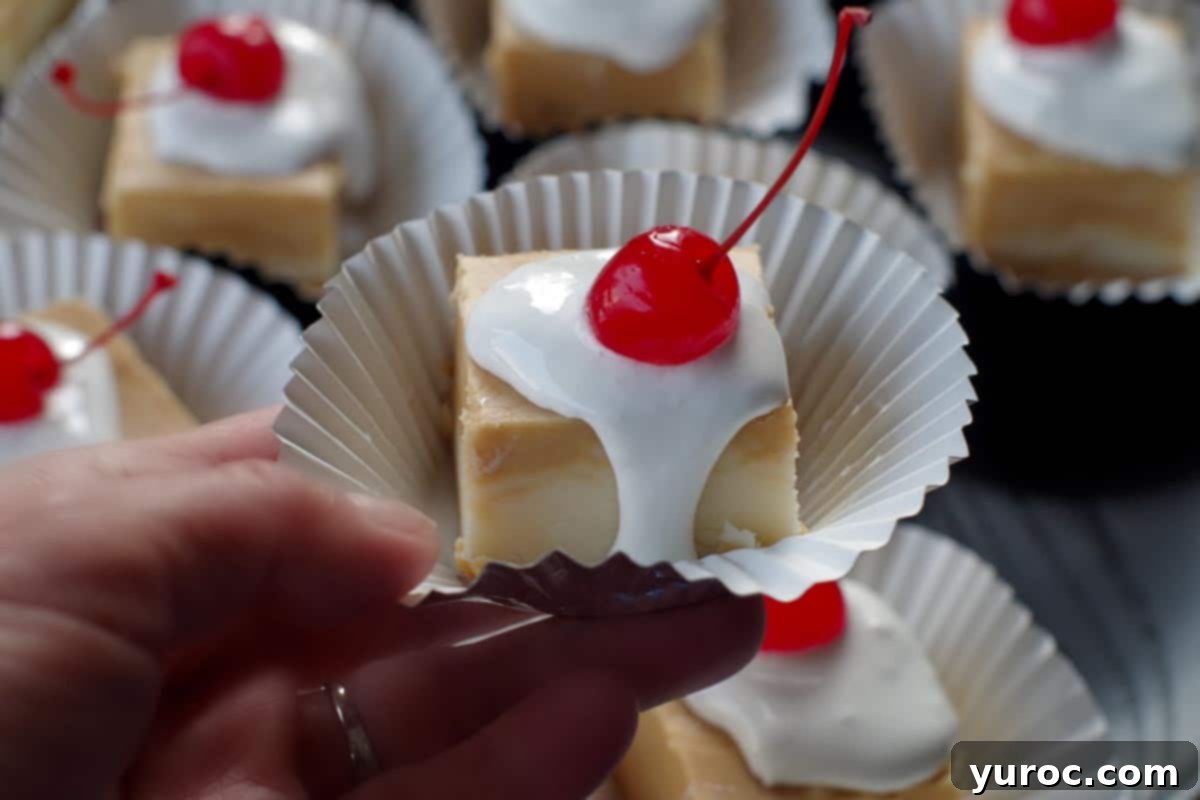
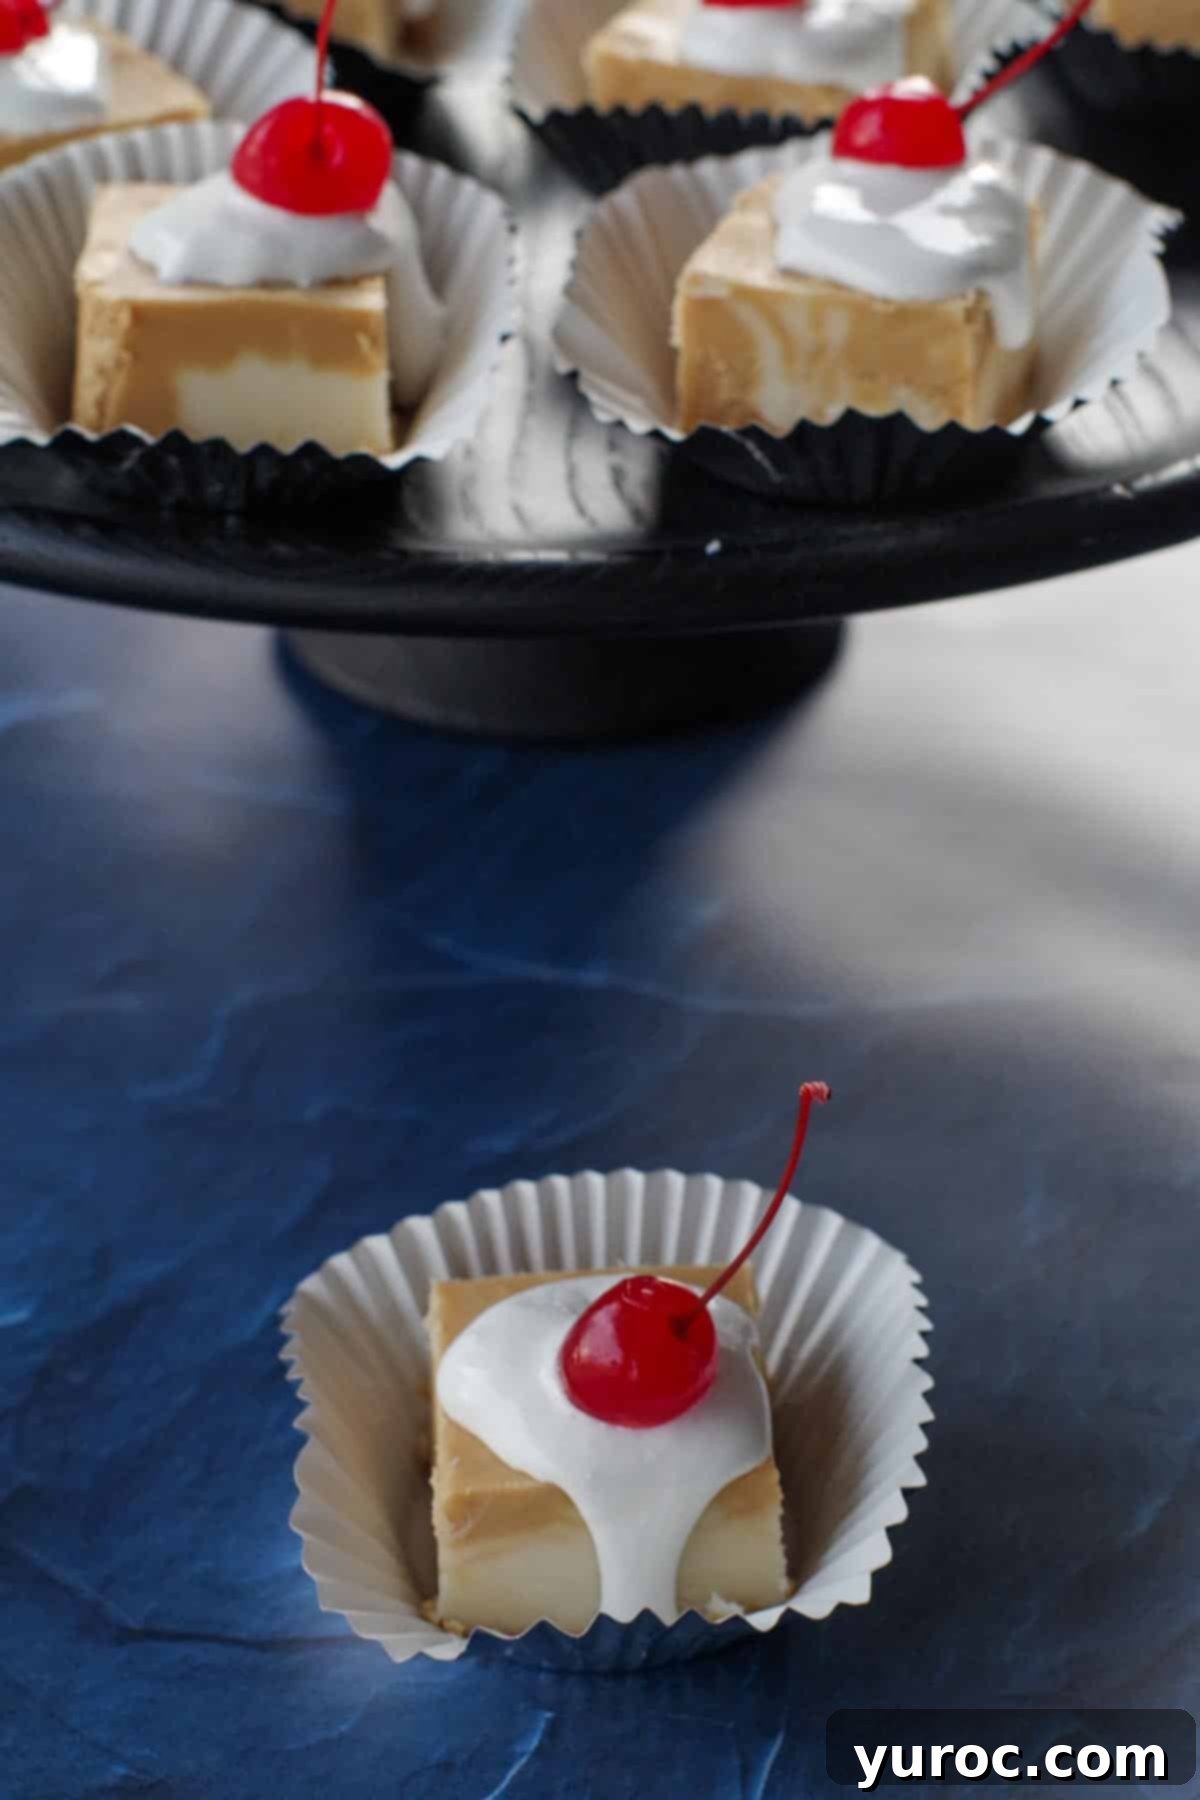
Just before serving, add a small dollop of the reserved marshmallow creme on top of each fudge square, resembling the foam of a float. Crown each dollop with a single maraschino cherry. For an extra touch of charm, serve individual pieces in mini cupcake liners. Enjoy your homemade root beer float fudge!
✅ Expert Recipe Tips for Flawless Fudge
Achieving perfect root beer float fudge is easier than you think with these expert tips:
- Always Use Root Beer Concentrate for Best Flavor: While extract works, root beer concentrate delivers a significantly bolder, more authentic root beer taste that truly elevates the “float” experience. It ensures the flavor isn’t lost in the sweetness of the fudge.
- Avoid Reheating After Adding Chocolate & Marshmallow Creme: Once you’ve removed the sugar mixture from the heat and stirred in the white chocolate chips and marshmallow creme, do NOT return the pot to the stove. Applying more heat at this stage can cause the fudge to seize, become grainy, or lose its creamy texture.
- Precision in Timing is Non-Negotiable: The boiling and stirring times are absolutely critical for this no-thermometer fudge. Boil the sugar, milk, and butter mixture for the full 10-12 minutes, then stir vigorously off the heat for exactly 4 minutes. Using a timer for both stages will ensure your fudge sets perfectly every time.
- Act Quickly Once Flavors Are Incorporated: Fudge sets surprisingly fast. Have your baking pan already lined and ready before you add the root beer and vanilla mixtures. Be prepared to spread and swirl promptly to ensure a smooth, marbled finish before the fudge begins to firm up.
- Parchment Paper is Your Best Friend for Easy Removal: Using parchment paper with a generous overhang not only prevents sticking but also creates convenient handles. This makes lifting the entire slab of set fudge out of the pan effortless and minimizes any potential damage.
- Warm Your Knife for Clean, Professional Cuts: For beautifully neat and smooth fudge squares, especially if you’re aiming for a polished presentation (like for a bake sale), run a sharp knife under very hot water and wipe it dry before each cut. This slight warmth helps the knife glide through the fudge without dragging or sticking.
- Garnish Just Before Serving: For the freshest and most appealing look, add the marshmallow creme and maraschino cherry garnishes right before you plan to serve the fudge. This prevents the marshmallow from sliding, melting, or absorbing into the fudge if it sits at room temperature, keeping your “floats” picture-perfect.
- Layer with Parchment for Stick-Free Storage: To prevent individual fudge pieces from sticking together, whether you’re storing them in the fridge or freezer, always place a layer of parchment or wax paper between them in an airtight container.
- Don’t Skip Trimming the Edges: Trimming the rough edges of the fudge block not only creates a more appealing, uniform presentation for your squares but also gives you a secret stash of “baker’s samples” to enjoy immediately or freeze for a quick future indulgence!
🌡️ Storage Solutions for Your Root Beer Float Fudge
Proper storage is essential to maintain the freshness and delightful texture of your homemade root beer float fudge. Here’s how to keep it at its best:
- Refrigeration: Store this root beer float fudge recipe in an airtight container in the refrigerator for up to 5 days. To prevent the individual pieces from sticking together, place a small piece of parchment paper or wax paper between each layer of fudge. For the best presentation, hold off on adding the marshmallow creme and maraschino cherry topping/garnish until just before you’re ready to serve. This ensures the toppings remain fresh and don’t sink or melt into the fudge.
- Freezing: This fudge recipe freezes exceptionally well, making it perfect for making ahead or enjoying later. Wrap the uncut fudge block tightly in plastic wrap, then a layer of aluminum foil, or store individual pieces (separated by parchment paper) in a freezer-safe airtight container or heavy-duty freezer bag. It can be frozen for up to 2-3 months. When you’re ready to enjoy, thaw the fudge in the refrigerator overnight. Again, add the marshmallow creme and maraschino cherry garnish only after the fudge has fully defrosted to maintain their ideal texture and appearance.
👪 Serving Size & Adjustments
This recipe, when cut into 4 rows of 4, yields a satisfying 16 servings of root beer float fudge. However, you have complete flexibility to adjust the serving size based on your needs. For smaller, bite-sized portions (perfect for a party platter or bake sale), you can cut the fudge into 5 rows of 5, which will give you 25 servings. This is ideal for those who prefer just a small taste of this delightful treat.
If you’re planning for a larger crowd or simply want to make more fudge, you can easily double or even triple the recipe. While the original recipe card might offer an automatic adjustment feature for ingredient quantities, remember that you will need additional 8×8 inch square pans to accommodate the increased volume of fudge. Using multiple pans ensures each batch sets properly and evenly. Consider how you’ll present them; serving in individual cupcake liners always adds a charming touch!
❔ Your Root Beer Float Fudge Questions Answered: Recipe FAQs
Absolutely! This recipe is specifically designed to be made *without a candy thermometer*. The key to its success lies in following the boiling and stirring times precisely. Use a reliable timer to ensure you boil the mixture for the full 10-12 minutes and then stir it vigorously for exactly 4 minutes off the heat. Adhering to these timings will guarantee your fudge reaches the perfect consistency without any special equipment.
If your fudge turned out too soft or didn’t set as expected, the most common reason is that the sugar, butter, and milk mixture was undercooked. It’s vital to bring it to a rapid, rolling boil and then continue cooking and stirring constantly for the full 4 minutes *after* it reaches that boil. Additionally, ensure you don’t skip the crucial cooling step for the full mixture before you proceed to swirl in the vanilla portion. Undercooking prevents the sugar from reaching the proper crystal structure needed for setting.
This root beer float fudge is an excellent make-ahead treat! You can prepare it up to 2 weeks in advance and store it in the freezer without the marshmallow creme and cherry topping. When you’re ready to serve, simply thaw the fudge in the refrigerator a day before your event. Just before presenting, add the fresh dollops of marshmallow creme and the vibrant maraschino cherries for that perfect “float” look and taste.
No, it is highly recommended not to use actual root beer soda. Root beer soda will not provide the necessary flavor intensity required for the fudge, and its high liquid content will significantly alter the fudge’s delicate chemistry, preventing it from setting correctly. For the best result and authentic root beer flavor, it’s crucial to use a concentrated form like root beer extract or, preferably, root beer concentrate.
An 8 or 9-inch square baking pan works best. Metal pans conduct heat more evenly and cool faster, which is beneficial for fudge setting. Always line it with parchment paper for easy removal, leaving an overhang on the sides.
If you’re a devoted fan of root beer or cherish the memory of a classic root beer float, then treating your taste buds to this unique and easy root beer fudge is an absolute must. It’s a delightful journey back to simpler times, packed into every creamy, flavorful square.
More Delicious Bake Sale & Everyday Treats
- Mini Cherry Cheesecakes (with Oreo crust)
- Matrimonial Cake (Date Slice)
- Whipped Shortbread Cookies (with cornstarch)
- Healthy Apricot Sunflower Rice Krispie Treats
Did your family ❤️ this recipe? Did you know that commenting and ⭐rating recipes is one of the best ways to support your favorite recipe creators? If you LOVED this recipe, please comment and rate it in the recipe card or share photos on social media using the hashtag #foodmeanderings or tagging @foodmeanderings ! Your feedback helps other home cooks discover delicious new treats!
Easy Root Beer Float Fudge Recipe
This Easy Root Beer Float Fudge is a decadent and indulgent dessert that combines the classic flavors of root beer and vanilla ice cream in a rich and creamy fudge. This Root beer fudge recipe captures the sweet, nostalgic taste of root beer floats but in the form of candy! It’s also easy and fun to make and a huge hit at bake sales!
Course: Dessert, Snack
Cuisine: American, Canadian, North American
Special Diet: Vegetarian
Servings: 16 servings
Calories: 386 kcal
Author: Terri Gilson
Prep Time: 15 minutes
Setting Time: 1 hour
Total Time: 1 hour 15 minutes
Equipment
- 8×8 square pan
- Spatula
- Trivets
- Saucepan
Ingredients
Fudge Base
- ¾ cup unsalted butter, divided
- 3 cups white granulated sugar
- 5 oz evaporated milk (2%) – about ½ a can
- 1 package white chocolate baking chips (8 oz / 225 g)
- 14 ounces marshmallow creme (from 2 – 7 ounce containers)
- ½ teaspoon vanilla extract
- 2 teaspoons root beer flavor (concentrate)
Garnish
- Marshmallow creme (remaining ½ container of marshmallow creme)
- Maraschino cherries (with stems, if possible)
Instructions
- Line an 8 or 9-inch square baking pan with parchment paper, leaving an overhang on the sides for easy lifting.
- In a large, heavy saucepan, combine the sugar, evaporated milk, and butter.
- Bring the mixture to a rapid boil over medium heat, stirring constantly. This will take approximately 10-12 minutes.
- Continue to cook and stir constantly for exactly 4 minutes. Remove the pot from the heat.
- While removed from heat, immediately stir in the white chocolate chips and 1.5 containers (1 ½ containers) of marshmallow creme. Reserve the remaining ½ container of marshmallow creme for topping/garnish.
- Stir the mixture until all the chocolate chips are melted and everything is smoothly combined. Do NOT return to heat.
- Pour one-third of the fudge mixture into a small separate bowl; stir in the vanilla extract until well incorporated.
- Add the root beer concentrate to the remaining two-thirds of the fudge mixture in the saucepan and stir until fully combined.
- Immediately spread the root beer-flavored portion of the fudge evenly into the prepared pan. Work quickly as the fudge sets fast.
- Drop spoonfuls of the vanilla mixture over the root beer layer. Using a knife or spatula, gently swirl the vanilla into the root beer fudge to create a marbled effect.
- Refrigerate the fudge for at least 1 hour, or until it is completely firm.
- Using the parchment paper as handles, lift the set fudge out of the pan and place it on a clean cutting surface.
- Remove the parchment paper and trim off any rough or uneven edges for a cleaner presentation. (These trimmed edges are delicious and can be enjoyed immediately or saved!)
- Cut the fudge in half, then proceed to cut it into 1-inch squares. You can cut 4×4 for 16 pieces, 4×5 for 20 pieces, or even 5×5 for 25 pieces, depending on your desired serving size.
- Just before serving, garnish each fudge square with a small dollop of the reserved marshmallow creme and top with a maraschino cherry. Serving in cupcake liners adds a nice touch.
Notes
Storage:
Store this root beer float fudge recipe in an airtight container in the fridge for up to 5 days. Place pieces of parchment paper (or wax paper) between layers to prevent sticking. For the freshest appearance, add the marshmallow creme and maraschino topping/garnish just before serving.
This fudge recipe freezes wonderfully. Wrap it tightly or store in a freezer-safe container for up to 2-3 months. When ready to enjoy, thaw in the refrigerator, and then add the marshmallow creme and maraschino cherry garnish once fully defrosted.
Expert Recipe Tips:
- Use root beer concentrate for bold flavor. Root beer extract works in a pinch, but concentrate gives the deepest, most authentic root beer float taste.
- Don’t overheat after adding chocolate and marshmallow creme. Once you add the white chocolate chips and marshmallow creme, do not return the pot to the heat. This can cause the mixture to seize or become grainy.
- Timing is everything. Boil the sugar mixture for the full 10-12 minutes, then stir vigorously for exactly 4 minutes off the heat. This timing is key to achieving the perfect creamy texture.
- Work quickly once flavors are added. The fudge begins to set fast. Have your pan prepared in advance and add the root beer and vanilla mixtures promptly so they swirl easily.
- Use parchment paper with overhang for easy removal. This makes lifting the fudge out of the pan a breeze and ensures cleaner cuts.
- Heat your knife for clean cuts. Run a sharp knife under hot water and wipe it dry before slicing the fudge. This helps make neat, smooth cuts, especially important if you’re making it for a bake sale.
- Decorate just before serving. Add the marshmallow creme and cherry garnish at the last minute for the freshest appearance and to prevent sliding or melting if the fudge warms slightly.
- Store between parchment layers. To keep pieces from sticking together in the fridge or freezer, store them with parchment or wax paper between layers.
- Don’t skip cutting off the edges. Trimming the edges not only improves presentation but gives you a little stash of “baker’s samples” to snack on or freeze for later.
Nutrition Information
Serving: 1 square | Calories: 386kcal (19%) | Carbohydrates: 68g (23%) | Protein: 2g (4%) | Fat: 14g (22%) | Saturated Fat: 9g (56%) | Polyunsaturated Fat: 0.5g | Monounsaturated Fat: 4g | Trans Fat: 0.3g | Cholesterol: 28mg (9%) | Sodium: 24mg (1%) | Potassium: 71mg (2%) | Fiber: 0.03g | Sugar: 62g (69%) | Vitamin A: 291IU (6%) | Vitamin C: 0.2mg | Calcium: 54mg (5%) | Iron: 0.1mg (1%)