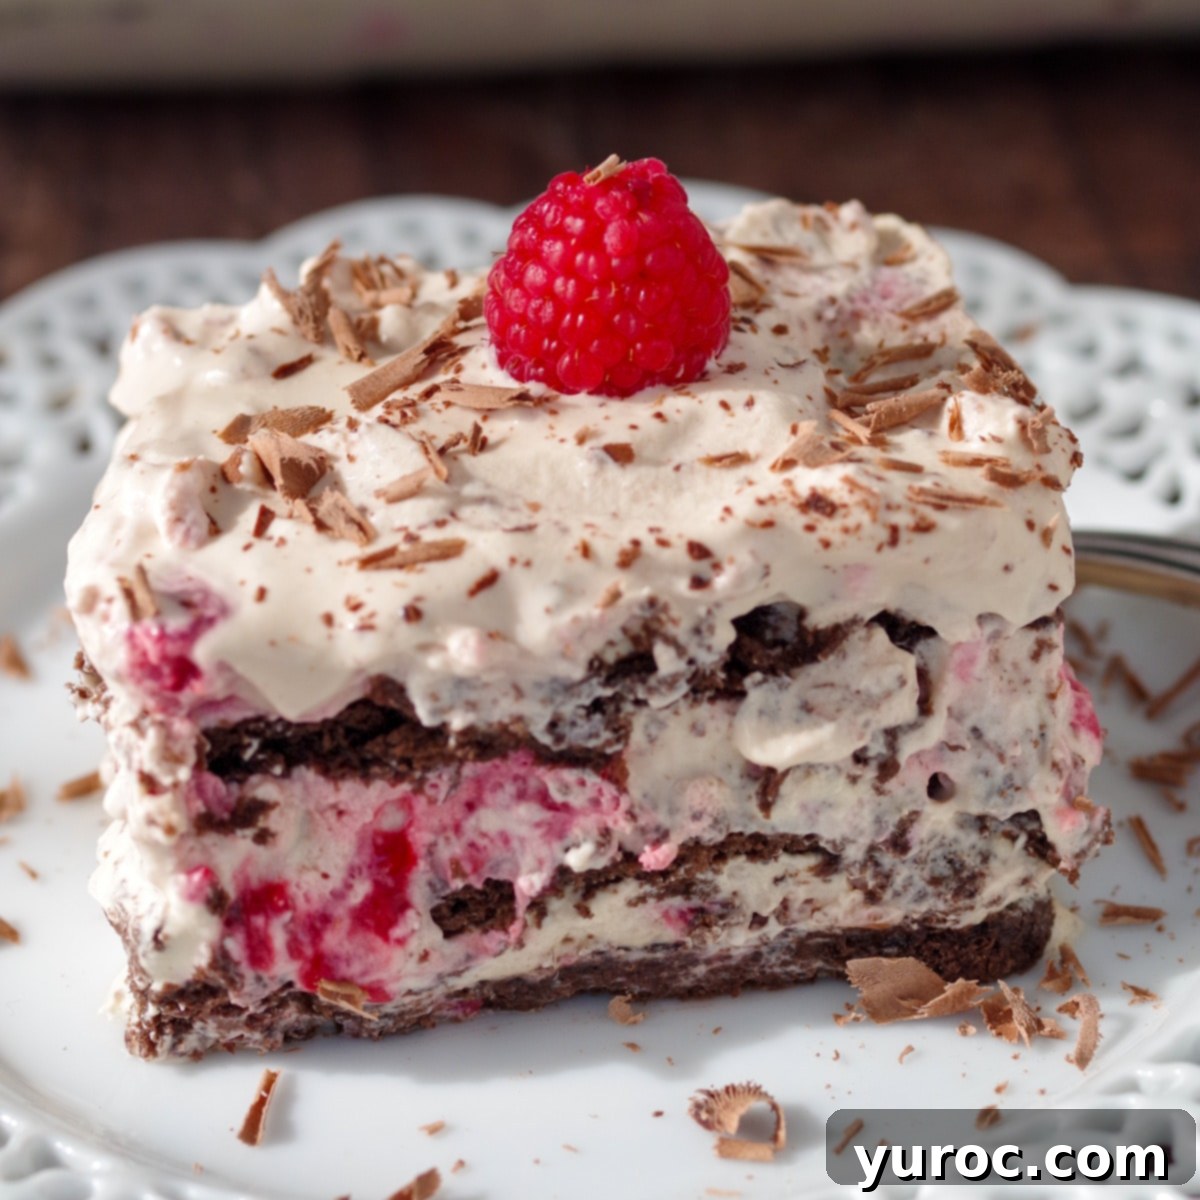
No-Bake Raspberry Chocolate Dulce de Leche Icebox Cake: Your Ultimate Easy Summer Dessert
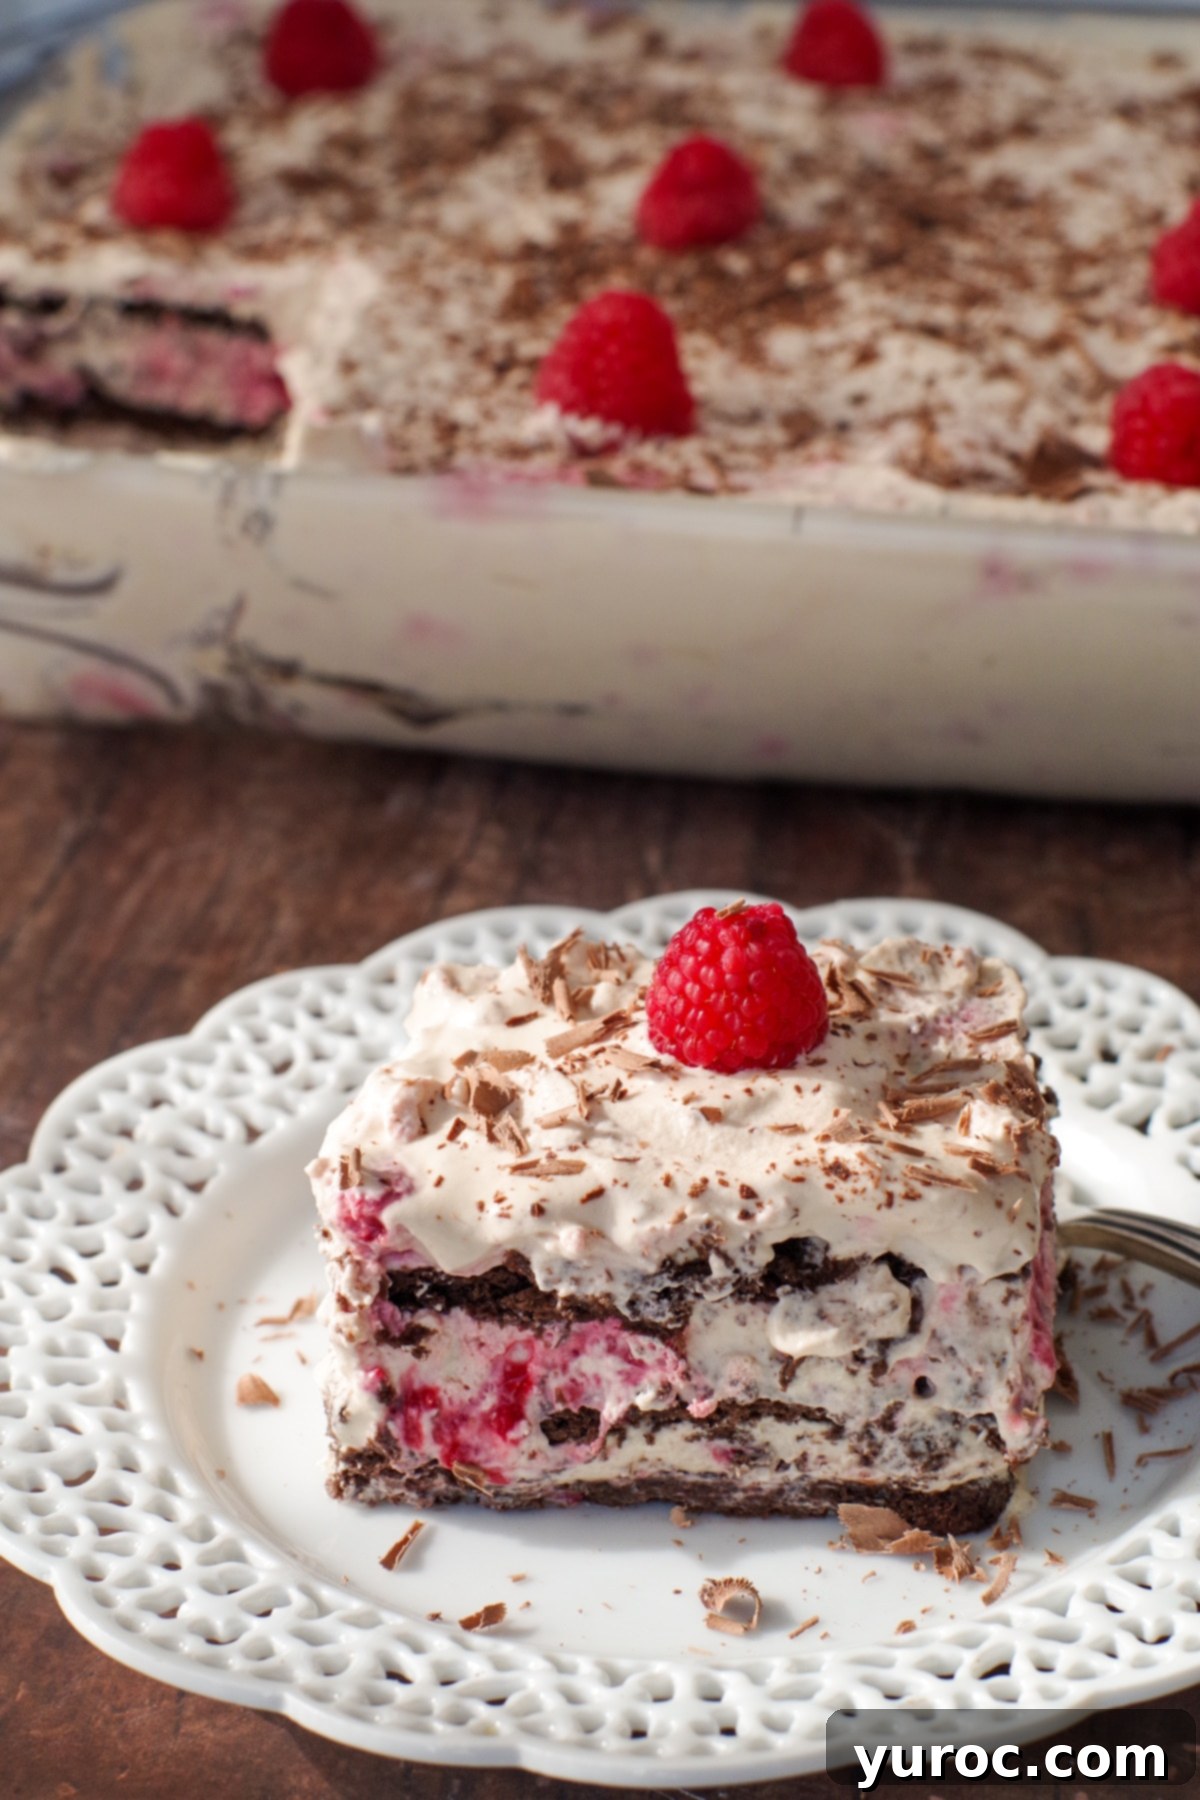
Summer family traditions are the best, and for us, that often means berry picking! This past summer, my family and I embarked on our annual raspberry picking adventure, and as always, it was an incredibly rewarding and delightful experience. There’s something truly special about gathering fresh, ripe berries directly from the bush, especially when you know they’ll transform into a spectacular treat. And what better way to celebrate a successful harvest than with a sensational dessert? This **Raspberry Chocolate Dulce de Leche Icebox Cake** is the exquisite creation born from that very outing.
Crafted with layers of delicate Oreo cookie thins, a luscious whipped cream infused with dulce de leche and fresh raspberries, and adorned with chocolate shavings, this no-bake summer berry icebox cake is a dream come true. The best part? It comes together in approximately 15 minutes of active preparation time, making it the perfect fuss-free dessert for any occasion, from casual family dinners to grand summer gatherings. Whether you’re using freshly frozen berries from your own garden or convenient store-bought options, this recipe promises an unforgettable taste experience.
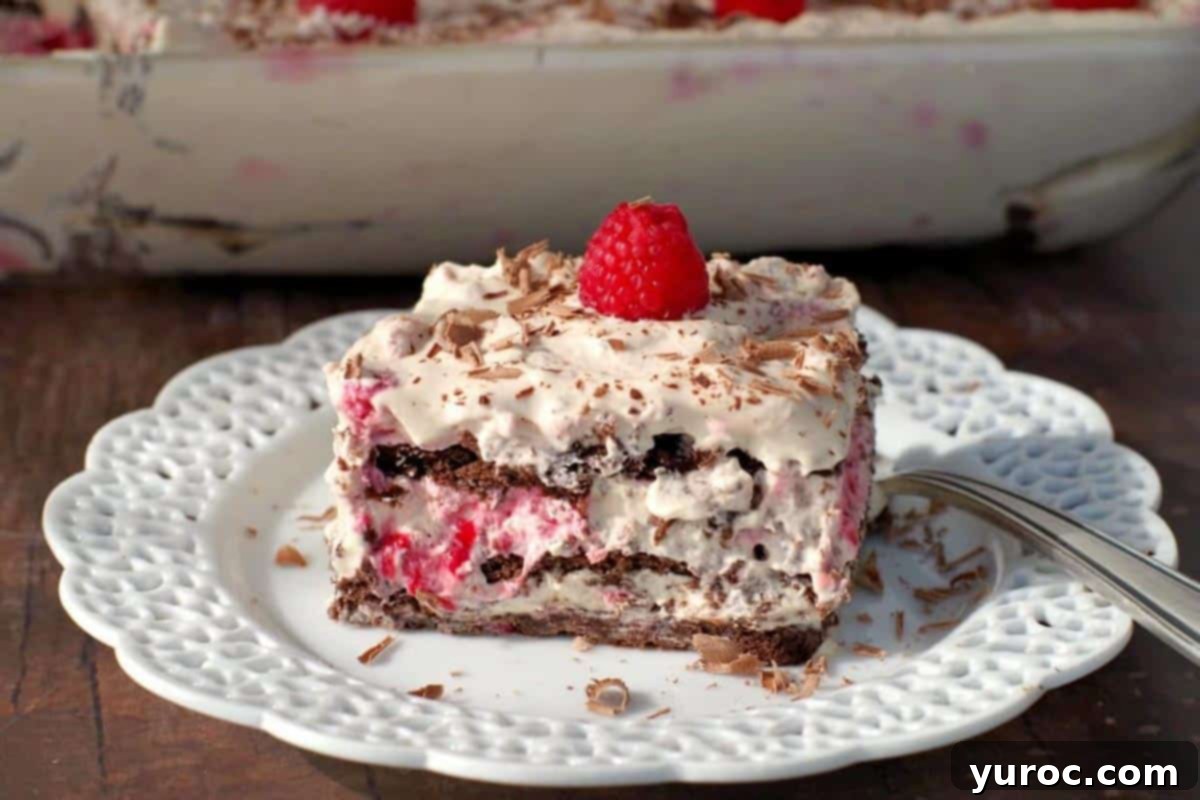
Having picked an abundant supply of raspberries, I froze them immediately to preserve their peak freshness. This Raspberry Chocolate Icebox Cake provided the ideal solution for utilizing those frozen berries. It’s not just an easy dessert; it’s arguably the best summer raspberry cake, offering an unbelievably rich and satisfying flavor profile with minimal effort. Made with only a handful of readily available ingredients, you’ll be astonished by its simplicity and depth of taste. The inspiration for this delightful treat comes from my popular Raspberry Tiramisu Tarts, guaranteeing a similarly impressive outcome.
🍒 Reader Review: A Five-Star Indulgence
“This was amazing!!! I love chocolate desserts, but I often find them too sweet. I was so surprised how easy this one went down. It was smooth, chocolatey, light, and left everybody wanting more.”⭐⭐⭐⭐⭐
🥘 Essential Ingredient Notes for Your Icebox Cake
Crafting the perfect icebox cake hinges on selecting the right ingredients. Unfortunately, some of the classic staples for icebox cakes, like chocolate graham crackers and Nabisco chocolate wafers, have been discontinued. This presented a creative challenge, but thankfully, excellent alternatives exist to ensure your no-bake dessert is just as delicious.
My preferred workaround for the cookie base is to use Oreo Thins. You can split them and gently scrape out the filling, or for an even easier approach, use them as is (though this will result in a sweeter cake). Another fantastic option, if you can find them, are Goya Foods Chocolate Maria Cookies, which offer a delightful crunch and chocolate flavor. However, their availability can vary by region.
For this divine summer raspberry cake, gather the following key ingredients:
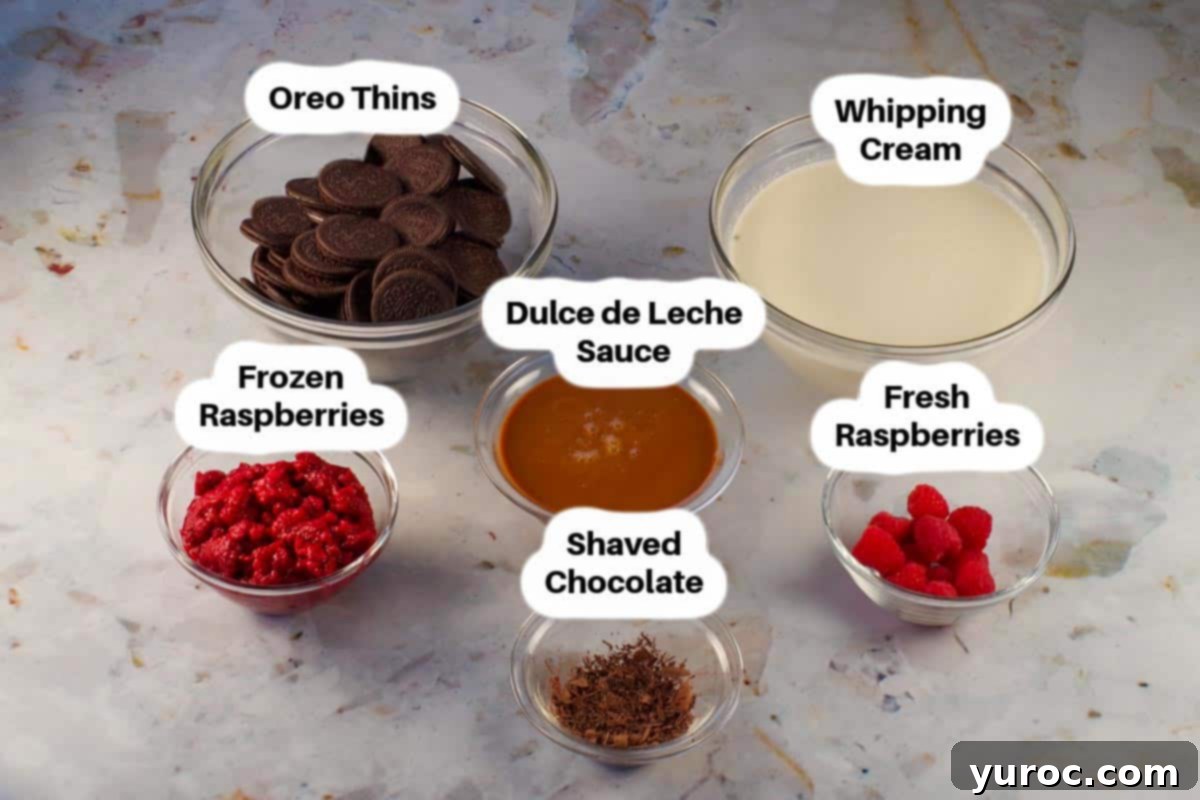
- Dulce de Leche Sauce: This thick, sweet, caramel-like sauce is traditionally made by slowly heating sweetened milk. To streamline the process, I highly recommend using canned dulce de leche, such as Eagle Brand, which you’ll typically find in the baking aisle next to condensed milk. If you purchase a 14 oz can, remember you’ll only need approximately 10 oz for this recipe; the remainder can be frozen for future use. Its rich, creamy texture and sweet flavor are crucial for the icebox cake’s unique character.
- Heavy Whipping Cream: Ensure your cream has a fat content of 33-36%. This higher fat content is essential for achieving stiff peaks when whipped, which provides the necessary structure and airy texture for the icebox cake. Cold cream whips best, so keep it chilled until ready to use.
- Frozen Raspberries: It’s important to measure the raspberries BEFORE you defrost and drain them. While both store-bought and fresh-frozen raspberries work beautifully, be aware that store-bought varieties might bleed their color a little more into the cream mixture. Freshly frozen raspberries tend to hold their shape better upon defrosting, offering a more vibrant visual appeal, as seen in the hero photos of this recipe, compared to the process photos where store-bought berries were used. Proper draining is key to prevent the cream from becoming watery.
- Oreo Thins: As mentioned, these are an excellent and widely available substitute for discontinued chocolate wafers or chocolate graham crackers. Their thinness allows them to soften perfectly into a cake-like consistency once refrigerated. You’ll want to gently split them and remove the cream filling to reduce sweetness and enhance the chocolatey flavor, though leaving the filling in is an option for a sweeter cake.
- Chocolate Shavings: A small amount of semi-sweet chocolate, about ¼ to ⅓ of a 1 oz square, is perfect for garnish. These add an elegant touch and a hint of extra chocolate flavor, making each slice even more enticing.
*Refer to the full recipe card below for precise quantities and additional details.
📖 Creative Variations & Smart Substitutions
This Raspberry Chocolate Dulce de Leche Icebox Cake is incredibly versatile, allowing for several creative twists and substitutions to suit your preferences or what you have on hand. Don’t be afraid to experiment!
- Raspberries: While frozen raspberries are ideal for their structural integrity and year-round availability, you absolutely can use fresh raspberries. However, keep in mind that fresh berries might release more moisture and could potentially smear more easily. If using fresh, consider gently patting them dry before folding into the cream. I personally prefer to freeze fresh raspberries after picking because they hold up exceptionally well in this recipe, maintaining their shape and flavor without turning mushy. If you’re short on berries, a good quality raspberry jam or preserve can also be used, though it will alter the texture and sweetness profile.
- Whipped Cream: For ultimate freshness and flavor, real whipped cream is unmatched. However, if convenience is your priority, you could opt for a store-bought whipped topping like Cool Whip. Be aware that Cool Whip is generally sweeter, so you might want to adjust the dulce de leche quantity slightly. I strongly advise against using aerosol spray whipped cream, as it lacks the stability required for an icebox cake and will quickly deflate, leaving your cake runny.
- Dulce de Leche: Store-bought dulce de leche offers fantastic convenience without compromising on flavor. Brands like Eagle Brand are widely available and deliver consistent results. For those who enjoy a culinary project, you can certainly make your own dulce de leche sauce from scratch. This typically involves slowly cooking sweetened condensed milk until it caramelizes into a rich, thick sauce, adding an extra layer of homemade goodness.
- Oreo Thins: The search for the perfect chocolate cookie base for icebox cakes can be tricky, especially with the discontinuation of many traditional wafers. Oreo Thins, with their delicate crunch, make an excellent replacement when split. For the adventurous baker, creating homemade chocolate wafers is a rewarding option. I specifically chose a slice-and-bake cookie recipe for its simplicity and use of common pantry ingredients. If baking isn’t an option, Goya Foods Chocolate Maria cookies (affiliate link) are a great pre-made alternative to Oreo Thins. Additionally, Lieber’s chocolate wafers are a good choice if you can find them, and they often come with gluten-free options. For a different flavor twist, consider using Nabisco plain or cinnamon graham crackers; they’ll create a delicious icebox cake with a slightly different spice profile.
- Chocolate: For the chocolate shavings garnish, you can use any plain dark, semi-sweet, or milk chocolate bar that you prefer. The type of chocolate will subtly influence the overall flavor, so choose one that complements the raspberries and dulce de leche.
🔪 Step-by-Step Guide: Crafting Your Easy Chocolate Raspberry Icebox Cake
Making this delightful icebox cake is surprisingly simple, but remember, the magic happens during the chilling process. So, a little patience is key!
Heads up! There is an 8-hour refrigeration time required for this icebox cake to properly set and achieve its perfect cake-like texture. Plan accordingly!
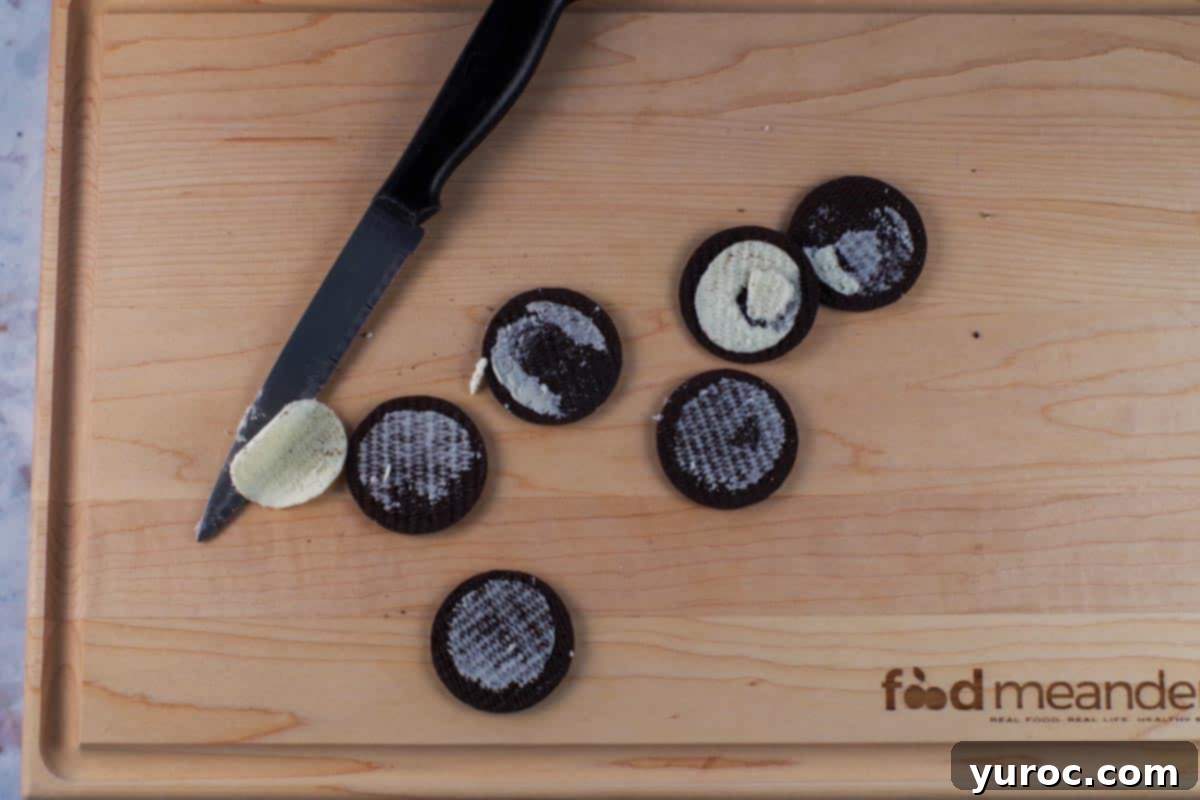
- Step 1: Prepare the Oreo Thins. Carefully cut each Oreo Thin cookie in half and gently scrape out the white cream filling from the middle. This step takes a bit of time and requires a delicate touch to prevent the cookies from breaking. For convenience, I often complete this step the night before. While broken pieces can still be used and hidden within layers, having whole, round cookie halves makes for a neater presentation. Alternatively, you can choose to leave the frosting in the middle and use the cookies as is, eliminating the need for double layers of cookies, but this will result in a noticeably sweeter cake.
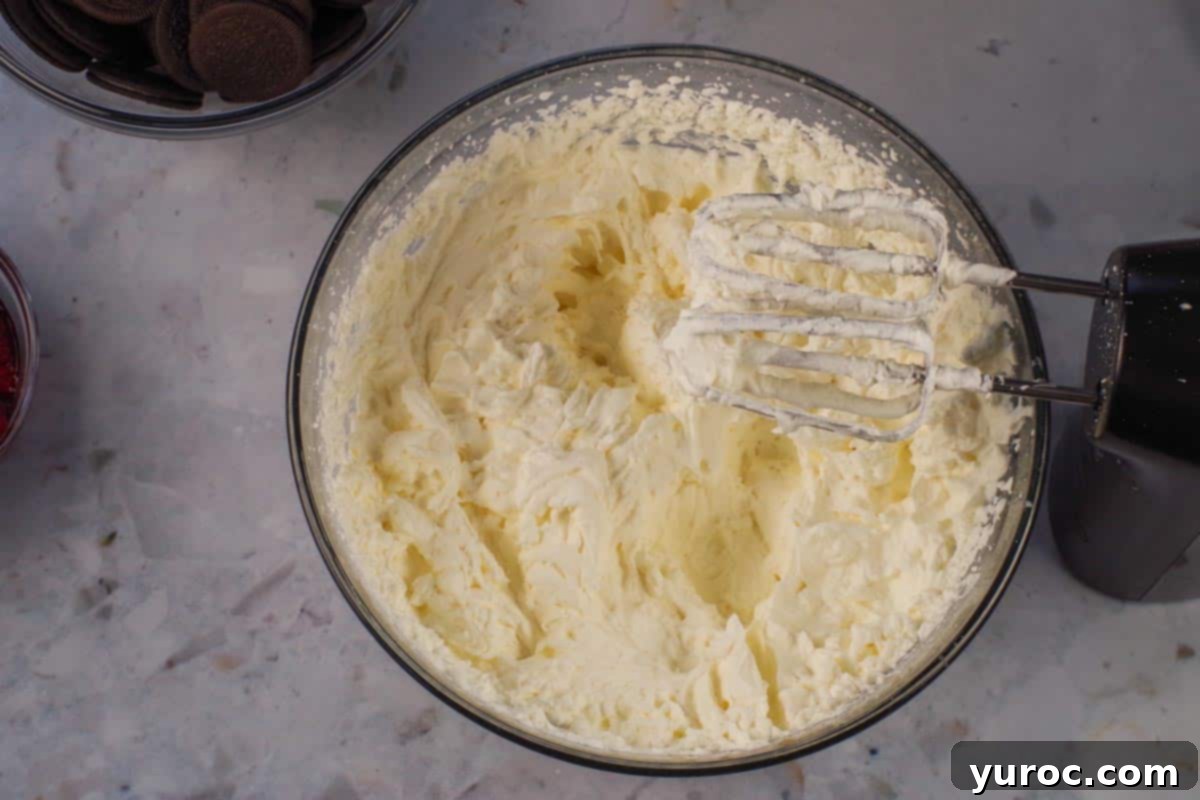
- Step 2: Whip the Cream. In a large, chilled mixing bowl, whip the heavy whipping cream until stiff peaks form. You can use an electric mixer or a stand mixer with a whisk attachment. Stiff peaks mean the cream holds its shape firmly when the beaters are lifted. Avoid over-whipping, as it can quickly turn into grainy butter. For a visual guide, watch this helpful video: **🎥 Video:** How to whip whipping cream to stiff peaks.
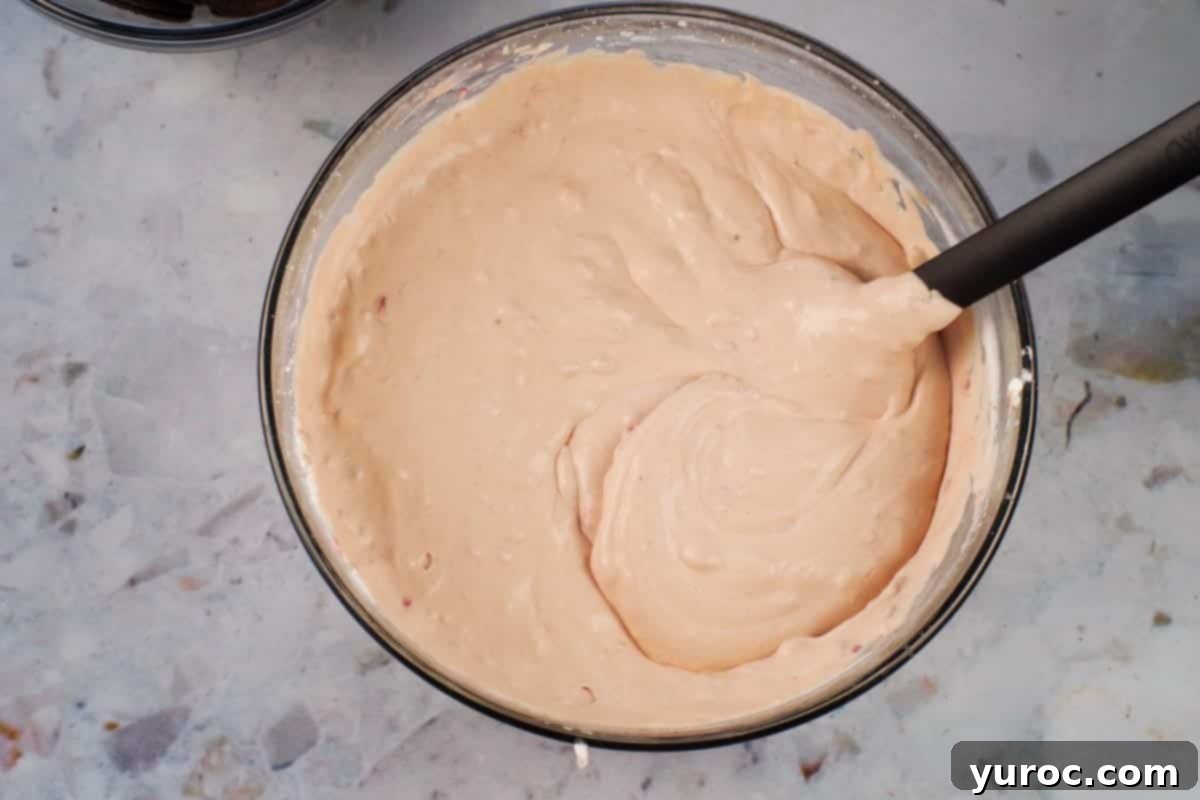
- Step 3: Fold in Dulce de Leche and Raspberries. Gently fold the entire can of dulce de leche sauce and the defrosted, well-drained raspberries into the whipped cream. Use a spatula and a light hand to combine them thoroughly without deflating the airy whipped cream. The goal is a beautifully marbled, creamy mixture with visible raspberry pieces.
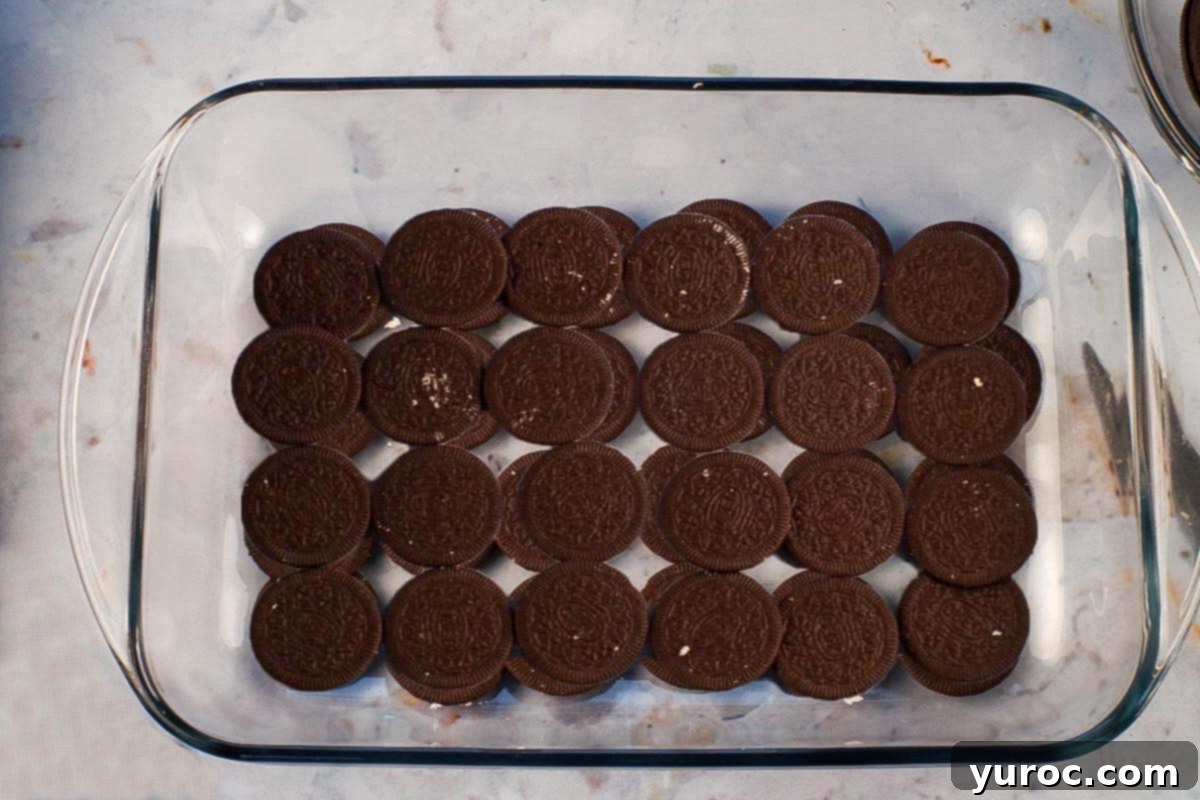
- Step 4: Create the First Cookie Layer. Arrange a double layer of the prepared chocolate cookie halves on the bottom of a 9 x 13-inch baking dish. This will use approximately one-third of your total cookies. I particularly love using a glass 9×13 dish with a lid, as it’s not only the perfect size for serving but also ideal for transporting to potlucks or BBQs. Ensure an even base, filling in any small gaps with broken cookie pieces if necessary.
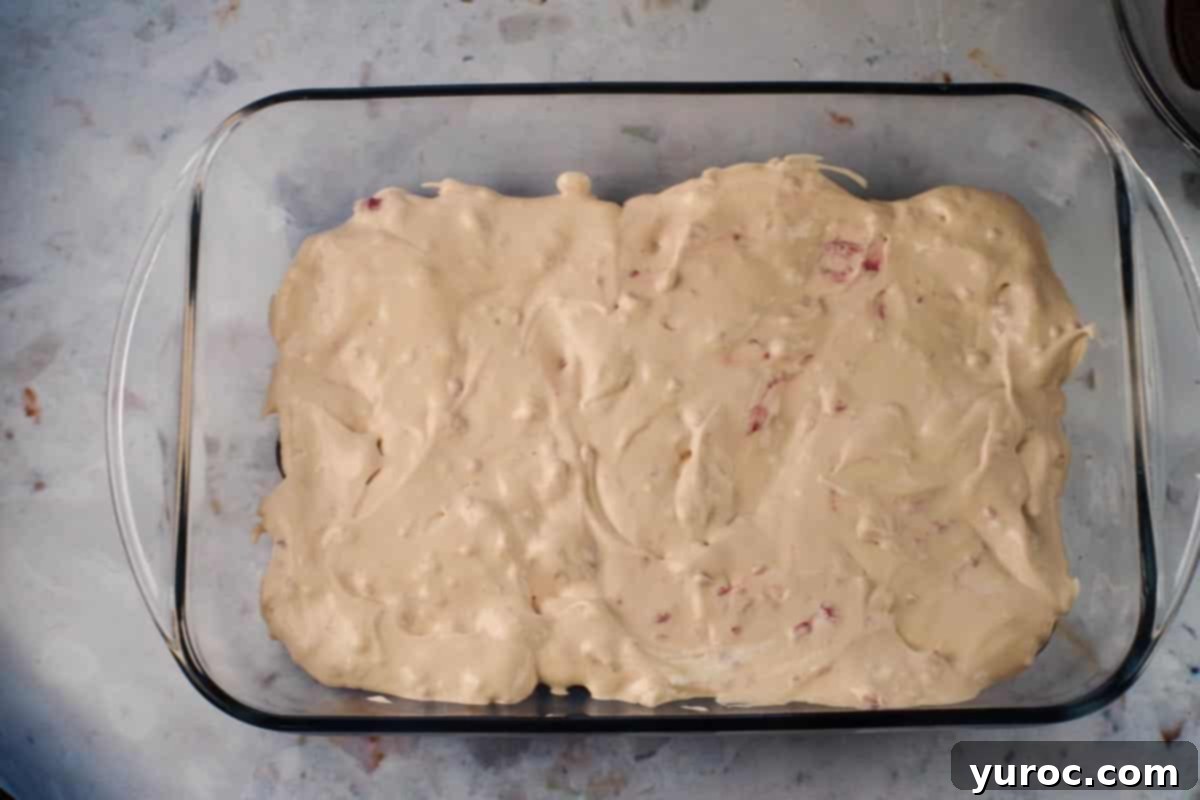
- Step 5: Add the First Cream Layer. Carefully spread one-third of the dulce de leche raspberry whipped cream mixture evenly over the first layer of chocolate cookies. Distribute it gently to avoid disturbing the cookie base.
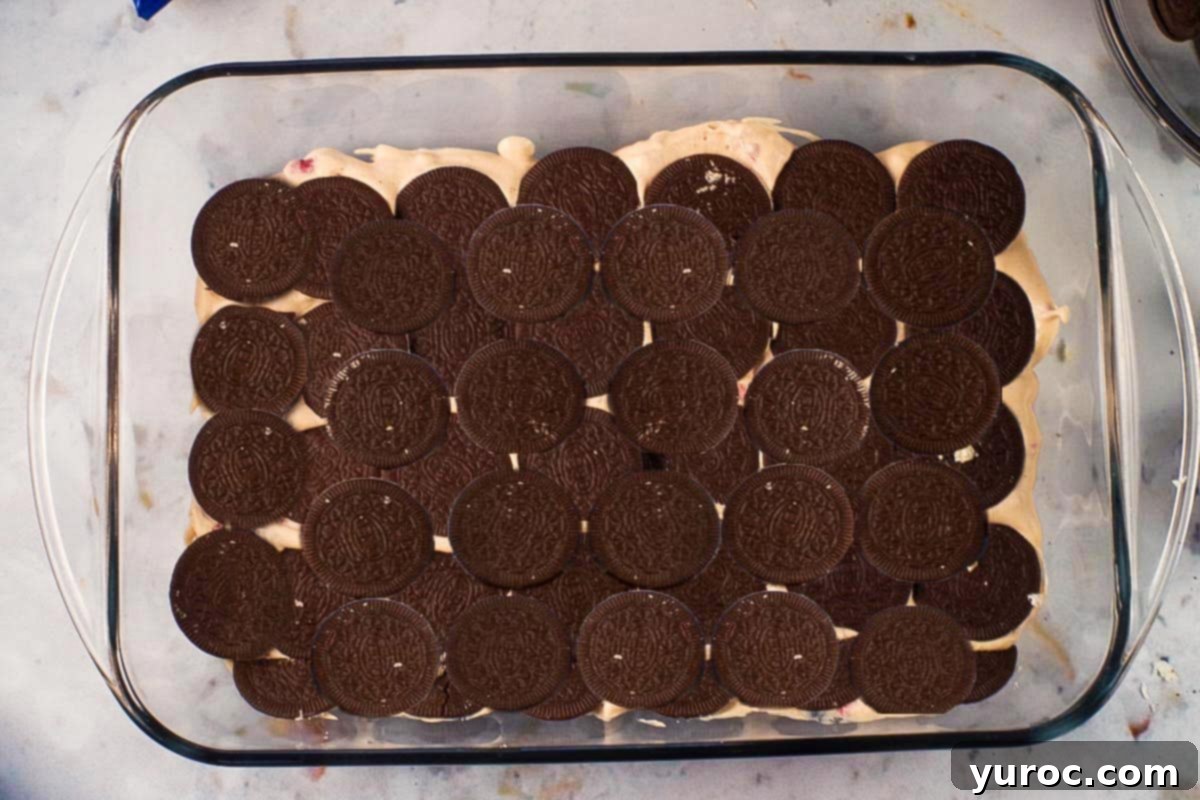
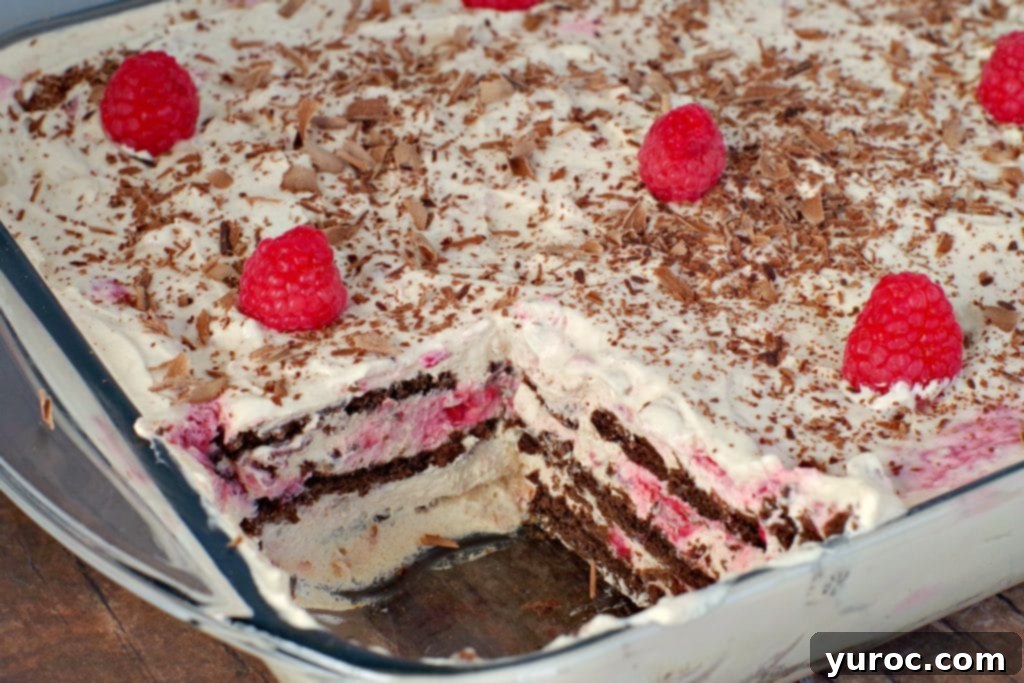
- Step 6: Add the Second Cookie Layer. Place another double layer of the remaining chocolate cookies (approximately one-third of your total cookies) over the first whipped cream layer. Try to stagger them slightly, placing them between the gaps of the cookies below, as shown in the image, to create a more integrated structure. Perfection isn’t necessary; broken pieces work perfectly well here.
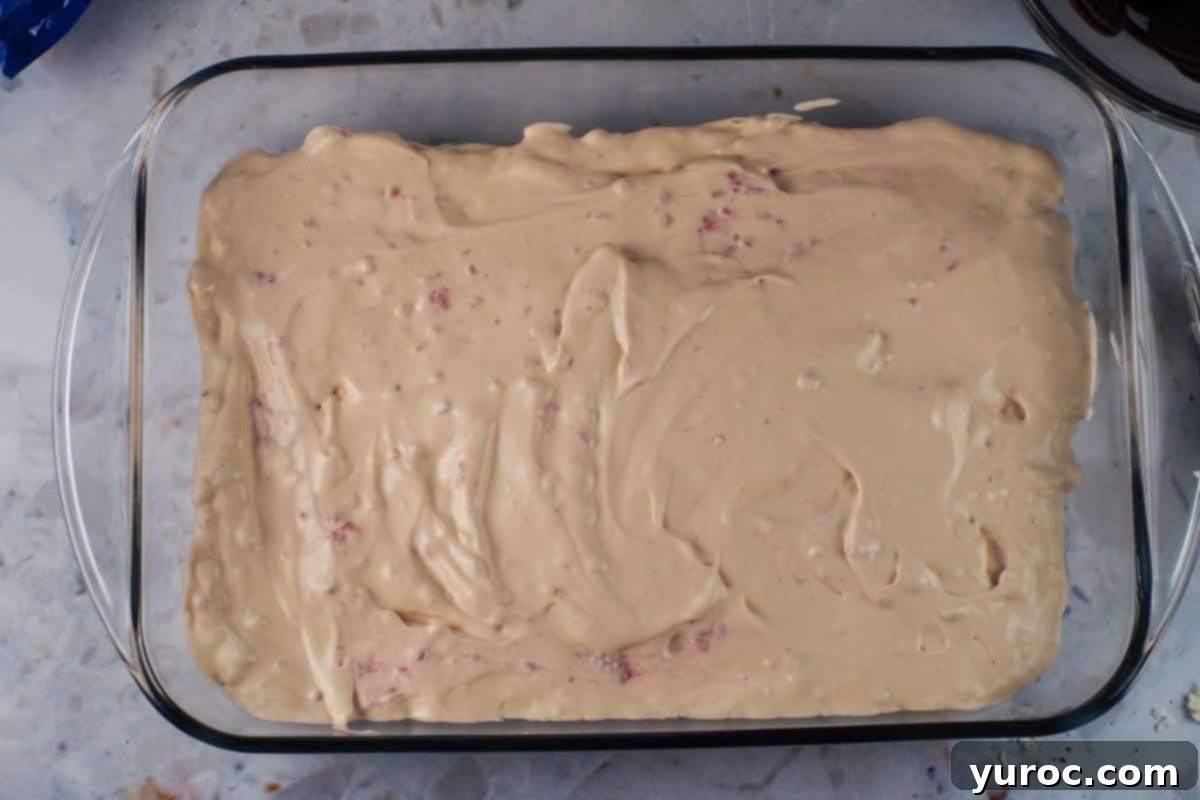
- Step 7: Add the Second Cream Layer. Spread half of the remaining whipped cream mixture evenly over the second cookie layer. Take your time to create a smooth, consistent layer.
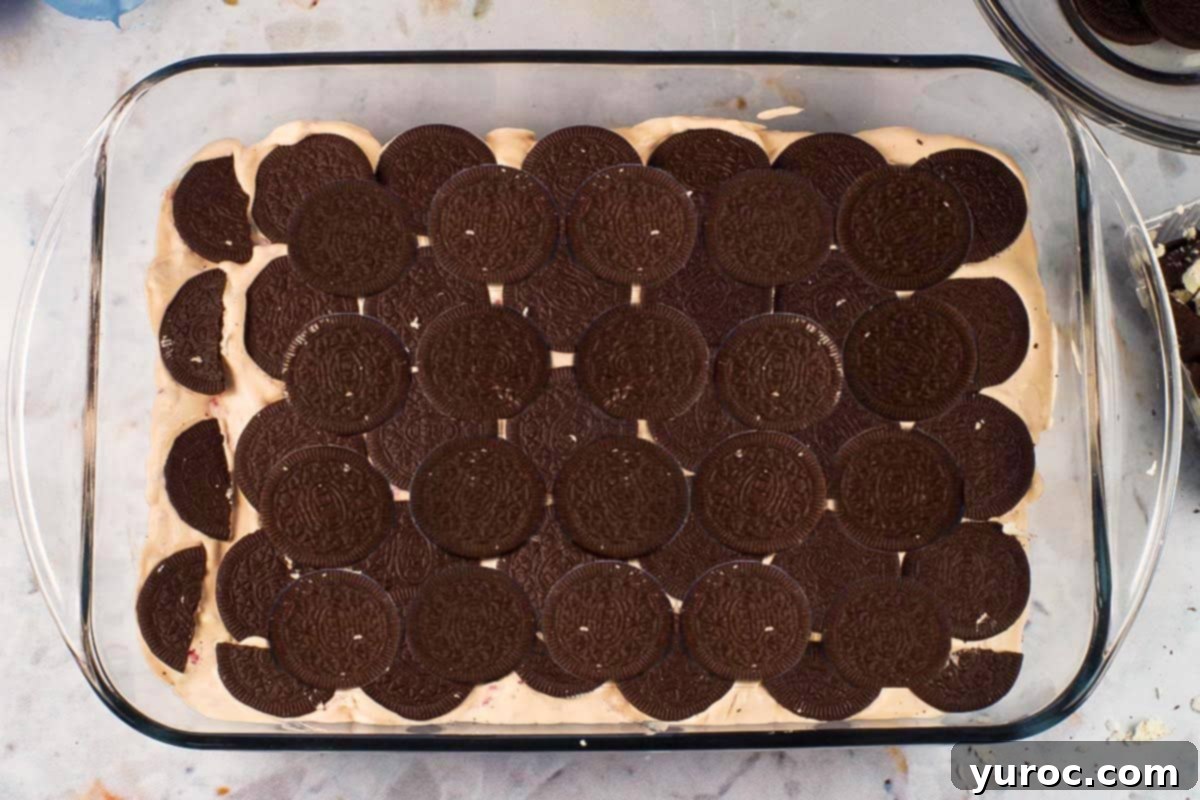
- Step 8: Place the Final Cookie Layer. Add the final double layer of cookies (the last one-third of your cookies) on top of the second whipped cream layer. Again, try to arrange them to fill gaps and create an appealing pattern.
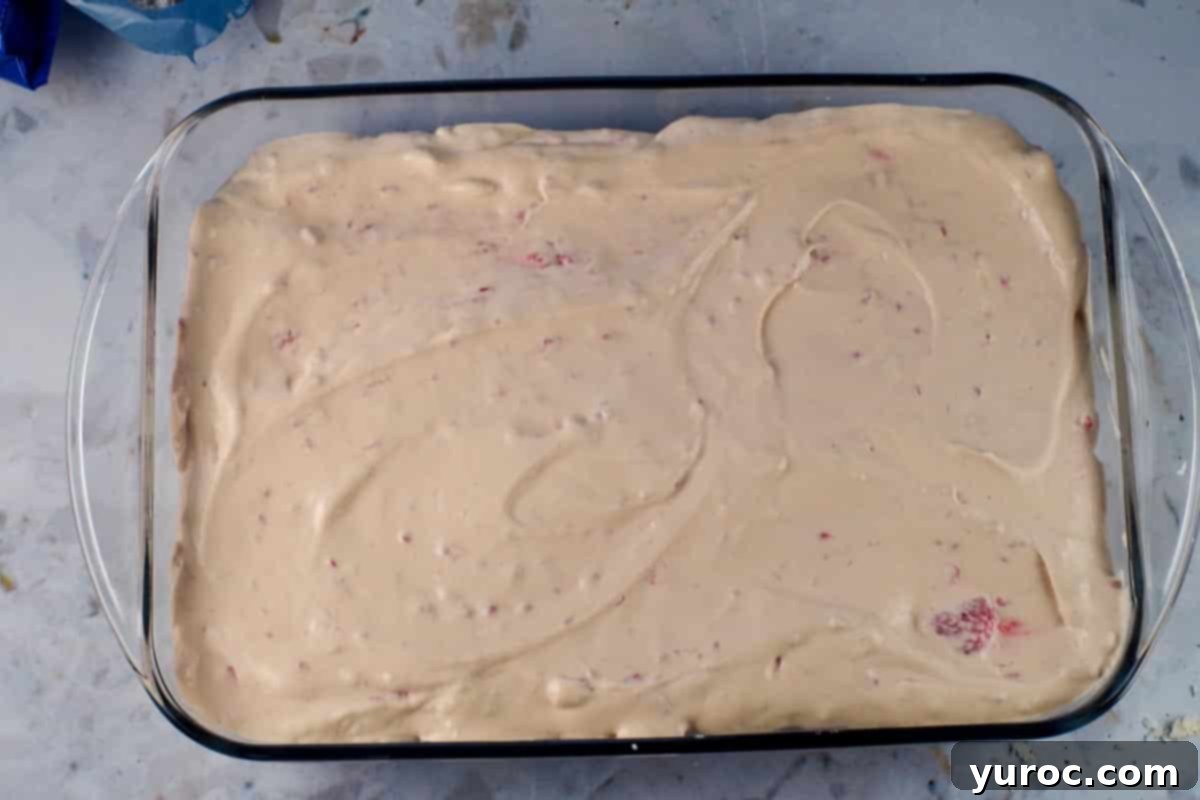
- Step 9: Finish with Cream and Refrigerate. Spread the remaining whipped cream mixture over the final layer of cookies, ensuring the top is smooth and even. Now, the most crucial step: refrigerate the cake for at least 8 hours, preferably overnight. This extended chilling time allows the cookies to soften, absorbing moisture from the cream and transforming into a tender, cake-like consistency. You can prepare it up to 48 hours in advance for maximum flavor development and ease.
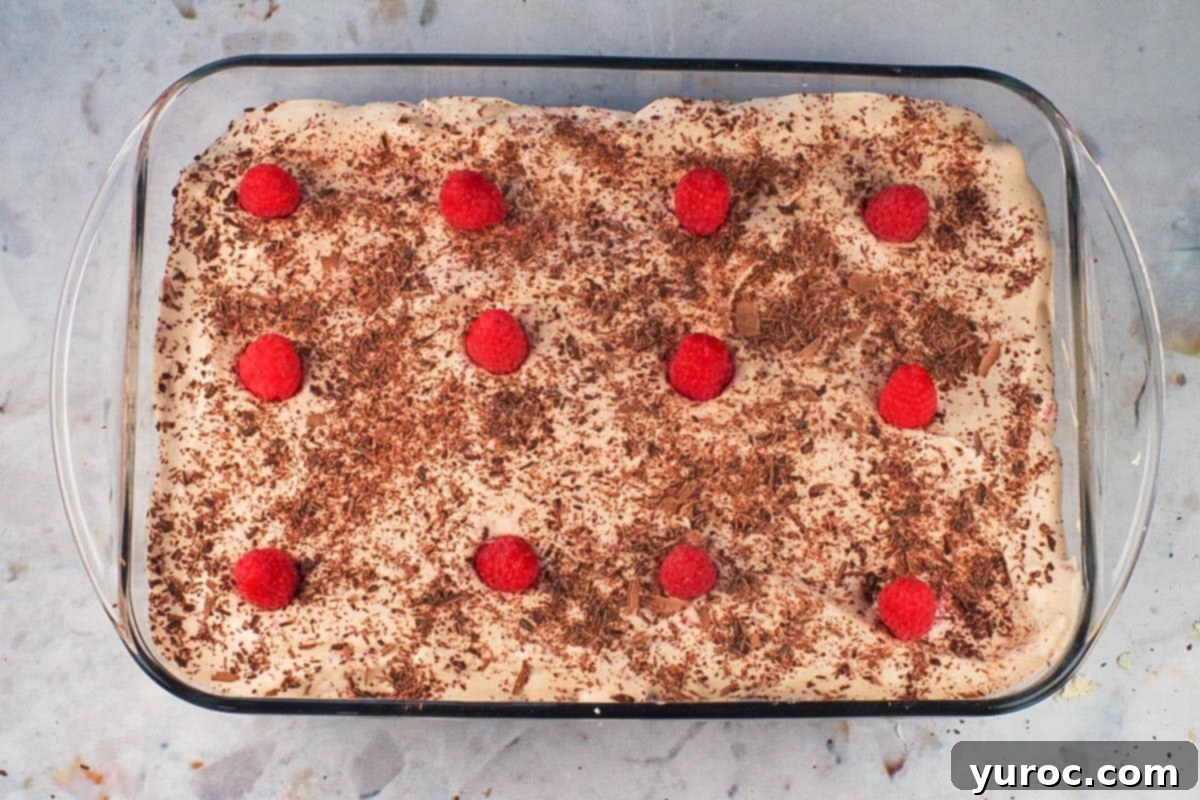
- Step 10: Garnish and Serve. Just before serving, generously sprinkle grated chocolate over the top of the chilled icebox cake. Then, artfully arrange fresh raspberries to complete the presentation. The contrast of the fresh berries against the chocolate and creamy topping is visually stunning and adds a burst of freshness with every bite.
PRO TIP for Grating Chocolate:
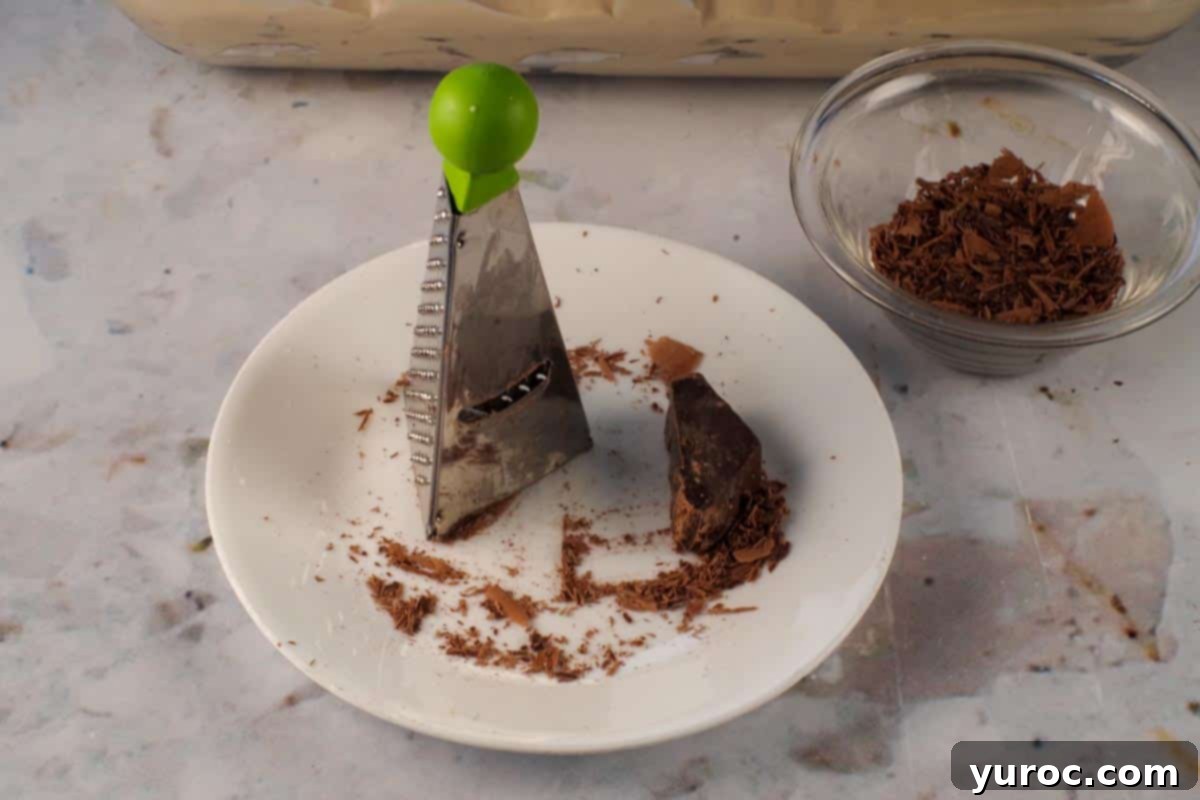
To achieve elegant chocolate shavings for garnish, I find that using the slicing side of a mini grater works wonders. Alternatively, a regular box grater can be used – just exercise caution, as the blades are sharp and you might need to apply firm pressure, making it easy for the chocolate to slip. For larger, more dramatic chocolate pieces or curls, a vegetable peeler or the coarser grating side of a box grater will give you excellent results. Experiment to find your preferred look!
✅ Expert Recipe Tips for Icebox Cake Perfection
Achieving the perfect texture and flavor for your Raspberry Chocolate Dulce de Leche Icebox Cake is simple with these expert tips:
- Whip Your Cream to Stiff Peaks: The secret to a stable icebox cake lies in perfectly whipped cream. Cold is absolutely key! Always use cold heavy whipping cream (with 33-36% fat content). For an extra boost, chill your mixing bowl and beaters in the freezer for 10-15 minutes before you start whipping. Ensure you don’t under-whip, as runny cream will make your cake too soft and unstable. Conversely, stop immediately once stiff peaks form; over-whipping can cause the cream to become grainy or even turn into butter.
- Use the Right Cookies: The choice of cookies significantly impacts the final texture. If traditional chocolate wafers are unavailable, Oreo Thins (split and de-iced) are an excellent, readily available alternative. The thinness of the cookies is crucial as it allows them to soften properly when absorbing moisture from the cream, creating that desirable cake-like consistency. If your chosen cookies feel too thick, you can lightly and quickly dunk them in milk for just a second before layering to help them soften more effectively.
- Drain Raspberries Well: This is a critical step, especially if you’re using frozen raspberries. Measure your raspberries before defrosting and draining. If the raspberries are too wet, the excess moisture will make your cream mixture runny, and the raspberry flavor might become overpowering, disrupting the balance with the dulce de leche and chocolate. After defrosting, gently press out any excess moisture using a paper towel or a clean kitchen towel to ensure a thick, flavorful cream.
- Layering Matters: When assembling your icebox cake, resist the urge to press down on the layers too hard. You want to maintain a light, airy texture, not a dense, compacted cake. When arranging your cookies, try to stagger them slightly so they overlap. This technique helps prevent large gaps in the cake when sliced, ensuring each piece is uniformly delicious.
- Chill Overnight for Best Texture: Patience truly is a virtue when it comes to icebox cakes! They require ample time to set, allowing the cookies to fully absorb the moisture from the whipped cream and transform into a tender, cake-like consistency. Refrigerate your cake for at least 8 hours, and ideally, overnight. If you’re really in a rush, you can speed up the process by chilling it for a minimum of 4 hours, but remember, the longer it chills, the better and more cohesive the texture will be.
- Avoid Overmixing the Filling: When combining the dulce de leche, whipped cream, and raspberries, always remember to fold, don’t stir! Gently folding the ingredients together helps to keep the whipped cream light and fluffy. Overmixing will deflate the air you’ve carefully whipped into the cream, resulting in a denser, less appealing filling.
My family was absolutely enamored with this Dulce de Leche Icebox Cake. Every single person requested seconds, and it disappeared far too quickly! I can personally attest to its addictive quality—I would have gladly devoured the entire thing myself if I could have. Its light yet rich profile makes it a standout dessert that will surely be a hit with everyone.
🌽 What to Serve with Dulce de Leche Icebox Cake?
This delightful Dulce de Leche Icebox Cake is a wonderfully light and refreshing dessert, making it the perfect finish to a variety of meals, especially during spring and summer. My family particularly appreciated its lightness after enjoying a hearty BBQ spread. On that occasion, we paired it with succulent steak, my easy 3-ingredient Onion Soup Mix Baked Potatoes, flavorful Mexican grilled corn on the cob (elote), and a vibrant Strawberry Spinach Pecan salad. Each dish complemented the others beautifully, creating a memorable feast.

Its versatility means it pairs exceptionally well with any festive spring or summer meal. Consider serving it after a holiday gathering featuring Easter Picnic Ham and a comforting Carrot Casserole. Alternatively, for a more casual setting, this cake is a fantastic complement to grilled dishes. Imagine it alongside my Healthy Mexican Street Corn Pasta Salad (pictured above), and grilled Marinated Grilled Maple Pork or rich Smoky Mesquite BBQ Slow Cooker Beer Ribs. The lightness of the icebox cake provides a perfect counterpoint to richer savory flavors, leaving everyone feeling satisfied but not overly full.
💡 Top Tip: How to Properly Freeze Fresh Raspberries
When you pick raspberries yourself, especially from local farms, they are often smaller and more delicate than store-bought varieties, meaning they tend to spoil much faster. To preserve their peak freshness and flavor, I highly recommend freezing your freshly picked raspberries immediately after harvesting, as they can quickly become mushy if left at room temperature.
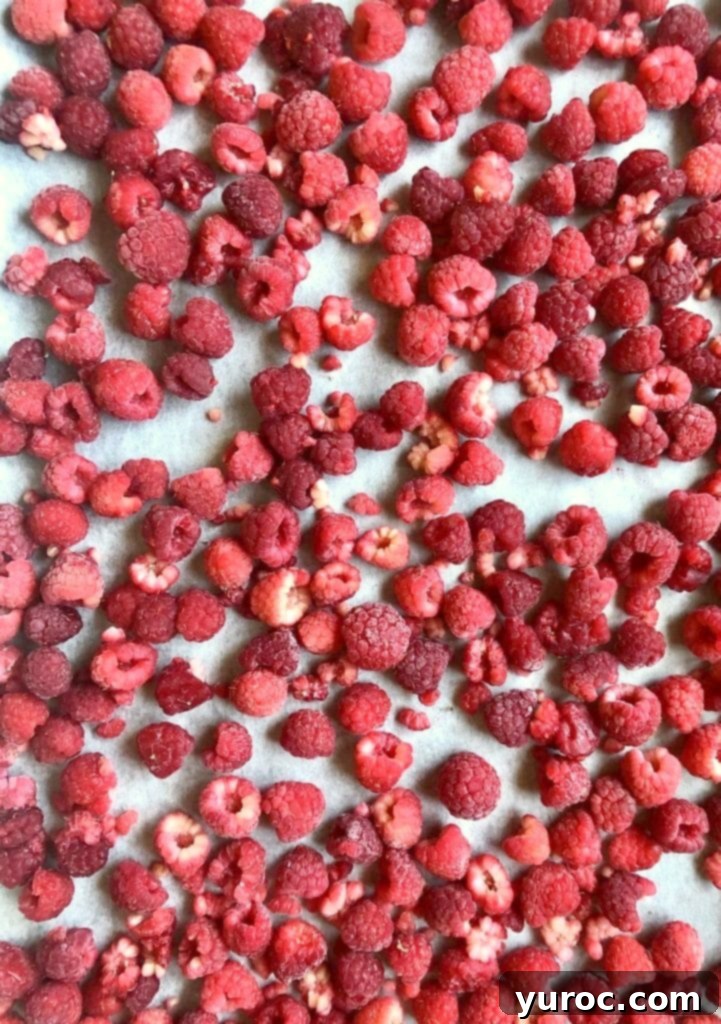
Here’s the best method for freezing raspberries: Once you’ve gently washed and dried your berries, lay parchment paper over a sturdy cookie sheet. Arrange the raspberries in a single layer on the parchment paper, ensuring they don’t touch each other. Freeze the berries in this single layer until they are completely solid, which usually takes a few hours. Once frozen solid, transfer them to a freezer-safe bag or an airtight container. This flash-freezing technique prevents them from clumping together, allowing you to easily grab just the amount you need for recipes like this icebox cake or smoothies, anytime you wish.
🌡️ Storage Guidelines for Your Icebox Cake
To keep this delicious Dulce de Leche Icebox Cake at its best, ensure it’s properly stored. Cover the cake tightly with plastic wrap, pressing it gently against the surface of the cake to prevent air exposure, or transfer it to an airtight container. Store it in the refrigerator for up to 3 days. While it might last a little longer, it’s so irresistibly good that it’s unlikely to remain untouched for that long! Please note that the ingredients in this particular icebox cake, especially the whipped cream and raspberries, do not hold up well to traditional freezing and defrosting. The texture can become watery and undesirable, so it’s best enjoyed fresh from the fridge.
👪 Serving Size & Adjustments
This delightful no-bake dessert recipe is designed to yield 12 generous servings, making it perfect for family meals or a small gathering. However, if you need to adjust the quantities for a larger crowd or a smaller indulgence, it’s incredibly easy to do. You can half, double, or even triple the recipe by simply clicking on the serving number in the recipe card below and selecting your desired number of servings. The ingredient quantities will automatically adjust, saving you the hassle of manual calculations. Just remember, if you’re significantly increasing the recipe, you might need an additional or larger pan to accommodate the extra volume.
❔ Frequently Asked Questions About Icebox Cakes
Interestingly enough, traditional icebox cakes aren’t technically baked cakes at all! They are a beloved no-bake dessert that magically transforms in the refrigerator (or “icebox,” as it was called before modern refrigeration). Layers of crispy wafer cookies or crackers are softened by a creamy filling, typically whipped cream, creating a tender, cake-like texture that melts in your mouth. The chilling time allows the flavors to meld beautifully and the structure to firm up, resulting in a light and elegant torte-like dessert without ever turning on the oven.
Yes, you absolutely can freeze this icebox cake, BUT you’ll want to enjoy it as a delightful frozen treat (which is truly AMAZING, I’ve tried it myself!). However, I do not recommend freezing and then defrosting this icebox cake with the intention of serving it as a chilled dessert. When thawed, the whipped cream can become watery and separate, and the raspberries may release too much moisture, compromising the beautiful texture and consistency of the cake. So, if you freeze it, plan to serve it straight from the freezer!
There are a couple of key reasons an icebox cake might turn out too soft or runny. The most common culprit is under-whipped cream. Ensure you whip your heavy cream to stiff peaks before gently folding in the dulce de leche and raspberries. Stiff peaks are essential for providing the cake with its structural integrity. Also, be careful not to over-whip, as that can lead to a grainy texture. Another crucial factor is properly draining your defrosted raspberries. Excess moisture from the berries can thin out the cream mixture, so make sure to press out any extra liquid with a paper towel before incorporating them.
If, after the recommended chilling time, your icebox cake still feels too soft for your liking, don’t despair! You can often remedy this by placing it back in the freezer for about 20-30 minutes just before serving. This brief freeze will help to firm up the layers, providing a more stable and sliceable texture. If it remains overly soft even after this, consider embracing it as a delicious frozen treat – it’s surprisingly good when served directly from the freezer, almost like an ice cream cake!
Absolutely! This Raspberry Chocolate Dulce de Leche Icebox Cake is an ideal make-ahead dessert. It requires a minimum of 8 hours of refrigeration to set properly, but it actually benefits from chilling for up to 24-48 hours. This extended time allows the flavors to deepen and the cookies to fully soften, creating an even more cohesive and delicious cake. Preparing it in advance takes the stress out of last-minute dessert preparations, making it perfect for parties, potlucks, and special occasions.
The truly wonderful aspect of this unique Icebox Cake is its adaptability. You can easily make it using high-quality frozen raspberries from the grocery store, which means it’s not limited to summer berry season. It’s an ideal dessert for those hot summer days when turning on the oven is the last thing you want to do, but it’s equally perfect for any time of the year when a refreshing, impressive, and simple treat is desired, especially when you just don’t feel like baking.
So, if you’re on the hunt for no-bake icebox cakes, and particularly one that’s incredibly easy to assemble, unbelievably delicious, and requires absolutely no baking, then this Raspberry Chocolate Dulce de Leche Icebox Cake is a must-try. It’s designed for effortless indulgence, perfect for feeding your family, delighting a crowd, or impressing guests when you bring it along to a potluck gathering!
And for those who share my profound love for chocolate icebox cakes, you absolutely won’t want to miss my Easter Creme Egg Icebox Cake. Seriously, you don’t even have to wait for Easter to enjoy that seasonal delight!
🍰 More Irresistible No-Bake Desserts
- No-Bake Baileys Cheesecake
- 15 Easy No-Bake Potluck Desserts
- Effortless No-Bake Cream Puff Dessert
- Decadent Death by Chocolate Trifle (with Kahlua)
Did your family ❤️ this incredibly easy and delicious dessert? Did you know that commenting and ⭐ rating recipes is one of the best ways to show your appreciation and support for your favorite recipe creators? If you absolutely LOVED this Raspberry Chocolate Dulce de Leche Icebox Cake, please take a moment to leave a comment and rate it in the recipe card below, or better yet, share your beautiful photos on social media using the hashtag #foodmeanderings or tagging @foodmeanderings ! Your feedback means the world to us!

📋 Raspberry Chocolate Dulce de Leche Icebox Cake Recipe
Equipment
- hand mixer
- 9X13 pan
Ingredients
- 4 cups heavy whipping cream (33-36 % fat, well chilled)
- 300 ml dulce de leche caramel flavoured sauce (I use Eagle Brand, found near condensed milk)
- 2 cups frozen raspberries, defrosted and well-drained (measure before defrosting & draining)
- 4 packages (261 gm each) Oreo Thin Cookies (split in half with cream filling removed)
For Garnish
- fresh raspberries
- chocolate shavings
Instructions
Heads up! There is an 8 hour refrigeration time for this cake.
- Carefully cut each Oreo Thin cookie in half and gently remove the white cream filling. This step can be done the night before for convenience.4 packages (261 gm each) Oreo Thin Cookies
- In a large chilled bowl, whip the cold heavy whipping cream until stiff peaks form.4 cups heavy whipping cream
- Gently fold the entire can of dulce de leche sauce and the defrosted, well-drained raspberries into the whipped cream until just combined.300 ml dulce de leche caramel flavoured sauce, 2 cups frozen raspberries, defrosted and drained
- Arrange a double layer of the prepared chocolate cookie halves (about ⅓ of total) on the bottom of a 9 x 13-inch baking dish.
- Evenly spread ⅓ of the whipped cream mixture over the cookie layer.
- Add another double layer of chocolate cookie halves (another ⅓ of total) over the first whipped cream layer, staggering them slightly.
- Then, spread half of the remaining whipped cream mixture evenly over this second cookie layer.
- Repeat with the final double layer of cookies (the last ⅓ of total cookies).
- Finally, spread the remaining whipped cream mixture over the top, smoothing it out evenly.
- Refrigerate the icebox cake for at least 8 hours (preferably overnight) to allow the cookies to soften into a cake-like texture. It can be made up to 48 hours in advance.
Garnish
- Just before serving, grate chocolate and sprinkle generously over the top of the dessert for an elegant finish.chocolate shavings
- Adorn with fresh raspberries for a burst of color and fresh flavor.fresh raspberries
Notes
-
- Whip Your Cream to Stiff Peaks: Cold is key! Use cold heavy whipping cream (33-36% fat), and chill your mixing bowl and beaters for 10-15 minutes before whipping. Don’t under-whip either! Stop when stiff peaks form. Under-whipped cream will make the cake too runny. Over-whipped cream can turn grainy or into butter.
-
- Use the Right Cookies: If you can’t find chocolate wafers, Oreo Thins (split and de-iced) are a great alternative. If your cookies are too thick, the layers might not soften properly. You can lightly dunk them in milk for a second to help soften them before layering.
-
- Drain Raspberries Well: If using frozen raspberries, measure before defrosting and draining, or the raspberry taste will completely take over – you need to balance it with the Dulce de Leche and chocolate. If the raspberries are too wet, the cream mixture will become runny, so press out excess moisture with a paper towel if needed.
-
- Layering Matters: Don’t press down the layers too hard-you want a light, airy texture, not a dense cake. When layering cookies, stagger them slightly so they overlap-this prevents big gaps in the cake.
-
- Chill Overnight for Best Texture: Icebox cakes need time to set! Refrigerate for at least 8 hours (or overnight) so the cookies soften into a cake-like texture. If you’re in a rush, you can speed up the process by chilling it for at least 4 hours, but the longer, the better!
-
- Avoid Overmixing the Filling: Fold, don’t stir! When combining the dulce de leche, whipped cream, and raspberries, gently fold them together to keep the mixture light and fluffy. Overmixing can deflate the whipped cream.
- Raspberries– You can use fresh raspberries or frozen raspberries, but I prefer to use frozen because they hold better in this recipe (and don’t smear as much). I usually take fresh raspberries and freeze them, but you could also just buy frozen raspberries. Just be aware that they won’t hold their shape when defrosted as well as the freshly frozen raspberries. You could also substitute raspberry jam.
- Whipped cream – You could use Cool Whip if you don’t have real whipped cream, but it will be sweeter. I do NOT recommend using a spray whipped cream as the whip doesn’t hold.
- Dulce de Leche – I use store-bought dulce de leche, but you could make your own dulce de leche sauce.
- Oreo Thins – You could make your own chocolate wafers. *I specifically chose this recipe because it’s an easy slice-and-bake cookie with simple pantry ingredients. If you don’t want to bake the cookies, you can use Goya Foods Chocolate Maria cookies (affiliate link) as an alternative to Oreo Thins. Lieber’s chocolate wafers will also work if you can find them and they’re gluten-free. Lastly, you could also use Nabisco plain or Cinnamon Grahams for a different flavor profile.
- Chocolate – You could use a plain dark or milk chocolate bar for the shavings.
