Delightful DIY Flower Pot Cupcakes: The Perfect Edible Mother’s Day Gift & Fun Kids’ Craft
It was 1975, a simpler time before the internet revolutionized how we connect, learn, and find inspiration. That year, my dear Mom received a rather unconventional Mother’s Day gift: a hockey puck. A used hockey puck, to be precise. Oh, how I wish the internet had existed then! Instead of that well-loved piece of vulcanized rubber, Mom could have received these charming and delicious Flower Pot Cupcakes, lovingly filled with rich chocolate pudding and crunchy Oreo cookie “dirt.”
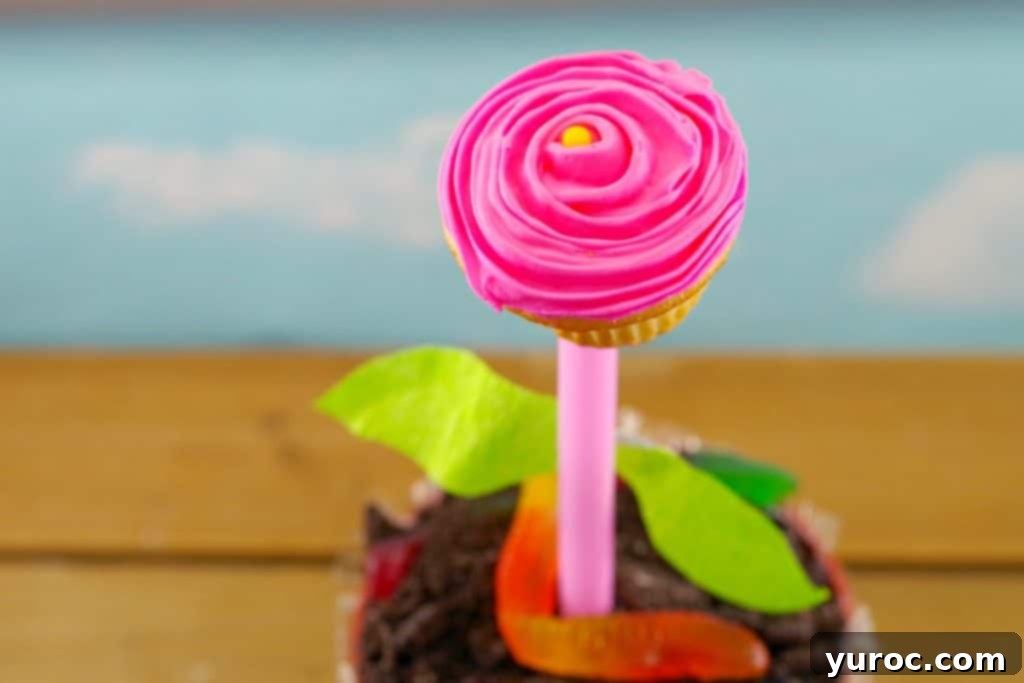
Thankfully, we live in an age where the internet thrives, bringing endless creative ideas right to our fingertips. And because of it, YOU can now effortlessly create these adorable Flower Pot Cupcakes! If you’re on the hunt for easy DIY Mother’s Day gift ideas that promise hours of fun for kids and a genuinely heartfelt present for Mom, consider this your secret weapon. Dads, if you’re reading this, take note: print this guide out and prepare for a memorable crafting and baking session with your children. Trust me, these cupcake flower pots are an ideal activity for older kids to tackle independently, while younger children will happily assist with a little help from Dad. They are genuinely the perfect easy Mother’s Day gifts, combining baking, crafting, and a whole lot of love.
Reflecting on that hockey puck incident, I distinctly remember Mom’s Oscar-worthy performance of feigned excitement and appreciation. It seemed a tad theatrical at the time, especially given the “pre-owned” nature of the gift. Little did I, in my youthful naiveté, understand the profound depth of her genuine and sincere reaction. It wasn’t about the object itself, but the thought, the effort, and the little hands that presented it.
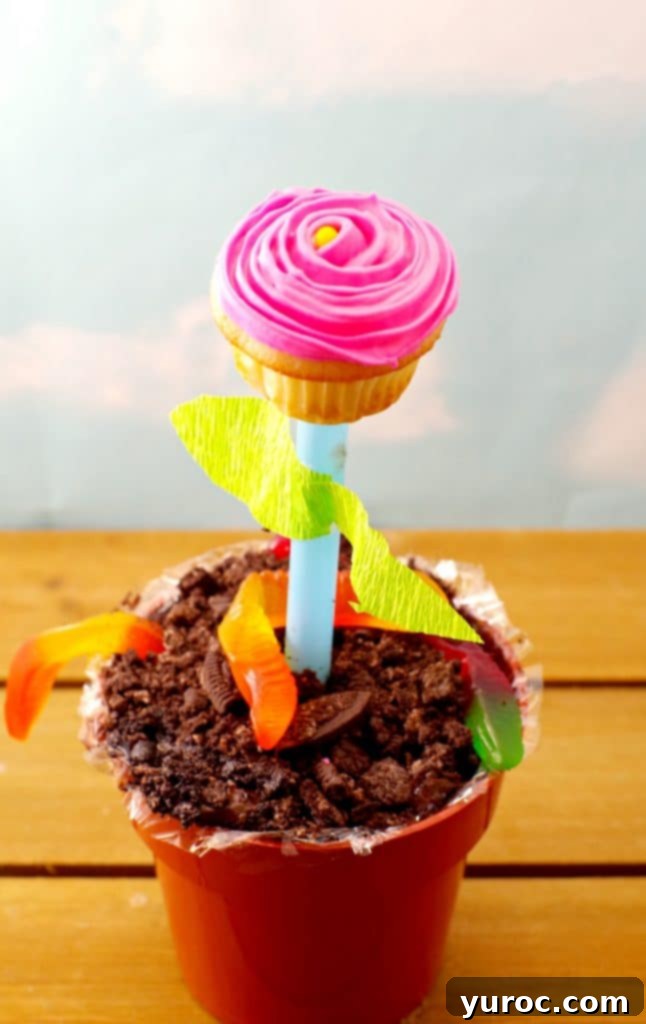
Indeed, becoming a mother reshapes one’s perspective entirely. Certain things that once held immense importance, like extravagant gifts, recede into the background. The true value shifts to experiences, to shared moments, and to the innocent, often imperfect expressions of love from your children. It’s a sentiment incredibly challenging to convey to someone without kids – the realization that a used hockey puck could, in fact, be one of the most meaningful gifts ever received. This profound understanding only clicked for me when I, too, became a mother.
Being a mom has brought countless joys, including the wonderful opportunity to engage in baking, cooking, and crafts with my daughter’s Girl Guides group. These DIY cupcake flowers were a huge hit as an edible spring craft! My daughter, at just 10 years old, proudly crafted the beautiful cupcake flowers featured in all these photos. Her meticulous work fills me with immense pride! Beyond Mother’s Day, these delightful treats are also absolutely perfect for celebrating Earth Day, symbolizing growth and renewal. If you’re looking for more fun, kid-friendly Earth Day recipes, you might also love my Jello Worms and Dirt recipe. And for a festive twist, imagine these charming flower pot cupcakes as the centerpiece for a whimsical kids’ garden party theme!
Why These Flower Pot Cupcakes are a Must-Make Edible Craft
These aren’t just any cupcakes; they are an experience in a pot! The beauty of these Flower Pot Cupcakes lies in their simplicity and the immense joy they bring to both the creators and the recipients. They perfectly blend the fun of baking with the creativity of crafting, making them an ideal activity for families. Here’s why they stand out:
- Perfect for All Ages: The steps are straightforward enough for little ones to help with crushing cookies or lining pots, while older kids can take the lead on baking and decorating. It’s a fantastic way to involve everyone in the kitchen.
- Heartfelt Homemade Gift: Nothing says “I love you” quite like a handmade gift. These edible creations go beyond a store-bought card, showing genuine effort and affection.
- Versatile for Various Occasions: While perfect for Mother’s Day, these cupcakes are also wonderful for spring celebrations, garden parties, or even as a creative Earth Day project to teach kids about plants and nature in a delicious way.
- Delicious and Fun to Eat: Layers of moist cupcake, creamy chocolate pudding, and crushed Oreo “dirt” topped with a beautiful buttercream flower make for an irresistible dessert that’s as fun to eat as it is to make.
- Boosts Creativity and Fine Motor Skills: From decorating the cupcakes to assembling the flower pots, children will engage their creativity and practice essential fine motor skills.
🥘 Ingredients for Your Edible Flower Pots
This easy and delightful recipe calls for a mix of simple baking staples and fun store-bought additions, making it accessible for everyone. Here’s what you’ll need to gather:
- All-purpose flour
- White granulated sugar
- Baking powder
- Salt
- Milk
- Vegetable or canola oil
- Egg
- Vanilla extract
- Whipped vanilla icing (I highly recommend Betty Crocker whipped vanilla for its light texture)
- Rose or pink icing color (adjust to achieve your desired shade)
- Yellow jumbo nonpareils (for the flower centers)
- Chocolate pudding snack pack containers
- Oreo cookies (the “dirt” component!)
- Gummy worms (for a fun, earthy touch)
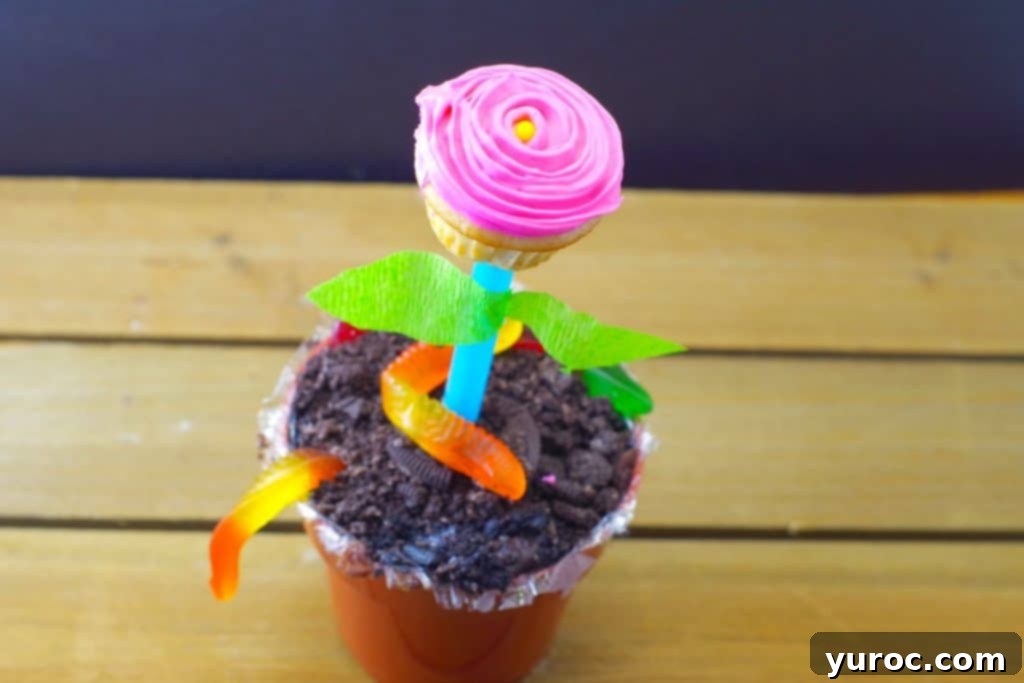
🔪 Step-by-Step Instructions to Create Your Cupcake Flower Pots
Follow these easy steps to bring your edible flower pot vision to life. This recipe is designed to be fun and manageable for all skill levels, especially for baking with kids!
Part 1: Make the Cupcakes
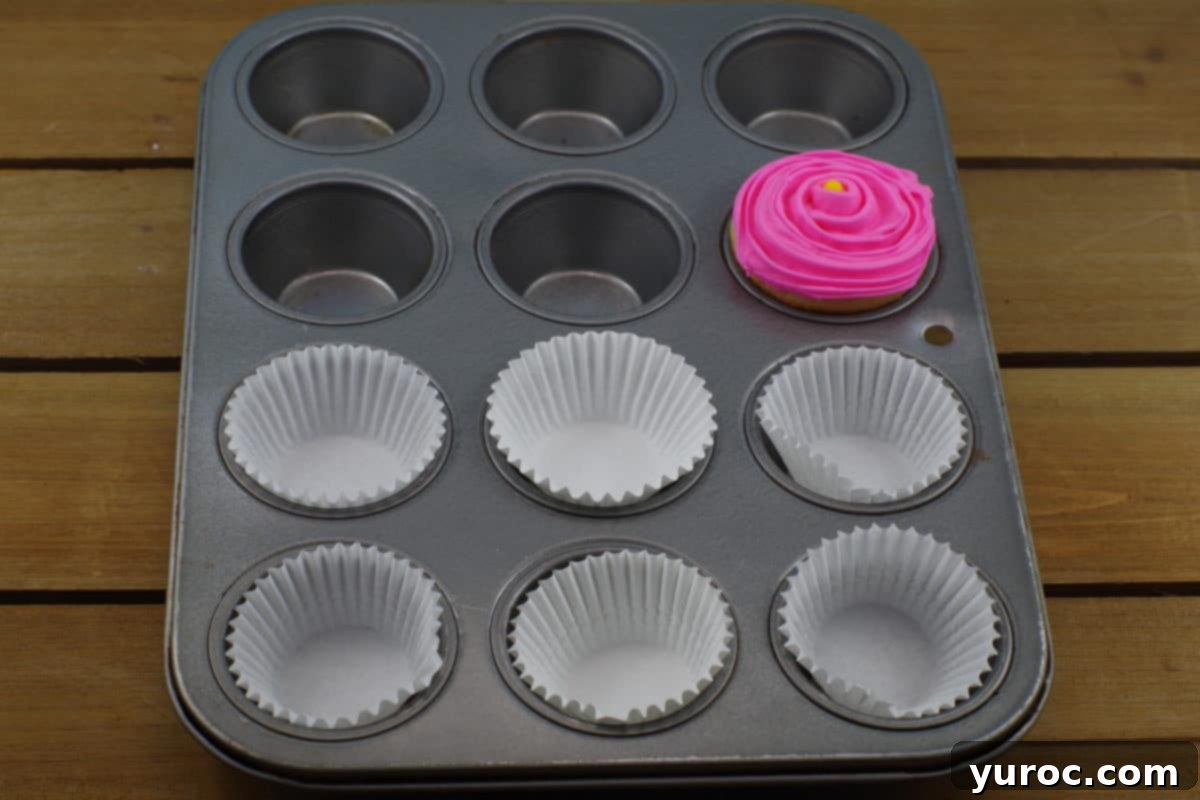
- Preheat your oven to 180 °C (350 °F) with the rack positioned in the middle. Prepare a mini muffin/cupcake tin by lining each well with mini muffin/cupcake liners.
- In a large mixing bowl, combine the dry ingredients: flour, sugar, baking powder, and salt. Stir them together thoroughly.
- Add the wet ingredients to the dry mixture: milk, vegetable or canola oil, egg, and vanilla extract. Use a whisk or an electric mixer to combine until the batter is smooth and free of lumps.
- Carefully pour the batter into the prepared mini muffin/cupcake tin, filling each liner only ¾ full to prevent overflow.
- Bake the cupcakes for approximately 13-15 minutes, or until a cake tester or toothpick inserted into the center of a cupcake comes out clean. This indicates they are perfectly cooked.
- While your cupcakes are baking, seize the opportunity to get a head start on preparing the other elements of your flower pot craft.
- Once baked, remove the cupcakes from the oven and allow them to cool completely on a wire rack before proceeding to the next steps. Cool cupcakes are essential for proper icing adhesion.
Part 2: Prepare the Flower Pot “Dirt”
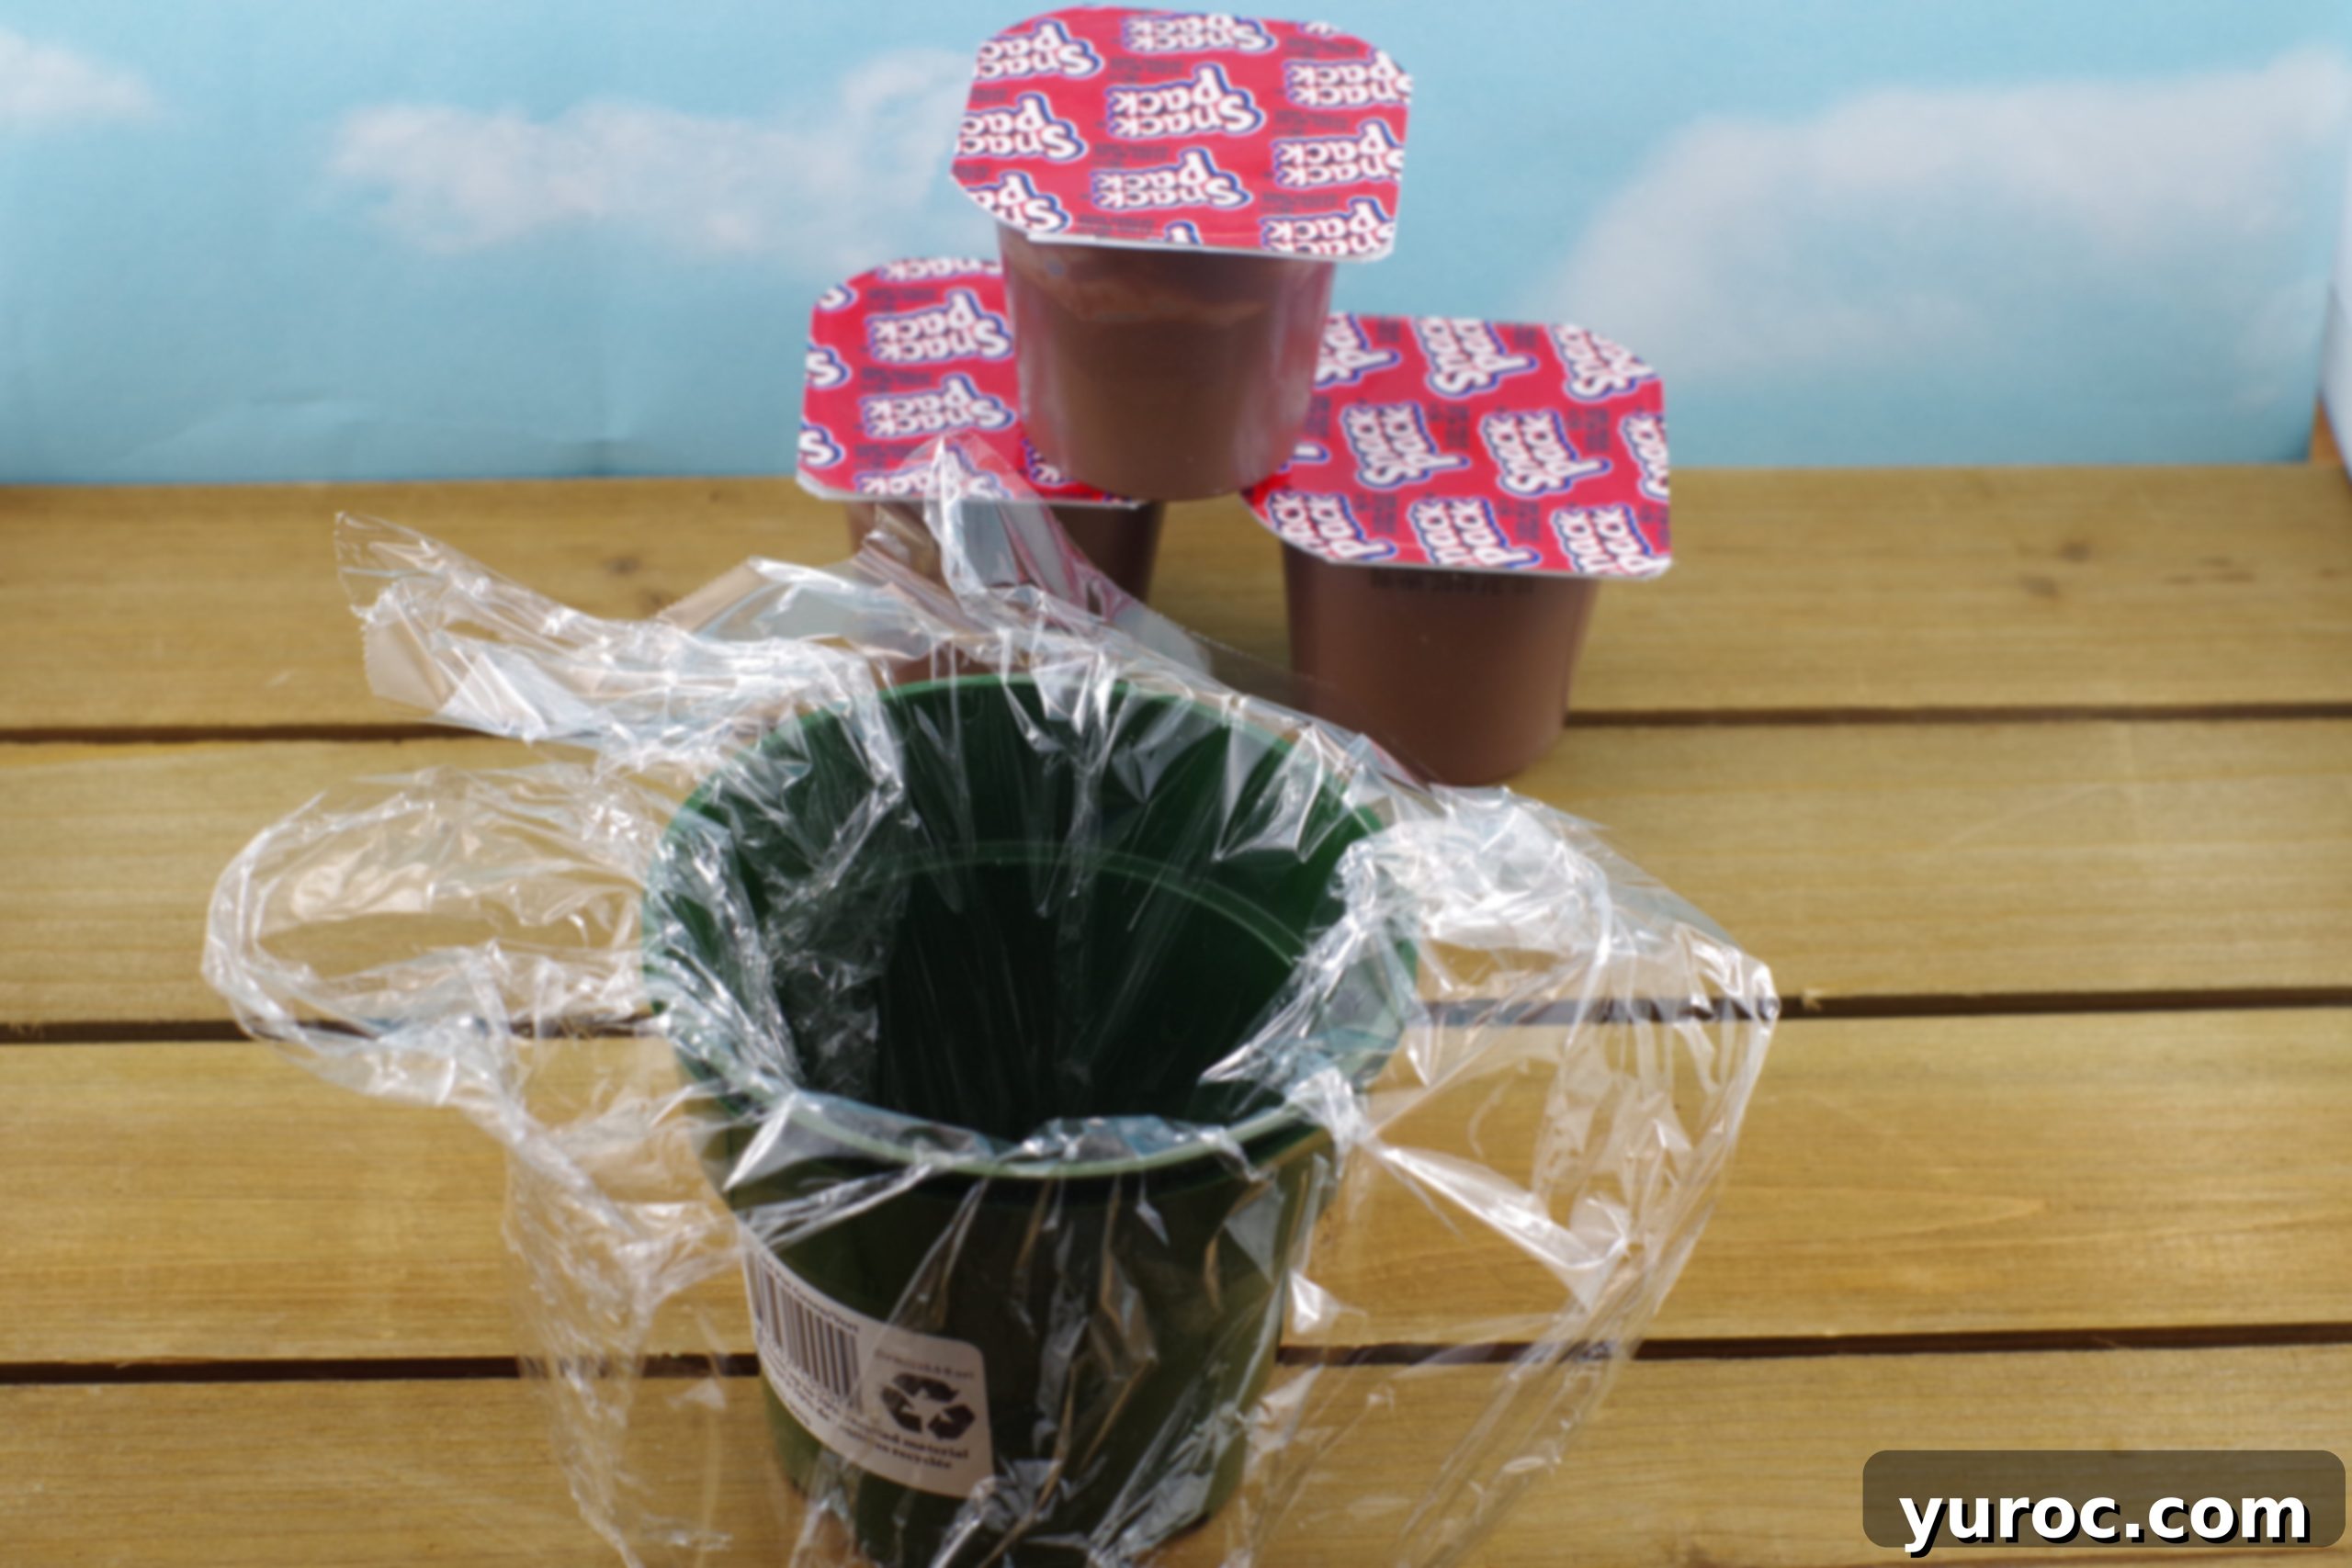
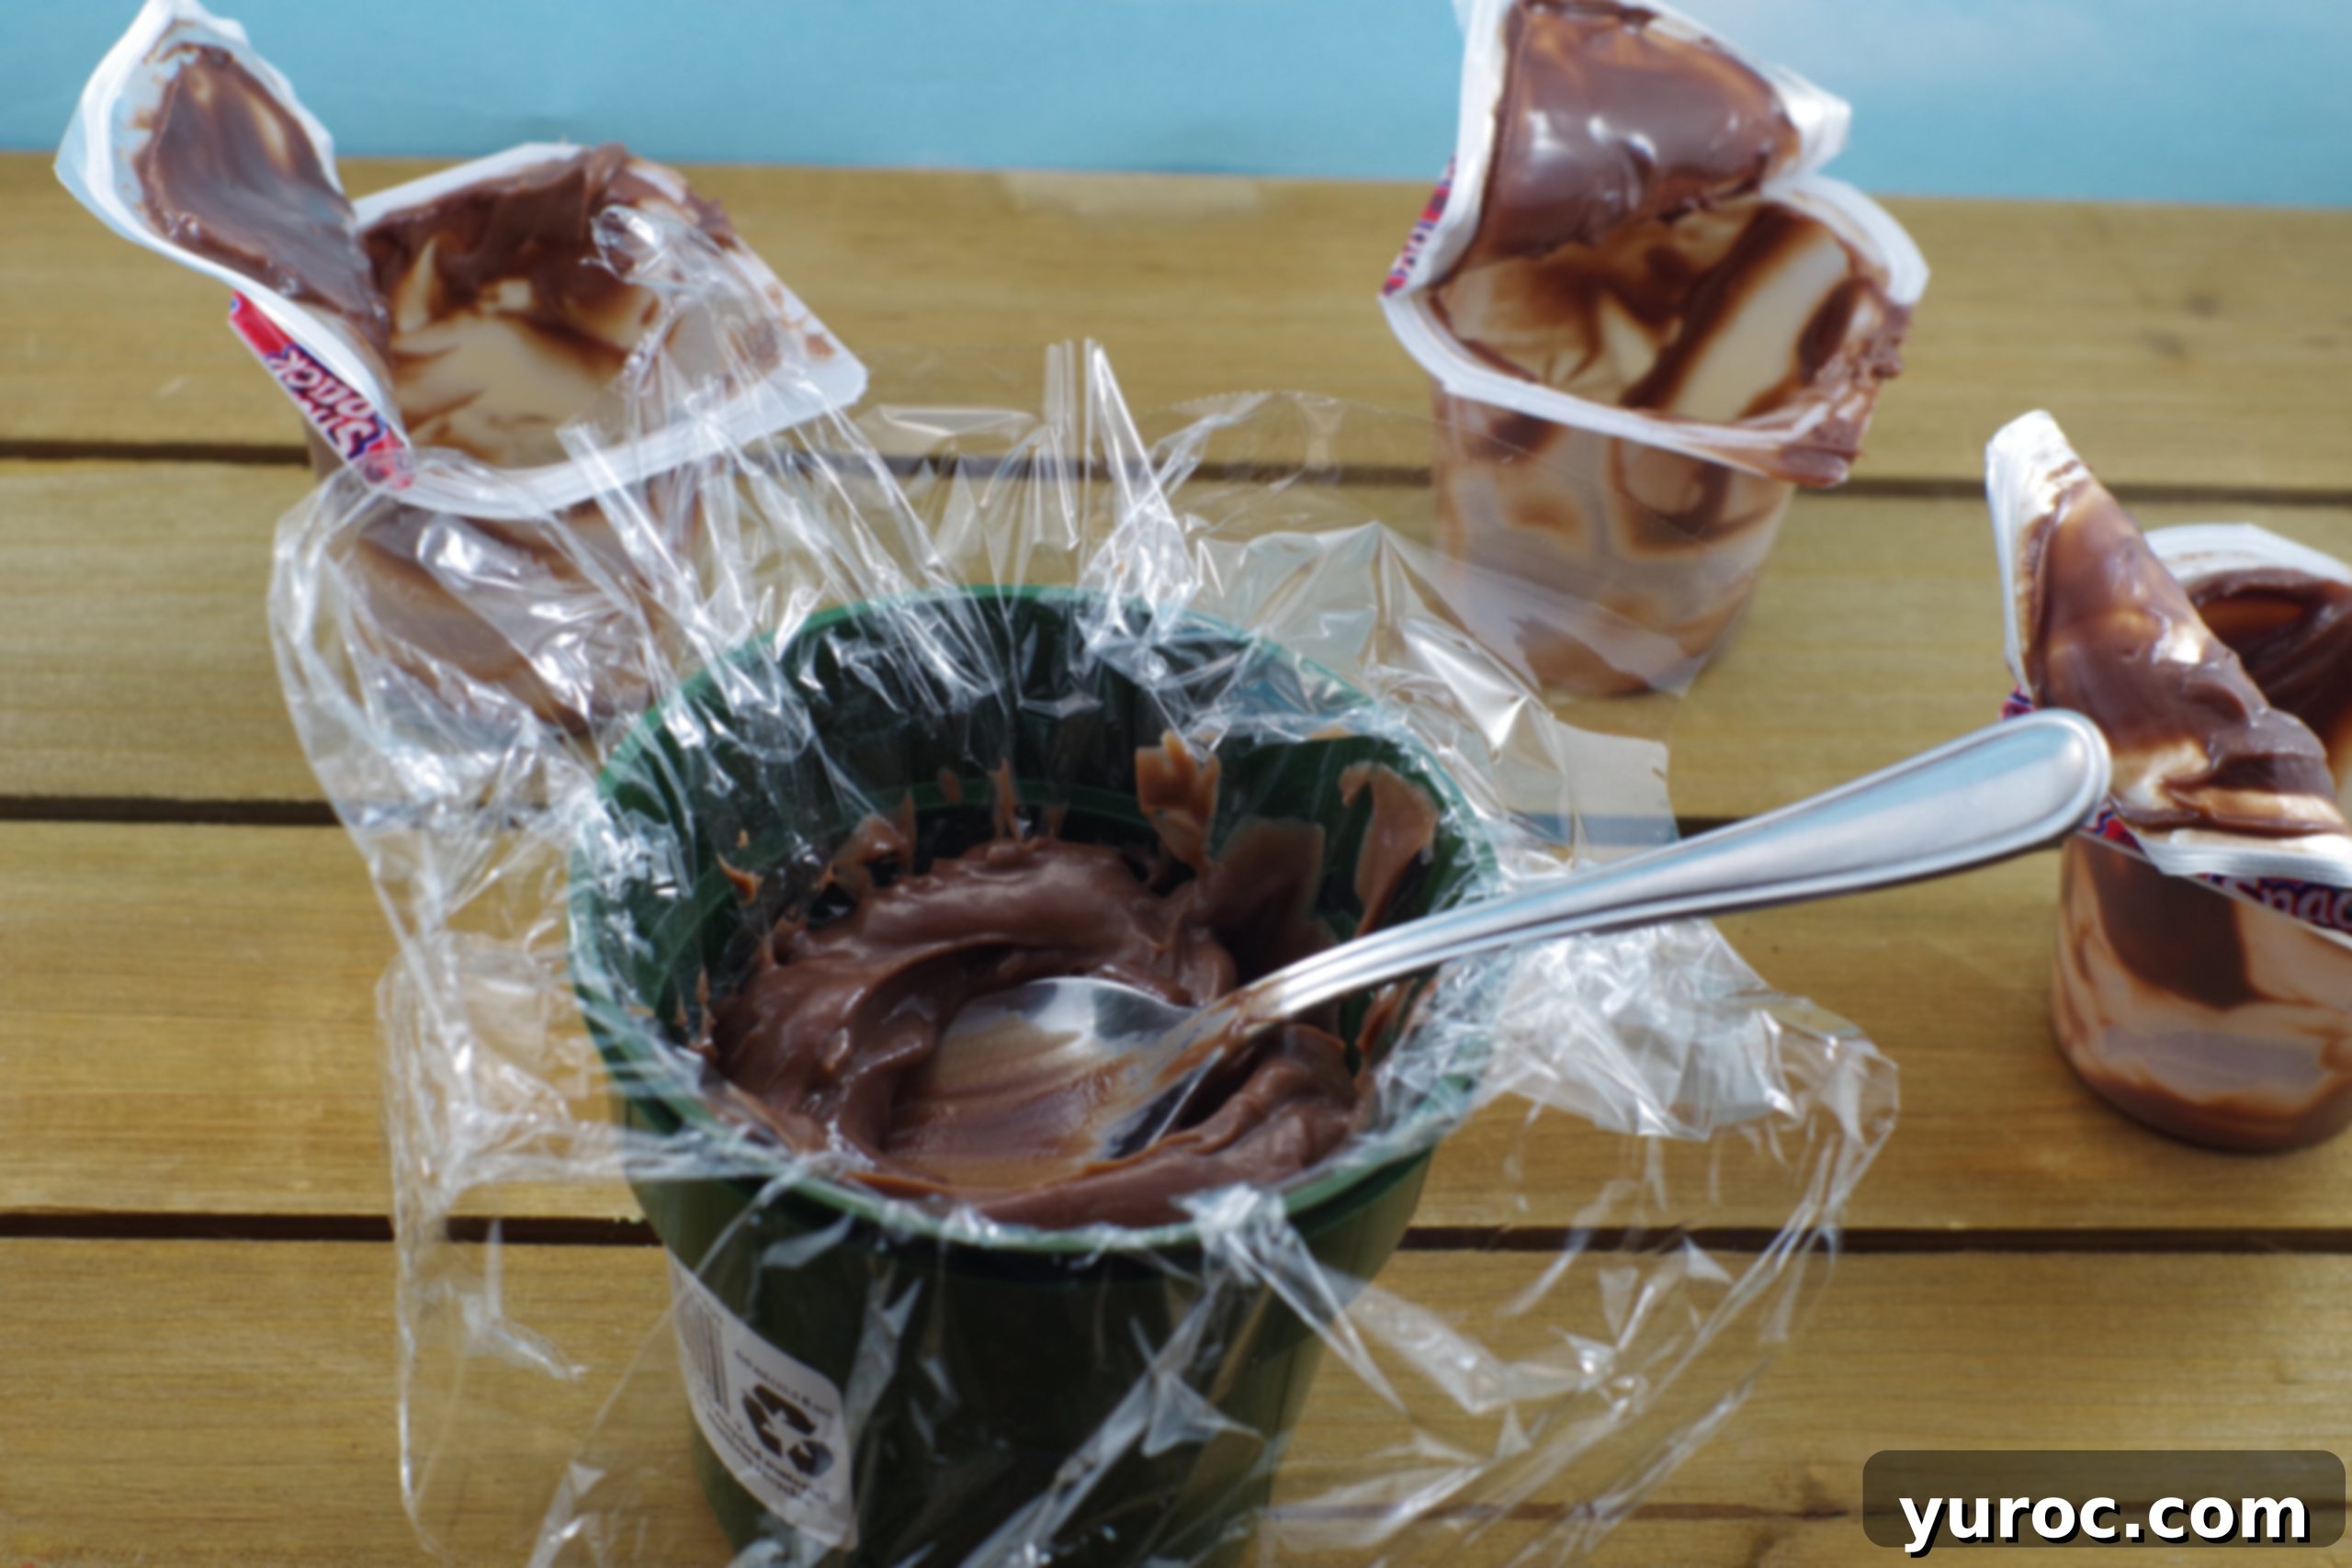
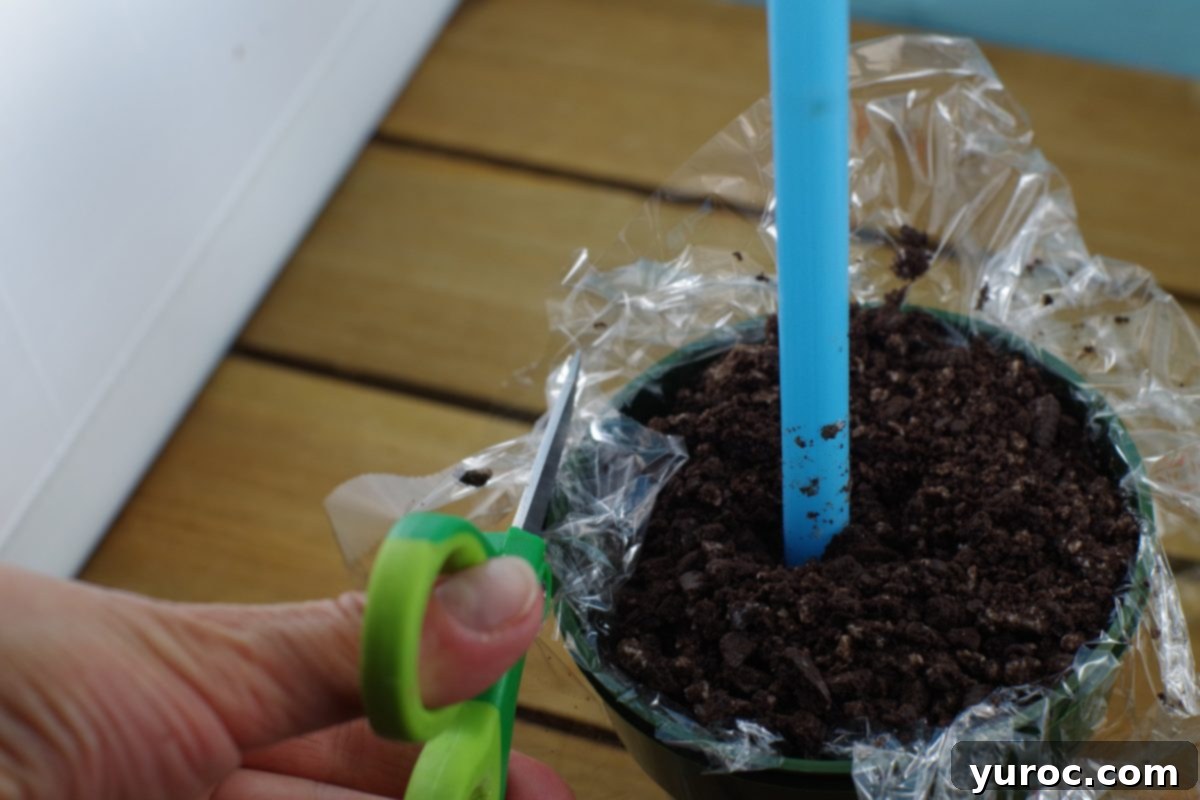
- To create the flower pot base, line the inside of a clean plastic flower pot with a sheet of saran wrap. This ensures the pot remains clean and the dessert is easy to serve.
- Pour 3 individual chocolate pudding snack pack containers into the saran-lined pot, spreading it evenly to form the first layer of “dirt.”
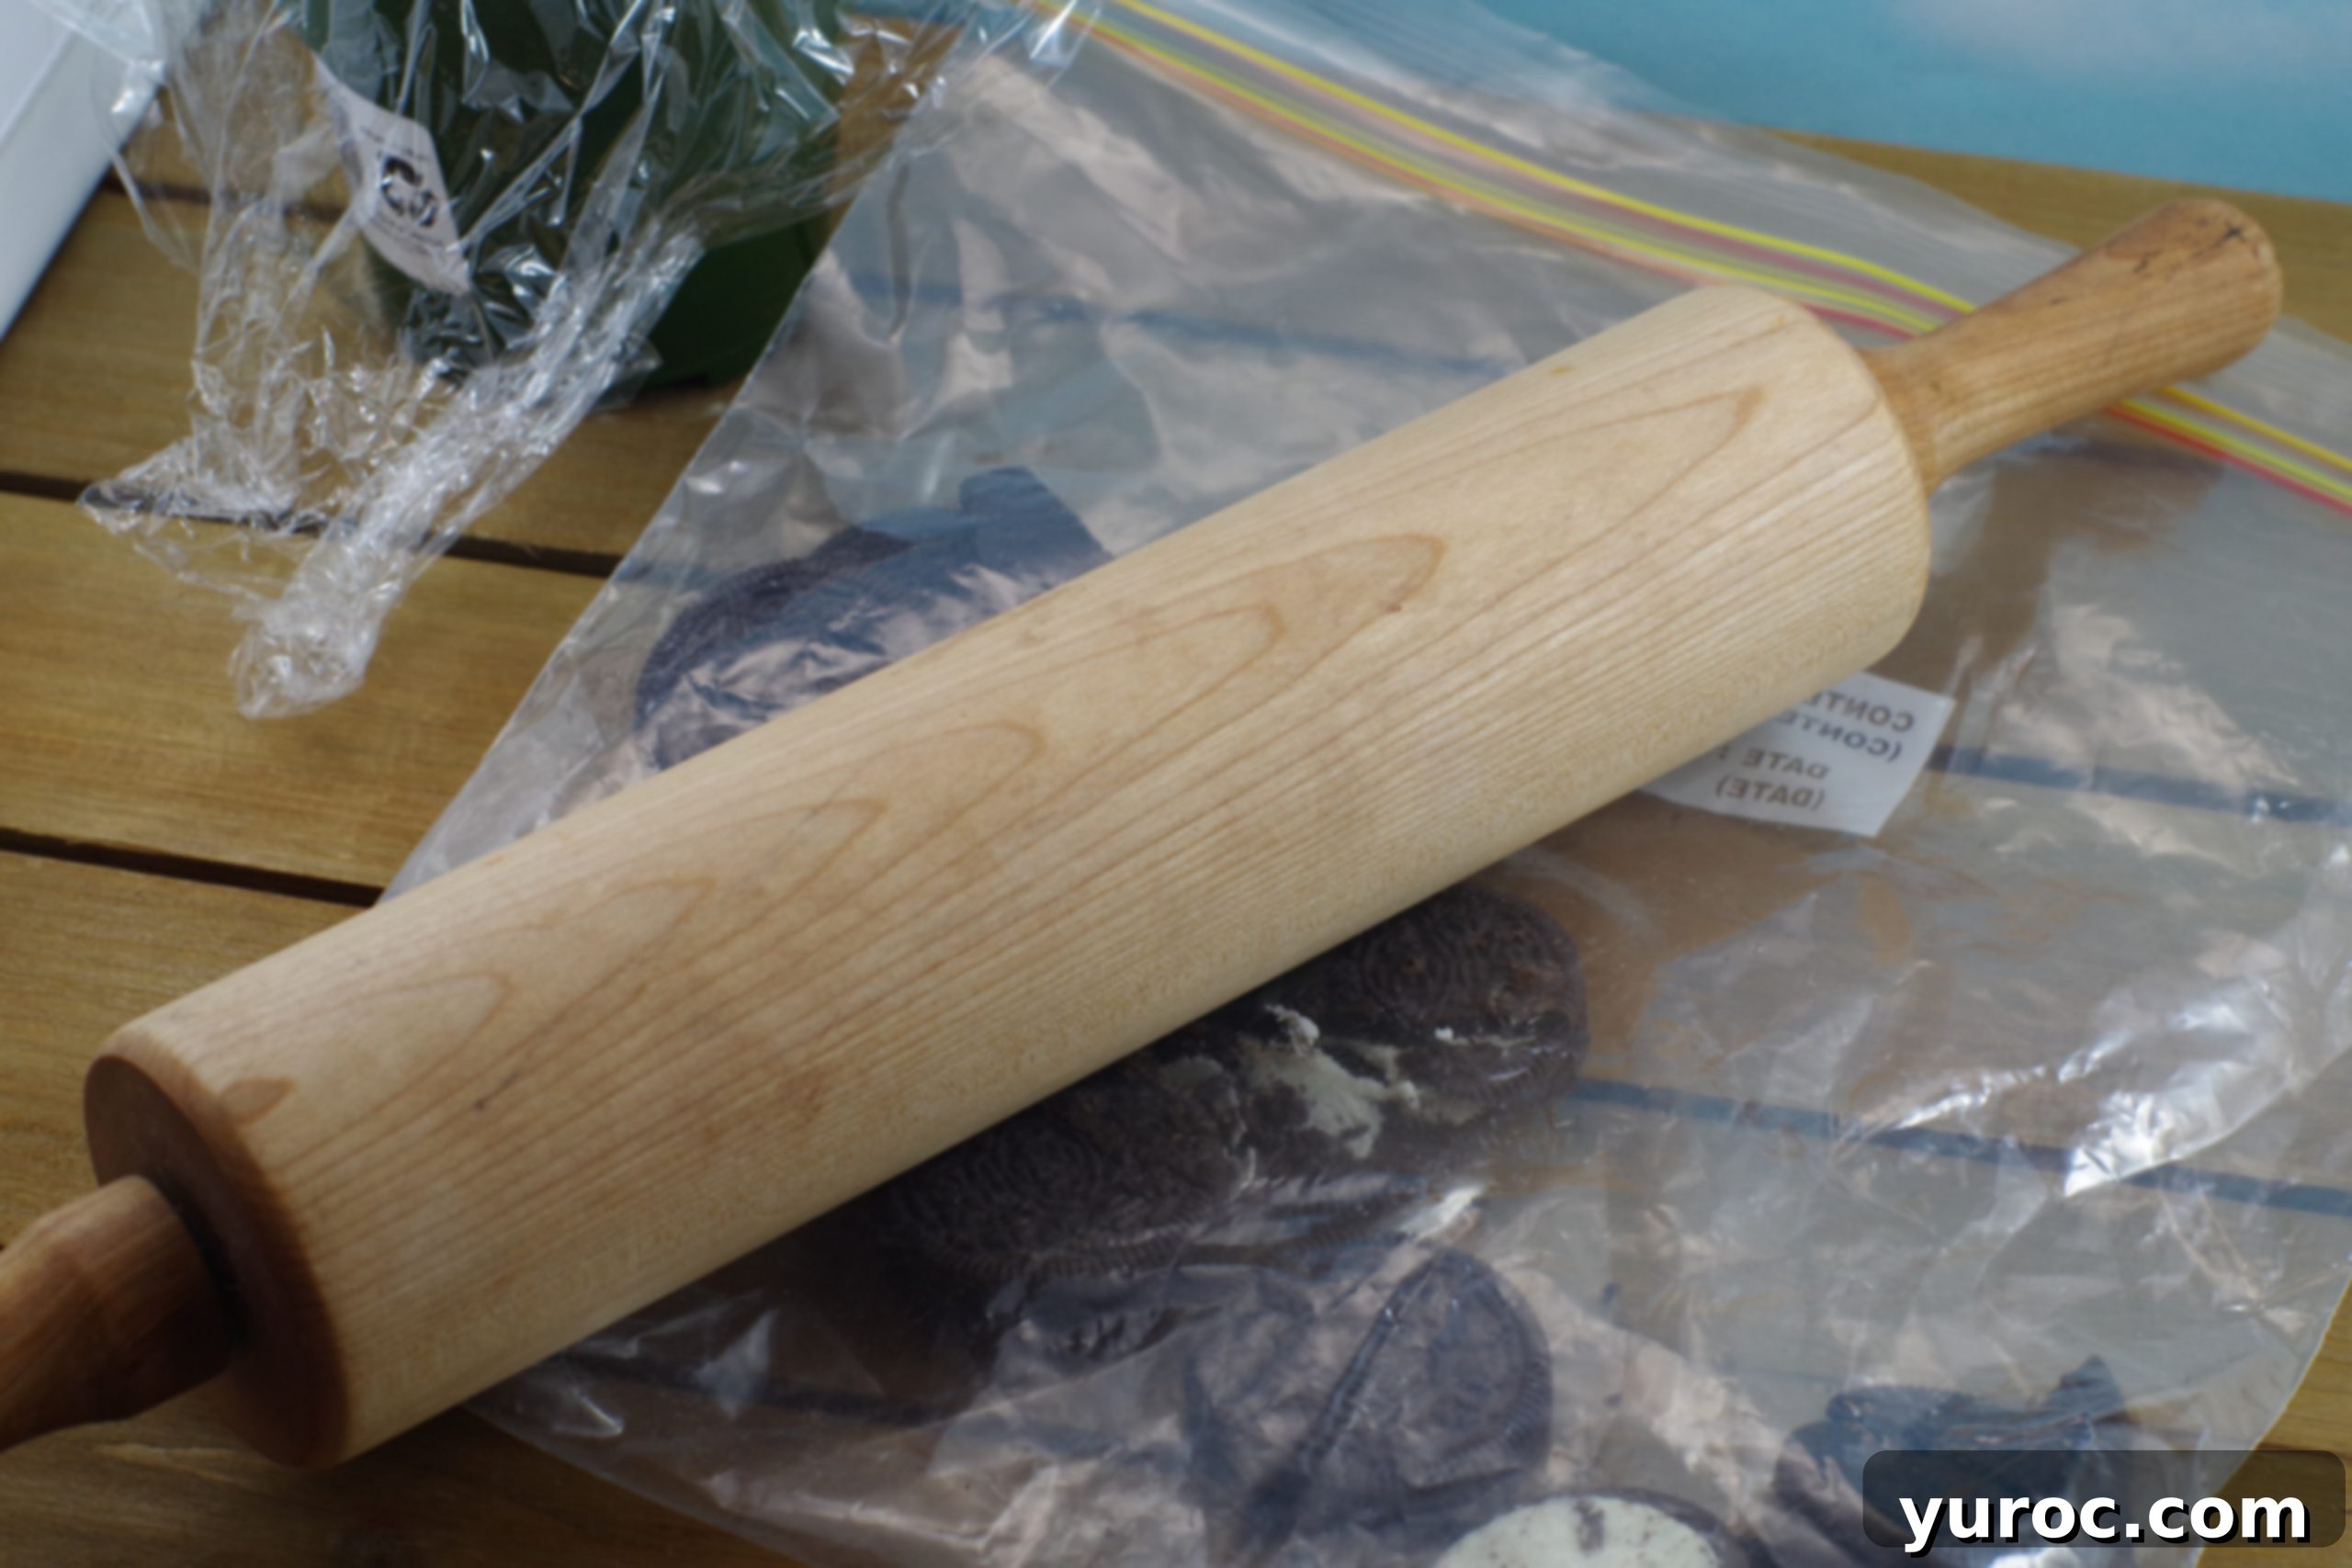
- Next, take about 10 Oreo cookies (per flower pot) and place them into a large Ziplock bag. Seal the bag tightly and, using a rolling pin, crush the cookies into small chunks and crumbs. This step is often a favorite for kids, and doing it on the floor can provide more stability and leverage.
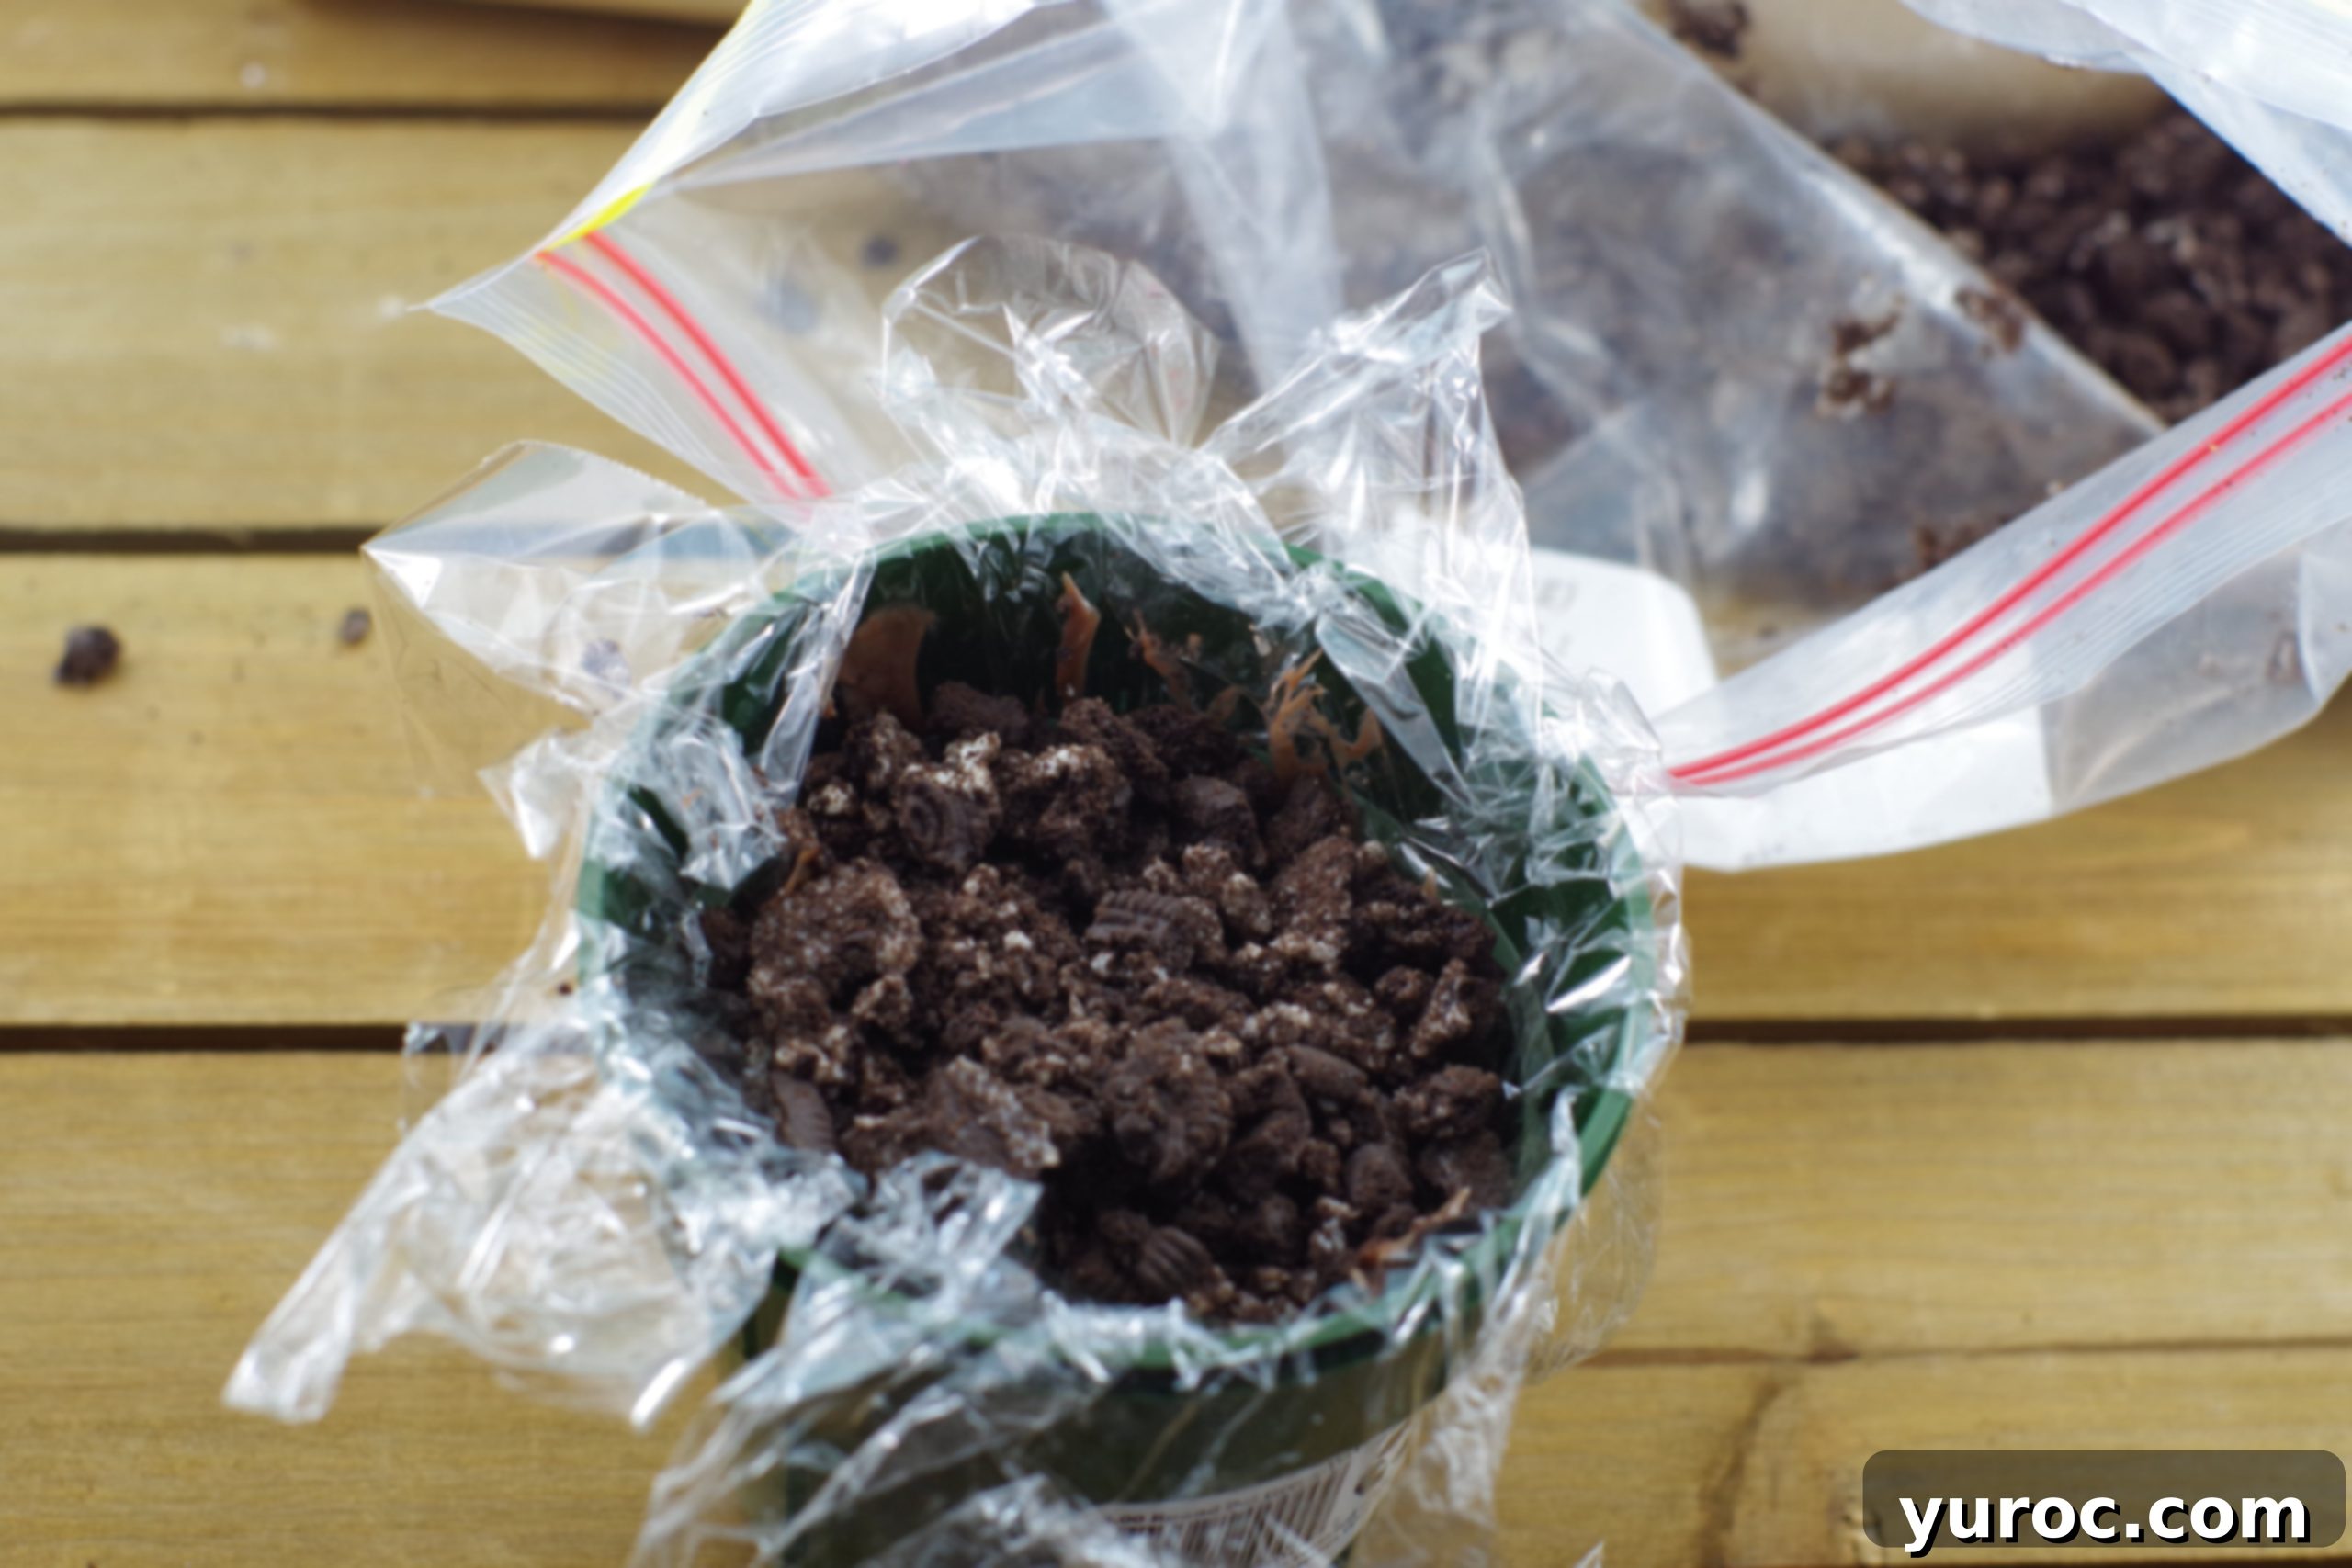
- Once crushed, generously pour the Oreo cookie crumbs on top of the chocolate pudding layer in the flower pot. This creates the realistic “dirt” effect.
Part 3: Craft the Stem
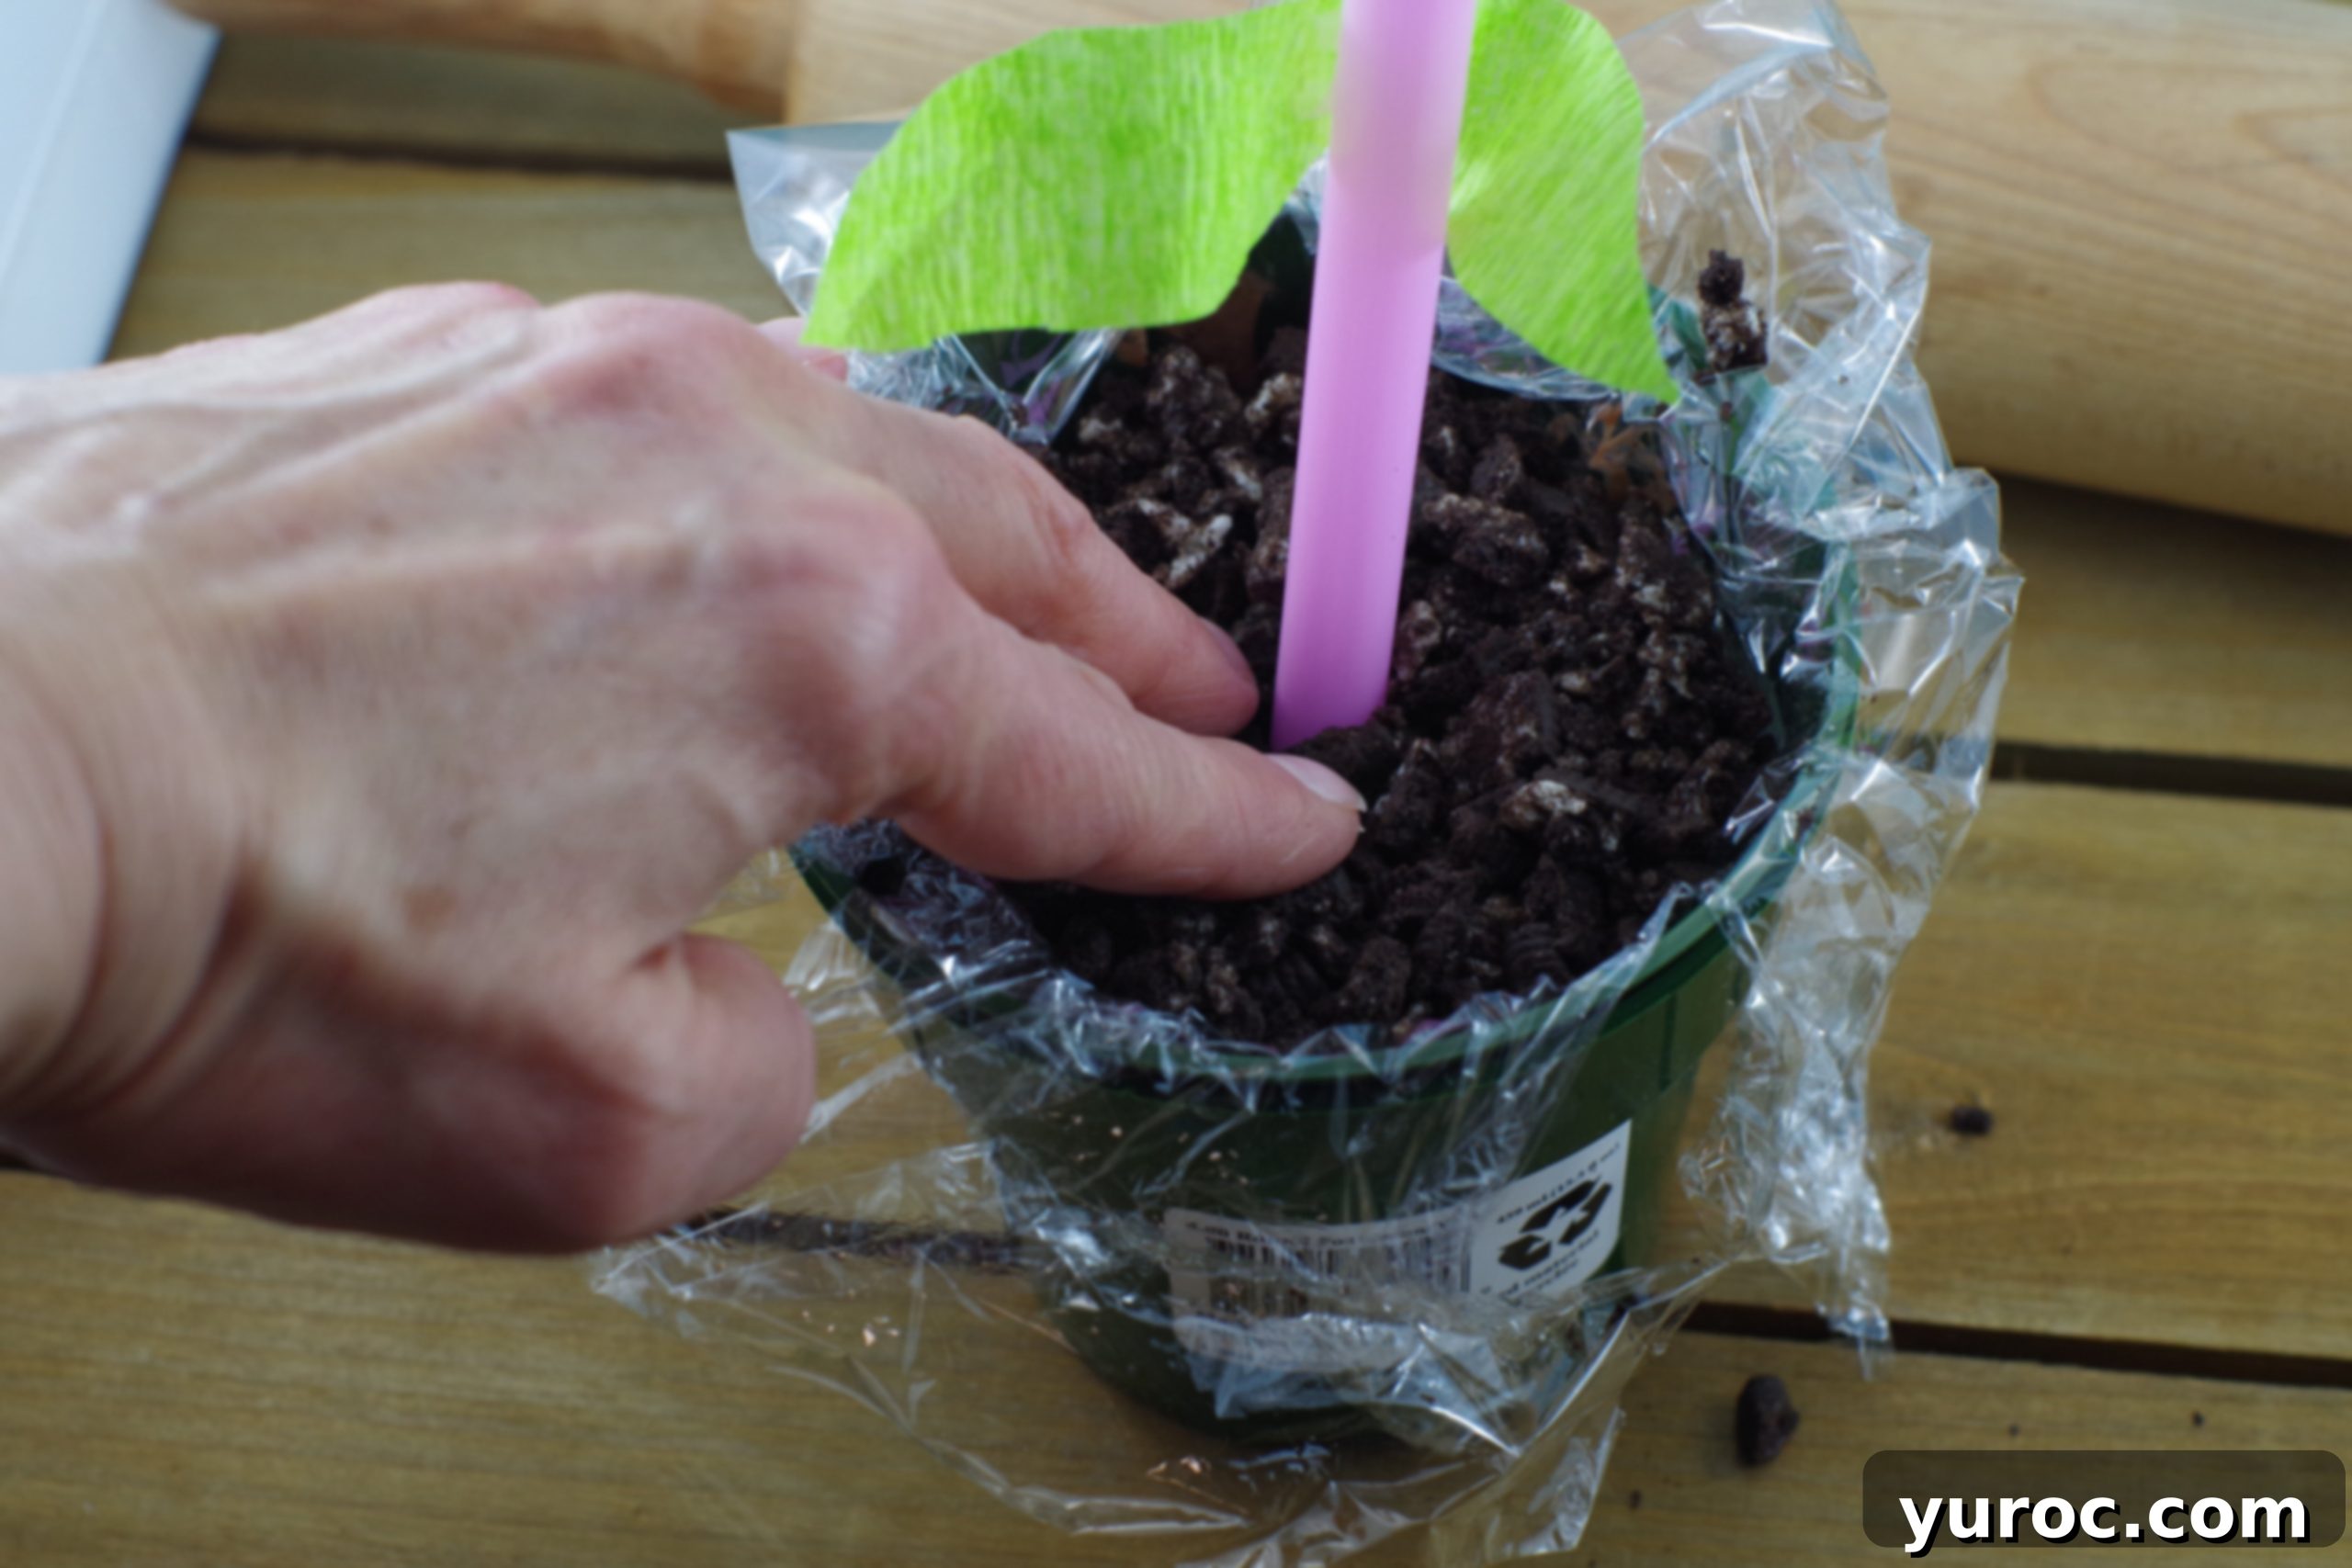
- From green crepe paper, free-hand cut two leaf shapes. Don’t worry about perfection; a natural, slightly irregular shape adds to the charm.
- Using tacky glue (or any strong, clear adhesive), attach these crepe paper leaves to a milkshake straw. A green straw is ideal for a more realistic stem.
- Carefully insert the straw (your newly crafted stem) into the center of the prepared flower pot, pushing it gently through the pudding and Oreo layers until it’s firmly standing.

Part 4: Decorate the Cupcakes
- If desired, add a few drops of rose or pink icing color to your whipped vanilla icing and mix until you achieve your preferred shade.
- Fit a pastry bag with an IM (or 2D) tip. This tip is excellent for creating a beautiful rose swirl effect.
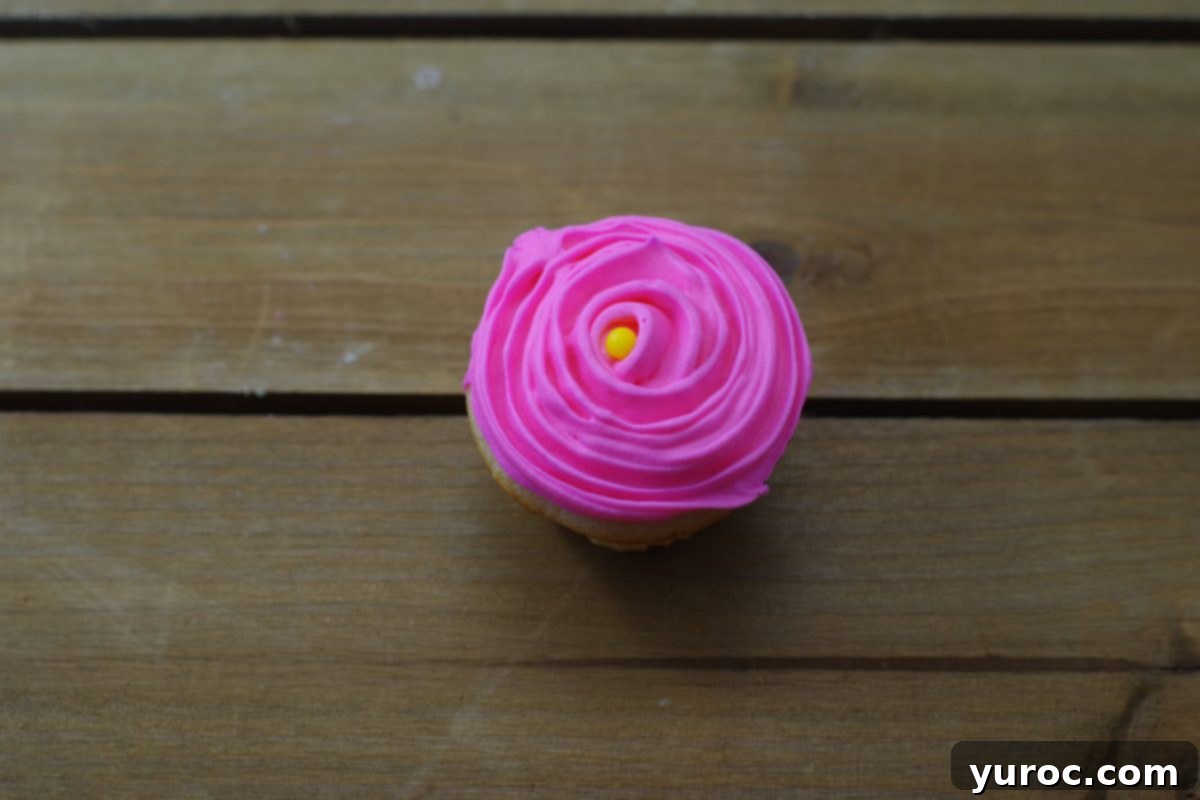
- To ice the cupcake, begin piping in the middle and move outwards in a circular motion, turning the cupcake as you go, until you reach the outer edges. This creates a stunning flower petal effect.
- Don’t worry if you have extra cupcakes! Some might break, or not turn out perfectly, so it’s always good to have spares. Plus, extra cupcakes mean more delicious snacks for the kids (and adults!) who are helping with the craft.
- If you’re new to piping, watch the video instructions (link provided below) on how to ice a cupcake using an IM tip, specifically focusing on the rose swirl technique.
- Once the cupcake is iced, gently place a few yellow jumbo nonpareils in the very center of the rose swirl to mimic the pollen-filled center of a flower.
Part 5: Final Assembly & Garnish
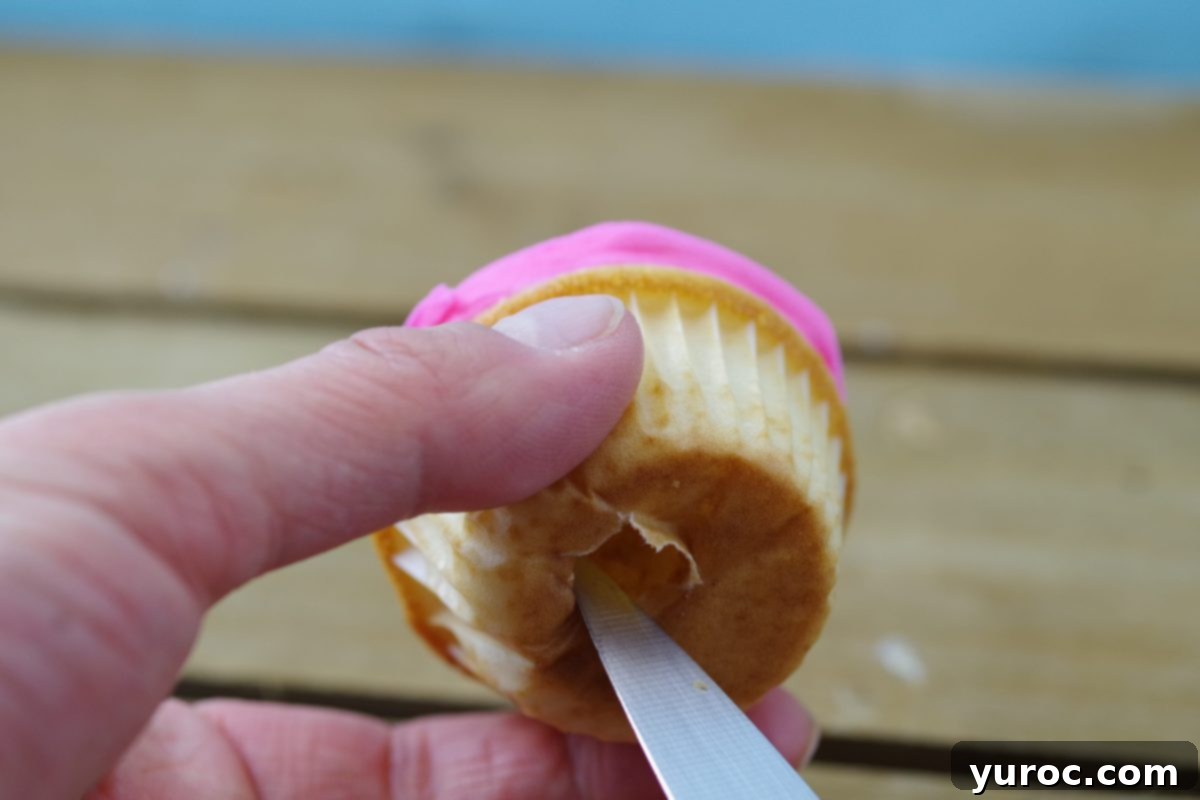
- Using a sharp knife, carefully cut a small hole into the bottom center of each iced cupcake. Ensure the hole is just large enough to fit over your straw stem; you can always make it slightly bigger if needed, but not smaller.
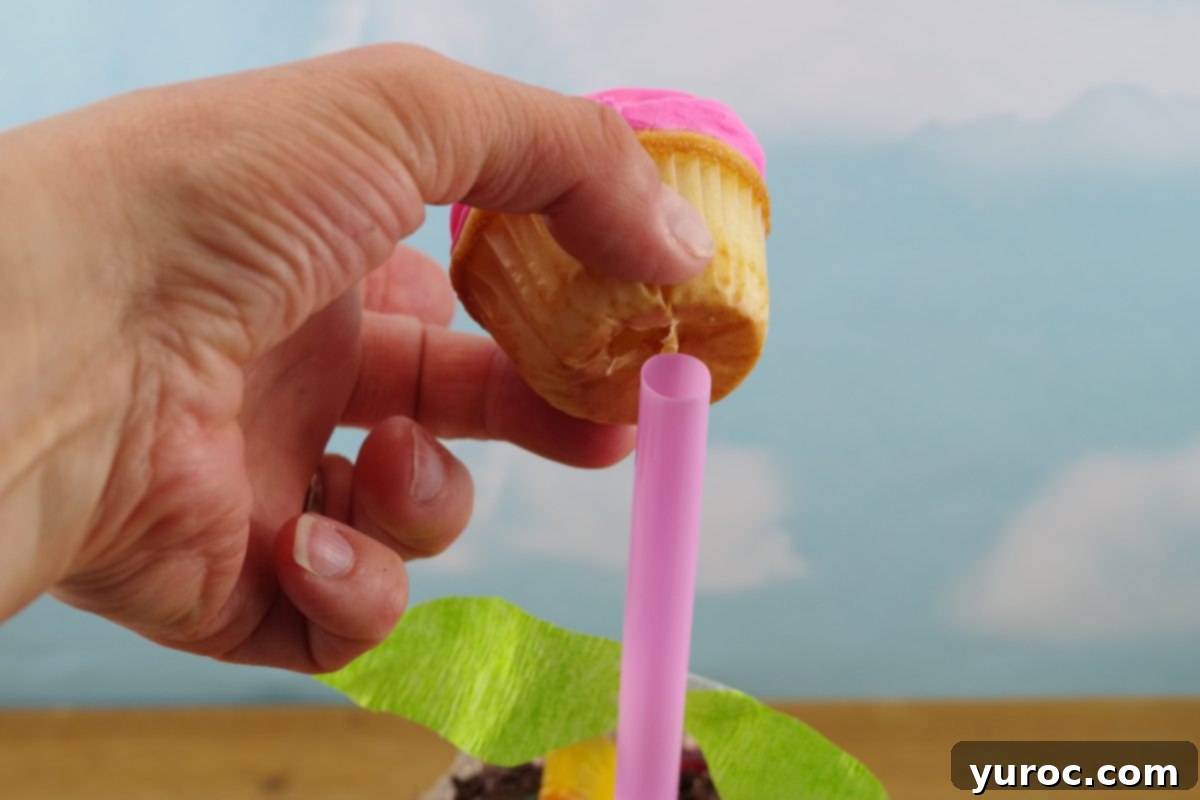
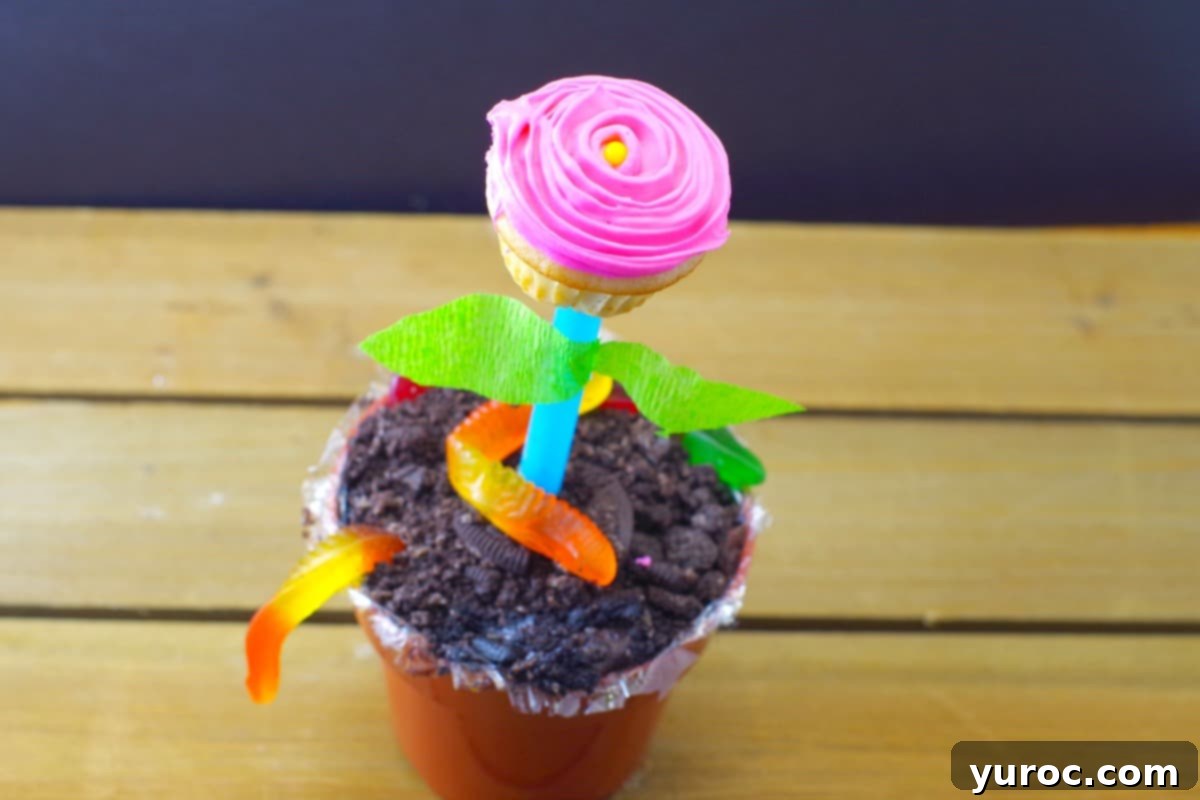
- Gently place the prepared cupcake on top of the straw stem, pushing down until it sits securely on the “dirt” layer, resembling a flower blooming from the pot.
- Trim any excess saran wrap that might be peeking out from the edges of the pot for a clean, polished look.
- For a playful final touch, arrange a few gummy worms on top of the Oreo “dirt,” as if they’re burrowing in the soil. And just like that, your charming, edible Flower Pot Cupcakes are complete!
🎥 Video Tutorial: Mastering the Rose Swirl
If you’re unsure about how to achieve that perfect rose swirl with your icing, fear not! Visual instruction can make all the difference. Check out this helpful video:
Video: HOW TO ICE A CUPCAKE (Remember to focus on the ROSE SWIRL technique for these flower cupcakes).
📖 Creative Variations & Simple Substitutions
One of the best parts of any DIY craft or recipe is the ability to customize it to your taste and available supplies. These Flower Pot Cupcakes are incredibly flexible, allowing for endless creative twists:
- Cupcake Flavors: While our recipe features a delicious vanilla base, feel free to experiment! You can use any favorite cupcake recipe or even a convenient box cake mix. For a chocolate lover’s dream, try chocolate cupcakes with rich chocolate frosting instead of vanilla. My Old Fashioned Sour Cream Chocolate Cake recipe can be easily adapted for cupcakes – just reduce the baking time by half.
- Frosting Colors: Unleash your inner artist! The frosting can be tinted any color you prefer. Imagine vibrant blues, sunny yellows, or even a rainbow of pastel flowers. Gel food coloring provides the most intense and professional-looking hues.
- “Dirt” Alternatives: If Oreos aren’t your preference, consider other crushed chocolate cookies, chocolate graham cracker crumbs, or even a mix of chocolate sprinkles and cocoa powder for the “dirt” effect.
- Pudding Varieties: While chocolate pudding works perfectly for the “dirt,” you could use vanilla or butterscotch pudding for a different flavor profile, especially if using lighter-colored cupcakes and “dirt.”
- Flower Pots: Plastic flower pots are convenient, but you could also use small terracotta pots (ensure they are clean and food-safe, perhaps lined with a small cup), or any other miniature decorative pots you find.
- Garnish Galore: Beyond gummy worms, consider adding tiny candy ladybugs, chocolate rocks, or even small edible flowers for an extra touch of garden whimsy.
- Stems: Green straws are great, but you could also use lollipop sticks or even pretzel sticks (though they won’t hold leaves as well).
👪 Serving Size & Adjustments
This recipe for Flower Pot Cupcakes is designed to yield approximately 15 delightful creations, perfect for a small party or a generous family treat. Should you need more or fewer, adjusting the recipe is a breeze! Simply click on the blue serving number within the recipe card (located below) and select your desired quantity. The ingredient amounts will automatically adjust, saving you the hassle of manual calculations. Just remember to gather additional supplies, such as flower pots and straws, if you increase the yield.
🍽 Essential Equipment for Your Edible Garden Project
To embark on this fun and creative baking and crafting journey, you’ll need a few standard kitchen tools and some readily available craft supplies. Many of these items can be found at your local craft store or conveniently ordered online:
- An electric hand mixer (for smooth cupcake batter and icing)
- Rolling pins (essential for crushing those Oreos!)
- Large mixing bowls and spoons
- Green crepe paper or streamers (for the leaves)
- Tacky clear glue (or another strong, clear adhesive)
- Milkshake straws (or other thick straws; green straws are ideal for stems)
- 1M or 2D icing tip (for the rose swirl effect)
- Disposable piping bag(s)
- Saran wrap
- Large Ziplock freezer bags
- Mini cupcake liners
- Small plastic flower pots (or terracotta pots, ensuring they are food-safe or adequately lined)
- Mini cupcake/muffin pan
🌡️ Storage Tips for Freshness
These delightful Flower Pot Cupcakes are best enjoyed fresh! For optimal taste and texture, store them at room temperature for up to 2 days. If you need to keep them longer, they can be refrigerated for an additional 1-2 days, though the cupcakes might dry out slightly and the Oreo “dirt” could become a bit softer. Always keep them covered to prevent them from drying out or absorbing other food odors.
My little brother, Danny, the thoughtful giver of that cherished hockey puck, was only about four years old at the time. He was just beginning to grasp the beautiful concept of altruistic giving. At that tender age, children often wrap up their most prized possessions, eager to share them with those they love. I witnessed my own children do the very same thing when they were small, and the memory floods me with heartfelt nostalgia. It’s a truly special phase in a child’s development, watching them begin to think beyond themselves and experience the joy of giving. As a parent, it’s an incredible and beautiful unfolding to witness. I’m forever grateful to have experienced it. If you know my story, you’ll know I was told I couldn’t have kids at all, so every moment like this is a profound gift.
And if my memory serves me correctly, I believe we all received a used hockey puck for Christmas that year too, all from Danny. But, quite obviously, those hockey pucks didn’t hold the same profound meaning for me as they did for Mom. That would have been an incredibly difficult thing for her to articulate, especially to a child. The true value of a gift, sometimes, is measured not by its monetary worth or brand new sheen, but by the love, innocence, and selflessness with which it is given.
Happy Mother’s Day, and enjoy crafting these special memories!
⭐ Your Feedback is Valued!
Did you make this heartwarming recipe? Please RATE THE RECIPE below and leave a comment! Your feedback helps other crafters and bakers in our community. We love hearing about your experiences and seeing your beautiful creations!
Please SUBSCRIBE (and get my FREE E-cookbook) and be sure to FOLLOW ME on FACEBOOK, TWITTER, INSTAGRAM and PINTEREST! Let’s connect and share more delicious and creative ideas!

🌼 Flower Pot Cupcakes Recipe
Print Recipe
Pin
Save RecipeSave Recipe
Rate
Add to Shopping ListGo to Shopping List
Ingredients
Super Easy White Mini Cupcakes:
- 1 cup all-purpose flour
- ½ cup white granulated sugar
- ½ tablespoon baking powder
- dash of salt
- ½ cup milk
- ¼ cup canola oil
- 1 egg
- ½ teaspoon vanilla extract
Icing:
- 4 12 ounce containers of whipped vanilla icing I use Betty Crocker whipped vanilla
- ½ teaspoon rose or pink icing color * amount you add will vary, depending on color you want to achieve
- 1 1.8 ounce container yellow jumbo nonpareils
Flower pot “dirt”
- 45 3.25 ounce chocolate pudding snack pack containers *This ingredient link is just to show you, but Walmart carries the full chocolate packages of 12
- 5 19.1 family packages of oreo cookies (10 cookies each)
Garnish:
- 45 gummy worms
Supplies:
- 1 roll green crepe paper/streamers
- 1 bottle tacky clear glue ( some kind of strong, clear glue)
- 15 milkshake straws (or other thick straws)
- 2 1M tip kids can share
- 1 package disposable pastry bags
- 1 package saran wrap
- 15 large ziplock freezer bags
- 3 rolling pins
- 1 package of mini cupcake liners
- 15 plastic flower pots
- 1 mini cupcake/muffin pan
Instructions
Make the Cupcakes:
-
With the rack in the middle position, preheat oven to 180 °C (350 °F). Line mini muffin/cupcake tin with mini muffin/cupcake liners.
-
In a large bowl, combine the flour, sugar, baking powder, and salt. Add the remaining ingredients and combine using a whisk or an electric mixer until the batter is smooth. Pour the batter into mini muffin/cupcake tin, filling to ¾ full only.
-
Bake cupcakes for about 13- 15 minutes or until a cake tester or toothpick inserted in the centre of the cake comes out clean.
-
While the cupcakes are baking, begin to prepare the rest of the craft.
-
When cupcakes are done, let the cupcakes cool on a wire rack.
Flower pot ‘dirt’:
-
Line a plastic flower pot with saran wrap.
-
Pour 3 chocolate snack pack puddings inside.
-
Add 10 oreo cookies (per flower pot) to a large ziplock bag and close the bag. Then crush into small chunks with a rolling pin. It is best to do this step on the floor.
-
Pour the crushed oreos on top of the pudding.
Stem:
-
Cut 2 leaf shapes out of the crepe paper. We just did this free-hand, as it’s pretty simple.
-
Glue leaves onto straw with tacky glue (or a strong clear glue).
-
Place straw (stem) into flower pot.
Ice cupcake:
-
Color the icing (if desired). I used a pink icing color. Then fit pastry bag with IM or 2D tip and ice in circular motion, beginning in the middle of the cupcake and moving towards the outer edges, turning the cupcake as you pipe.
-
You will have additional cupcakes, but some may break, not go on correctly etc… And it’s nice to have extra cupcakes for the kids to eat!
-
See VIDEO INSTRUCTIONS IN NOTES on how to ice a cupcake if you’re not sure how to ice a cupcake with a IM tip. *** USE THE ROSE SWIRL
Place the candy decoration in the middle of the rose
Assembly:
-
Cut a hole into bottom of the middle of the cupcake with a sharp knife. Make sure that it’s not too big- you can always make it a little bigger if it doesn’t go on the first time, but you can’t make it smaller.
-
Place cupcake on top of straw.
-
Trim excess saran wrap from edges of pot.
-
Add gummy worms. You are done!
Notes