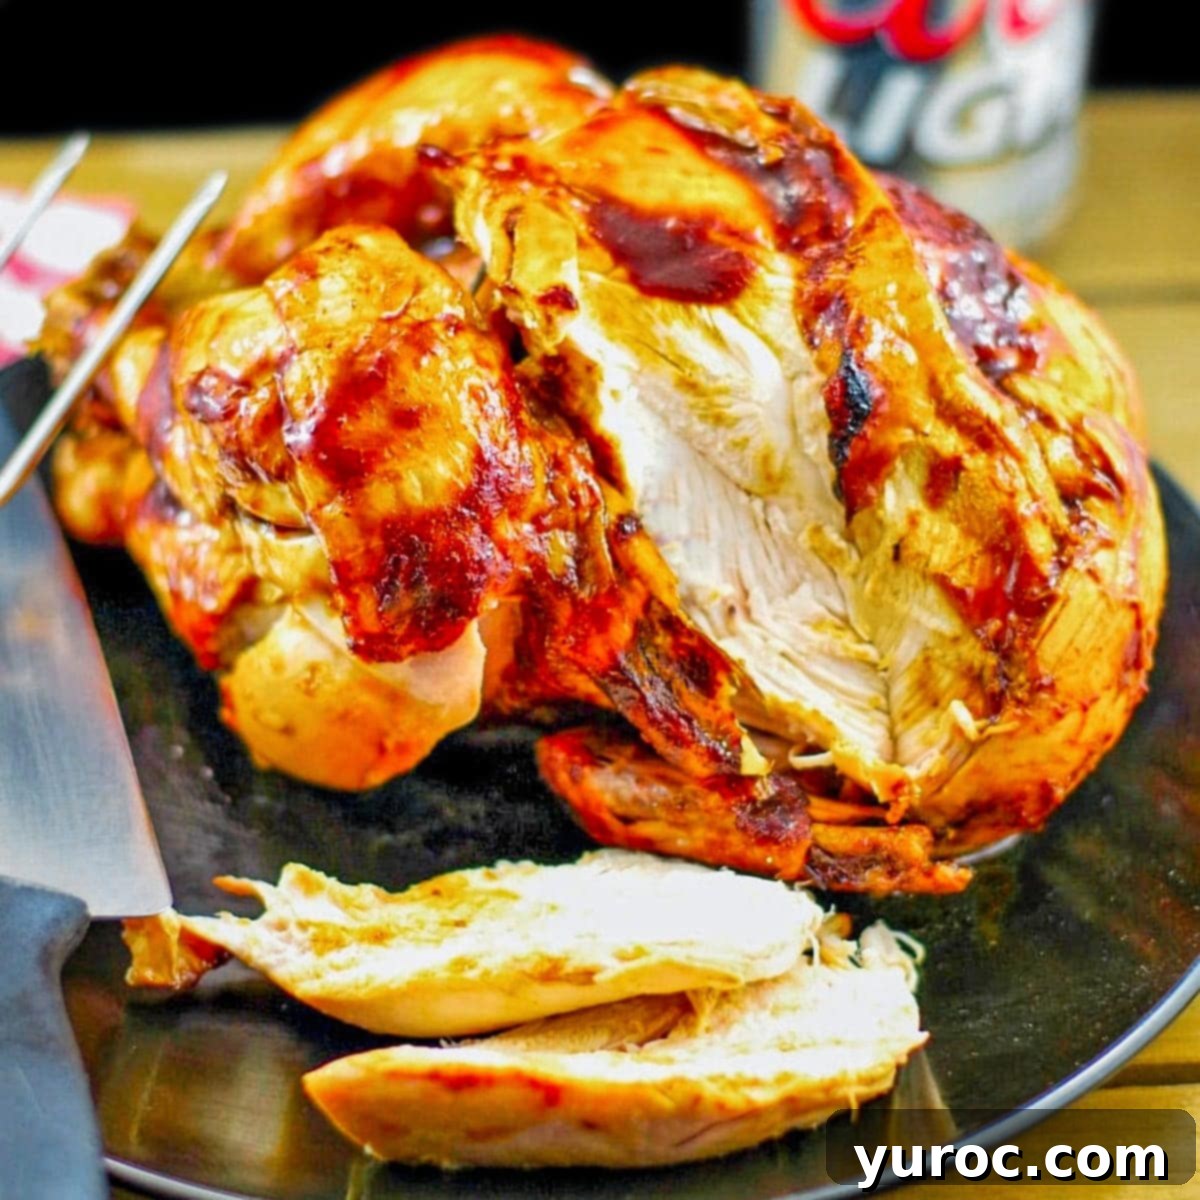
The Ultimate BBQ Beer Can Chicken Recipe: Juicy, Tender & Perfectly Grilled for Father’s Day
Discover the secret to incredibly moist, tender, and flavorful grilled chicken with this sensational BBQ Beer Can Chicken recipe, also affectionately known as Beer Butt Chicken. I first stumbled upon this grilling phenomenon back in 2003 during its peak popularity, and after a brief hiatus, it’s making a well-deserved comeback. There’s a true resurrection of this classic, and for good reason! Not only is it unbelievably delicious, but it’s also a surprisingly healthy way to prepare a whole chicken, as much of the fat conveniently drips away during the indirect grilling process. If you’re on the hunt for easy, healthy, and utterly delicious chicken dinner recipes, especially perfect for occasions like Father’s Day, look no further – this is the one!
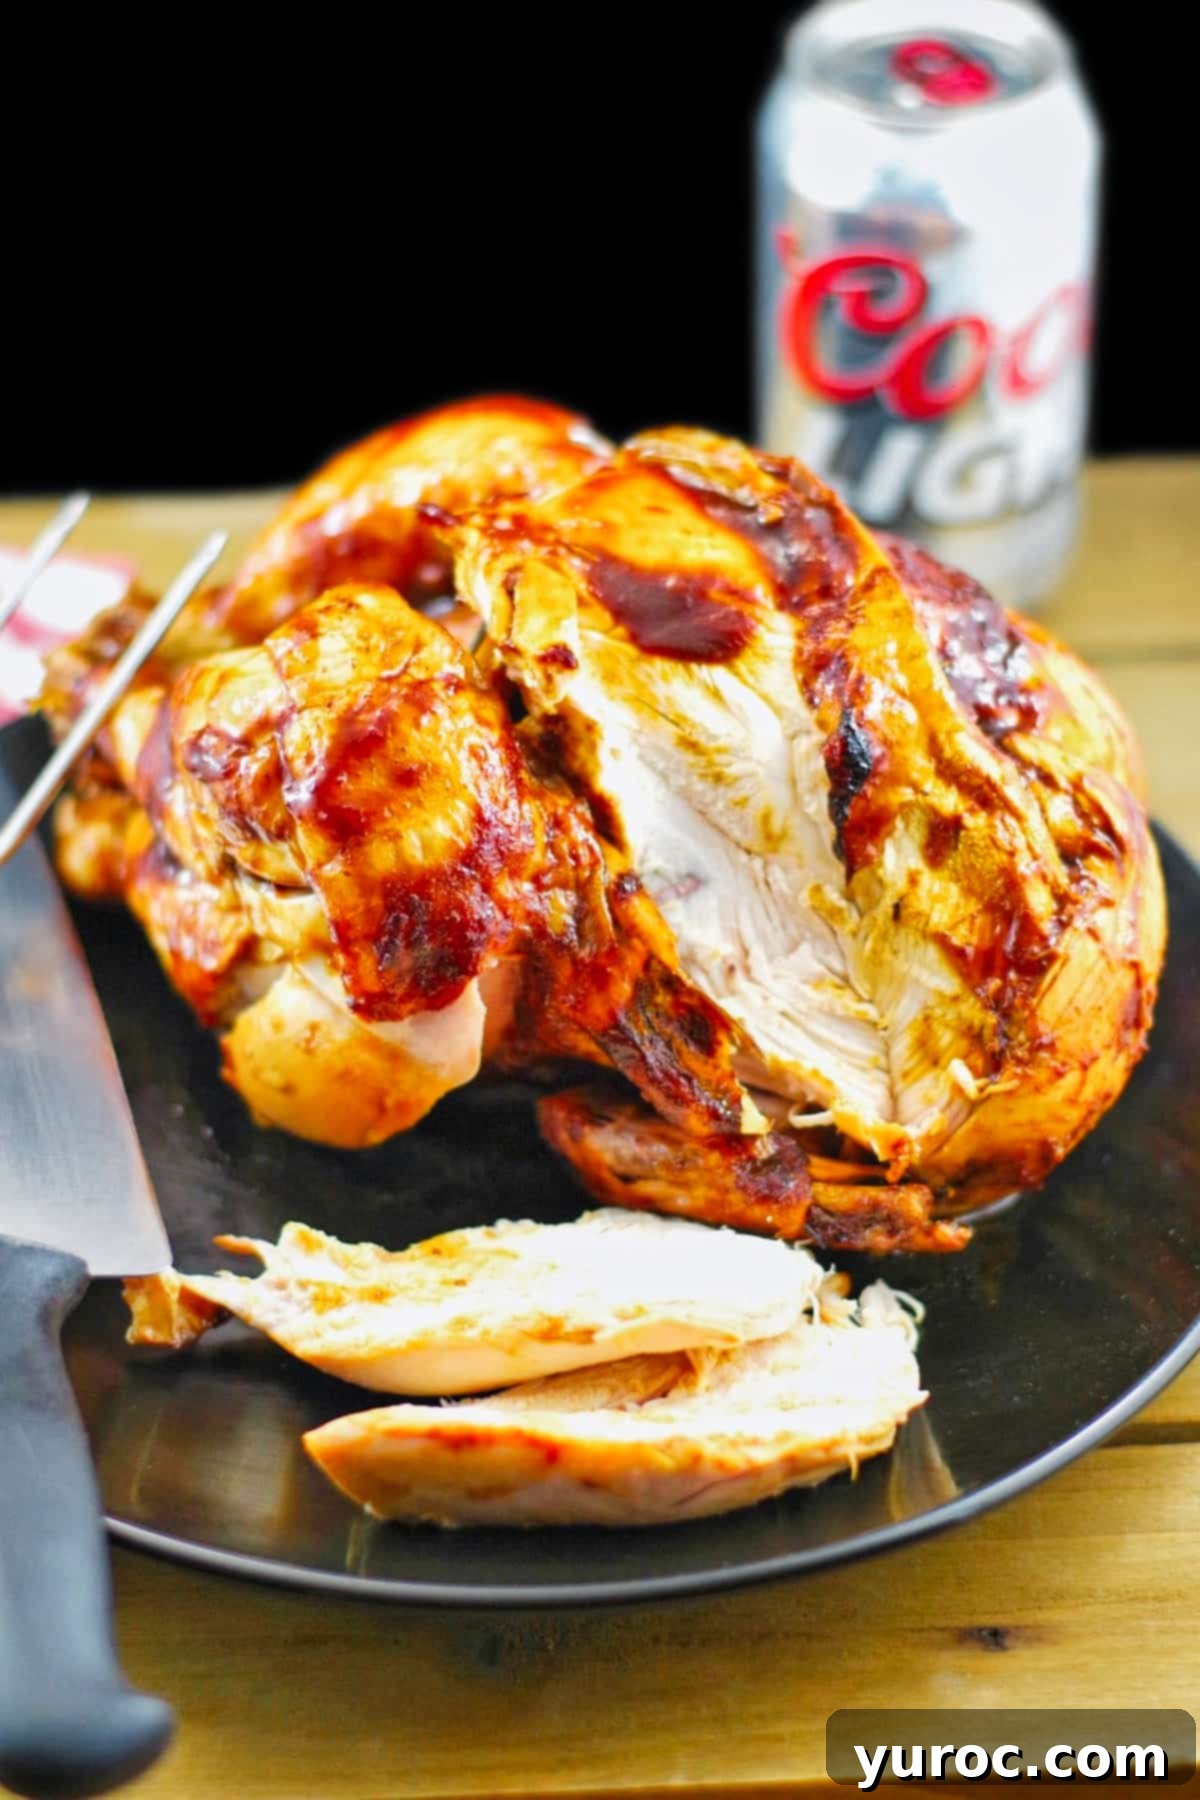
The magic of Beer Can Chicken lies in its unique cooking method. For reasons that are as simple as they are effective, placing a half-filled can of beer into the chicken’s cavity results in a bird that is exceptionally tender, incredibly juicy on the inside, and boasts a wonderfully crispy skin on the outside. This method steams the chicken from within while the external indirect heat crisps it up, creating a perfect balance. This particular Beer Butt Chicken recipe is a perennial favorite throughout the summer months, making it a staple for grilling season and backyard barbecues.
[feast_advanced_jump_to]
My own father is a true grill master, a “BBQ’er” if you will – and I can confidently say he makes the best barbecue chicken I’ve ever tasted. He always swore by his secret: generous amounts of delicious BBQ sauce. Perhaps that’s why this Beer Can Chicken recipe holds a special place in my heart and taste buds. It features an absolutely AMAZING Molasses BBQ sauce that takes this grilled chicken from great to unforgettable!
BBQ chicken has always been one of my absolute favorites, and this easy, Weight Watchers Friendly Barbecue Beer Can Chicken recipe is certainly no exception. It delivers on flavor without compromising on health. Whether you call it Beer Can Chicken or Beer Butt Chicken, the result is the same: a show-stopping meal that’s perfect for feeding a crowd or simply enjoying with your family on a warm evening.
🍗 Essential Ingredients for Perfect Beer Can Chicken
Crafting the perfect Beer Can Chicken starts with selecting quality ingredients for both the chicken and our signature Molasses BBQ sauce. Here’s a closer look at what you’ll need:
- Beer: The star of the show! I typically opt for a light beer, such as Coors Light, as it imparts a subtle flavor without overpowering the chicken. It also keeps the recipe lighter, which is a bonus if you’re mindful of calories or following a program like Weight Watchers. While the type of beer doesn’t drastically alter the flavor profile of the chicken itself, a lighter beer works well in the sauce to maintain balance.
- Whole Chicken (Roaster): Choose a whole chicken, typically a roaster, weighing between 3-5 pounds. Ensure it’s fresh and has been properly thawed if frozen. Preparing the chicken by patting it dry is crucial for achieving that coveted crispy skin.
- Chili Sauce (for BBQ Sauce): I find Heinz Chili Sauce to be ideal for this recipe due to its wonderfully mild flavor, which serves as an excellent base for our BBQ sauce. It provides a foundational tang and sweetness without being overly spicy, allowing other flavors to shine.
- Molasses (for BBQ Sauce): Molasses is key to achieving that rich, deep, and classic barbecue flavor. It adds a luxurious sweetness and a beautiful dark hue to the sauce, while also balancing the tangy and spicy notes from the other ingredients. Don’t skip this for an authentic BBQ taste.
- Louisiana Hot Sauce (for BBQ Sauce): This bold pepper sauce introduces a fantastic kick of heat from its combination of horseradish and hot peppers. Crucially, it adds zest without sacrificing the hearty flavor of the overall sauce, ensuring a well-rounded taste experience. Adjust the amount to your preferred spice level.
- Lemon Juice (for BBQ Sauce): I use lemon juice from concentrate for convenience, but fresh lemon juice works just as well. It provides a bright, acidic counterpoint to the richness of the molasses and chili sauce, cutting through the sweetness and adding a vibrant zing to the BBQ sauce.
- Liquid Smoke (for BBQ Sauce): While you only need a small amount of liquid smoke, it makes a monumental difference in the final flavor. It infuses the sauce with that authentic, irresistible smoky depth characteristic of slow-smoked barbecue, even when cooking on a gas grill. It’s a secret weapon for enhancing grilled flavor.
*Refer to the full recipe card below for the precise list of ingredients and quantities required for both the chicken and the Molasses BBQ sauce.
📖 Recipe Variations and Smart Substitutions
Flexibility in cooking allows for personalization and adapting to what you have on hand. Here are some smart variations and substitutions for this Beer Can Chicken recipe:
- Chili Sauce Alternatives: If Heinz Chili Sauce isn’t available, you have a few options. A simple substitute is ketchup mixed with a pinch of cayenne powder for a mild heat. For more in-depth alternatives, explore other chili sauce substitutes that might fit your pantry and palate. You could also try a combination of tomato paste, vinegar, and a touch of brown sugar and spices.
- Lemon Juice Options: While lemon juice from concentrate is convenient, fresh lemon juice can elevate the brightness of the sauce. If using fresh lemons, you’ll generally need to double the amount specified in the recipe to achieve a similar tartness.
- Embrace a Dry Rub: For an additional layer of flavor or a different take on BBQ, consider applying your favorite dry rub to the chicken before placing it on the grill. A good dry rub, made with a blend of spices like paprika, garlic powder, onion powder, brown sugar, salt, and pepper, can create an incredible crust. You can use it in conjunction with the Molasses BBQ sauce (apply the rub first, then baste with sauce later in cooking) or as a standalone flavoring.
- Alternative Liquids for the Can: While beer is traditional, if you prefer not to use it, or are looking for a non-alcoholic option, you can substitute it. Chicken broth, apple cider, or even a can of soda (like Coca-Cola for a sweet glaze, or ginger ale for a milder flavor) can work similarly by providing internal moisture. Just ensure the can is safe for grilling.
- Spice it Up or Down: Feel free to adjust the amount of Louisiana hot sauce to suit your heat preference. For less heat, reduce the amount or omit it entirely. For more kick, a dash of extra cayenne pepper or a spicier hot sauce can be added.
🔪 Step-by-Step: How to BBQ Whole Beer Can Chicken
Making delicious BBQ Beer Can Chicken on your grill is surprisingly straightforward and relies on the principle of indirect heat, which helps cook the chicken evenly and keeps it moist. Follow these steps for a perfectly cooked bird:
- Preheat Your Grill: Begin by heating your gas grill to a medium temperature, aiming for around 350-375°F (175-190°C). For indirect cooking, you’ll typically turn on burners on one side of the grill and leave the other side off. The chicken will cook on the side with no direct flame beneath it. If using a charcoal grill, arrange coals to one side.
- Prepare the Beer Can: Carefully open one can of beer using a can opener. Pour out approximately half of the beer into a separate container and reserve it. This reserved beer will be used in our amazing Molasses BBQ sauce.
- Prepare the Chicken: Thoroughly pat the entire chicken, inside and out, with paper towels. This crucial step removes excess moisture, which is key to achieving that desirable crispy skin. Remove any giblets from the cavity if they haven’t been already.
- Position the Chicken: Carefully lower the whole chicken onto the top of the partially filled beer can, pushing the can firmly into the chicken’s cavity (its “butt”). Ensure the chicken is stable and upright on the can. If you have a dedicated beer can chicken holder (see equipment section), now is the time to use it for extra stability and drip collection.
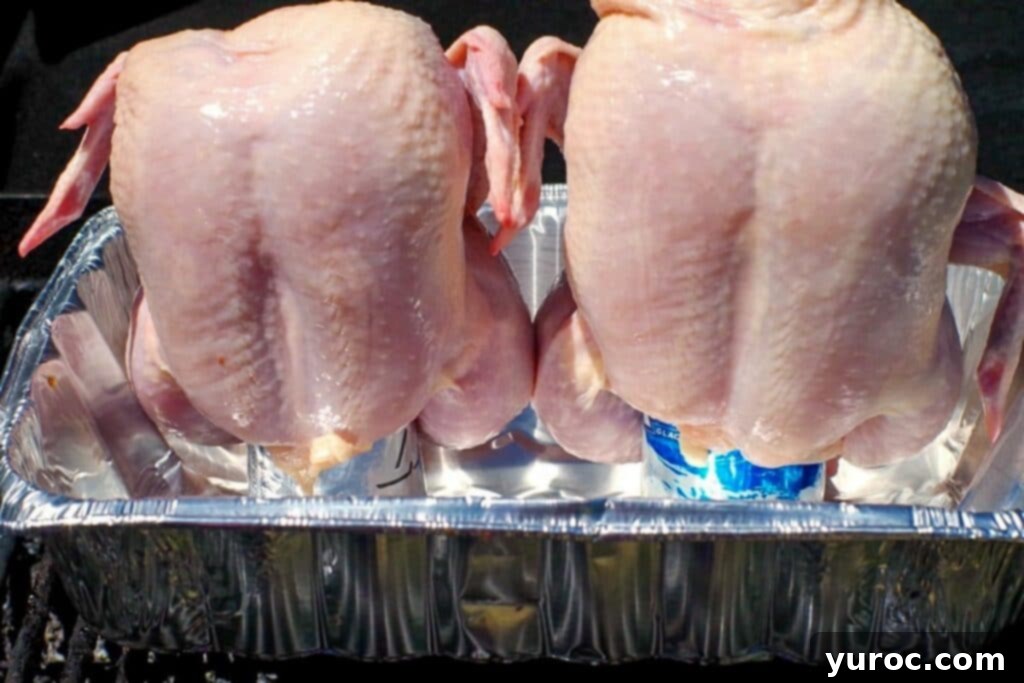
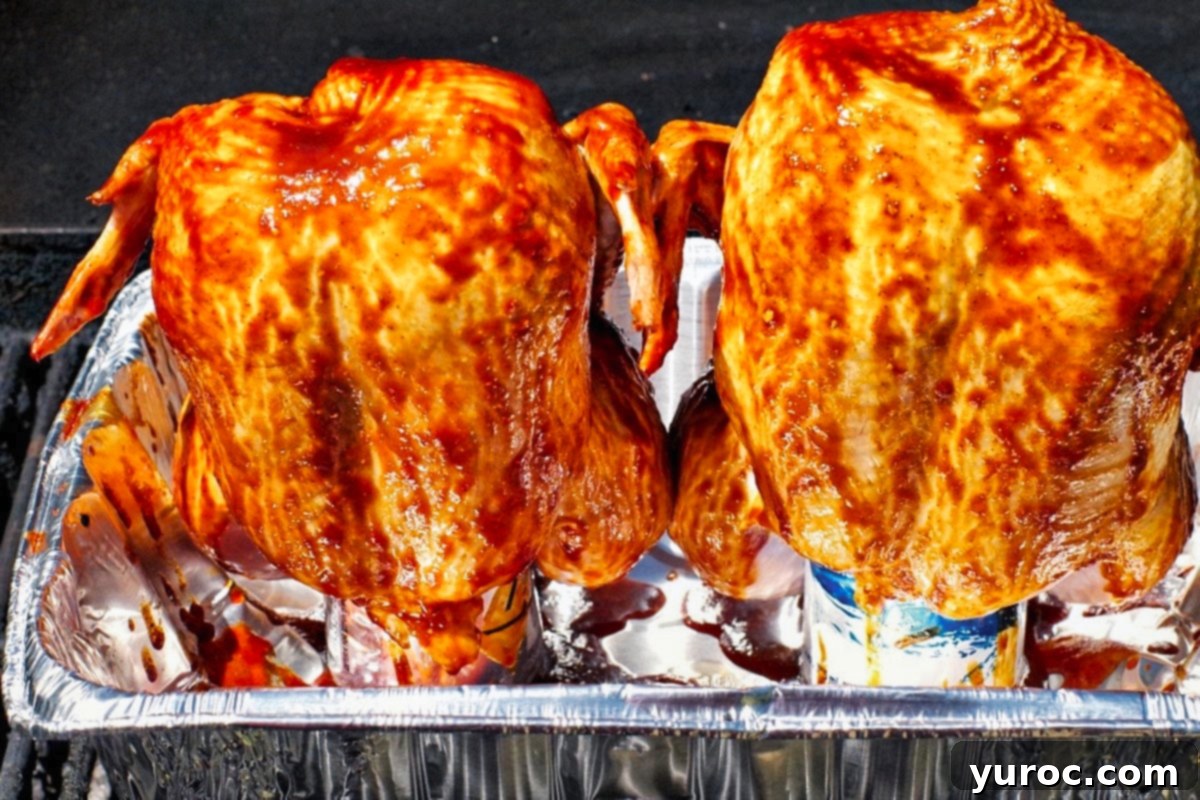
- Begin Grilling (Initial Phase): Place the chicken, still upright on its beer can, into a deep aluminum roasting pan. This pan will catch all the delicious drippings and prevent flare-ups, while also making cleanup easier. Position the pan onto the preheated gas grill, ensuring it’s on the side with indirect heat. Close the BBQ lid and let the chicken cook for approximately 45 minutes without disturbing it.
- Prepare and Apply BBQ Sauce: While the chicken is cooking, combine all the Molasses BBQ sauce ingredients in a saucepan. Whisk them together until well blended. After the initial 45 minutes of cooking, open the grill lid and generously baste the outside of the chicken with a liberal amount of the prepared BBQ sauce.
- Continue Grilling (Final Phase): Close the grill lid once more and allow the chicken to cook for the remaining 45 minutes, or until it reaches the desired internal temperature (see ‘Top Tip’ below for details on checking doneness).
- Simmer Remaining BBQ Sauce: In the same saucepan, gently simmer the remaining BBQ sauce over low heat for about 20 minutes, stirring occasionally. This will allow the sauce to thicken and reduce by approximately half its volume, concentrating its rich flavors.
- Rest, Slice, and Serve: Once the chicken is fully cooked, carefully remove it from the grill. Transfer it to a cutting board and allow it to rest for 10-15 minutes before carving. Resting is essential as it allows the juices to redistribute throughout the meat, ensuring a more tender and flavorful chicken. Slice the chicken as desired and serve it with the thickened, reserved BBQ sauce on the side. The result will be an incredibly flavorful and juicy chicken that’s sure to impress!
*Important Note on Fuel: For this method of cooking, your grill will need to maintain a consistent temperature for up to 1.5 hours. If you’re using a propane gas grill, make sure you have a full tank or an extra tank on hand to avoid running out mid-cook!
**Important Note on Cooking Time: The total cooking time provided (1.5 hours) is an estimate. The actual time will vary depending on the size of your whole chicken and the precise temperature of your grill. The only accurate way to determine doneness is by checking the internal temperature with a reliable meat thermometer. It should reach 165°F (74°C) in the thickest part of the thigh, away from the bone.
***Important Note on Grill Height: Ensure your grill is tall enough to accommodate a whole chicken standing upright on a beer can, with enough clearance for the lid to close completely. Always do a quick test fit before you light the grill to prevent any surprises.
Best Beer for Beer Can Chicken: What You Need to Know
When it comes to selecting the best beer for Beer Can Chicken, many people overthink it. The truth is, the type of beer you use actually makes less of a difference to the chicken’s flavor than you might expect. The primary role of the beer in the can is to create steam within the chicken’s cavity, which helps keep the meat incredibly moist and tender. After experimenting with various types and brands of beers over the years, I’ve found that they all deliver fantastic results.
You don’t need to reach for a fancy craft beer for this recipe; in fact, I generally do not recommend using very hoppy or intensely flavored craft beers. Strong, bitter IPAs or very dark stouts can sometimes impart a slightly off-flavor if too much liquid drips into the pan or steams too aggressively. A simple, affordable lager or light beer is often the best choice.
However, if you’re aiming to keep the recipe lighter, healthier, and particularly Weight Watchers friendly (especially since some beer is also used in the Molasses BBQ sauce), then opting for a light beer is a smart move. My go-to for this recipe is usually Coors Light. Its mild flavor ensures it won’t compete with the delicious BBQ sauce, and it still performs perfectly for internal steaming. Ultimately, while a light beer is my preference for a balanced flavor and calorie count, feel free to use a can of your favorite mild-flavored beer if you prefer – just avoid anything too strong or complex.
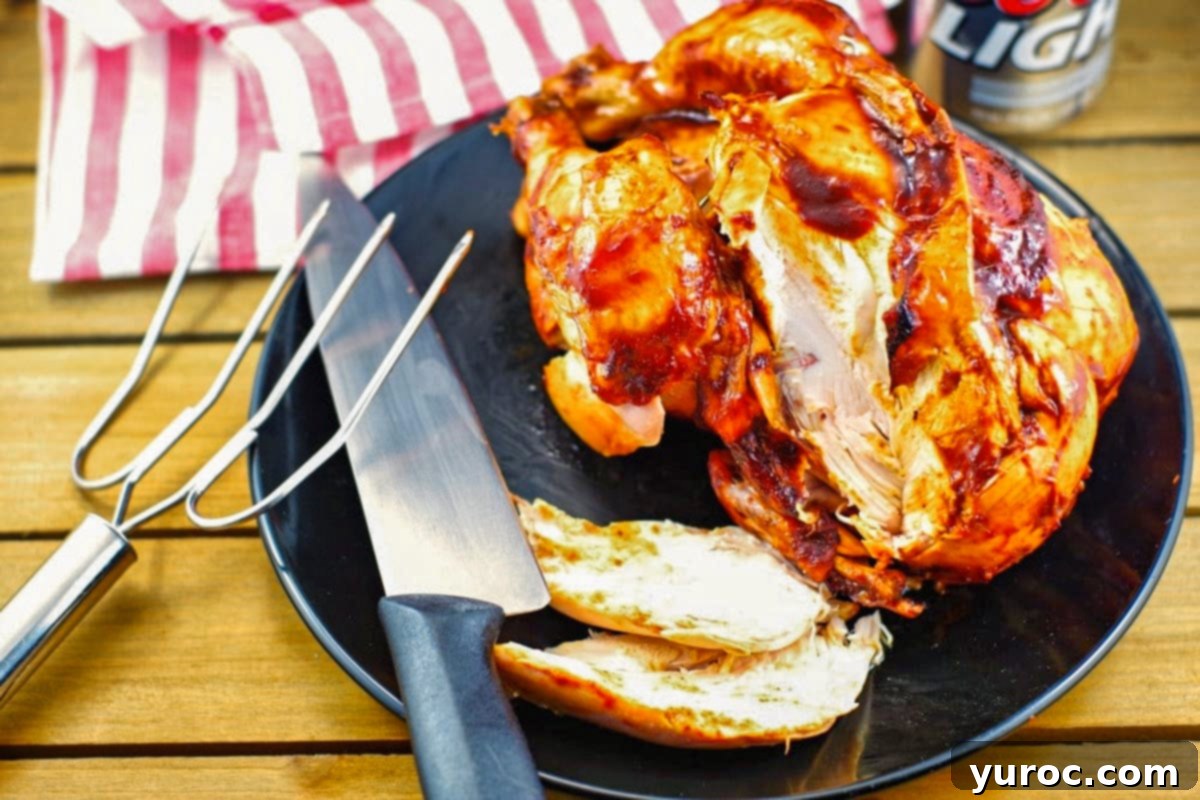
🥗 Delightful Sides to Serve with Beer Can Chicken
A perfectly grilled Beer Can Chicken deserves an equally impressive supporting cast of side dishes. Here are some of the very best pairings that will complete your barbecue feast and delight your taste buds:
- 5 Minute Easy Bean Salad: A refreshing and vibrant salad that comes together in minutes. Its crisp texture and tangy dressing provide a lovely contrast to the rich chicken, making it a healthy and quick side.
- Healthy Classic Potato Salad: (shown in image below) A creamy, comforting classic that’s a staple at any barbecue. Our healthy version means you can indulge without guilt, offering a satisfying and flavorful accompaniment to the chicken.
- Healthy Mexican Street Corn (Elote): Bring a taste of summer festival to your table with this flavorful corn dish. Grilled corn slathered with a zesty, creamy topping offers a sweet and savory kick that pairs beautifully with the smoky chicken.
- Coleslaw: A cool, crunchy, and tangy coleslaw provides a refreshing bite that perfectly complements the savory chicken. Whether creamy or vinaigrette-based, it’s always a crowd-pleaser.
- Grilled Vegetables: Asparagus, bell peppers, zucchini, or onions, lightly seasoned and grilled alongside the chicken, add a fresh, smoky flavor and healthy nutrients to your meal.
- Corn on the Cob: Simple, sweet, and satisfying, grilled or boiled corn on the cob is a quintessential summer side that’s easy to prepare and universally loved.
- Baked Beans: Classic baked beans, with their sweet and smoky undertones, are a hearty and flavorful addition that rounds out any BBQ spread.

For an even wider array of options, be sure to explore these 21 Side Dishes to Serve with Beer Can Chicken for the rest of the best ideas!
💡 Top Tip: Food Safety and Doneness with an Instant-Read Thermometer
Ensuring your Beer Can Chicken is perfectly cooked and safe to eat is paramount. The absolute best way to check for doneness is by measuring the internal temperature with an accurate instant-read thermometer (affiliate link). Insert the thermometer into the thickest part of the chicken’s thigh, making sure it doesn’t touch the bone, as bones can give a false reading.
For grilled Beer Butt Chicken, the target internal temperature for poultry is 165°F (74°C). This temperature ensures that any harmful bacteria are eliminated, leaving you with a safe and delicious meal. I personally own and love one of these instant-read thermometers; it’s an invaluable tool in my kitchen and I use it for everything from baking pies to cooking roasts and checking bread!

- This instant-read thermometer is more than just a meat thermometer! I rely on my Thermapen for a wide array of cooking tasks, from baking perfect pies and fluffy bread to cooking eggs, casseroles, making candy, and so much more!
- This amazing little tool instantly and accurately measures temperature with just a quick poke. It’s not just for the grill; it’s the go-to kitchen instrument trusted by some of the world’s most acclaimed chefs and BBQ champions (even Alton Brown considers it one of his ‘favorite things’).
- Furthermore, it often comes with a handy little chart that provides chef-recommended temperatures, as well as the minimum safe cooking temperatures for various foods, making it an indispensable guide for any home cook.
🍽 Essential Equipment for Beer Can Chicken
While the Beer Can Chicken method is fairly simple, having the right equipment can make the process even smoother and more enjoyable. Here’s what you’ll need and some recommendations:
First and foremost, you’re going to need a way to support the chicken on the beer can. My current setup involves a large aluminum roasting pan, which serves as both a drip pan and a base. I carefully balance the chicken on top of the beer can within this pan, as shown in one of the photos above. While this make-shift method works, it can sometimes be a bit wobbly, requiring careful handling. For ultimate stability and peace of mind, especially if you plan to make Beer Can Chicken regularly, investing in a dedicated beer can chicken stand is highly recommended.
Many fantastic beer can chicken holders are available on the market. I particularly favor the beer can roasting chicken holders that come with their own roaster. These integrated systems provide excellent stability and often include a pan to catch drippings, simplifying cleanup and preventing grill flare-ups. If I were to purchase one today, I would definitely choose this style for its practicality and design. Another indispensable tool for any grilling enthusiast is a good pair of BBQ mitts (affiliate links). These heat-resistant gloves are essential for safely handling hot chicken and maneuvering trays on a scorching grill. They offer protection and a firm grip, making your grilling experience much safer and more comfortable.
👪 Serving Size and Batch Cooking Tips
This Beer Can Chicken recipe is designed to generously serve 6 people, making it perfect for family dinners or a small gathering. However, if you’re hosting a larger crowd or simply love having delicious leftovers (who doesn’t?!), you can easily adjust the recipe. Most recipe cards offer a convenient feature to double or triple the serving size by simply clicking on the serving number and selecting your desired quantity. The ingredient amounts will automatically adjust, saving you the hassle of manual calculations.
As you can see in some of the photos provided, I often make two whole chickens at once. This is a fantastic strategy for efficient meal prep, ensuring you have plenty of that amazing juicy chicken for future meals, sandwiches, or salads. Grilling two chickens simultaneously typically doesn’t significantly increase the cooking time, especially if your grill is large enough to maintain indirect heat around both birds. Just ensure proper spacing for even cooking and good airflow.
🔢 Weight Watchers Points for Beer Can Chicken
For those following the Weight Watchers program, this Beer Can Chicken recipe, especially when paired with our delicious BBQ sauce, is a great option. When consuming the breast meat, which is typically leaner, this chicken dish calculates to approximately 6 WW points per serving. Keep in mind that the point value can vary if you opt for other parts of the chicken, particularly if you include the crispy chicken skin, which is higher in fat. To accurately track your points, consider the specific cut of chicken you’re eating and adjust your calculations accordingly. This recipe focuses on leaner preparation methods, making it a fantastic choice for a healthy yet flavorful meal.
🌡️ Storage and Reheating Leftover Beer Can Chicken
Should you be lucky enough to have any leftover Beer Can Chicken, proper storage is key to maintaining its flavor and freshness. Store any remaining cooked chicken in an airtight container in the refrigerator for up to 4 days. To prevent the chicken from drying out and to keep the sauce at its best, it’s recommended to store the extra BBQ sauce in a separate airtight container.
When reheating, gently warm the chicken in the oven or on the stovetop with a little chicken broth to keep it moist. Avoid microwaving if possible, as it can sometimes make the chicken rubbery. A low-temperature oven (around 275°F / 135°C) for 15-20 minutes, covered with foil, works wonderfully to bring it back to juicy perfection. Serve with a fresh dollop of the reserved BBQ sauce.
If you’ve enjoyed cooking and baking with beer in this recipe, you’ll love exploring other beer-infused delights! Be sure to try my Easy Beer Cheese Soup for a comforting and savory meal, and indulge in my rich Guinness Chocolate Cake with Baileys Frosting for a truly decadent dessert.
So, whether it’s for a special occasion like Father’s Day, a casual summer barbecue, or just a weeknight when you’re craving an exceptional grilled chicken, this BBQ Beer Can Chicken recipe is a must-try. Its moist, juicy chicken and incredible Molasses BBQ sauce are sure to become a cherished family favorite, bringing smiles and satisfied appetites to your table time and time again!
More Mouthwatering BBQ and Grilling Recipes
- Maple Cider Grilled Chicken Kabobs
- Grilled Steak Salad Recipe with Feta and Clamato Dressing (Moxie’s Copycat)
- Marinated Maple BBQ Pork Loin Steaks
- Grilled Greek Ribs
Did your family ❤️ this recipe? Did you know that commenting and ⭐ rating recipes is one of the best ways to support your favorite recipe creators? If you LOVED this recipe, please comment and rate it in the recipe card or share photos on social media using the hashtag #foodmeanderings or tagging @foodmeanderings!

📋 BBQ Beer Can Chicken Recipe
Print Recipe
Pin
Save RecipeSave Recipe
Rate
Add to Shopping ListGo to Shopping List
Equipment
-
beer can chicken holder or deep aluminum roasting pan
-
Gas or Charcoal BBQ Grill
-
Instant-Read Thermometer
-
BBQ Mitts
Ingredients
- 1 can light beer (like Coors Light)
- 1 whole chicken (roaster, approx. 3-5 lbs)
- Molasses & Beer BBQ sauce (prepared from ingredients below)
For the Molasses & Beer BBQ sauce:
- 1 ¼ cup chili sauce (e.g., Heinz)
- ¾ cup molasses
- ¾ cup light beer (reserved from opening the can)
- 2 tablespoon dijon mustard
- 1 tablespoon chili powder
- 1 tablespoon Louisiana hot sauce (adjust to your spice preference)
- 1 ¼ tablespoon lemon juice (from concentrate or fresh)
- ½ tablespoon liquid smoke
Instructions
-
Preheat your grill to medium heat, aiming for 350-375°F (175-190°C). Set up your grill for indirect heat (e.g., burners on one side, chicken on the other).
-
Open the can of beer. Pour approximately half of the beer into a container and set aside; this will be used for the BBQ sauce. Pat the entire whole chicken thoroughly dry with paper towels to ensure crispy skin.
-
Carefully place the dried chicken onto the partially filled beer can, inserting the can into the chicken’s cavity as shown in the images. Ensure the chicken is stable. Use a beer can chicken holder if you have one.
-
Place the chicken upright in a deep aluminum roasting pan and position it on the indirect heat side of your grill. Close the BBQ lid and cook for the first 45 minutes without opening.
-
While the chicken cooks, combine all the Molasses & Beer BBQ sauce ingredients (chili sauce, molasses, reserved light beer, dijon mustard, chili powder, Louisiana hot sauce, lemon juice, liquid smoke) in a saucepan and mix well. After the initial 45 minutes, open the grill and generously baste the chicken with a portion of the sauce.
-
Close the grill lid and allow the chicken to cook for the remaining 45 minutes, or until the internal temperature reaches 165°F (74°C) in the thickest part of the thigh, away from the bone, using an instant-read thermometer.
-
Meanwhile, gently simmer the remaining BBQ sauce in the saucepan for about 20 minutes, or until it has reduced by approximately half its volume and thickened to your liking.
-
Once cooked, carefully remove the chicken from the BBQ. Let it rest on a cutting board for 10-15 minutes before carving. Serve the juicy chicken slices with the thickened BBQ sauce as desired.
Notes
**Grill Clearance: Before lighting your grill, always double-check that it is tall enough to close completely over the whole chicken standing upright on the beer can.
***Nutritional Analysis Disclaimer: It is challenging to provide an exact nutritional analysis for this recipe due to variables like chicken size, the amount of fat rendered, and how much BBQ sauce is consumed vs. baked off. The provided nutritional analysis assumes consumption of ALL the BBQ sauce and that it fully adheres to the chicken. In reality, much of the sauce bakes off during the 1.5-hour cooking period, and many families (like mine, who only use about ⅓ of the sauce for 4 people) will consume less. Therefore, the actual calorie count and fat content per portion are likely reduced for most consumers. While Google requires a nutritional analysis for better search visibility, please use these figures as a general estimate rather than an exact measurement.
****Weight Watchers Points Calculation: For WW points, I calculate this recipe assuming a consumption of about 4 tablespoons of barbecue sauce per serving, with chicken breast often being 0 points on my specific program. This results in approximately 6 WW points per serving. Adjust your personal points based on the amount of sauce you consume and the specific chicken parts (e.g., skin, dark meat) you include.
Nutrition
