Irresistible Cherry Cha Cha: Your Ultimate No-Bake Marshmallow Dessert Recipe
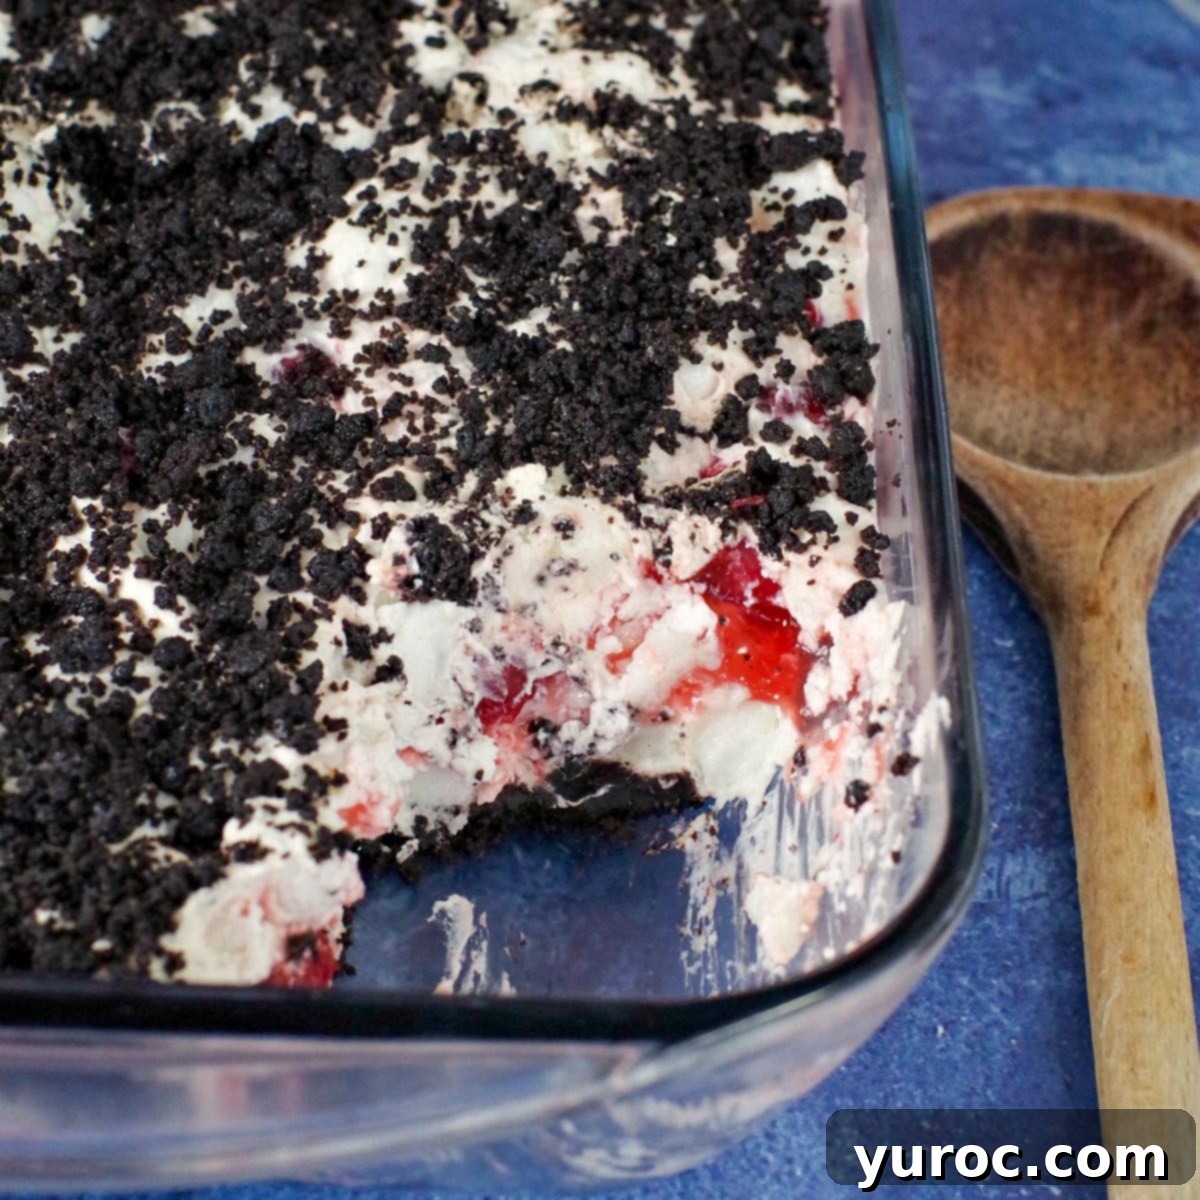
This year, for our cherished Christmas dessert, I had the honor of recreating the legendary Cherry Cha Cha. This isn’t just any dessert; it’s a beloved family tradition, a sweet legacy passed down from my grandma, who for years delighted us with her culinary magic. Since her dessert-making days have slowed, I joyfully embraced the role of carrying on this delicious custom! Cherry Cha Cha is an effortlessly easy, no-bake dessert that harmoniously blends canned cherry pie filling, rich Oreo cookie crumbs, luscious whipped cream, and soft marshmallows. It’s the perfect solution for a last-minute treat that feels incredibly special, making it ideal for festive family gatherings, vibrant summer BBQs, or casual potlucks.
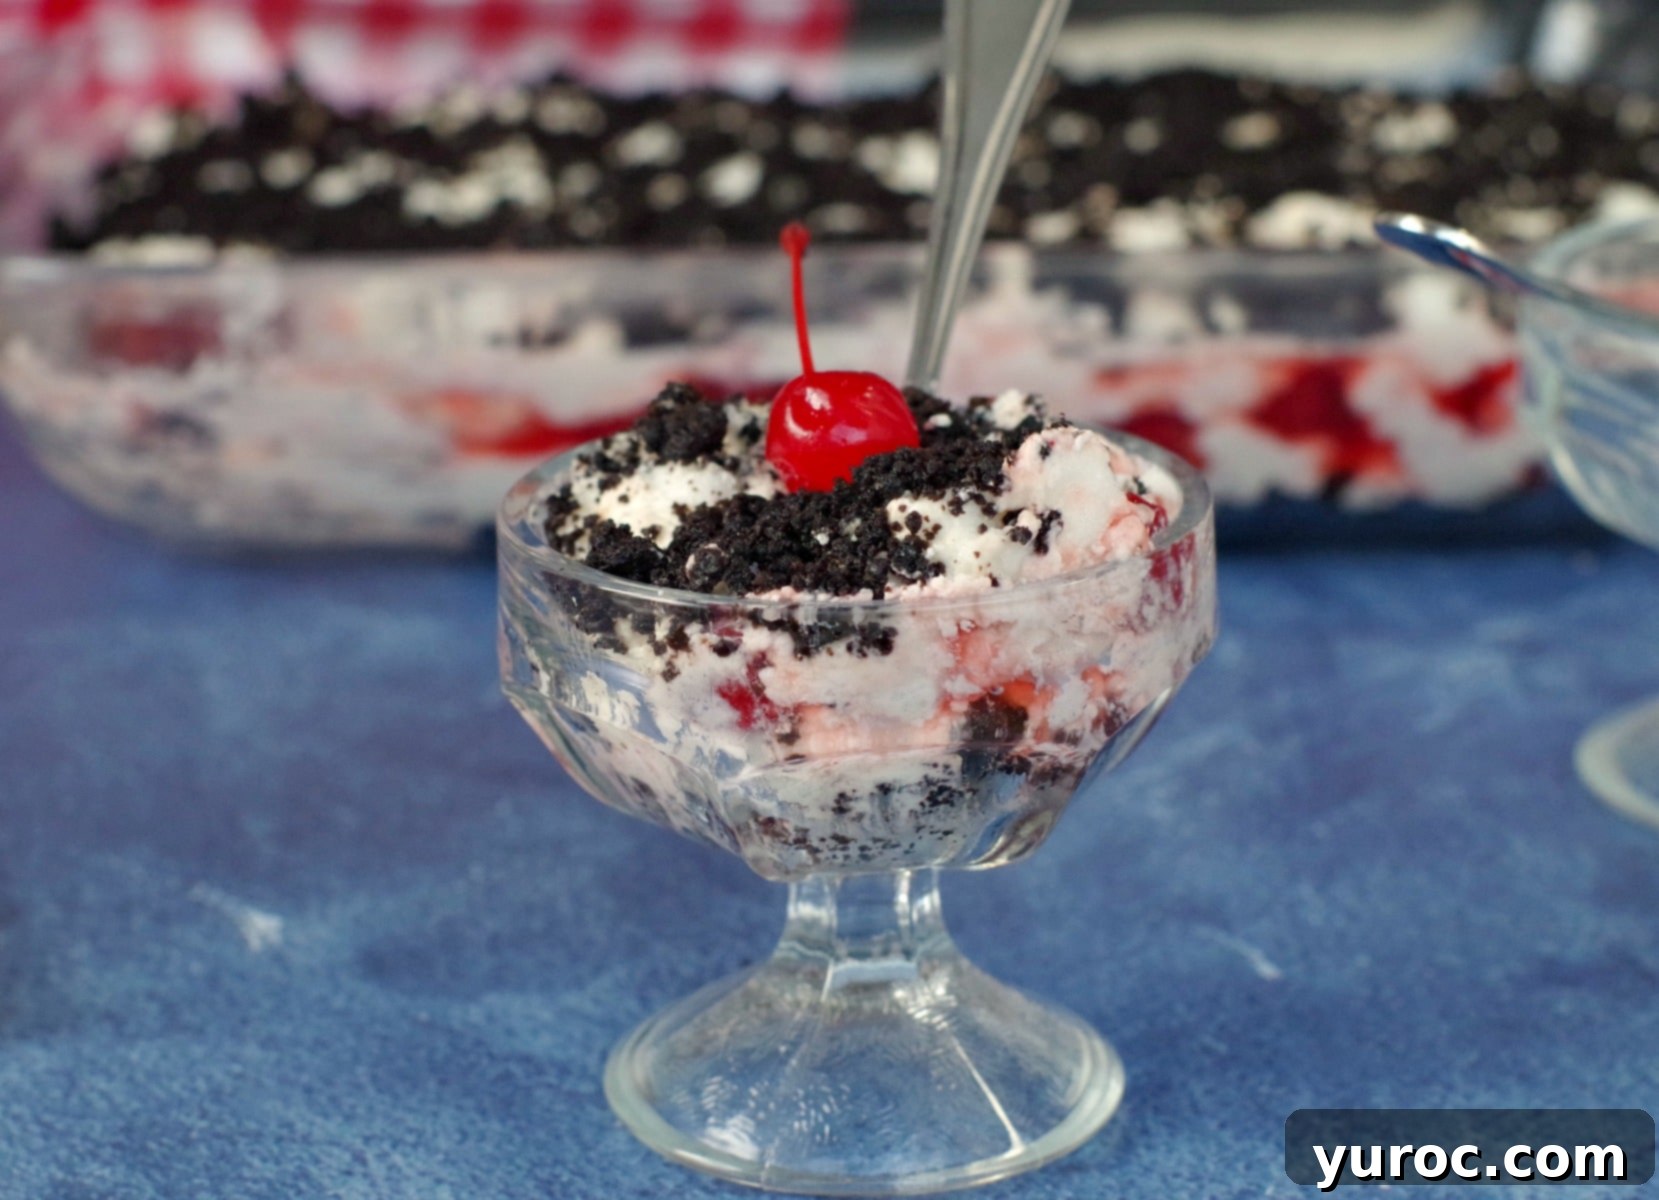
Our Christmas dinners typically feature a delightful array of desserts, because, let’s be honest, more desserts are always a fantastic idea, aren’t they? However, I often find myself compelled to add a personal touch, subtly enhancing a classic for the better. This year, my little twist involved swapping out the traditional graham cracker crumbs for decadent Chocolate Oreo cookie crumbs. Because everyone agrees: chocolate undeniably elevates everything to another level of deliciousness!
And what a difference it made! The addition of Oreo crumbs truly transformed this dessert from merely good to absolutely phenomenal, adding a deep chocolatey crunch that perfectly complemented the sweet cherries and creamy layers. This classic dessert, like my beloved Skor Bar Dessert and Pistachio Dessert recipes, is an oldie but a definite goodie. I adore unearthing and celebrating these timeless recipes, ensuring they’re not lost to the passage of time. There’s a profound reason these recipes endure beyond simple nostalgia – they are genuinely fantastic and universally loved!
Beyond its incredible taste, this Cherry Cha Cha stands out for its sheer convenience. It’s a no-bake wonder that comes together in a flash, making it an absolute lifesaver for those scorching summer days when the thought of turning on the oven is unbearable. Imagine: a vibrant, chilled dessert that’s perfect for summer gatherings, backyard barbecues, and potlucks, requiring absolutely no baking whatsoever. It’s the ideal way to satisfy everyone’s sweet tooth without breaking a sweat in the kitchen!
🍒 Essential Ingredients for Your Cherry Cha Cha
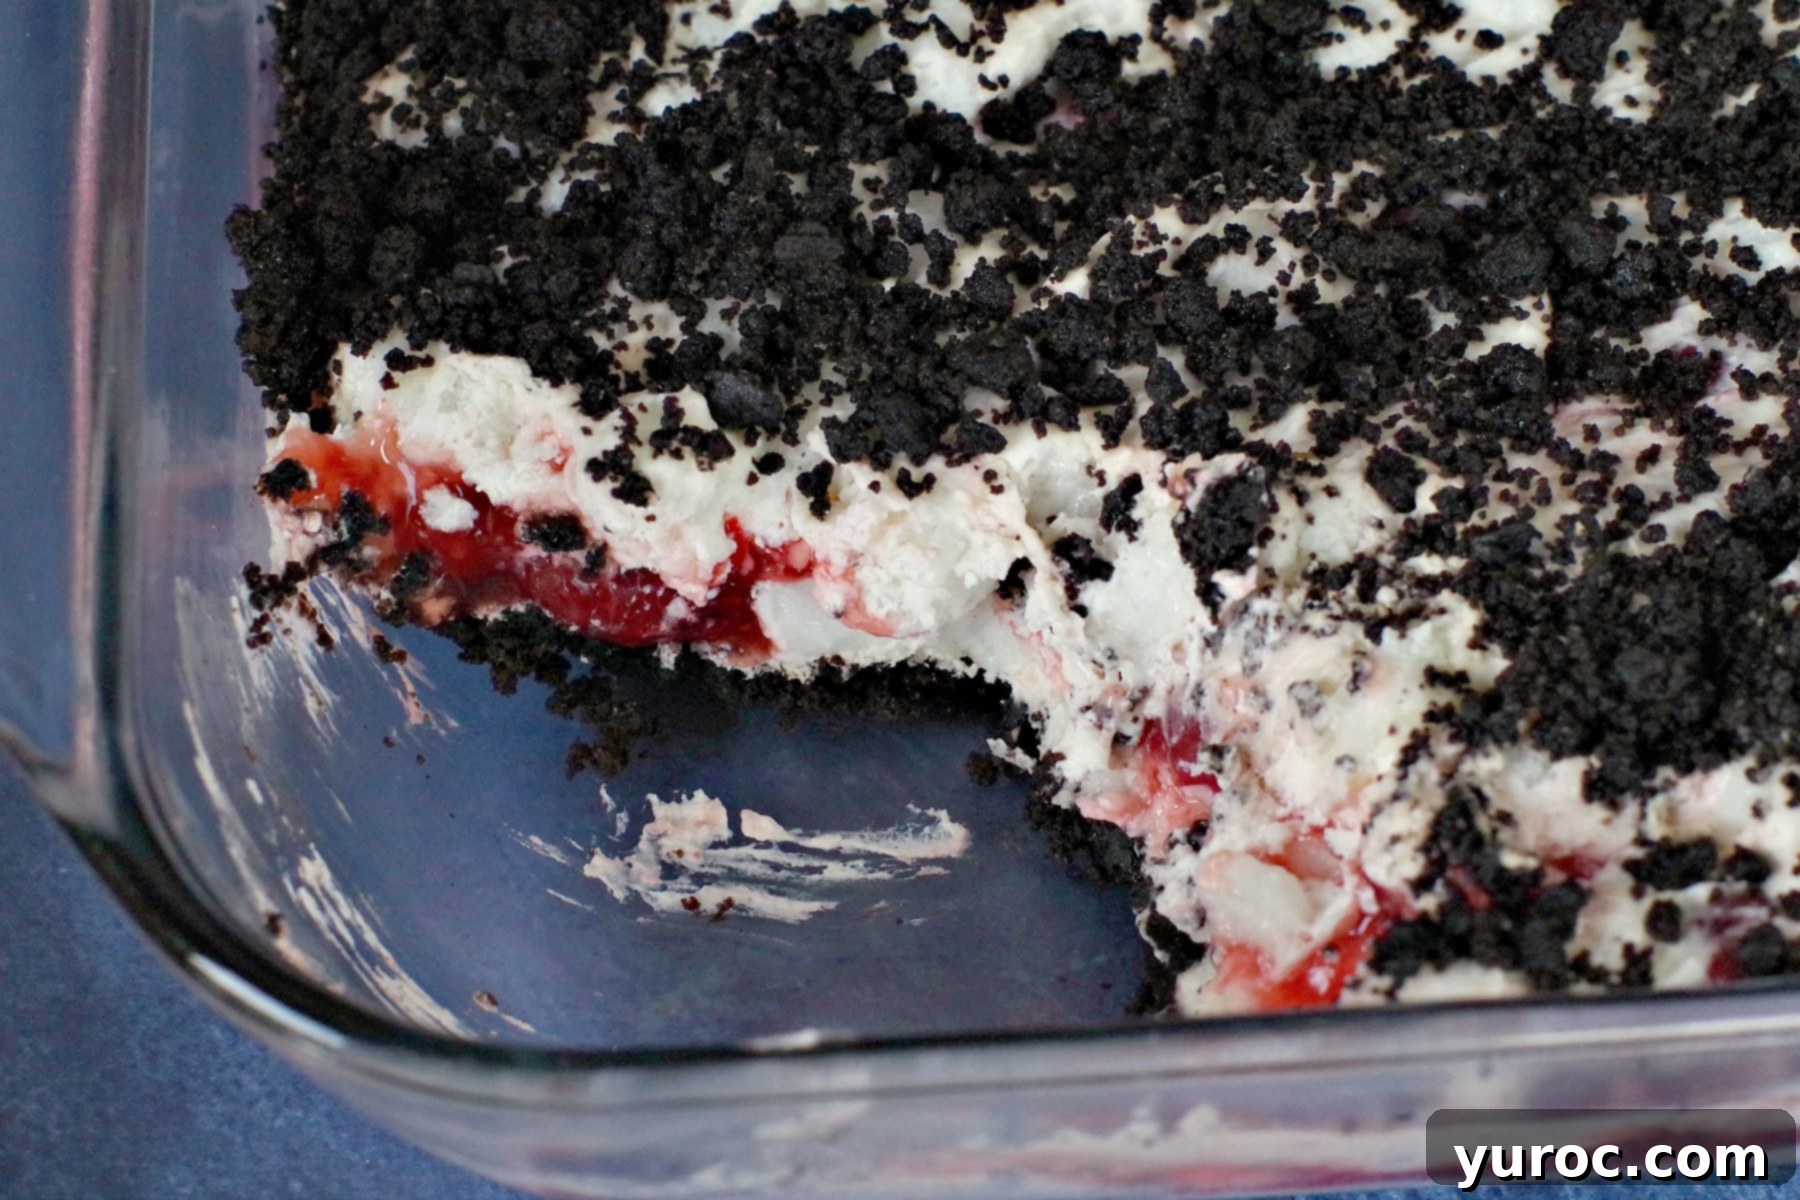
While some variations might be known as “Cherry Delight,” our Cherry Cha Cha boasts a unique construction with the vibrant cherry layer nestled enticingly in the middle, embraced by a cloud of whipped cream and marshmallows. And let’s not forget the chocolatey goodness at both the bottom and top – a delightful feature you simply can’t go wrong with!
- High-Quality Whipping Cream. For the best results and the creamiest texture, I strongly recommend using real whipping cream. Look for a product with at least 33% to 36% fat content, as this ensures a stable and wonderfully fluffy whipped cream. Avoid aerosol spray creams; they simply won’t hold up in this layered dessert. The richness of proper whipped cream is crucial for the overall luxurious feel of the Cherry Cha Cha.
- Oreo Chocolate Baking Crumbs. These crumbs provide the perfect chocolatey foundation and topping. The pre-crushed Oreo baking crumbs are a fantastic time-saver. If you can’t find them, don’t worry! You can easily make your own by finely crushing whole Oreo cookies (cream filling included for extra flavor!) in a food processor. Regular chocolate baking crumbs also work well if Oreos aren’t available, but the classic Oreo flavor truly takes this dessert up a notch.
- Canned Cherry Pie Filling. This is a key component, providing the luscious, sweet cherry layer. It’s vital to purchase actual canned cherry pie filling, not just plain canned cherries. Pie filling is already sweetened and thickened, providing the ideal consistency and flavor profile for this dessert. Using plain canned cherries would result in a less sweet and runnier layer, which would compromise the structural integrity and taste of the Cherry Cha Cha.
These core ingredients, while simple, are carefully chosen to ensure that each bite of your Cherry Cha Cha is a perfect symphony of sweet, creamy, and crunchy textures, creating a truly unforgettable dessert experience.
📖 Creative Variations & Smart Substitutions
One of the beauties of the Cherry Cha Cha is its adaptability. While the classic recipe is a family favorite, don’t hesitate to experiment with these variations and substitutions to tailor it to your taste or dietary needs:
- Dairy-Free Option: For those with dairy sensitivities or following a vegan diet, you can easily adapt this recipe. Simply substitute regular whipping cream with a high-quality dairy-free whipped topping (such as coconut whipped cream or a commercial vegan whipped cream alternative). Ensure that any butter used for the crust is also replaced with vegan margarine or a plant-based butter substitute.
- Alternative Pie Fillings: While cherry is traditional, feel free to unleash your creativity with different fruit pie fillings. Blueberry pie filling offers a lovely tart-sweet contrast, while Saskatoon Berry Pie Filling provides a unique, regional flavor. Peach, apple, or even a mixed berry pie filling could also create a delightful twist on the original.
- Crumb Base Alternatives: If Oreo crumbs aren’t your preference, or you’re simply looking for a different flavor profile, classic graham cracker crumbs are an excellent alternative. You could also try vanilla wafer crumbs, shortbread cookie crumbs, or even ginger snap crumbs for a spiced kick, especially appealing during the holidays. For a gluten-free option, use gluten-free chocolate or graham cracker crumbs.
- Added Crunch and Flavor: Consider folding in finely chopped nuts like pecans or walnuts into the crumb mixture for extra texture. A sprinkle of mini chocolate chips or a drizzle of chocolate sauce over the top layer could also enhance the chocolate notes.
- Marshmallow Alternatives: While I highly recommend keeping the marshmallows for their unique texture transformation (more on that below!), if you absolutely must omit them, you could experiment with folding in small pieces of angel food cake or even a different type of soft cookie into the whipped cream layer for a similar light, fluffy effect.
These simple adjustments allow you to personalize your Cherry Cha Cha, ensuring it’s always a hit with your crowd, regardless of preferences or dietary requirements.
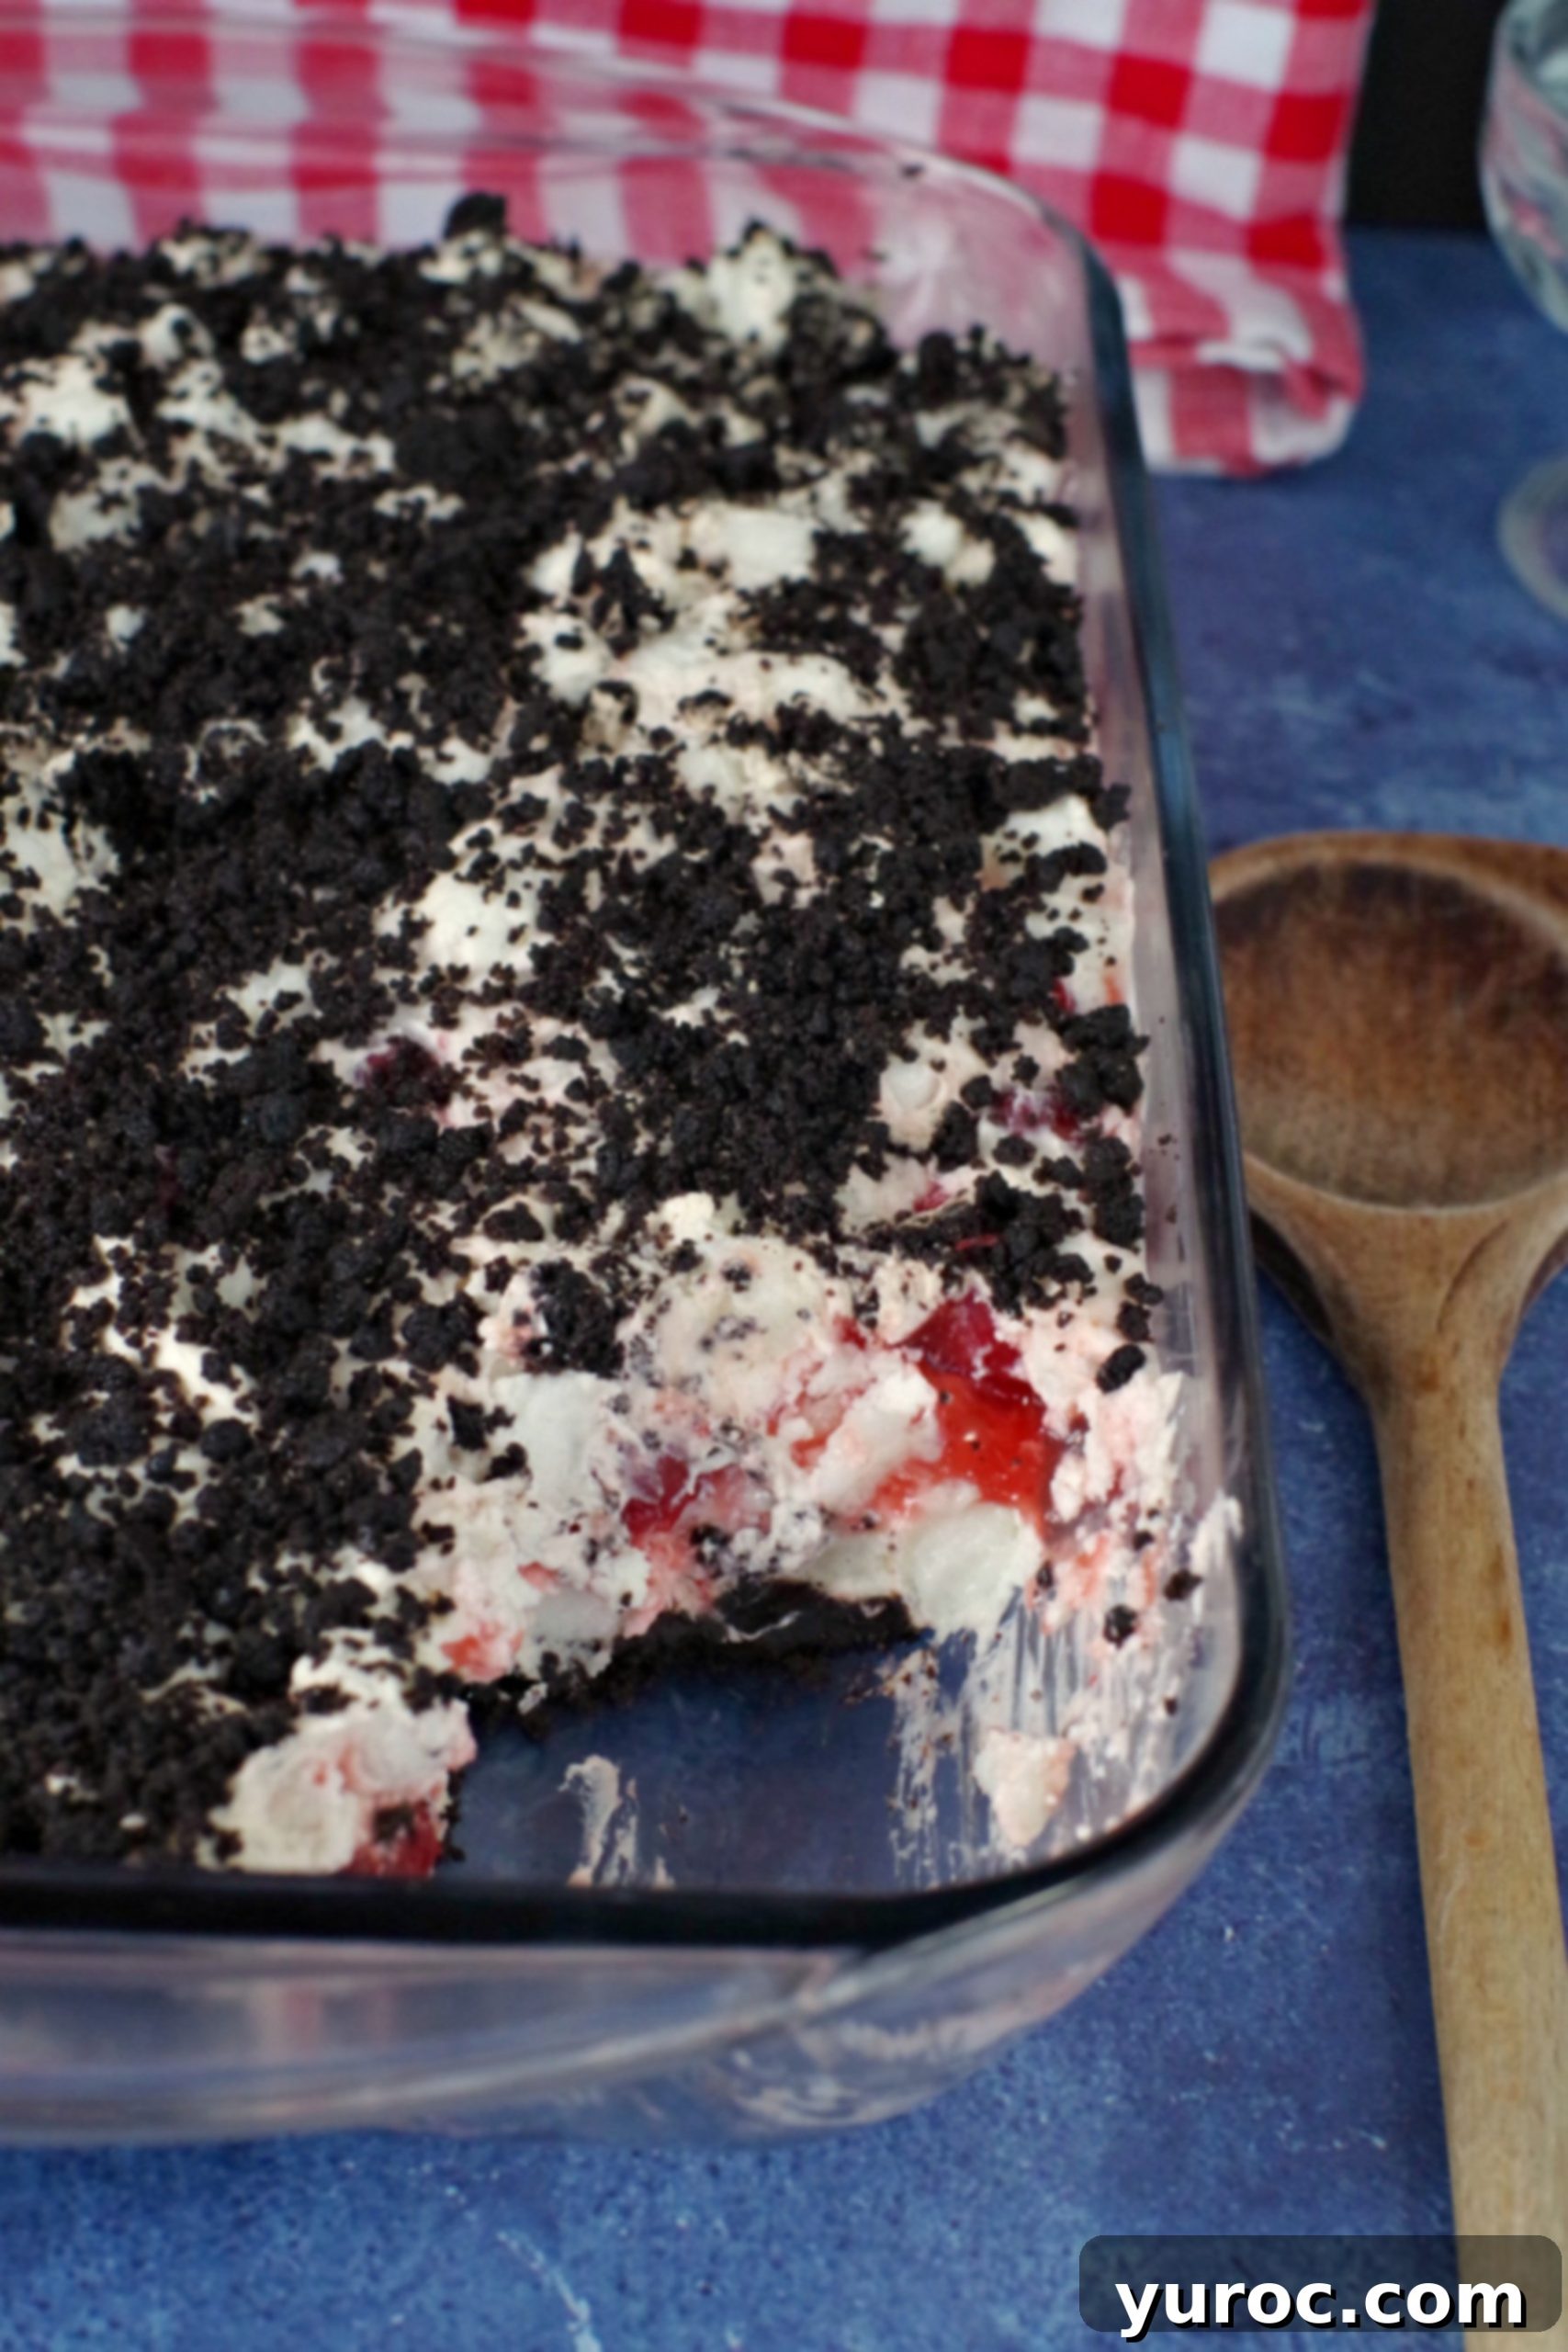
I’ll be completely honest with you – I am generally not at all a marshmallow fan! The typical chewy, sticky texture isn’t usually my thing. However, for some magical reason, I absolutely adore them in this Cherry Marshmallow Dessert! I truly believe it comes down to a fascinating texture transformation. When the marshmallows are gently folded into the luscious whipped cream and given ample time to meld and chill, they undergo a remarkable change. They slowly absorb the moisture and richness of the whipped cream, becoming incredibly soft, pillowy, and almost melt-in-your-mouth creamy.
This process not only alters their texture but also subtly mellows their inherent sweetness, integrating them seamlessly into the cream layer. It’s as if the marshmallows and whipped cream become one harmonious entity, creating a light, airy, yet substantial filling that is simply divine. So, if you, like me, are typically wary of marshmallows, please don’t let that deter you from trying this dessert! I promise you’ll be pleasantly surprised by this wonderful union of flavors and textures, and you might just find a new marshmallow-loving side to yourself, at least for this particular treat.
🔪 Step-by-Step Guide: Crafting Your Easy Cherry Cha Cha
Making this No-Bake Cherry Marshmallow Dessert is incredibly simple, requiring minimal effort for maximum deliciousness. Follow these easy steps for a perfect layered treat:
PREPARATION:
- Prepare the Pan: Lightly spray the bottom and sides of a standard 9×13-inch baking pan with non-stick cooking spray. This will ensure your dessert can be easily removed and served.
- Create the Crumb Base: In a medium bowl, combine the finely crushed Oreo cookie crumbs with the melted butter. Mix thoroughly until all the crumbs are moistened.
- Form the Crust: Press approximately two-thirds (⅔) of this chocolatey crumb mixture evenly onto the bottom of the prepared 9×13-inch pan. Use the back of a spoon or your fingers to create a firm, compact crust. Set aside the remaining one-third of the crumbs for later.
- Whip the Cream: Using an electric mixer (preferably with a chilled bowl and beaters for best results), whip the cold heavy whipping cream on medium-high speed until it forms soft peaks.
- Sweeten and Flavor the Cream: Gradually add the icing sugar (powdered sugar) and vanilla extract to the whipped cream. Continue whipping until stiff peaks form, meaning the cream holds its shape firmly when the beaters are lifted.
- Incorporate Marshmallows: Gently fold the mini marshmallows into the stiffly whipped cream using a spatula. Mix until they are well distributed throughout the creamy mixture.
ASSEMBLY:
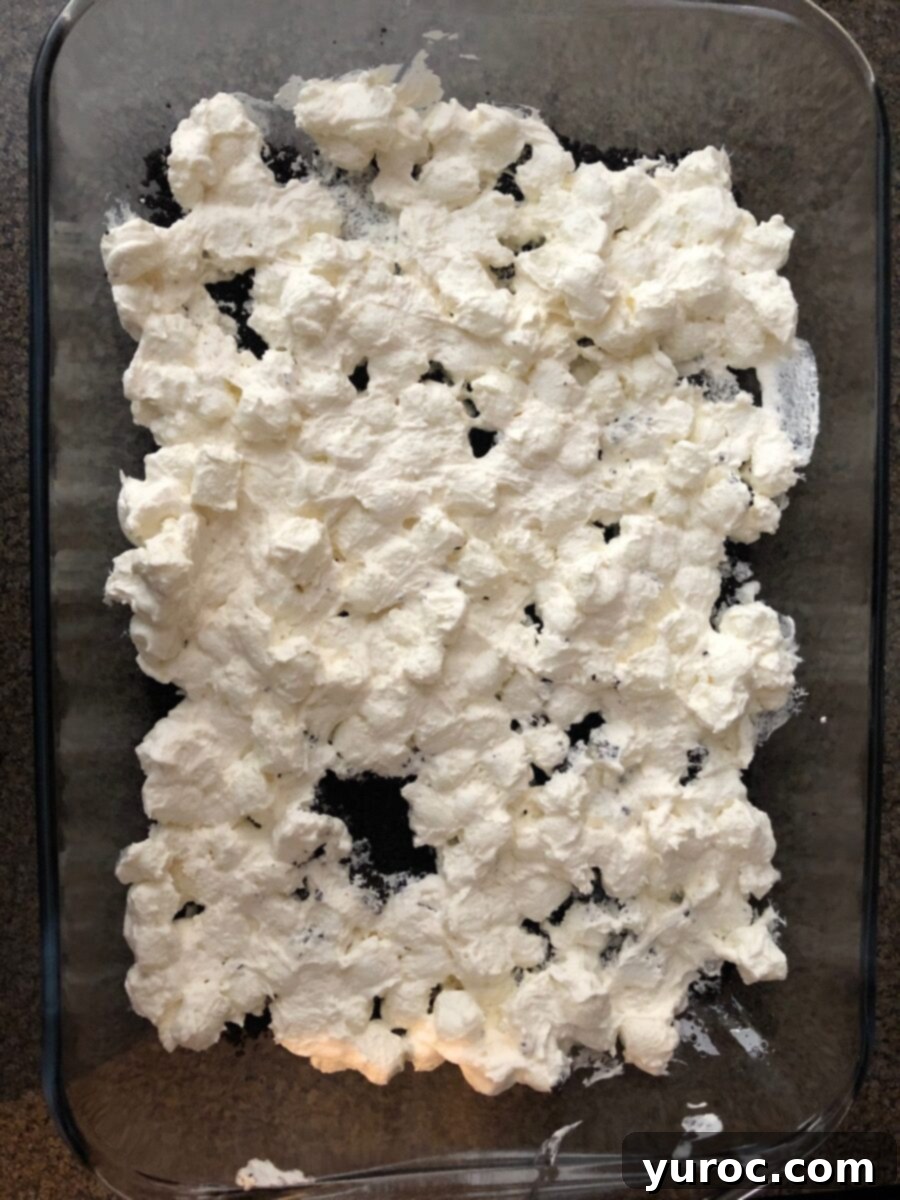
- Step 1: Carefully spread half of the marshmallow-whipped cream mixture evenly over the compacted Oreo crumb base in the pan. Use an offset spatula for smooth application.
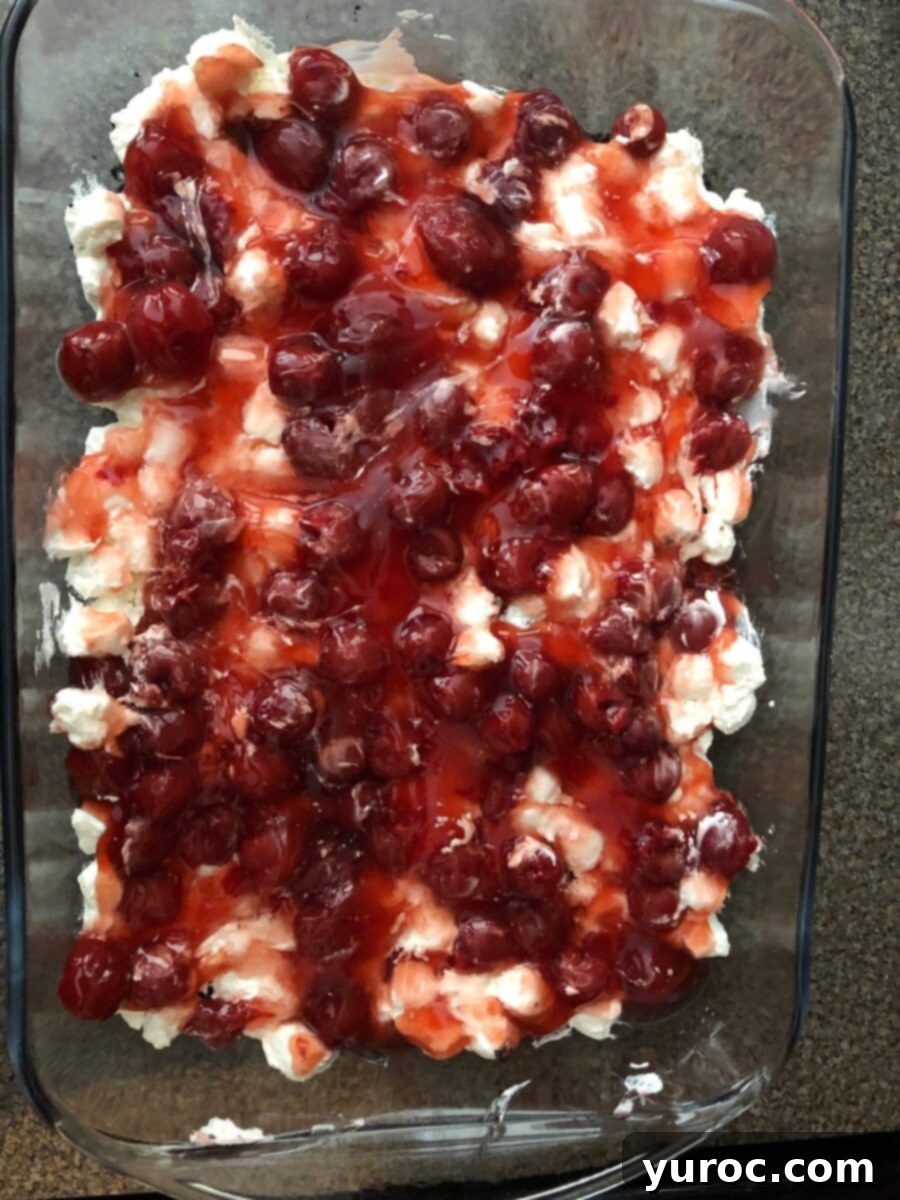
- Step 2: Gently spread the entire can of cherry pie filling over the first marshmallow layer. Ensure an even coating, but avoid pressing down too hard.
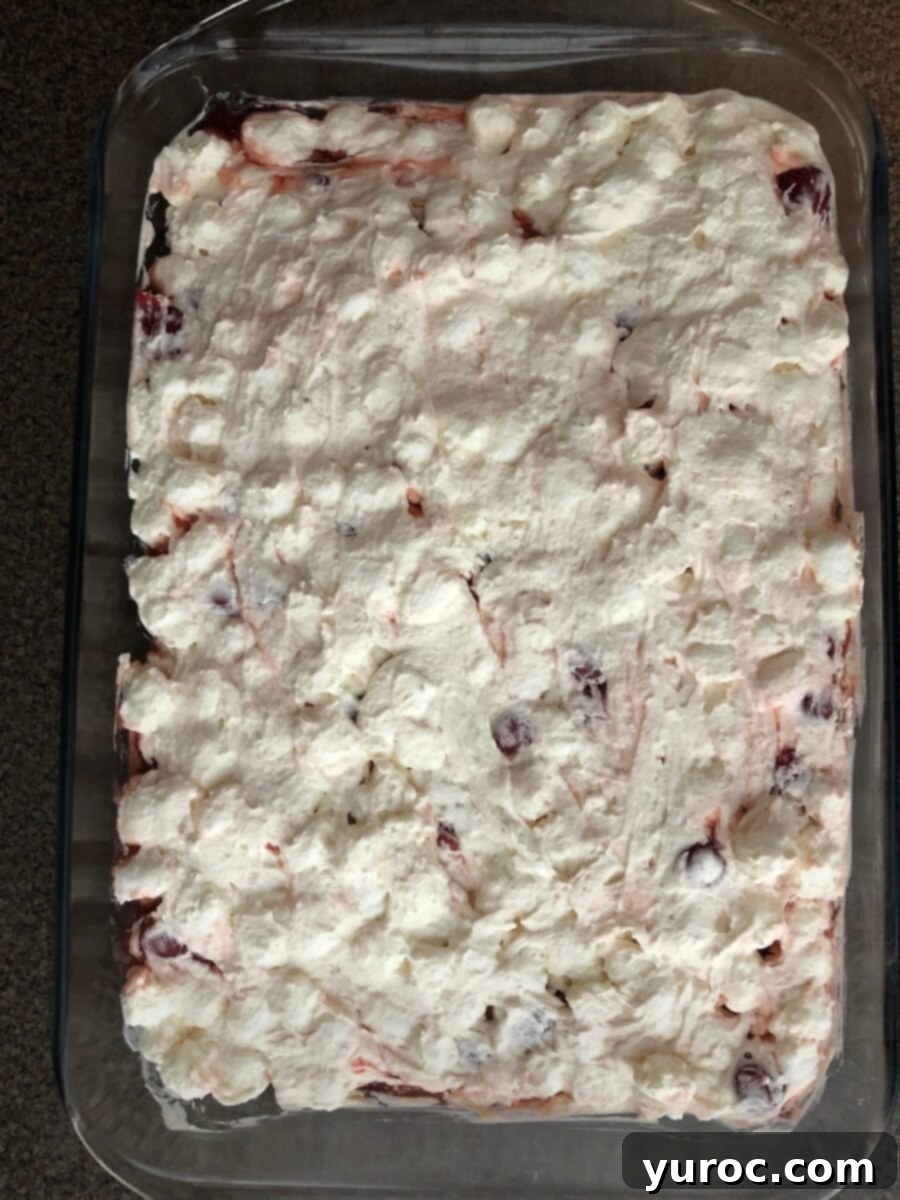
- Step 3: Carefully spread the remaining half of the marshmallow-whipped cream mixture over the cherry pie filling layer, covering it completely.
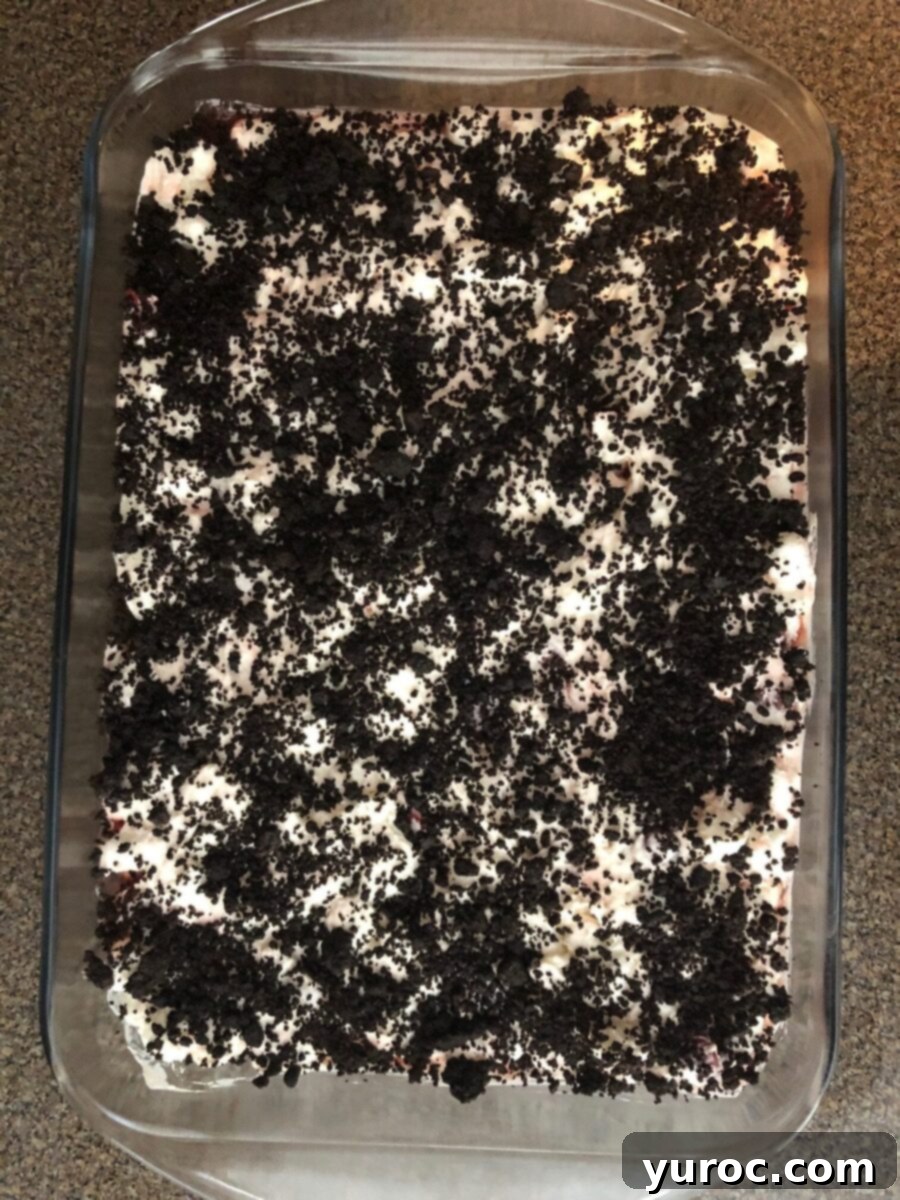
- Step 4: Sprinkle the reserved crumb mixture evenly over the top marshmallow layer. Cover the pan tightly with plastic wrap and refrigerate for at least 6 hours, or ideally, overnight, to allow the dessert to set and the flavors to meld beautifully.
Once properly chilled, your Cherry Cha Cha will be firm enough to slice and serve, offering a delightful combination of textures and flavors in every bite!
💡 Expert Recipe Tips for a Perfect Cherry Cha Cha
Achieving a truly spectacular Cherry Cha Cha is easy when you keep a few expert tips in mind. These small details can make a big difference in the texture, presentation, and overall enjoyment of your dessert:
- Measure Butter Before Melting. This might seem like a minor point, but it’s crucial for the perfect crust. Always measure your butter in its solid form (e.g., using tablespoon markings on a stick) *before* you melt it. Measuring after melting can lead to using too much liquid butter, which can make your cookie crumb crust greasy and less cohesive once chilled.
- Chill Your Mixing Bowl for Whipping Cream. For the fluffiest, most stable whipped cream, pre-chill your mixing bowl and beaters (or whisk attachment) in the freezer for about 15 minutes before you start whipping. Cold equipment helps the cream whip faster and achieve those desirable stiff peaks that hold their shape beautifully in the dessert. This also prevents the cream from deflating too quickly, ensuring a light and airy texture.
- Use Freshly Whipped Cream. Always whip your cream just before you’re ready to assemble the dessert. While you can prepare the crumbs and pie filling ahead, freshly whipped cream ensures maximum volume and airiness. Pre-whipped cream can lose its structure over time, leading to a denser, less appealing texture in your final product.
- Avoid Overmixing Whipped Cream. Once you’ve reached stiff peaks, stop! Overbeating whipped cream is a common mistake that can quickly turn it grainy, curdled, or even into butter. The moment it holds firm peaks when you lift the beaters, you’re done. A perfectly whipped cream is smooth, light, and airy.
- Layer Evenly for Best Results. Take your time when spreading each layer. An even distribution of the crumb base, marshmallow cream, and cherry filling is key not only for a beautiful presentation but also for a balanced flavor in every bite. An offset spatula or the back of a spoon works wonderfully for smoothing the creamy layers, ensuring a consistent and appealing cross-section when served.
- Give it Ample Chill Time. The 6-hour minimum refrigeration is not just a suggestion – it’s essential! This extended chill time allows the dessert to set properly, ensuring that the layers become firm and distinct. More importantly, it gives the marshmallows time to soften and meld with the whipped cream, creating that unique, irresistible texture that makes Cherry Cha Cha so special. For the best possible outcome, chilling it overnight is highly recommended.
By following these expert tips, you’ll be well on your way to creating a Cherry Cha Cha that is not only delicious but also visually stunning and perfectly textured.
🥗 What to Serve with Your Delightful Cherry Cha Cha
Cherry Cha Cha is a versatile dessert that pairs wonderfully with a variety of meals, whether you’re hosting a casual summer gathering or a more elaborate holiday feast. Its vibrant flavors and light, creamy texture make it an ideal palate cleanser after a hearty meal or a refreshing treat on its own.
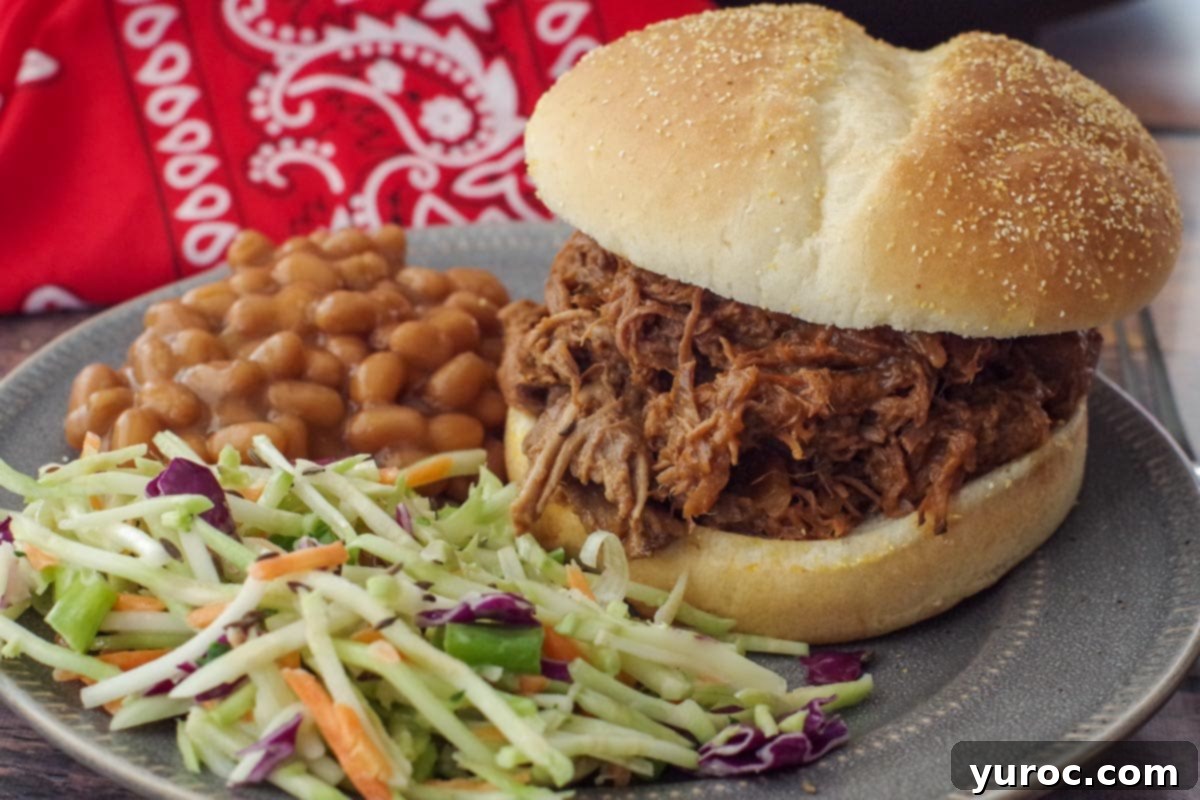
If you’re planning a relaxed summer get-together with family and friends, you’ll want a main course that’s just as easy and satisfying. I love serving this no-bake dessert alongside a comforting and fuss-free Slow Cooker Beef on a Bun (as shown in the image below). This tender, savory dish complements the sweet dessert perfectly. To round out the meal, consider adding hearty Slow Cooker New England Baked Beans and a fresh, crisp salad like this beautiful Strawberry Spinach Pecan Salad. The combination offers a delightful balance of sweet, savory, and fresh flavors without keeping you tethered to the kitchen.
Should you be thinking of serving this delightful dessert after a more traditional holiday dinner, it also fits right in. It provides a lighter, fruit-forward contrast to richer holiday fare. I highly recommend pairing it with a succulent Picnic Ham recipe, classic Old Fashioned Scalloped Potatoes (without cheese for a truly traditional touch), and a unique Carrot Casserole (with Stove Top Stuffing). The vibrant red of the cherries also makes it a festive addition to any holiday table, adding a pop of color and a touch of sweetness that everyone will appreciate.
No matter the occasion, Cherry Cha Cha is sure to be a refreshing and memorable end to your meal!
👪 Flexible Serving Sizes for Any Gathering
This Cherry Cha Cha recipe is designed to yield 12 generous servings, making it perfect for an average family meal or a small gathering. However, its versatility allows for easy adjustments to suit any crowd size. If you’re hosting a more intimate dinner, you can easily cut the recipe in half and use a smaller 8×8-inch or 9×9-inch pan. Conversely, if you’re preparing for a large party, holiday feast, or a big potluck, you can effortlessly double or even triple the recipe to ensure everyone gets a taste of this delightful dessert!
To make adjustments, simply click on the serving size displayed in the recipe card below. Enter your desired number of servings, and the ingredient amounts will automatically adjust to scale the recipe accordingly. For particularly large crowds, consider doubling the recipe and preparing it in a ½ sheet cake pan (approximately 13×18 inches) for ample portions that are still manageable to serve.
This flexibility ensures that Cherry Cha Cha is always the right size for your occasion, whether it’s an everyday treat or a special celebration.
🌡️ Storage Instructions & Make-Ahead Tips
Proper storage is key to enjoying your Cherry Cha Cha to its fullest. Once assembled and chilled, this dessert should be stored in a sealed, airtight container in the refrigerator. When stored correctly, it will maintain its delicious flavor and ideal texture for up to 3 days. While it’s tempting to leave it uncovered, doing so can cause the whipped cream to absorb odors from the fridge and dry out, affecting its creaminess.
One of the fantastic advantages of Cherry Cha Cha is that it’s an excellent make-ahead dessert. In fact, I highly recommend preparing it the day before you plan to serve it. This allows ample time for the dessert to firm up completely and for all the flavors to truly meld together, enhancing its overall taste and texture. The minimum refrigeration time required is 6 hours, but an overnight chill truly yields the best results, ensuring a perfectly set and delicious dessert every time.
It’s important to note that this dessert does not stand up well to freezing. The delicate texture of the whipped cream and marshmallows, along with the pie filling, can become watery and lose its integrity upon thawing. For the best experience, always enjoy your Cherry Cha Cha fresh from the refrigerator within the recommended storage period.
❔ Frequently Asked Questions About Cherry Cha Cha
Here are some common questions about making and serving this delightful Cherry Cha Cha dessert:
Absolutely! This dessert is perfectly suited for advance preparation. In fact, I highly recommend making it the day before you plan to serve it. This allows sufficient time for it to chill and set properly in the refrigerator (at least 6 hours, or ideally, overnight), which significantly enhances its texture and flavor integration. It’s a fantastic option for reducing stress on the day of your event.
This recipe is perfectly portioned for a standard 9×13-inch baking pan. This size ensures the layers are distributed correctly, resulting in the ideal thickness for each component. If you prefer to make a smaller portion, you can easily halve the recipe and use an 8×8-inch or 9×9-inch square pan instead. For larger gatherings, the recipe can be doubled and prepared in a ½ sheet cake pan.
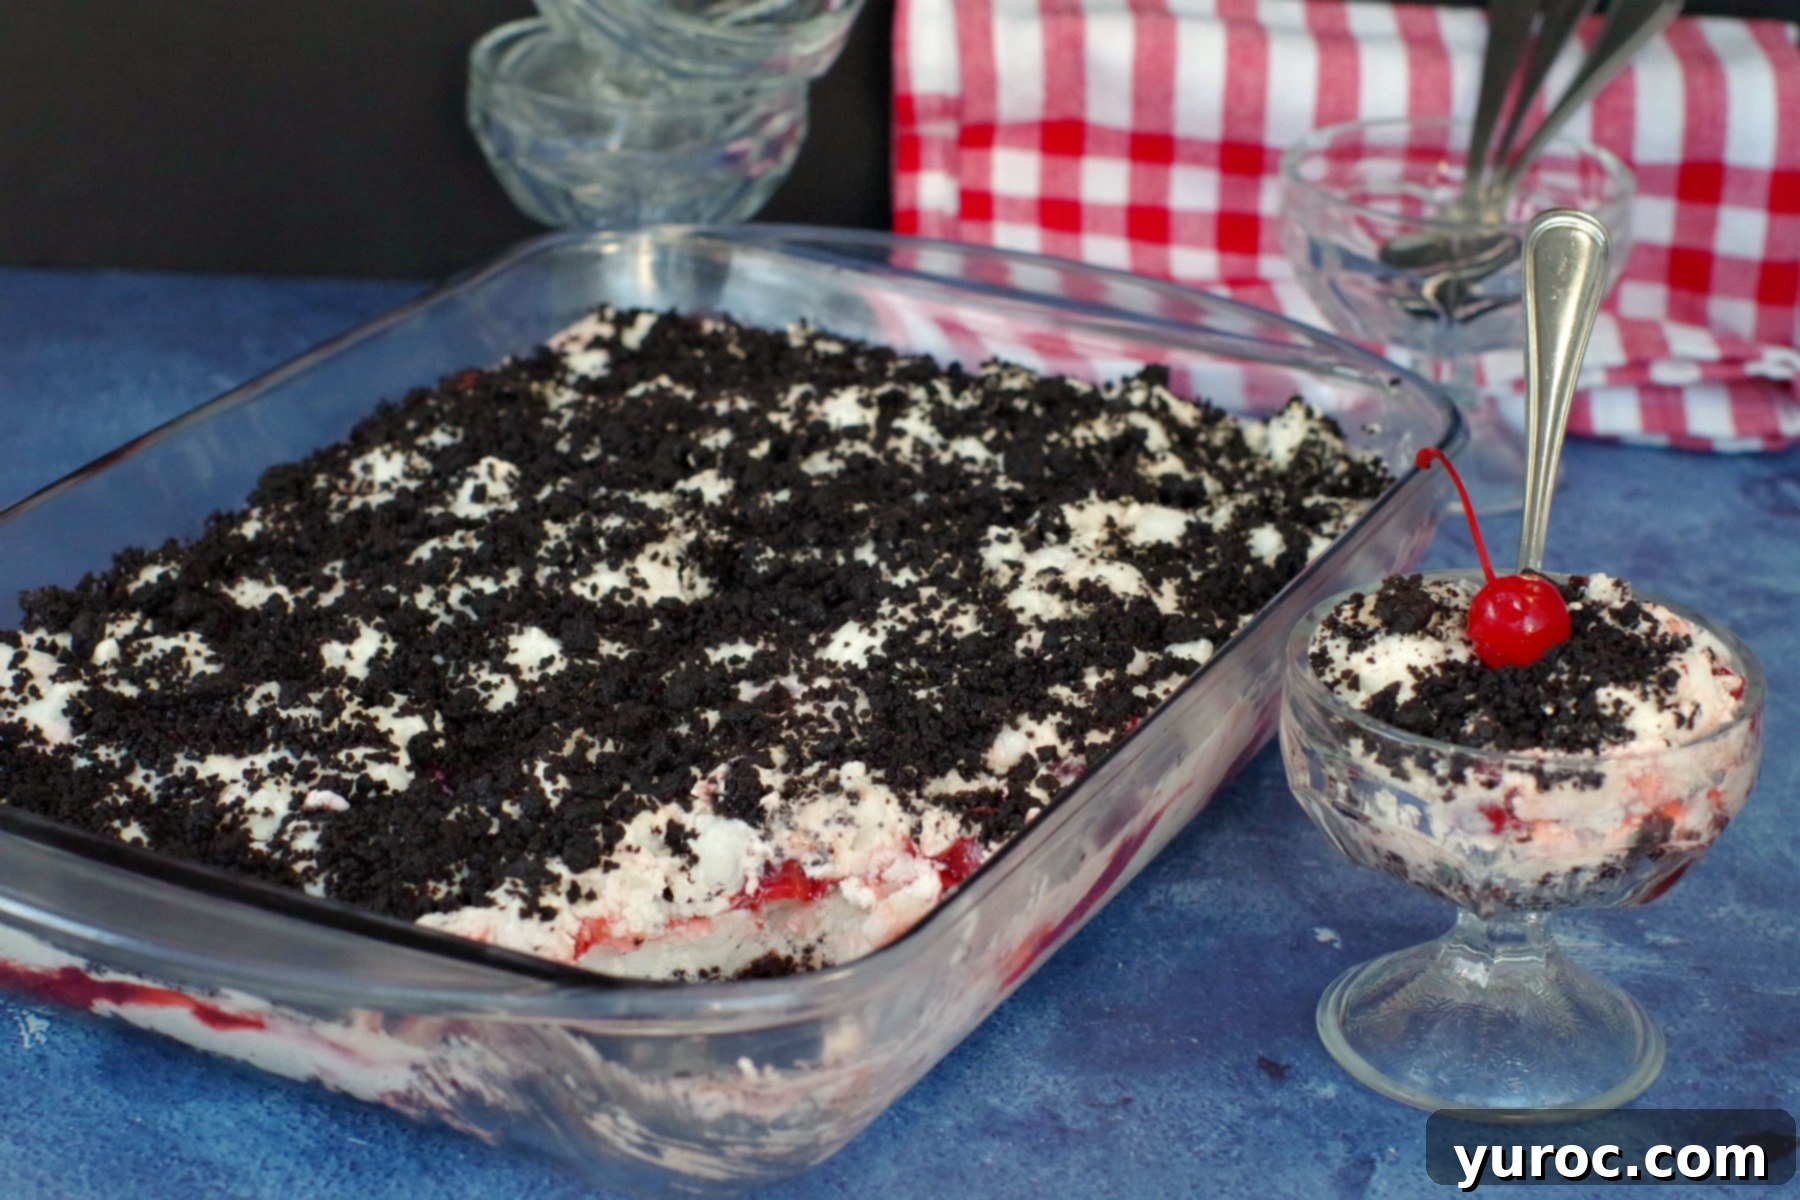
Cherry Cha Cha is best enjoyed chilled, scooped directly from the refrigerator. Given its trifle-like consistency, I recommend using a large serving spoon or a pie server to scoop individual portions into small dessert bowls or onto plates. For an extra touch of elegance and flavor, garnish each serving with an additional dollop of fresh whipped cream, a bright maraschino cherry, or a sprinkle of extra Oreo crumbs. It’s a delightful ending to any meal!
While I completely understand your hesitation (as a non-marshmallow fan myself!), I genuinely do not recommend omitting them from this recipe. The magic of this dessert lies in how the marshmallows transform when mixed with the whipped cream and allowed to chill. They lose their typical chewy sweetness, becoming soft, creamy, and almost undetectable as individual marshmallows. This process creates a light, airy, and unique texture that is crucial to the Cherry Cha Cha experience. If you’re truly determined to avoid them, an alternative could be to gently fold in small chunks of soft angel food cake into the whipped cream for a similar light, fluffy volume, though the texture won’t be quite the same.
Yes, absolutely! While canned cherry pie filling is excellent for convenience and consistency, homemade cherry pie filling can add an extra layer of freshness and flavor. Just ensure your homemade filling is properly thickened and cooled before incorporating it into the dessert to maintain the correct texture and prevent it from making the other layers soggy.
For an enhanced presentation, you can lightly dust the top with a fine layer of cocoa powder or finely shaved chocolate before serving. Alternatively, arrange a few fresh cherries or maraschino cherries on top of each slice. Using a clear glass serving dish also allows the beautiful layers of the Cherry Cha Cha to shine through, making it even more visually appealing.
This Cherry Cha Cha recipe truly is the quintessential dessert when you’re seeking a quick, incredibly easy, and absolutely no-bake option for a potluck, a large family gathering, or simply when you need to feed a crowd. Its straightforward assembly and delightful flavor profile make it a perennial favorite. Or, if you’re just on the hunt for a simple yet satisfying dessert recipe featuring the bright taste of cherries, this one is an absolute winner!
And let’s not overlook its festive appeal: with its striking red and white layers, it’s not only perfect for your joyous Christmas celebrations but also a fantastic, patriotic choice for Canada Day festivities! Its vibrant colors and crowd-pleasing taste guarantee smiles all around.
Enjoy ~ the ease of preparation and the delicious outcome will make this a staple in your dessert repertoire!
📋 Discover More Irresistible No-Bake Desserts!
If you loved the simplicity and deliciousness of this Cherry Cha Cha, you’re in for a treat! Our collection of no-bake desserts is packed with equally easy and delightful recipes that require minimal effort but deliver maximum flavor. Perfect for any occasion where you want to impress without the stress of an oven. Explore these other fantastic options to expand your repertoire of stress-free sweet treats:
- No Bake Cream Puff Dessert
- Black Forest Tiramisu (No Bake)
- Drumstick Dessert
- Dulce De Leche Chocolate Raspberry Icebox Cake
Did your family ❤️ this recipe? Did you know that commenting and ⭐ rating recipes is one of the best ways to support your favorite recipe creators? If you LOVED this recipe, please comment and rate it in the recipe card below, or share photos on social media using the hashtag #foodmeanderings or tagging @foodmeanderings! Your feedback means the world and helps other home cooks discover delicious, easy recipes like this one!

🍒Cherry Cha Cha Recipe
Equipment
- hand mixer
Ingredients
- 2 cups whipping cream 1 pint (ensure it’s at least 33-36% fat for best results)
- 2 tablespoon icing sugar *Also known as powdered sugar or confectioners sugar, for sweetening the whipped cream.
- 1 teaspoon vanilla extract
- 10 oz -package of mini marshmallows
- 2 cups Oreo chocolate cookie crumbs
- ⅓ cup butter, melted * Measure the butter BEFORE you melt it to ensure proper crust consistency.
- 540 ml -can cherry pie filling
Instructions
- Spray the bottom of a 9X13 pan with non-stick cooking spray to prevent sticking.
- Combine Oreo cookie crumbs and melted butter in a bowl until fully moistened. Press ⅔ of the mixture onto the bottom of the 9X13 pan to form a firm crust. Set aside the remaining crumbs.
- With an electric mixer, whip the cold whipping cream to soft peaks.
- Then, add icing sugar and vanilla extract to the whipped cream and continue to whip until stiff peaks form. Gently fold in the mini marshmallows until well combined.
- Spread half of the marshmallow-whipped cream mixture evenly on top of the prepared Oreo crumb base.
- Carefully spread the entire can of cherry pie filling over the marshmallow layer, creating a vibrant red middle layer.
- Spread the remainder of the marshmallow-whipped cream mixture over the cherries, covering them completely.
- Sprinkle the remaining crumb mixture evenly over the top marshmallow layer. Cover the pan securely with plastic wrap and refrigerate for at least 6 hours or, ideally, overnight to allow the dessert to set and flavors to meld perfectly.
Notes
-
- Measure Butter Before Melting. It’s important to measure the butter in its solid state before melting. Measuring after melting could lead to using too much, which may make the crust too greasy and difficult to set properly.
-
- Chill the Mixing Bowl for Whipping Cream. For the fluffiest and most stable whipped cream, chill your mixing bowl and beaters in the freezer for 15 minutes before whipping the cream. This cold environment helps the cream whip faster and achieve superior stiff peaks that hold their form beautifully in the dessert.
- Use Freshly Whipped Cream. Always whip the cream just before using it in the assembly. Whipping it fresh ensures maximum fluffiness and prevents the cream from deflating, which can negatively affect the overall light and airy texture of the dessert.
-
- Avoid Overmixing Whipped Cream. When whipping cream to stiff peaks, exercise caution not to overbeat it. Overmixing can cause the cream to become grainy, or even turn into butter, which would ruin the smooth texture of the dessert. Stop mixing as soon as firm, stiff peaks form and the cream holds its shape.
-
- Layer Evenly. For the best presentation and a perfectly balanced distribution of flavors and textures in every slice, take your time spreading each layer evenly. A silicone spatula or an offset knife works exceptionally well for smoothing out both the whipped cream and the cherry layers.
