Festive & Flavorful Christmas Almond Pinwheel Cookies: Your Ultimate Holiday Baking Guide
There’s nothing quite like the magic of homemade cookies during the holiday season, and these **Christmas Almond Pinwheel Cookies** are truly the epitome of festive baking! With their enchanting red, white, and green swirls, these almond-flavored sugar cookies are not just a treat for the taste buds but also a feast for the eyes. They make a spectacular addition to any holiday cookie platter, a delightful contribution to a cookie exchange, or a heartfelt, edible Christmas gift that everyone will adore.
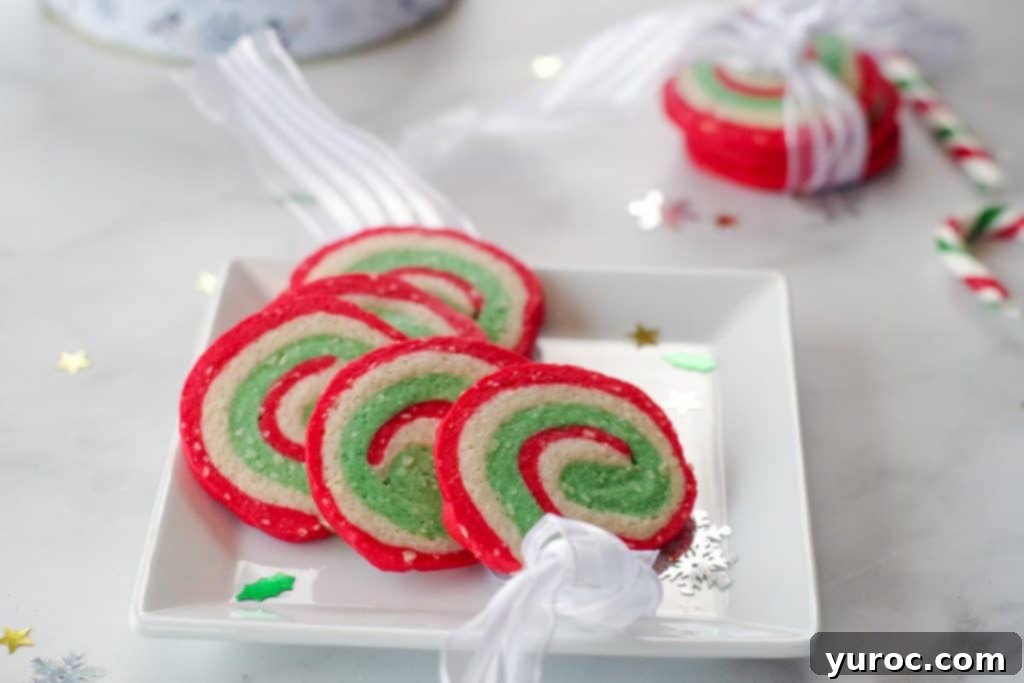
While these vibrant pinwheel cookies are exceptionally popular during Christmas, their charm isn’t limited to one season. Their adaptable nature allows for creative customization throughout the year. Imagine pastel yellow and pink swirls for an Easter celebration, or bold orange and black for a spooky Halloween delight! For those moments when time is of the essence, you can even streamline the process by opting for good quality store-bought sugar cookie dough, ensuring you still achieve that signature swirled magic and unique almond essence.
If you’re a fan of colorful and delightful holiday treats, you might also enjoy giving my Christmas Nougat a try!
Essential Ingredients for Perfect Pinwheel Cookies
What truly sets these Christmas Pinwheel Cookies apart from traditional sugar cookies is their distinctive and delectable almond flavor, which comes from a combination of finely ground almonds and a touch of almond extract. This unique blend creates a wonderfully aromatic and flavorful cookie that stands out on any holiday table. For this delightful recipe, you’ll need a few key ingredients:
- Almond Extract: This is the secret to the distinctive, rich almond flavor that elevates these cookies beyond a basic sugar cookie. It provides a warm, nutty aroma and taste that pairs perfectly with the festive colors. Ensure you use a good quality almond extract for the best results.
- Ground Almonds: Incorporating finely ground almonds into the dough not only enhances the almond flavor but also contributes to the cookies’ unique texture and a slightly speckled, charming appearance. For a smooth dough and even distribution, it’s highly recommended to use very finely ground almonds, which are typically available pre-packaged. If you can only find whole or slivered almonds, ensure they are blanched (skin removed) and processed into a very fine meal in a food processor to avoid a darker appearance and gritty texture.
- Green and Red Food Coloring (Gel or Icing Color): The vibrant, streak-free swirls are achieved with high-quality food coloring. I personally recommend using gel or icing colors such as Wilton Kelly Green and Americolor Super Red. These concentrated colors provide much deeper, more vibrant hues with less product compared to liquid grocery store food colorings, which can thin out your dough and result in paler, less distinct colors.
*Please refer to the recipe card below for a complete list of all ingredients and their exact quantities.
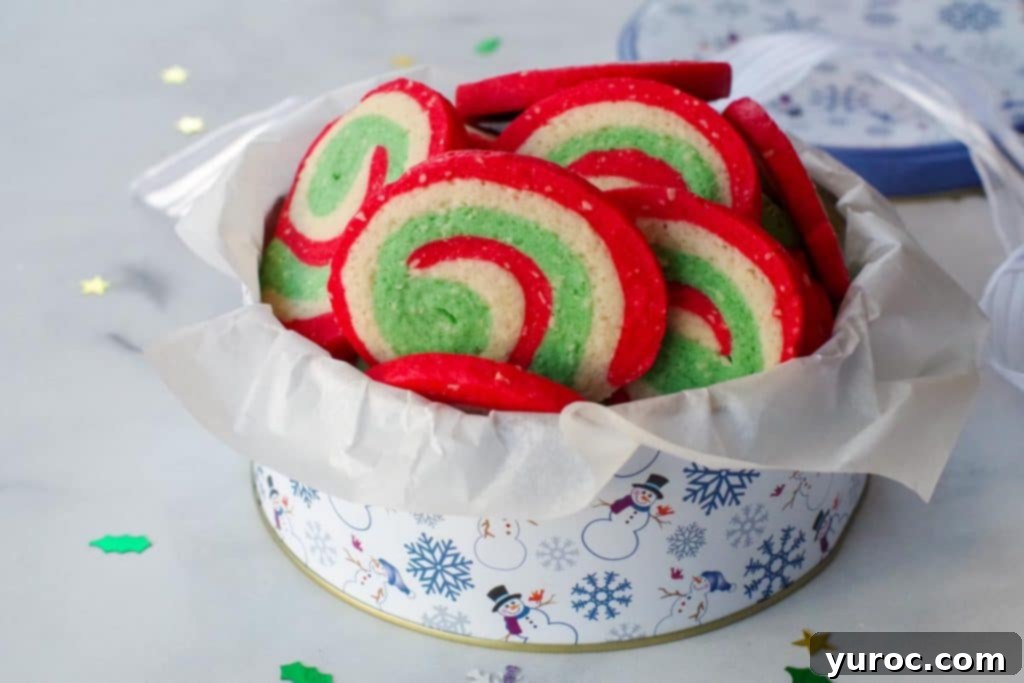
Once baked and cooled, these beautiful swirled cookies are perfect for gifting. Simply line a cute cookie tin with parchment paper, arrange the pinwheels carefully, and you’ve created an ideal edible gift that embodies the spirit of the holidays!
Step-by-Step Guide: Crafting Your Almond Pinwheel Cookies
Creating these delightful Almond Christmas cookies involves a classic sugar cookie dough base, which is then divided and dyed into festive red and green colors. The magic happens when these colored doughs are carefully stacked, rolled together, and then sliced to reveal their mesmerizing swirl pattern. While this recipe does involve a few distinct stages and requires patience, especially with chilling times, following these detailed instructions precisely will ensure your pinwheel cookies turn out perfectly with beautiful, defined swirls and a tender, delicious texture.
Important Note: This recipe includes essential chilling times, totaling approximately 3 hours. Do not skip or shorten these periods, as they are crucial for preventing the dough from spreading and ensuring the distinct colors hold their shape during baking.
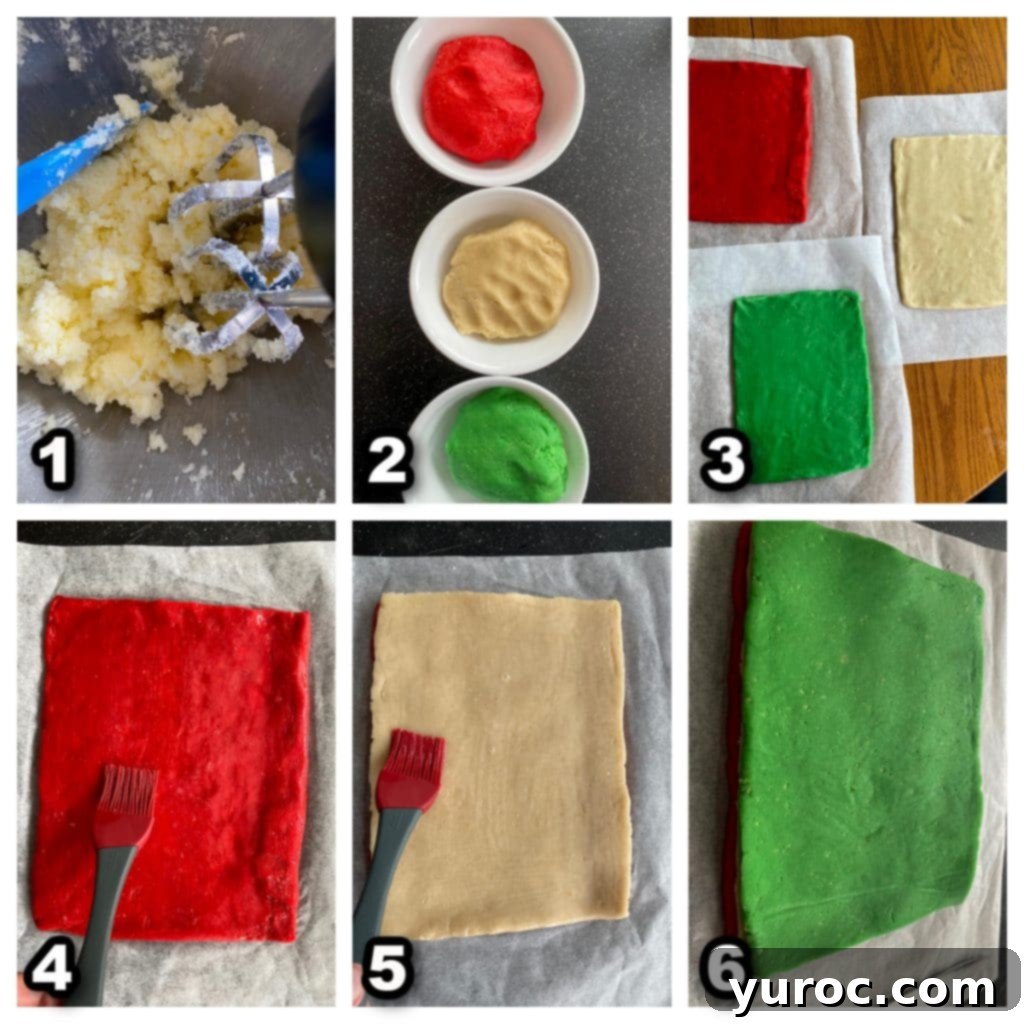
- Prepare the Dough Base: Begin by creaming together the softened unsalted butter and granulated white sugar in a large mixing bowl. Use an electric mixer with a paddle attachment on low to medium speed until the mixture becomes pale, light, and fluffy. This step is vital as it incorporates air, which contributes to the cookies’ tender texture. Next, beat in the whole egg, ensuring it’s fully incorporated. Remember to scrape down the sides of the bowl frequently to ensure all ingredients are evenly mixed.
- Add Flavor & Dry Ingredients: Continue by beating in the milk, both almond and vanilla extracts (for a layered flavor profile), salt, and the finely ground almonds. These additions infuse the dough with its signature taste and texture. Gradually add the all-purpose flour, mixing on low speed until a soft dough begins to form. Towards the end, you may find it easier to incorporate the final amount of flour by hand to avoid overmixing, which can lead to tough cookies.
- Divide and Color the Dough: Carefully divide the prepared dough into three equal portions. Place each portion into a separate bowl. Leave one portion plain to represent the white swirl. Tint the second portion with green food coloring and the third with red food coloring. Mix each color thoroughly until there are no streaks visible in the dough – consistency is key for vibrant swirls. A helpful tip: use your electric mixer to blend in the food coloring; it’s much easier than kneading by hand and prevents staining your hands! Once colored, cover each bowl of dough tightly with plastic wrap and chill them in the refrigerator until they are firm to the touch and no longer sticky. This usually takes about 45 minutes.
- Roll Out the Dough Layers: Cut three pieces of parchment paper, each measuring at least 10×12 inches (25×30 cm). Lightly flour a rolling pin. Take one chilled dough portion at a time and roll it directly onto its designated piece of parchment paper. Roll each dough portion into a precise 7×9 inch (18×23 cm) rectangle, aiming for an even thickness of approximately ⅛ inch (3mm). If necessary, gently patch any uneven edges to achieve the desired rectangular shape. Once rolled, place the dough rectangles (still on their parchment paper) onto a baking sheet and chill them again for 10-15 minutes until firm. This makes them easier to handle for stacking.
- Layer the Dough: In a small separate bowl, lightly beat the egg white with a fork. This will act as a “glue” between your dough layers. Place the red dough layer (still on its parchment paper) onto your clean work surface. Brush the top surface of the red dough generously with the beaten egg white. Carefully invert the plain (white) dough layer onto the red layer, aligning the edges perfectly. Gently peel off the parchment paper from the white dough. Brush the top of the white dough with egg white. Finally, invert the green dough layer onto the white layer, peeling off its parchment paper. You should now have a stack of red, white, and green dough layers.
Pro Tip: For effortless and mess-free food coloring integration, use your stand mixer or hand mixer. It’s significantly easier than kneading by hand and helps prevent your hands from getting stained!
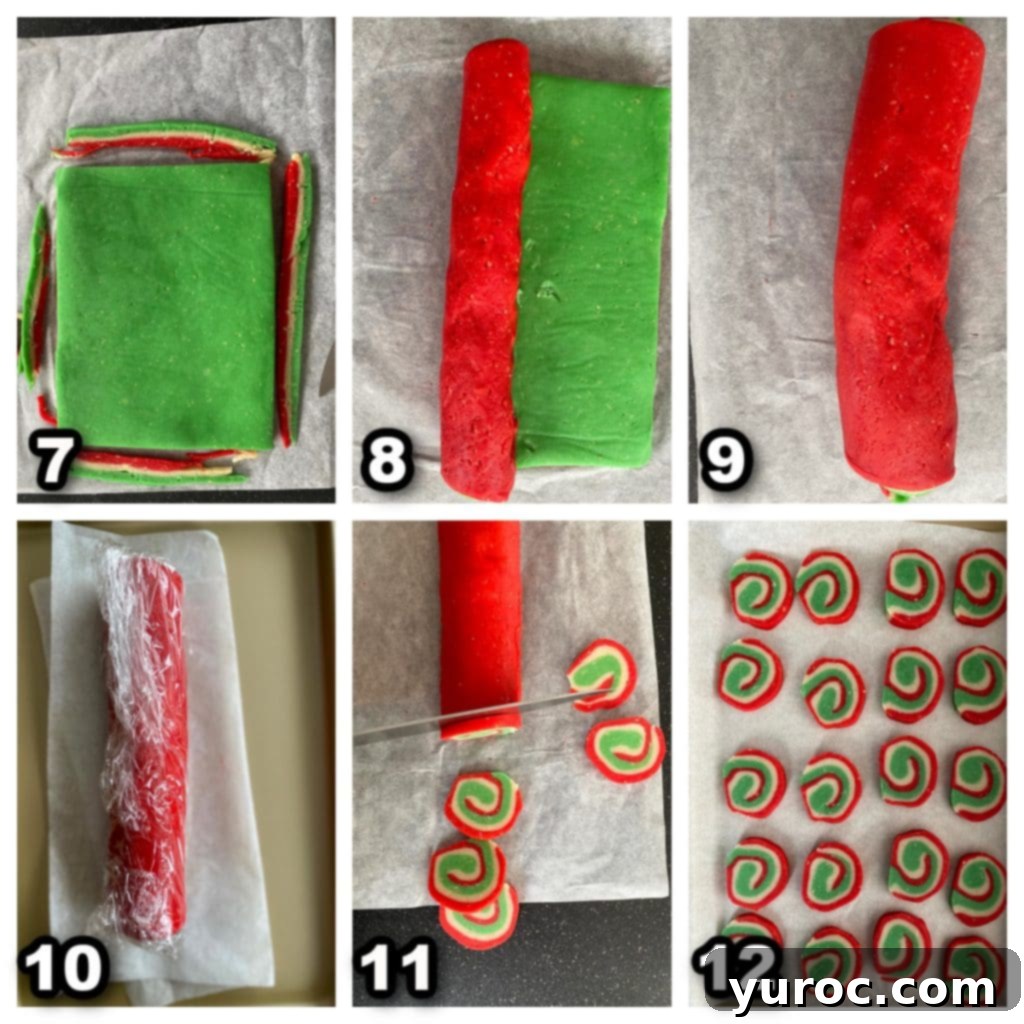
- Trim and Roll the Log: Using a very sharp knife, carefully trim the edges of the stacked dough rectangle to create clean, straight lines. Wipe the blade clean between each cut to prevent colors from smudging and keep them distinct. Orient the dough so one of the long sides is nearest to you. Beginning from this long side, tightly roll the layered dough into a snug log. As you roll, gently smooth and straighten the log, lifting the parchment paper underneath to help release the dough and ensure a tight roll. This tightness is crucial for well-defined swirls. Gently press the seam of the log together to seal it. If your log is thicker than 2 inches (5 cm) in diameter, you can gently roll it with your hands to lengthen it and achieve a more slender diameter.
- Final Chill: Wrap the cookie dough log tightly in plastic wrap. Place it back in the refrigerator to chill until it is very firm. This second chilling period, approximately 2 hours or even overnight, is absolutely essential. It ensures the dough is firm enough for clean, precise slices and prevents the colors from bleeding or the cookies from spreading excessively during baking.
- Slice and Bake: Once the log is thoroughly chilled and firm, preheat your oven to 350 degrees F (180 degrees C). Using a very sharp knife, slice the log into ¼ inch (5 mm) thick rounds. Again, wipe the knife blade clean after every few slices to maintain crisp, distinct color separation. Arrange the sliced cookies about ½ inch (1.25 cm) apart on two parchment-lined baking sheets.
- Bake to Perfection: Bake the cookies for 12-14 minutes, or until they are firm to the touch but not visibly browned. Overbaking can make them dry, so watch them closely. Once baked, allow the cookies to cool on the baking sheets for about 2 minutes before carefully transferring them to a wire rack to cool completely for an additional 5 minutes. Enjoy your beautiful, homemade Christmas Almond Pinwheel Cookies!
Creative Substitutions & Delicious Variations
These Christmas Almond Pinwheel Cookies are wonderfully versatile, allowing for several creative adaptations to suit your taste, time constraints, or specific occasions. Here are some ideas to inspire you:
- Time-Saving with Store-Bought Cookie Dough: In a rush? You can absolutely use pre-made, store-bought sugar cookie dough as a shortcut. However, to maintain the signature flavor profile of this recipe, be sure to incorporate the ground almonds and, most importantly, the almond extract into the store-bought dough. This will ensure your cookies still have that unique, delicious taste.
- Butter Options: If you only have salted butter on hand, you can use it! Simply omit the ¼ teaspoon of salt called for in the recipe to avoid making your cookies too salty.
- Seasonal Food Coloring: The beauty of pinwheel cookies lies in their visual appeal. Beyond Christmas, unleash your creativity with different color combinations. Try cheerful pink and yellow for an Easter celebration, bold orange and black for a Halloween-themed treat, or even blues and purples for a winter wonderland effect. The possibilities are endless!
- Almond Alternatives: If finely ground almonds are not available at your grocery store, you can easily make your own. Simply process blanched (skinless) slivered or whole almonds in a food processor until they reach a very fine, flour-like consistency. It’s important to use blanched almonds; if you use whole almonds with their brown skins, the resulting dough will have a darker hue, which won’t work well for the bright, contrasting colors of this pinwheel recipe. For those with nut allergies, a good quality flour like oat flour or a nut-free blend might work, though the distinct almond flavor will be absent, changing the cookie’s character.
Expert Tips for Pinwheel Cookie Success
Achieving those perfectly swirled, crisp, and flavorful pinwheel cookies requires a few key techniques. Pay close attention to these tips to ensure your Christmas Almond Pinwheel Cookies turn out beautifully every time:
- Respect the Chilling Time! This is perhaps the most crucial tip. The recipe calls for a total of approximately 3 hours of chilling time, divided into stages. Do NOT be tempted to cut back on this. Sufficient chilling ensures your dough is firm and manageable, preventing it from sticking, spreading excessively during baking, and most importantly, maintaining the distinct separation of the colorful layers. Without proper chilling, your beautiful swirls might merge in the oven.
- Mixer for Food Coloring: To save your hands from getting stained and to ensure an evenly colored dough, use your electric mixer (stand mixer or hand mixer) to incorporate the food coloring. This method is much more efficient than kneading by hand.
- Roll the Log Tightly: When rolling the layered dough into a log, ensure it is rolled very firmly and tightly. A loosely rolled log will result in gaps between the colors, causing them to separate and lose their definition in the oven. Use the parchment paper to assist in creating a compact, uniform log.
- Sharp Knife for Clean Cuts: Use a very sharp knife for both trimming the edges of the dough layers and slicing the chilled log into individual cookies. A dull knife will drag and distort the dough, blurring your beautiful swirls. For the cleanest lines and most distinct colors, wipe your knife blade clean with a damp cloth between every few cuts.
- Opt for Gel Food Coloring: For vibrant and rich colors, always choose gel or icing food coloring over liquid food dyes. Gel colors are highly concentrated, meaning you need less product to achieve a deeper hue, and they won’t alter the consistency of your cookie dough as much as liquid colors can. For this recipe, I used Wilton Kelly Green and Americolor Super Red.
- Measure Flour Accurately: For baking, especially cookies, proper flour measurement is critical. Use the “spoon and level” method: spoon flour into your measuring cup and then level it off with the back of a knife. Do not scoop directly from the bag, as this compacts the flour, leading to too much flour and a dry, crumbly dough.
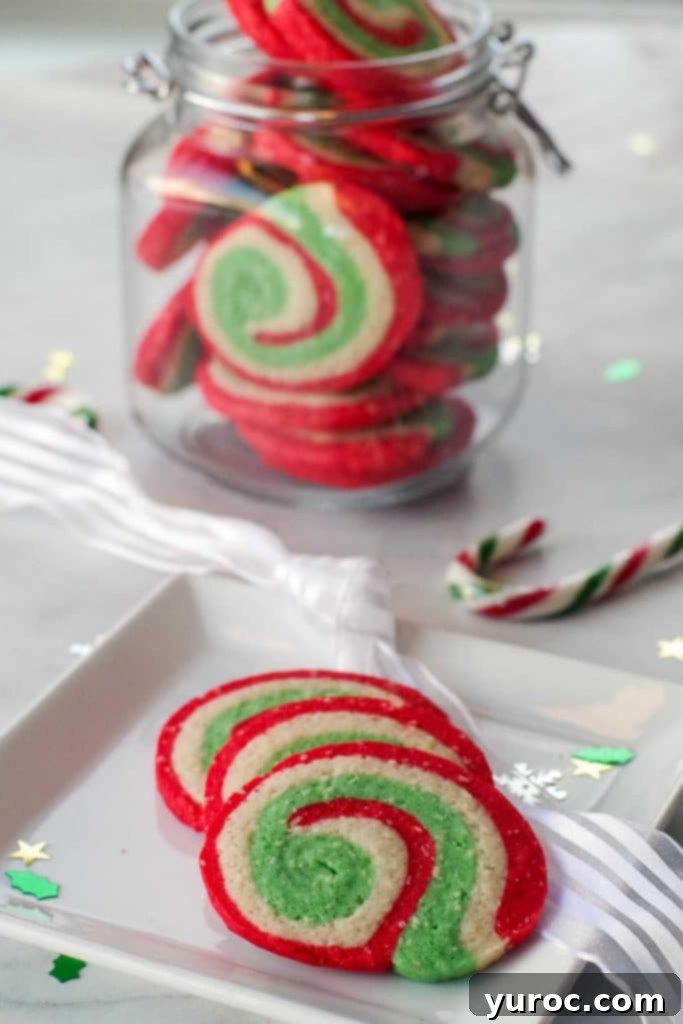
Storing Your Christmas Swirl Cookies
Proper storage is key to enjoying your delicious Christmas Swirl Cookies for as long as possible. Here’s how to keep them fresh:
You can store these festive cookies in an airtight container at room temperature on your kitchen counter for up to 4 days. To maintain their crispness and flavor, ensure they are completely cooled before storing them. However, these cookies also freeze exceptionally well, which is often my preferred method for longer preservation. I typically transfer them to the freezer almost immediately after they cool. When properly stored in a freezer-safe, airtight container or bag, these beautiful pinwheel cookies can be frozen for up to 3 months. When you’re ready to enjoy them, simply thaw them at room temperature for an hour or two. They’ll taste just as fresh as the day they were baked!
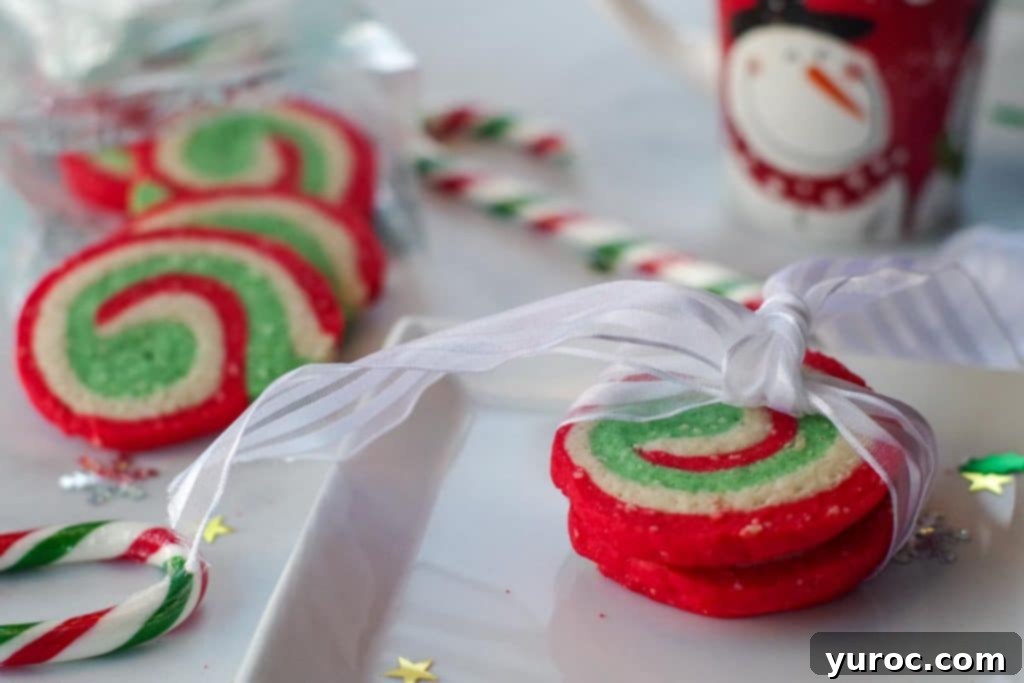
Serving Size & Adjustments
This recipe is designed to yield approximately 30 delightful Christmas Pinwheel Sugar Cookies, making it perfect for holiday gatherings, gifts, or stocking up your cookie jar. If you need more or fewer cookies, the recipe is easily adjustable. Simply click on the serving number in the recipe card below and select your desired number of servings. The ingredient quantities will automatically adjust to match your preference, ensuring you always have the right amount for your baking needs.
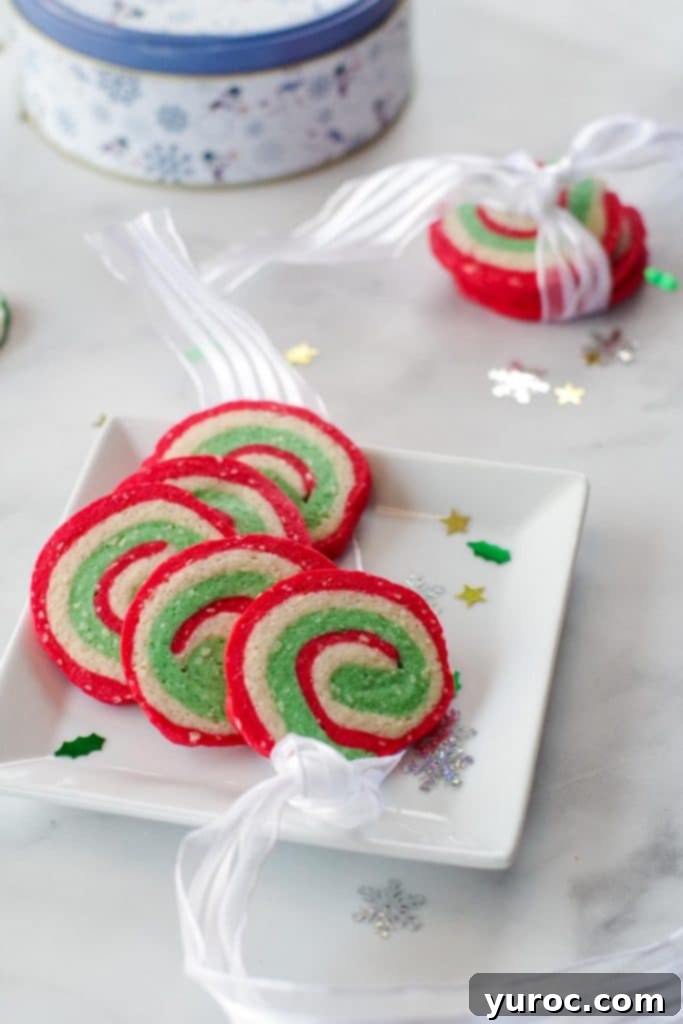
Frequently Asked Questions About Pinwheel Cookies
The method for making pinwheel cookies involves a creative layering technique. First, cookie dough is prepared and divided into separate portions, which are then colored with different food dyes (typically red, white, and green for Christmas). Each colored dough portion is rolled flat into thin, even rectangles. These rectangles are then carefully stacked one on top of the other, often with a light egg white wash in between to help them adhere. The layered dough is then tightly rolled into a log, chilled until firm, and finally sliced into rounds. These rounds are then baked, revealing their mesmerizing swirled pattern.
Ensuring your pinwheel cookie swirls remain distinct and vibrant during baking hinges on two critical factors: ample chilling time and a tight roll. Firstly, do not skimp on the chilling time; cold dough is less prone to spreading. Warm ingredients or insufficient chilling will cause the butter in the dough to melt too quickly in the oven, leading to flattened cookies where the colors run into each other. Secondly, it is paramount to roll the layered dough into a very tight, compact log. Any looseness in the roll will create air pockets, allowing the colors to separate and merge during the baking process, diminishing the crispness of the pinwheel design.
Absolutely! The pinwheel cookie dough is excellent for make-ahead baking. You can prepare the log of dough, wrap it tightly in plastic wrap, and store it in the refrigerator for up to 3-4 days. For even longer storage, you can freeze the dough log for up to 3 months. When ready to bake, simply transfer the frozen log to the refrigerator to thaw overnight before slicing and baking as directed. This makes holiday baking much less stressful!
These Pinwheel Christmas Cookies truly embody the spirit of the holiday season! They are not just visually stunning with their fun and festive red, white, and green swirls, but their unique almond flavor also makes them incredibly delicious. Whether you’re looking for an engaging holiday baking project, a thoughtful edible gift for friends and family, or a show-stopping cookie for your next cookie exchange, these almond swirl cookies are guaranteed to be the star of your holiday spread. Happy baking!
More Festive Christmas Cookie Recipes!
- Christmas Biscotti Recipe (with cranberry and pistachio)
- Gingerbread Yule Log Cookies
- Raspberry Jam Cookies (Classic Thumbprint)
- Baileys and Eggnog Cookies (with frosting)
Did your family ❤️ this recipe? Did you know that commenting and ⭐rating recipes is one of the best ways to support your favorite recipe creators? If you LOVED this recipe, please comment and rate it in the recipe card or share photos on social media using the hashtag #foodmeanderings or tagging @foodmeanderings !

📋 Christmas Almond Pinwheel Cookie Recipe
Ingredients
- ¾ cup unsalted butter softened
- 1 cup white granulated sugar
- 1 egg
- ⅓ cup milk
- 1 teaspoon almond extract
- 1 tsp vanilla extract
- 1 egg white
- ¼ teaspoon salt
- 2 ½ cups all-purpose flour
- 1 pkg ground almonds 100 g
- ½ teaspoon red food coloring
- ½ teaspoon green food coloring
Instructions
- Heads up: there are 2 chilling times involved in this recipe – for a total of about 3 hours
- In a large bowl, cream together butter and sugar with an electric mixer on medium speed (until pale and creamy). Beat in whole egg. Scrape down sides of bowl.
- Beat in milk, extracts, salt and ground almonds.
- Gradually add in flour until a soft dough forms. *You many need to add in the final addition of flour by hand.
- Divide dough into 3 equal portions, each in its own bowl. Leave one ball of dough plain white and tint one with green food coloring and the other with red food coloring. Mix in food color thoroughly so there are no streaks. Cover each dough with plastic wrap and and chill until firm and no longer sticky (about 45 minutes)
- Cut 3 pieces of parchment paper at least 10 x12 inches (25×30 cm) in size. Using a floured rolling pin, roll each dough into a 7×9 inch (18×23 cm) rectangle, approximately ⅛ inch (3mm) thick on its own piece of parchment paper. Patch edges as required to attain size. Chill dough, still on parchment paper (on baking sheet) until firm).
- In a small bowl, beat egg white with a fork. To layer, place red layer of dough (still on parchment paper), on work surface and brush with egg white. Lining up the edges, invert white dough onto red one and peel off parchment from plain dough. Brush with egg white and invert green dough on top again, peeling away parchment.
- Use a sharp knife to trim edges, wiping blade clean between cuts to keep colors distinct.
- Place long side of dough nearest to you and tightly roll up into a log, smoothing and straightening it as you roll (lifting the parchment to help release the dough) Gently press edge of log together to seal. If the log is thicker than 2 inches (5 cm) in diameter, gently use your hands to roll it and lengthen it.
- Wrap log in plastic wrap and chill until firm, approximately 2 hours or overnight.
- Preheat oven to 350 degrees F/ (180 degrees C). Slice log into ¼ inch (5 mm) thick rounds, wiping blade clean between cuts. Set about ½ inch ( 1.25 cm) apart on 2 parchment lined baking sheets.
- Bake for 12-14 minutes until firm to the touch, but not browned. Allow to cool for 2 minutes before moving to a cooling rack to cool for an additional 5 minutes.
Notes
- Do not skip chilling time! There is about 3 hours of chilling time in total, but it’s worth it. Don’t be tempted to cut back or your dough will be hard to work with, your cookies will likely spread and the colors will spread into each other.
- Use your mixer to blend in your food coloring. It’s easier than kneading with your hands and you don’t stain your hands!
- Ensure you roll the log up firmly. If the log is rolled too loosely, the colors will separate from each other in the oven.
- Use a sharp knife. Use a sharp knife to cut cookies and trim edges. Wiping the blade clean between cuts will keep the colors separate.
- Use gel food coloring. You can use less and get a deeper color. *I used Wilton Kelly green (affiliate link) and Americolor super red (affiliate links).