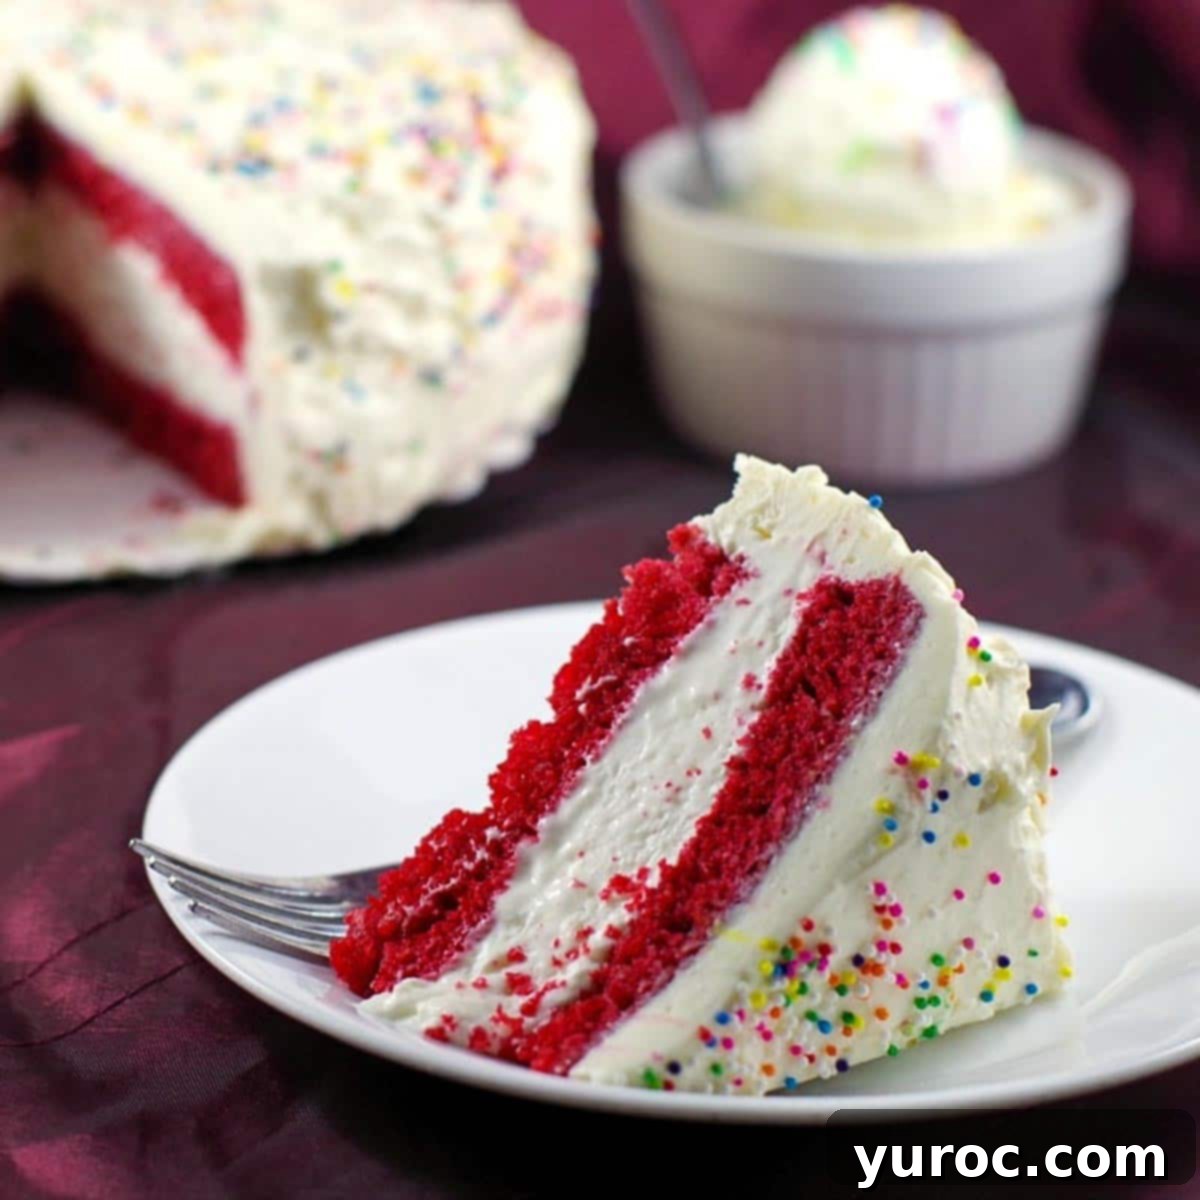
The Ultimate Red Velvet Ice Cream Cake: An Easy No-Churn Homemade Recipe
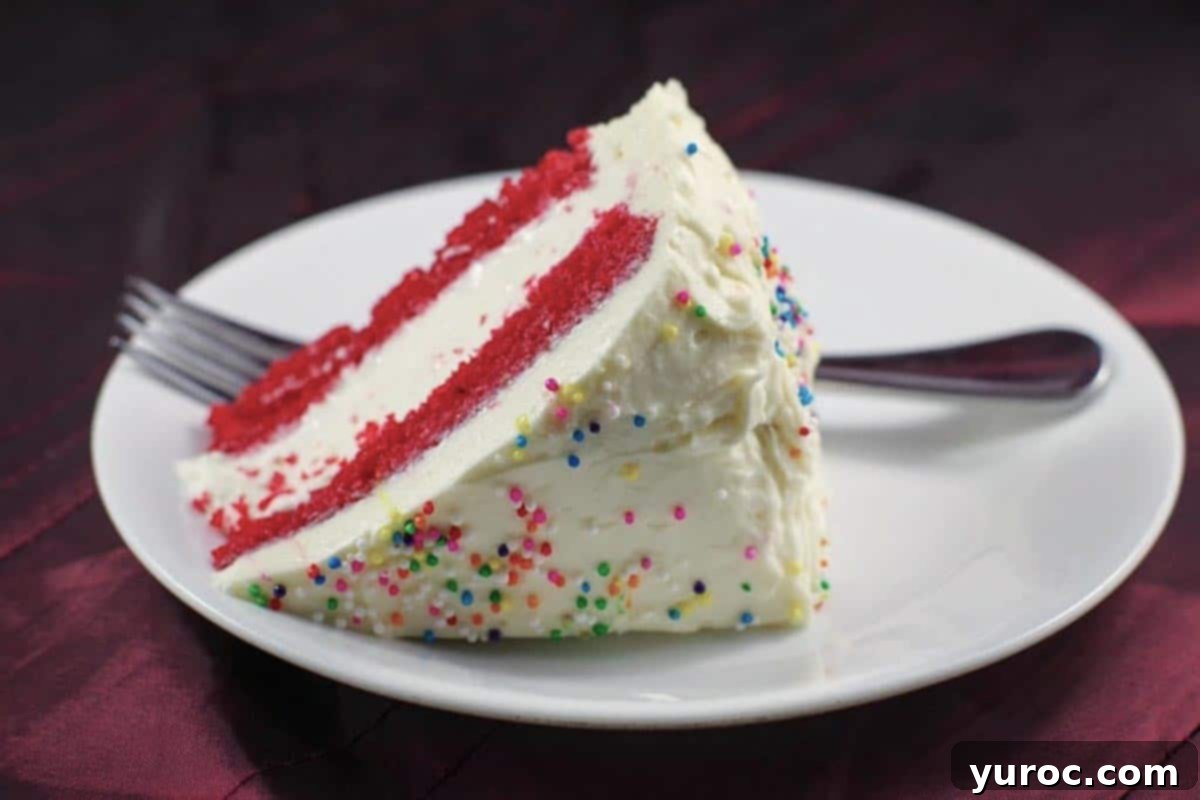
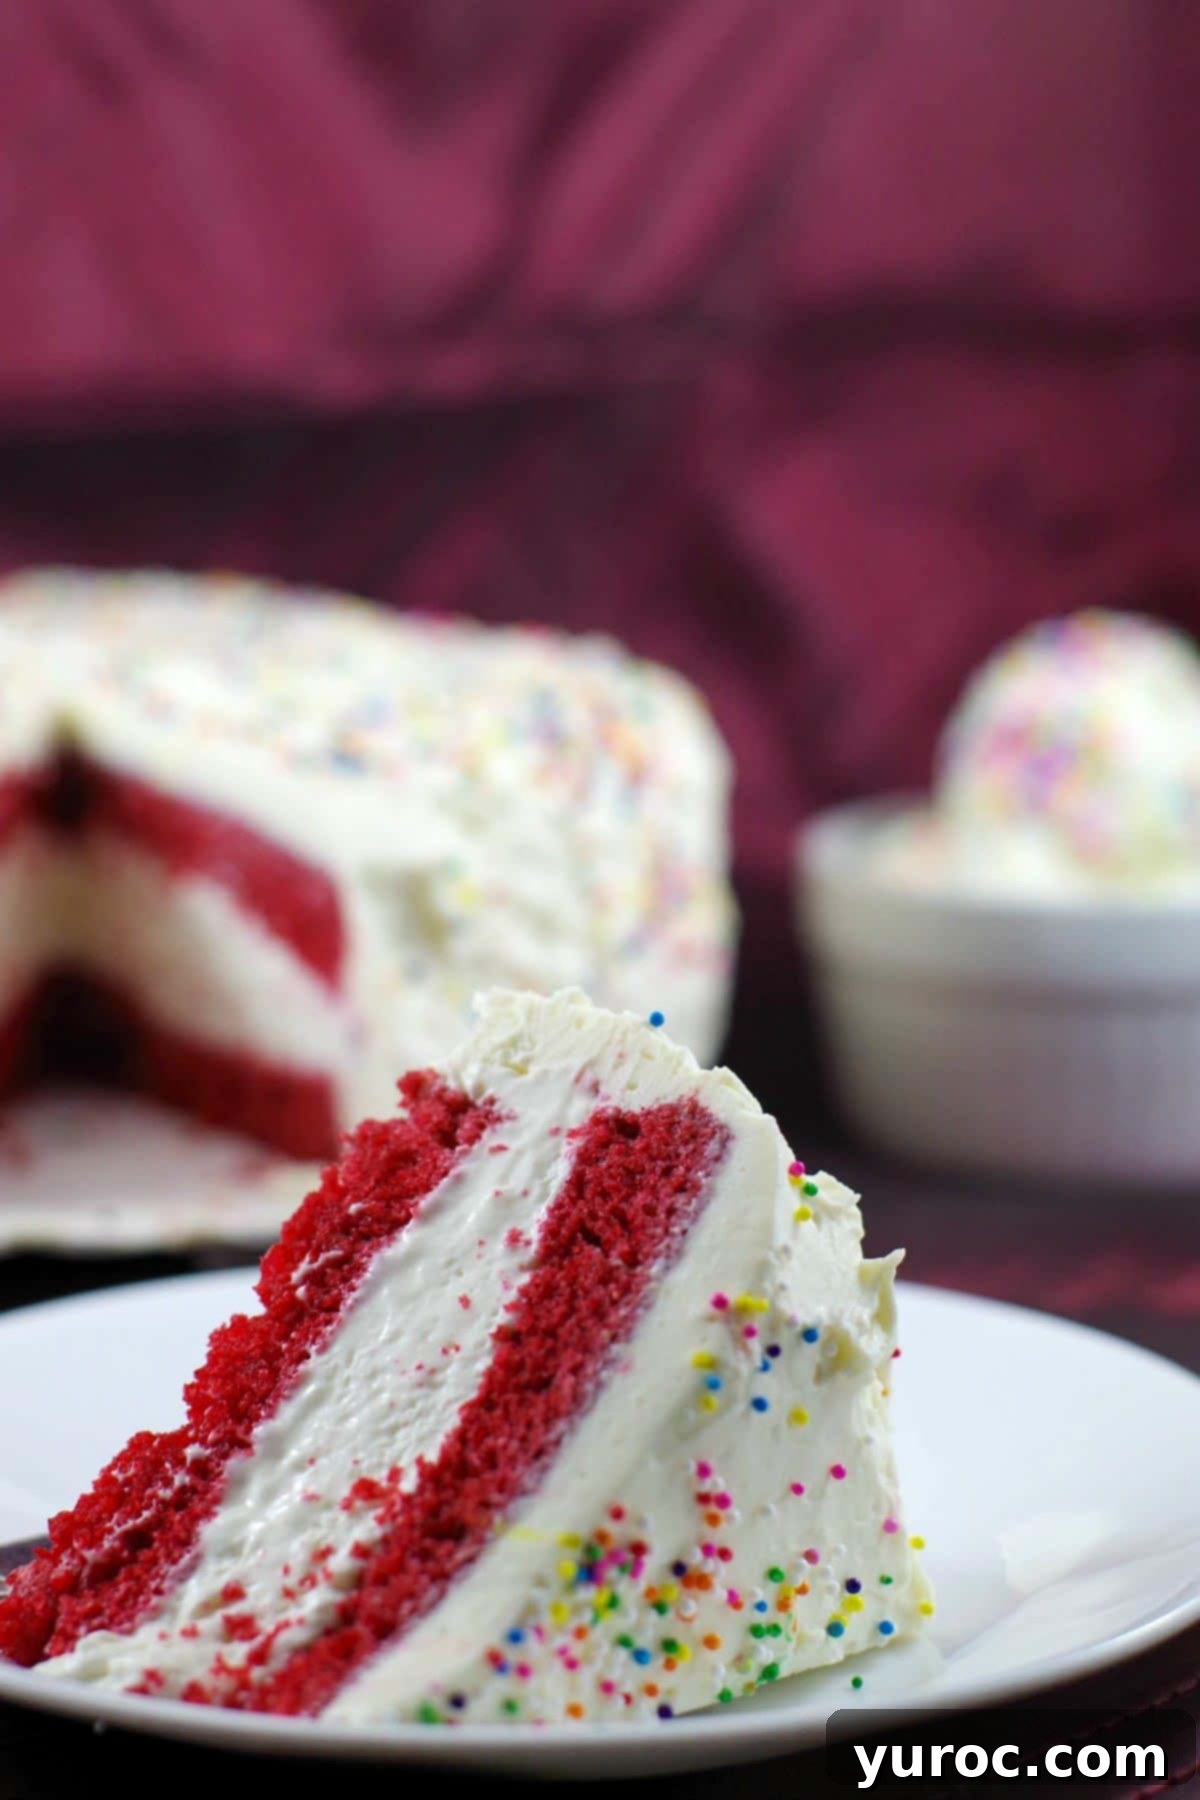
Prepare to be enchanted by this show-stopping Red Velvet Ice Cream Cake recipe – a perfect fusion of two beloved desserts! This masterpiece features layers of incredibly moist, pillowy, and vibrant red velvet cake that lovingly cradle a rich, easy-to-make no-churn cheesecake ice cream filling. The entire creation is then lavishly smothered in a dreamy, creamy white chocolate cream cheese frosting, making every bite an unforgettable experience.
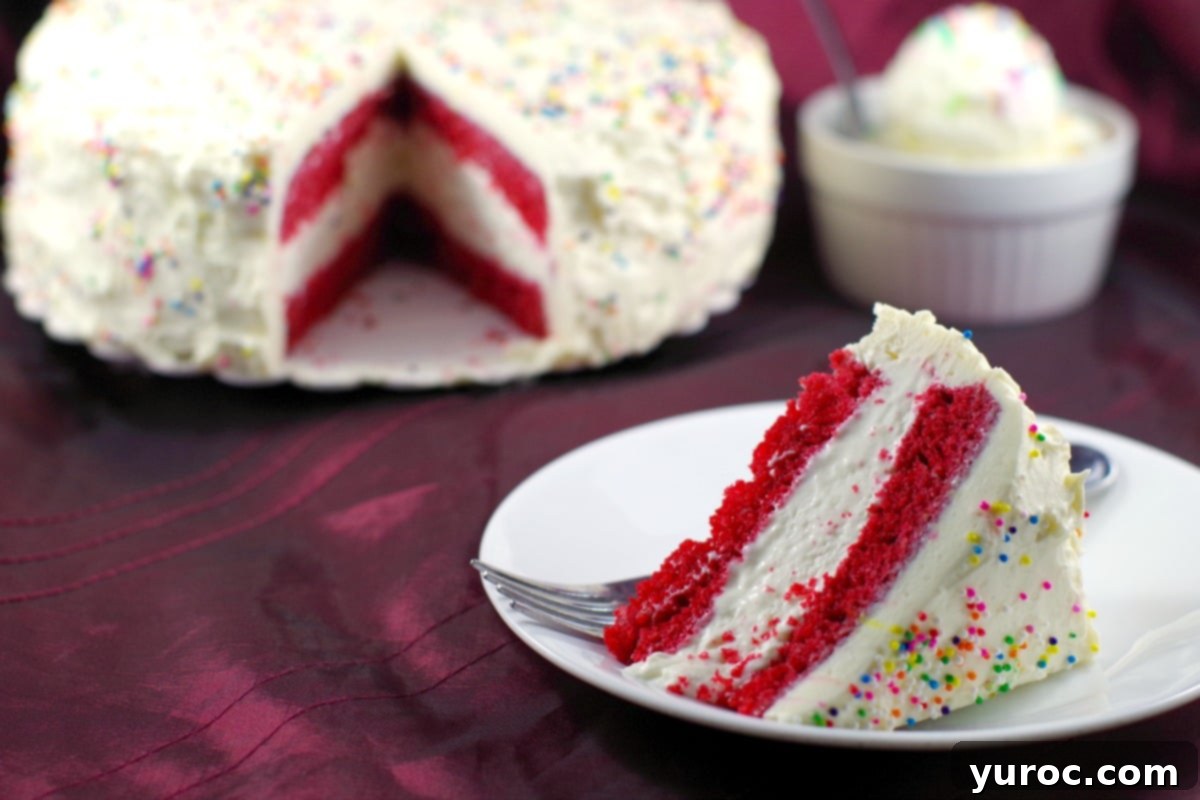
While often a highlight of summer gatherings, this delightful red velvet ice cream cake is truly perfect for any time of the year. Its striking appearance and irresistible flavor make it an ideal choice for birthdays, holidays like Valentine’s Day, or any special occasion that calls for an extraordinary dessert. Imagine pairing a slice of this cool, decadent cake with a hearty summer meal such as Slow Cooker Pulled Pork on a Bun or a refreshing Creamy Bacon Ranch Chicken Pasta Salad. For a romantic Valentine’s dinner, it beautifully complements an elegant dish like Baked Cornish Hens in Wine Sauce.
The inspiration for this ultimate dessert came during my son’s 12th birthday. When I asked him the perennial question, “What kind of cake do you want this year?”, his immediate answer was Red Velvet. It wasn’t a surprise; red velvet has always been his absolute favorite. Although often associated with elegant weddings, my son was always an adventurous eater with a refined palate, far from your typical 12-year-old.
Having tasted countless cakes since he was old enough for solid food, he truly knew his desserts! And since he also has a deep affection for ice cream cake, we brilliantly combined his two loves into one magnificent creation: a red velvet ice cream cake. It was truly the best of both worlds – the rich, tangy flavor of red velvet cake meeting the cool, creamy indulgence of ice cream.
If you’re also a fan of delicious ice cream cakes, be sure to explore my other fantastic recipes like the Copycat Cookie Dough Ice Cream Cake (DQ Style) and the refreshing Neapolitan Ice Cream Cake!
This particular recipe for Red Velvet Ice Cream Cake brings together a trio of my all-time favorite components: a super easy no-churn cheesecake ice cream filling, my perfected Red Velvet Cake recipe (thoughtfully adapted from Chef Steph’s Southern Red Velvet), and my go-to Dreamy Creamy White Chocolate Cream Cheese Frosting (with a few personal enhancements to Rose Levy Barenbaum’s original). The result is a harmonious blend of textures and flavors that will undoubtedly impress everyone who tries it.
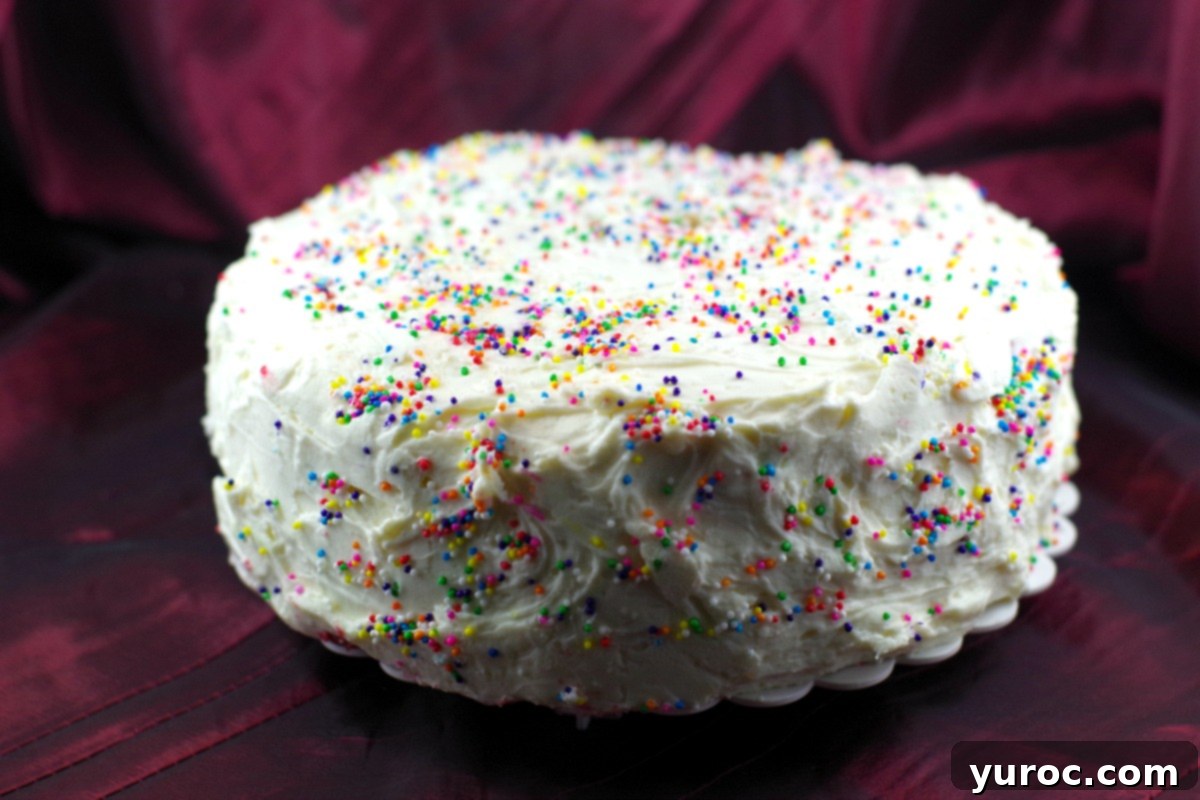
In essence, I’ve meticulously curated and combined the very best cake, ice cream, and frosting recipes into one sensational dessert, creating what I believe is truly the best red velvet ice cream cake recipe you’ll find anywhere. It’s an easy yet incredibly impressive treat that perfectly balances the classic tang of red velvet with the cool, refreshing delight of homemade ice cream.
🍰 Essential Ingredient Notes for Your Red Velvet Ice Cream Cake
Creating this spectacular Red Velvet Ice Cream Cake relies on selecting the right ingredients. Here’s a closer look at what you’ll need and why certain choices make a big difference for each component:
For the Red Velvet Cake Layers, you’ll need:
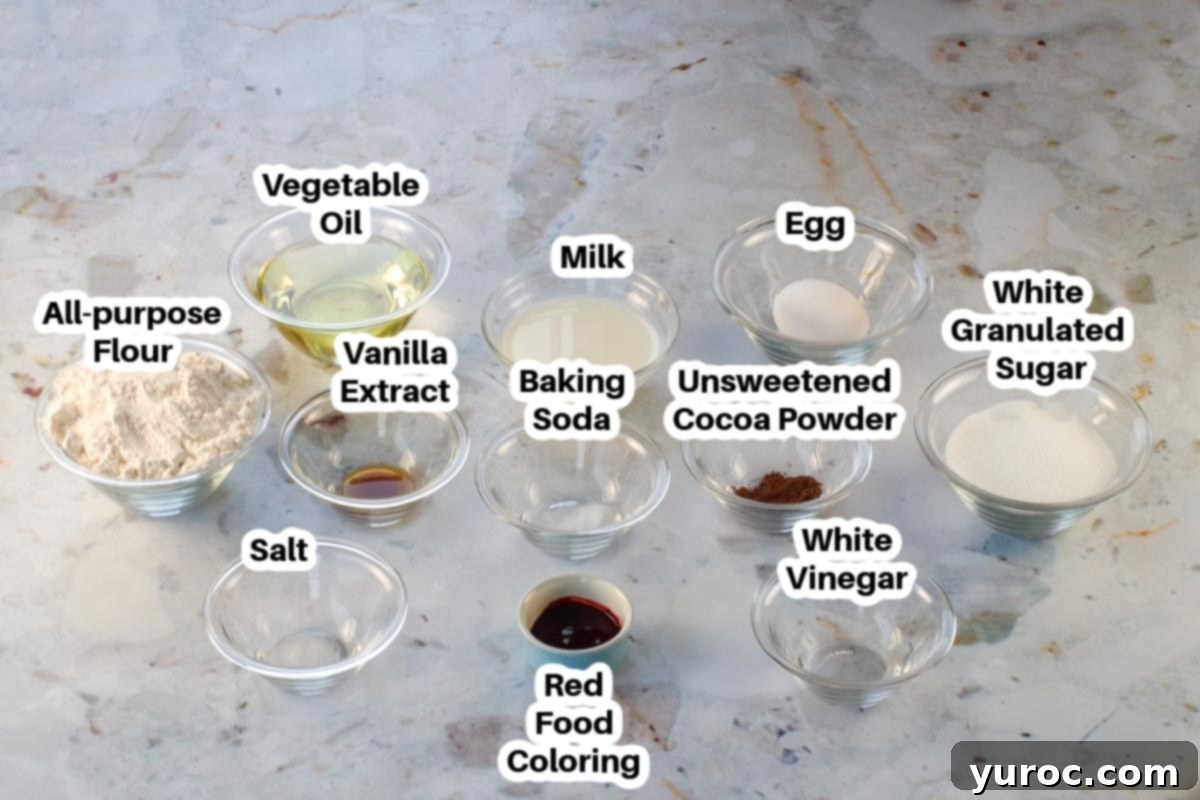
- High-Quality Red Food Coloring: Achieving that iconic vibrant red hue is crucial for red velvet cake. I highly recommend using a gel food coloring, as it is significantly more concentrated than the liquid varieties typically found at grocery stores. Gel coloring is designed for intense color in frostings and batters without diluting the mixture. My top choice is Americolor Super Red food coloring because it delivers outstanding color with less product. If you opt for another gel brand, such as Wilton, ensure you purchase their “no taste red” variety. Many red food colorings can impart an unpleasant flavor when used in large quantities, which is often necessary to get a deep, rich red. Skip the standard grocery store liquid food coloring entirely, as it’s nearly impossible to achieve the desired vibrant red with it.
- Buttermilk Substitute (Milk + Vinegar): This recipe calls for adding vinegar to regular milk to create a homemade buttermilk substitute. This acidic mixture reacts with the baking soda in the dry ingredients, leading to a tender, light crumb and contributing to the cake’s signature tanginess.
For the Cream Cheese Ice Cream Filling, you’ll need:
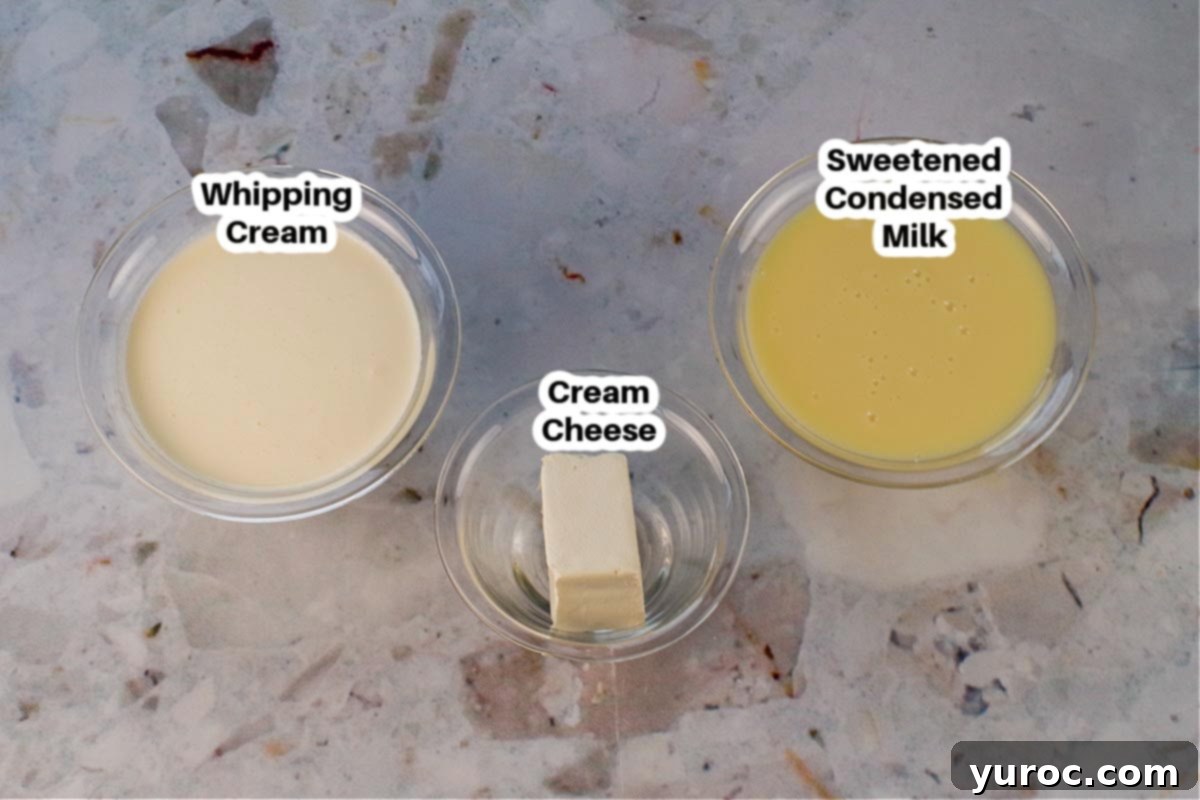
- Cold Whipping Cream (Heavy Cream): For optimal results and to achieve stiff peaks, it’s essential to use cold whipping cream with a fat content of 33-36%. The higher fat content ensures a stable, fluffy whipped cream that forms the base of your no-churn ice cream, giving it a rich and airy texture.
- Sweetened Condensed Milk: This is the magical ingredient that eliminates the need for an ice cream machine. It provides both sweetness and a creamy texture, preventing the ice cream from becoming icy.
For the Dreamy Creamy White Chocolate Cream Cheese Frosting, you’ll need:
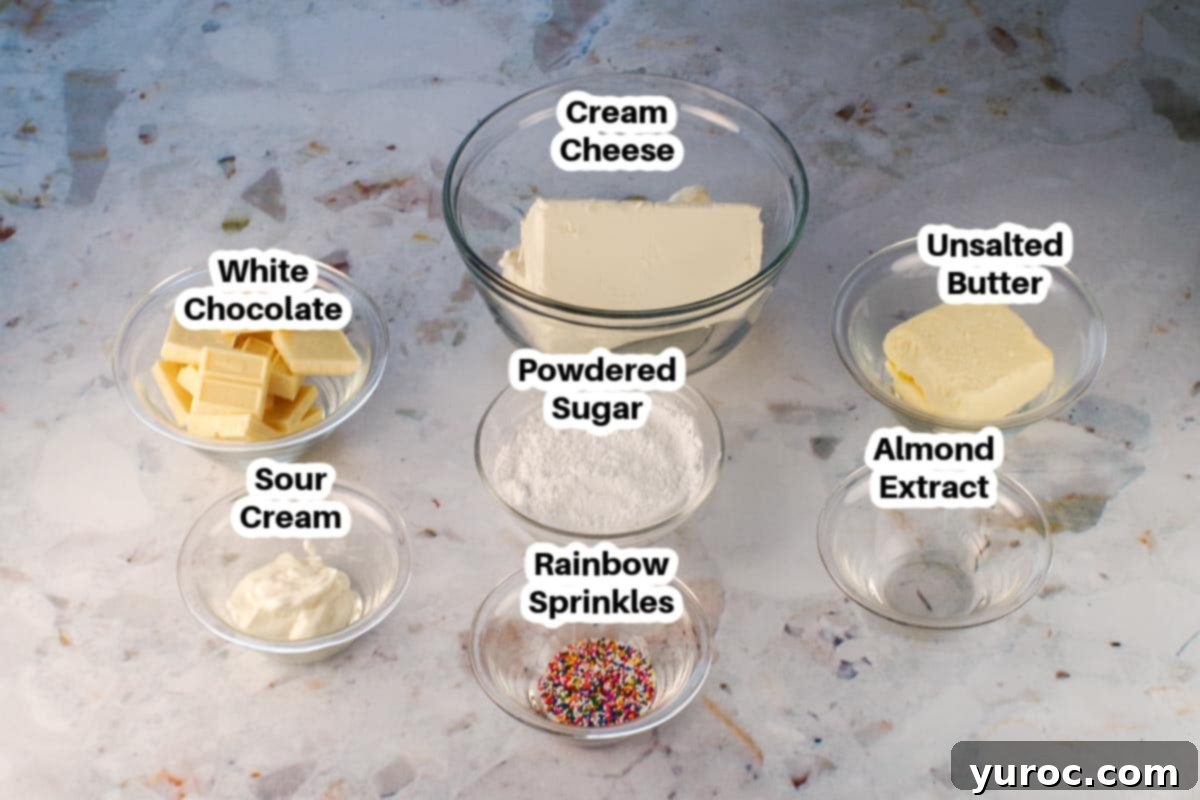
- Quality White Chocolate Baking Bar: This is critical for a smooth, glossy, and delicious frosting. Always use a white chocolate baking bar, not chocolate chips. Baking bars are formulated to melt smoothly and integrate seamlessly into frostings, while chocolate chips contain stabilizers that prevent them from melting as fluidly, potentially leading to a grainy or lumpy texture.
- Cream Cheese and Unsalted Butter (Softened): Ensure both are at proper room temperature for effortless mixing and a lump-free, creamy frosting.
- Sprinkles: I love using rainbow sprinkles for a festive touch, but you can choose any type or color of sprinkles to match your occasion or personal preference.
📖 Creative Variations & Easy Substitutions
This Red Velvet Ice Cream Cake recipe is incredibly versatile! Feel free to customize it to your taste or simplify the process with these ideas:
- Frosting Alternatives: While our white chocolate cream cheese frosting is divine, you have other options. You could use a classic whipped cream frosting, such as my EASY Stabilized Whipped Cream Frosting (with piping gel) or my 2-Ingredient White Chocolate Whipped Cream Frosting (Ganache). For a more stable, classic option, a shortening-based buttercream frosting works well, especially if the cake will be out of the freezer for a bit. Or, simply use your absolute favorite frosting recipe!
- Simplify the Cake: If you’re short on time, don’t hesitate to use your favorite red velvet cake recipe or even a high-quality boxed cake mix. Just follow the package directions for baking, then ensure the layers are completely cooled and leveled before assembly.
- Store-Bought Ice Cream: For the quickest assembly, you can substitute the homemade no-churn cheesecake ice cream filling with store-bought vanilla, cream cheese, or cheesecake-flavored ice cream. Let it soften slightly, spread it into your prepared 8-inch pan, and refreeze until solid.
- Different Ice Cream Flavors: Get creative with your ice cream choice! Chocolate, strawberry, mint chip, or even a coffee-flavored ice cream could add an exciting twist to the classic red velvet.
- Add-Ins to Ice Cream: Fold in mini chocolate chips, chopped nuts, crushed cookies, or even small pieces of leftover red velvet cake crumbs into your no-churn ice cream for extra texture and flavor.
- Make it Gluten-Free: Easily adapt this recipe by using a gluten-free all-purpose flour blend for the cake layers. Ensure your blend contains xanthan gum, or add ¼ teaspoon per cup of flour.
💡 Expert Recipe Tips for a Flawless Red Velvet Ice Cream Cake
To ensure your Red Velvet Ice Cream Cake turns out perfectly, pay close attention to these expert tips for each stage of the process:
Cake Baking Tips:
- Use High-Quality Gel Food Coloring: As mentioned in the ingredients, a superior gel food coloring like Americolor Super Red or Wilton “No Taste Red” is paramount for achieving that vibrant, deep red without any artificial aftertaste. Grocery store liquid colors often require so much product that they can affect the batter’s consistency and flavor.
- Do Not Overmix the Batter: Overmixing develops the gluten in the flour too much, leading to a tough and dense cake. Mix your batter just until the ingredients are fully combined, ensuring a light, tender, and fluffy red velvet cake texture.
- Cool Cake Layers Completely Before Assembly: This step is non-negotiable! Warm cake layers will quickly melt your ice cream filling, leading to a messy and unstable cake. Allow your cake layers to cool entirely on a wire rack before even thinking about adding the ice cream.
- Proper Pan Preparation: Grease and flour your cake pans thoroughly, or use a reliable non-stick spray or Wilton Cake Release (affiliate link). This ensures your delicate red velvet layers release cleanly from the pan, preventing any breakage.
No-Churn Ice Cream Tips:
- Chill Your Mixing Bowl and Beaters: For whipping heavy cream to stiff peaks, a cold environment is your best friend. Chill your mixing bowl and whisk attachments in the freezer for 10-15 minutes before you start. This significantly helps the cream whip up faster and more effectively, resulting in a stable, airy whipped cream.
- Gently Fold Ingredients: When combining the sweetened condensed milk mixture with the whipped cream, use a light, delicate folding motion. This technique preserves the airy, voluminous texture of the whipped cream, which is crucial for a smooth and light no-churn ice cream. Avoid vigorous stirring, which can deflate the cream.
- Allow Sufficient Freezing Time: Patience is key for no-churn ice cream. Let the ice cream layer freeze for at least 8 hours, or ideally overnight, until it is completely solid. A firm ice cream layer is essential for easy handling and assembly, ensuring your cake holds its shape beautifully.
- Use the Same Pan Size for Ice Cream: To ensure a perfect fit and seamless layers, line an 8-inch cake pan with plastic wrap (the same size as your cake layers) for the ice cream layer. This makes assembly much easier and creates a professional-looking cake.
Frosting & Decorating Tips:
- Opt for High-Quality White Chocolate Baking Bar: As previously emphasized, a white chocolate baking bar (not chips) is paramount. It melts into a smooth, liquid consistency that blends seamlessly into the cream cheese frosting, contributing to its dreamy texture and flavor.
- Bring Frosting to Room Temperature Before Spreading: Our white chocolate cream cheese frosting firms up beautifully in the refrigerator. To ensure it’s easy to spread and work with, allow it to sit at room temperature for about 30 minutes before you begin frosting your cake. This will make it pliable and smooth.
- Achieve Crumb-Free Frosting with Wilton Cake Release: A little trick for crumb-free frosting starts with the cake release. I highly recommend Wilton Cake Release (affiliate link) to ensure your cakes come out of the pan without sticking. After removing the cakes, gently brush off any loose red velvet cake crumbs with a pastry brush before you start frosting.
- Apply a Crumb Coat for a Clean Finish: For a truly professional look, apply a thin, initial layer of frosting (the “crumb coat”) to trap any stray cake crumbs. Freeze the cake for about 15-30 minutes until this layer is firm, then apply your final, thicker layer of frosting. This prevents red crumbs from mixing into your pristine white frosting.
- Generously Apply Frosting and Spread Carefully: Another technique to avoid crumbs is to work in sections. Add a generous amount of frosting to each section of the cake and spread it gently from the top downwards. This minimizes the chance of your knife or spatula touching the crumb coat beneath, keeping your final frosting layer smooth and clean.
- Use a Separate Bowl for Working Frosting: Always transfer a portion of your frosting to a separate bowl for immediate use. This way, if any cake crumbs accidentally get onto your knife or spatula, you can scrape them off into this working bowl, preventing the main batch of frosting from becoming contaminated with crumbs.
- Warm Your Knife for an Ultra-Smooth Finish: For an incredibly smooth and polished frosting surface, run your spatula or knife under warm water, wipe it completely dry, and then use it to gently smooth the frosting. The warmth helps the frosting glide and creates a perfect finish.
- Work Quickly When Decorating: Ice cream cakes melt, especially when exposed to room temperature. Work efficiently when frosting and decorating, then return the cake to the freezer immediately after each step to keep it firm.
Storage & Serving Tips:
- Allow to Sit Briefly Before Serving: For easier slicing and a more enjoyable eating experience, let the frozen cake sit at room temperature for about 5-10 minutes before cutting. This allows the ice cream to soften just enough.
- Utilize an Airtight Cake Container for Storage: To prevent freezer burn and keep your ice cream cake fresh and tasting its best, store it in an airtight cake container in the freezer. This also protects it from absorbing other freezer odors.
- Slice with a Warm, Dry Knife: For clean, precise cuts, dip a sharp knife in hot water, wipe it completely dry, and then slice the cake. Re-warm and dry the knife between each cut for the best results.
If the thought of making a Red Velvet Ice Cream Cake seems daunting, especially if you don’t own an ice cream maker, please don’t be intimidated – it’s surprisingly easy! While it involves several steps and some waiting time for freezing, the process is straightforward: bake the cake layers, prepare the simple no-churn ice cream separately, sandwich them together, and then cover the entire creation with the luscious frosting. Each component is manageable, and the final result is truly worth the effort.
🔪 Step-by-Step Guide: How to Make Red Velvet Ice Cream Cake
Follow these detailed instructions to create your homemade Red Velvet Ice Cream Cake, from baking the cake layers to the final decorative touches:
PREP: Preheat your oven to 350°F (176°C). Prepare two 8-inch round cake pans by greasing and flouring them thoroughly, or use a non-stick spray like Wilton Cake Release (see Expert Tips in NOTES section for more detail).
* Heads up! Remember there is a minimum 8-hour freezing time required for this cake, so plan accordingly.
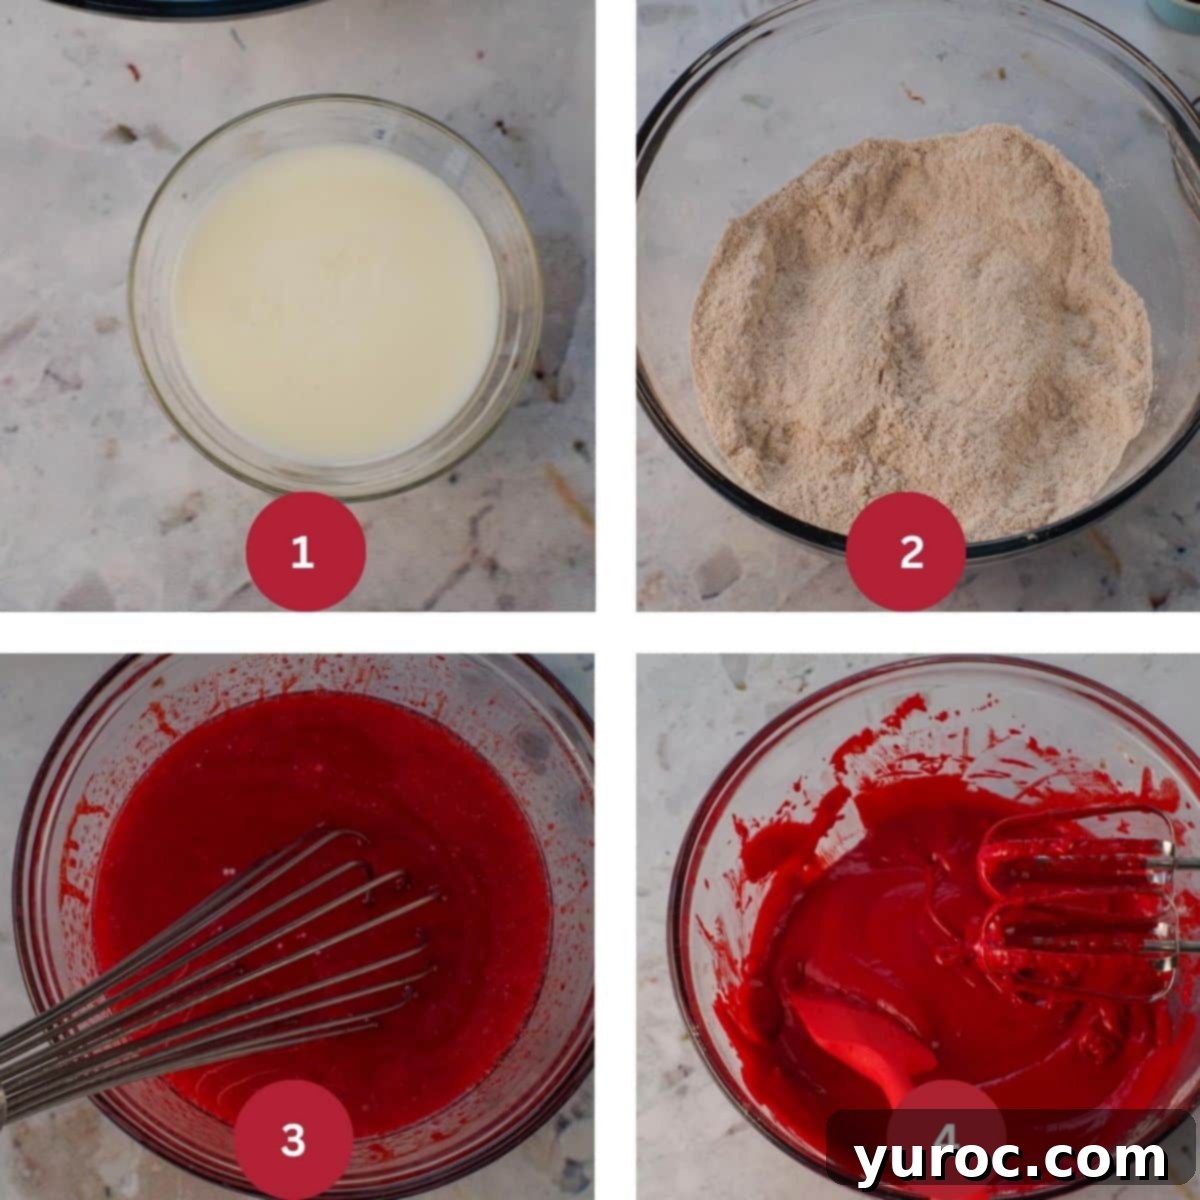
MAKE THE CAKE (STEP 1): Begin by adding white vinegar to your milk and letting it sit for 5 minutes; this creates a buttermilk substitute (IMAGE 1). Next, sift all your dry ingredients together into a large mixing bowl to ensure there are no lumps and they are well combined (IMAGE 2). In a separate bowl, whisk together all your wet ingredients thoroughly (IMAGE 3). With your mixer set to low speed, gradually blend the wet ingredients into the dry ingredients, mixing only until they are just combined. Be careful not to overmix, as this can lead to a tough cake (IMAGE 4).
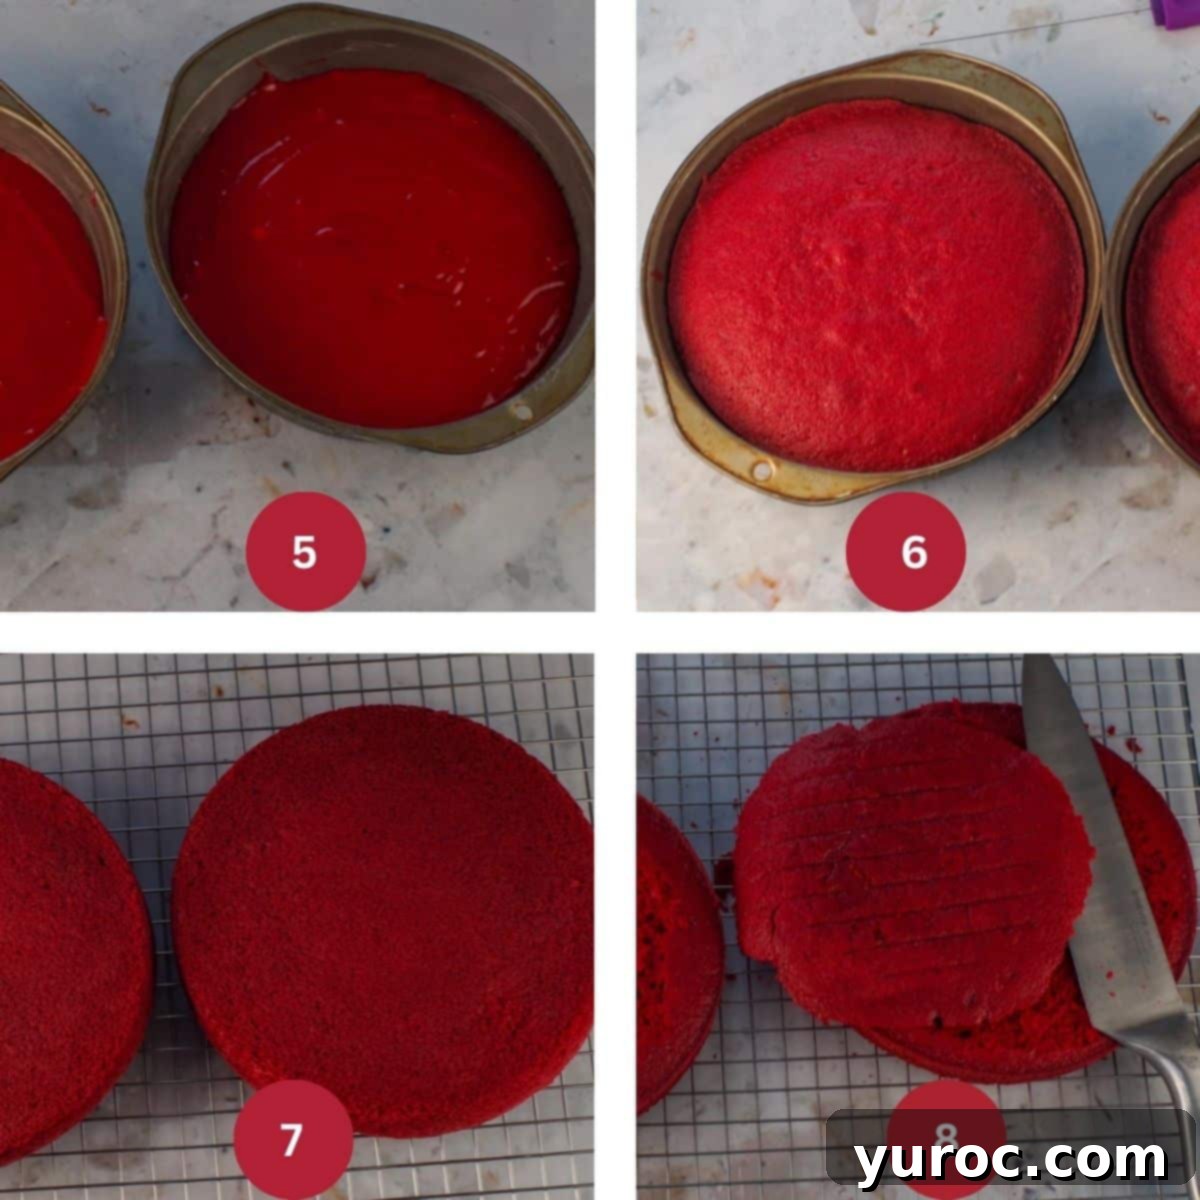
BAKE THE CAKE (STEP 2): Evenly divide the prepared cake batter between your greased 8-inch cake pans, filling each approximately ½ to ⅔ full (IMAGE 5). Bake in the preheated oven for about 25-30 minutes, or until a wooden skewer or toothpick inserted into the center of the cakes comes out clean (IMAGE 6). Once baked, remove the cakes from the oven and let them cool in their pans for 10 minutes. Then, invert them onto a wire rack to cool completely for another 15 minutes (IMAGE 7). Finally, use a serrated knife to carefully level the cake layers by slicing off any domed “hump” from the tops (IMAGE 8).
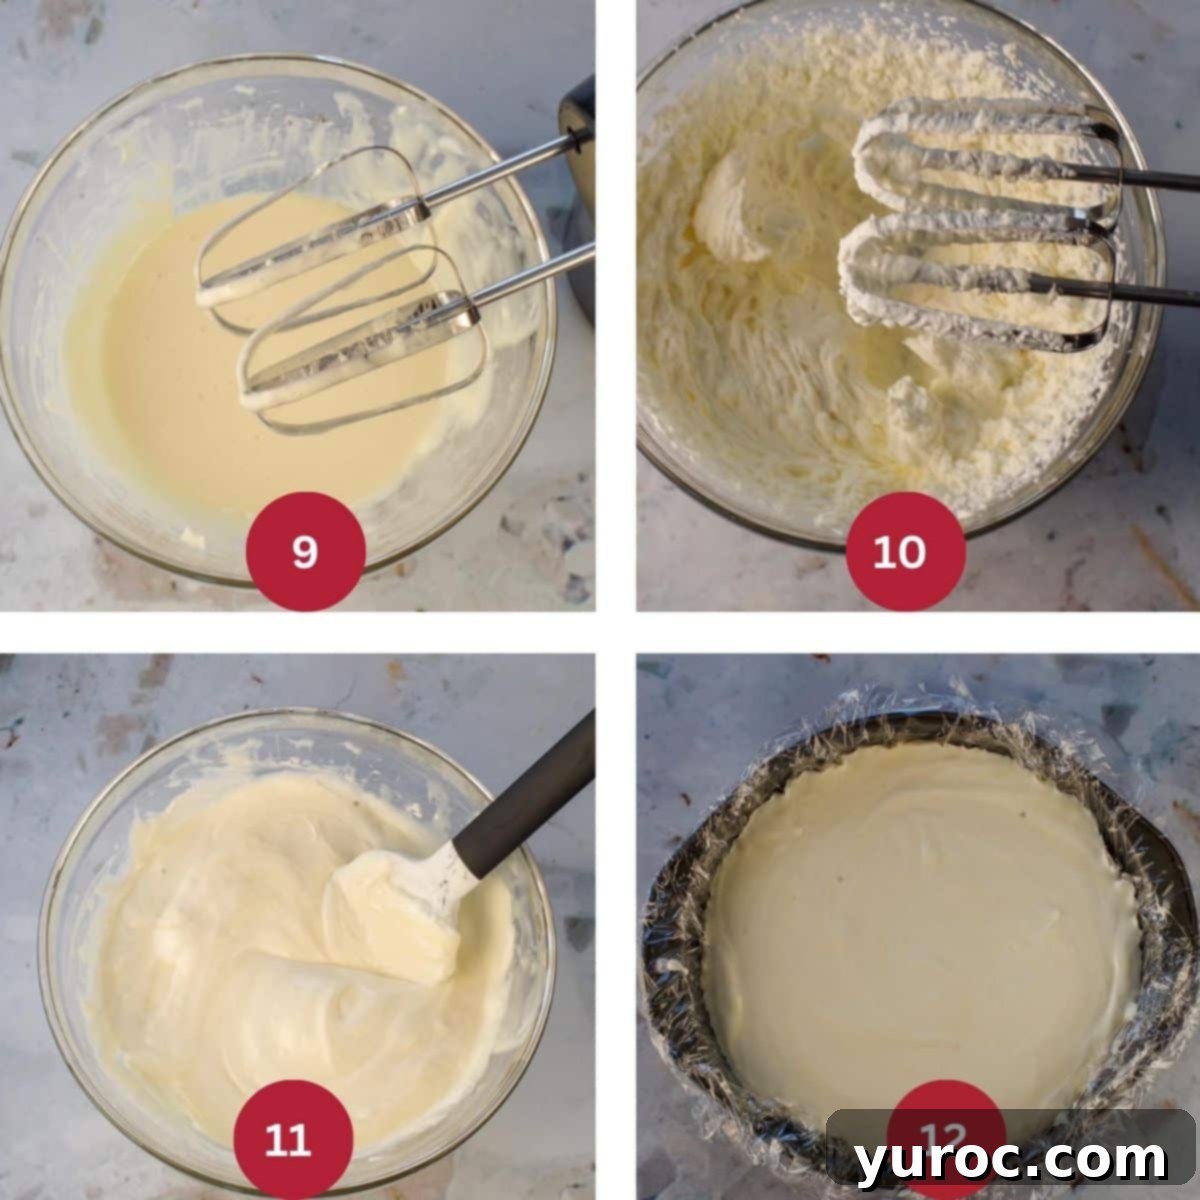
MAKE THE ICE CREAM FILLING (STEP 3): In a large bowl, use an electric mixer to beat together the softened cream cheese and sweetened condensed milk until the mixture is smooth and well combined (IMAGE 9). In a separate, thoroughly chilled bowl (with chilled beaters), beat the cold whipping cream until it forms firm, stiff peaks (IMAGE 10). Gently fold the whipped cream into the cream cheese and condensed milk mixture. Use a light, delicate motion to preserve the airiness of the whipped cream, stirring just until everything is combined and no streaks remain (IMAGE 11). Line an 8-inch baking pan (the same size as your cake pans!) with plastic wrap, leaving an overhang on the sides for easy removal. Pour the ice cream mixture into the prepared pan, smoothing out the top evenly (IMAGE 12). Cover the top of the ice cream with additional plastic wrap, pressing it directly onto the surface to prevent ice crystals, and freeze until completely solid, which will take at least 8 hours or ideally overnight.
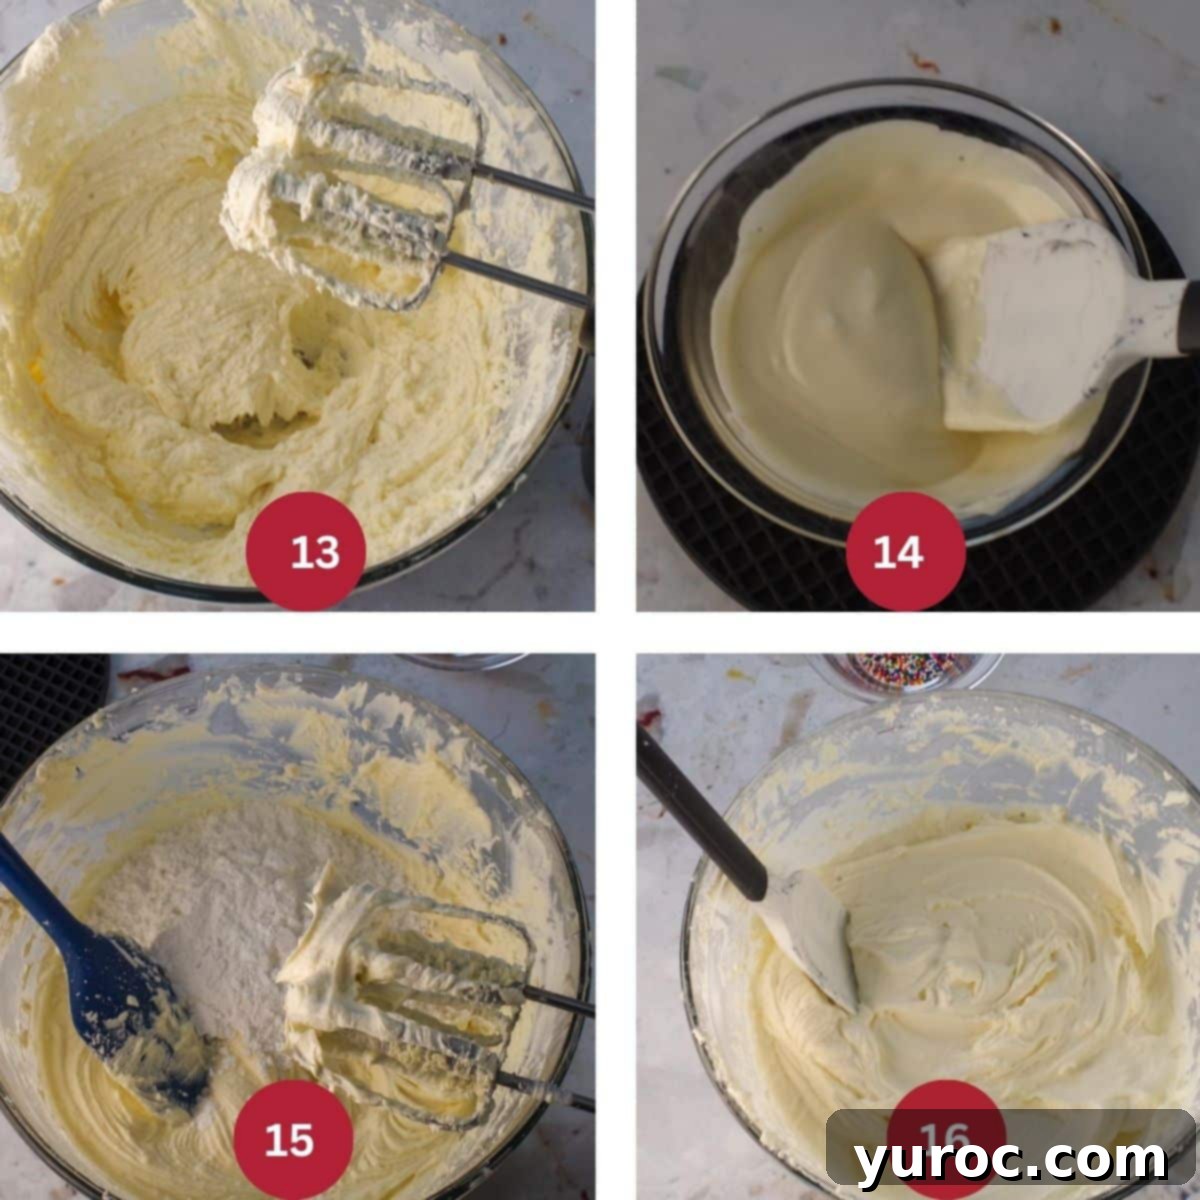
MAKE THE FROSTING (STEP 4): In a large mixing bowl, beat together the softened cream cheese, unsalted butter, and sour cream until the mixture is incredibly smooth and creamy, with no lumps (IMAGE 13). Scrape down the sides of the bowl to ensure everything is incorporated. Next, melt the white chocolate: carefully heat the white chocolate until it is almost completely melted. If using a microwave, use a small microwavable bowl and melt at ½ power (50%) for 2 minutes, then stir with a silicone spatula every 15 seconds until it’s fully melted and smooth. Alternatively, use a double boiler set over hot (not simmering) water, stirring often and ensuring the bottom of the container does not touch the water (IMAGE 14). Allow the melted white chocolate to cool slightly until it is no longer warm to the touch but still fluid. Add the cooled melted white chocolate to the cream cheese mixture and mix until it is smoothly incorporated. Stir in the almond extract, then gradually add the powdered sugar (IMAGE 15). Beat everything together with an electric mixer until light and fluffy (IMAGE 16). This frosting must be refrigerated, where it will firm up. *Before frosting the cake, let it sit out at room temperature for about 30 minutes to make it easier to spread and manage.
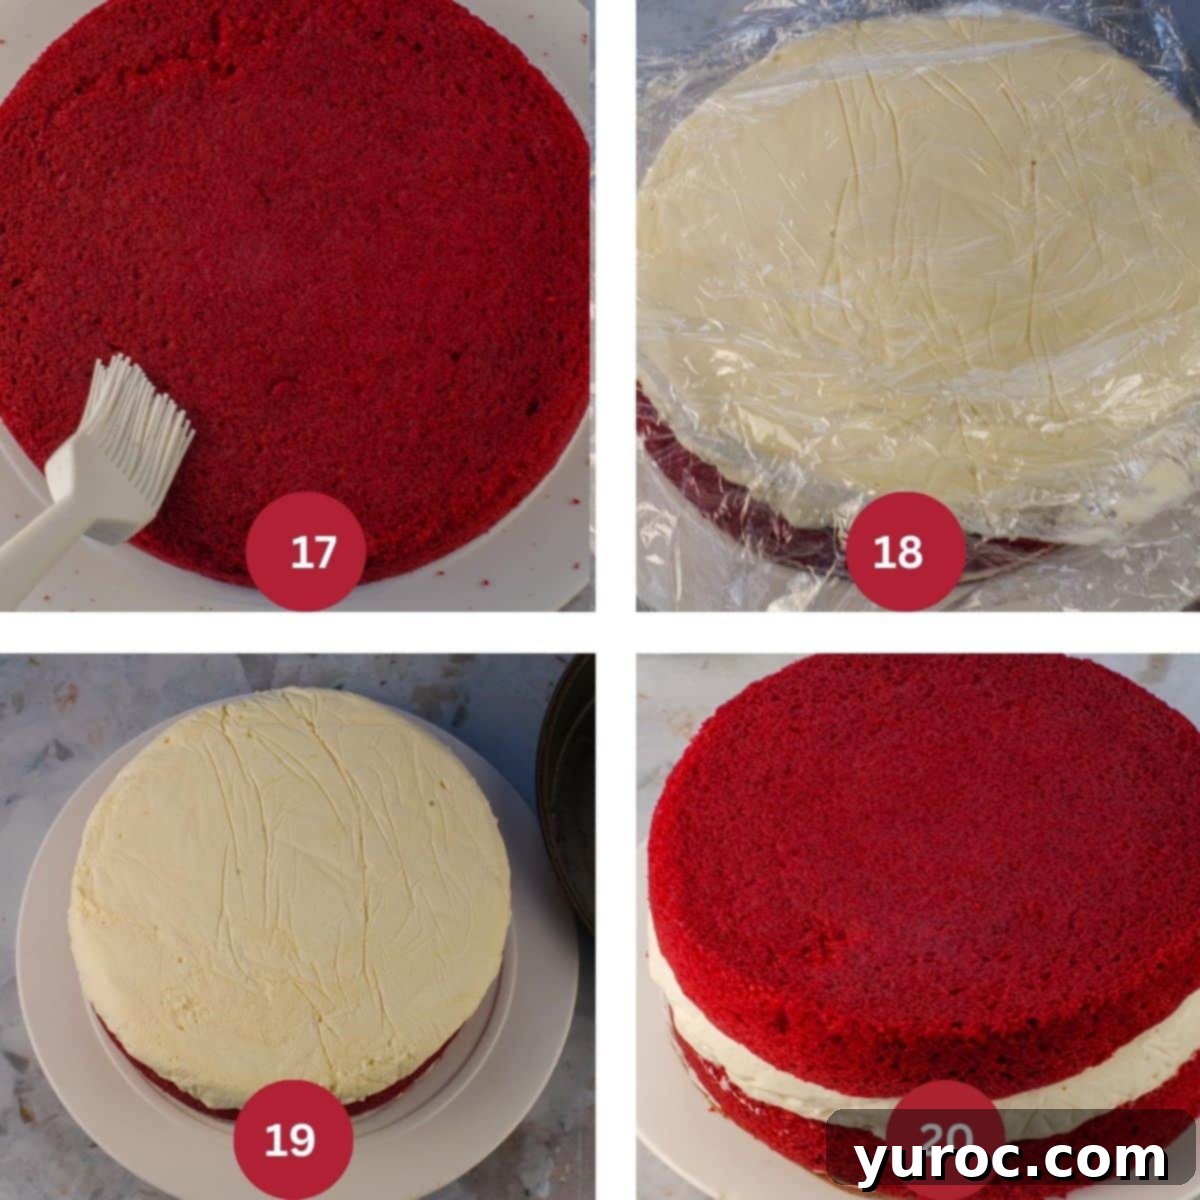
ASSEMBLE THE CAKE (STEP 5): Carefully place one of your leveled red velvet cake layers onto a cake stand or serving plate, with the cut side facing down. For the cleanest finish, use a pastry brush to gently brush away any stray crumbs from the cake (IMAGE 17). Now, it’s time for the ice cream layer. Carefully remove the frozen ice cream from its pan by lifting the plastic wrap overhang (IMAGE 18). Peel away the plastic wrap from the ice cream layer (IMAGE 19) and center it directly on top of the first cake layer. Place the second red velvet cake layer (cut side down) on top of the ice cream layer (IMAGE 20). *If the frozen ice cream happens to overhang the edges of the cake slightly, you can easily trim it off using a sharp knife or spatula while gently rotating the cake.
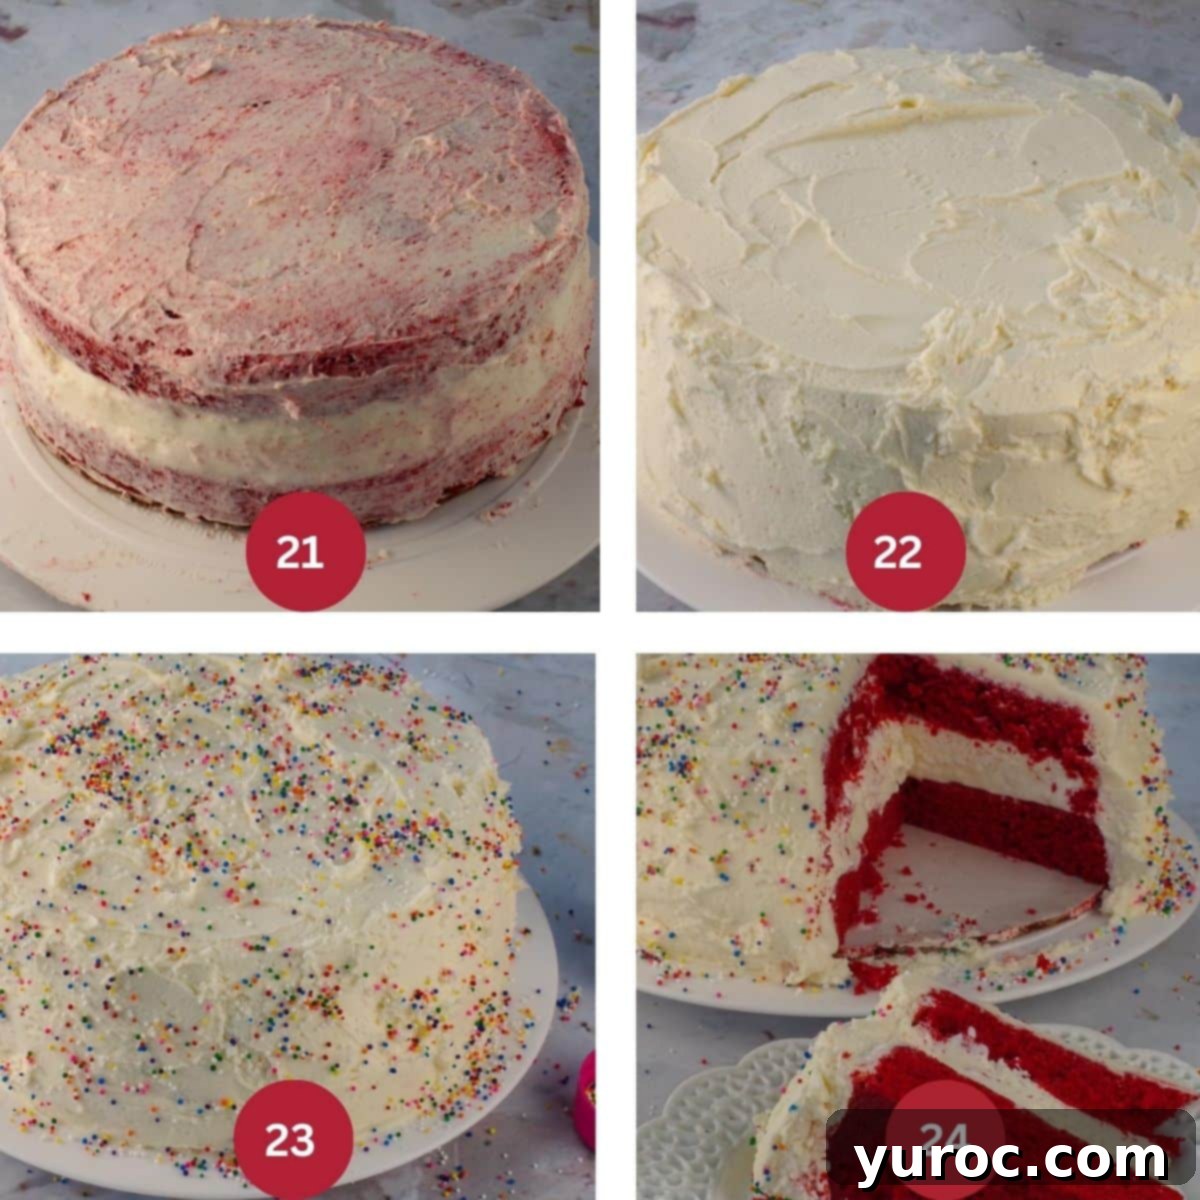
DECORATE THE CAKE (STEP 6): To ensure a perfectly smooth and crumb-free final frosting layer, first apply a very thin layer of your white chocolate cream cheese frosting to the entire cake. This is known as a “crumb coat” (IMAGE 21). Immediately after applying the crumb coat, return the cake to the freezer for 30 minutes to firm up. Once the crumb coat is firm, take the cake out and apply the remaining dreamy creamy white chocolate cream cheese icing. Remember, the frosting should have been sitting at room temperature for at least 30 minutes to be soft enough to work with (IMAGE 22). *As the cake is cold, the frosting may stiffen as you work. To counteract this, you can warm your knife or decorating spatula by running it under warm water, then thoroughly drying it with a clean tea towel between sections. For an optional decorative touch, you can add a border around the cake using a pastry bag fitted with a #21 star frosting tip. Finish your beautiful creation by decorating with rainbow round sprinkles (IMAGE 23). *For the sides, a simple trick is to put some sprinkles in the cap of the sprinkles bottle and gently toss them at the sides of the cake to make them adhere. Freeze the cake until you are ready to serve (IMAGE 24). *You’ll need to return it to the freezer for at least an hour before serving to ensure it’s properly firm.
🌡️ Storing & Serving Your Red Velvet Ice Cream Cake
Proper storage is essential to keep your Red Velvet Ice Cream Cake at its best, ensuring it remains delicious and perfectly structured for every slice.
This cake absolutely needs to be stored in an airtight container in the freezer! No-churn ice cream, while incredibly easy to make, tends to melt more quickly than traditional churned ice cream due to its higher air content and lack of stabilizers. Therefore, you’ll want to take it out only for the brief periods required for decorating and then again when it’s time to serve. After each instance, get it back into the freezer as quickly as possible to maintain its firm consistency.
The white chocolate cream cheese frosting also freezes exceptionally well, helping to protect the cake and keep it fresh. When properly stored in an airtight container, this magnificent Red Velvet Ice Cream Cake will freeze beautifully for up to 2 months, allowing you to enjoy slices whenever the craving strikes or for future celebrations.
👪 Serving Size & Adjustments
As written, this decadent Red Velvet Ice Cream Cake recipe is designed to generously serve 12 people. Each slice is a substantial and satisfying portion, perfect for a crowd or special gathering.
However, if you’re planning for a larger event or prefer a taller, multi-layer cake with an even more dramatic presentation, you can easily double all the components: the red velvet cake batter, the no-churn ice cream filling, and the dreamy cream cheese frosting. Many recipe cards, including ours, offer a convenient feature to adjust the serving size; simply click on the serving size within the recipe card, and it will automatically calculate and update all the ingredient quantities accordingly.
❔ Frequently Asked Questions About Red Velvet Ice Cream Cake
Absolutely! If you’re short on time or simply prefer the convenience, feel free to use your favorite store-bought vanilla, cream cheese, or cheesecake-flavored ice cream. To prepare it for the cake, let it soften slightly at room temperature until it’s spreadable. Then, press it evenly into your prepared 8-inch cake pan lined with plastic wrap and freeze it until it’s completely solid before assembling your cake.
This cake is fantastic for making ahead! You can prepare and assemble the entire cake up to 2 months in advance. The key to long-term storage is ensuring it’s kept in a truly airtight cake container in the freezer. This prevents freezer burn and keeps the flavors fresh and vibrant until you’re ready to serve.
For optimal slicing and eating, allow the cake to sit at room temperature for about 5-10 minutes before you begin cutting. This brief resting period allows the ice cream layers to soften just enough, making it easier to slice cleanly while preventing the ice cream from melting too quickly.
It’s common for cream cheese frosting to firm up significantly in the refrigerator. If your frosting is too stiff, simply let it sit at room temperature for approximately 30 minutes. You can also give it a brief stir or whip it gently with an electric mixer for a minute or two to soften it back to a spreadable consistency. Using a warm, dry knife or spatula (as described in the expert tips) also greatly assists in smoothing out firm frosting.
Absolutely! Using a boxed red velvet cake mix is a fantastic shortcut if you’re short on time or prefer a simpler approach. Just prepare the cake mix according to the package instructions, and make sure your cake layers are completely cooled and leveled before you proceed with assembling the ice cream cake.
Several strategies help prevent premature melting. First, ensure your cake layers are thoroughly cooled, and your ice cream layer is completely frozen solid. You can even place the cooled cake layers in the freezer for 15-20 minutes before assembly to make them extra cold. Most importantly, work quickly and efficiently during assembly and decorating. If you find the ice cream softening too much at any point, simply pause the process and return the cake to the freezer until it firms up again, then continue.
Red velvet cake, with its mild cocoa and tangy notes, pairs wonderfully with several ice cream flavors. Typically, classic choices like vanilla, cream cheese, or cheesecake ice cream are the best and most popular pairings. However, adventurous options like chocolate, strawberry, or even a subtle coffee ice cream can also create a delightful flavor profile.
So, if you’re searching for an incredibly easy, yet utterly impressive, red velvet ice cream cake and you don’t even own an ice cream maker, then this is truly THE ONE for you! After many years of baking and decorating countless cakes, and experimenting with numerous red velvet recipes and cream cheese frostings, this combination stands out as my absolute favorite and go-to recipe.
The velvety smooth, no-churn cheesecake ice cream filling offers a cool and refreshing counterpoint to the rich, moist red velvet cake layers, all crowned with that irresistible white chocolate cream cheese icing. And I genuinely tried to keep the decorating simple and accessible for everyone – no fancy skills required here.
I simply used a cake spatula and a butter knife to create subtle swirls in the cream cheese frosting, then added a scattering of vibrant multi-colored sprinkles, and that was it! The result was a stunning dessert that looked effortlessly elegant and tasted even better.
Therefore, if you’re looking to create an amazing, show-stopping red velvet ice cream cake that’s both approachable and incredibly delicious, I wholeheartedly encourage you to give this recipe a try!
🎂 Explore More Delicious Cake Recipes
- Root Beer Float Layer Cake
- Easy Black Forest Cake Recipe
- Chocolate Genoise Sponge Cake (with Summer Berries)
- White Chocolate Pistachio Cake (with Pistachio Pudding Filling)
Did your family ❤️ this recipe? Did you know that commenting and ⭐ rating recipes is one of the best ways to support your favorite recipe creators? If you LOVED this recipe, please comment and rate it in the recipe card below or share photos on social media using the hashtag #foodmeanderings or tagging @foodmeanderings!

🍰 Red Velvet Ice Cream Cake Recipe
Print Recipe
Pin
Save RecipeSave Recipe
Rate
Add to Shopping ListGo to Shopping List
Equipment
-
cooling rack
-
electric mixer
-
cake storage container
Ingredients
Red Velvet Cake
- 1-¼ cups all-purpose flour
- ¾ cups sugar
- ½ tsp baking soda
- ¼ tsp salt
- 1 tsp cocoa powder
- ¾ cups vegetable oil
- ½ cup milk room temp
- 1 large egg room temp
- 1 tablespoon red food coloring
- ½ tsp white vinegar
- ½ tsp vanilla extract
Cheesecake Ice Cream
- 2 oz cream cheese (about ¼ cup)
- 7 ounces sweetened condensed milk (½ of a 14 ounce can)
- 1 ½ cups whipping cream (aka heavy cream – 33% -36% fat)
Dreamy Creamy White Chocolate Cream Cheese Icing
- 6 ounces white chocolate baker’s white chocolate, not chips
- 16 oz cream cheese, softened 2 (8 oz pkgs) or 2 cups
- ½ cup unsalted butter
- ¼ tsp almond extract
- 2 tablespoon sour cream
- ⅔ cup icing sugar/powdered sugar
- rainbow sprinkles any color/type you prefer
Instructions
Make the red velvet cake:
-
* Heads up! There is a minimum 8 hour freezing time with this cake.
-
Preheat oven to 350 degrees F. Prepare two 8″ or 9″ round pans. I use Wilton Cake Release to prevent sticking (see NOTES)
-
Add vinegar to milk and let stand for 5 minutes.½ teaspoon white vinegar, ½ cup milk
-
Sift all dry ingredients together into stand mixer bowl.1-¼ cups all-purpose flour, ¾ cups sugar, ½ teaspoon baking soda, ¼ teaspoon salt, 1 teaspoon cocoa powder
-
In another large bowl whisk together all wet ingredients.¾ cups vegetable oil, 1 large egg, 1 tablespoon red food coloring, ½ teaspoon vanilla extract
-
In the bowl of a stand mixer, using a paddle attachment or with an electric hand mixer, on low speed, blend the wet ingredients into the dry ingredients until just combined.
-
Divide the cake batter evenly between your prepared cake pans, filling each approximately ½ -⅔ full.
-
Bake until a tester inserted in the center comes out clean (about 25-30 minutes).
-
When the cake is done, allow it to cool in the pans for 10 minutes, then transfer to a wire rack. Cool for another 15 minutes, then level the cake by carefully slicing off any domed ‘hump’ from the tops.
Make the no-churn cheesecake ice cream filling:
-
In a large bowl, beat together the softened cream cheese and the sweetened condensed milk until smooth and well combined.2 oz cream cheese, 7 ounces sweetened condensed milk
-
In a separate, chilled bowl, beat the cold whipping cream until it has stiff peaks. Gently fold the whipped cream into the cream cheese mixture, stirring just until combined, being careful not to deflate the cream.1 ½ cups whipping cream
-
Line an 8 or 9-inch baking pan with plastic wrap (*use the same size you used for the cakes!) Add the ice cream mixture to the pan, smoothing out the top. Cover the top with plastic wrap, pressing it directly onto the surface, and freeze until solid, at least 6 hours or preferably overnight.
Make the dreamy creamy cream cheese icing:
-
Melt the white chocolate: Heat the chocolate until almost completely melted. Use a small microwavable bowl, stirring with a silicone spatula every 15 seconds (or use the top of a double boiler set over hot, not simmering, water, stirring often-do not let the bottom of the container touch the water). **If you use the microwave, be sure to only heat it on ½ power (50%)6 ounces white chocolate
-
Remove the white chocolate from the heat and, with the silicone spatula, stir until fully melted and smooth. Allow it to cool until it is no longer warm to the touch but is still fluid.
-
Make the Frosting: In your mixer (or with an electric hand mixer), mix the softened cream cheese, unsalted butter, and sour cream until smooth and creamy. Scrape down the sides of the bowl. Add the cooled melted white chocolate and mix until it is smoothly incorporated.16 oz cream cheese, softened, ½ cup unsalted butter, 2 tablespoon sour cream
-
Add the almond extract, then gradually add the icing sugar. Beat until light and fluffy. The frosting must be refrigerated and it will firm up in the refrigerator. Let it come to room temperature for about 30 minutes before frosting the cake for easier management.¼ teaspoon almond extract, ⅔ cup icing sugar/powdered sugar
Assembly:
-
Place one cake layer on a cake stand or cake plate with the cut side down. Remove the plastic wrap from the solid ice cream layer and carefully place it on top of the cake.
-
Add the second cake layer on top of the ice cream layer (cut side down). Apply a thin crumb coat of the dreamy creamy white chocolate cream cheese icing and freeze for 30 minutes. Then, frost the cake fully with the remaining icing. Decorate with rainbow round sprinkles as desired. Freeze the cake until ready to serve, allowing at least an hour for it to firm up before serving.rainbow sprinkles
Notes
Red Velvet Cake: This recipe has been adapted from Chef Steph’s Southern Red Velvet Cake for optimal flavor and texture.
Dreamy Creamy White Chocolate Cream Cheese Icing: Adapted from Rose Levy Beranbaum’s Heavenly Cakes, with minor adjustments for enhanced flavor and texture.
EXPERT RECIPE TIPS:
Cake Tips:
- Use High-Quality Food Coloring – Americolor Super Red or Wilton “No Taste Red” will give you a vibrant red hue without an unpleasant aftertaste. Avoid grocery store liquid food coloring, as it requires too much to achieve the right color and can affect flavor/consistency.
- Don’t Overmix the Batter – Overmixing can lead to gluten development, resulting in a dense and tough cake. Mix just until the ingredients are combined for a light and fluffy texture.
- Cool Completely Before Assembly – Ensure your cake layers are fully cooled before adding the ice cream layer to prevent it from melting prematurely and creating a messy cake.
Ice Cream Tips:
- Chill the Mixing Bowl – When whipping heavy cream, chilling your bowl and beaters in the freezer for 10-15 minutes beforehand helps achieve stiff peaks faster and more stably.
- Gently Fold – When mixing the sweetened condensed milk mixture with the whipped cream, use a light, delicate folding motion to maintain the airy texture of the whipped cream, which is crucial for a light no-churn ice cream.
- Don’t Rush the Freezing Process – Allow the ice cream to freeze for at least 8 hours (or overnight) to ensure a firm, solid consistency that holds up when assembling and serving the cake.
- Use the Same Pan Size – Line an 8-inch cake pan with plastic wrap for the ice cream layer to ensure it matches the cake layers perfectly, making assembly much easier and creating even layers.
Frosting & Decorating Tips:
- Use High-Quality White Chocolate – Always use a white chocolate baking bar (NOT white chocolate chips). Baking bars melt more smoothly and blend better into the frosting, ensuring a creamy, lump-free texture.
- Let the Frosting Sit at Room Temperature – Since the frosting firms up in the fridge, let it sit out for about 30 minutes before spreading for easier and smoother application.
- Crumb-Free Frosting: For a professional finish, I use Wilton Cake Release(affiliate link) for my pans. After baking, I brush off any loose red velvet cake crumbs with a pastry brush before applying frosting.
- Crumb Coat for a Clean Finish – Apply a very thin layer of frosting first (the crumb coat), freeze for 30 minutes, then frost fully. This traps any crumbs and prevents them from mixing into your beautiful white frosting.
- Add a generous amount of frosting then spread- Another trick to avoid getting cake crumbs in your frosting is to work in sections. Apply a generous amount of frosting to each section and spread it from the top down so your knife or spatula doesn’t need to touch the crumb coat beneath.
- Use a separate bowl – Always transfer a portion of the frosting you are actively working with to a separate bowl. This way, if any crumbs come into contact with your knife or spatula, you can scrape them off into this working bowl without contaminating your main batch of frosting.
- Warm Your Knife for a Smooth Finish – For a polished, smooth surface, run your spatula or knife under warm water, wipe it completely dry, and then use it to gently smooth the frosting. The warmth helps the frosting glide effortlessly.
- Work Quickly When Decorating – Ice cream cakes are sensitive to warmth. Frost and decorate the cake as efficiently as possible, then return it to the freezer immediately to prevent melting and maintain its structure.
Storage & Serving Tips:
- Let It Sit for 5-10 Minutes Before Serving – This brief resting period allows the ice cream to soften just enough for easier cutting and a more pleasant eating experience.
- Use an Airtight Cake Container – To prevent freezer burn and keep the cake fresh, always store it in an airtight container in the freezer.
- Slice with a Warm Knife – Dip a sharp knife in hot water, wipe it dry, and slice for clean, even cuts. Repeat this process for each slice.
🌡️Storing
Clearly, as highlighted in the story and throughout, this cake absolutely needs to be stored in the freezer! No-churn ice cream melts relatively quickly compared to commercial ice cream, so you’re going to want to take it out only for the brief periods necessary to decorate, and then again, to serve it. Always return it to the freezer as soon as possible and keep it there. The white chocolate cream cheese frosting also freezes remarkably well, maintaining its texture and flavor beautifully.
